Hello everyone, I’m Brian Casper, a Solution Architect on the Oracle Cloud Infrastructure team working to bring Oracle Applications to Oracle Cloud Infrastructure. I recently looked at the automation tools that Oracle provides for quickly deploying JD Edwards on Oracle Cloud Infrastructure, and in this post I’m going to share three basic steps that you can follow to set up an environment for development, test, or production. The intent of this post is to describe the process and steps at a high level; a deeper dive with more detailed steps is available in the resources provided at the end of the post.
Oracle Cloud Infrastructure provides all of the essential elements for a secure JD Edwards operating environment. To get going, you install Terraform and a set of Oracle-provided Terraform sample scripts. You then create a configuration file to point to the tenancy where you want the JD Edwards environment to be provisioned. You can customize the number of servers to deploy and details like hostnames and account credentials used during the deployment. The automation creates private subnets and security lists to allow only necessary communications between tiers, provisions the required storage and compute instances, installs the Oracle WebLogic and JD Edwards EnterpriseOne software, and provisions a JD Edwards database instance by using the Oracle Cloud Infrastructure Database service.
JD Edwards is a highly customizable platform that can meet a wide variety of business needs. You establish a base configuration by using the Oracle One-Click Provisioning tool. After the Terraform step is completed, you set up the One-Click software on the Server Manager Console host. Finally, you launch and connect to the provisioning console, provide the required JD Edwards configuration and orchestration details, and then sit back and watch as the environment is fully deployed.
The following sections walk through these steps in more detail.
Step 1: Set Up and Run Terraform
For simplicity, I created a “bootstrap” host to host the Terraform components by setting up an Oracle Linux instance. To prevent conflicts later, you should set up this instance in a different compartment from the one in which you intend to deploy the JD Edwards environment. I used a 200-GB boot volume to ensure enough room to download and stage all of the software for the installation.
After the bootstrap instance has started, download the Terraform binaries and the latest Oracle Cloud Infrastructure provider and install it. Finally, unpack the sample Terraform scripts for JD Edwards (available on request). For more information, see Getting Started with the Terraform Provider.
Before you can run the Terraform, you must set up SSH and PEM keys, and configure your environment variables in the env-vars file and settings in the variables.tf file. More information about the JD Edwards Terraform configuration is available in the documentation that accompanies the package.
The env-vars file contains all of the information that Terraform needs to connect to the cloud, including OCID data for your compartment, tenancy, and a user with sufficient privileges to perform the required tasks, as well as encryption key information. Following is an example env-vars file:

The variables.tf file is the key to the Terraform deployment. There are many configurable options, but the following ones are the important ones to set:
- region = the region where you want to deploy (for example, phoenix or ashburn)
- jde_ent_count = the number of enterprise servers to be provisioned
- jde_web_count = the number of web servers to be provisioned
- jde_smc_count = the number of Server Manager Console servers to be provisioned
- JDK_INSTALL_BINARY_NAME = the name of the Java JDK installation tar file (for example, jdk-8u161-linux-x64.tar.gz)
- WLS_INSTALL_BINARY_NAME = the name of the WebLogic installation jar file (for example, fmw_12.2.1.2.0_wls.jar)
Note any passwords that are used in the variables.tf file because you will need them later.
The Terraform scripts completely build the JD Edwards infrastructure, including installing and configuring the WebLogic servers. You must download the installation binaries from the Oracle Technology Network and stage them so that the Terraform scripts can use them:
- Download the WLS 12.1.3/12.2.0 generic jar files and place them in the /u01/jde/ automation-oci-v2/web/wlsbinary directory.
- Download the JDK for Linux-x64 platform and place it in the /u01/jde/ automation-oci-v2/web/wlsbinary directory.
Now Terraform can complete the provisioning.
Load the environment into the shell by running the source env-vars command:

Initialize Terraform by running the terraform init and terraform plan commands (the following output is truncated for brevity):

Run the Terraform by running the terraform apply command (the following output is truncated for brevity):

A final output that describes the environment that was configured is displayed. Note this output for use in Step 2 to set up One-Click.
The terraform apply command completely performs all of the steps that are required for manual provisioning on all of the Linux hosts, and no further interaction is required. However, an additional step is required on the Windows hosts. Terraform creates a PowerShell script on the bootstrap host in the /u01/jde/automation-oci-v2/jdedeploy directory. Copy the jdewin_pre.ps1 script to the Windows hosts and execute it as administrator in a command prompt window. This action completes the configuration of the Windows host so that it is prepared for the One-Click installation.
Now the Terraform step is complete, and the environment is ready for the One-Click step of the deployment.
Step 2: Set Up One-Click
This step installs and launches the One-Click Provisioning tool.
Log in to the Oracle Software Delivery Cloud, search for the JD Edwards One-Click Provisioning 3.1 for Apps 9.2 Tools 9.2.2.4 software package, and add it to the cart. Download all of the parts by using the download manager or the wget.sh script.
After the parts are downloaded, copy them to the Server Manager Console host and unzip them. This action expands the zip files into the DiskPart files that need to be reassembled, a checksum file, and a reassembly script. Ensure that the rebuild script is executable and then run the script. The script performs the following actions:
- Ensures that adequate space exists in the /u01 directory to perform the extraction
- Combines the unzipped archive files into a single tar file
- Verifies the recombined file by using the checksum file
- Moves the JD Edwards packages to the /u01 directory
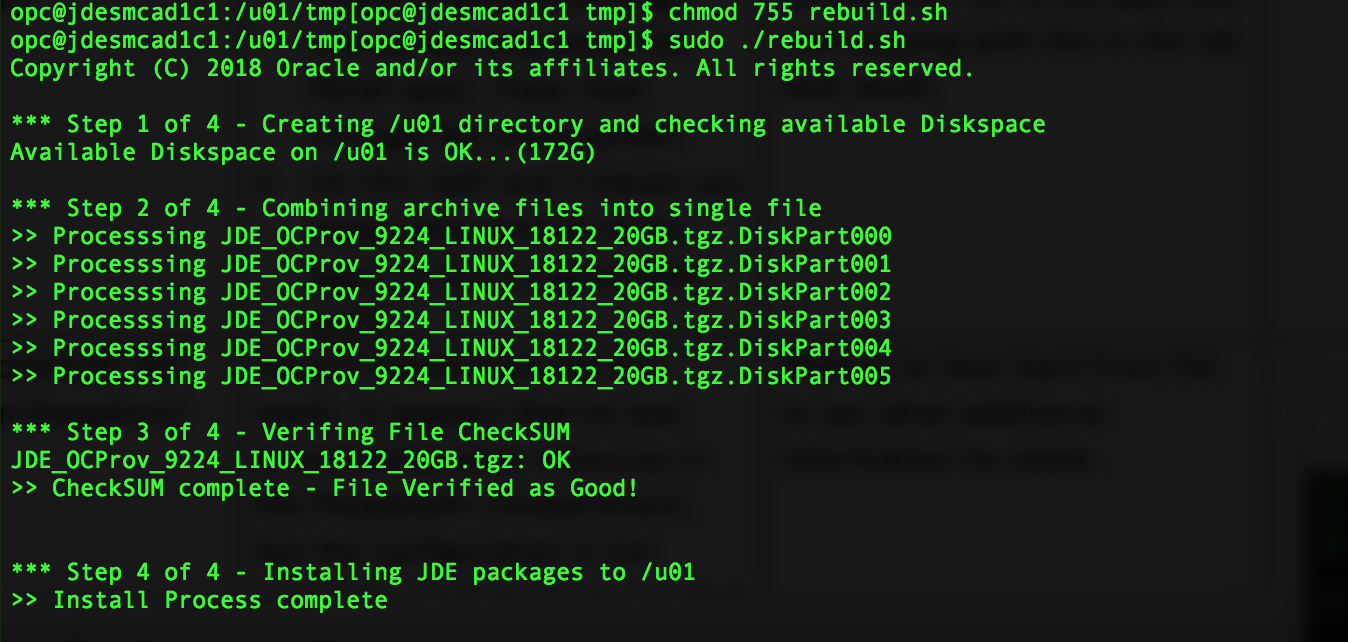
When the rebuild script is finished, run the setupPr.sh script to install and launch the One-Click Provisioning software on the Server Manager Console host.

The One-Click Provisioning tool is ready to begin the orchestration and deployment of JD Edwards.
Step 3: Deploy JD Edwards with the One-Click Provisioning Tool
Launch the One-Click Provisioning tool and connect to the interface at the following URL: https://<public_IP_address>:3000
<public_IP_address> is the public IP address for the One-Click Provisioning Server Instance running on the Server Manager Console host.
The One-Click console looks as follows:
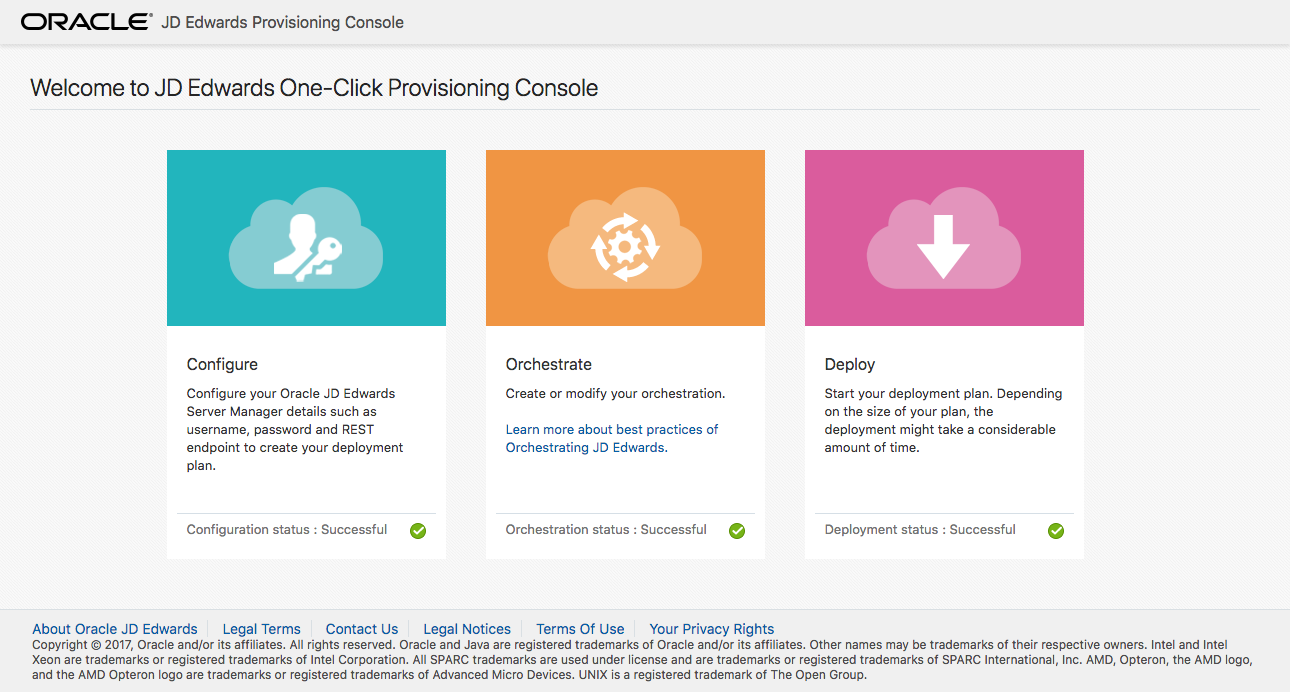
Perform the following steps to complete the deployment.
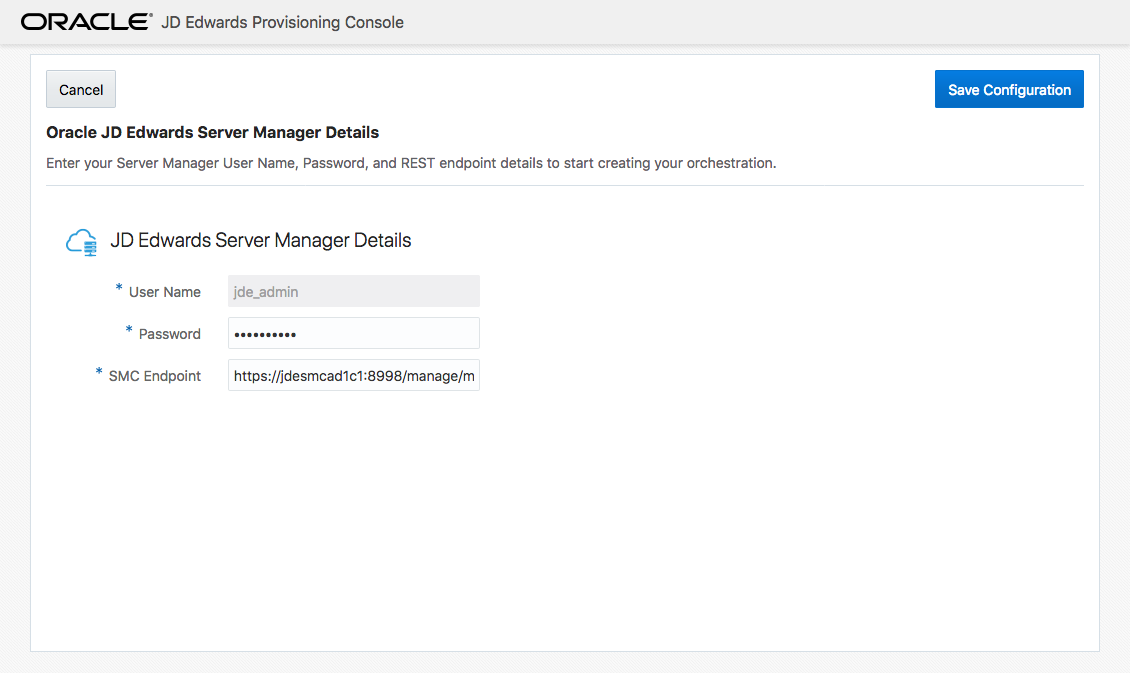
Click the Configure box and enter the server manager details.
Next, click the Orchestrate box and choose a Quick Start deployment. You are prompted for details about the environment that was built during the Terraform step and details about the upcoming deployment, such as user IDs, hostnames, path names, and so on. The inputs are validated on each screen. When the Quick Start is complete, review or edit the inputs by again clicking the Orchestrate box. Walk through the server details in the Advanced settings, where you can configure more complicated environments by using multiple server configurations.
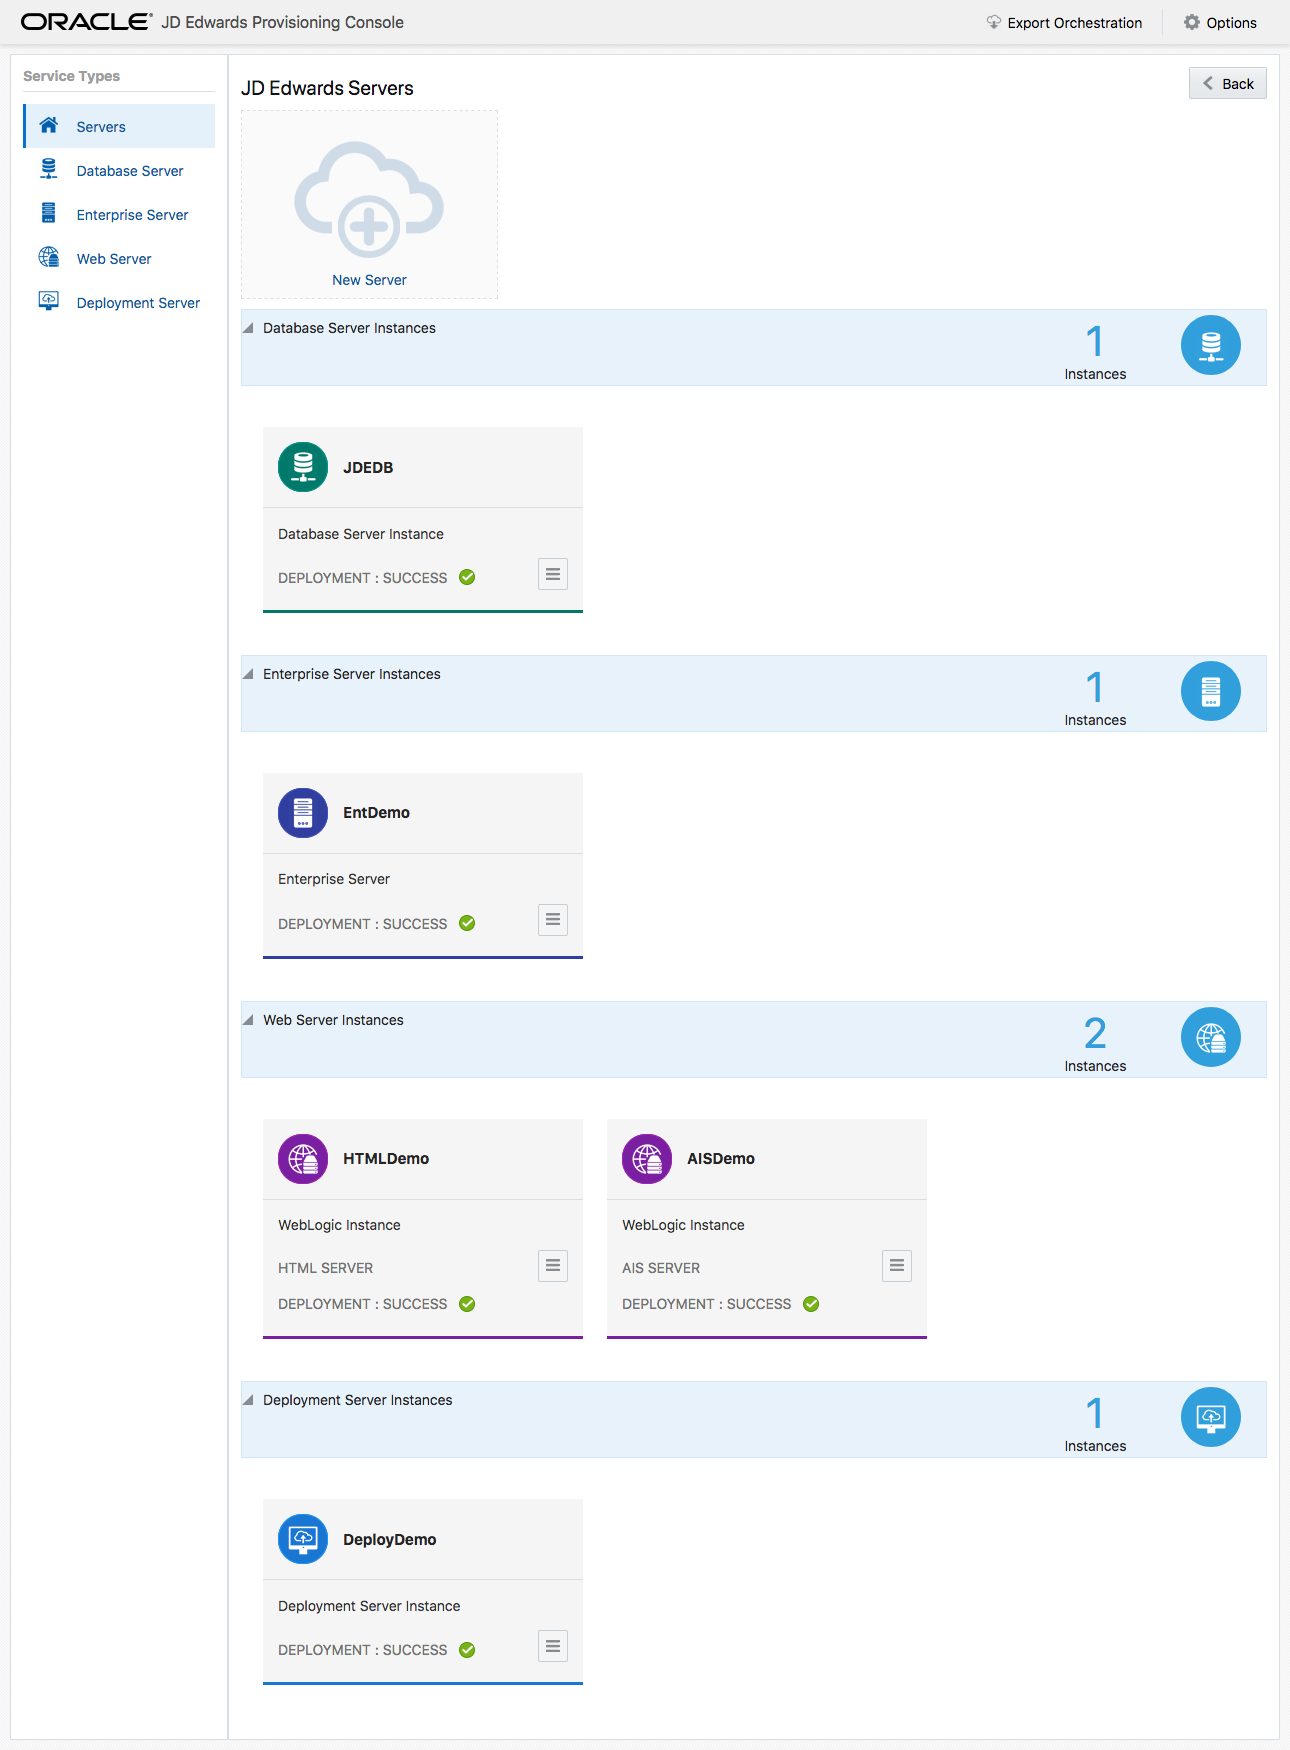
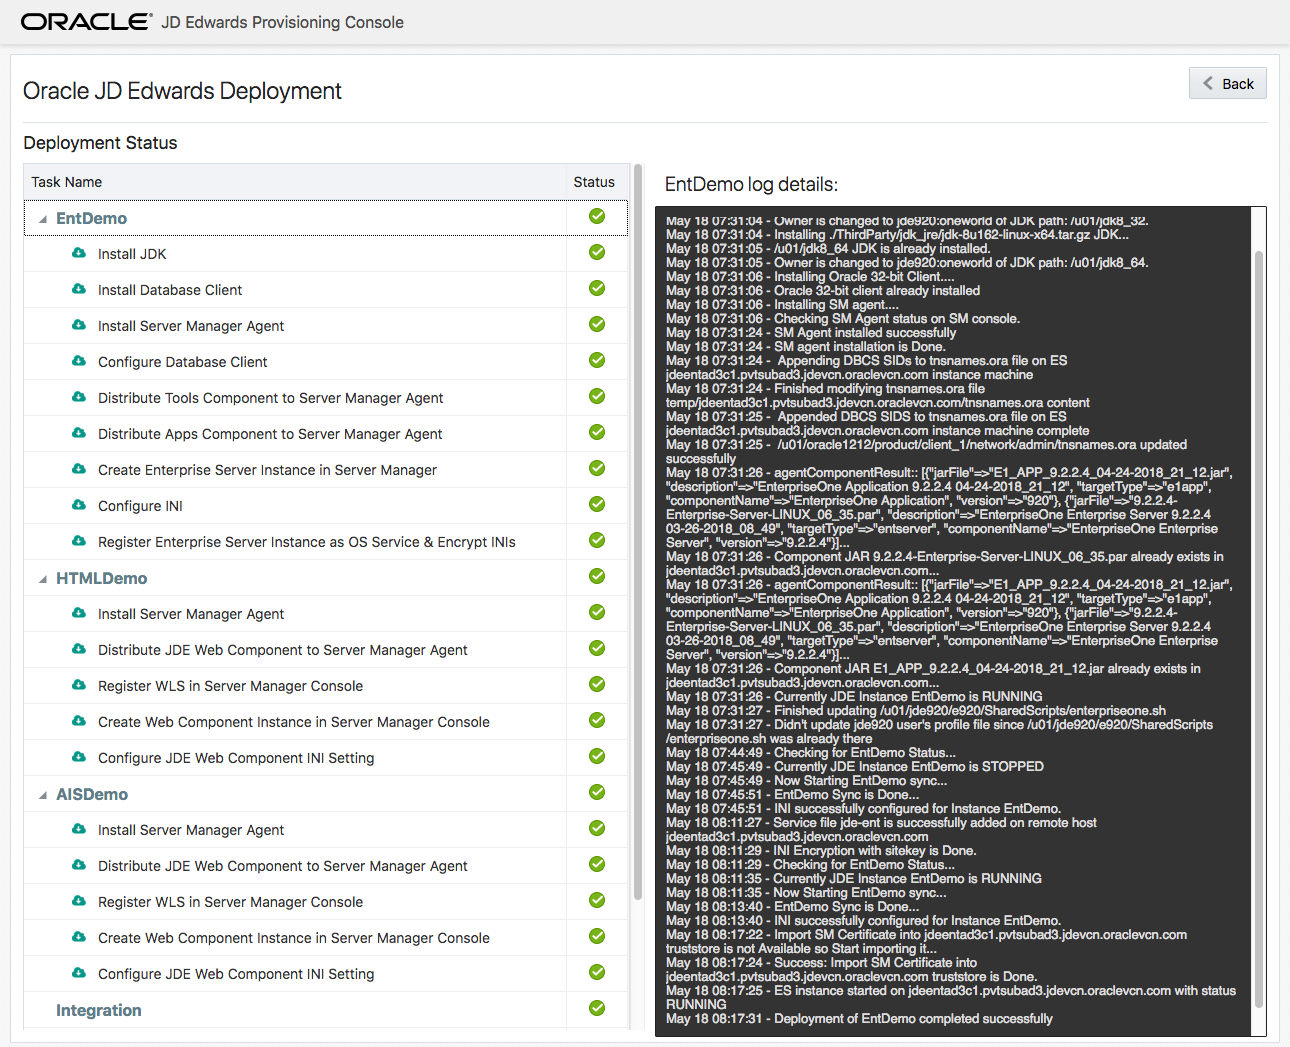
When the orchestration step is complete, click the Deploy box to begin the installation. This step completes the installation and configuration of the JD Edwards environment from start to finish without any further interaction. Allow a few hours for the deployment to complete. In the meantime, monitor the progress on the Deployment Status screen.
When the deployment is complete, the JD Edwards environment is fully available. From this point, you can customize the JD Edwards application environment to suit your business needs by using the same JD Edwards management tools that are familiar from non-cloud deployments. You might want to lift-and-shift the entire operational environment from your existing JD Edwards installation by using the JD Edwards Migration Utilities to export your database and configuration settings and then import them into the newly provisioned environment on Oracle Cloud Infrastructure.
To change the configuration after the JD Edwards instance is up and running, revisit both Terraform and One-Click Provisioning to modify the configuration. For example, to scale the environment by adding or removing instances and services, go to the configuration steps and make changes. Then rerun the automation to orchestrate the changes.
For more information about JD Edwards in the cloud, visit these additional resources:
- Preparing for a Deployment of JD Edwards EnterpriseOne on Oracle Cloud Infrastructure on Linux
- Administering Your JD Edwards EnterpriseOne Release 9.2 One-Click Deployment
- Migrating JD Edwards EnterpriseOne Release 9.2 to Oracle Cloud for Linux
- JD Edwards in the Cloud: Oracle Apps on Oracle Cloud Infrastructure
I hope you found this post informative. Check back for updates as new features or enhancements to the automation tools become available.