Original Publish Date : 8/24/2013
Quick Commands : (Just copy the below 3 commands and run it on your shell/cmd prompt to quickly create an identity and trust Keystore) :
keytool -genkeypair -alias mykey -keyalg RSA -sigalg SHA256withRSA -keysize 2048 -validity 365 -dname “cn=localhost, ou=WLS, o=Oracle, c=IN” -storepass password -keypass privatepassword -keystore identity.jks
keytool -export -alias mykey -file root.cer -keystore identity.jks -storepass password
keytool -import -alias mykey -file root.cer -keystore trust.jks -storepass password -trustcacerts -noprompt
—————-
Steps in Detail :
Below are the steps to create a self signed certificate :
Command 1 :
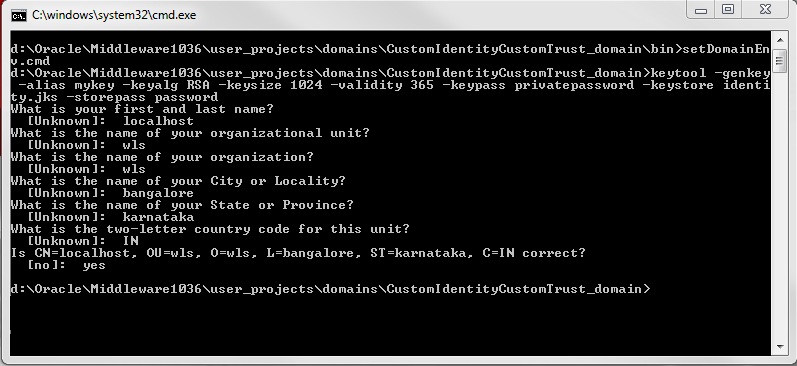
keytool -genkey -alias mykey -keyalg RSA -keysize 1024 -validity 365 -keypass privatepassword -keystore identity.jks -storepass password
Note :
List of keytool commands which are changed in java 1.6 :
-export, renamed to -exportcert
-genkey, renamed to -genkeypair
-import, renamed to -importcert
All previous commands are still supported in this release ( keytool in java 1.6 ) and will continue to be supported in future releases.
To create a 2048 bit SHA2/SHA256 certificate use the following command :
Command :
keytool -genkey -alias mykey -keyalg RSA -keysize 2048 -sigalg SHA256withRSA -validity 365 -keypass privatepassword -keystore identity.jks -storepass password
Command 2 :
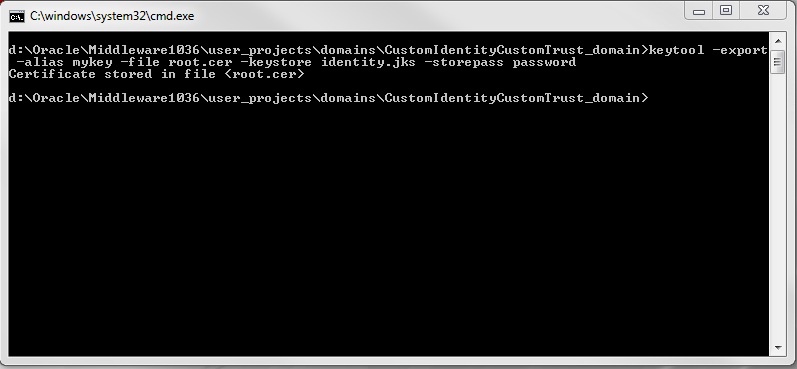
keytool -export -alias mykey -file root.cer -keystore identity.jks -storepass password
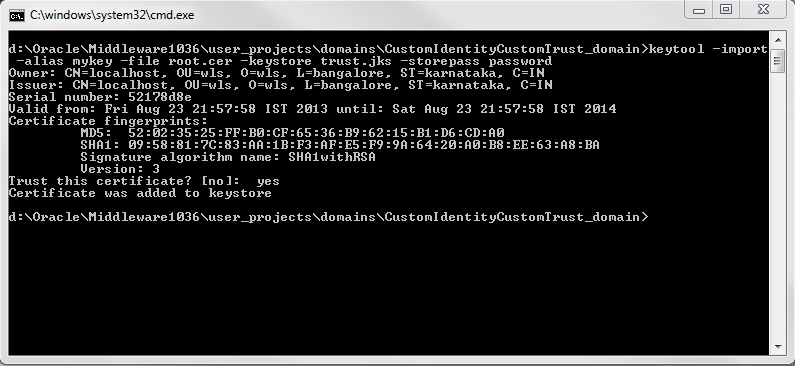
Command 3 :
keytool -import -alias mykey -file root.cer -keystore trust.jks -storepass password
“>
< Additional Info >
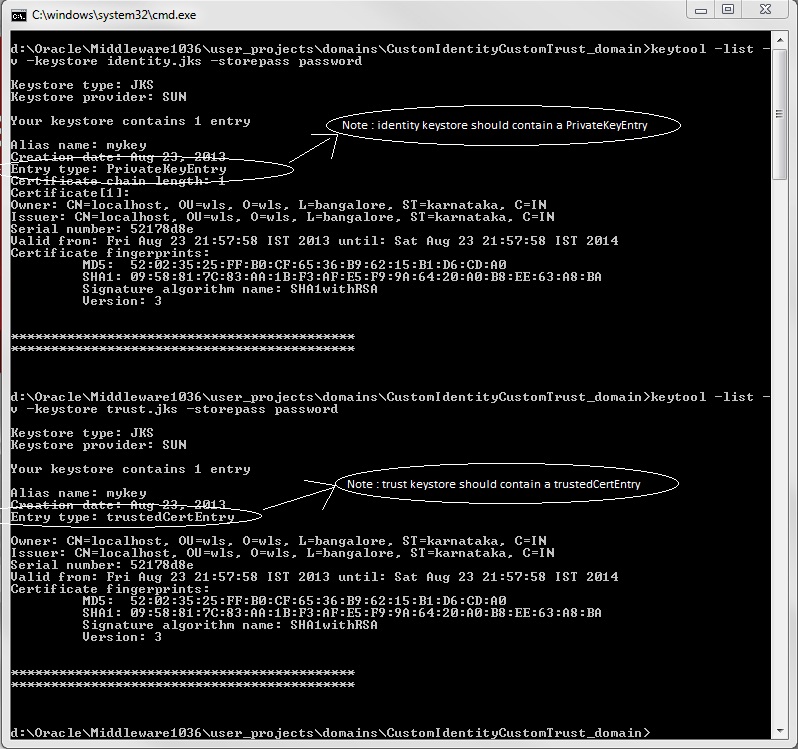
To see the contents of the keystore use the following command :
Command :
keytool -list -v -keystore identity.jks -storepass password
To see the contents of an individual certificate ( like root.cer in our case ).
Command :
keytool -printcert -file root.cer
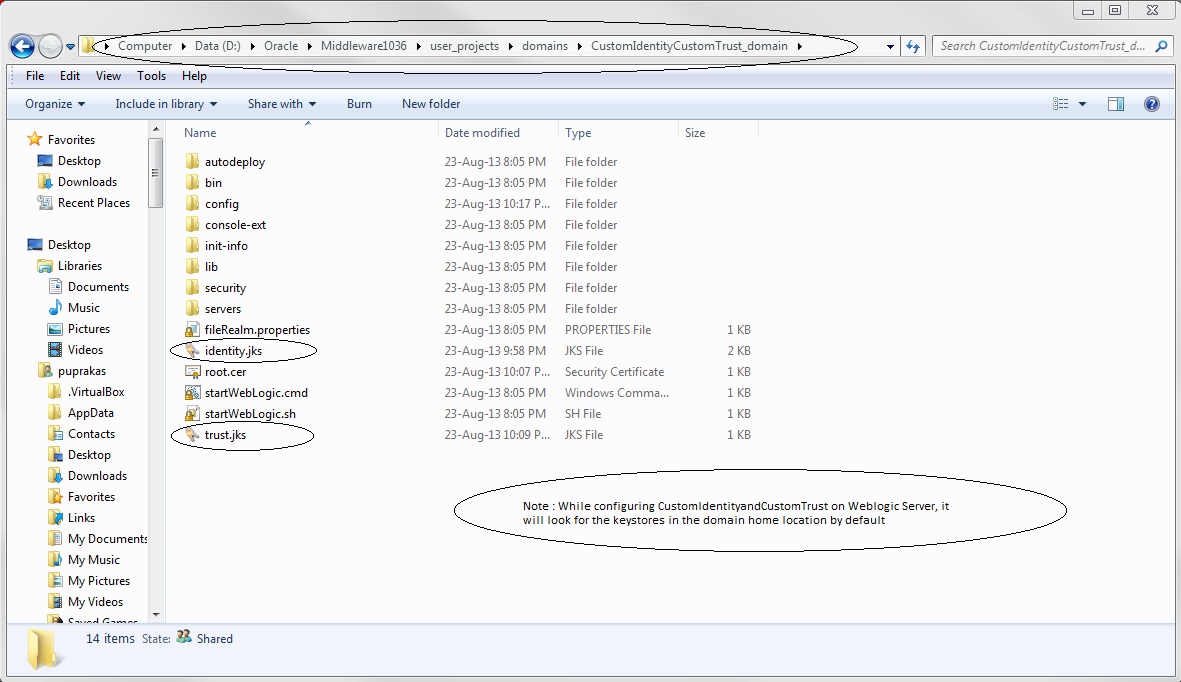
Copy the keystore files in the domain_home location :
Below are the steps to configure Custom Identity and Custom Trust with Weblogic Server :
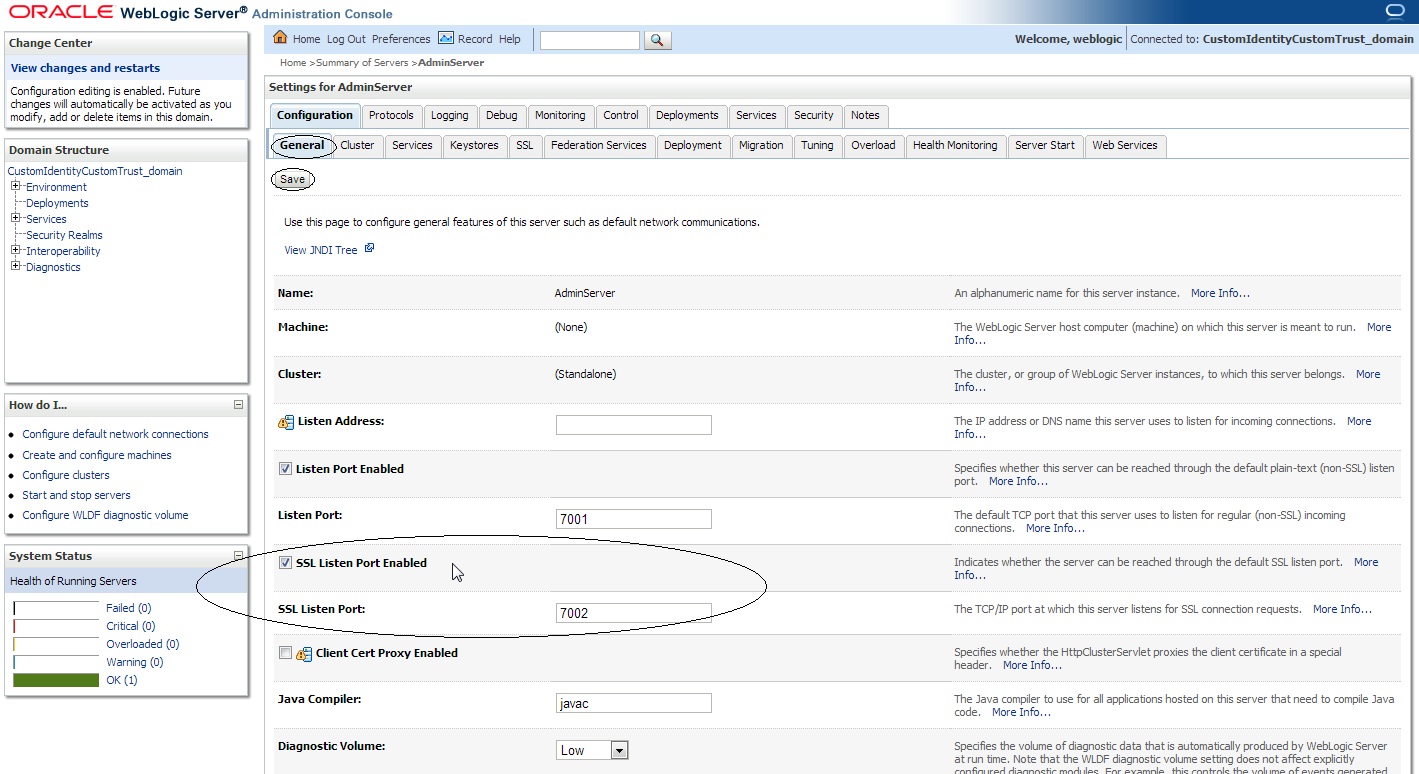
Step 1 :
Login to Weblogic Admin console –> Environment –> Servers –> < server_name_where_ssl_has_to_be_configured > –> Configuration -> General –> SSL Listen Port Enabled ( Check )
Note : The default SSL Listen Port would be 7002, change it if required.
Step 2 :
Click on Keystores tab under ” Configuration ” tab :
Step 2a :
Click on the drop down menu next to Keystores and sleect ” Custom Identity and Custom Trust ”
Step 2b :
Now fill in the following information :
—Identity—
Custom Identity Keystore : < location_of_identity_keystore_that_you_have_created>
NOTE : By default WLS will look for this keystore file in domain_home location.
Custom Identity Keystore Type : jks
Custom Identity Keystore Passphrase: < This_would_be_your_storepass >
—Trust—
Custom Trust Keystore : < location_of_trust_keystore_that_you_have_created>
NOTE : By default WLS will look for this keystore file in domain_home location.
Custom Trust Keystore Type : jks
Custom Trust Keystore Passphrase: < This_would_be_your_storepass >
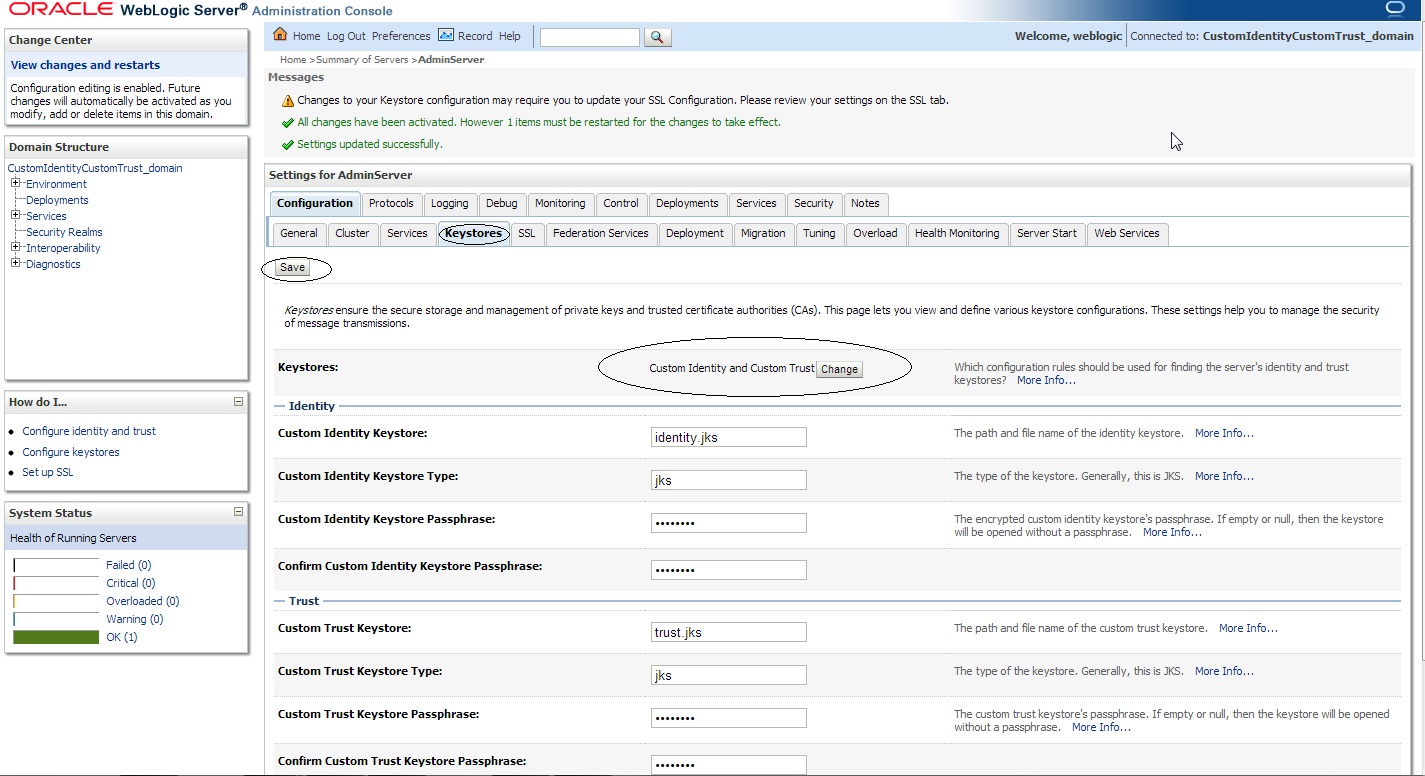
Step 2c :
Now save the changes and click on ” SSL ” tab :
Private Key Alias: < This_would_be_your_certificate_alias >
Private Key Passphrase: < This_would_be_your_keypass >
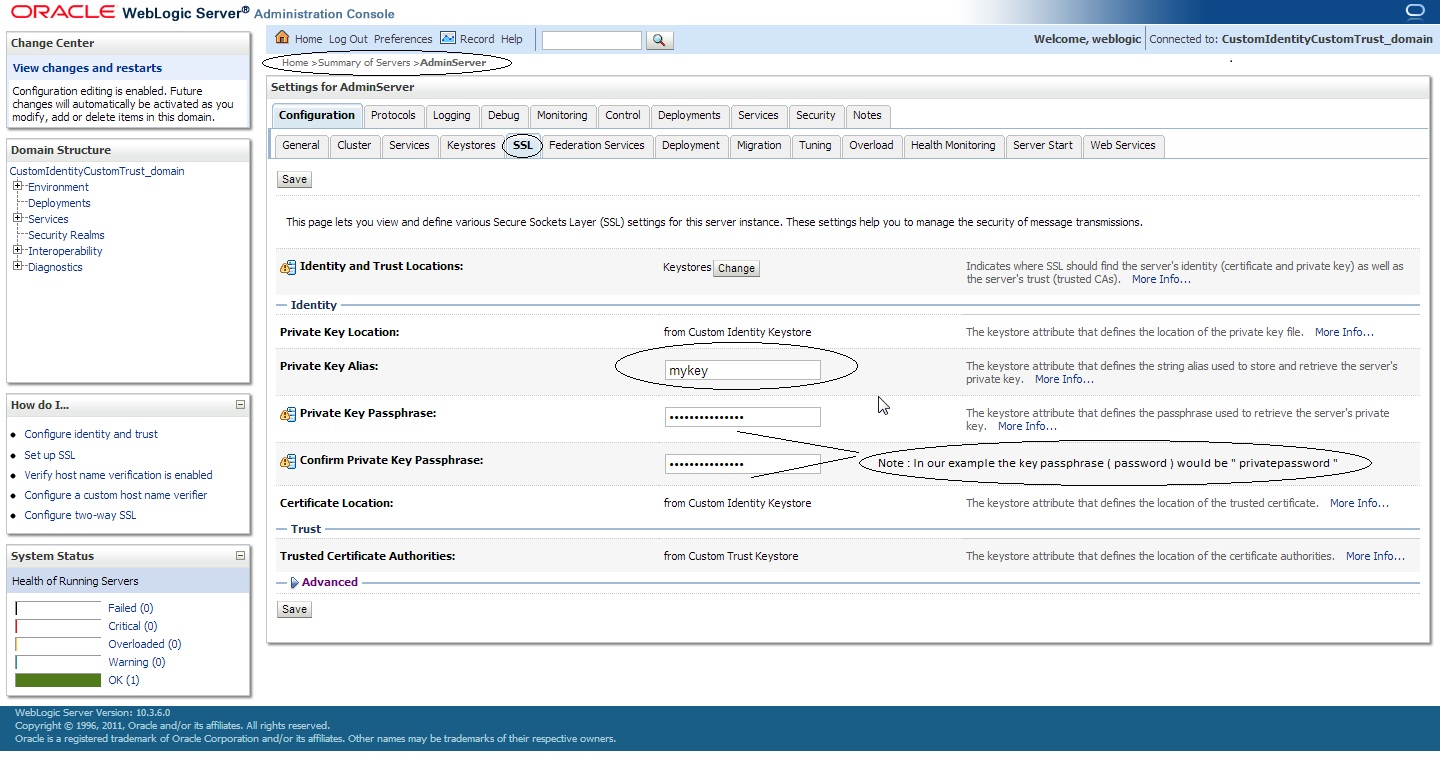
Step 3 :
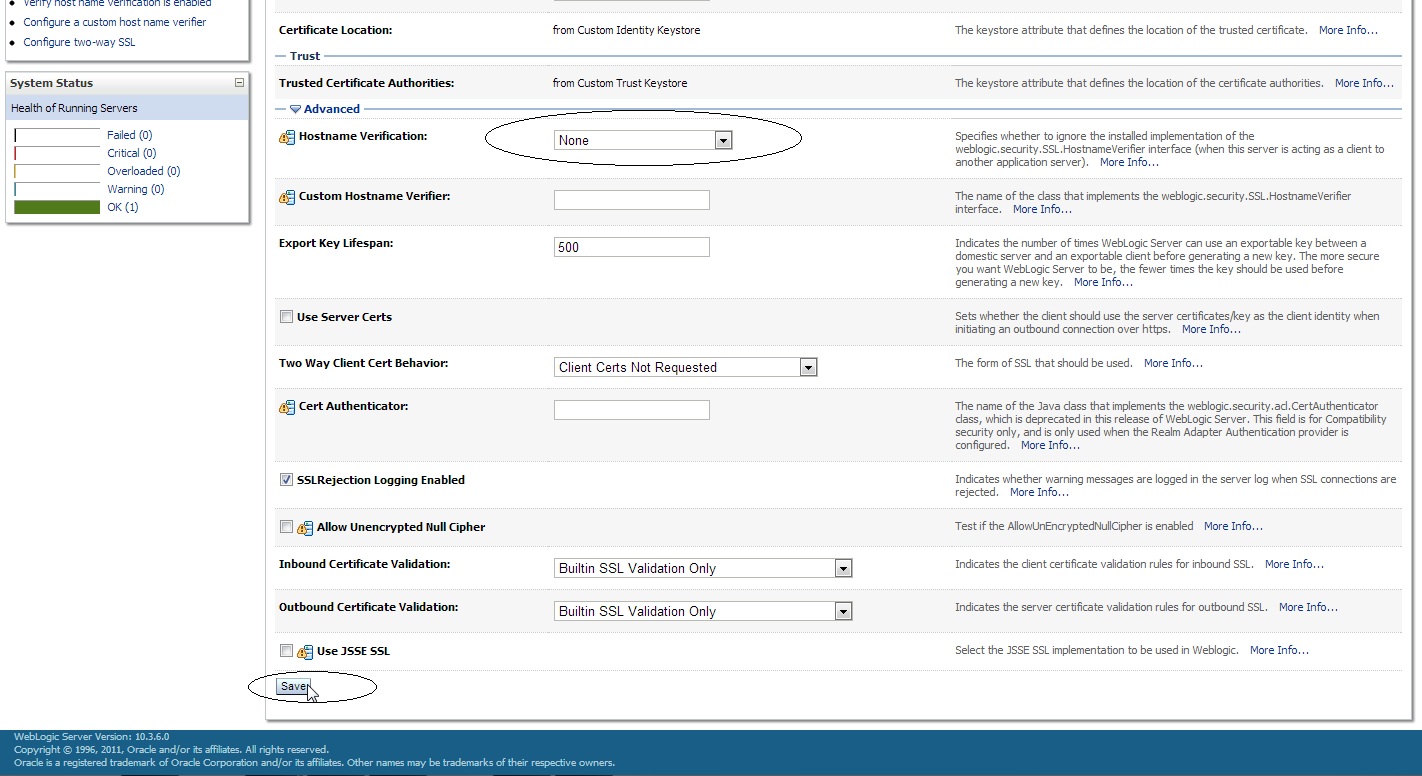
Save the changes and click on the ” >Advanced ” field under the ” SSL ” tab :
Set the ” Hostname Verification: ” to None ( from the drop down menu ).
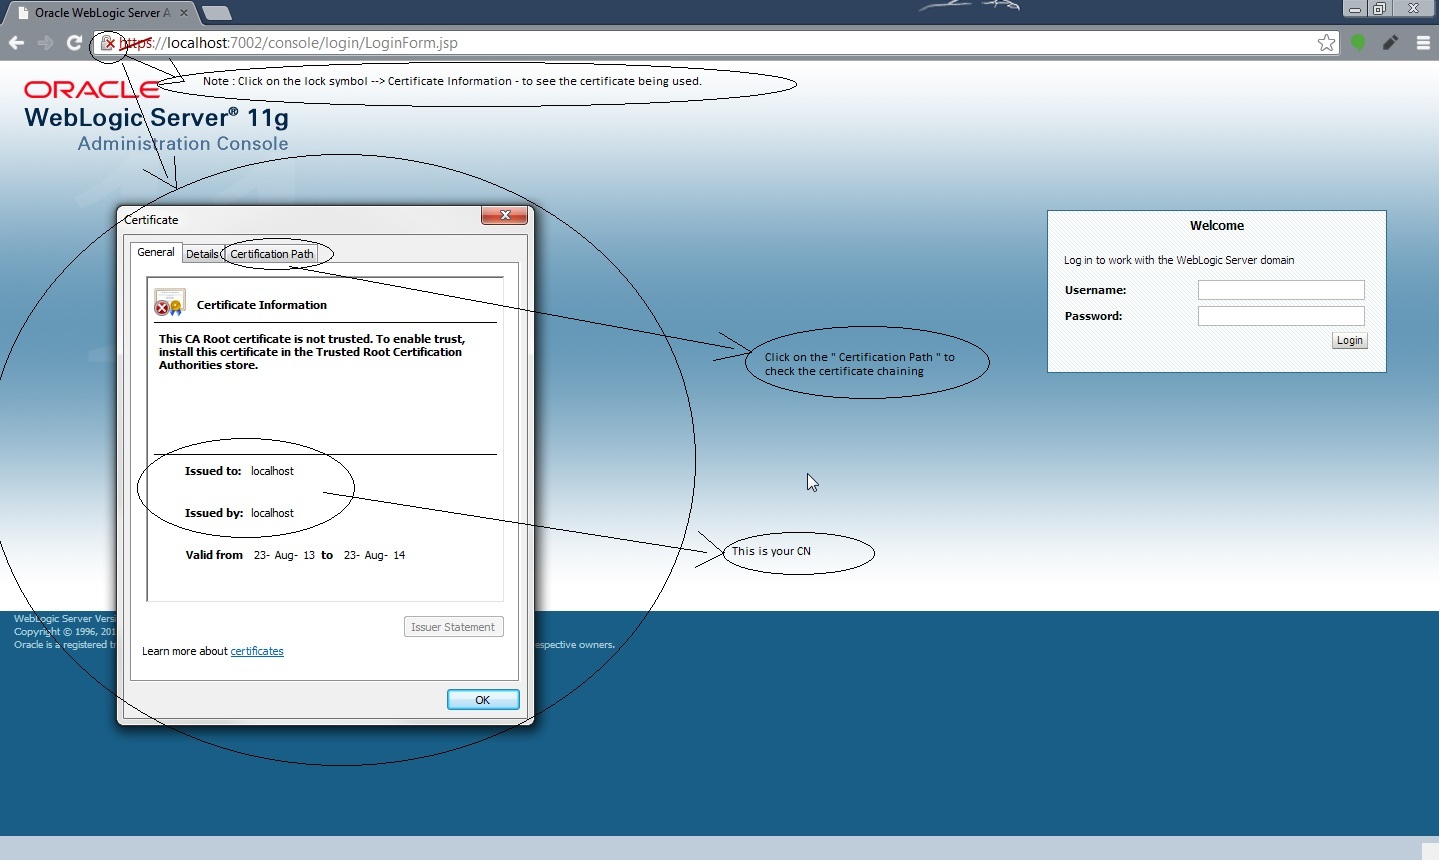
Note : We need to select the hostname verification as none if the CN of the certificate is not the same as the hostname of the machine where WLS is installed.
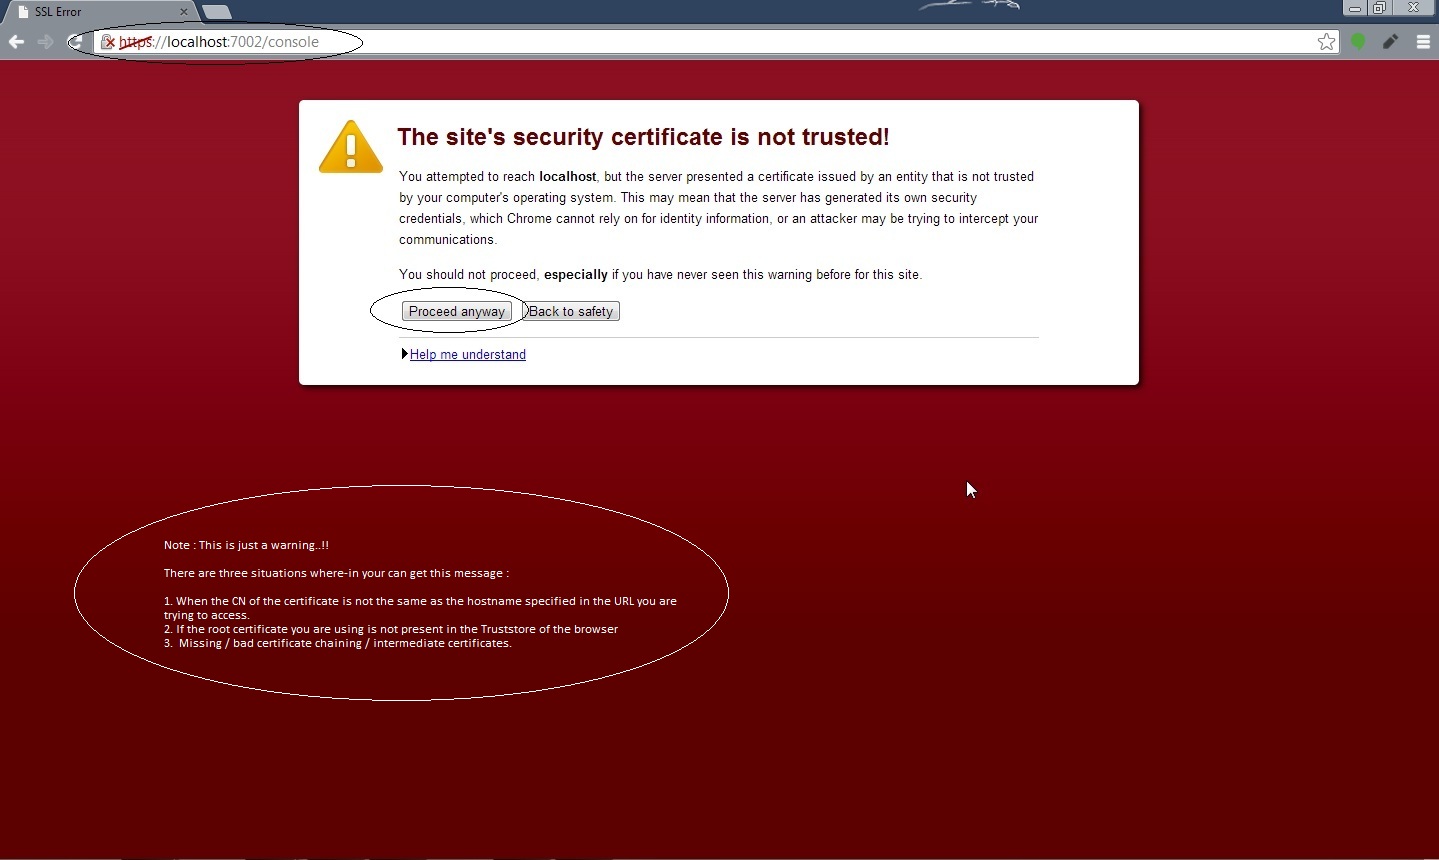
Now access your Weblogic Admin console over https URL :
” https://localhost:7002/console “