Original Publish Date : 3/11/2016
Below are the steps to configure SAML 2.0 with Okta as Identity Provider and Weblogic as a Service Provider.
Okta IDP configuration :
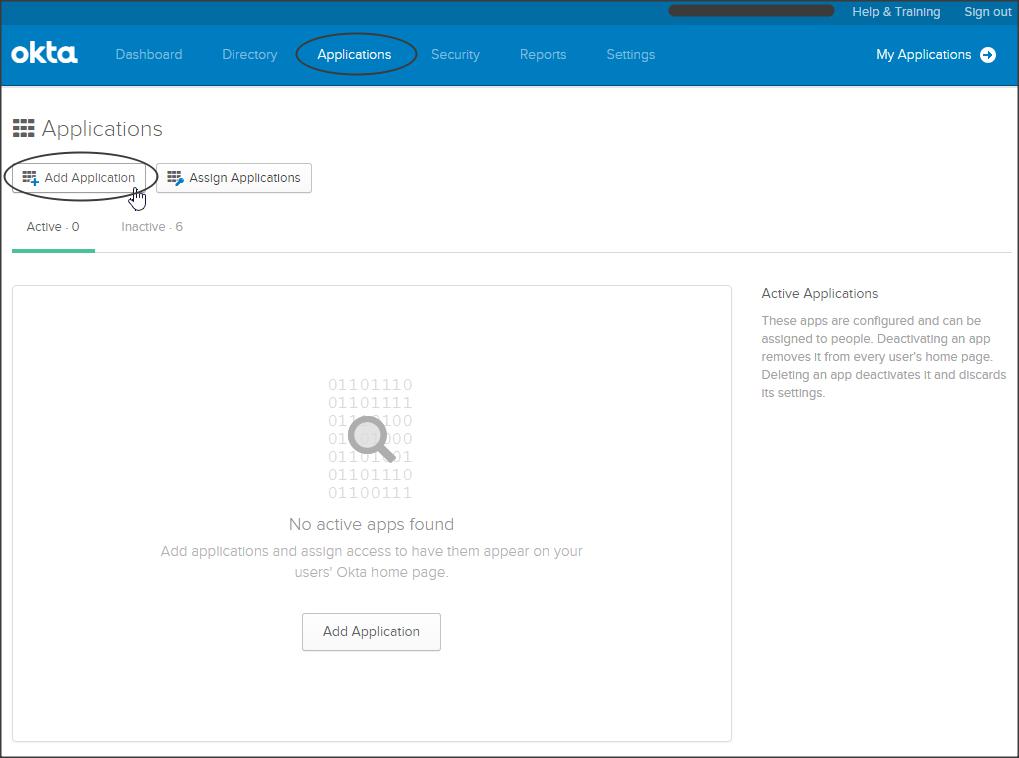
Step 1 :
Log-in to your Okta subdomain homepage to access the Application Dashboard.
Now click on Applications -> Add Application -> Create New App -> select SAML 2.0 -> create
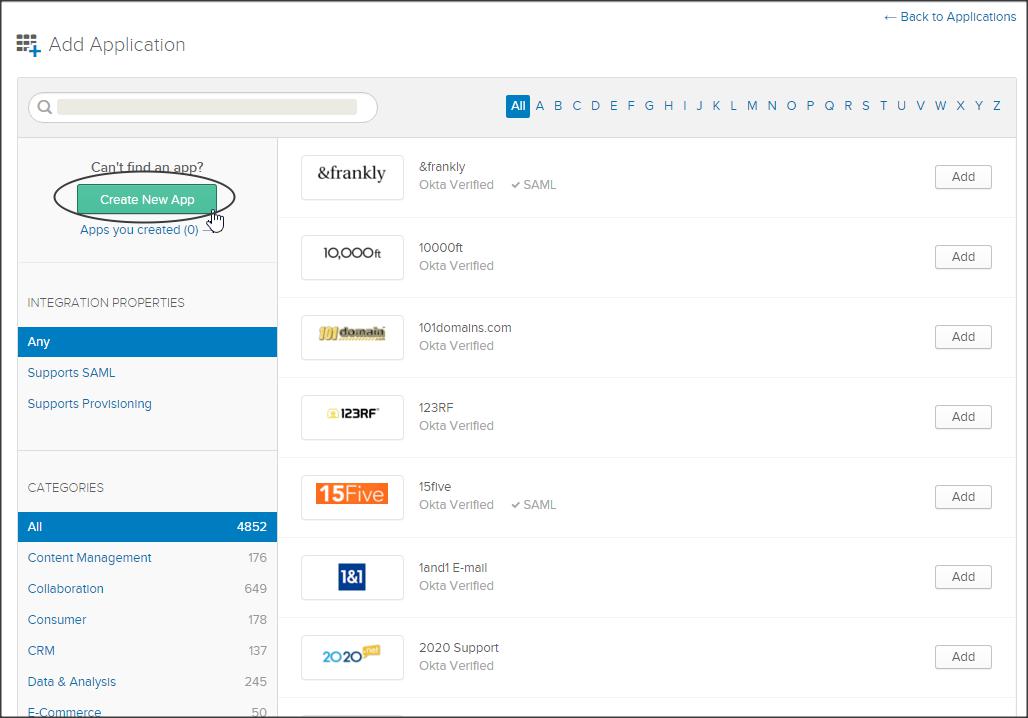

Step 2 :
Follow the on-screen instructions.
Create a SAML integration as shown below :
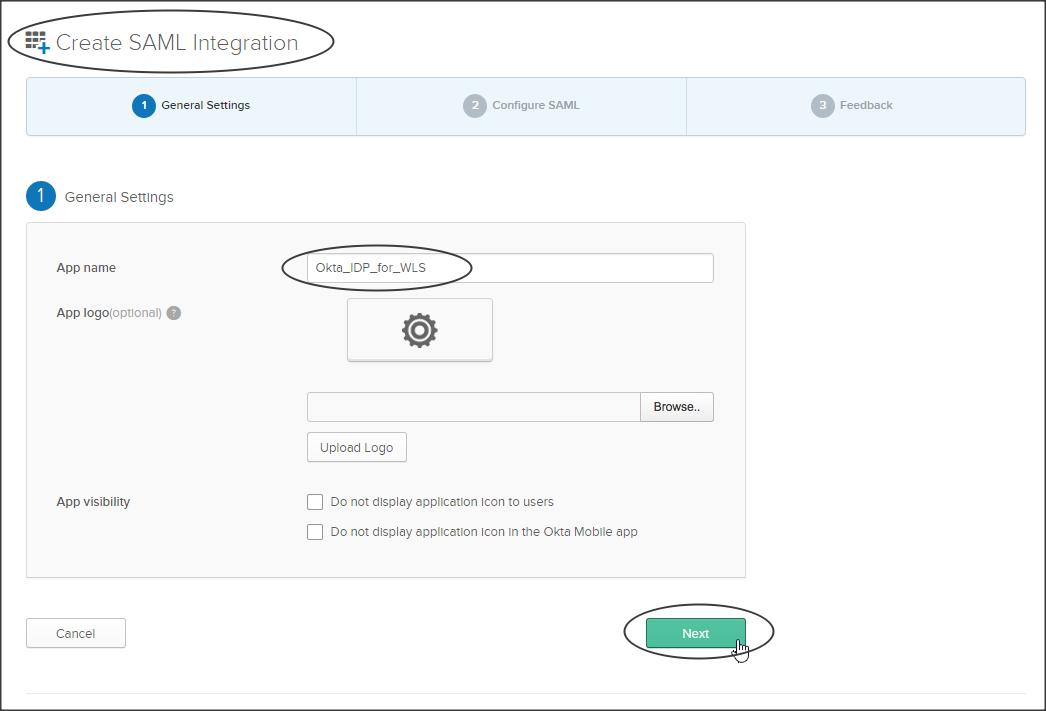
Enter the following :
Single sign on URL : <https://<weblogic_sp_hostname>:<port>/saml2/sp/acs/post
Use this for Recipient URL and Destination URL (check)
Audience URI : This would be the entity ID that you will be specifying in your WLS SP ( Make a NOTE of what you have entered here, we need to use the same in –> WLS console->Federation Services->SAML2 General-> EntityID)
NOTE :
– Unlike other SAML configurations we are not importing the SP metadata into Okta IDP, instead we fill-in the above values manually.
– Hence it is important to make a NOTE of the Audience URI (i.e SP entity ID) and use the same in Weblogic SP configuration.

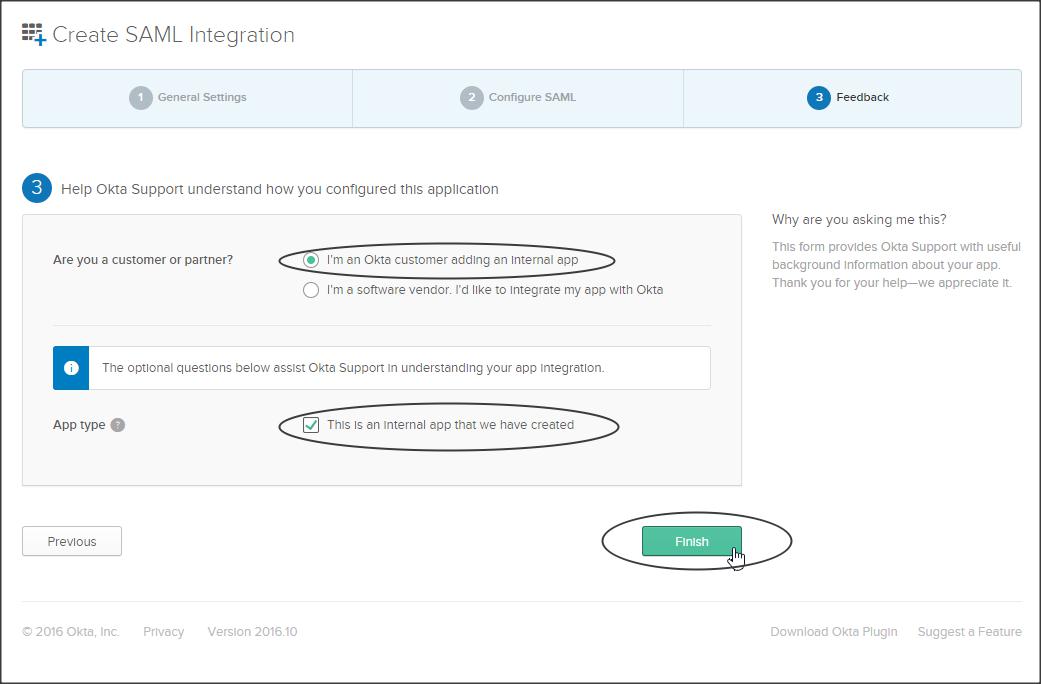
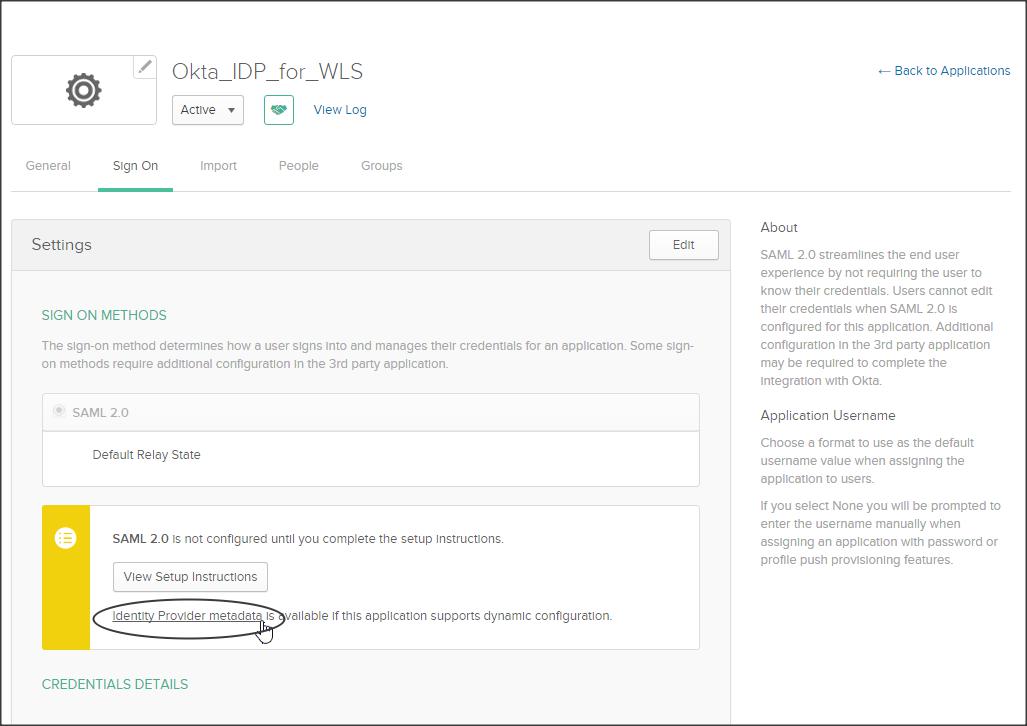
Step 3 :
We have successfully created a SAML Integration, now lets download the IDP metadata (say Okta_IDP_for_WLS-metadata.xml) from the Sign On sub-tab :
Step 4 :
Go to People sub-tab and assign users to your application :

Step 5 :
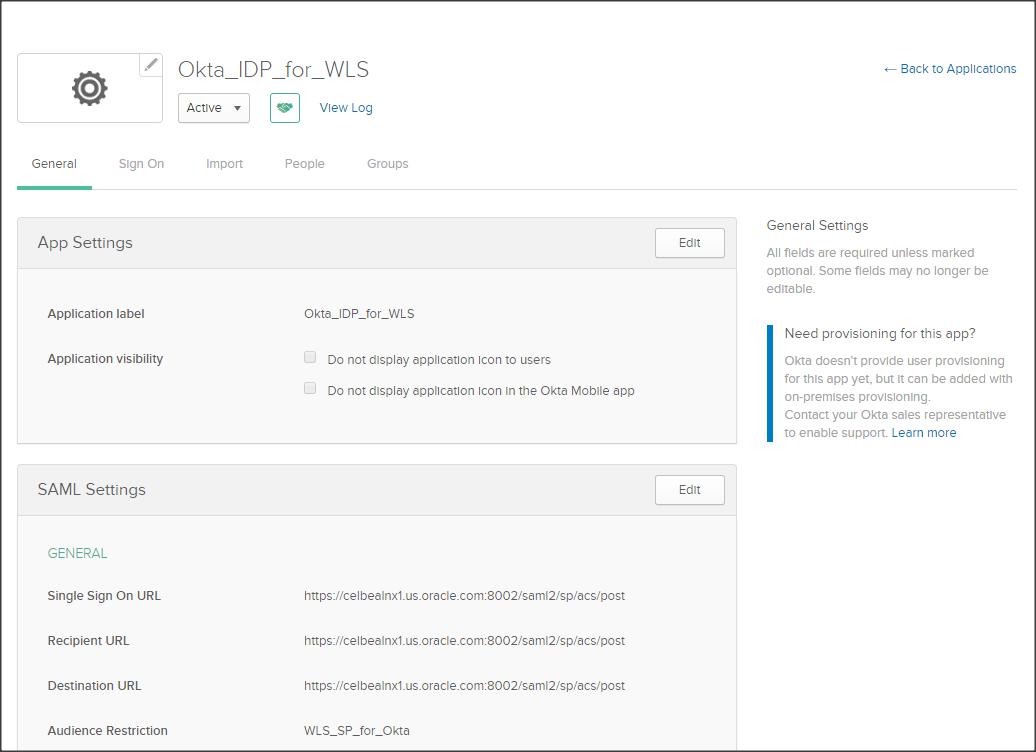
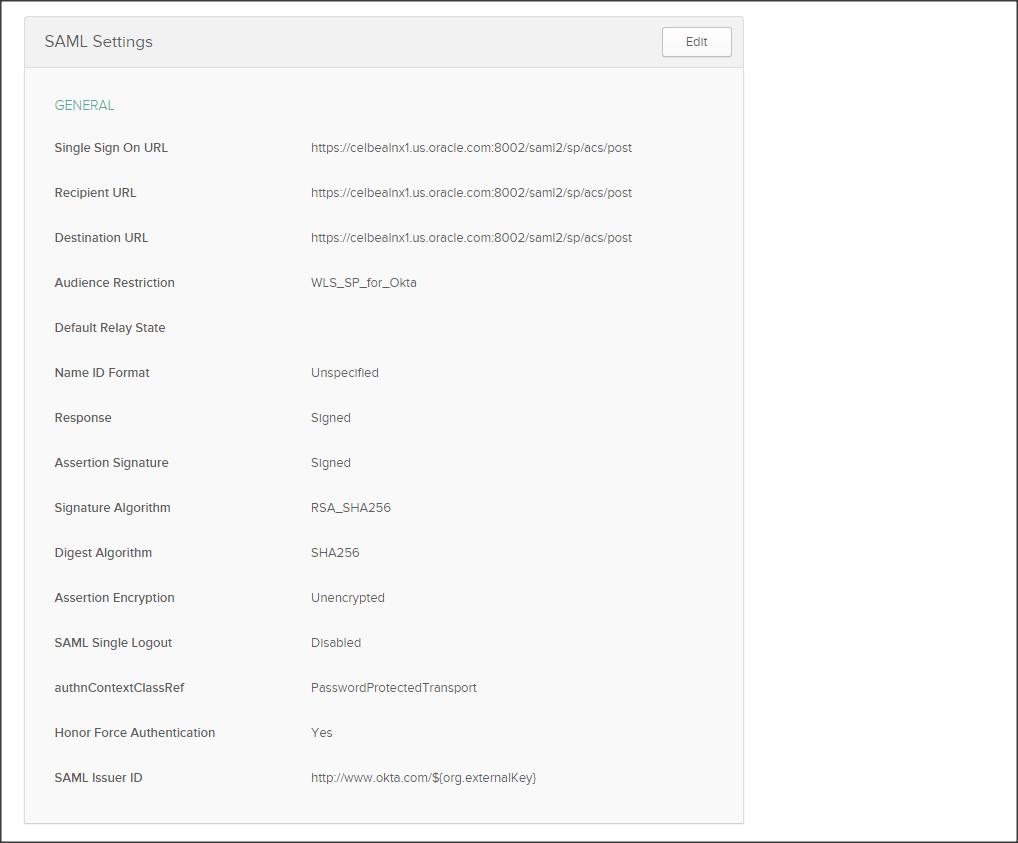
Click on the General sub-tab and validate your IDP configuration.
Step 6 :
Login to Okta with the user who was assigned this application :

Your Okta IDP configuration is now complete, lets configure Weblogic as a SAML Service Provider.
Weblogic SAML SP configuration :
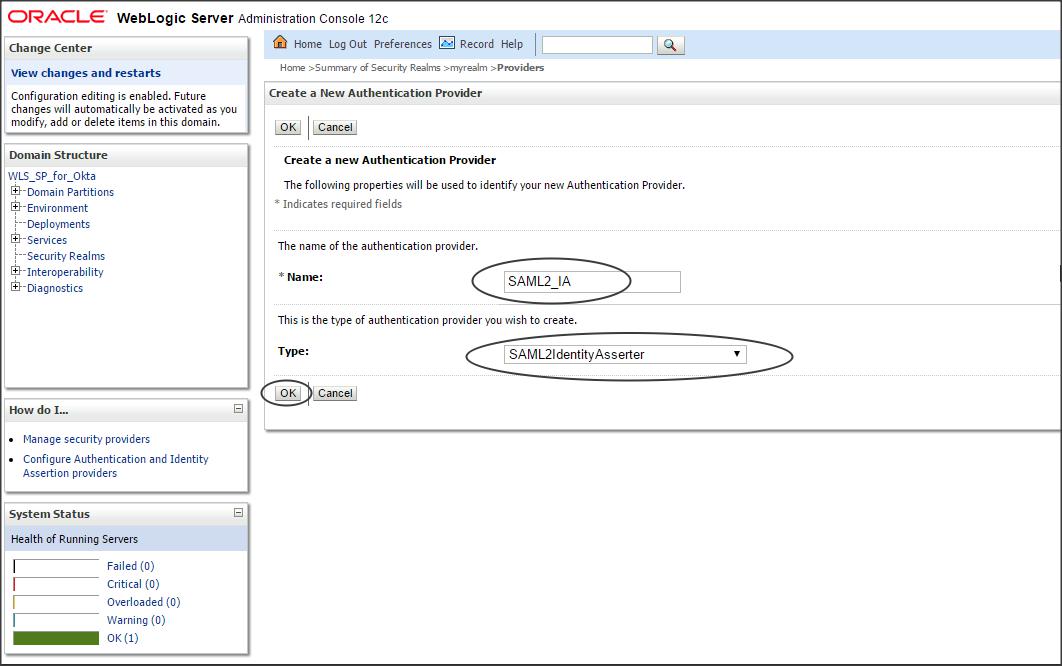
Step 1 :
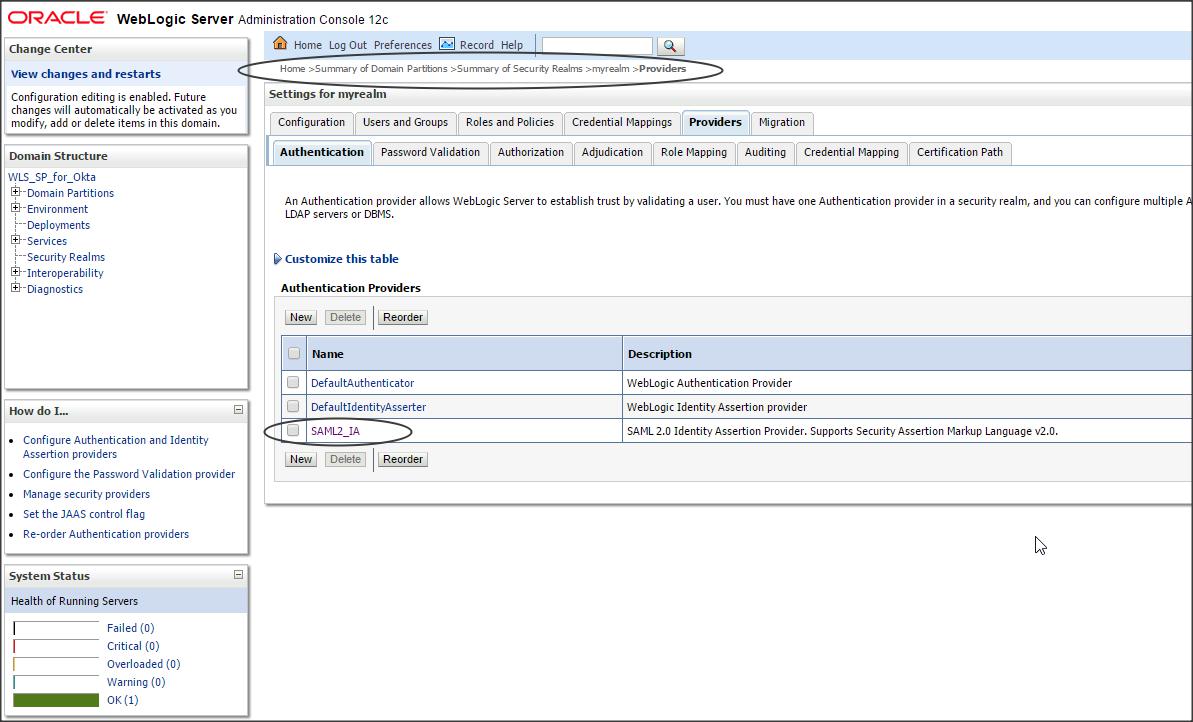
Login to Weblogic console -> Security Realms -> myrealm -> Providers -> Authentication -> new -> SAML2IdentityAsserter
Step 2 :
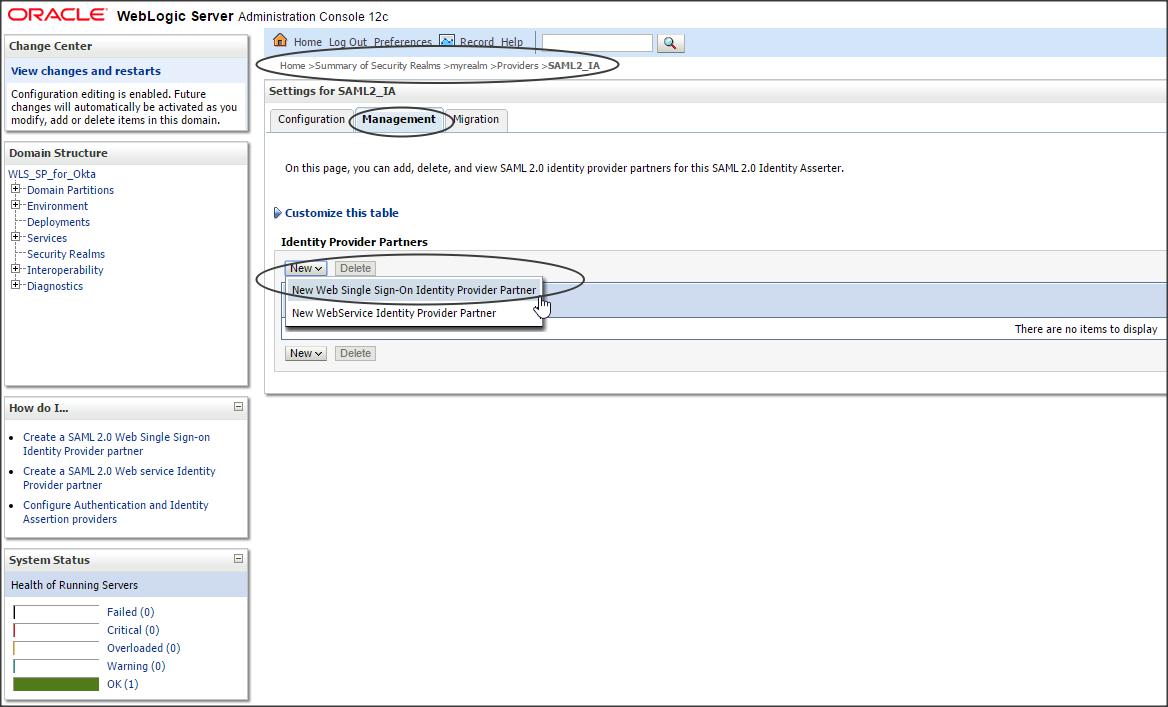
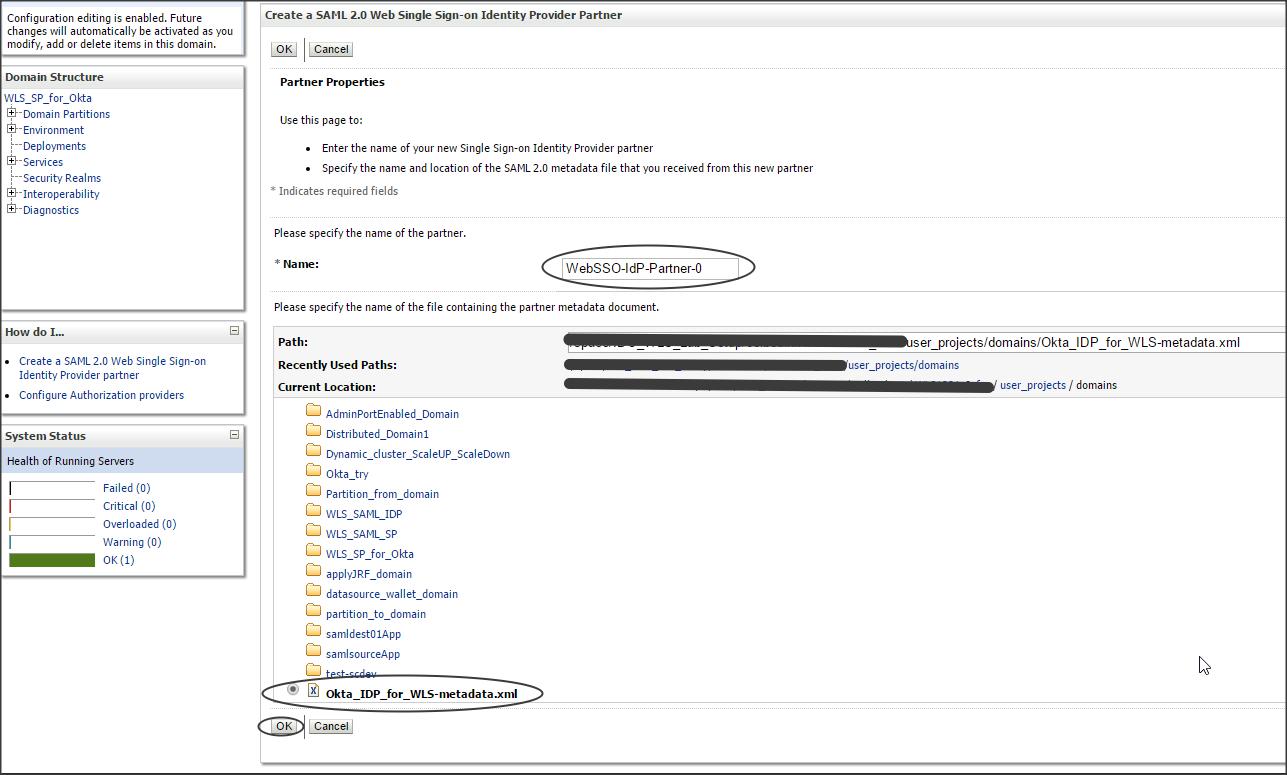
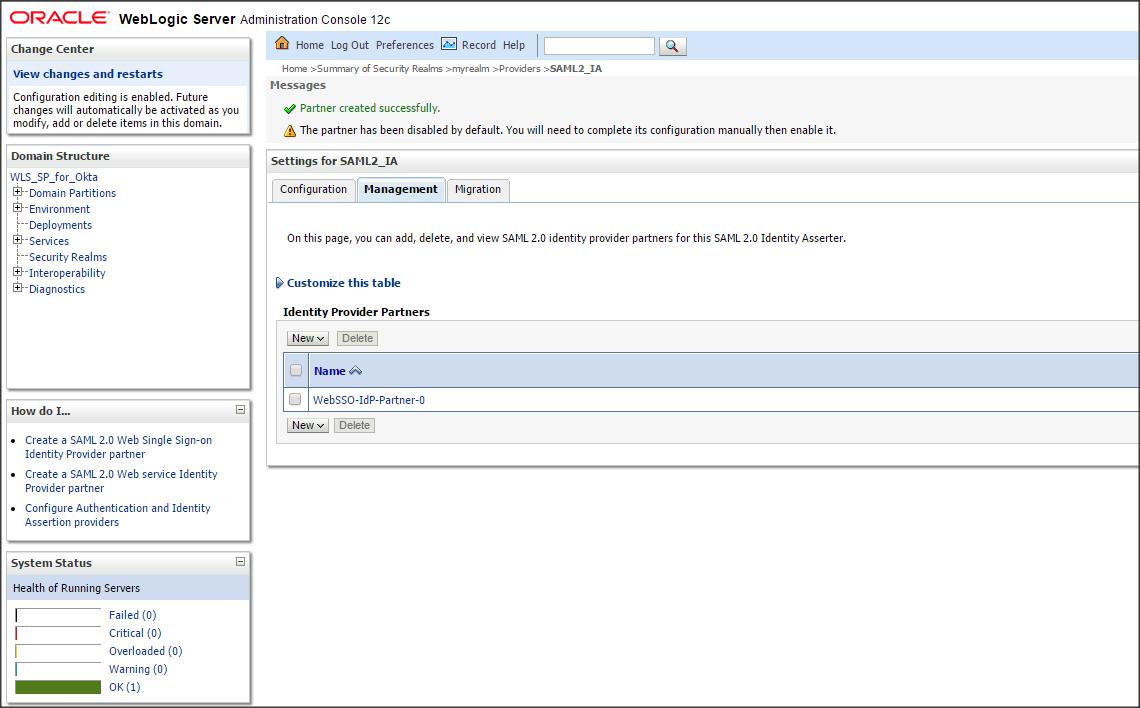
Click on the newly created SAML2IdentityAsserter (say SAML2IA) -> Management -> new -> “new Web Single Sign-On Identity Provider Partner” (say WebSSO-IdP-Partner-0)
Select the metadata.xml file that you downloaded from Okta (say Okta_IDP_for_WLS-metadata.xml)
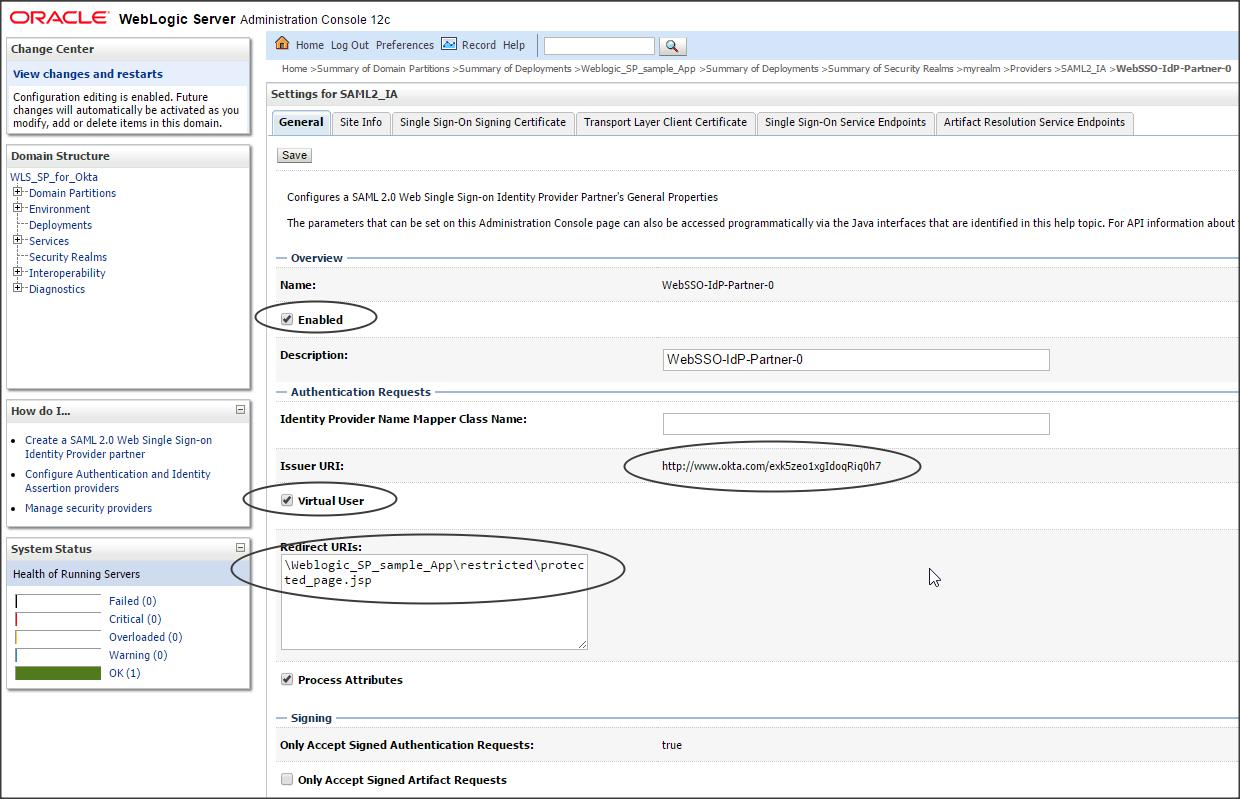
Step 3 :
Click on the newly created IDP partner and enter the following :
Enable (check)
Redirect URIs : /Weblogic_SP_sample_App/restricted/protected_page.jsp
Step 4 :
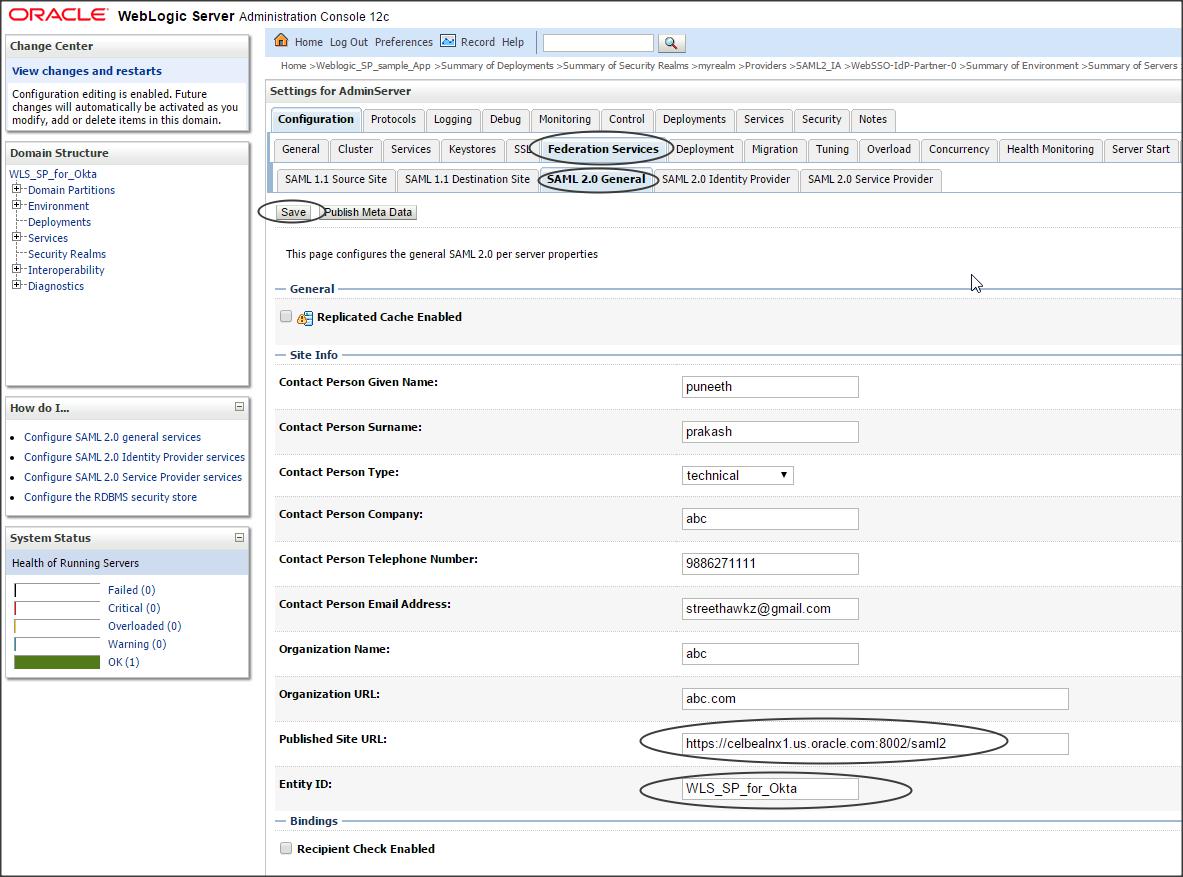
Click on the Server (where the IDP application is deployed) -> Configuration -> Federation Services -> SAML 2.0 General -> and enter the following :
Publish Site URL : https://celbealnx1.us.oracle.com:8002/saml2
Entity ID : WLS_SP_for_Okta
Step 5 :
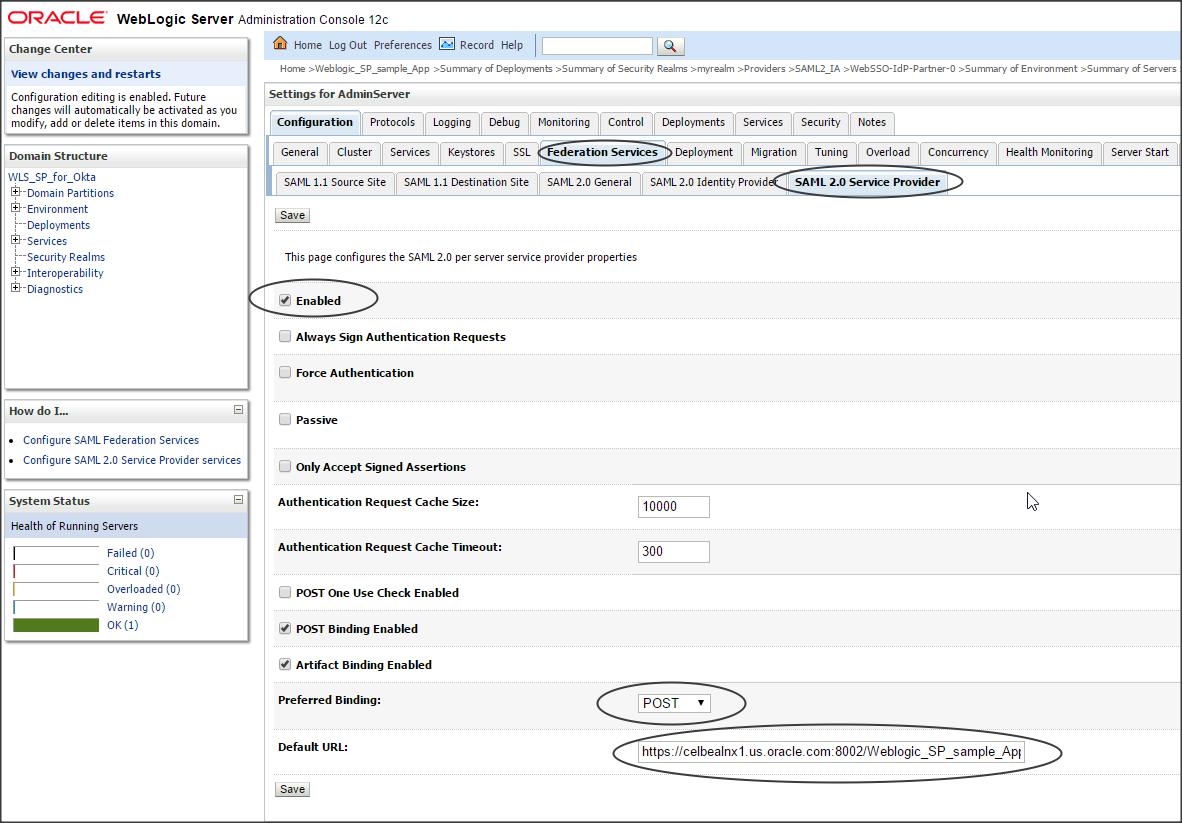
Click on Server (where the IDP application is deployed) -> Configuration -> Federation Services -> SAML 2.0 Service Provider -> and enter the following :
Enabled (check)
Preferred Binding : POST
Default URL : https://celbealnx1.us.oracle.com:8002/Weblogic_SP_sample_App/restricted/protected_page.jsp
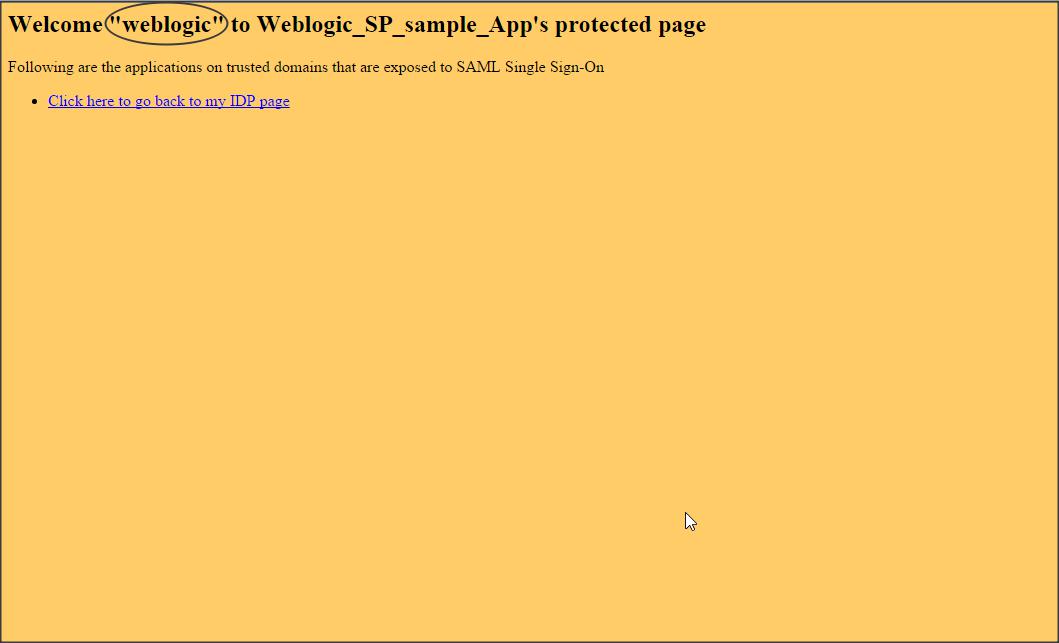
You have successfully configured Okta IDP with Weblogic SP. Time to test it now 🙂
Deploy the sample application on Weblogic (Weblogic_SP_sample_App.zip)
DOWNLOAD “Weblogic_SP_sample_App.zip”
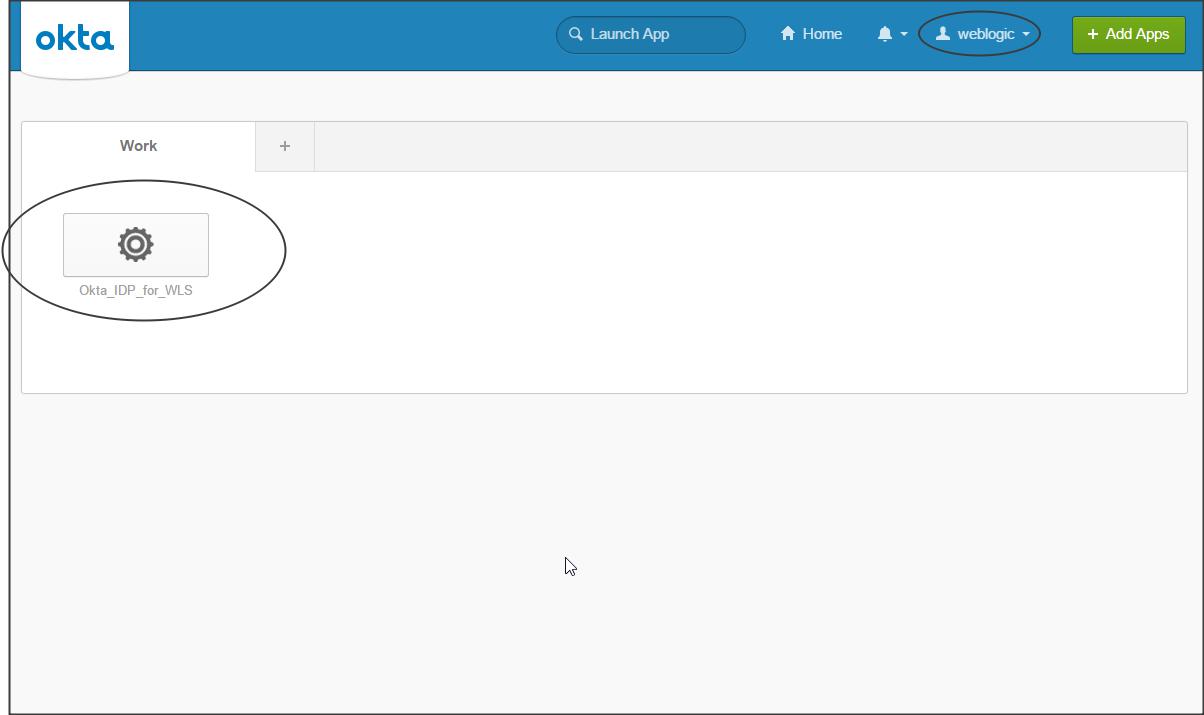
Now open the Okta page -> click on the application and check if the protected page of application deployed on WLS is accessible.
NOTE :
– Okta sends the login name (i.e email address) by default in the SAML token to Weblogic.
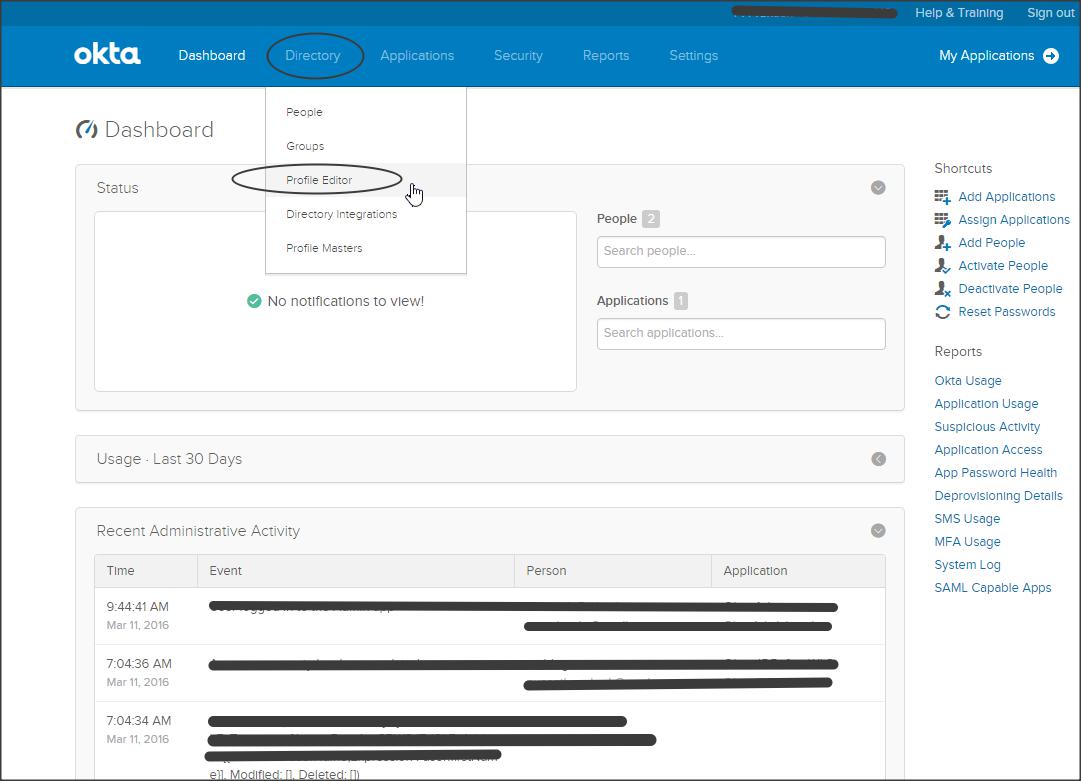
– If you want to retrieve the Firstname of the user to authenticate into the protected page of Weblogic SP application, then make the following changes in Okta :
Login to Okta dashboard as Admin -> Directory -> Profile Editor
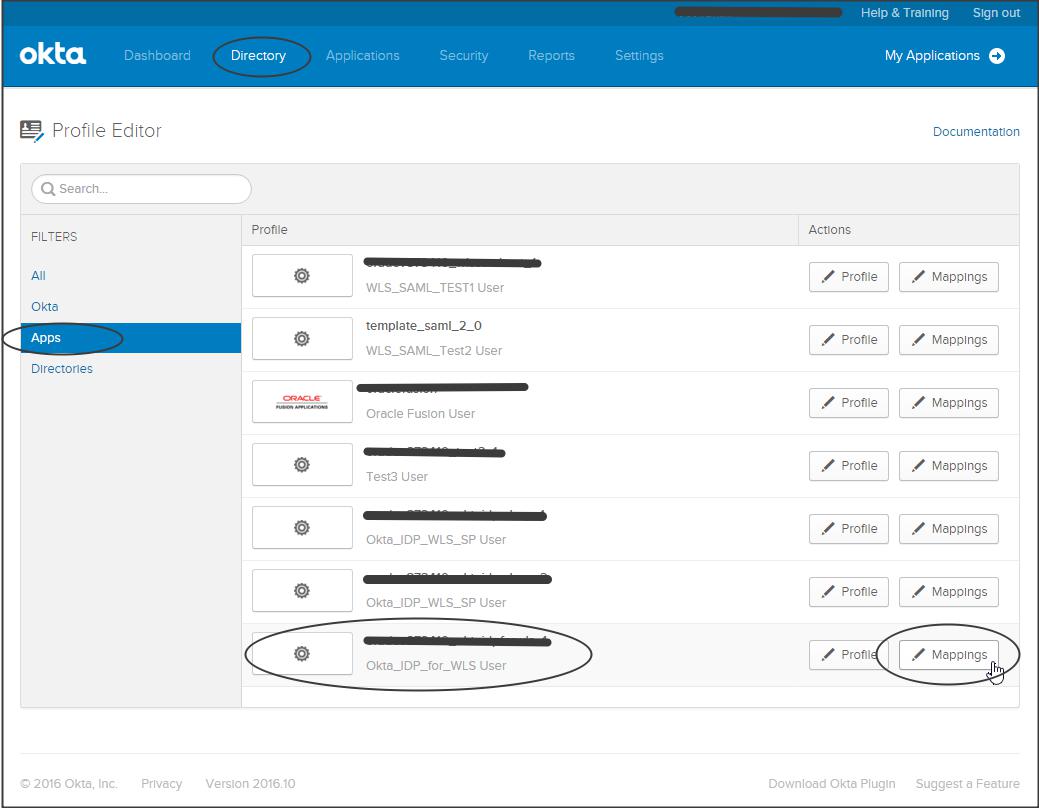
Click on “Apps” -> “Mapping” next to your application
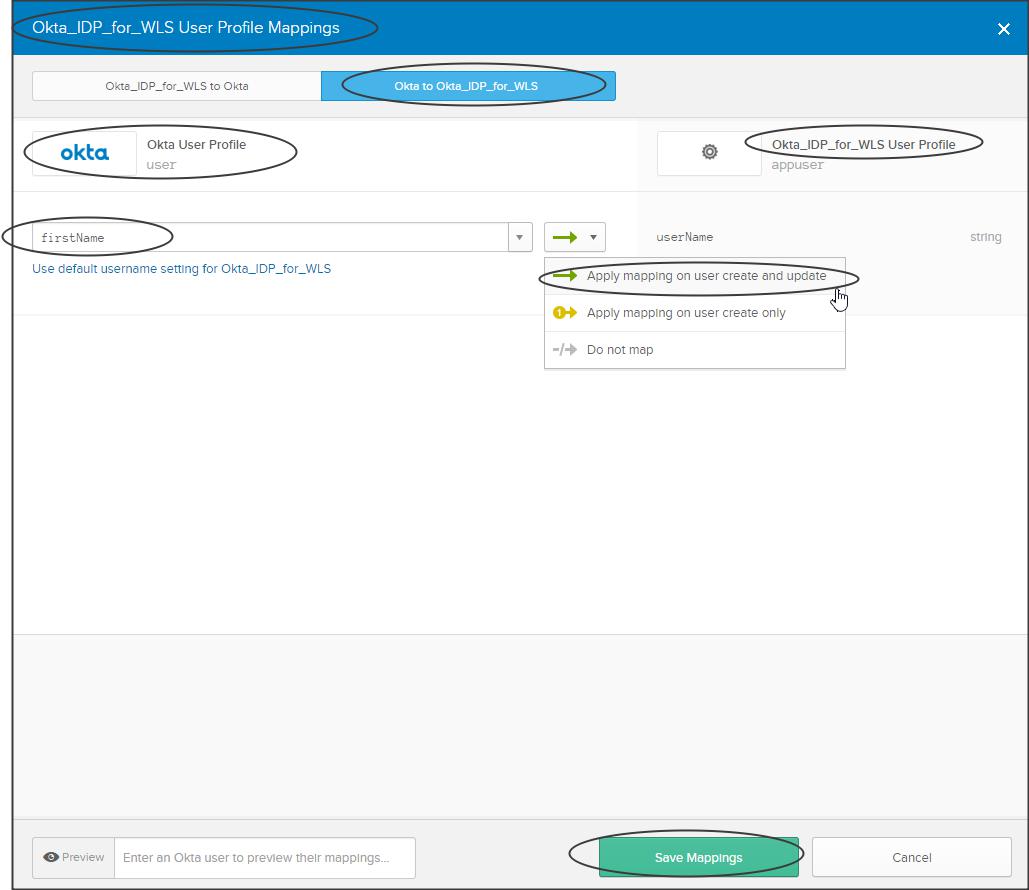
Click on “Okta to Okta_IDP_for_WLS” -> Select “firstName” from the dropdown -> “Apply mapping on user create and update” -> “Save mapping”
Now test your application…!!!
Demo :
Have a look at the following video which shows how to install the sample application and enable Virtual User feature in WebLogic :
NOTE: The video shows a sample application from JCS SAML blog but it holds good for the sample application used in this blog as well.
