NOTE:
For demonstration purposes only, not for use in production.
Refer the following documentation for detailed information:
https://oracle.github.io/weblogic-kubernetes-operator/
Step 1:
Install latest version of Maven and JDK 21:
Example:
Step 2:
Set JAVA_HOME and MAVEN_HOME:
Example:
Step 3:
Set proxy:
Example:
NOTE:
Add the IP address of all nodes in k8s cluster at the end of no-proxy as shown above.
Step 4:
Clone WKO repo:
Example:
Step 5: (Optional)
You can customize WKO as needed at this stage.
Example:
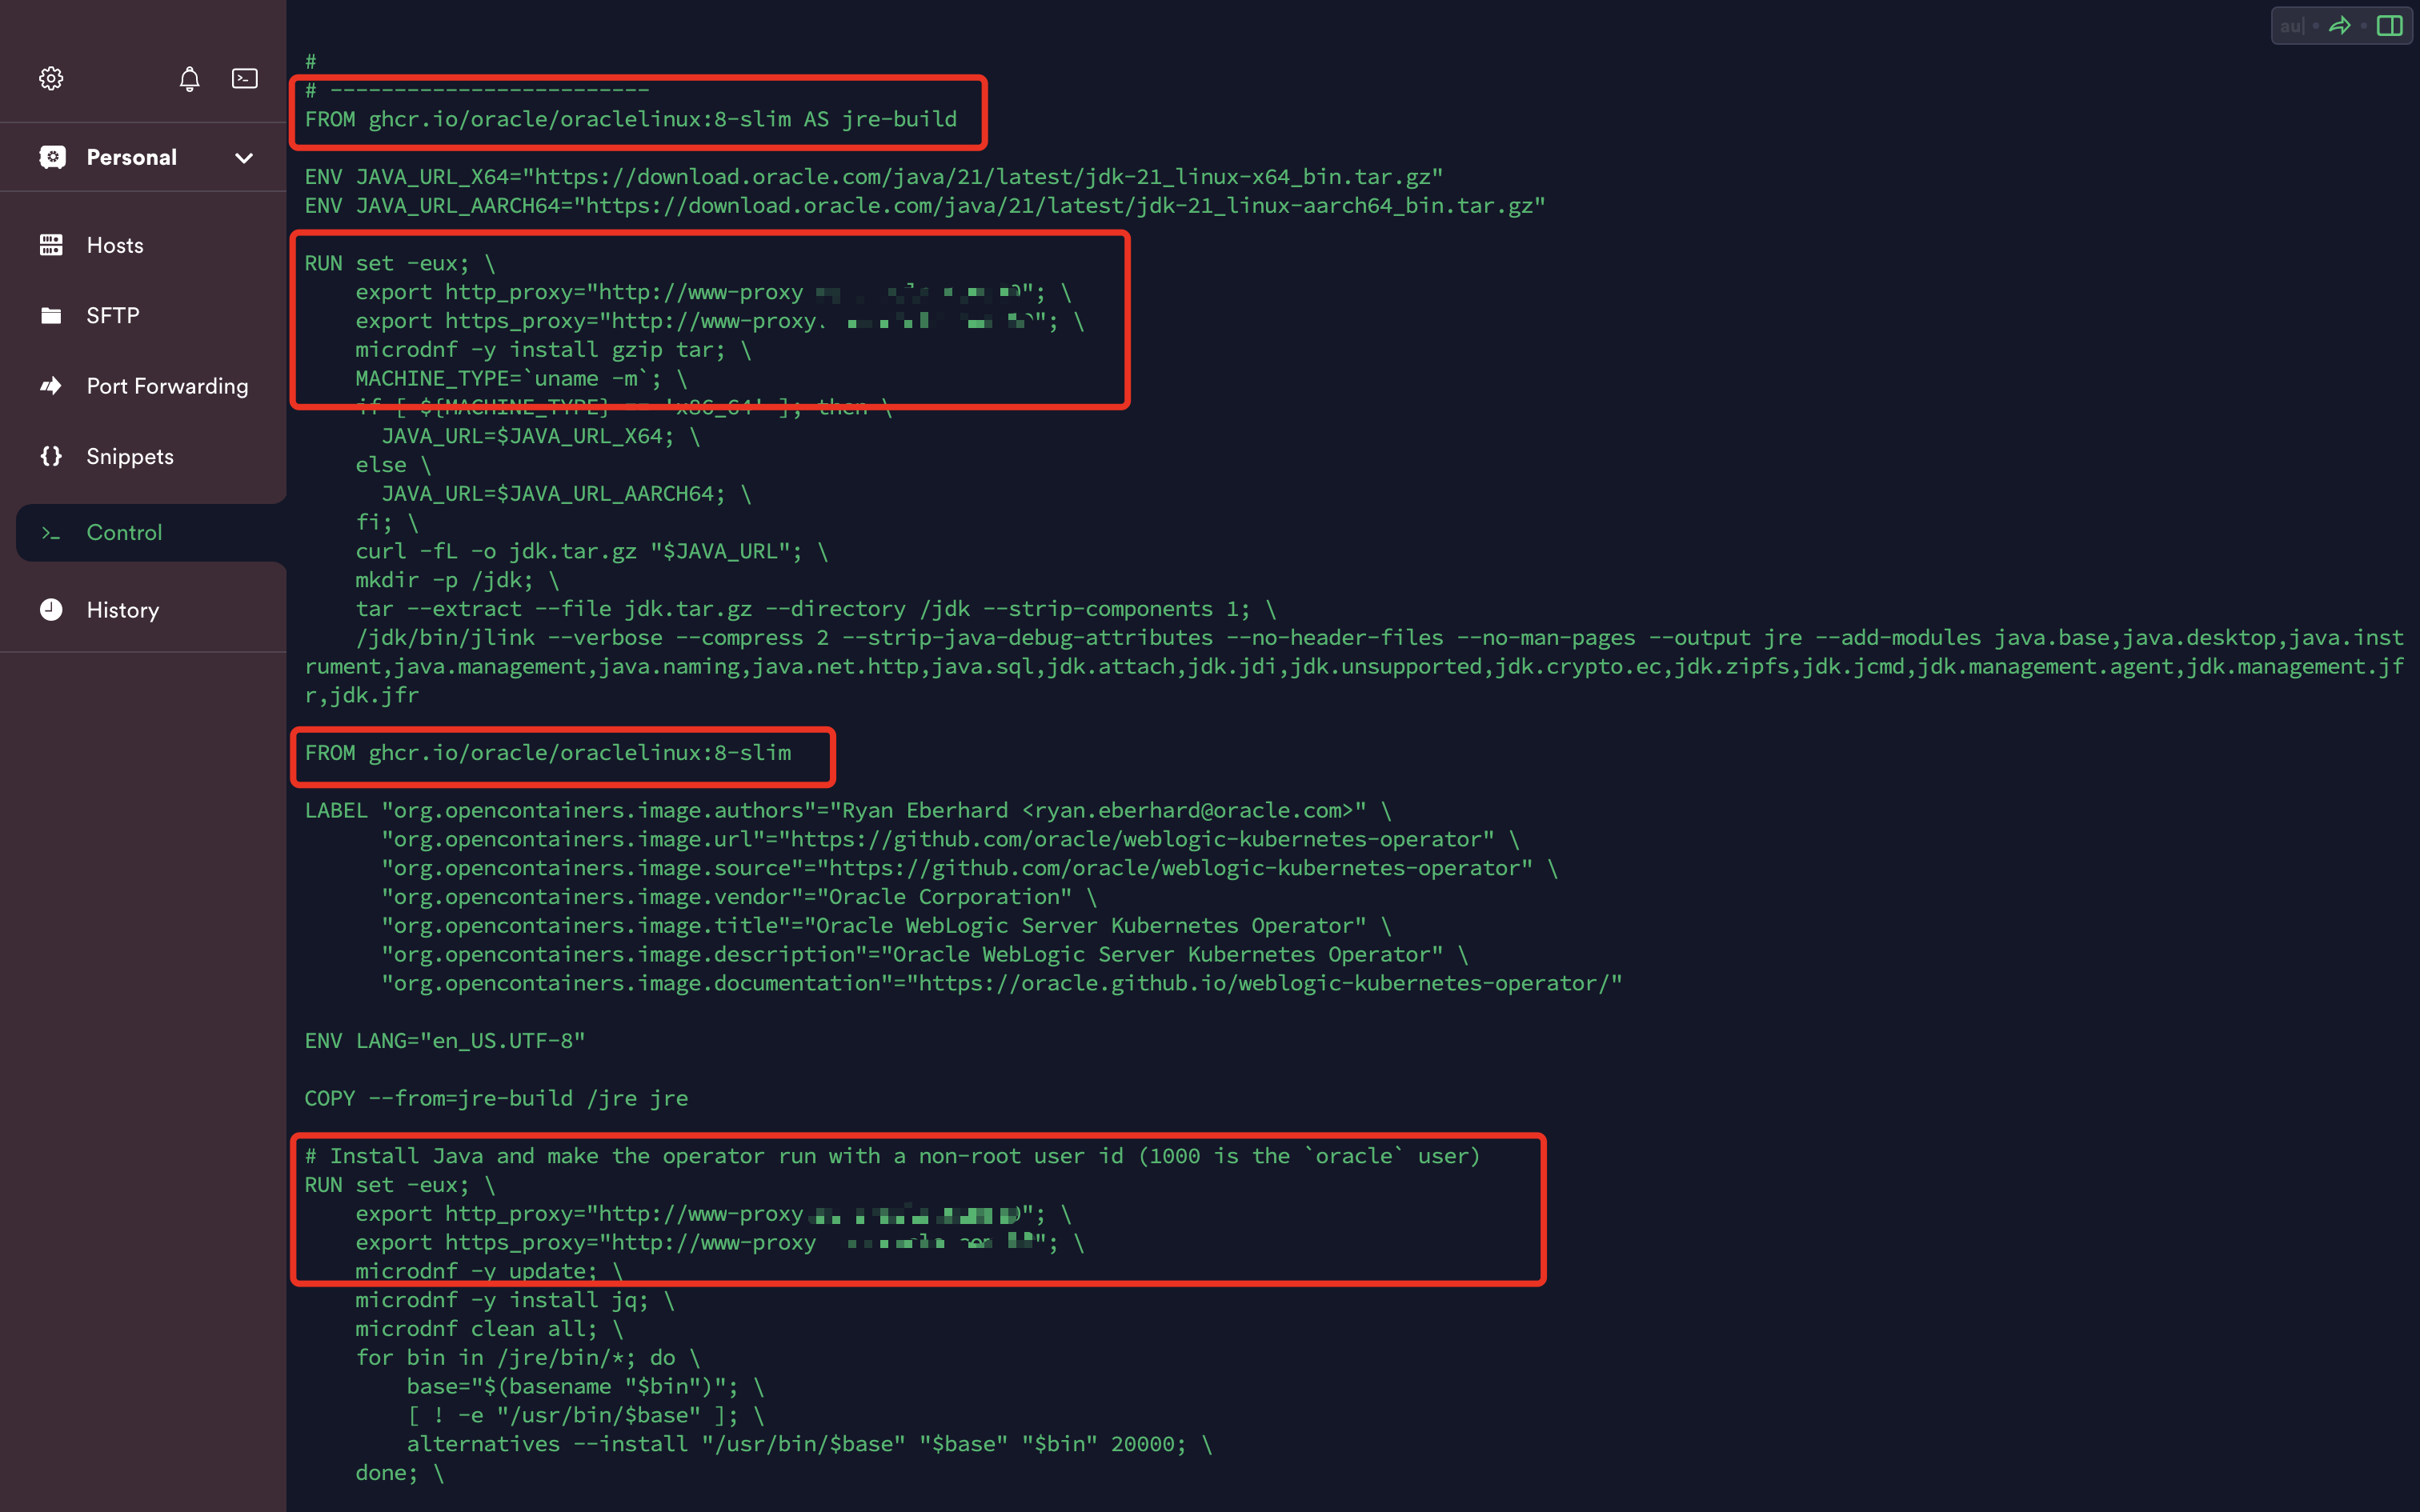
In this example I will build WKO on OL8 instead of the default OL9:
unzip and cd to weblogic-kubernetes-operator directory and make the following changes to DockerFile
* Change “FROM ghcr.io/oracle/oraclelinux:9-slim AS jre-build” to “FROM ghcr.io/oracle/oraclelinux:8-slim AS jre-build”
* Change “FROM ghcr.io/oracle/oraclelinux:9-slim” to “FROM ghcr.io/oracle/oraclelinux:8-slim”
* Set Proxy:
Add proxy below the line that starts with: RUN set -eux; \
Example:
export http_proxy=”http://www-proxy.xx.xxxxx.xxx:80″; \
export https_proxy=”http://www-proxy.xx.xxxxx.xxx:80″; \
Step 6:
Maven Install
Example:
If you get a warning only while testing then you can skip Maven test using the following command:
OR
Step 7:
After running maven install successfully, you can build the WKO image using the following command:
Example:
OR
<Additional Info>
I was using a very old version of VirtualBox for my tests and when I used the production release of WKO image from https://github.com/oracle/weblogic-kubernetes-operator (which is built on OL9) I saw the following error:
kubectl logs -n sample-weblogic-operator-ns weblogic-operator-bf77-67
Fatal glibc error: CPU does not support x86-64-v2
To overcome this I had to build a WKO image by modifying the DockerFile and forcing it to use OL8 instead of OL9.
You can pull this custom image from my repo:
