NOTE:
For demonstration purposes only, not for use in production.
Refer the following documentation for detailed information:
https://docs.oracle.com/en/operating-systems/olcne/
Step1:
Setup your environment/machines :
You need a minimum of 3 machines – Operator, Control and Worker nodes.
For Detailed Info:
https://blogbypuneeth.medium.com/1-setup-your-nodes-ocne-1-7-b911cbdf3202
a. Set the hostname (on each node):
hostnamectl set-hostname control.xx.xxxxx.com
hostnamectl set-hostname worker1.xx.xxxxx.com
hostnamectl set-hostname worker2.xx.xxxxx.com
b. Edit /etc/hosts file and add map the IP and hostname / alias (On All Nodes):
10.xx.xx.xxx control.xx.xxxxx.com control
10.xx.xx.xxx worker1.xx.xxxxx.com worker1
10.xx.xx.xxx worker2.xx.xxxxx.com worker2
Step 2:
a. Create “opc” user and assign elevated permissions to this user. (On All Nodes)
For Detailed Info:
Commands:
passwd opc
usermod -aG wheel opc
visudo
%wheel ALL=(ALL) NOPASSWD: ALL
b. login with opc user and run the following commands: (On All Nodes)
On each node :
sudo chmod -R 755 /etc/systemd/system/crio.service.d
cd /etc/systemd/system/crio.service.d
Environment=”HTTP_PROXY=http://www-proxy-xxxx.xx.xxxxx.com:80″
Environment=”HTTPS_PROXY=http://www-proxy-xxxx.xx.xxxxx.com:80″
Environment=”NO_PROXY=localhost,127.0.0.1,.xx.xxxxx.com,10.xx.xx.xxx,10.xx.xx.xxx,10.xx.xx.xxx”
Step 3:
a. Login to Operator node with the user who will run olcnectl commands.
In this case its opc, so login with opc user and create an ssh key pair. (on Operator node)
You should see the certs created as follows :
/home/opc/.ssh
[opc@operator .ssh]$ ls
authorized_keys id_rsa id_rsa.pub known_hosts
For Detailed Info:
https://blogbypuneeth.medium.com/ocne-1-7-setup-ssh-key-based-authentication-9f4dc6f2168a
b. Now transfer the public key to all other nodes (On Operator node)
ssh-copy-id opc@control
ssh-copy-id opc@worker1
ssh-copy-id opc@worker2
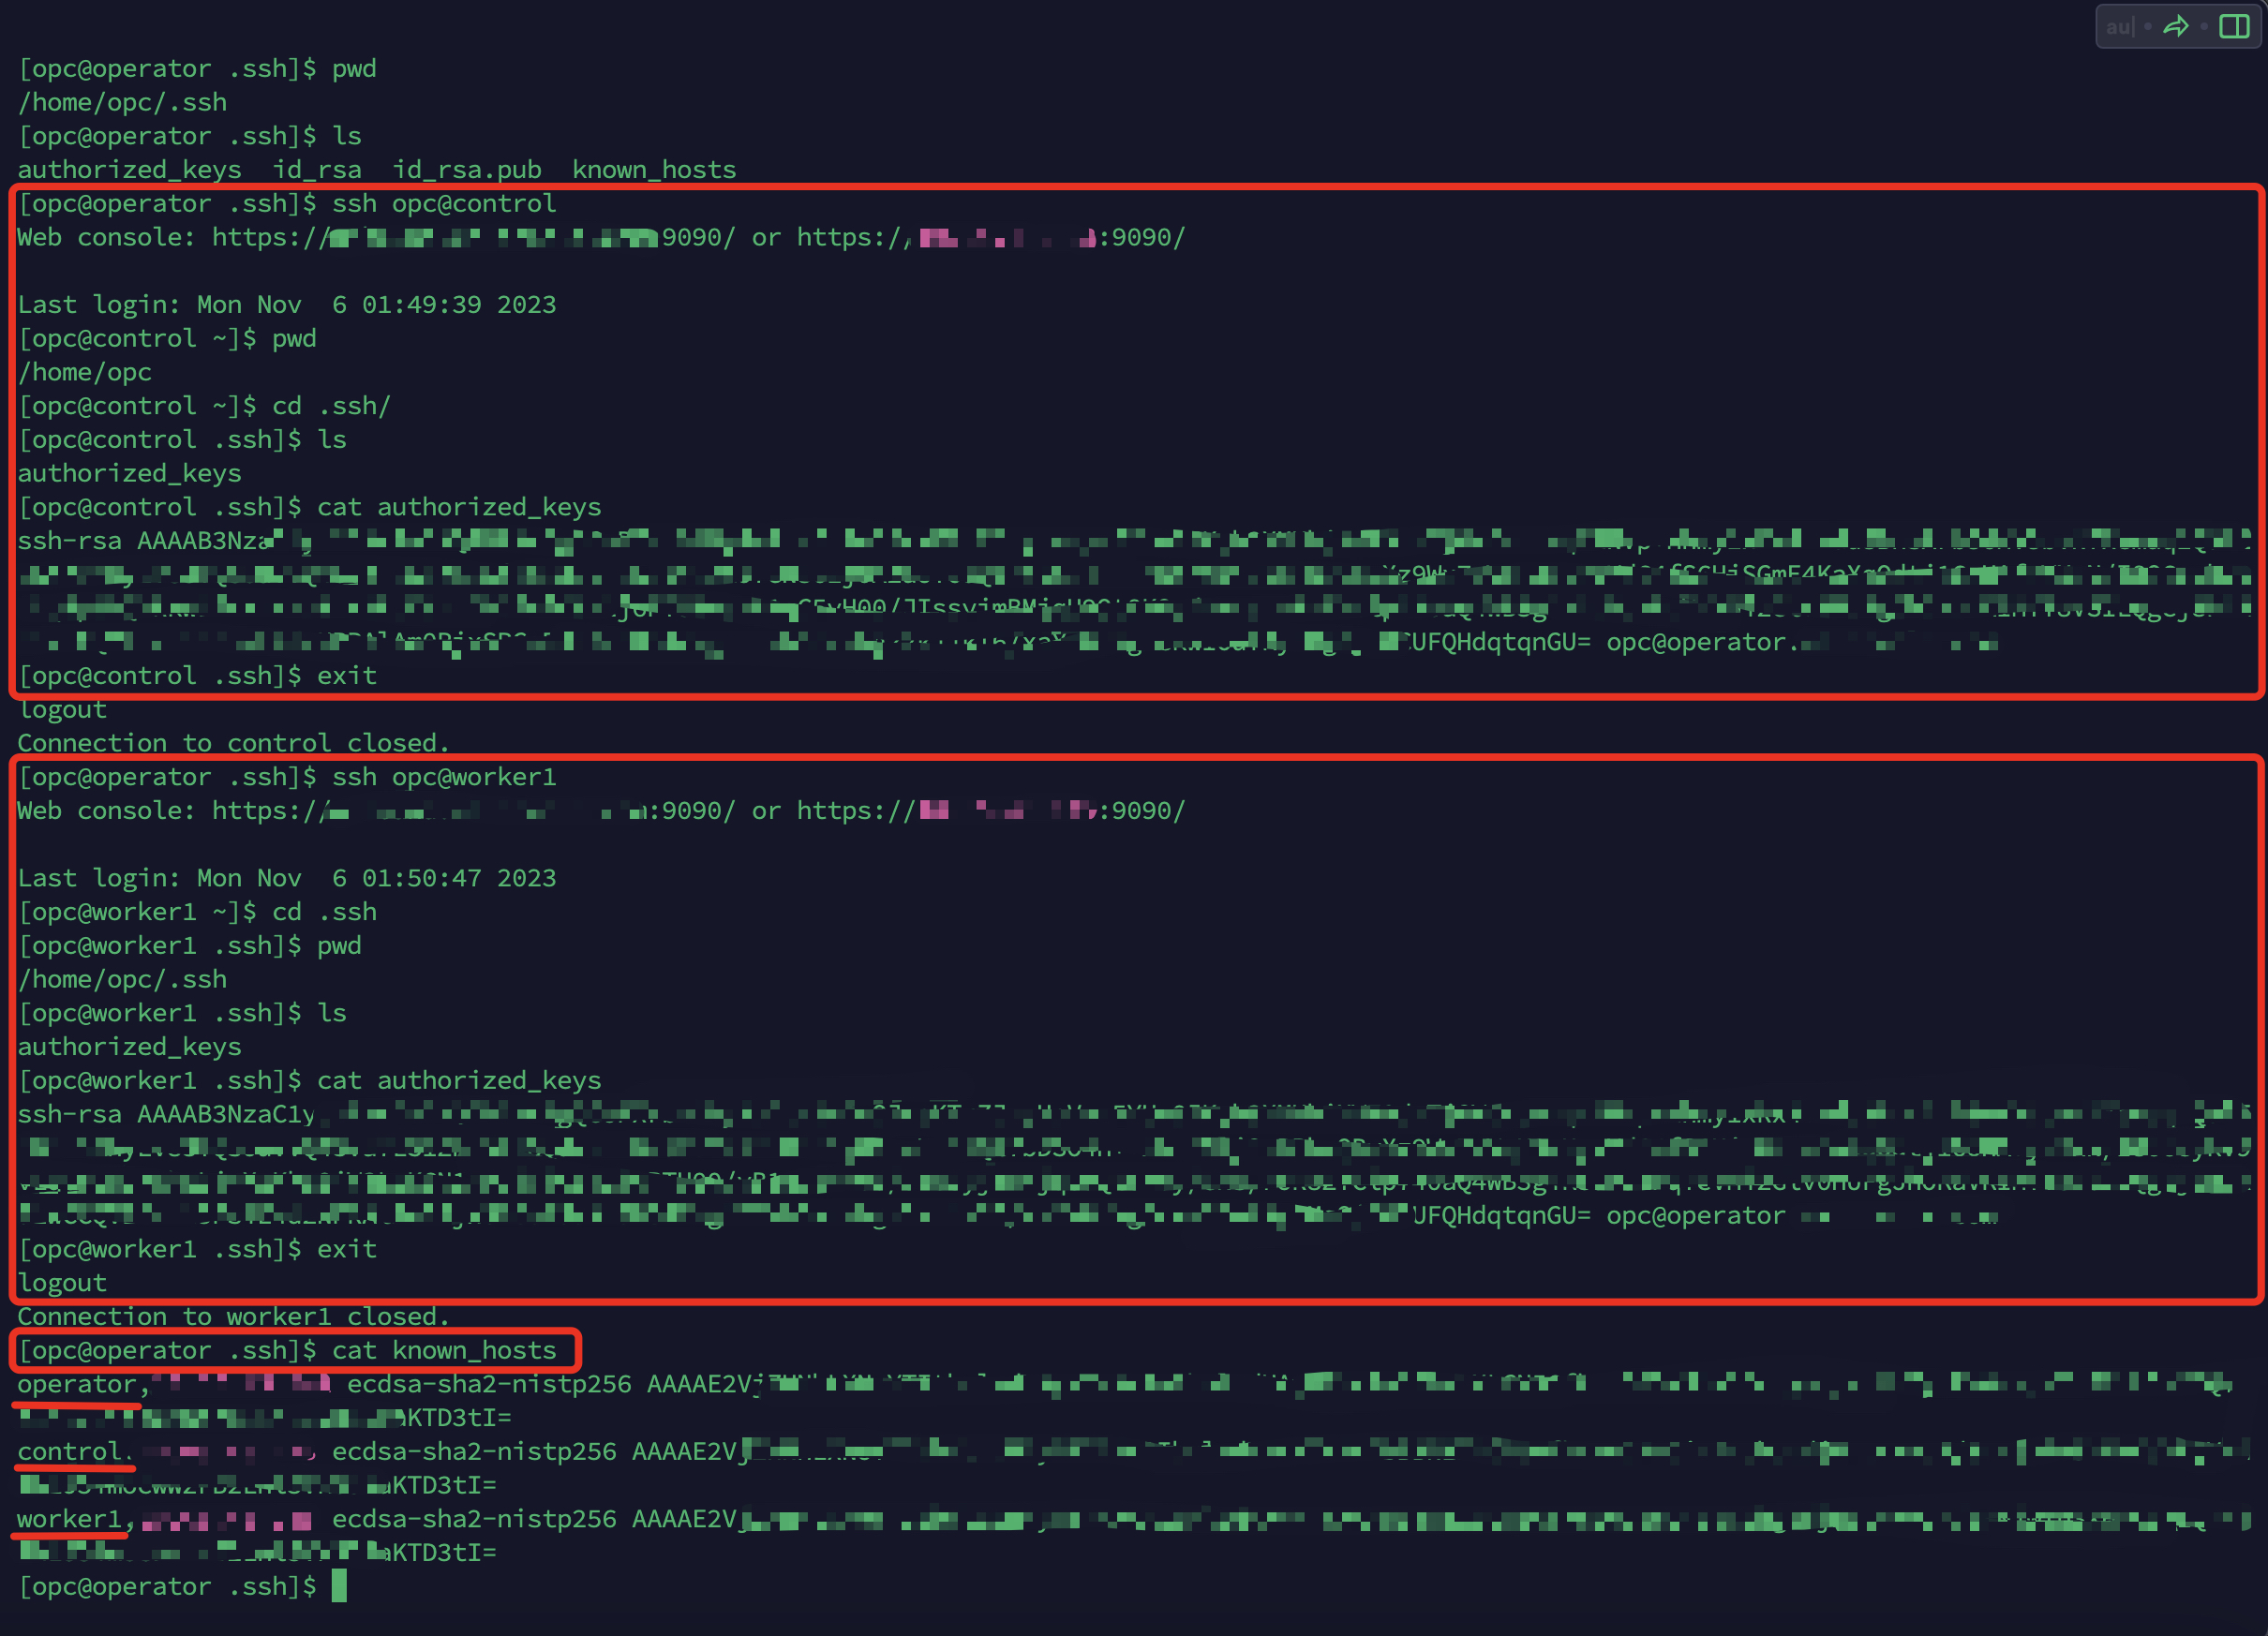
After running the above commands successfully, you will see that the public key’s (id_rsa.pub) contents from Operator Node have been added to the copy of the user’s $HOME/.ssh/authorized_keys file on the Control and Worker Nodes.
cat $HOME/.ssh/authorized_keys (on All nodes)
Now login to each node from Operator node using ssh and check if passwordless authentication is successful. (Make sure you are logged in as “opc” user)
You should see the following file “authorized_keys” created on all nodes :
Step 4:
Install and enable Chrony: (On All Nodes)
sudo systemctl enable –now chronyd
Step 5:
Set proxy: (On All Nodes)
export http_proxy=http://www-proxy-xxxx.xx.xxxxx.xxx:80
export no_proxy=“localhost,127.0.0.1,.xx.xxxxx.com,10.xx.xx.xxx,10.xx.xx.xxx,10.xx.xx.xxx”
Step 6: (On Operator node)
Setup Operator node:
sudo dnf config-manager –disable ol8_olcne16 ol8_olcne15 ol8_olcne14 ol8_olcne13 ol8_olcne12
sudo dnf repolist –enabled | grep developer
sudo dnf config-manager –disable ol8_developer
For Detailed Info:
https://blogbypuneeth.medium.com/3-setup-operator-node-ocne1-7-74aff80e2fea
Step 7: (On All Nodes)
Restart all nodes.
Step 8: (On Operator node)
NOTE:
Add the IP address of all nodes in k8s cluster at the end of no-proxy as shown above.
You can monitor the output of above commands and also tail the following logs to check the progress:
Step 9: (On Operator node)
Step 10: (On Control node)
After the provisioning completes successfully, ssh to Control node and run the following commands:
sudo cp -i /etc/kubernetes/admin.conf $HOME/.kube/config
sudo chown $(id -u):$(id -g) $HOME/.kube/config
export KUBECONFIG=$HOME/.kube/config
echo ‘export KUBECONFIG=$HOME/.kube/config’ >> $HOME/.bashrc
Check if the kubernetes cluster was created successfully using the following command:
