Update Table Connections Without Rebuilding Datasets
Have you ever needed to switch the database connection of a dataset—but dreaded the idea of having to rebuild or remap everything just to make it work? If you’re working with mirrored or regionally distributed data sources that share the same schema and table structure, we’ve got good news. Oracle Analytics allows you to update the connection used by individual tables in your dataset without breaking anything downstream.
This makes it easy (and safe) to switch one connection for another, keeping your dataset—and any dependent workbooks and dashboards fully intact.
Working with an Existing Dataset
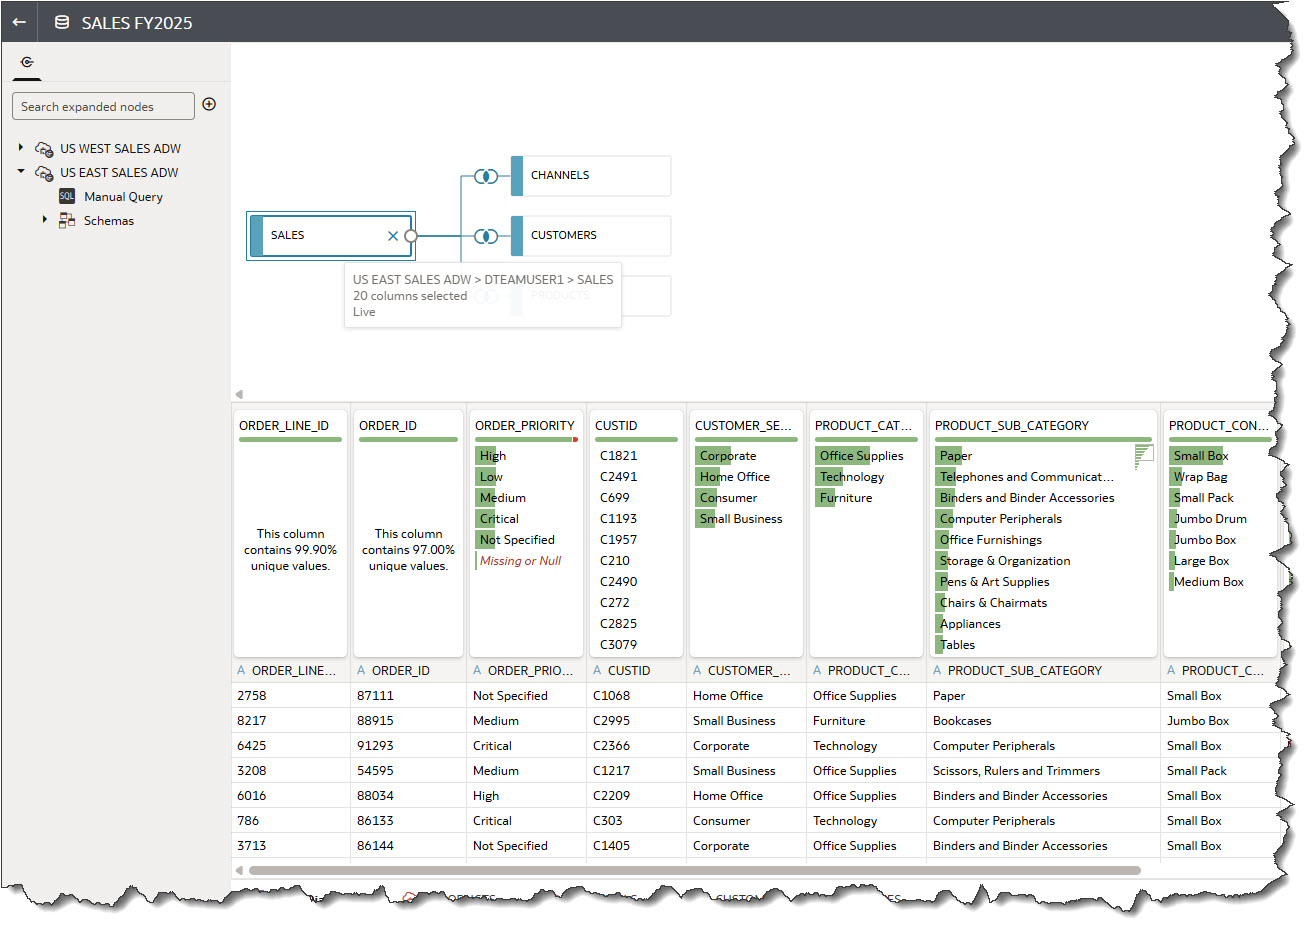
Let’s say you’re working with a dataset that’s currently using a connection called US WEST SALES ADW. In this example, the dataset includes four tables: Sales, Customers, Products, and Channels.
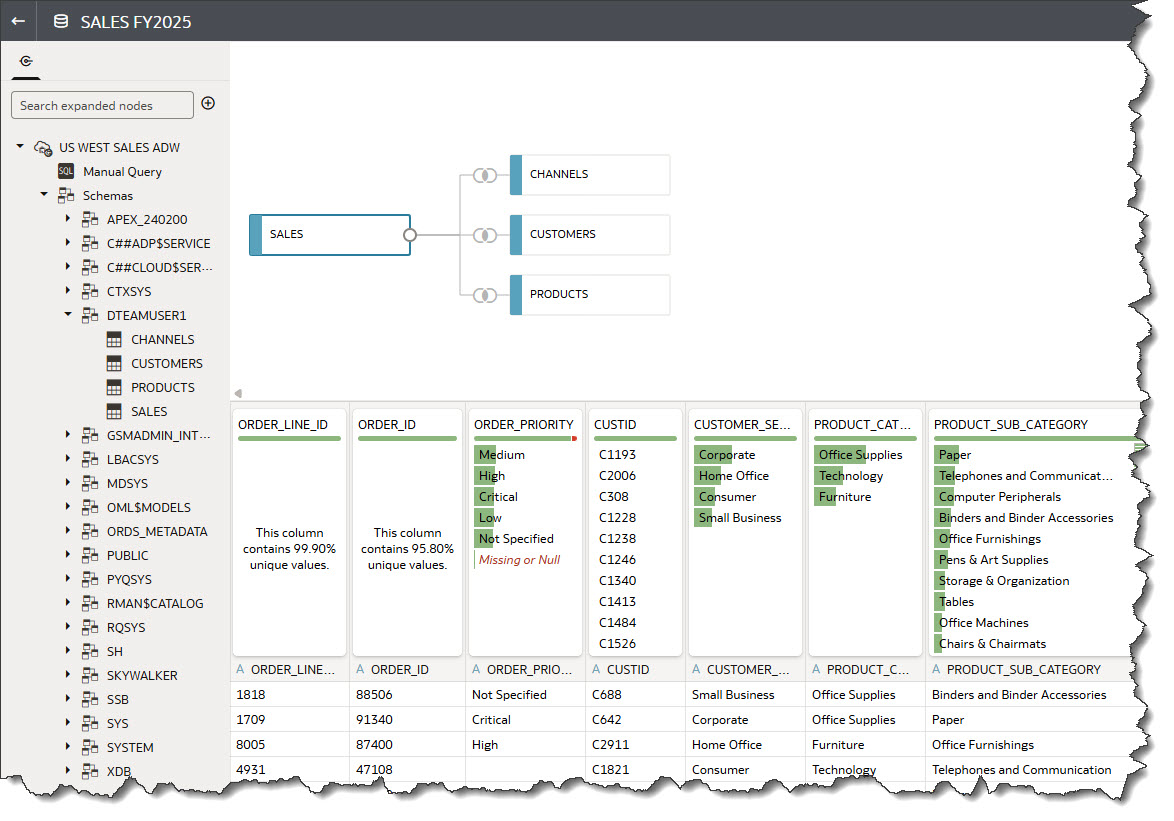
Now imagine you need to switch the connection for just one of those tables—say, the Sales table—to a regional mirror with the same structure. With the Replace Connection feature, that update is fast and seamless.
Step 1: Using Replace Connection
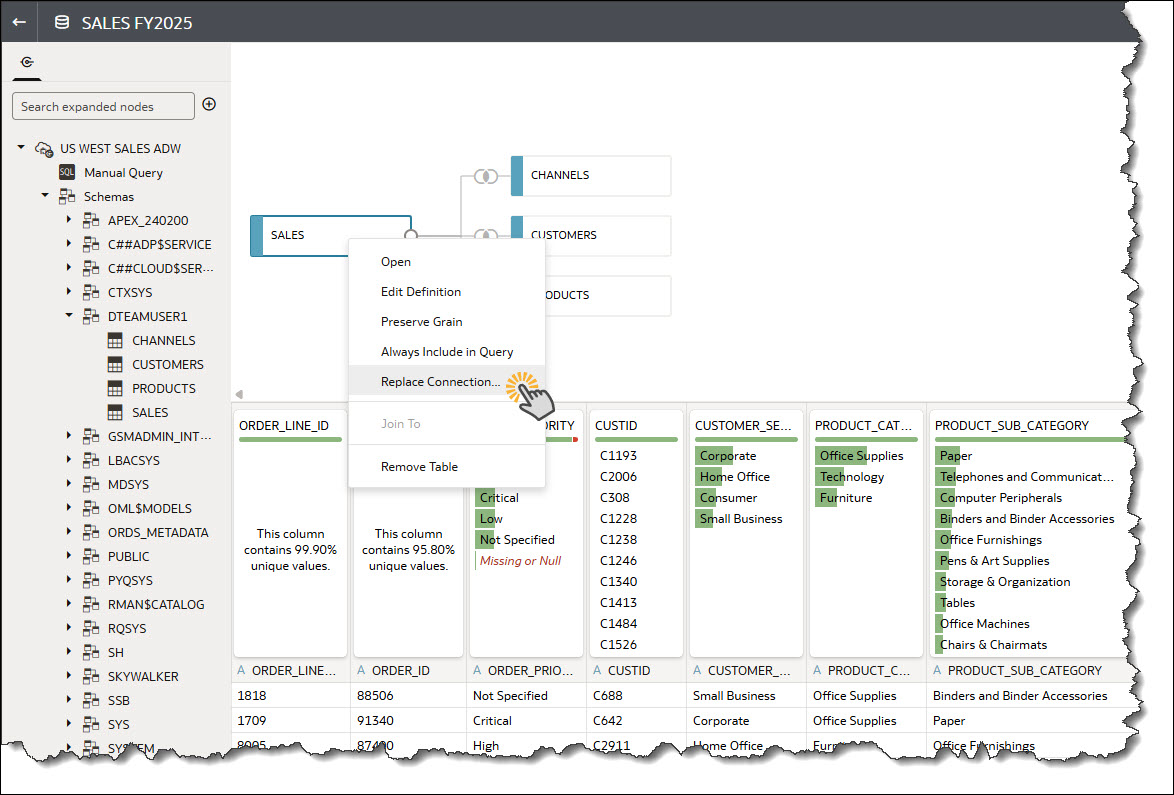
To begin, right-click the table node you want to update—in this case, Sales—and choose Replace Connection from the drop-down menu.
Step 2: Selecting the new Connection
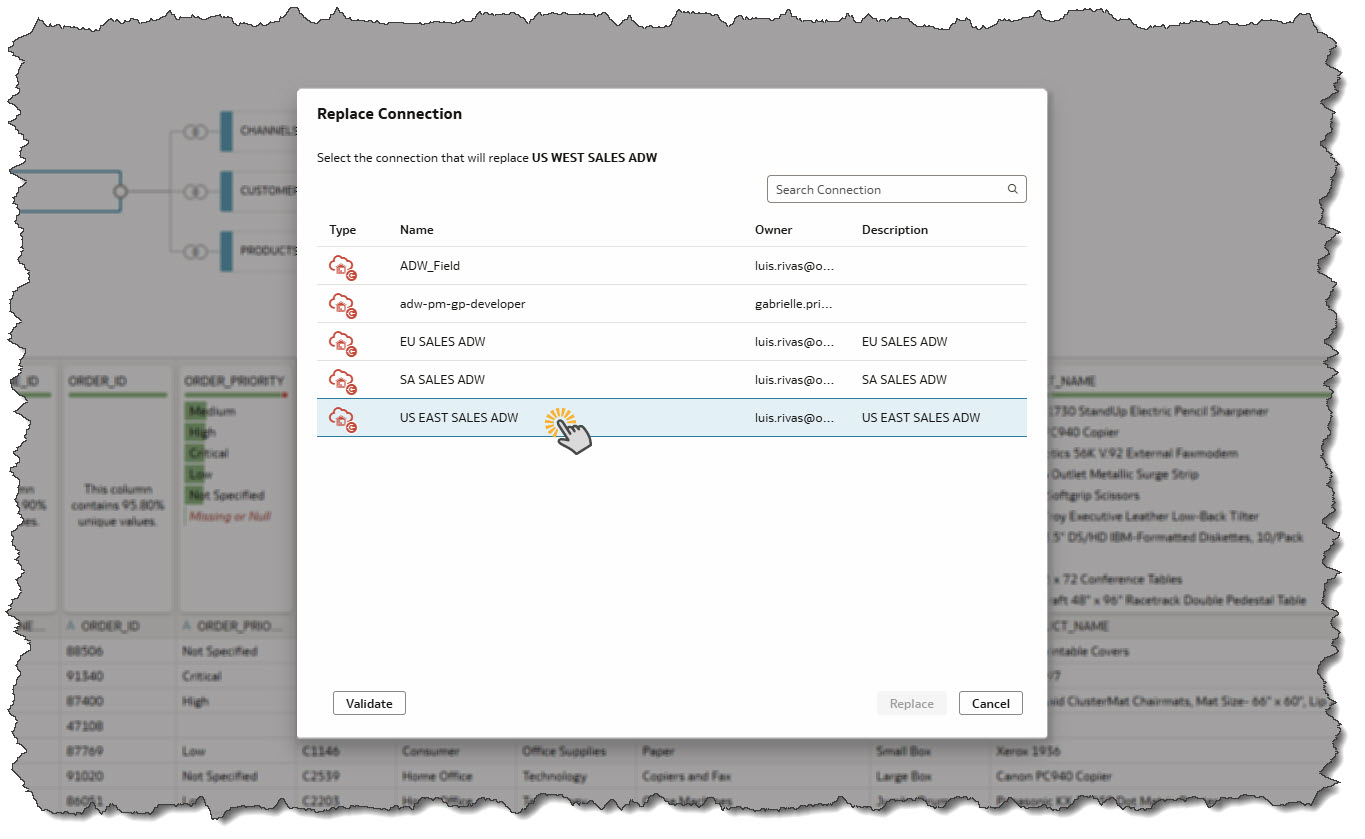
This opens a dialog showing other available connections that contain similar sources. In our case, we’ll choose US EAST SALES ADW connection.
Step 3: Validating the Change
Before finalizing the replacement, click Validate. Oracle Analytics checks that the new connection has the same schema, table, and column structure.
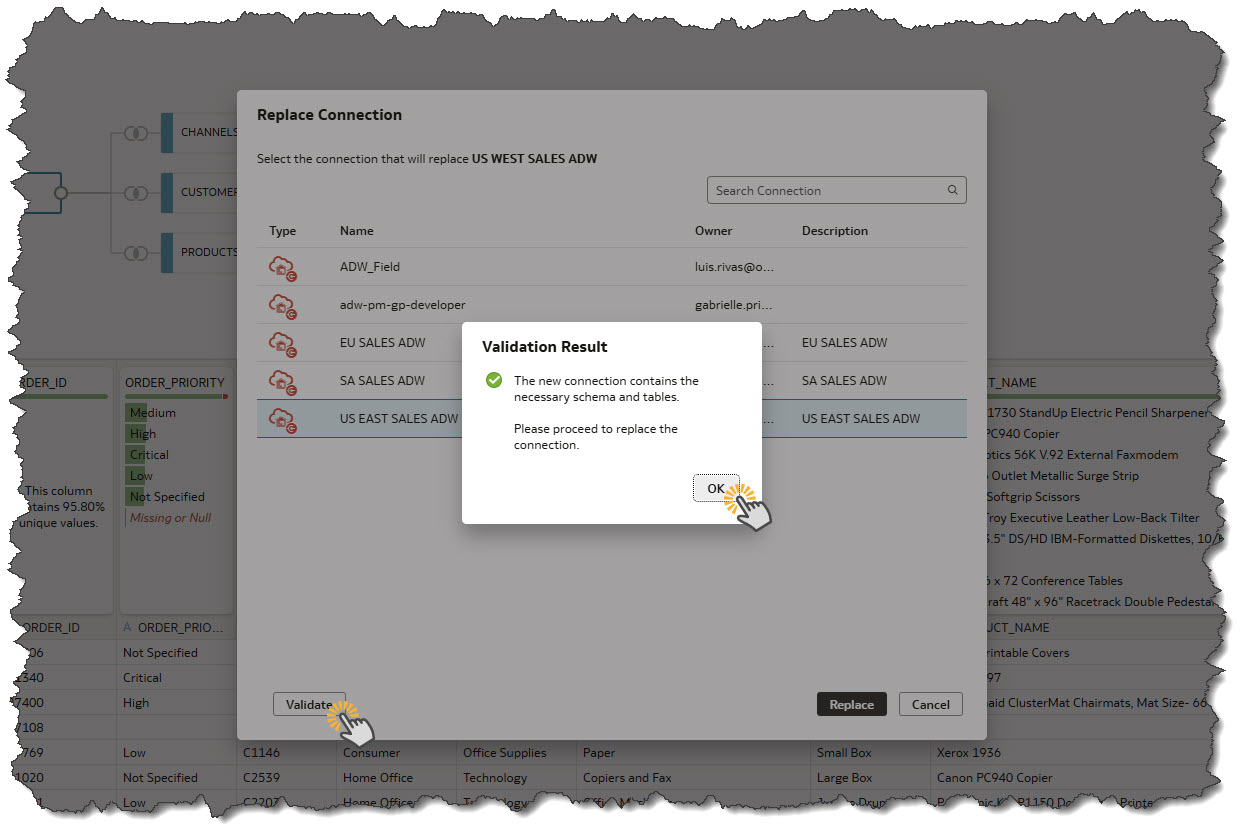
This step ensures that everything is compatible—looks for schema, confirms no broken references, no lost columns or changes in column data types.
Step 4: Applying the Replacement
Once validation passes, click Replace. After confirming, the system updates the table’s connection and fetches a new data sample from the selected source, and kicks off a new semantic profile.
When the profile completes, you’ll see a refreshed set of Data Quality Insights that reflect the updated backend. Also notice that hovering over the table node indicates the table is now coming from the US EAST SALES ADW connection.
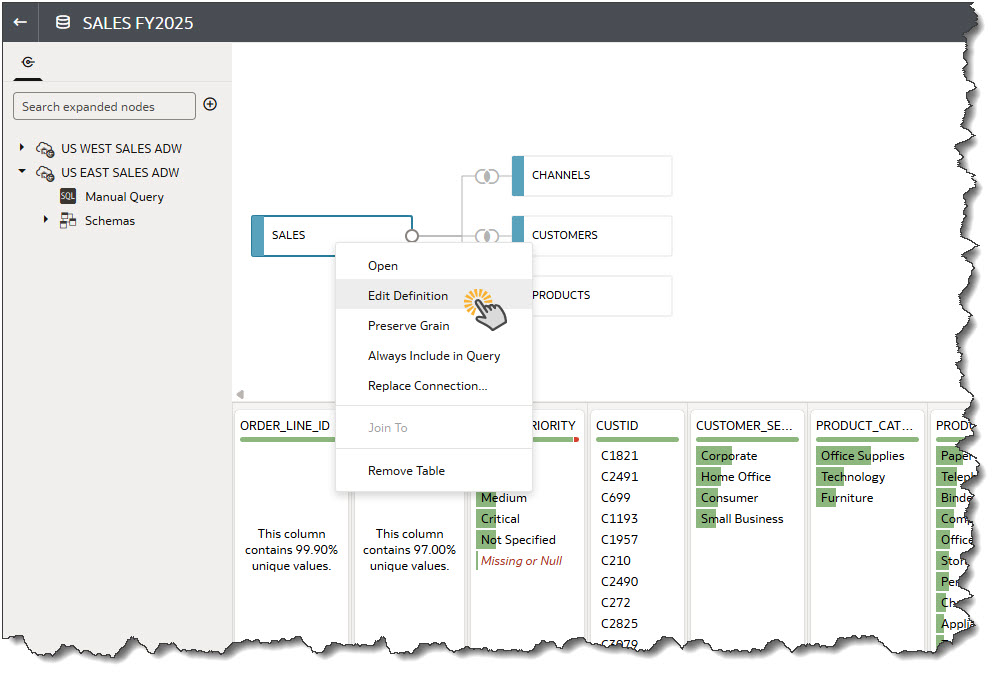
Step 4: Verifying with Edit Definition
As a best practice, it’s recommended to open Edit Definition for the table you just updated. This lets you review the metadata and confirm that the structure still matches expectations and that all transforms are still valid.
To open Edit Definition, right-click the Sales table node and select Edit Definition from the context menu.
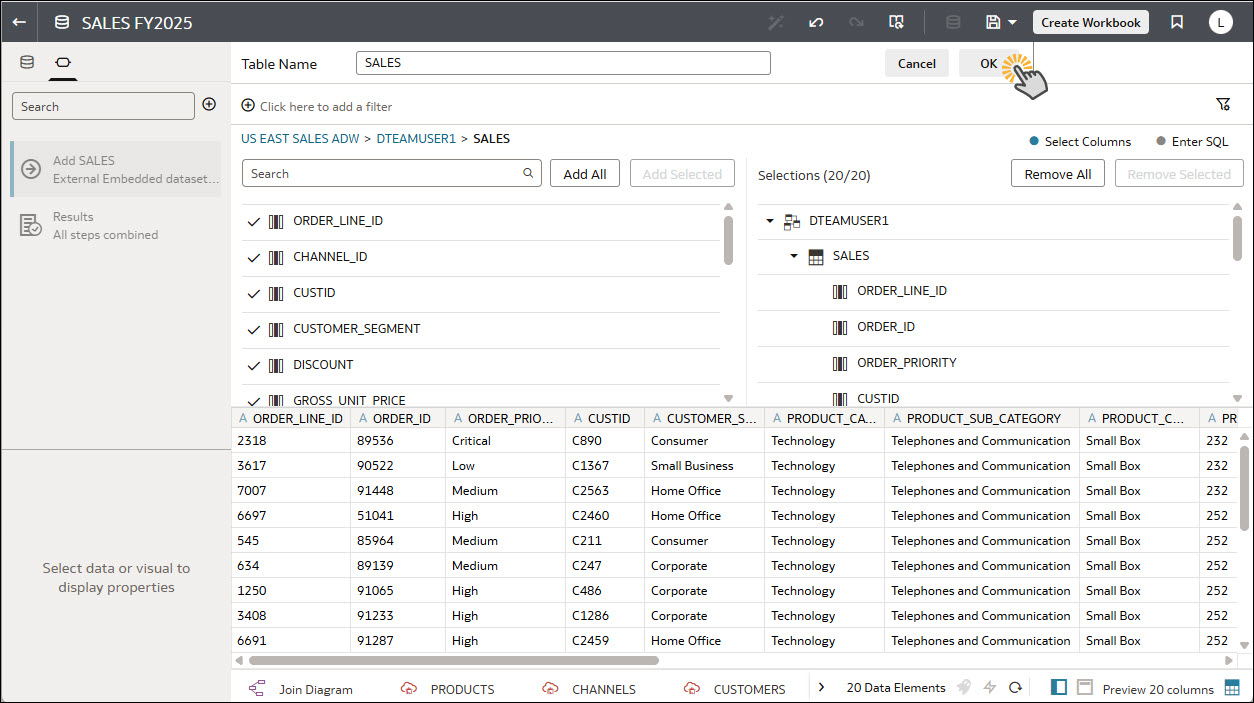
Once in Edit Definition, check that there are no error in the screen or after clicking OK.
What’s Next
This example walks through the cleanest, most common scenario—but what happens when the schemas don’t match perfectly, or when the replacement connection is missing key columns? In the next section, we’ll cover what to look out for, how to catch issues early, and strategies to fix common errors when switching connections.
Schema Differences
What do you do when you want to change from one Db connection to another and the table is in a different schema? The process is a little different, but with a few extra steps can still be made to work.
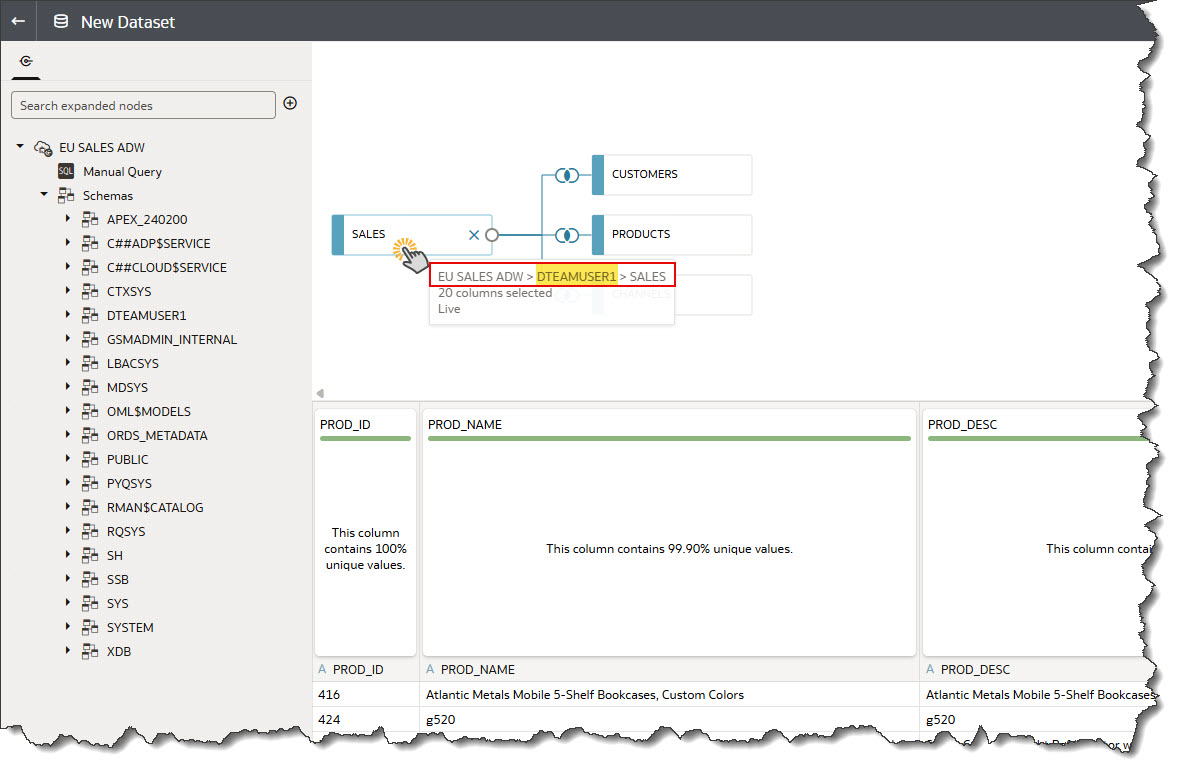
Let’s say you’re working with a dataset that’s currently using a connection called EU SALES ADW and for this example, the sales table is under a schema called DTEAMUSER1.
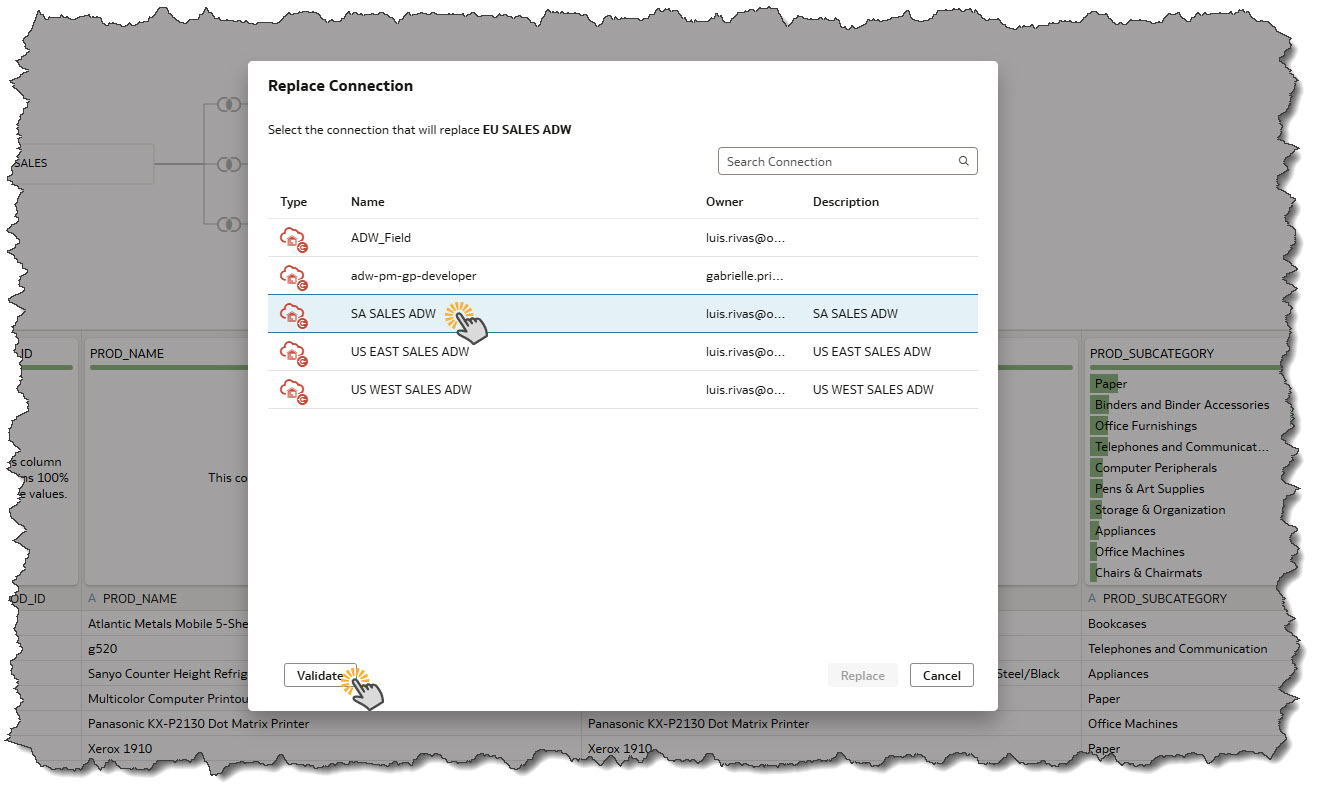
To change the connection we repeat Steps 1 and 2 above – all the way to selecting the new connection. For this different schema example, we will are going to change the connection from the current EU SALES ADW to the SA SALES ADW connection.
Step 1: Selecting the New Db Connection
The rub is that this new connection doesn’t have the SALES table under the DTEAMUSER1 schema, but in another schema called DEMOUSER1. So, when we click Validate, it will fail validation and we will get a message that informs us that “The schema or table is not found in the new connection: DTEAMUSER1.SALES”
Step 2: Reviewing the Validation Error
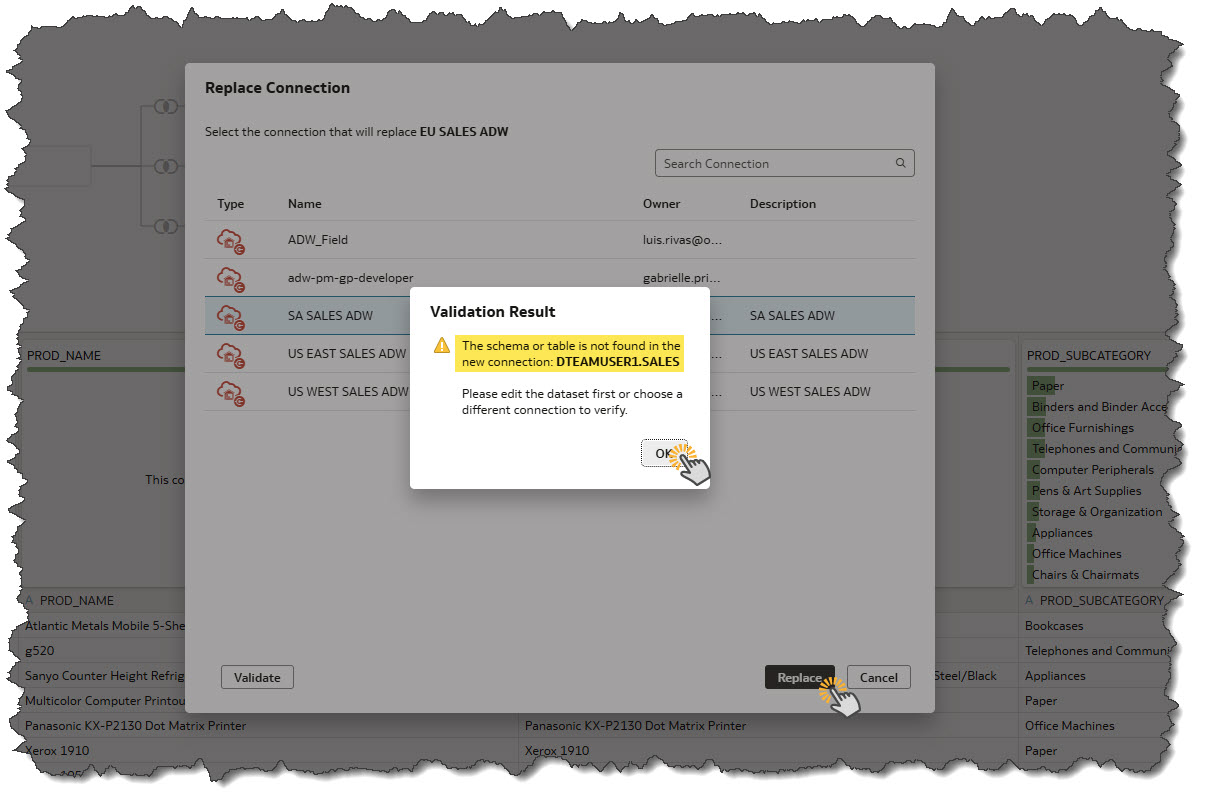
If you’re going to a connection which you expect the schema and table name and structure to be identical, you would terminate and call your administrator or dba at this point to verify the connections. However, since we already know that the schema is different, we will click OK on the validation result dialog and then click Replace.
Step 3: Continuing the Connection Replacement
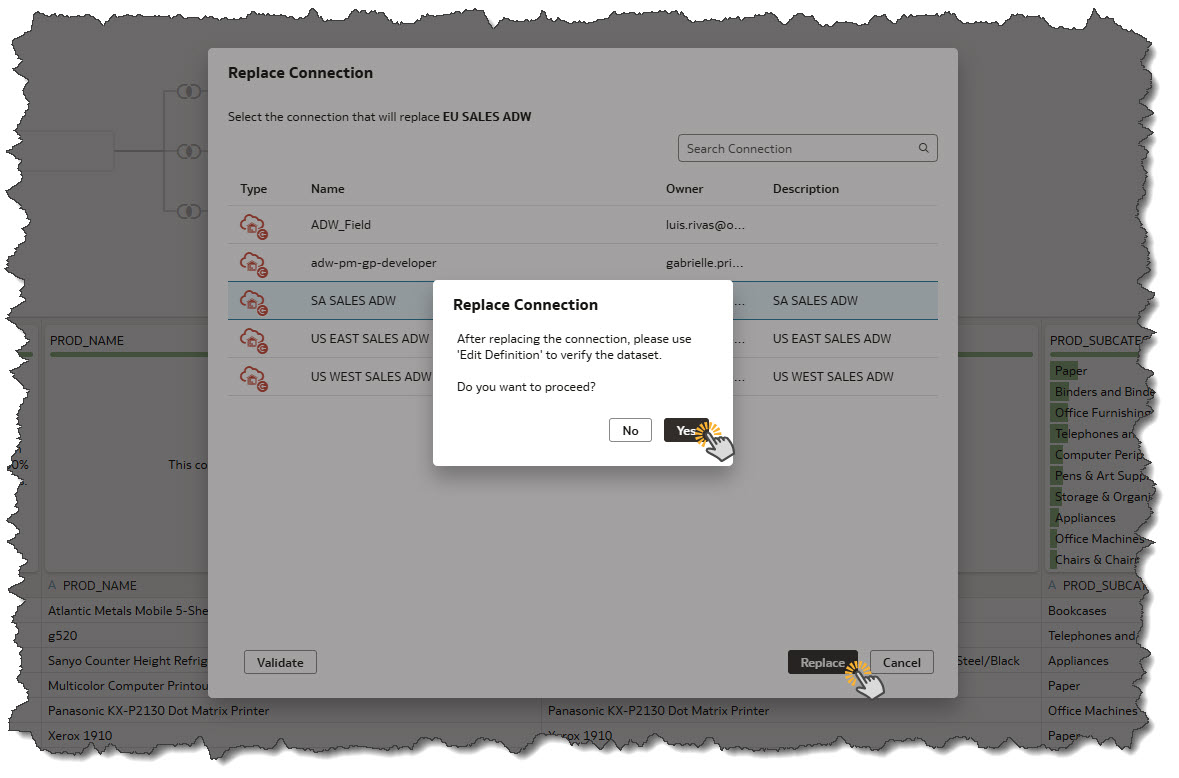
After clicking Replace, you will have one more chance to back out. Make sure the table under the new schema is the correct one. If you aren’t sure, it’s best to verify with your administrator. Let’s go ahead and click Yes to continue with the replacement.
Step 4: Completing the Connection and New Schema Change in Edit Definition
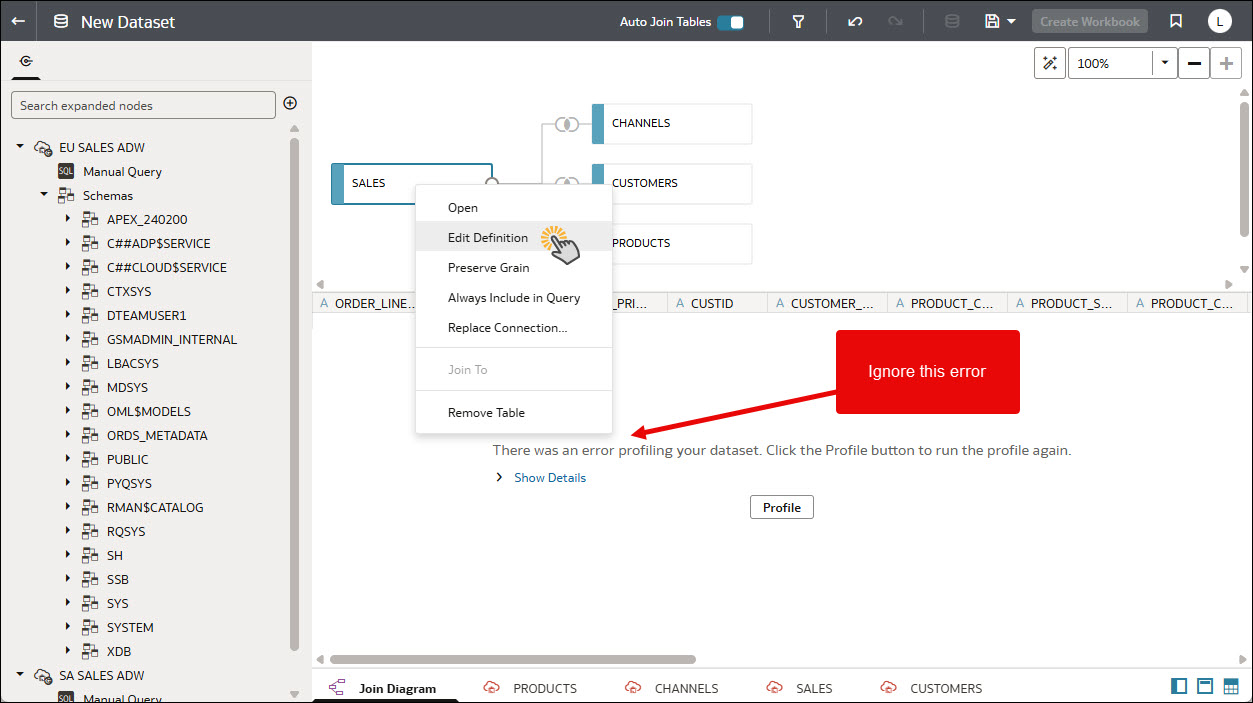
Since the system will be looking for the table under the old schema in the new connection and will not be able to find it, the profile will fail. This error is expected at this point and can be ignored. We will go into Edit Definition to pick the new schema and select the Sales table under the new schema and everything will go back to normal.
Step 5: Ignore Error in Edit Definition and Click OK
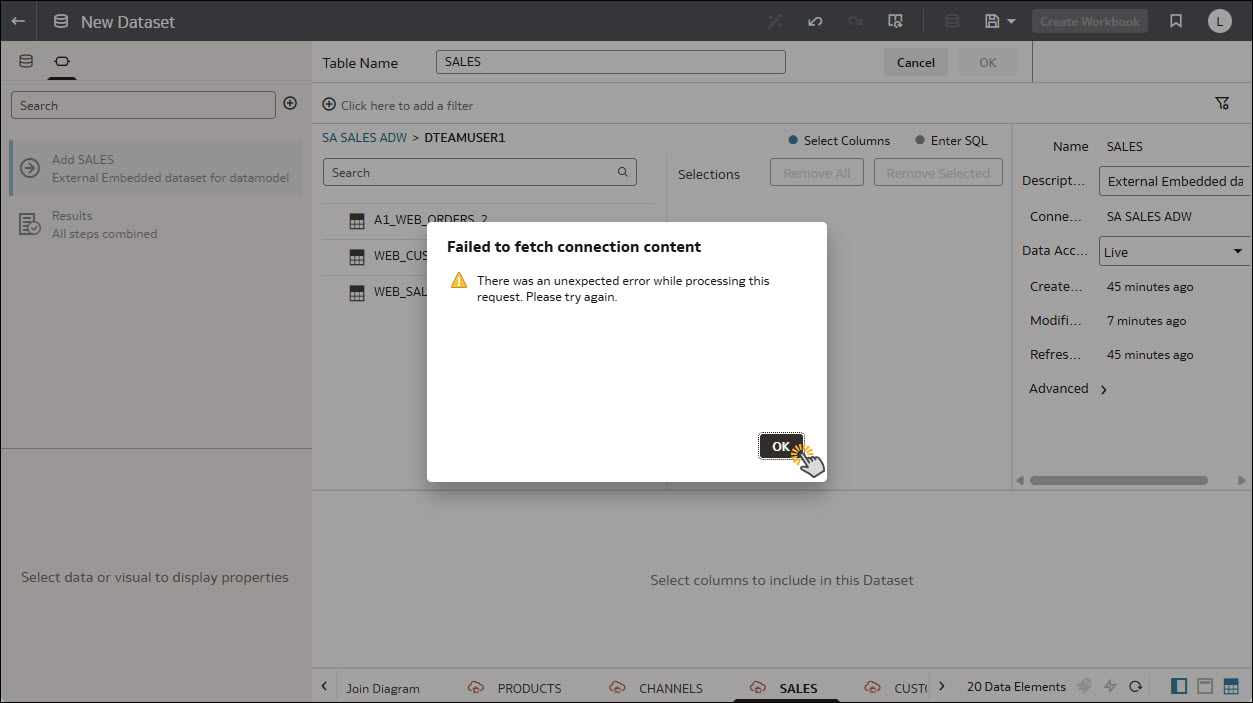
The Edit Definition page will try again to load under the old schema name, so we will get one more error dialog. Go ahead and click OK.
Step 6: Clicking on the Connection Link and Finding New Schema
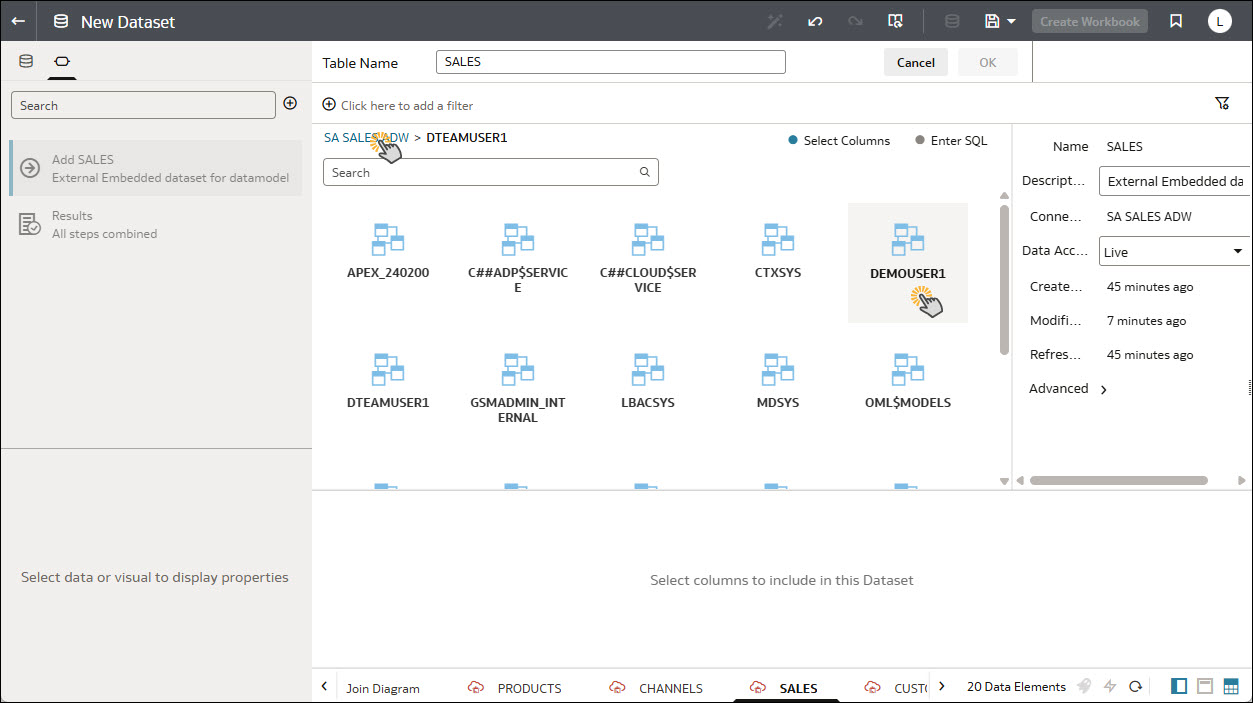
Now we will click on the connection name to view all the available schemas and we will select the new schema name, in this case DEMOUSER1 schema which contains our SALES table that is identical in structure to the sales table in our old connection.
Step 7: Selecting the Sales Table Under New Schema
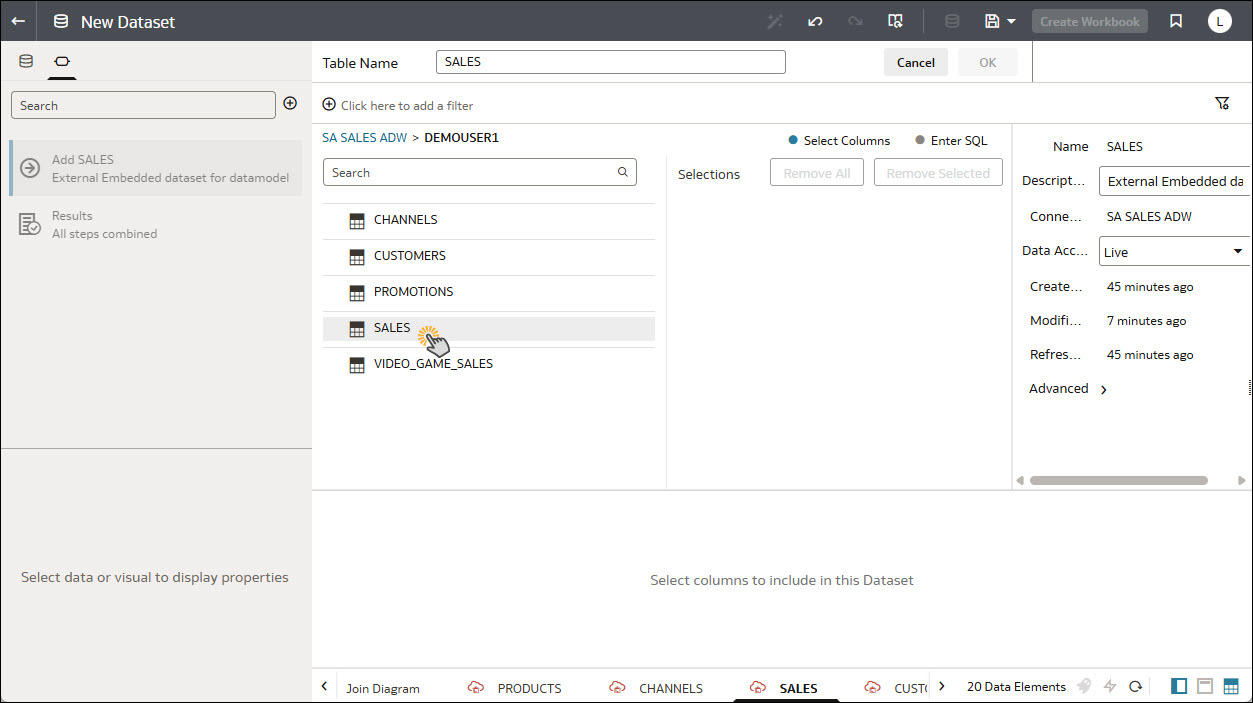
Once in the new schema, we locate the SALES table and select all the columns that were selected in the SALES table under the old connection. IMPORTANT – before making this change, make sure you know which columns were selected for this table as we need to pick the same columns for this table under the new schema.
Step 8: Selecting the Necessary Columns and Validating
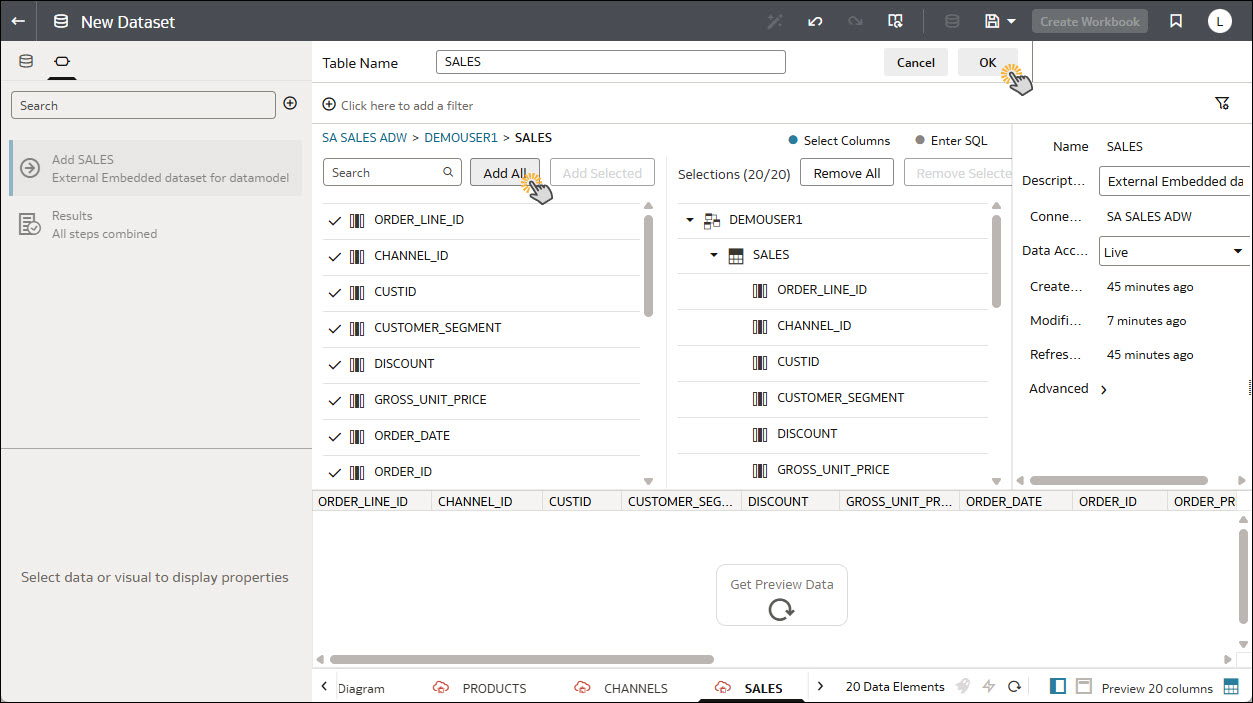
For this example, we know we need all columns from the sales table, so we click on the SALES table and click Add All to select all the columns. Now to validate the change, we will click OK and the system will pull a new random sample and run the profile. Review and make sure everything looks good and save your changes. The table is now pointed to the new connection and schema.
Table Structure Differences
When the system detects structural differences between the original table and the one found in the new connection, it’s strongly recommended not to proceed. Continuing with the connection change at this point can break existing transforms in the dataset editor and may cause issues for any downstream consumers—workbooks, dashboards, or anything else relying on that dataset.
It’s critical to ensure that the table in the new connection has the exact same number of columns, and that all columns match in data type. During validation, the system will flag any discrepancies—missing columns, type mismatches, or other inconsistencies.
If any of these issues are reported, you should terminate the connection change and reach out to your admin to confirm that the tables are structurally aligned before proceeding.
Ready to Try It?
Whether you’re supporting multiple environments or need to rewire a dataset to a mirrored source, this feature makes connection changes fast and reliable. Try it out on one of your own datasets, and stay tuned for our next post.