Introduction
In Part 1 of this blog article series, User-Defined Time Zones in Oracle Fusion Data Intelligence – Building Blocks, we set up the key building blocks: loading the time zone table, modeling it, and capturing user preferences in a session variable.
In this article, we’ll extend the semantic model, join the custom time zone data, and show you how to enable user-driven time zone selection directly in your analytics workbooks.
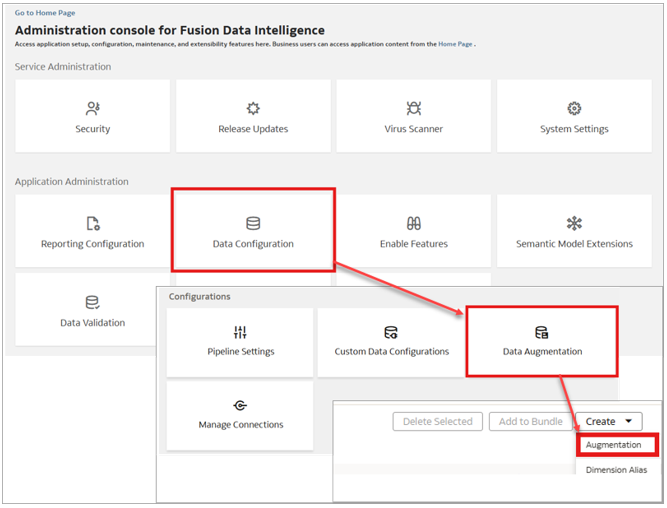
Data Augmentation
1. In Console, click Data Configuration, then Data Augmentation, then Create, and select Augmentation.
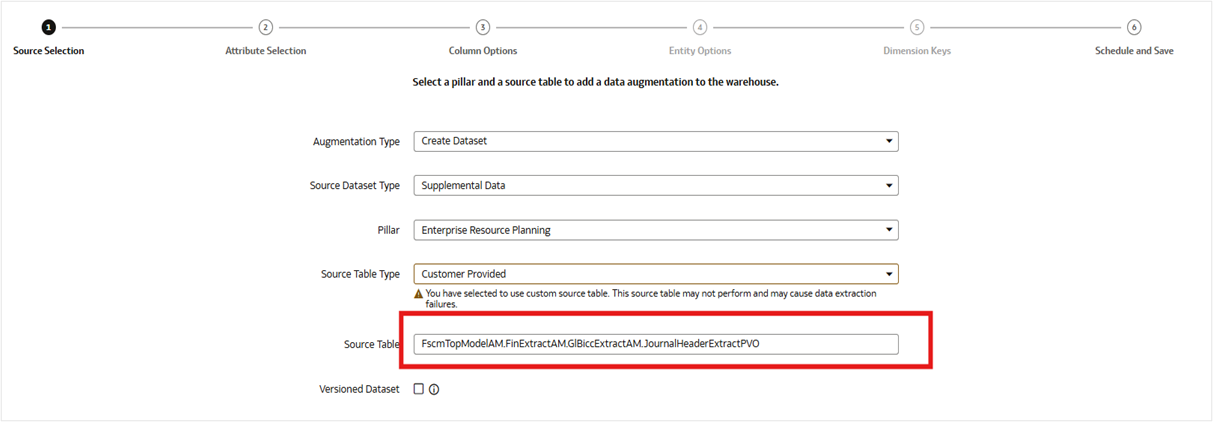
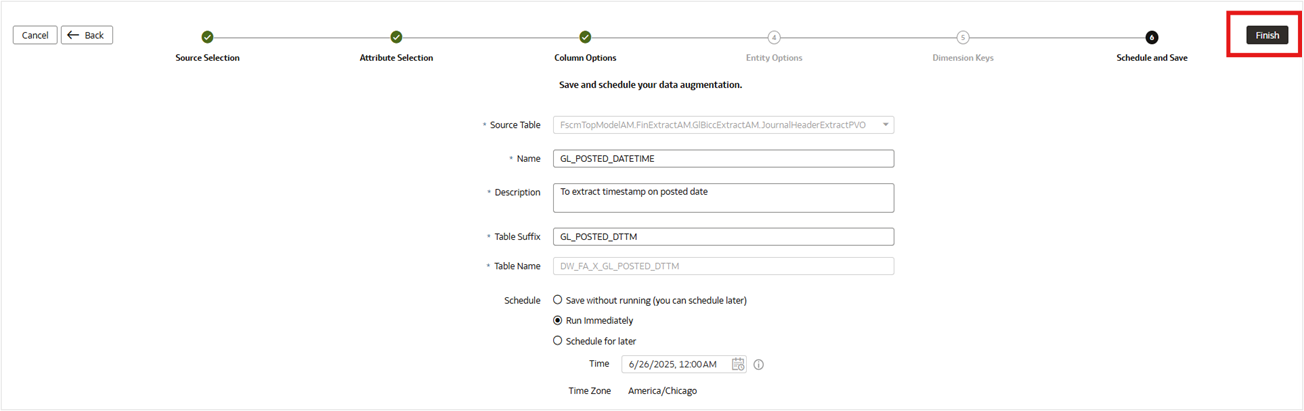
2. In Source Table, enter FscmTopModelAM.FinExtractAM.GlBiccExtractAM.JournalHeaderExtractPVO, and click Next.
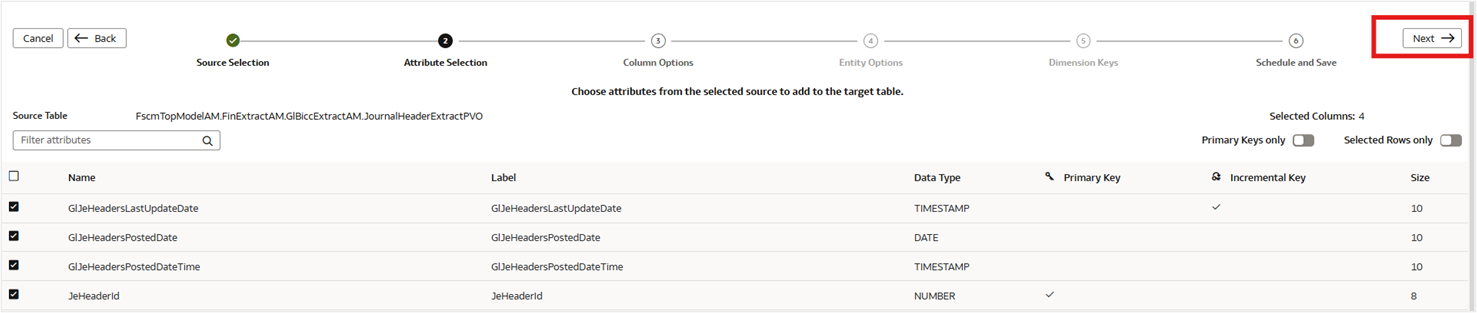
3. Select the required attributes, define the primary and incremental keys, and click Next.
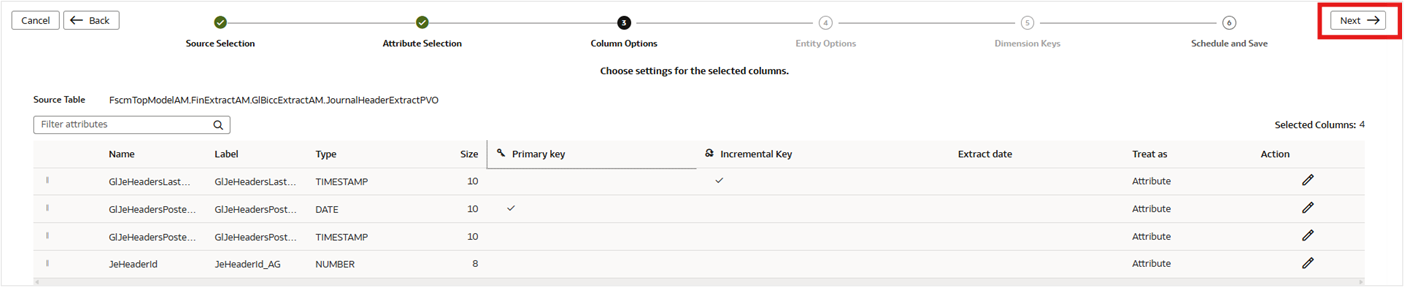
4. Leave the columns as attributes and click Next.
5. Specify a name for the augmentation, select the Run Immediately option, and click Finish.
Semantic Model Extension
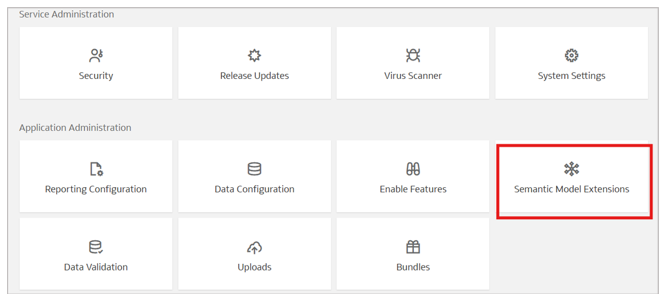
1. In Console, click Semantic Model Extensions.
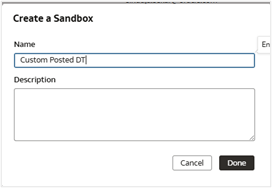
2. Name the sandbox and click Done.
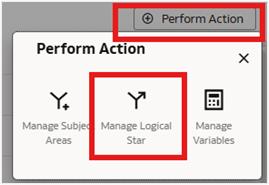
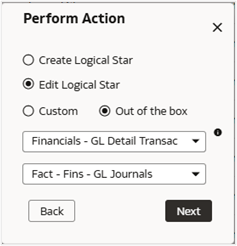
3. Click Perform Action and then Manage Logical Star.
4. Select the Edit Logical Star option and then select the relevant subject area and fact table.
5. Click Add Dimension, and add the previously created augmentation (for example, DW_FA_X_GL_POSTED_DTTM) as a dimension.
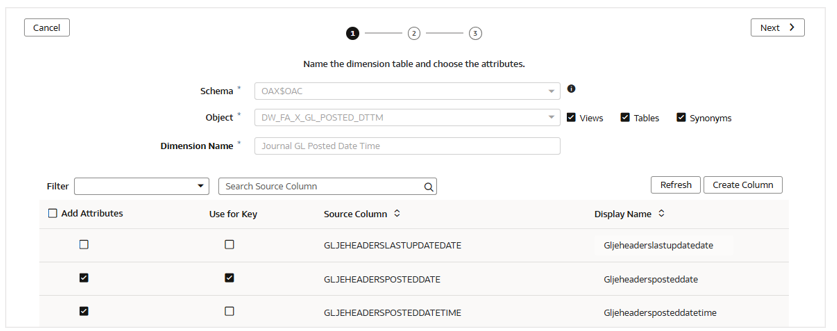
6. Assign the Primary Key and Display Attribute and click Next.
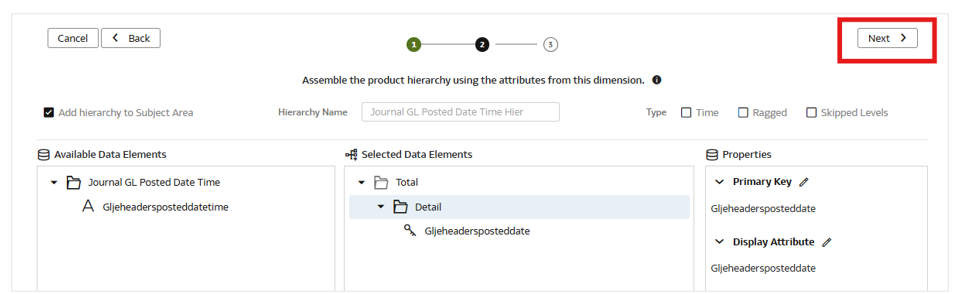
7. Select the sort order column and click Finish.
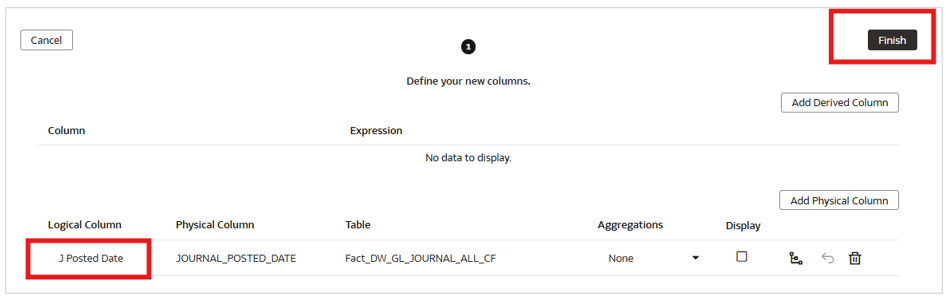
8. In Fact – Fins – GL Journals, click Manage Extension, and add columns.

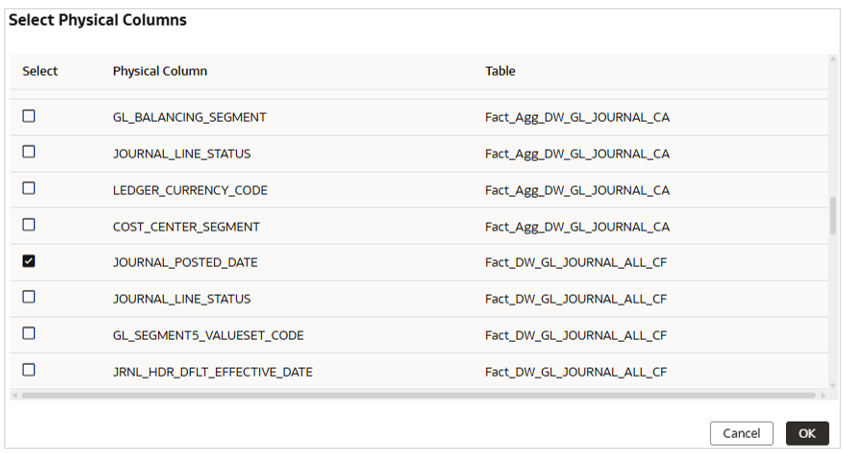
9. Add a physical column.
10. Rename the Logical Column and click Finish.
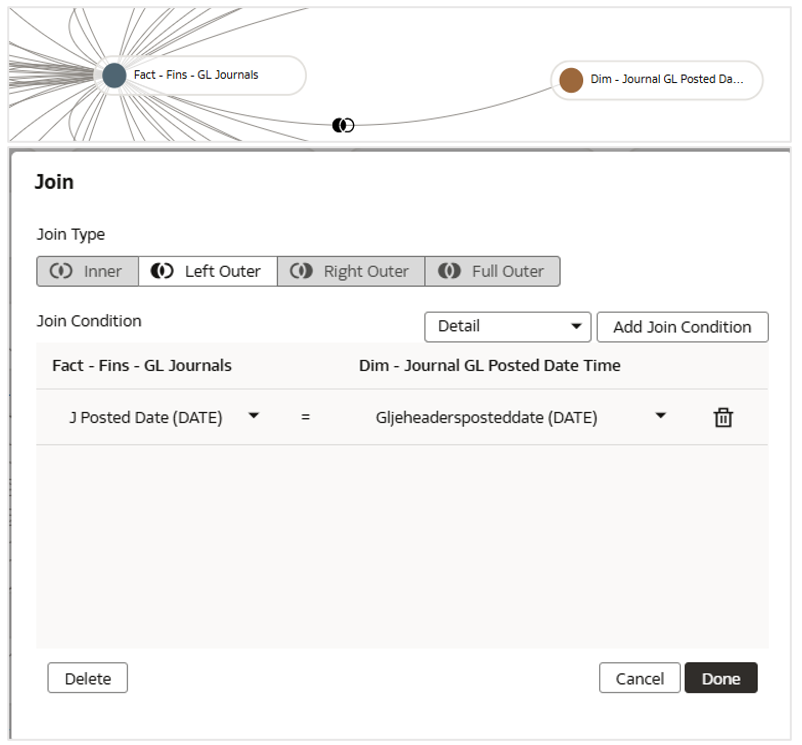
11. Create a custom left outer join on date columns between the fact and Dim – Journal GL Posted Date table and click Done.
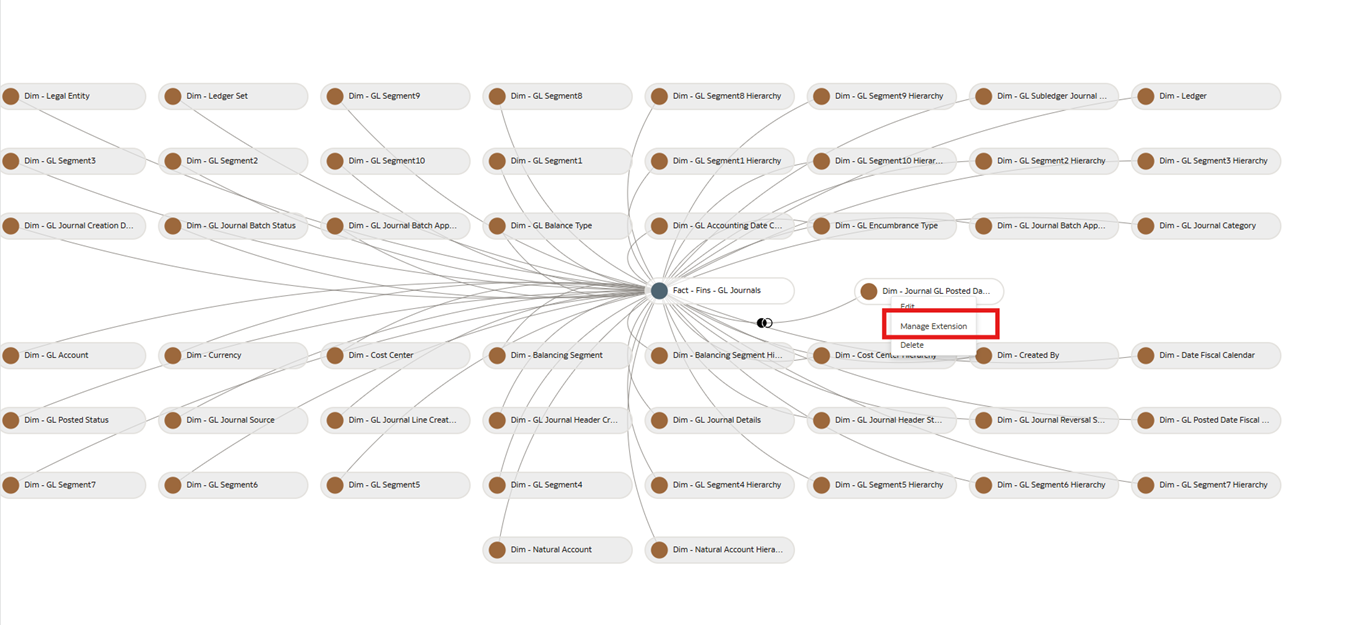
12. Right-click custom Dim – Journal GL Posted Date and select Manage Extension.
13. Add the Derived Column, Custom_TZ_ID, and assign the ‘GMT‘ constant value.
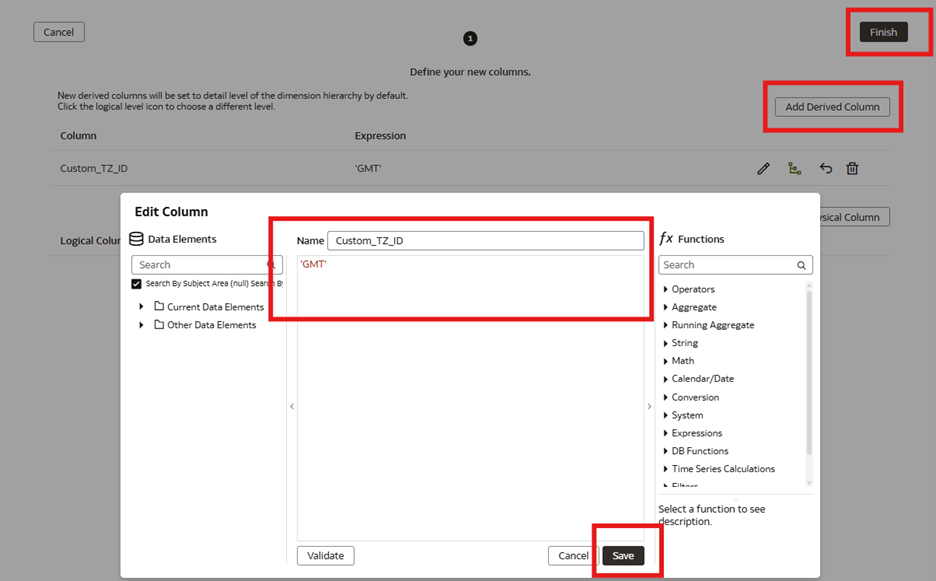
14. Click Save and then Finish.
15. Apply Sandbox, Merge and Publish to Main sandbox.
Worksheet/Workbook Setup — Request Variable and Custom Calculation
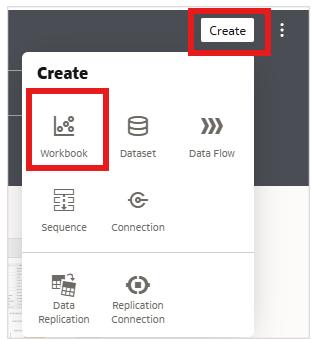
1. From your Oracle Analytics Cloud (OAC) Home page, click Create, and then Workbook.
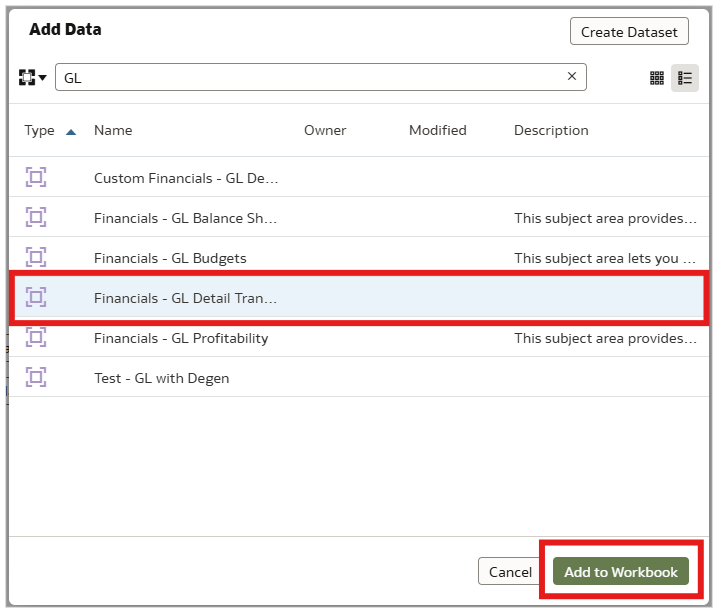
2. Select Financials – GL Detail Transactions and click Add to Workbook.
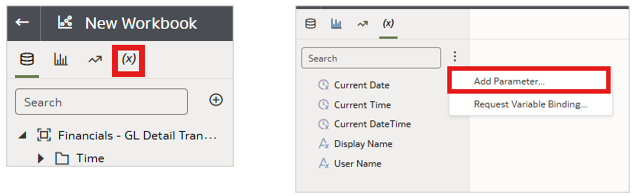
3. Create a new parameter.
4. Paste the following query in Logical SQL Query.
| SELECT DISTINCT “MY CUSTOM SUBJECT AREA”.”CUSTOM TZ TABLE”.”TIMEZONE” FROM “MY CUSTOM SUBJECT AREA” |
5. Set the initial value to first available value and click OK.

6. Click  and select Request Variable Binding.

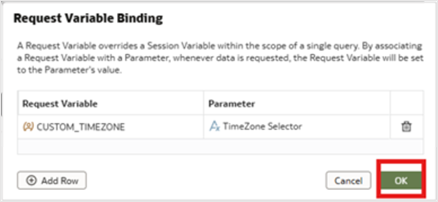
7. Add a row, assign CUSTOM_TIMEZONE to the parameter you created, and click OK.
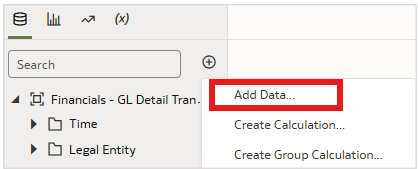
8. In your workbook Data pane, click Add  , and select Add Data.
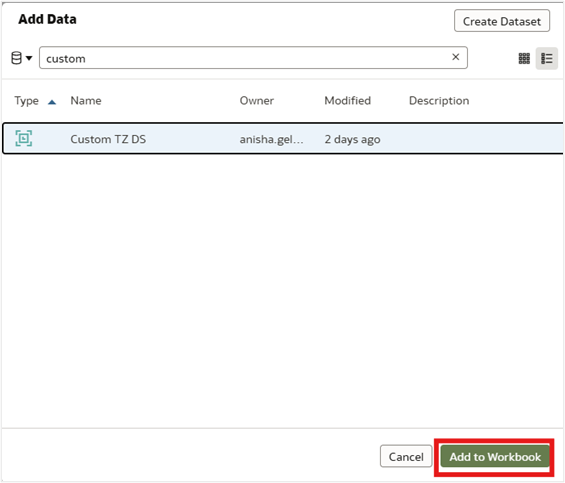
9. Select the Custom TZ DS dataset and click Add to Workbook.
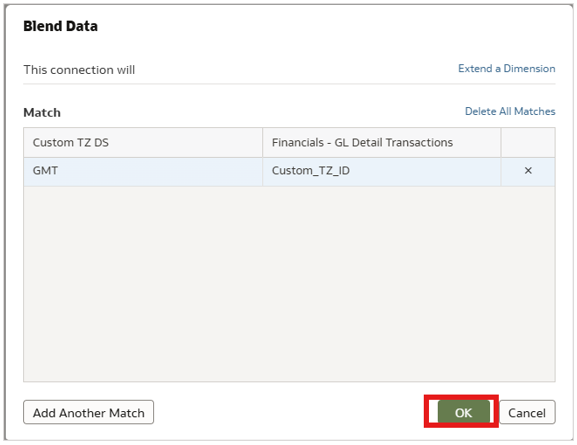
10. Navigate to the Data pane and create a join between the subject area and custom dataset.

11. Select GMT column under Custom TZ DS, and Custom_TZ_ID column from Financials – GL Detail Transactions, which was previously added using the SME steps, and click OK.
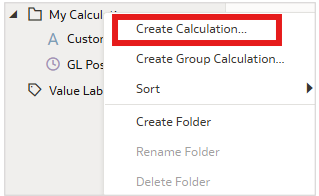
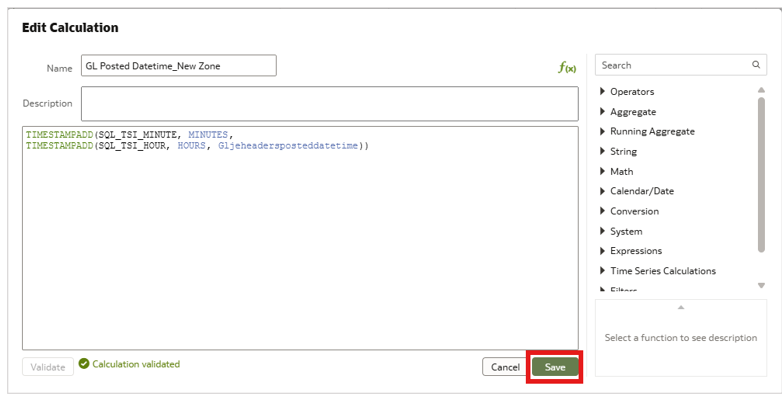
12. Create a custom calculation on the GL Posted Date Time column.
13. Create a calculation to derive a custom value with a new time zone.
14. Validate the expression and click Save.
Visualize and Validate
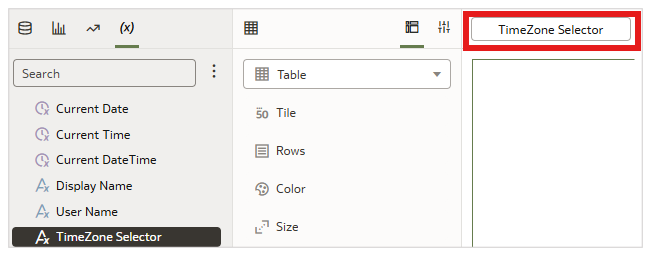
1. Drag and drop the parameter created on the filters shelf.
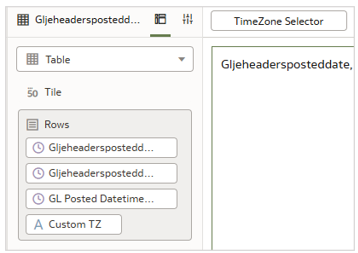
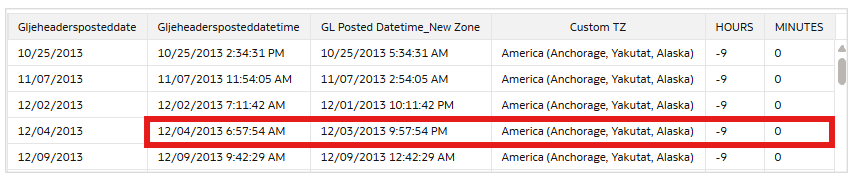
2. Add the Gljeheaderposteddate, Gljeheaderposteddatetime, Custom TZ, and GL Posted Datetime_New Zone columns to test the use case.
3. Select a time zone and validate your results.
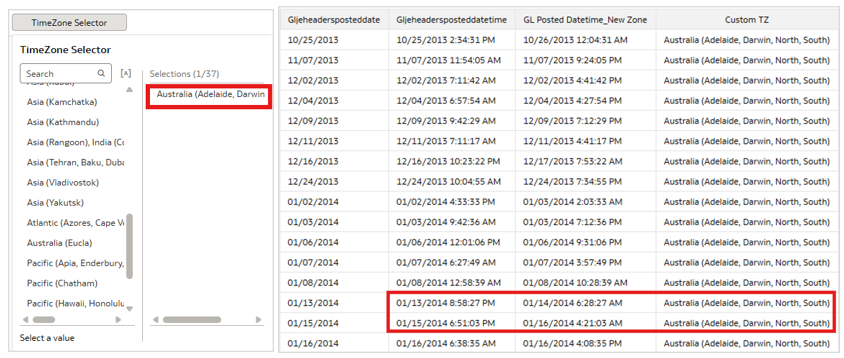
4. Update the parameter to a new time zone and validate.
5. Save the canvas.
Conclusion
This two-part blog article series demonstrates how to deliver fully personalized analytics in Oracle Fusion Data Intelligence (FDI) by enabling users to view transactional data in their own preferred time zone—instantly and interactively.
Missed Part 1? Read it here Part 1.
Summary
By leveraging data augmentation, semantic model extensions, and dynamic request variables, you can present any Date/Time column (such as GL_POSTED_DATETIME) in a user-selected time zone at runtime. This approach increases reporting flexibility and supports the needs of globally distributed teams. The same pattern applies to any other date/time column or data domain.
Call to Action
Now that you’ve read this post, try it yourself and let us know your results in the Oracle Analytics Community, where you can also ask questions and post ideas. If you have questions or need more details, you can always check the Oracle Help Center for Oracle Analytics documentation.