Install OCI CLI
To Install OCI CLI, follow the cli install steps for all OS: Linux, MacOS, Windows
Here we cover for Linux and Windows.
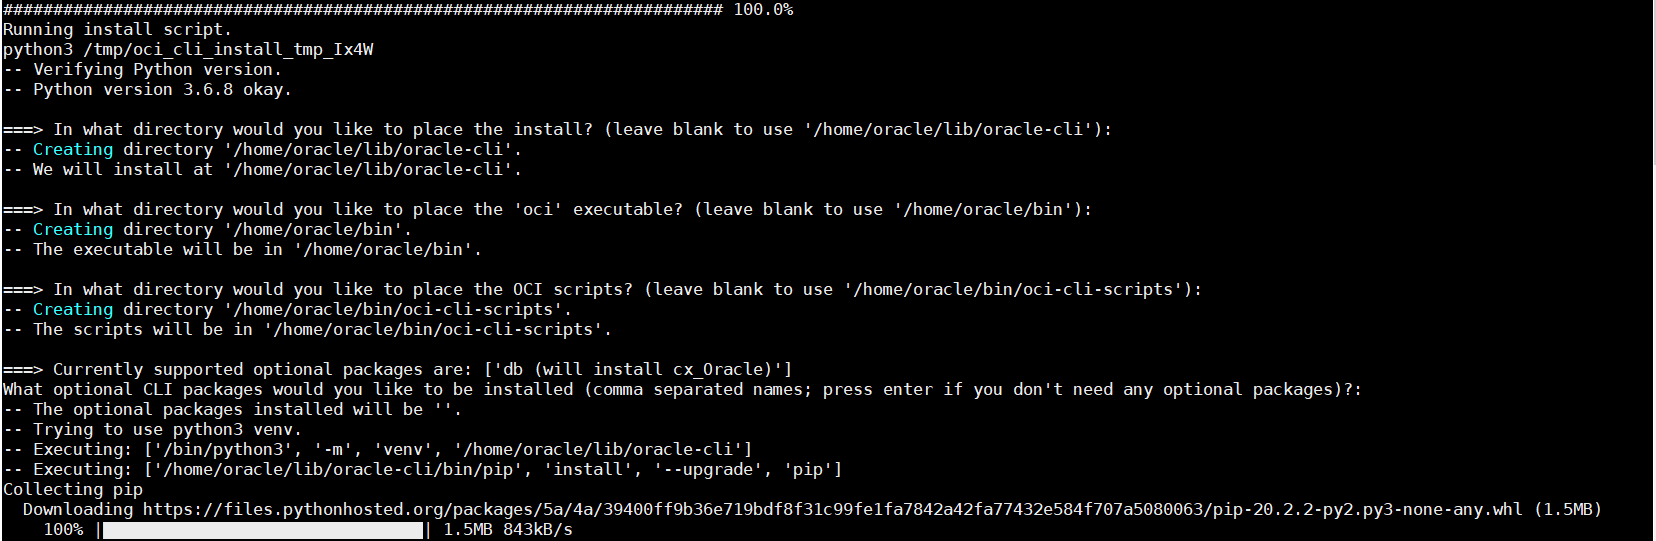
Install OCI CLI on Oracle Linux:
- Open a terminal
- Run below command
bash -c “$(curl -L https://raw.githubusercontent.com/oracle/oci-cli/master/scripts/install/install.sh)”
- Respond to the Prompts accordingly


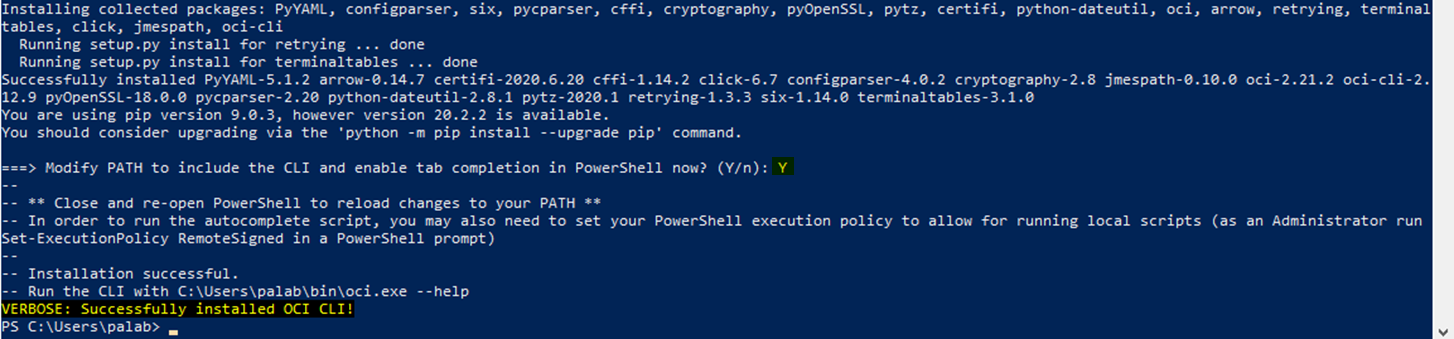
Install OCI CLI on Windows:
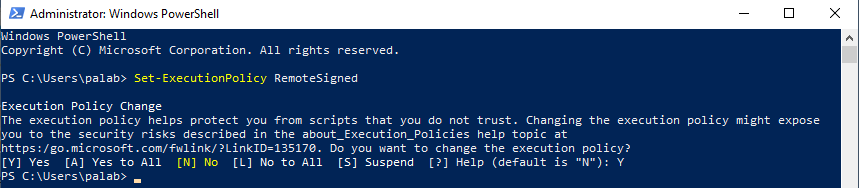
- Open the PowerShell console using the Run as Administrator option.
- The installer enables auto-complete by installing and running a script. To allow this script to run, you must enable the RemoteSigned execution policy.
To configure the remote execution policy for PowerShell, run the following command.
Set-ExecutionPolicy RemoteSigned
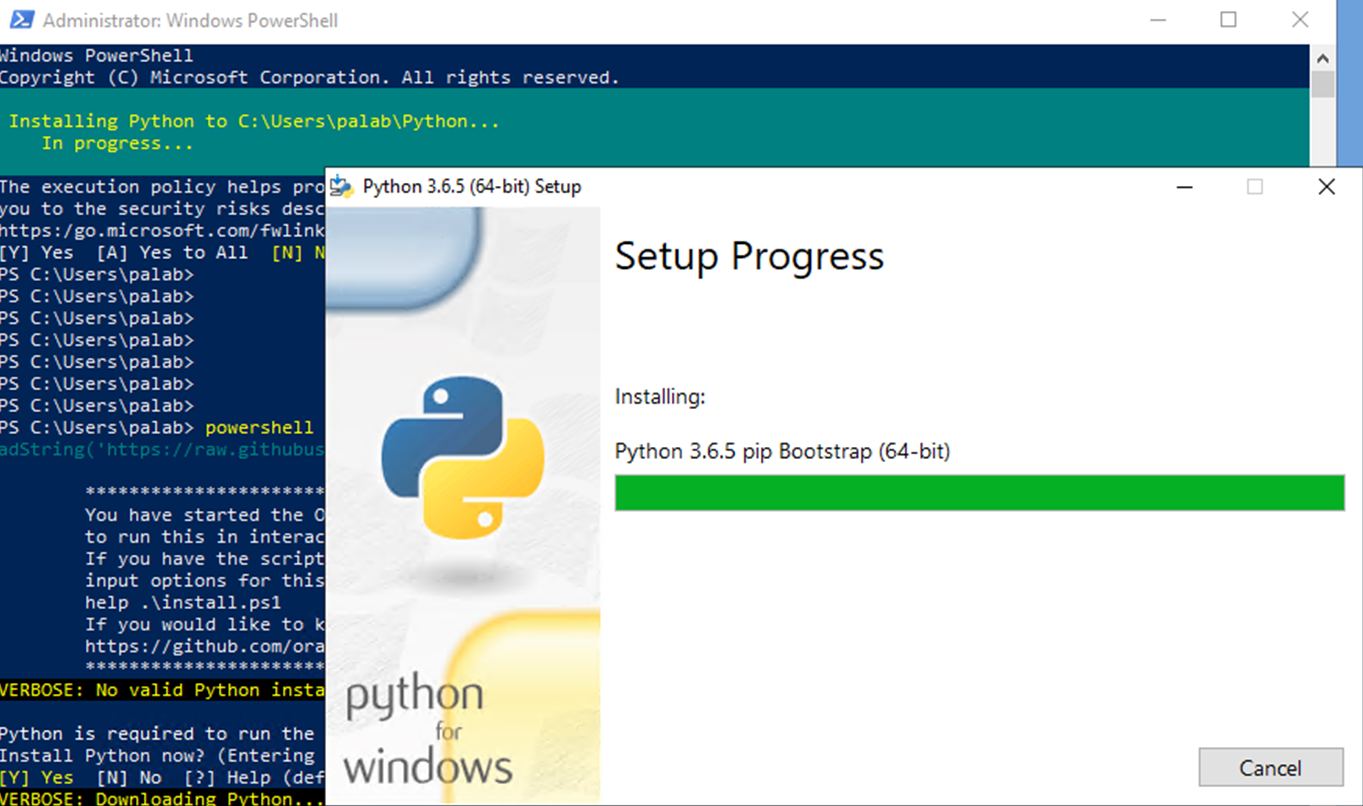
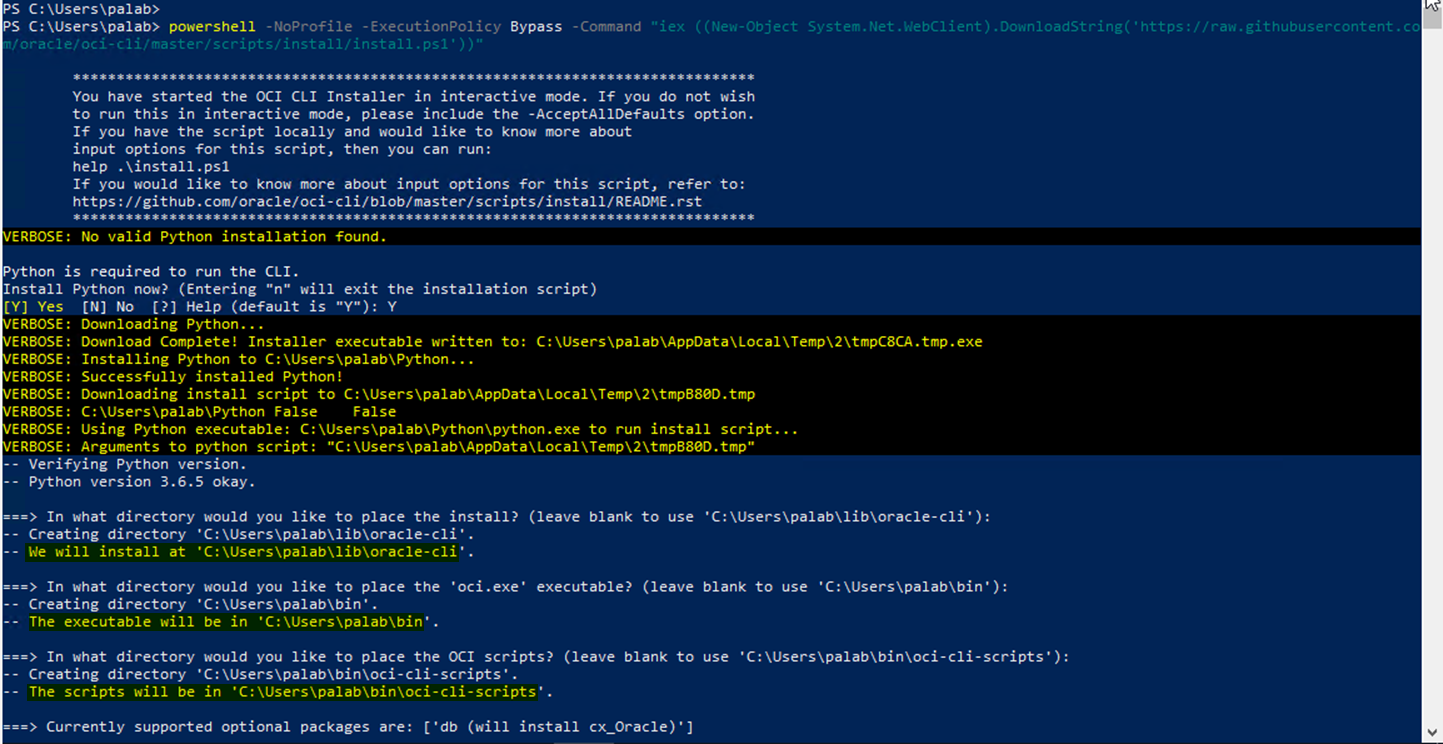
- To run the installer script, run the following command.
powershell -NoProfile -ExecutionPolicy Bypass -Command “iex ((New-Object System.Net.WebClient).DownloadString(‘https://raw.githubusercontent.com/oracle/oci-cli/master/scripts/install/install.ps1’))”
- Respond to the Prompts accordingly

Setting up the Config File
Follow these steps to create a config file.
We can either create the config file manually or through the oci setup wizard
The default configuration file name and location is ~/.oci/config
Creating Manually:
cd /home/oracle
mkdir ~/.oci
vi config
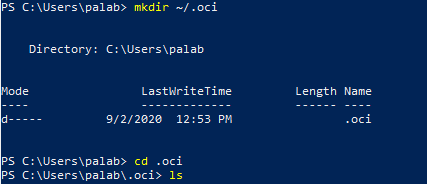
Create a folder .oci, which cannot be created in Windows File Explorer, so you need to create using command line
In the same powershell run below cmd
mkdir ~/.oci
The CLI Config file location is ~/.oci/config
i.e. %User_Home%/.oci/config
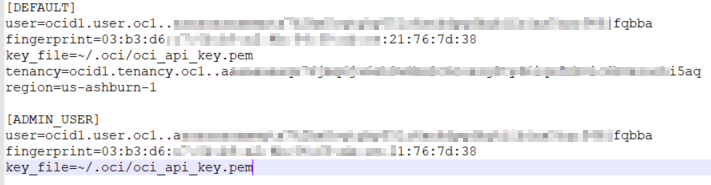
Example config file is as below:
[DEFAULT]
user=ocid1.user.oc1..<unique_ID>
fingerprint=<your_fingerprint>
key_file=~/.oci/oci_api_key.pem
tenancy=ocid1.tenancy.oc1..<unique_ID>
region=us-ashburn-1
[ADMIN_USER]
user=ocid1.user.oc1..<unique_ID>
fingerprint=<your_fingerprint>
key_file=keys/admin_key.pem
pass_phrase=<your_passphrase>
Follow the steps in the link to update the above config file or follow the below steps:
Generate an API Signing Key (link):
- Create a folder .oci under user home:
mkdir ~/.oci
- Generate Private Key:
With passphrase:
openssl genrsa -out ~/.oci/oci_api_key.pem -aes128 2048
Recommended: To generate the key, encrypted with a passphrase you provide when prompted.
NOTE: If you have a passphrase, pass the passphrase to the CLI at runtime.
Without passphrase:
openssl genrsa -out ~/.oci/oci_api_key.pem 2048
- Ensure that only you can read the private key file:
chmod go-rwx ~/.oci/oci_api_key.pem
- Generate the public key
openssl rsa -pubout -in ~/.oci/oci_api_key.pem -out ~/.oci/oci_api_key_public.pem
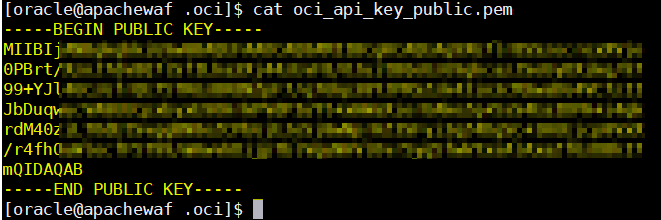
- Copy the contents of the public key to the clipboard (you’ll need to paste the value into the Console later)
cat ~/.oci/oci_api_key_public.pem
- Get the Key’s Fingerprint:
openssl rsa -pubout -outform DER -in ~/.oci/oci_api_key.pem | openssl md5 –c

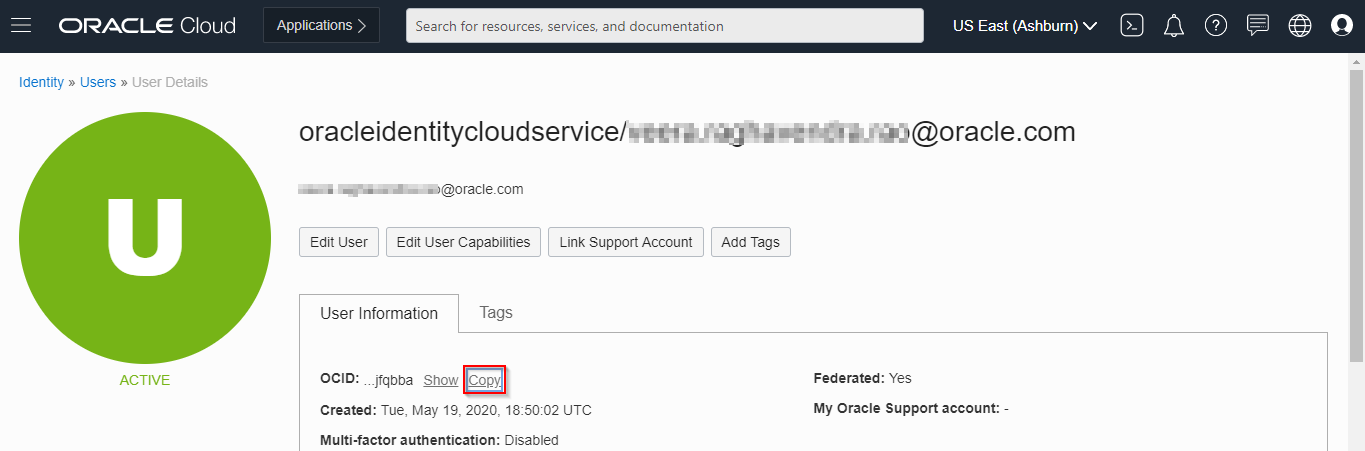
Get the User’s OCID:
Need existing user who have access to create an OAC instance, can be a direct OCI Native/IAM User or IDCS User
- Login to OCI Console
- Navigate to Identity à Users under Governance and Administration section
- Click on the user who will create the OAC Instance
- User Details are shown under User Information tab, click on Copy to copy it to the clipboard
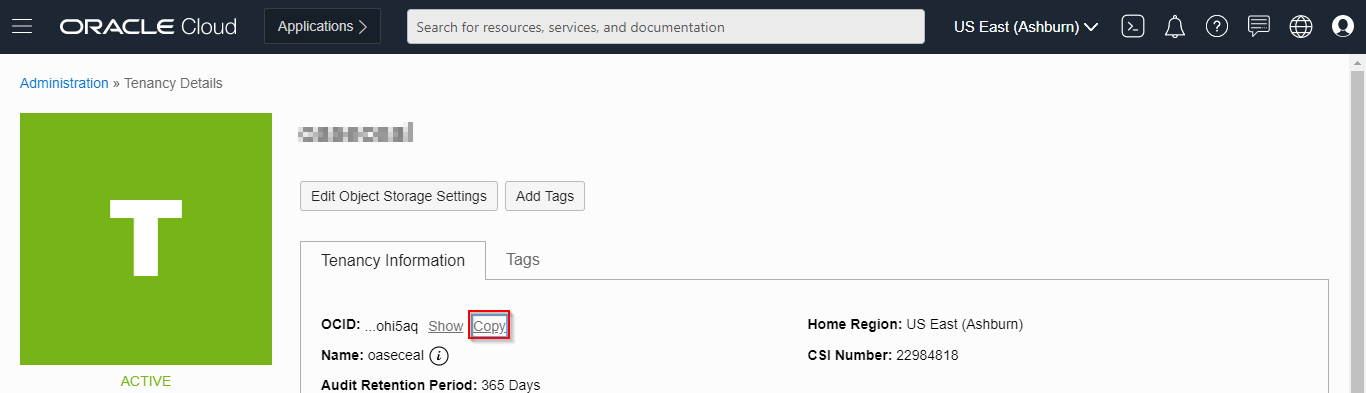
Get the Tenancy’s OCID:
- Login to OCI Console
- Navigate to Administration à Tenancy Details under Governance and Administration section
- Tenancy Details are shown under Tenancy Information tab, click on Copy to copy it to the clipboard
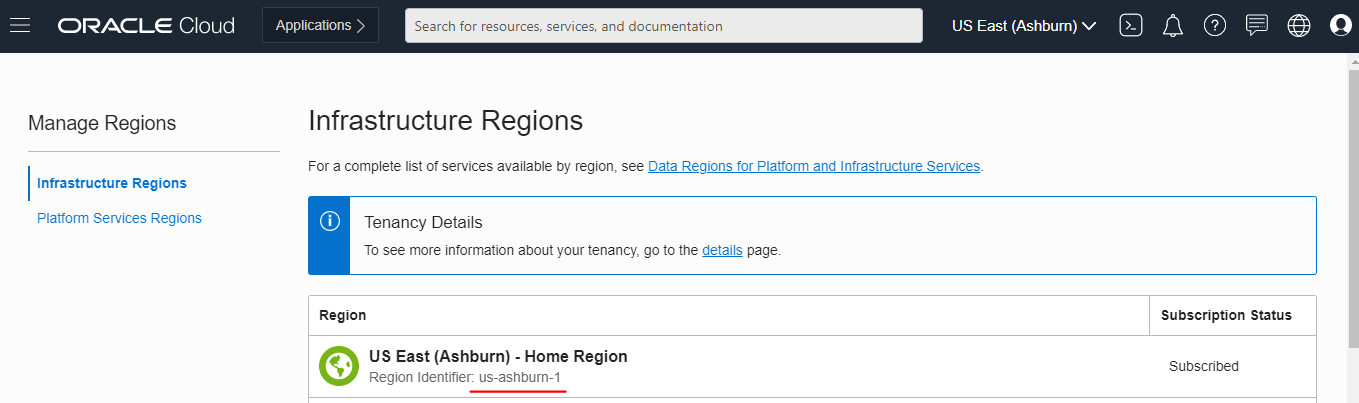
Get the Region of your OCI Tenancy:
- Login to OCI Console
- Navigate to Administration à Region Management under Governance and Administration section
With all the above info update the ~/.oci/config file
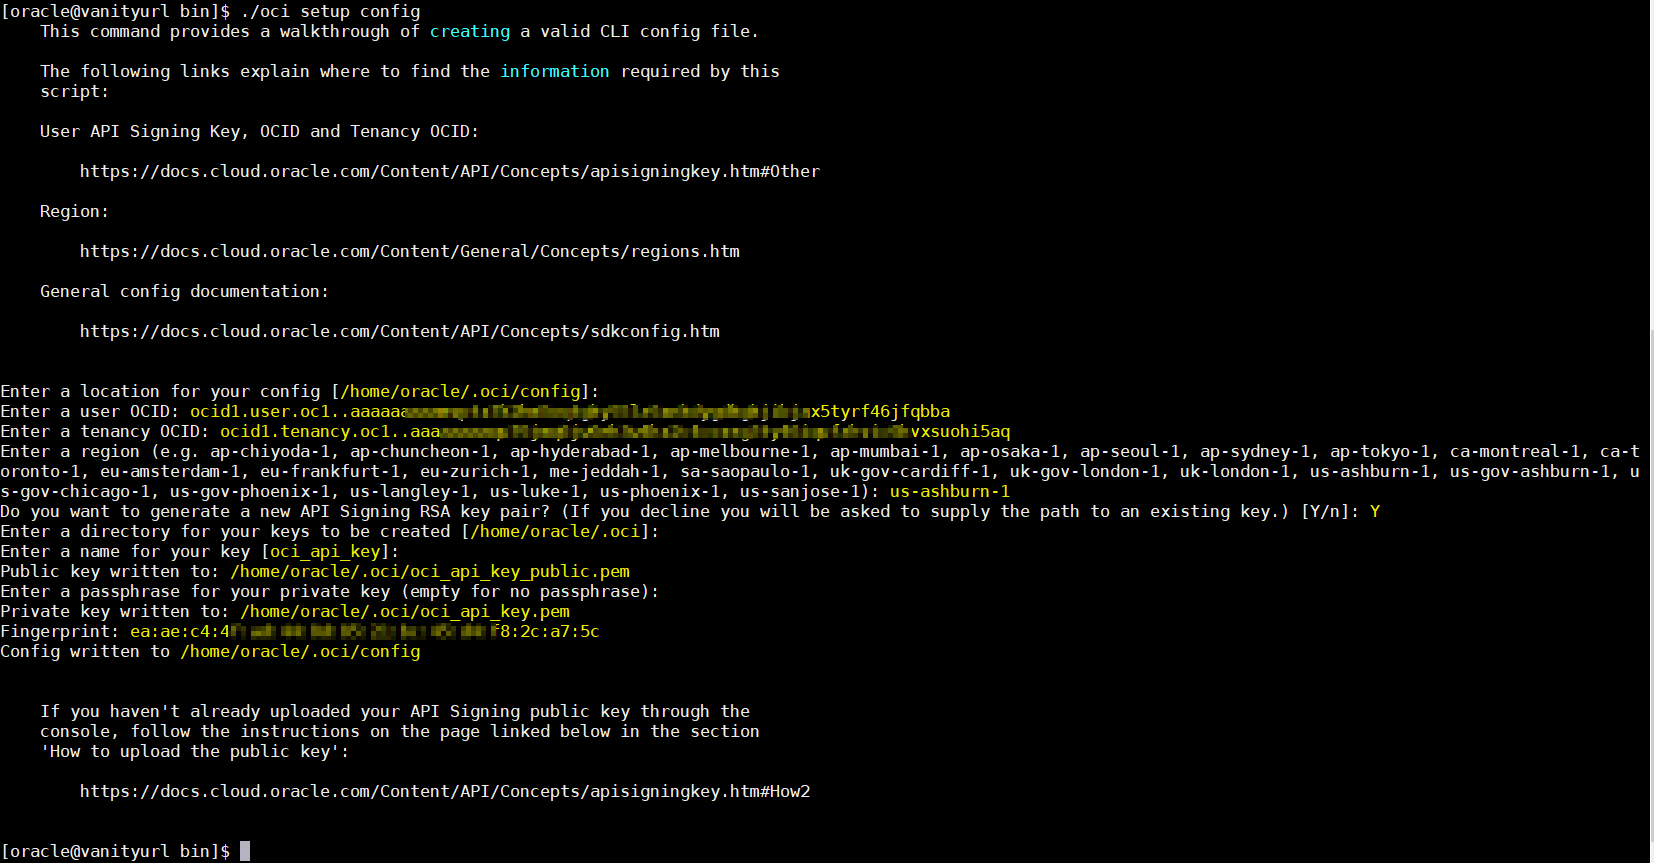
Setting up the config file using the setup wizard:
cd /home/oracle/bin
./oci setup config

Upload the Public Key for the user:
- Login to OCI Console
- If you are signed as the same user who will be creating the OAC Instance, Open Profile menu à User Settings.
- If you login as Administrator and other user will be creating the OAC instance, Open Navigation Menu.
- Navigate to Identity à Users under Governance and Administration section à select the user à API Keys
- Click on Add Public Key and upload the Public Key

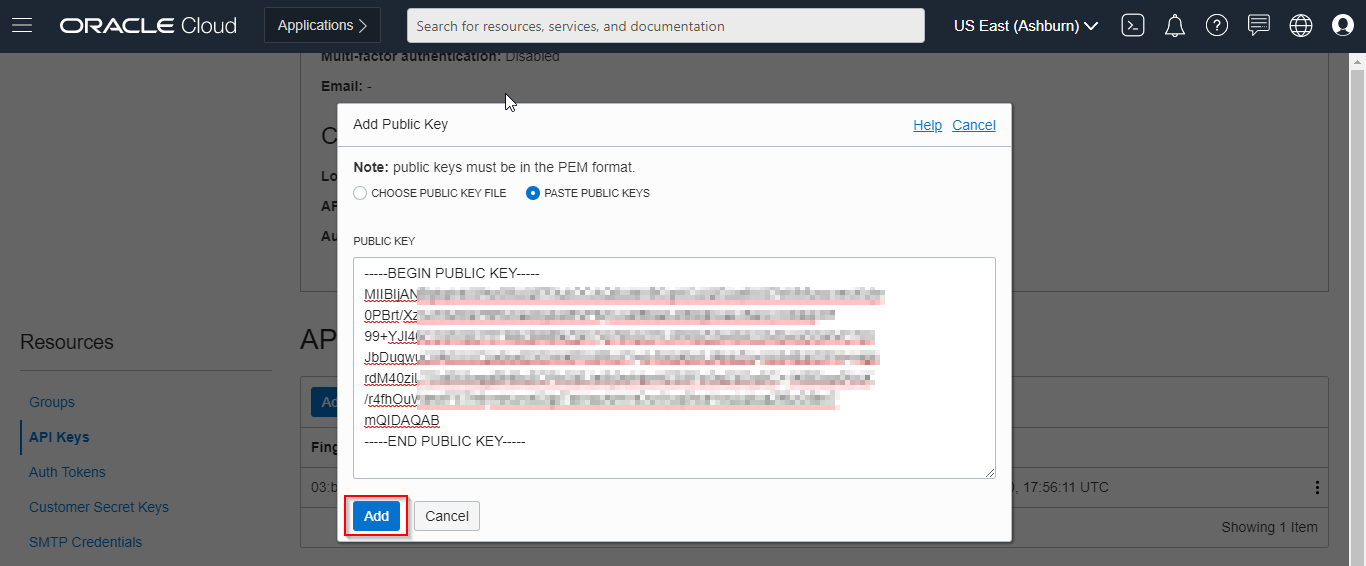
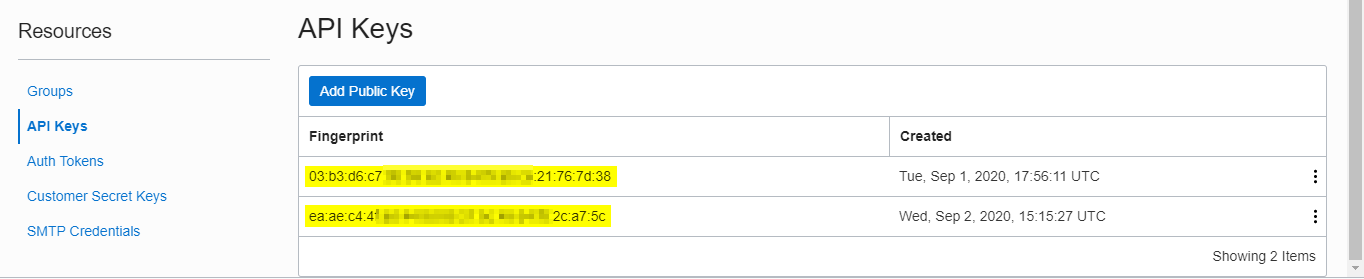
NOTE: You can have up to three API Keys pairs per User.
Get the OCID of the OAC Instance which you need to stop and start
- Login to OCI Console
- Under Analytics & AI section, Navigate to Analytics Cloud à Select the Compartment à click on the respective OAC Instance
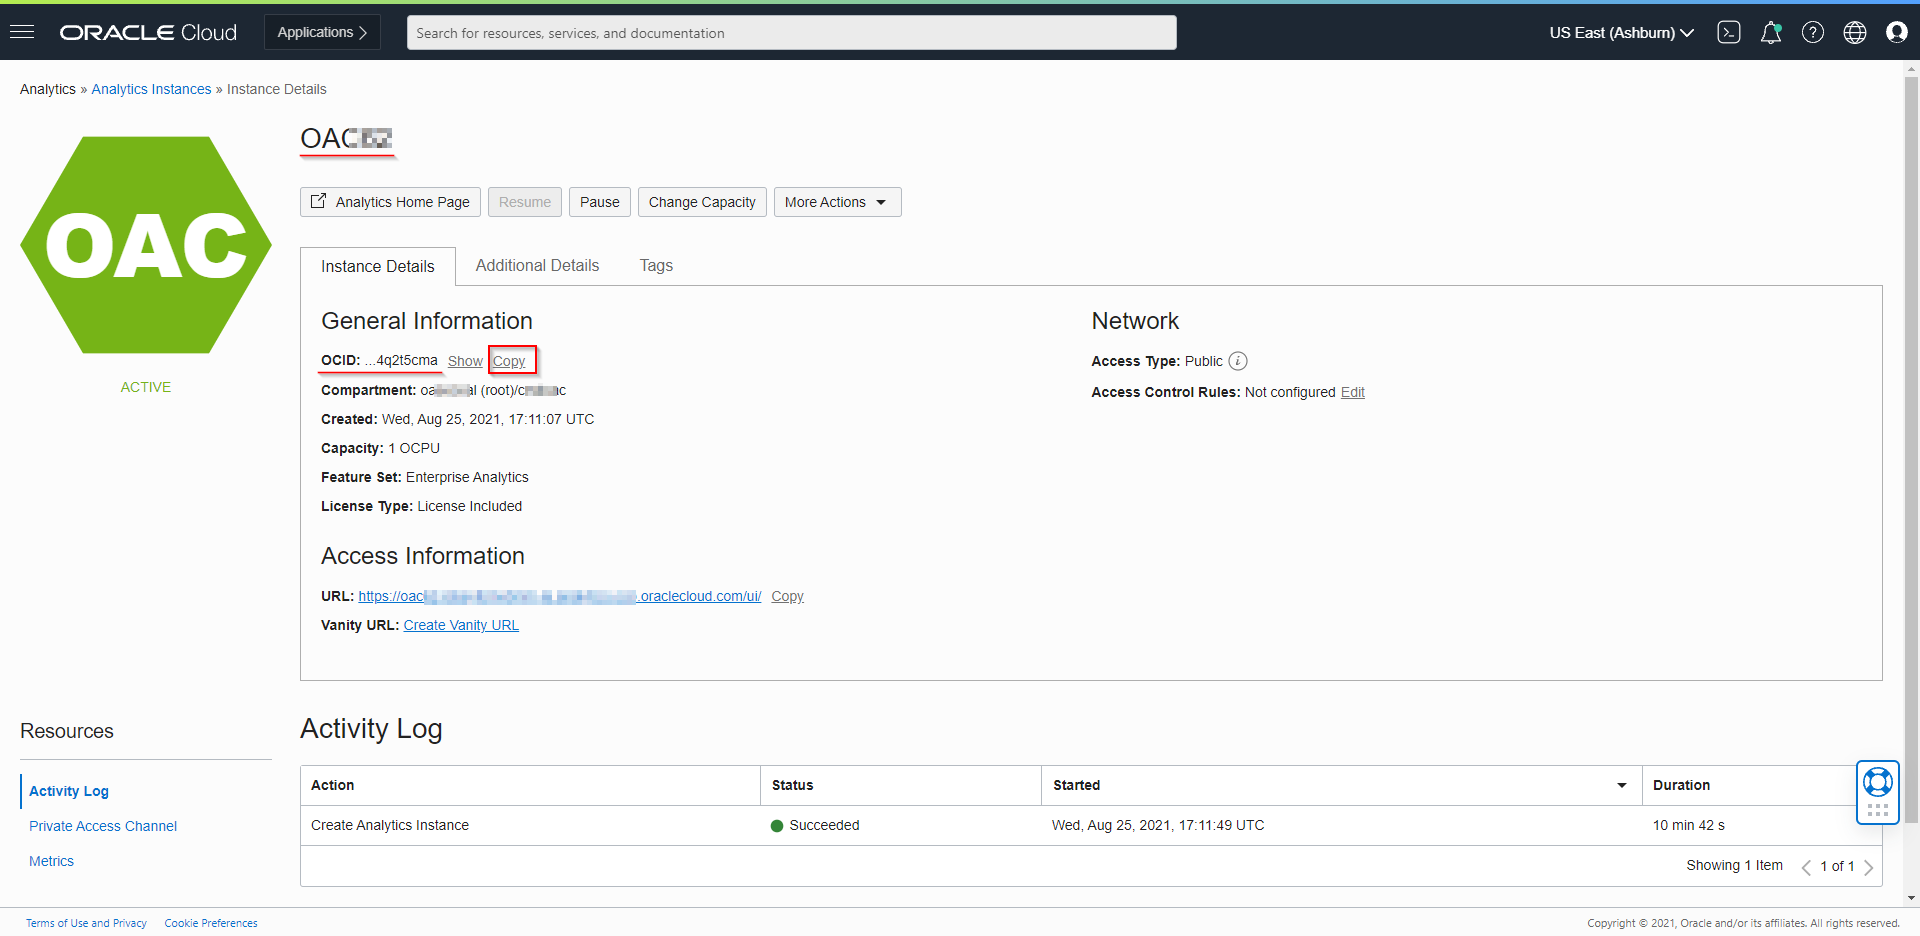
- Click on Copy to copy the OCID of the OAC Instance into the clipboard
e.g. ocid1.analyticsinstance.oc1.iad.aaxxxxxxa5x25qj3zogdugruiewhewirhewiuh45qdmlqyyimdgefewhruiewrew
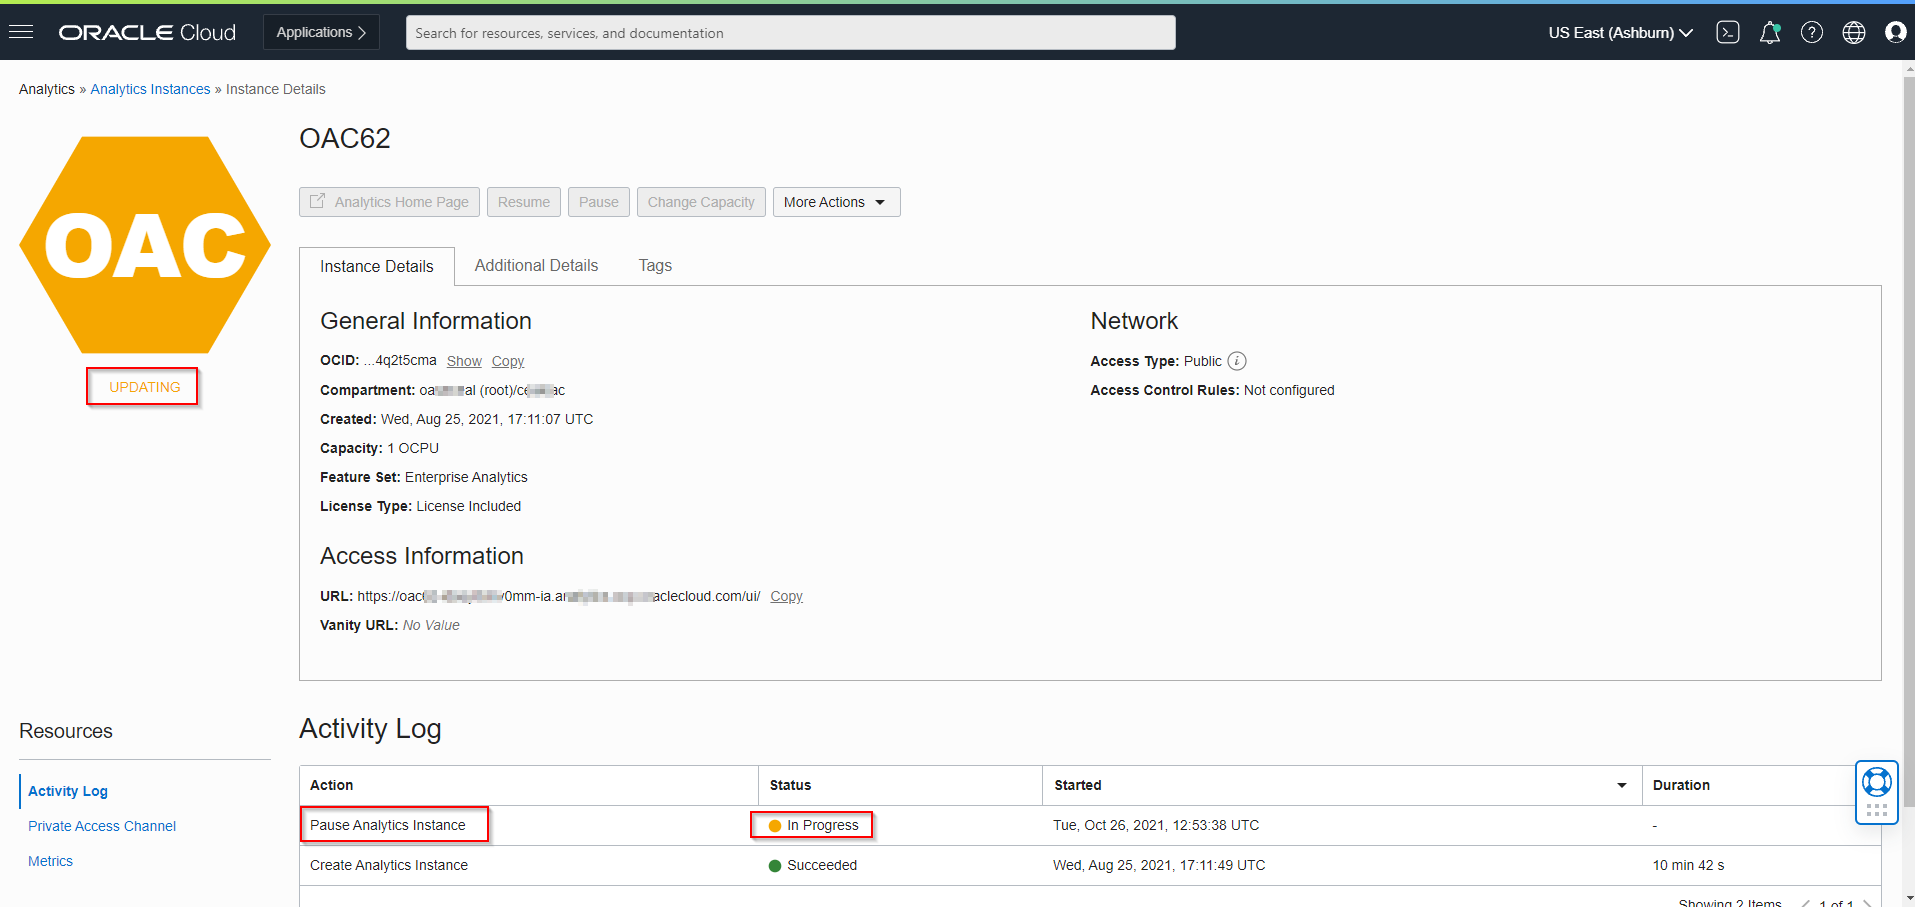
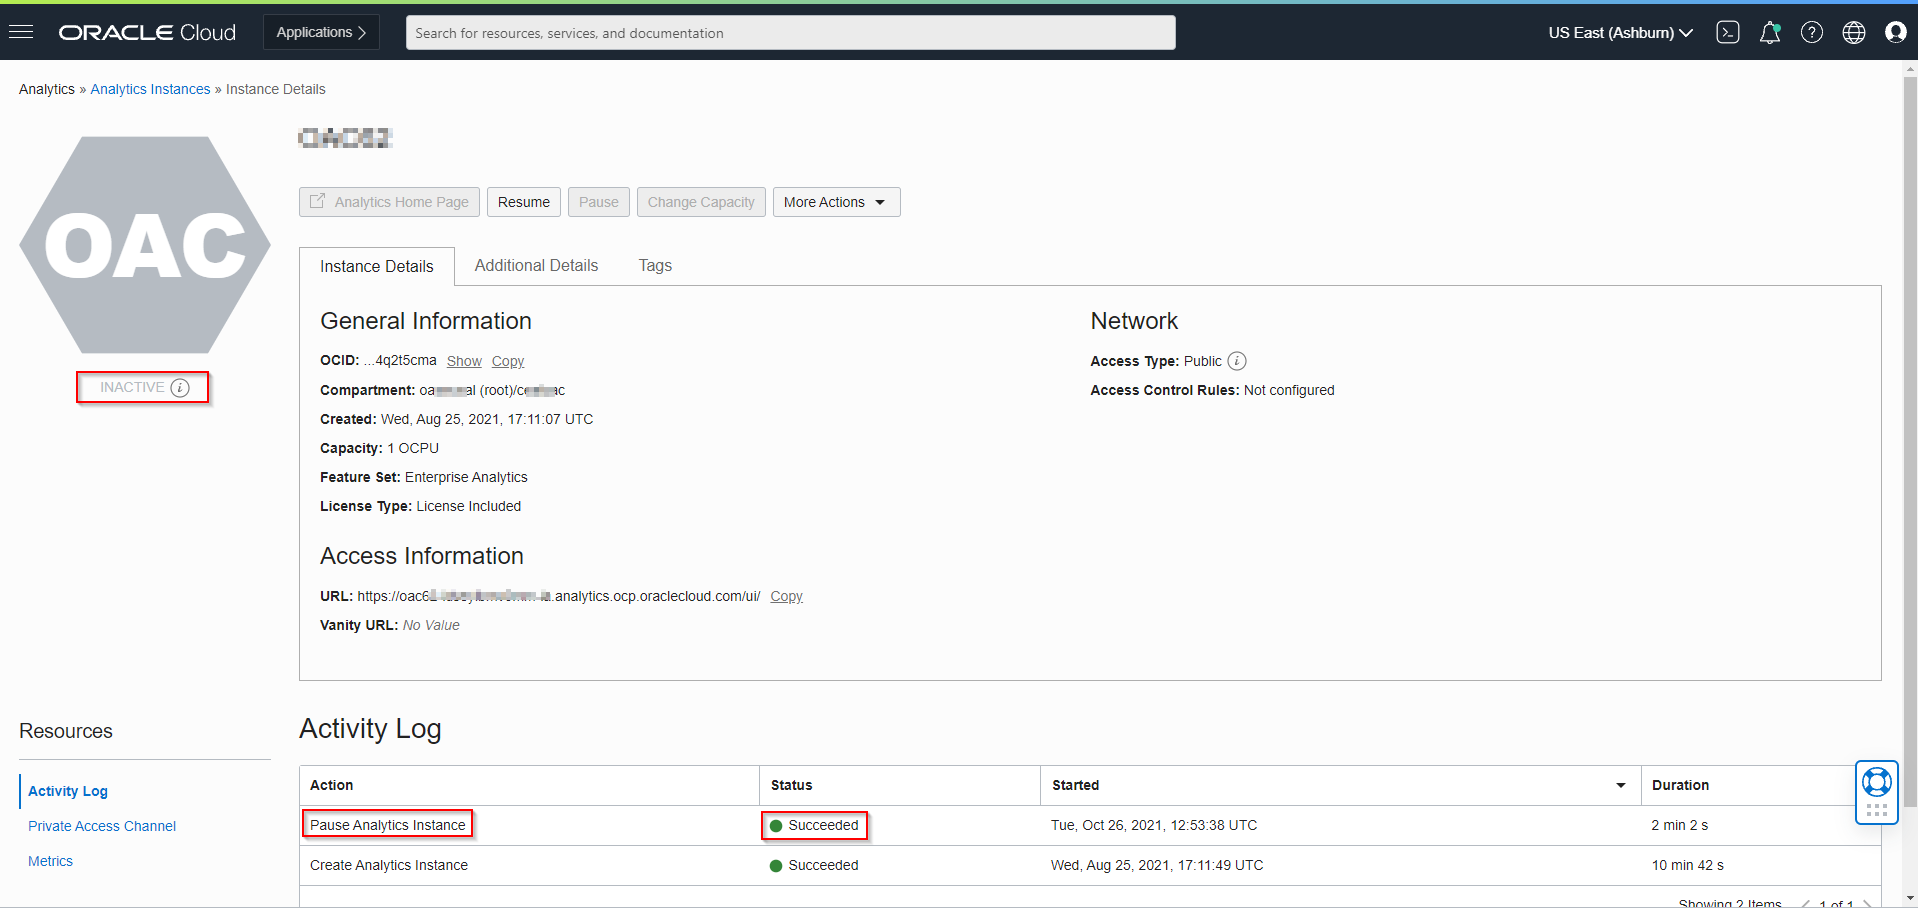
Stop OAC Instance (Gen2) using OCI CLI:
Start the CLI Tool:
- cd /home/oracle/bin
- ./oci analytics analytics-instance stop [OPTIONS]
Also can get the options using below commands:
- ./oci –help
- ./oci analytics –help
- ./oci analytics analytics-instance –help
- ./oci analytics analytics-instance stop –help
Required Parameters:
| Parameter |
Description |
| –analytics-instance-id [text] |
The OCID of the AnalyticsInstance |
Optional Parameters:
| Parameter |
Description |
| –from-json [text] |
Provide input to this command as a JSON document from a file using the file://path-to/file syntax |
| –if-match [text] |
For optimistic concurrency control. In the PUT or DELETE call for a resource, set the if-match parameter to the value of the etag from a previous GET or POST response for that resource. The resource will be updated or deleted only if the etag you provide matches the resources current etag value. |
| –max-wait-seconds [integer] |
The maximum time to wait for the work request to reach the state defined by –wait-for-state. Defaults to 1200 seconds. |
| –wait-for-state [text] |
Accepted values are: ACCEPTED, CANCELED, CANCELING, FAILED, IN_PROGRESS, SUCCEEDED |
| –wait-interval-seconds [integer] |
Check every –wait-interval-seconds to see whether the work request to see if it has reached the state defined by –wait-for-state. Defaults to 30 seconds |
Syntax:
oci analytics analytics-instance stop –analytics-instance-id $analytics_instance_id
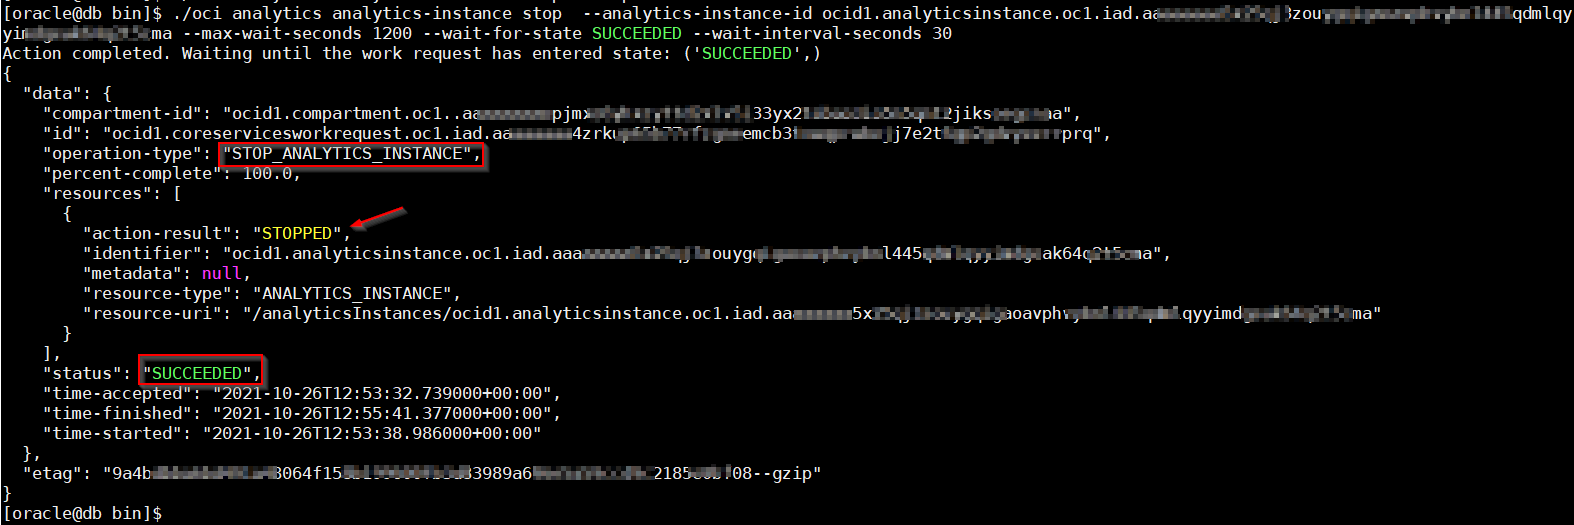
Example:
./oci analytics analytics-instance stop –analytics-instance-id ocid1.analyticsinstance.oc1.iad.aaxxxxxxa5x25qj3zogdugruiewhewirhewiuh45qdmlqyyimdgefewhruiewrew –max-wait-seconds 1200 –wait-for-state SUCCEEDED –wait-interval-seconds 30

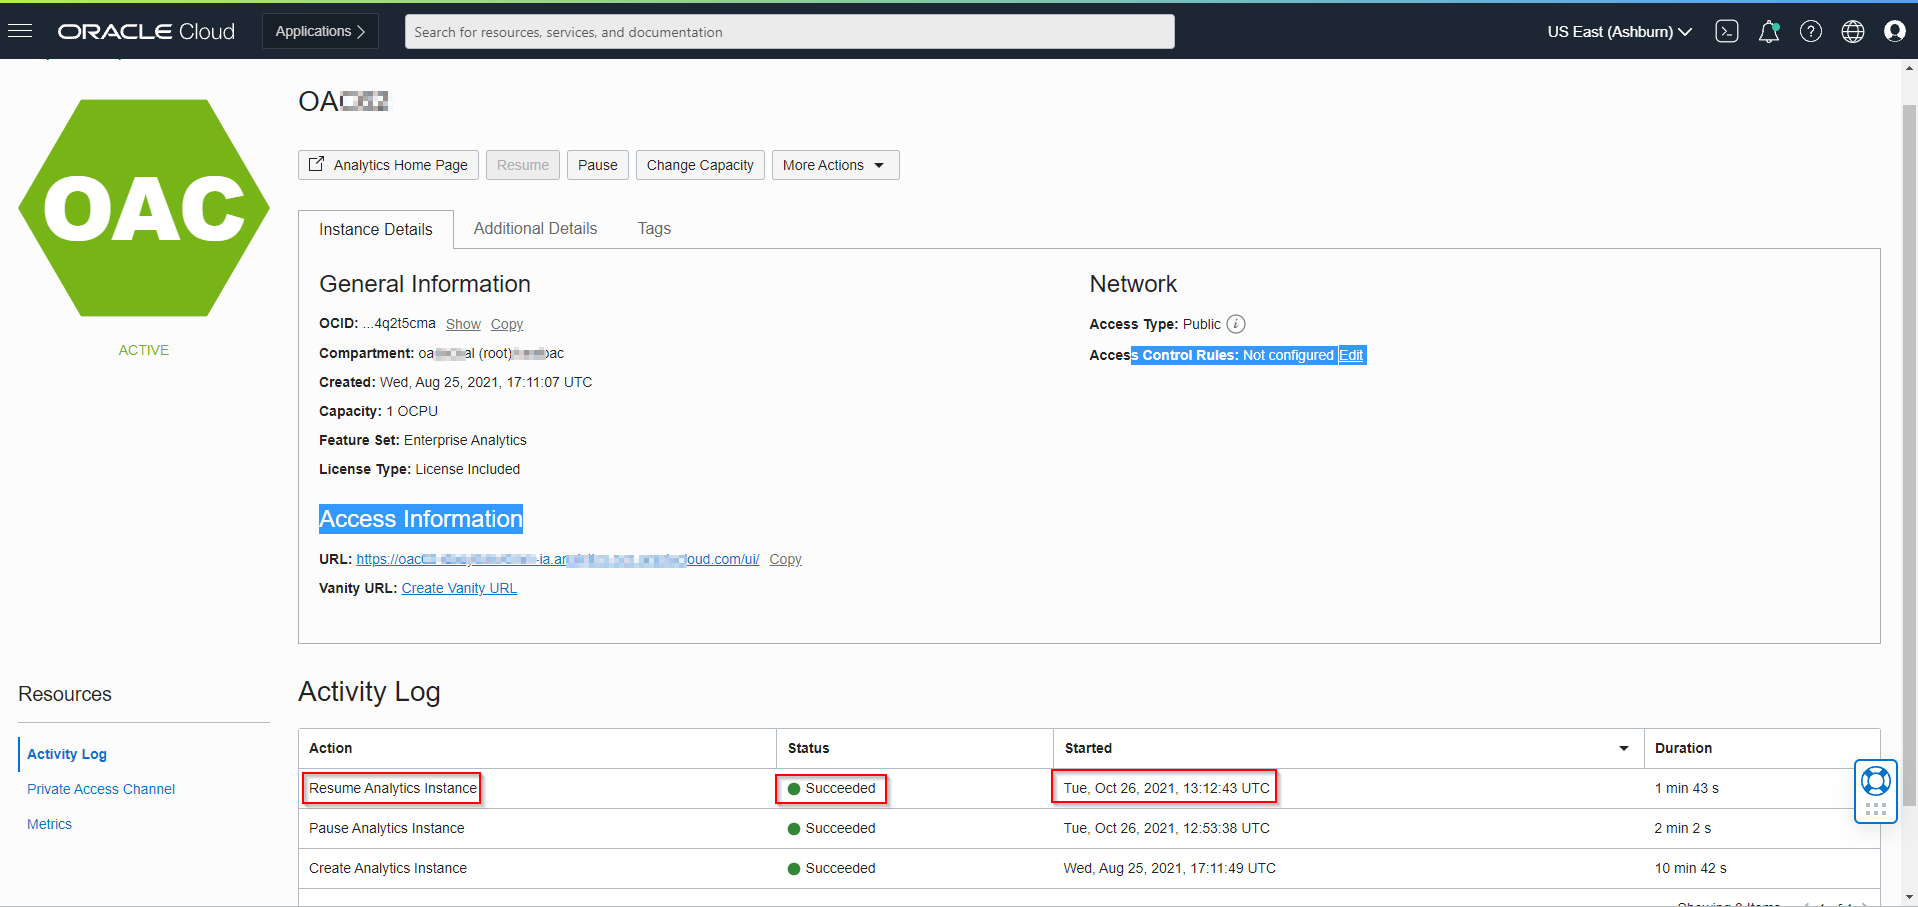
Start OAC Instance (Gen2) using OCI CLI:
Start the CLI Tool:
- cd /home/oracle/bin
- ./oci analytics analytics-instance start [OPTIONS]
Also can get the options using below commands:
- ./oci –help
- ./oci analytics –help
- ./oci analytics analytics-instance –help
- ./oci analytics analytics-instance start –help
Required Parameters:
| Parameter |
Description |
| –analytics-instance-id [text] |
The OCID of the AnalyticsInstance |
Optional Parameters:
| Parameter |
Description |
| –from-json [text] |
Provide input to this command as a JSON document from a file using the file://path-to/file syntax |
| –if-match [text] |
For optimistic concurrency control. In the PUT or DELETE call for a resource, set the if-match parameter to the value of the etag from a previous GET or POST response for that resource. The resource will be updated or deleted only if the etag you provide matches the resources current etag value. |
| –max-wait-seconds [integer] |
The maximum time to wait for the work request to reach the state defined by –wait-for-state. Defaults to 1200 seconds. |
| –wait-for-state [text] |
Accepted values are: ACCEPTED, CANCELED, CANCELING, FAILED, IN_PROGRESS, SUCCEEDED |
| –wait-interval-seconds [integer] |
Check every –wait-interval-seconds to see whether the work request to see if it has reached the state defined by –wait-for-state. Defaults to 30 seconds |
Syntax:
oci analytics analytics-instance start –analytics-instance-id $analytics_instance_id
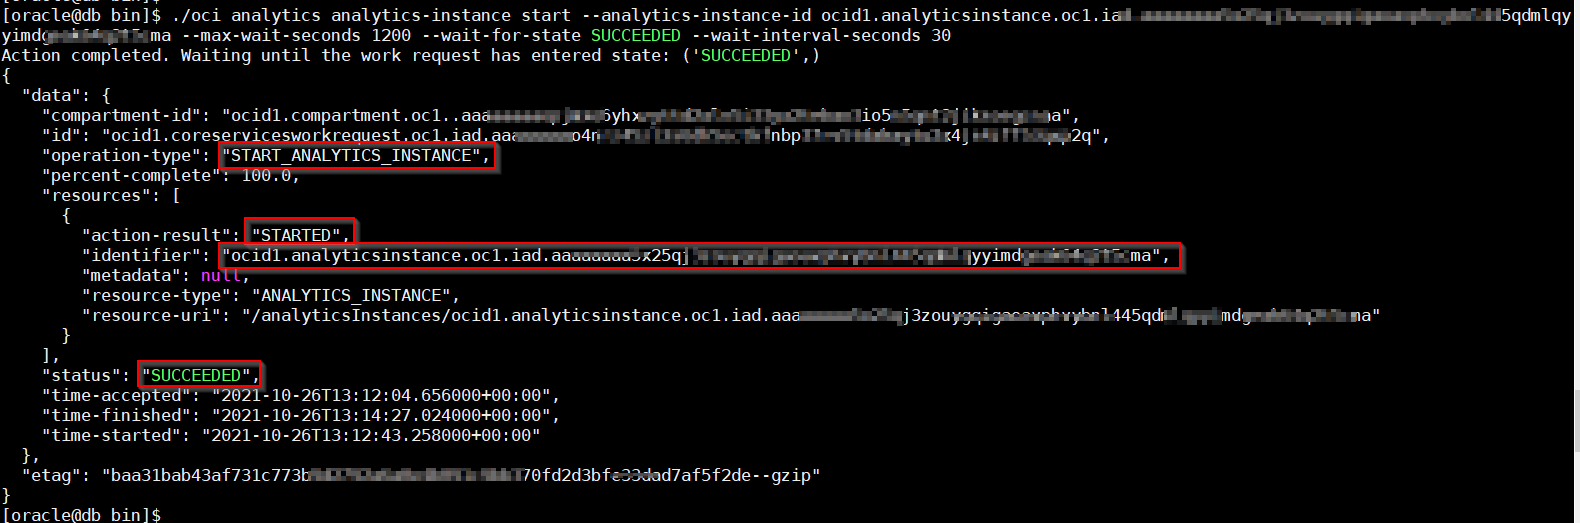
Example:
./oci analytics analytics-instance start –analytics-instance-id ocid1.analyticsinstance.oc1.iad.aaxxxxxxa5x25qj3zogdugruiewhewirhewiuh45qdmlqyyimdgefewhruiewrew –max-wait-seconds 1200 –wait-for-state SUCCEEDED –wait-interval-seconds 30
NOTE: CLI will be connecting based on the user and tenancy details that are store in the ~/.oci/config file.
Doc Reference:
Stop:
Start:
OAC Instance Create: