With inputs from Shubham Vipul Majmudar, Senior Memeber of Technical Staff
Introduction
Oracle Fusion Data Intelligence (FDI) is the next generation of Oracle Fusion Analytics Warehouse, designed specifically for Oracle Fusion Cloud Applications. It brings together business data, ready-to-use analytics and prebuilt AI, and machine learning (ML) models. This powerful combination delivers deeper insights and accelerates the decision-making process, turning data into actionable results and opening up a world of possibilities for your business.
Data Build Tool (DBT) is an open-source tool that has been transforming the landscape of analytics by enabling data teams to implement transformations directly in their data warehouses. It allows for analysts and engineers to collaboratively (via version control) use SQL and templating to define and execute data models, moving from a source paradigm to a business-oriented paradigm.
Oracle Enterprise Data Management Cloud (EDMCS) provides a central Change Management platform that enables you to align your master data and enterprise hierarchies in a single location and distribute them to operational, financial, and reporting systems. EDMCS manages all dimensions at a corporate level.
Customers using FDI often need to bring in hierarchy information from EDMCS for their reporting requirements.
Actions Summary
This article covers the steps for loading EDMCS hierarchy data into FDI using the DBT tool:
1 – Create an extract in EDMCS
2 – Set up a connection in FDI
3 – Create augmentations using the EDMCS source
4 – Use DBT to flatten the hierarchy
Actions Steps
1 – Create an extract in EDMCS
a. Log in to Oracle Enterprise Data Management Cloud.
b. Select the application.

c. On the Dimensions page, select the Dimension.
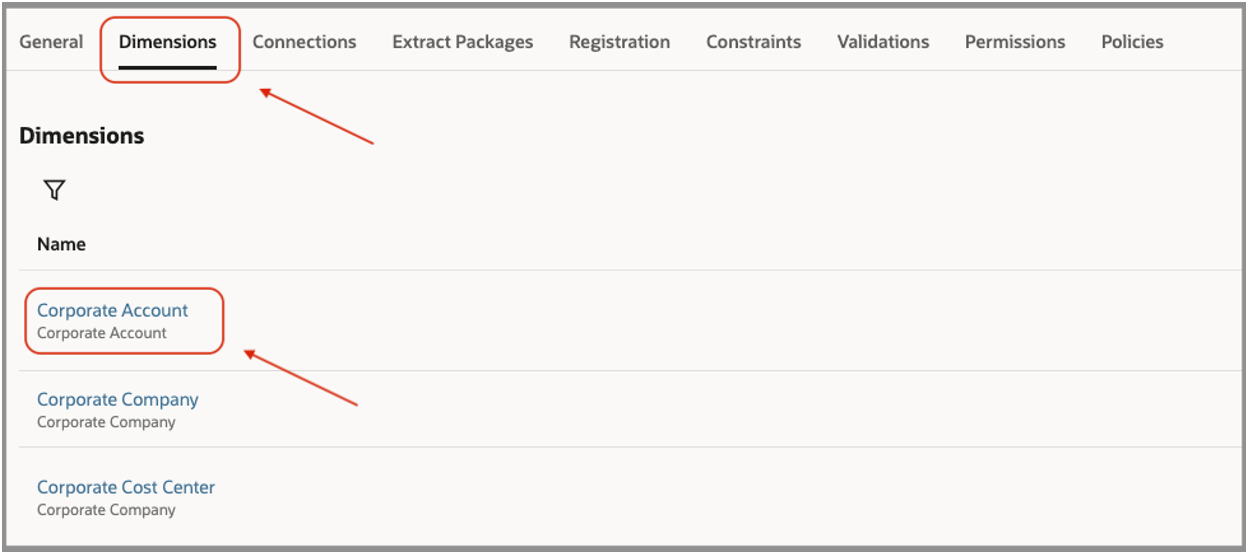
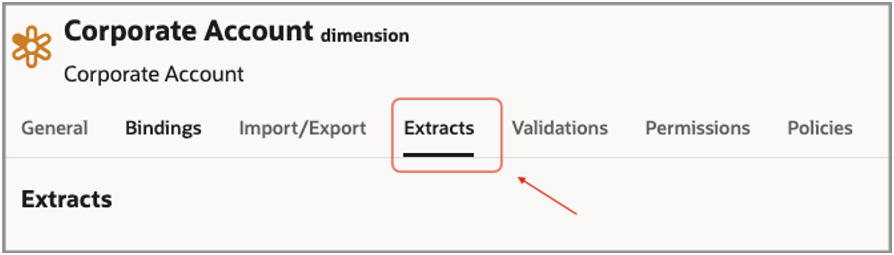
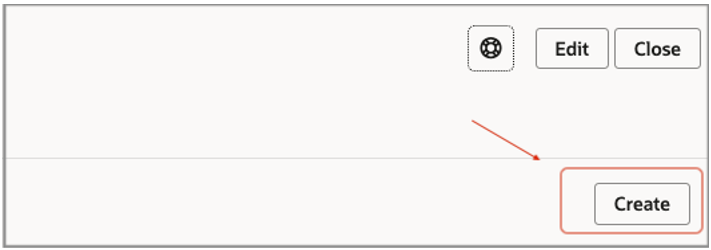
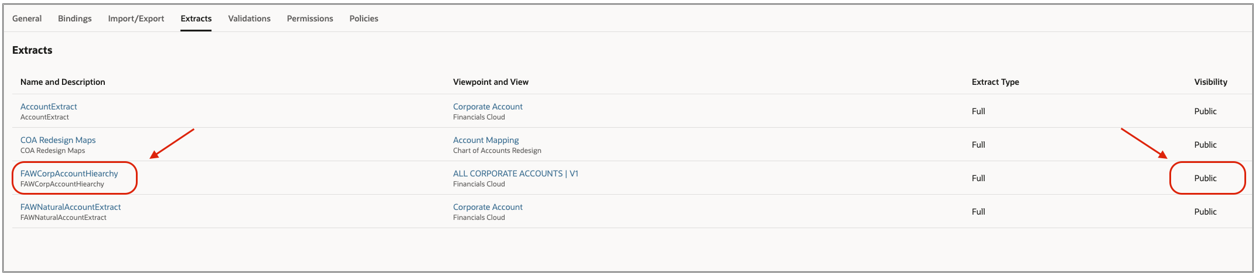
d. Select the Extracts tab and click Create to create a new extract.
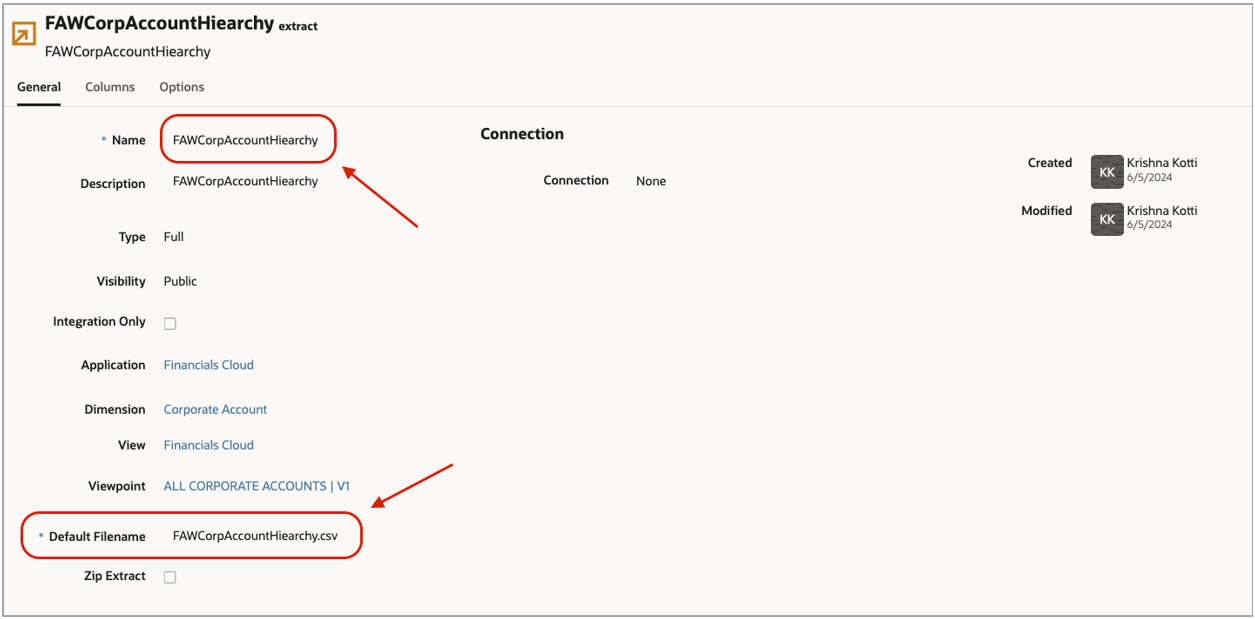
e. Select the Viewpoint and provide a Name and Description.
f. Select the Extract Type as Full and click Create to create the extract.
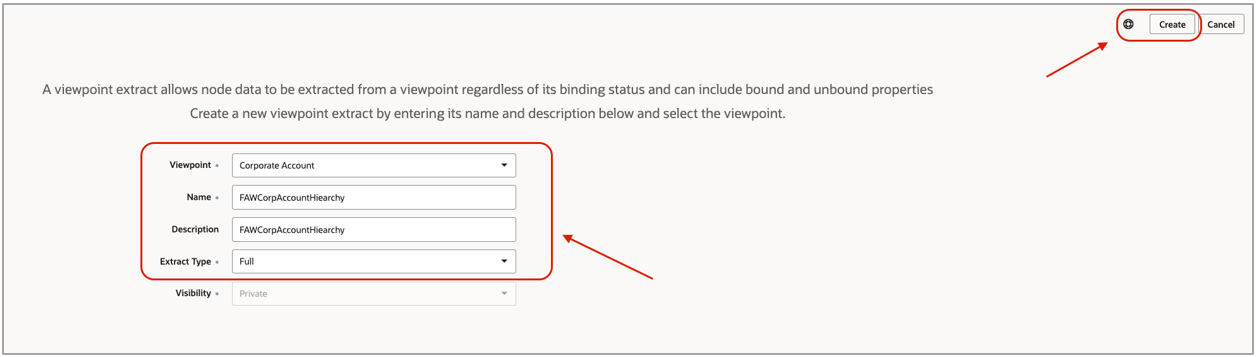
Note: Ensure that the extract name doesn’t include any spaces.
g. Ensure that default filename is in the CSV format.
h. Edit the extract and select the required columns.
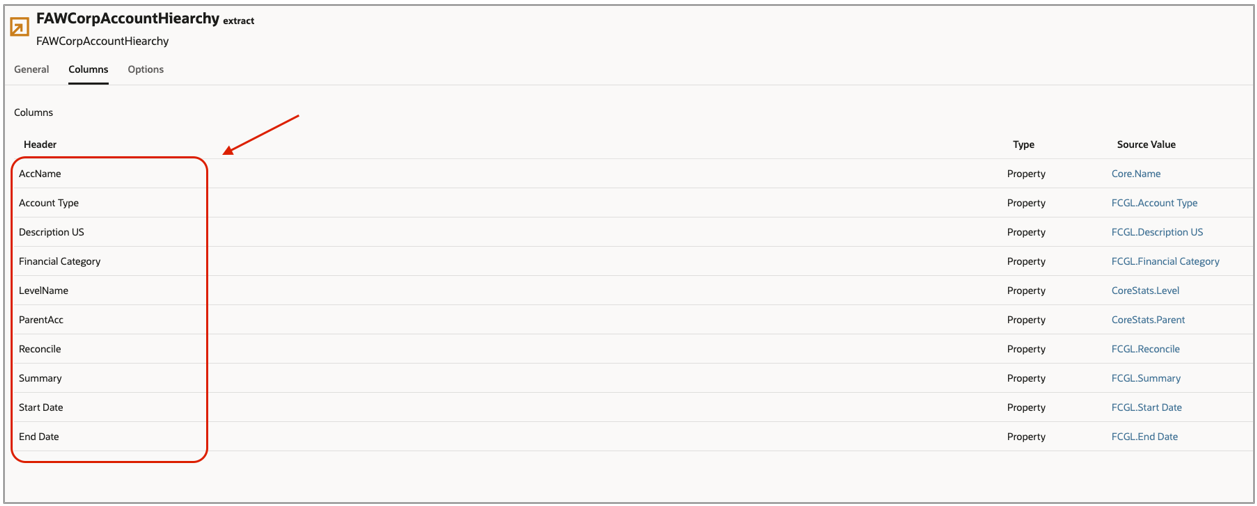
Note: Ensure that the Parent column is selected. This column contains the hierarchy parent child relationship. If the Level column is also selected, then it must be renamed to LevelName.
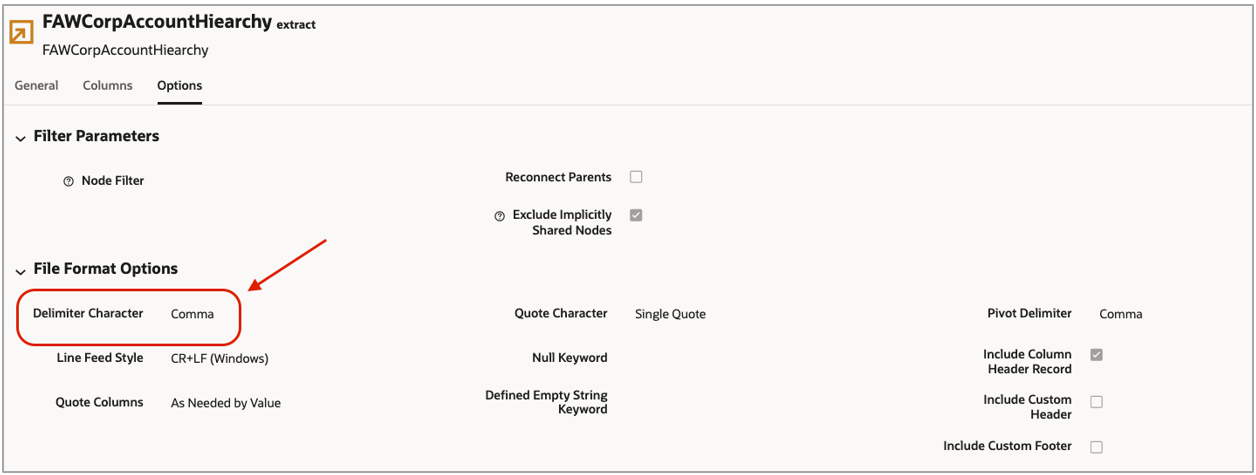
i. Ensure that Delimiter Character is set to Comma.
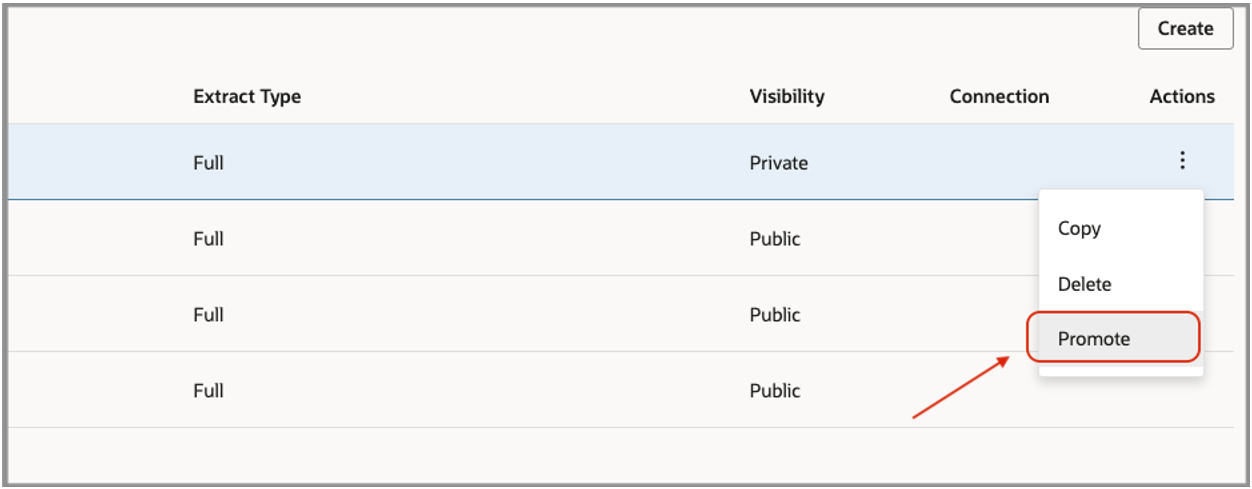
j. Change the Visibility from Private to Public by promoting the extract.

2 – Set up a Connection in FDI
a. Log in to FDI.
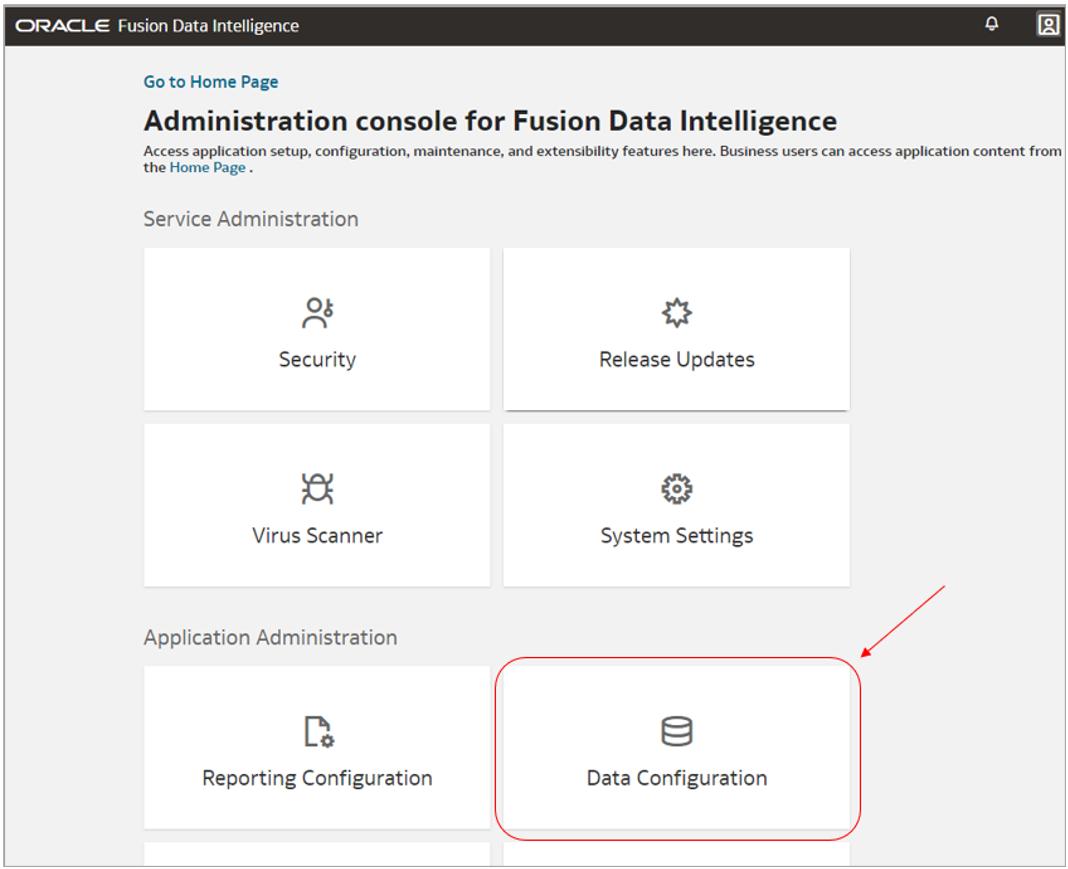
b. Navigate to Data Configuration.
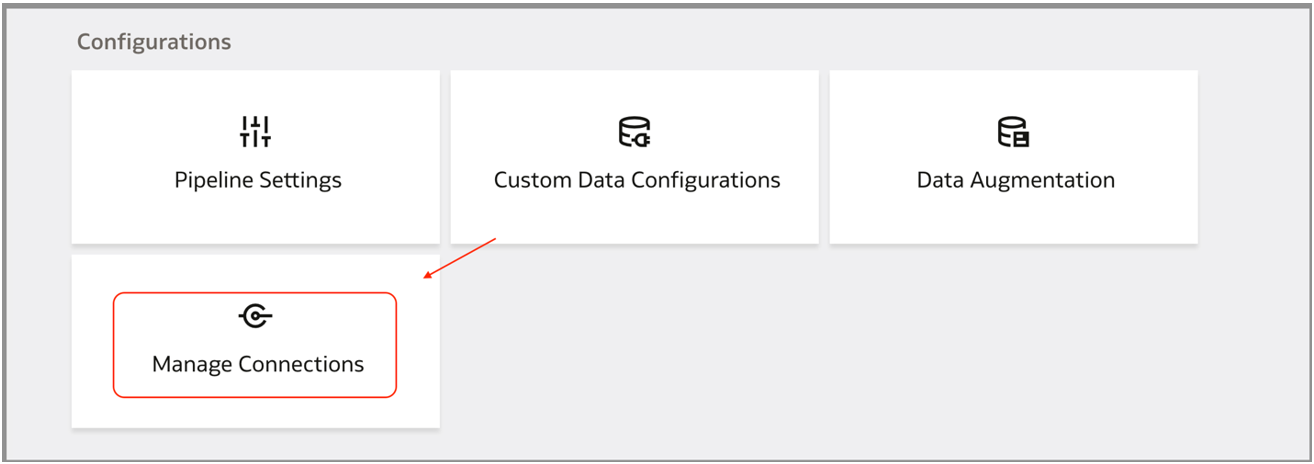
c. Click Manage Connections.
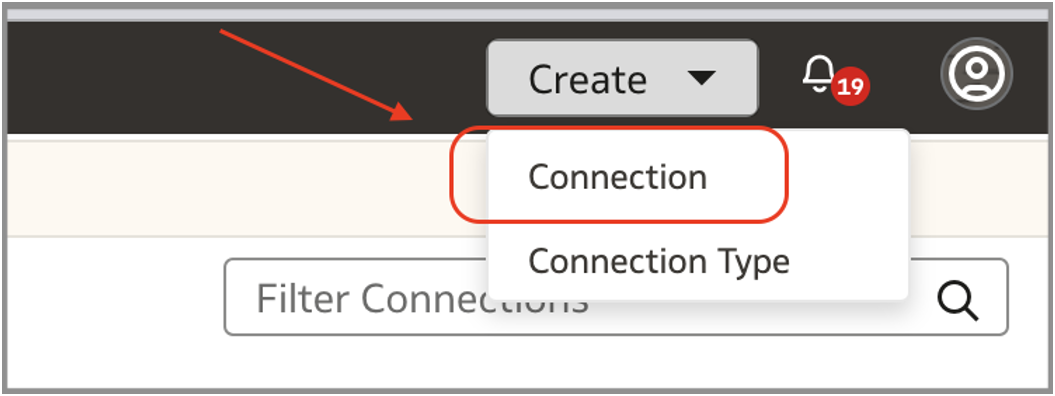
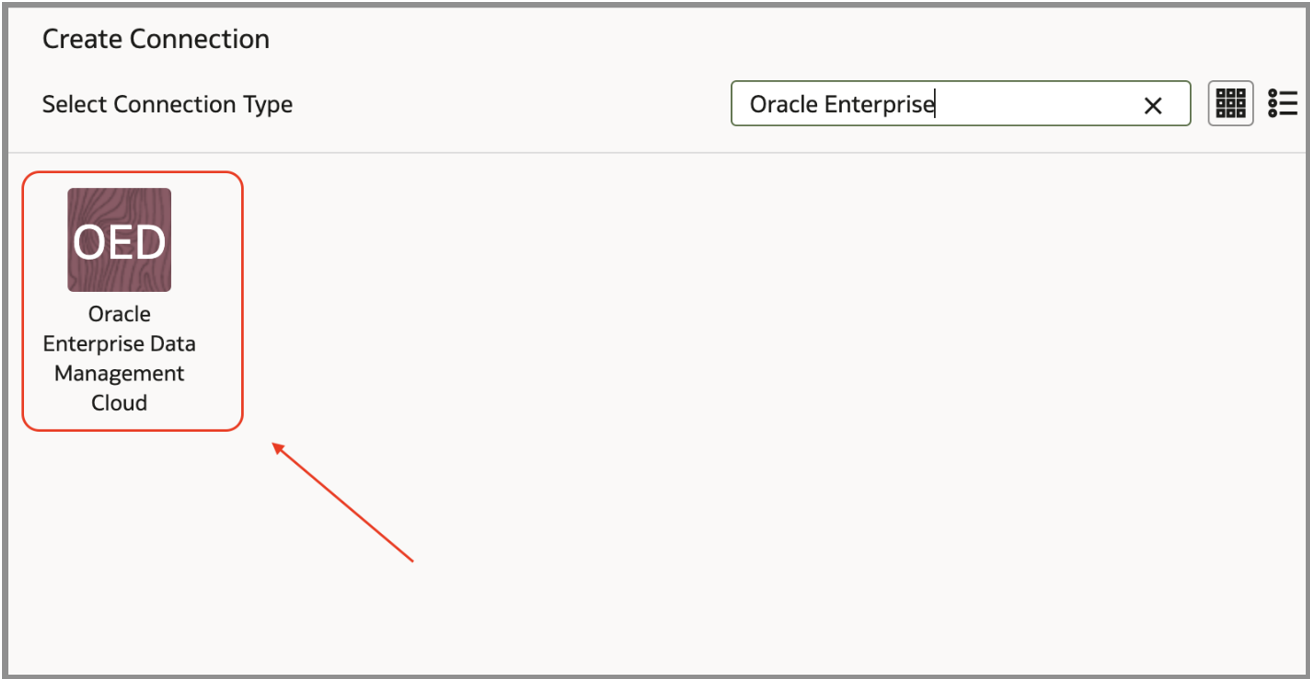
d. Click Create and select Connection.
e. Select Oracle Enterprise Data Management Cloud.
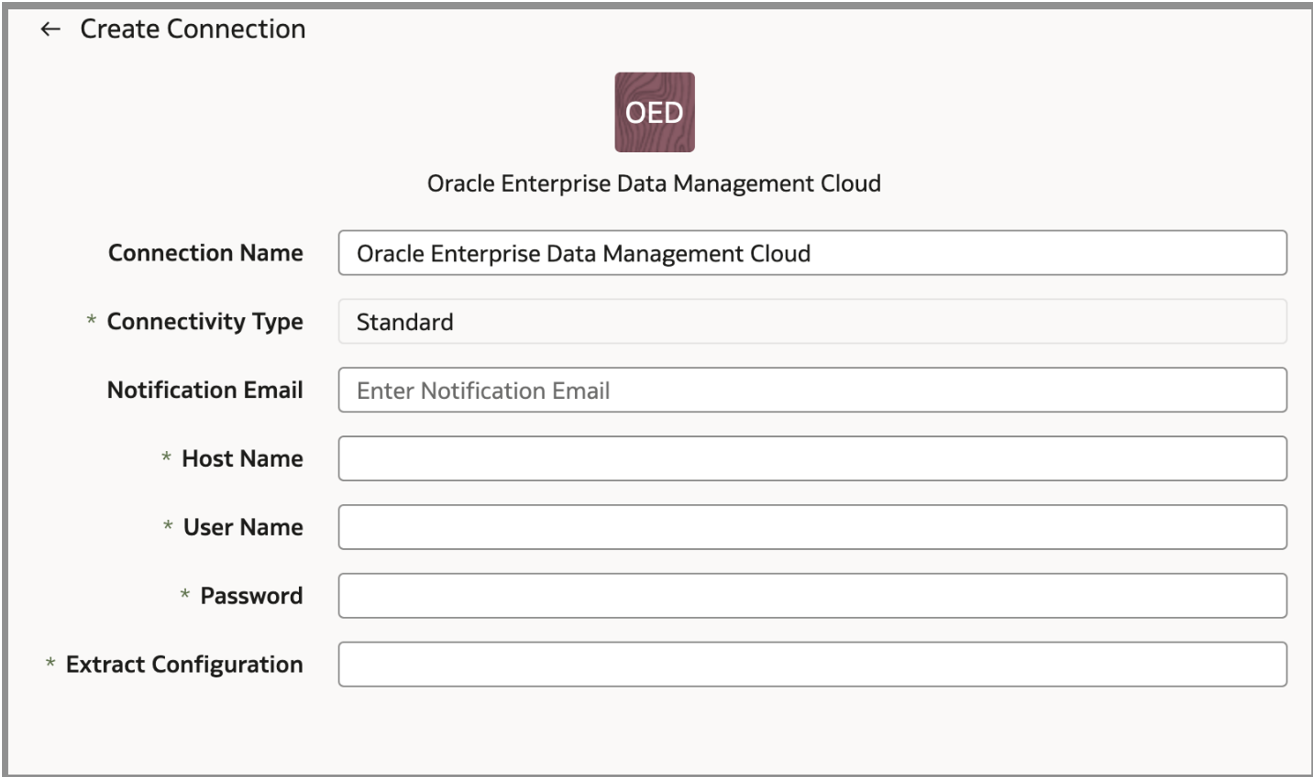
f. Provide the details in the Create Connection dialog.
3 – Create augmentations using the EDMCS source
a. Log in to FDI.
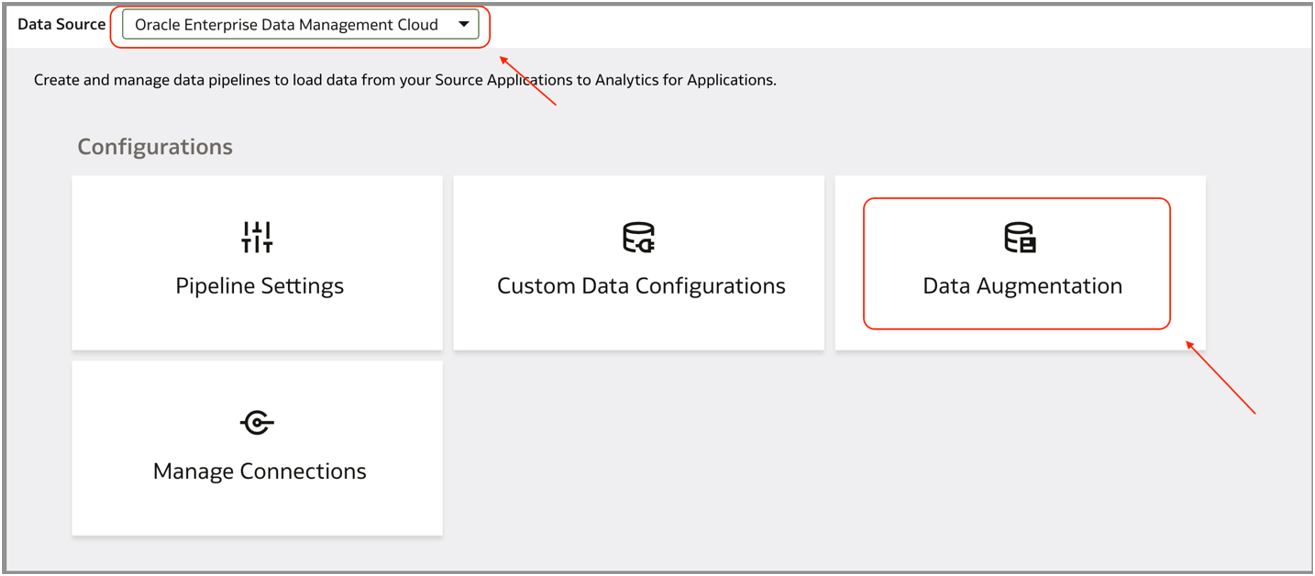
b. Navigate to Data Configuration.
c. Select the Data Source as Oracle Enterprise Data Management Cloud.
d. Click Data Augmentation.
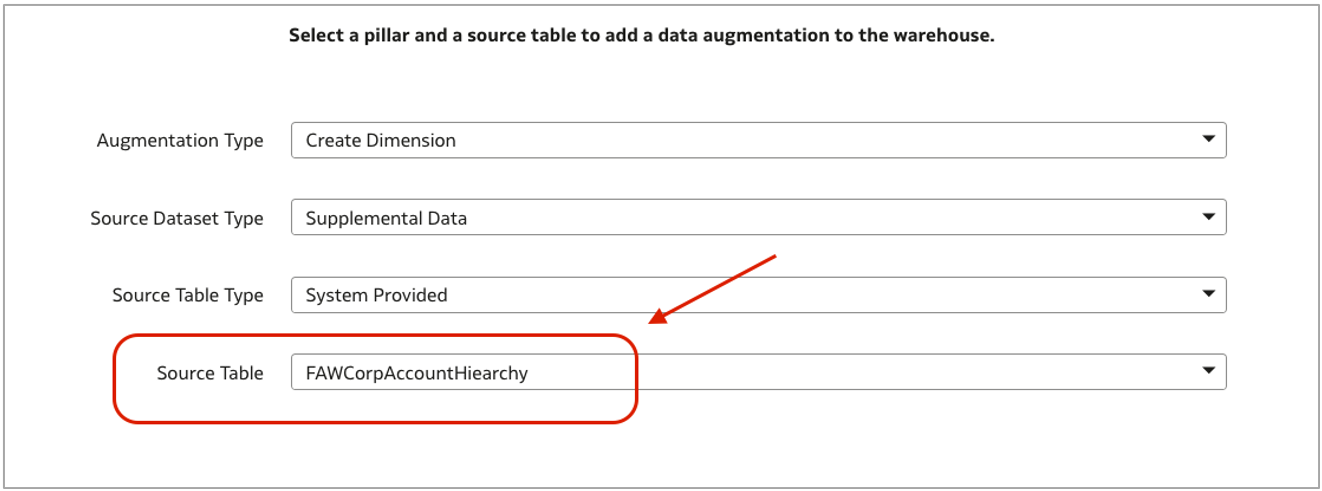
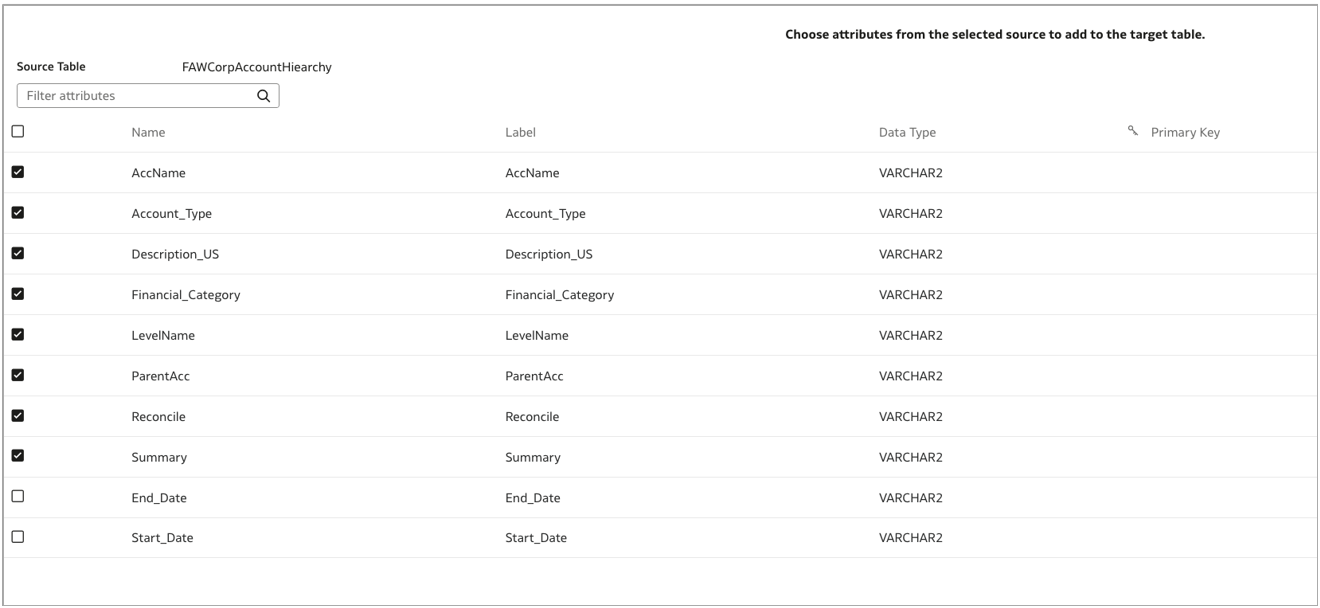
e. Select the extract name in Source Table.
f. Select the columns in the augmentation.
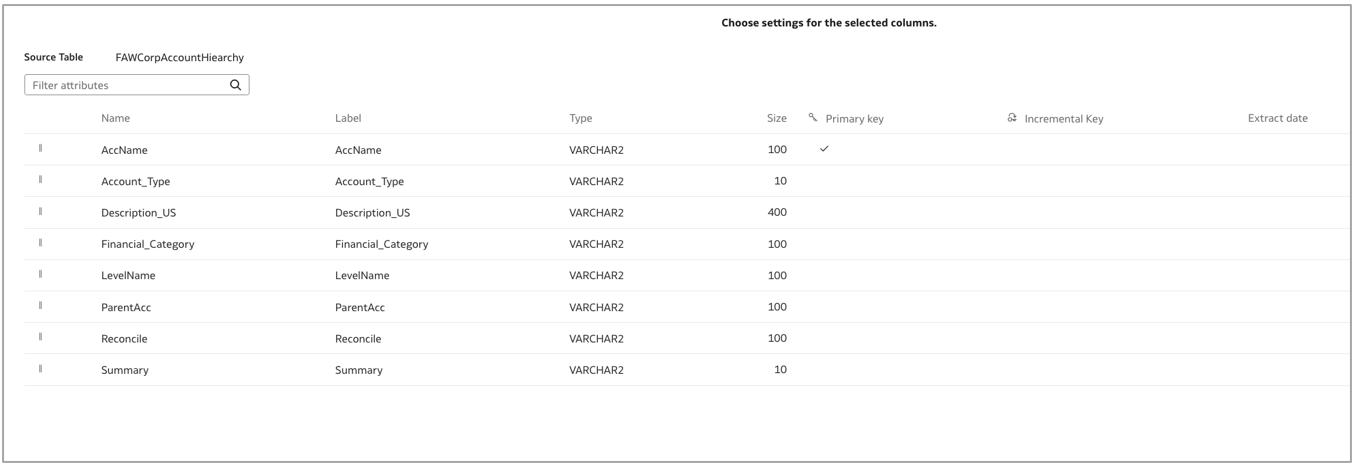
g. Modify the column sizes and identify the Primary Key used to uniquely identify the records.
h. Provide the data augmentation in Name and Table Suffix, and select Run Immediately.
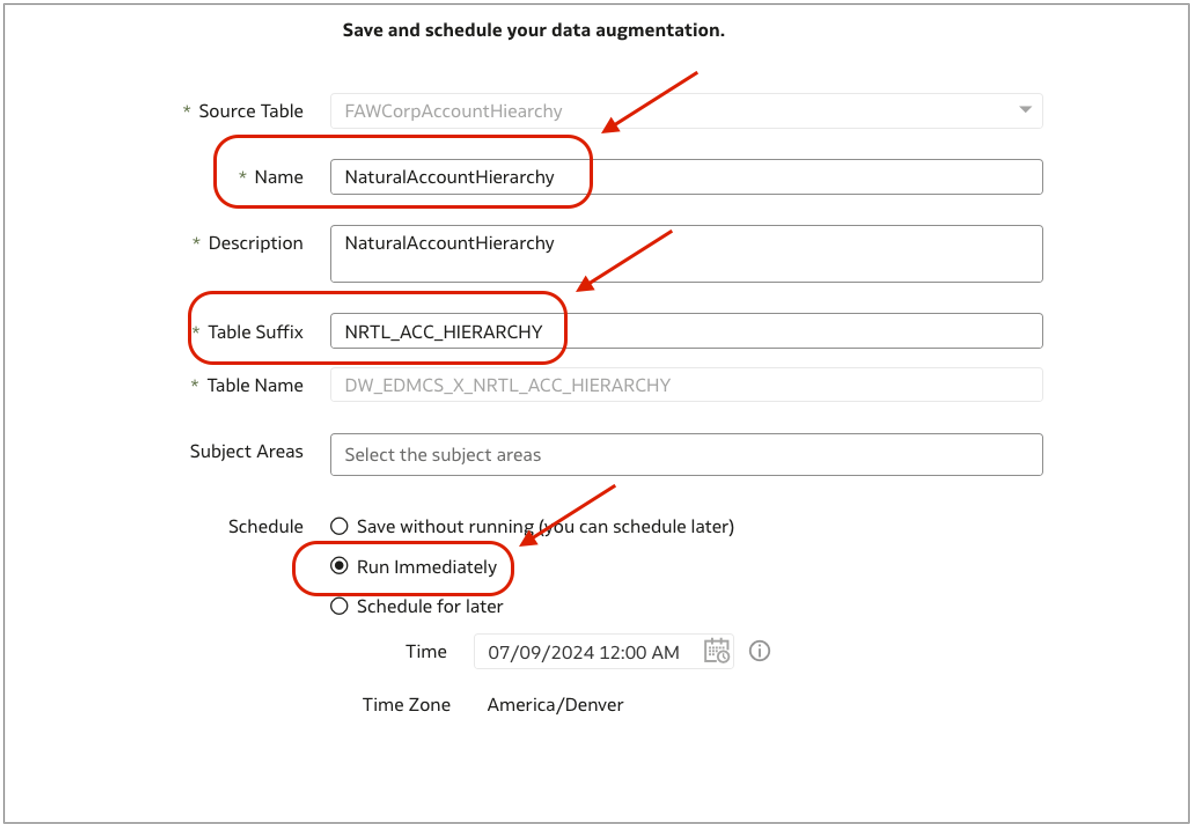
The Augmentation will be in a Scheduled state. As soon as the process status changes to Activation Completed, data is available in FDI.

4 – Use DBT to flatten the hierarchy
Refer to the following article on prerequisites and set up for DBT: https://blogs.oracle.com/analytics/post/set-up-data-build-tool-for-use-with-fusion-data-intelligence
a. Once the DBT is set up, create the below folder structure on your local environment where the GIT repository is set up.
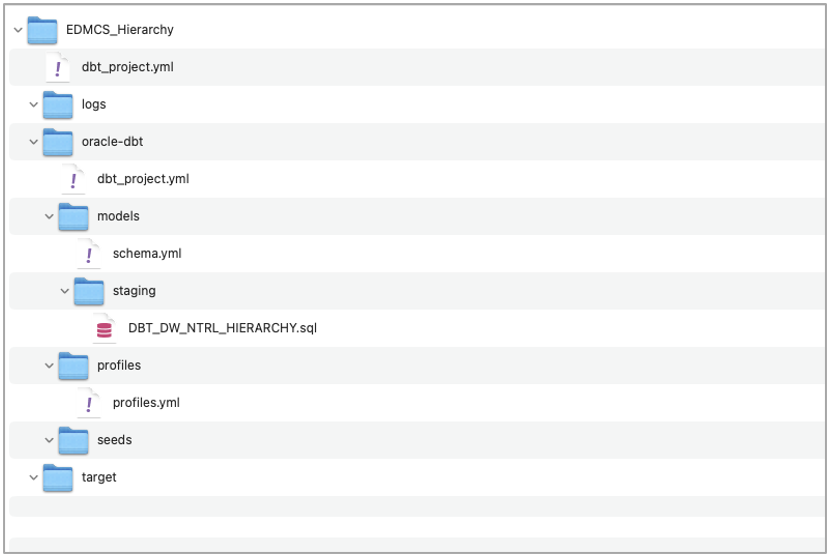
- Schema.yml should have the following information:
version: 2
sources:
  - name: OAX$DW
    schema: OAX$DW
    quoting:
        database: true
        schema: true
        identifier: true
- profiles.yml should have the following information:
oracle_dbt:
  outputs:
    dev:
      type: oracle
      user: "{{ env_var('DBT_ORACLE_USER') }}"
      pass: "{{ env_var('DBT_ORACLE_PASSWORD') }}"
      tns_name: "{{ env_var('DBT_ORACLE_TNS_NAME') }}"
      schema: "{{ env_var('DBT_ORACLE_SCHEMA') }}"
      oml_cloud_service_url: "{{ env_var('DBT_OML_CLOUD_SERVICE_URL')}}"
      threads: 4
  verify_ssl: false
  target: dev
- DBT_DW_NTRL_HIERARCHY.sql will contain the below code that will create the flattened Hierarchy Strucure:
{{
config(
materialized="materialized_view"
)
}}
select
'Corporate Account' NTRL_ACNT_SGMNT_VALUESET_CODE,
'ALL CORPORATE ACCOUNTS' HIERARCHY_TREE_CODE,
Accname,
parentacc,
Levelname,
sys_connect_by_path(Accname, '/') as pathname,
nvl(trim(both '/' from sys_connect_by_path(case when level = 1 then Accname end, '/')),Accname) level1,
nvl(trim(both '/' from sys_connect_by_path(case when level = 2 then Accname end, '/')),Accname) level2,
nvl(trim(both '/' from sys_connect_by_path(case when level = 3 then Accname end, '/')),Accname) level3,
nvl(trim(both '/' from sys_connect_by_path(case when level = 4 then Accname end, '/')),Accname) level4,
nvl(trim(both '/' from sys_connect_by_path(case when level = 5 then Accname end, '/')),Accname) level5,
nvl(trim(both '/' from sys_connect_by_path(case when level = 6 then Accname end, '/')),Accname) level6,
nvl(trim(both '/' from sys_connect_by_path(case when level = 7 then Accname end, '/')),Accname) level7,
nvl(trim(both '/' from sys_connect_by_path(case when level = 8 then Accname end, '/')),Accname) level8
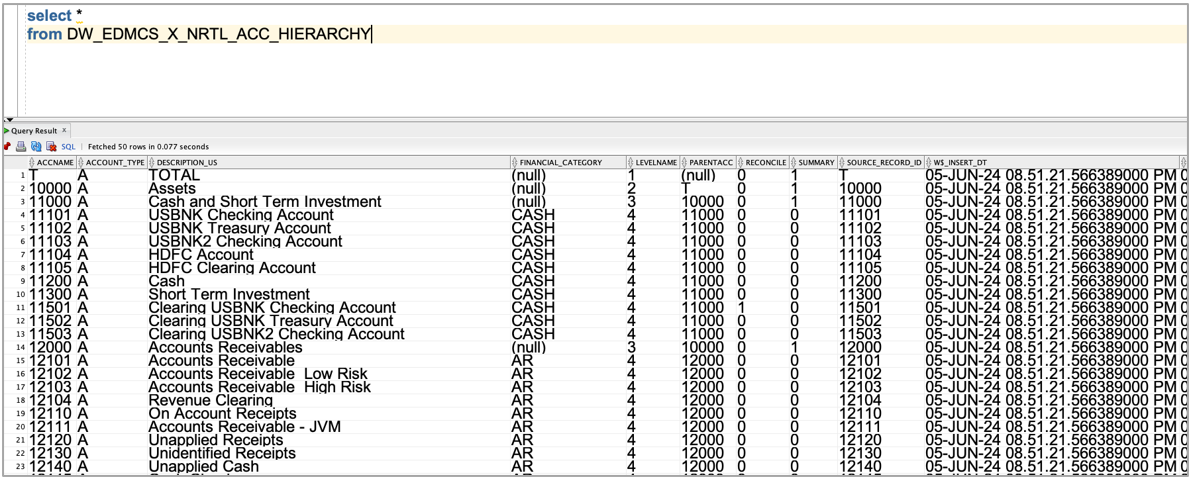
from DW_EDMCS_X_NRTL_ACC_HIERARCHY
start with parentacc is null
connect by prior Accname = parentacc
Note: The config at the start of the code can be a table or a materialized view. Each file inside the model or staging folder corresponds to a database object that will be created and managed by DBT. The database object name will be the same as the filename.
b. Use GIT commands to commit and push the code to your OCI Repository.
See this site for a description of GIT commands: https://www.atlassian.com/git/glossary#commands
c. Log in to FDI.
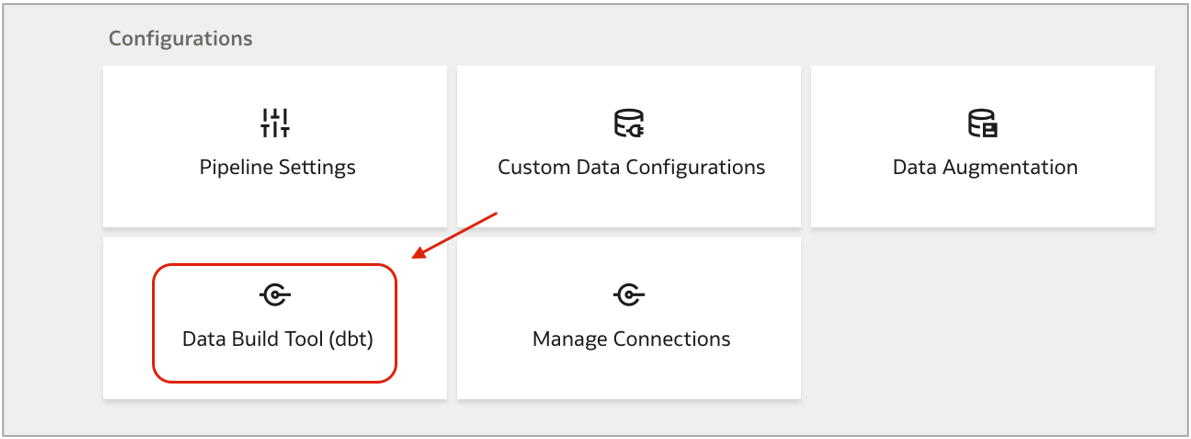
d. Navigate to Data Configuration and click Data Build Tool (dbt).
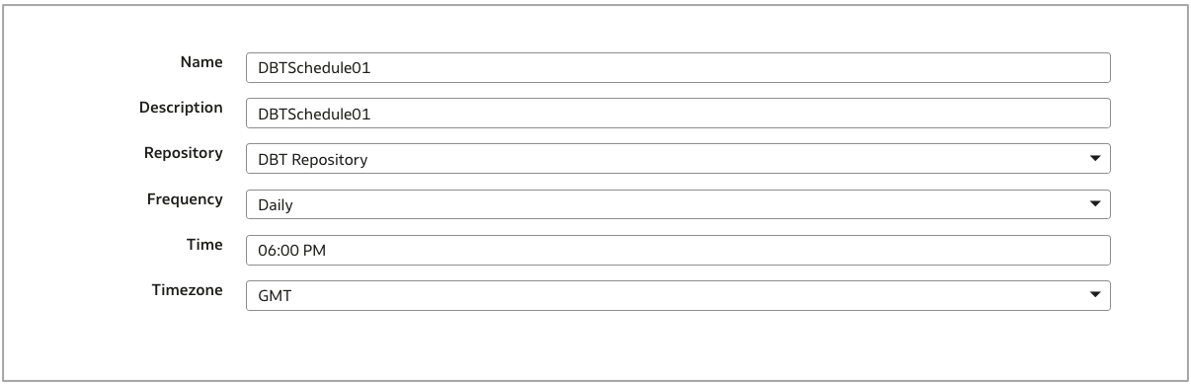
e. Click Create to create a new DBT schedule.

f. Provide details for the schedule as shown below. Select the Frequency as Daily to refresh the data in the flattened hierarchies on a daily basis.
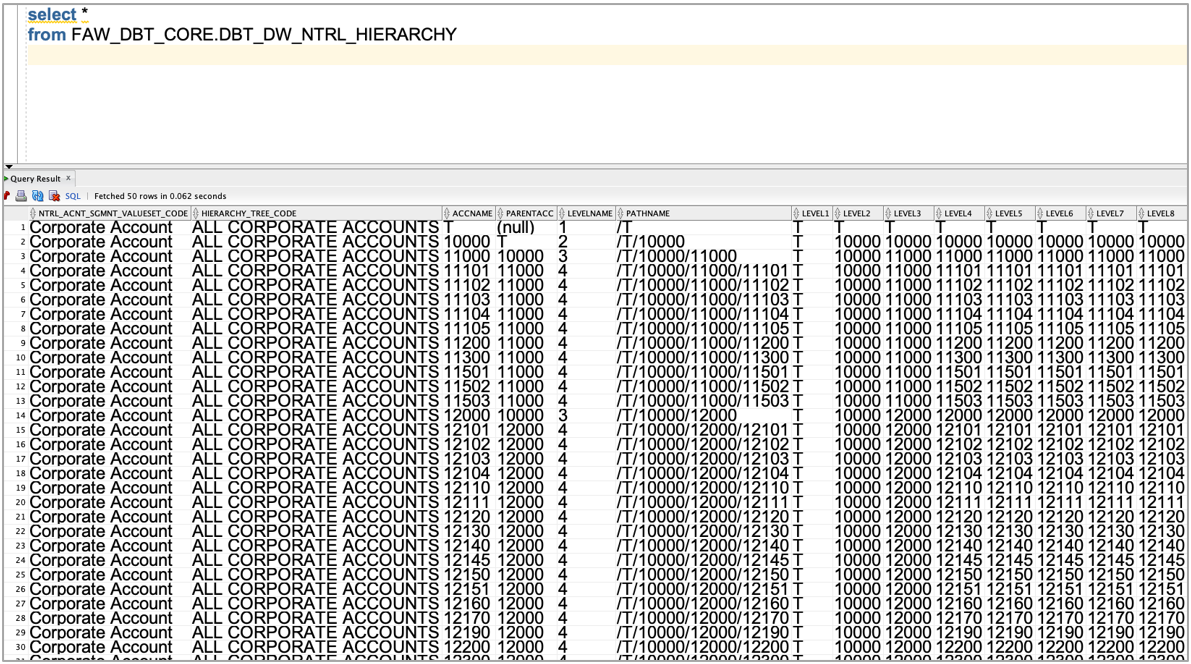
DBT executes and creates the necessary database objects (Table/Materialized View) in the Oracle Autonomous Data Warehouse of FDI.
You can now use this table in the Semantic Model Extension to model it based on your reporting requirements.
Call to Action
Now that you know more, visit the Oracle Analytics Community to share your feedback and also to let us know if you have questions or new ideas!
For even more information, see the Customize Oracle Fusion Analytics Warehouse documentation.