The following blog describes the extraction and load of custom data from Snowflake database using Oracle Data Integrator (ODI) ELT (Extraction Load and Transformation) Tool. ODI is available in Oracle marketplace for data customization.
Business Case
Most modern clouds based datawarehouses leverage MPP (Massive Parallel Processing) capability of Snowflake for creating data marts on top of their transaction data , Our Fusion customers using Fusion Analytics Warehouse (commonly referred to as FAW) application can also leverage such datamarts and have a single wholistic enterprise reporting solution combining capabilities of FAW and custom data marts.
The Approach
Custom data extraction from Snowflake can be achieved by following steps
Common steps
- Sneak Peek into Snowflake Source Database .
- Create a Custom Schema in ADW
ODI Dataflows option
- ODI Dataload option
- Set up new Data server
- Set up new New Physical Schema
- Create Model
- Create the ELT Mapping for Data load
- Data Load and data validation
Step 1: Sneak Peek into Snowflake Source Database
Snowflake is a database with separate compute and storage. We are using a trial version subscription of the Snowflake on Azure Cloud . Snowflake is available in Google and AWS cloud offerings as well. First, we create a database inside our Snowflake subscription issue and call it OAX_DB
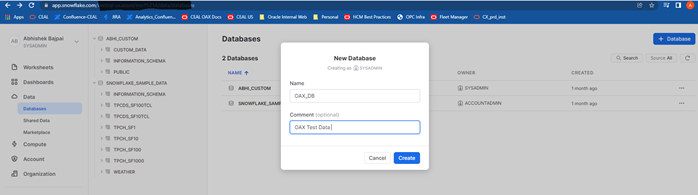
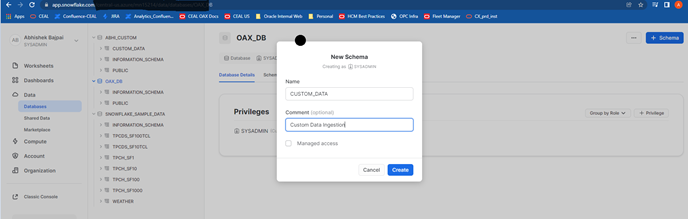
Next, we create the schema custom_data in the database
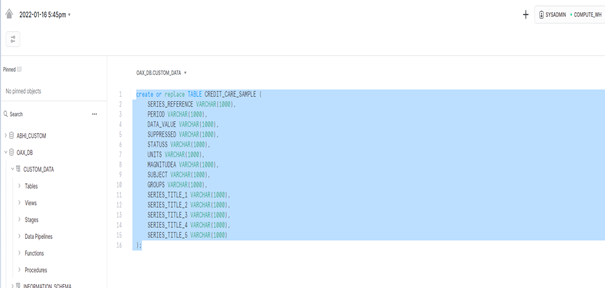
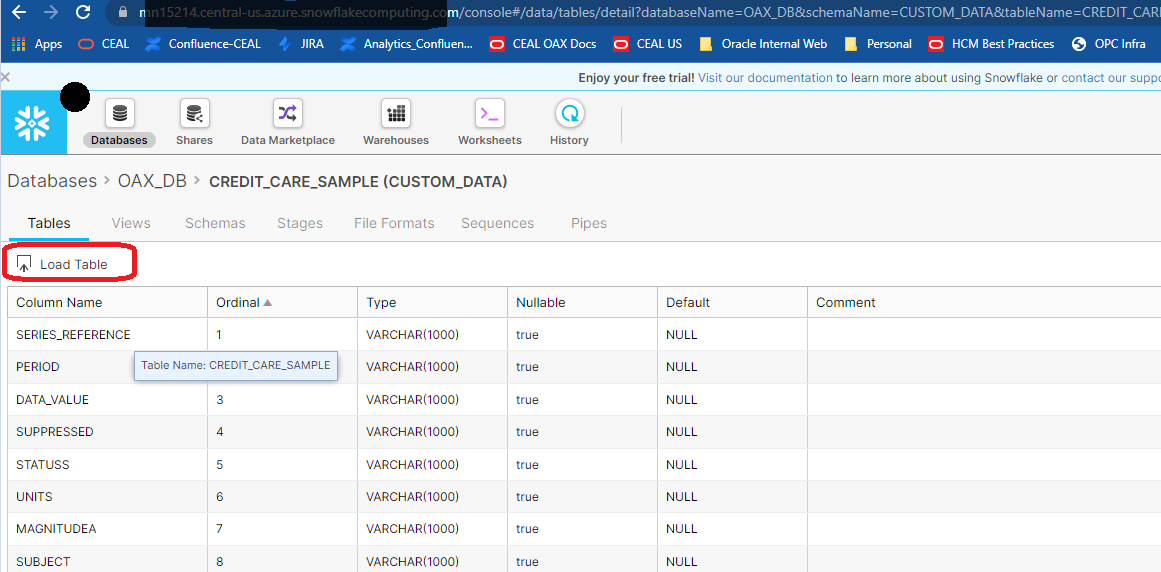
Next, we create custom table Credit_care_sample in the database
Finally, we load some sample data in our table
Refer Snowflake architecture for more deep dive.
Step 2: Create a Custom Schema in Autonomous Data Warehouse (ADW)
Fusion Analytics warehouse provides an instance of Autonomous Data Warehouse (ADW) .
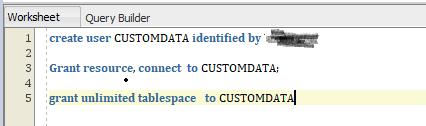
We need to create a placeholder schema where all the custom tables and related artifacts reside within this database provide. Thus we create a schema called CUSTOMDATA with initial privileges to connect and create tables and unlimited tablespace .
It is initially a good idea to allocate unlimited tablespace quota and alter it at a later stage when we have better estimates on sizing and growth rates of the database.
Connect to ADW and the schema thus created using an oracle client (e.g., SQL Developer). Following is a blog on connection steps for ADW . Once connected run the following set of commands. Please note the password specified in Identified clause is case sensitive.
Step 3: Connecting to Snowflake via ODI
Set up new Data server
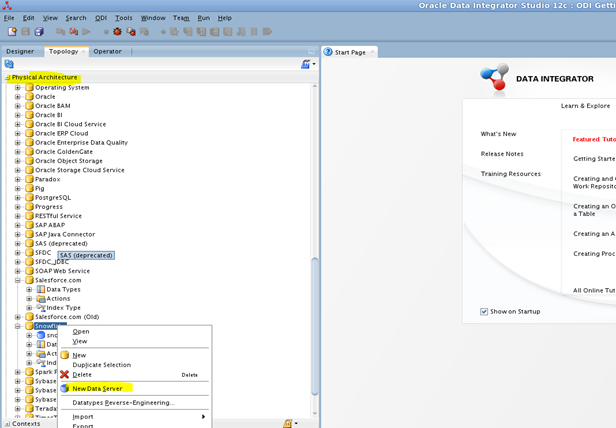
We login to ODI and navigate to the tab Physical Architecture and further navigate to Snowflake technology. Then select the option New Data Server
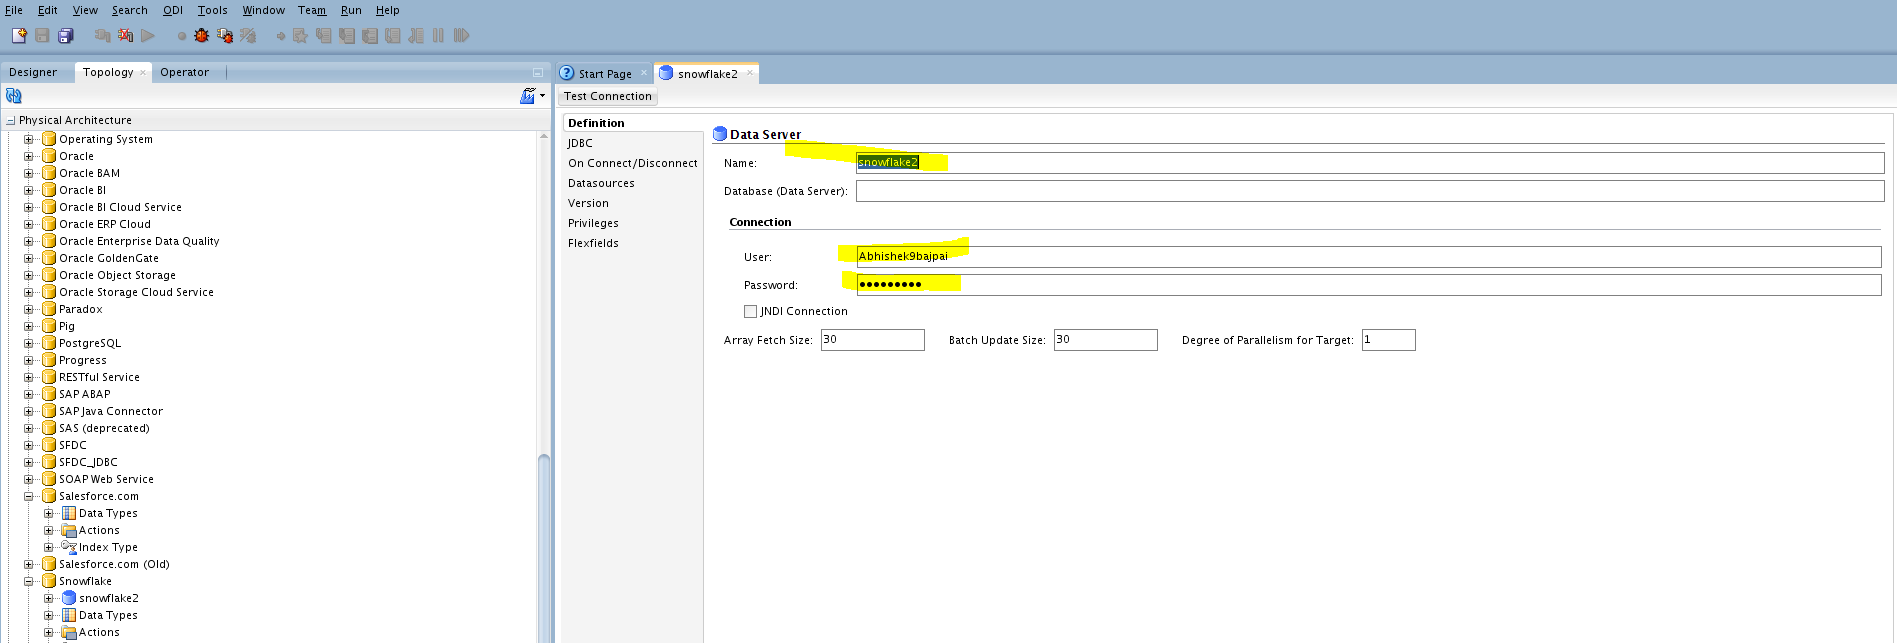
We get a screen as shown below. In definition tab define the dataserver Name, User and Password for Snowflake instance
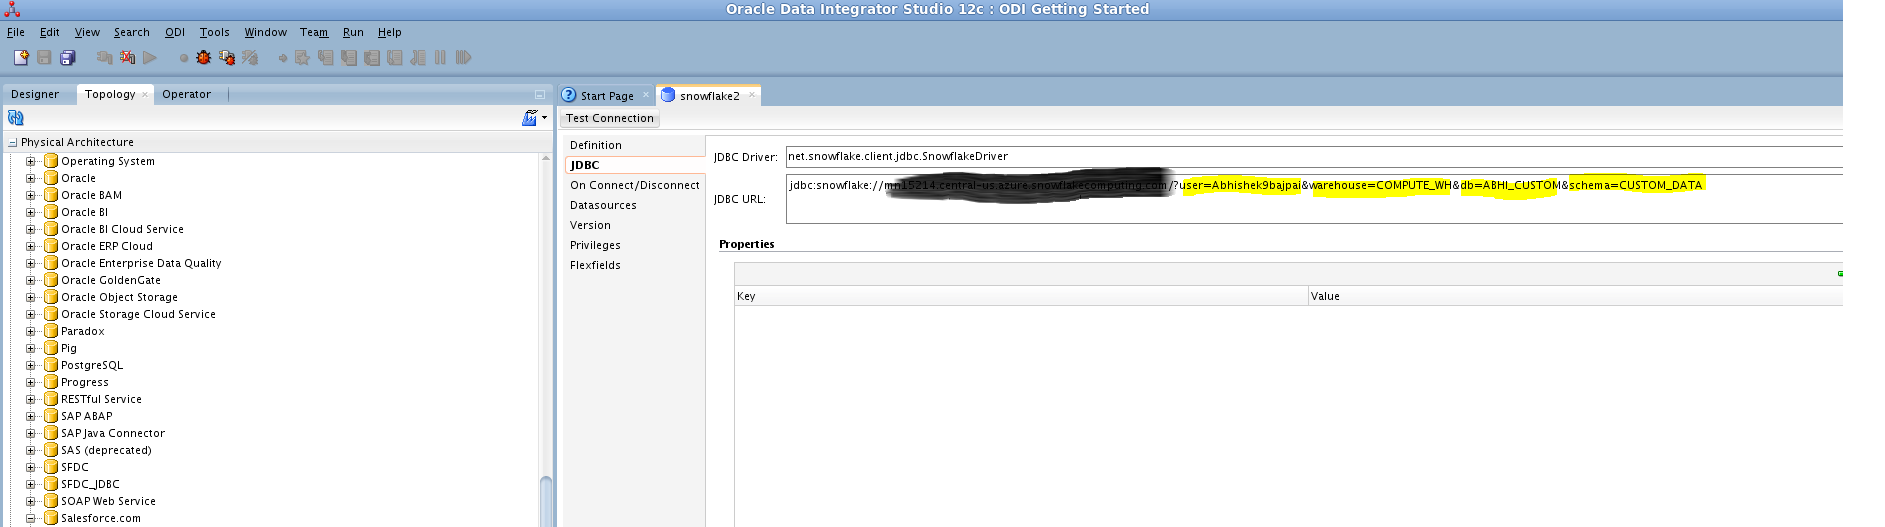
Further navigate to JDBC tab on the same data server. In this tab we need to define
JDBC Driver : net.snowflake.client.jdbc.SnowflakeDriver
JDBC URL : jdbc:snowflake://<<instance name>>/?user=<<user name>>&warehouse=<<warehouse name>>&db=<<db name>>&schema=<<schema name>>
We call our dataserver as snowflake2 . This data server provides inputs needed by ODI to make a basic connection to our Snowflake instance. It is important that our Snowflake instance is up and running at this point.
Set up new New Physical Schema
Now that we have defined connection details, we also need to define New Physical Schema.
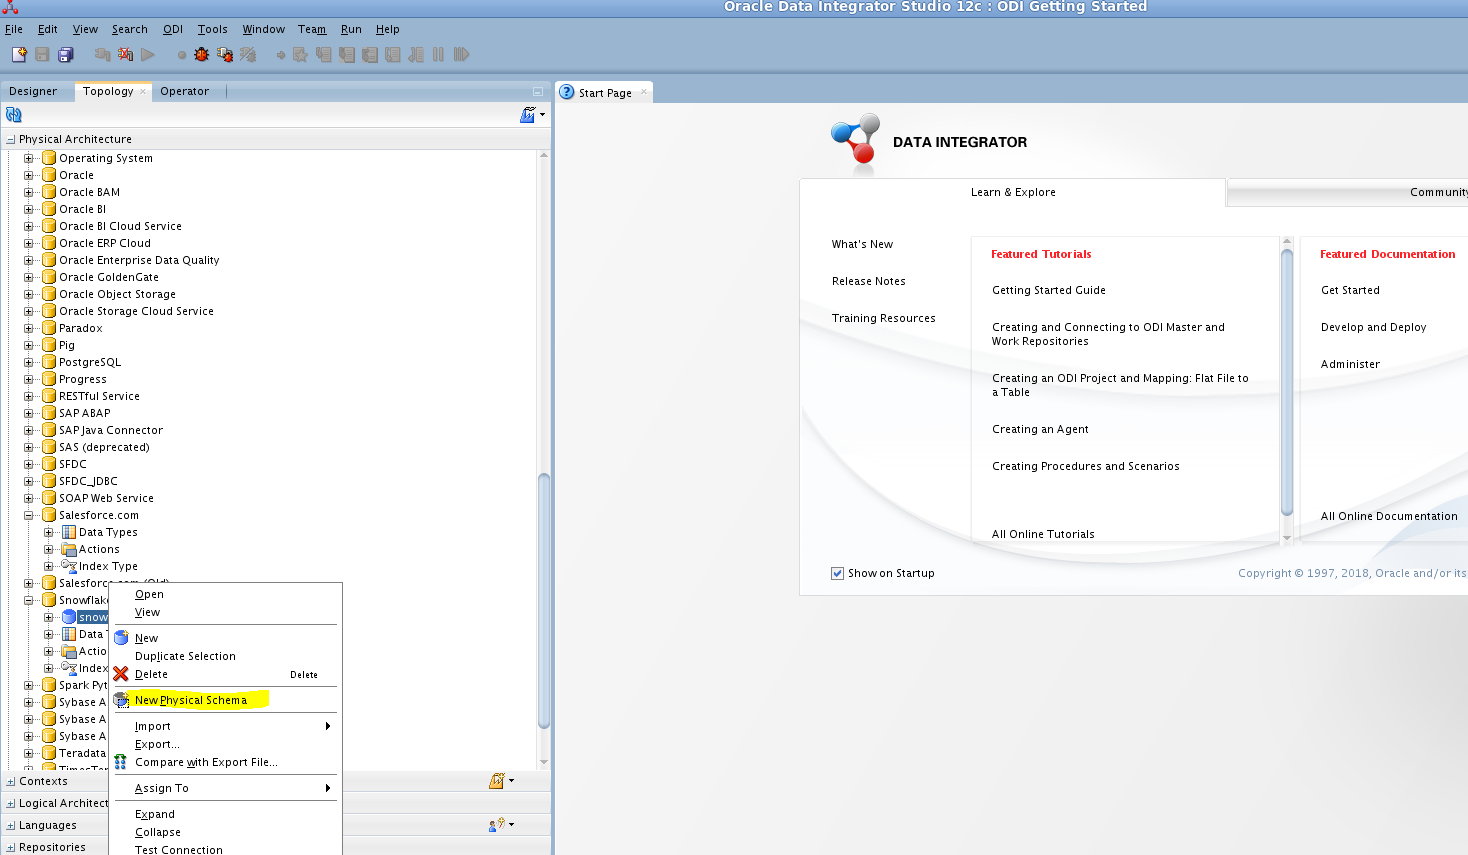
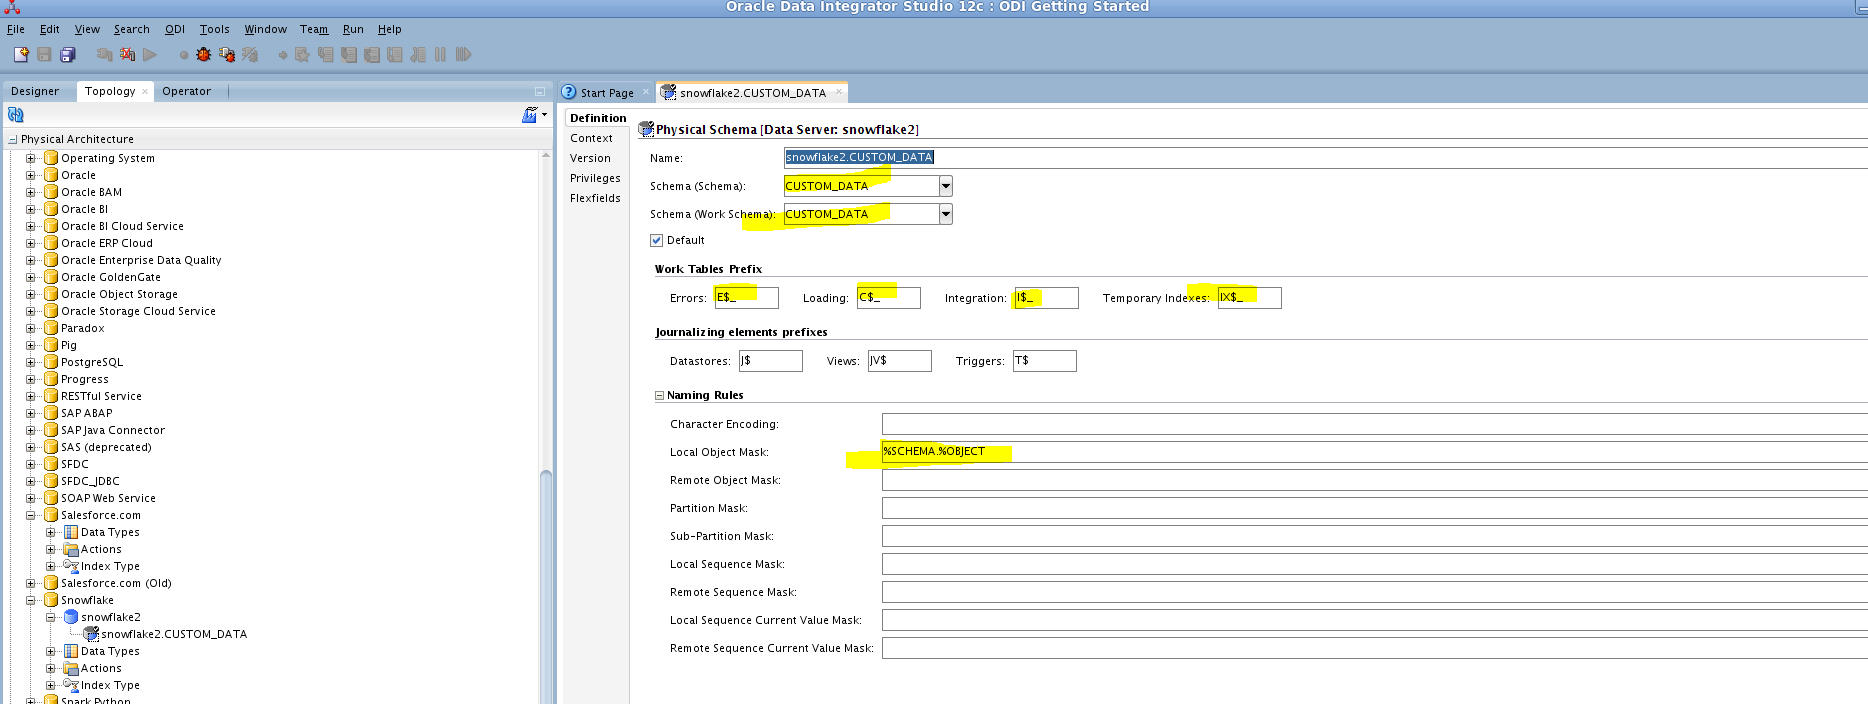
We name this as snowflake2.CUSTOM_DATA. Here we need to provide two critical inputs
- Schema: Data schema where we created our tables
- Work Schema : Temp Objects created by ODI i.e. checking constraints , logs , loads etc.
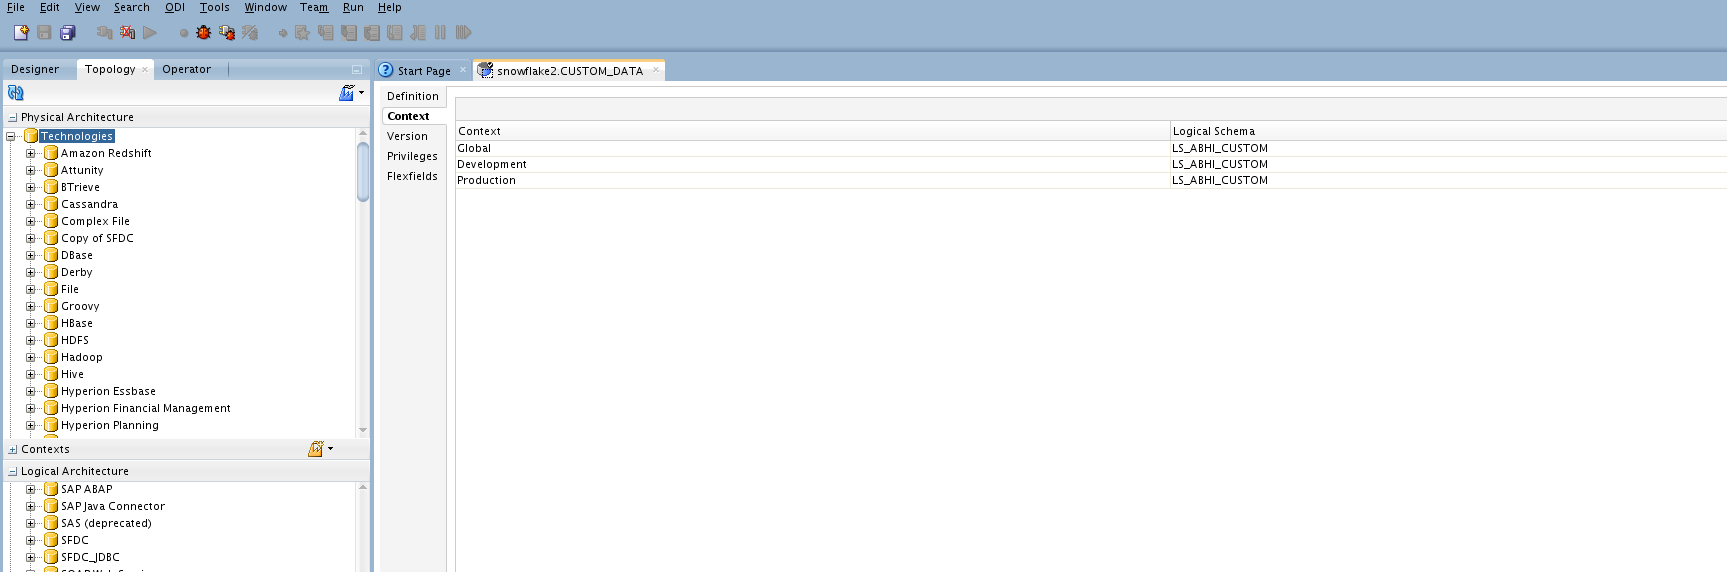
Click on the tab Context as shown to fill out logical schema corresponding to different possible physical environment instances ( i.e. Prod , Dev etc.). Since we have only one environment we have chosen to identify all physical instance by same name i.e. LS_ABHI_CUSTOM
 ODI Topography helps us encapuslate various Physical environment details under the more business friendly terminology of Dev, Prod, QA / User defined known as contexts. These in turn are mapped to Logical schema
Create Model
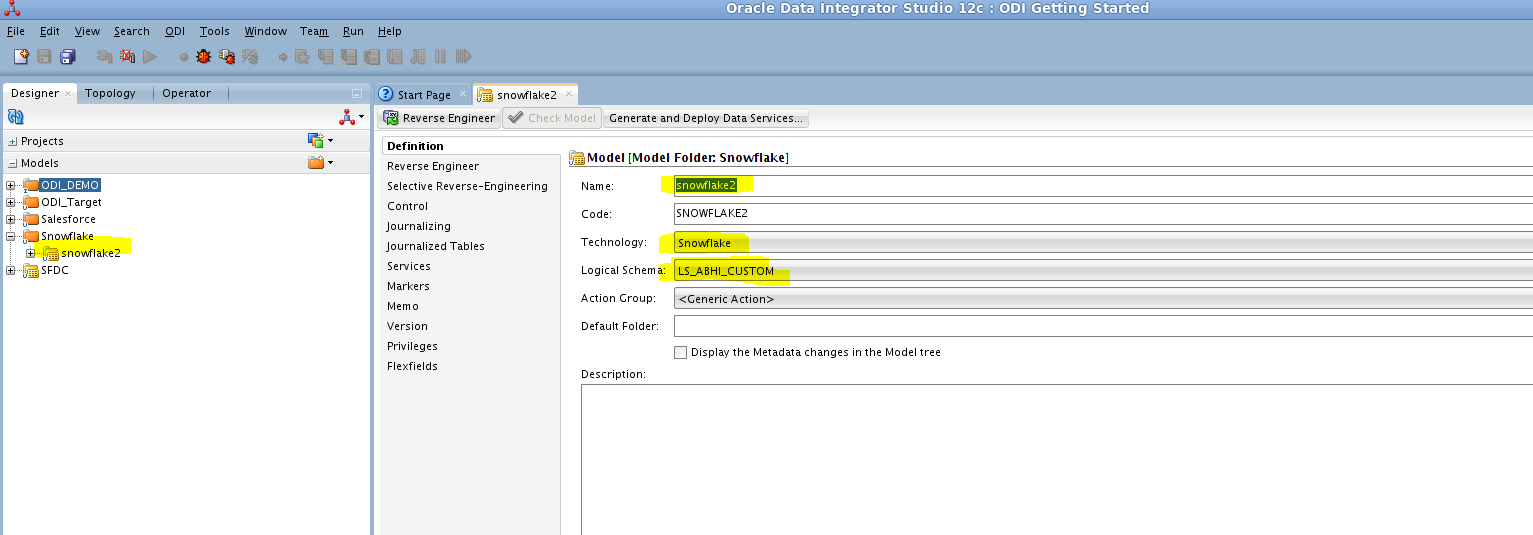
After supplying connectivity details, we are ready to import all artifacts of the source. First we need to create a data model. Navigate to Designer, then further navigate to Models . Right click on Models and we get the screen such as below
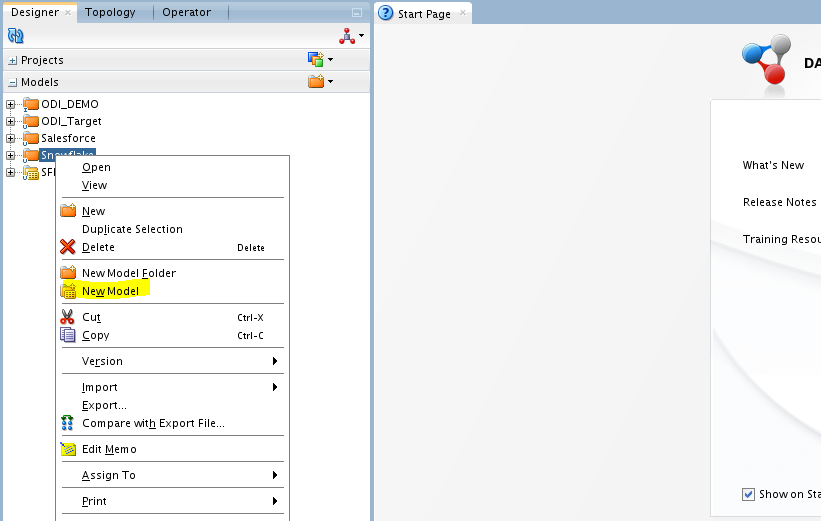
We name our model snowflake2. Most importantly we select the logical schema that we defined in the earlier step. This is the bridge between physical connection details that we provided and the data model artifacts that we are going to retrieve or create.
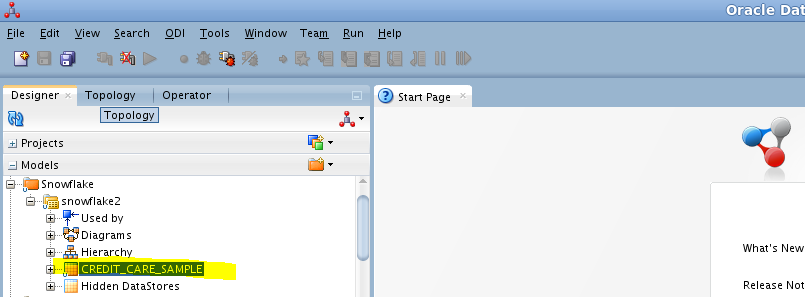
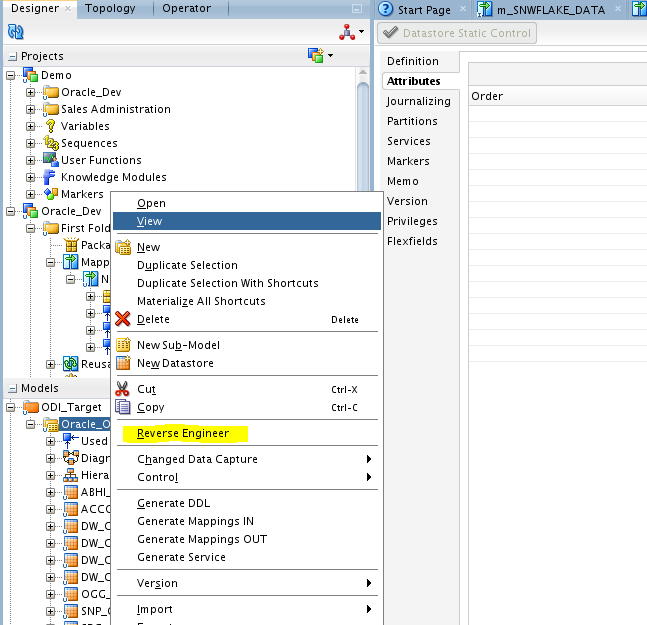
Click on Reverse Engineer to retrieve all snowflake source tables
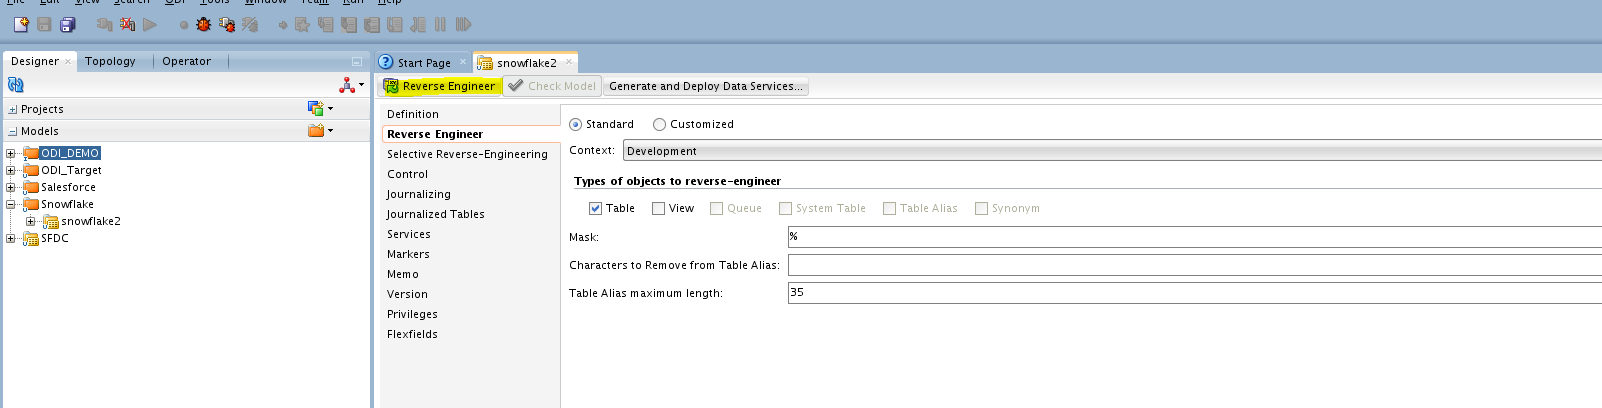
In our case we have created just one table which is retrieved.
To map the above source we need a target table so we create target table in the ADB database
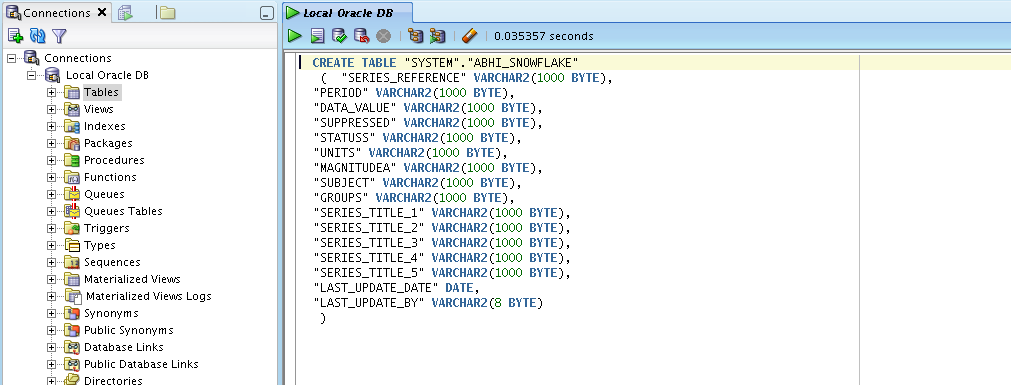
and then reverse engineer the definition in ODI
Create the ELT Mapping for Data load
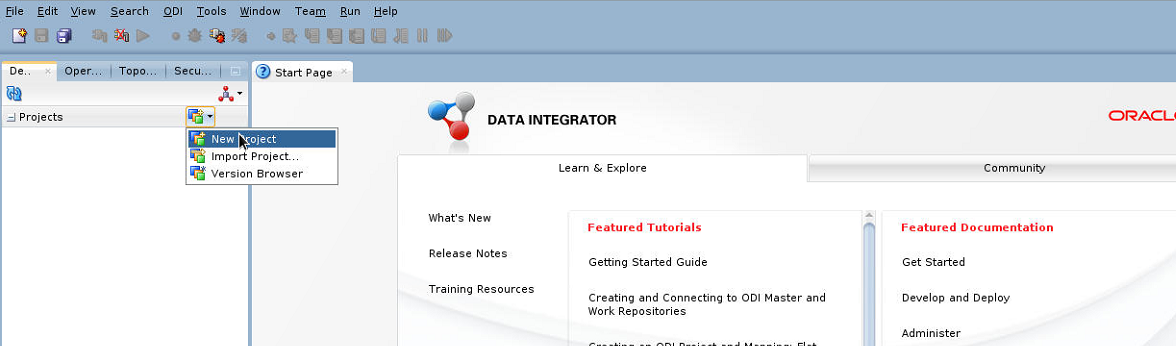
Now define a new Project in ODI, and we named it Oracle_Dev
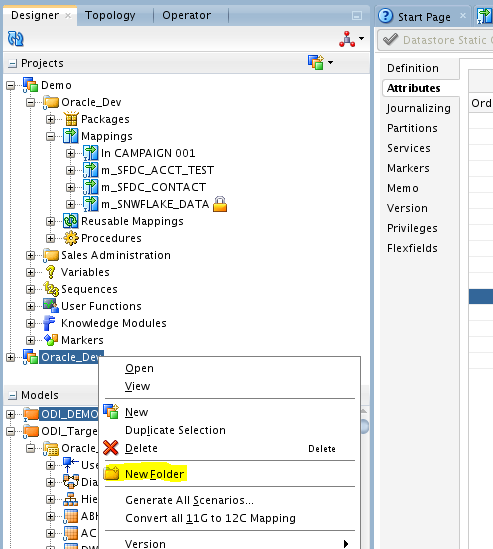
Within the project create a folder Snowflake_Jobs
Project is a collection of folders which in turn are collection of ELT mappings, Procedures, Packages and scenarios
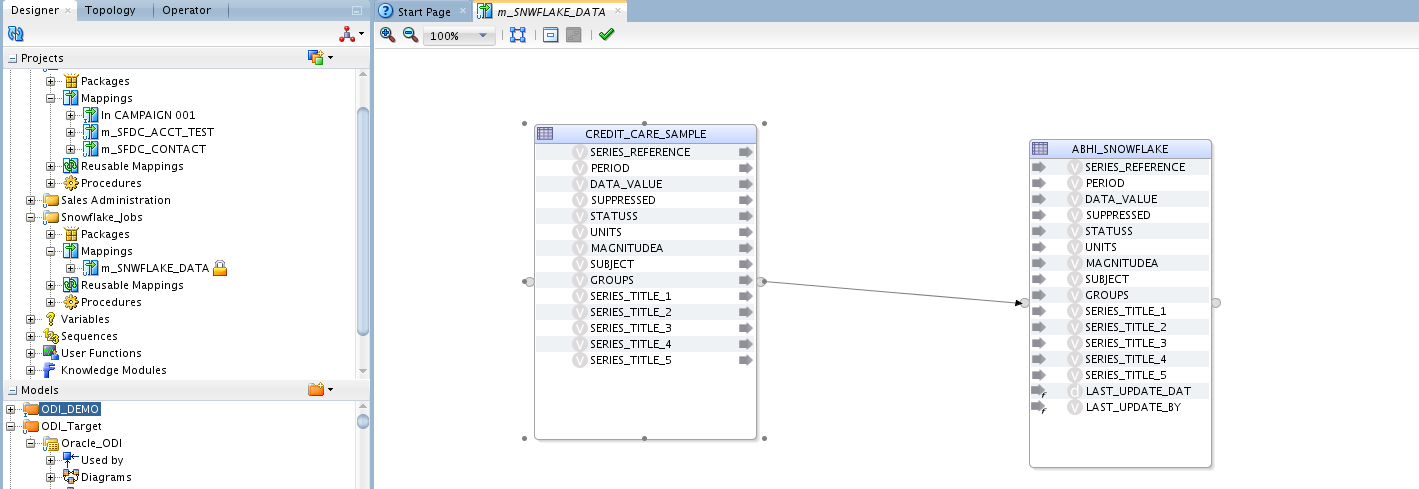
Next we create our basic mapping to load data from snowflake source the ADB target
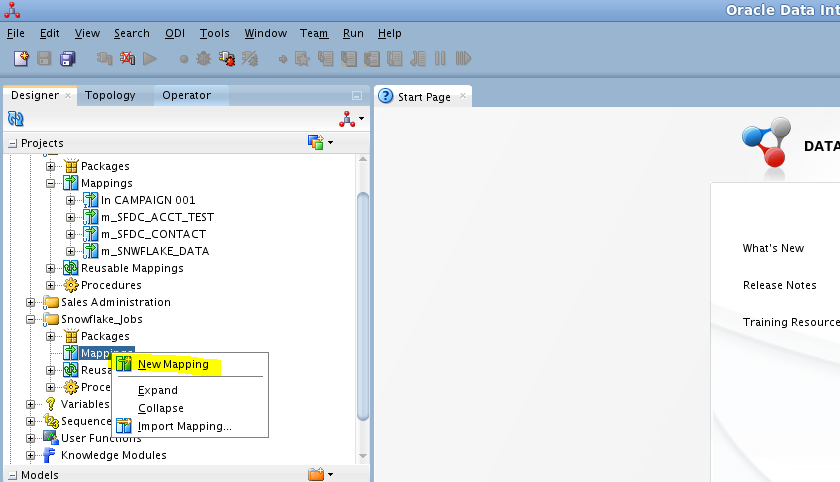
We will call this mapping m_SNWFLAKE_DATA. To keep things simple we will just map all columns from source to Target
Data Load and data validation
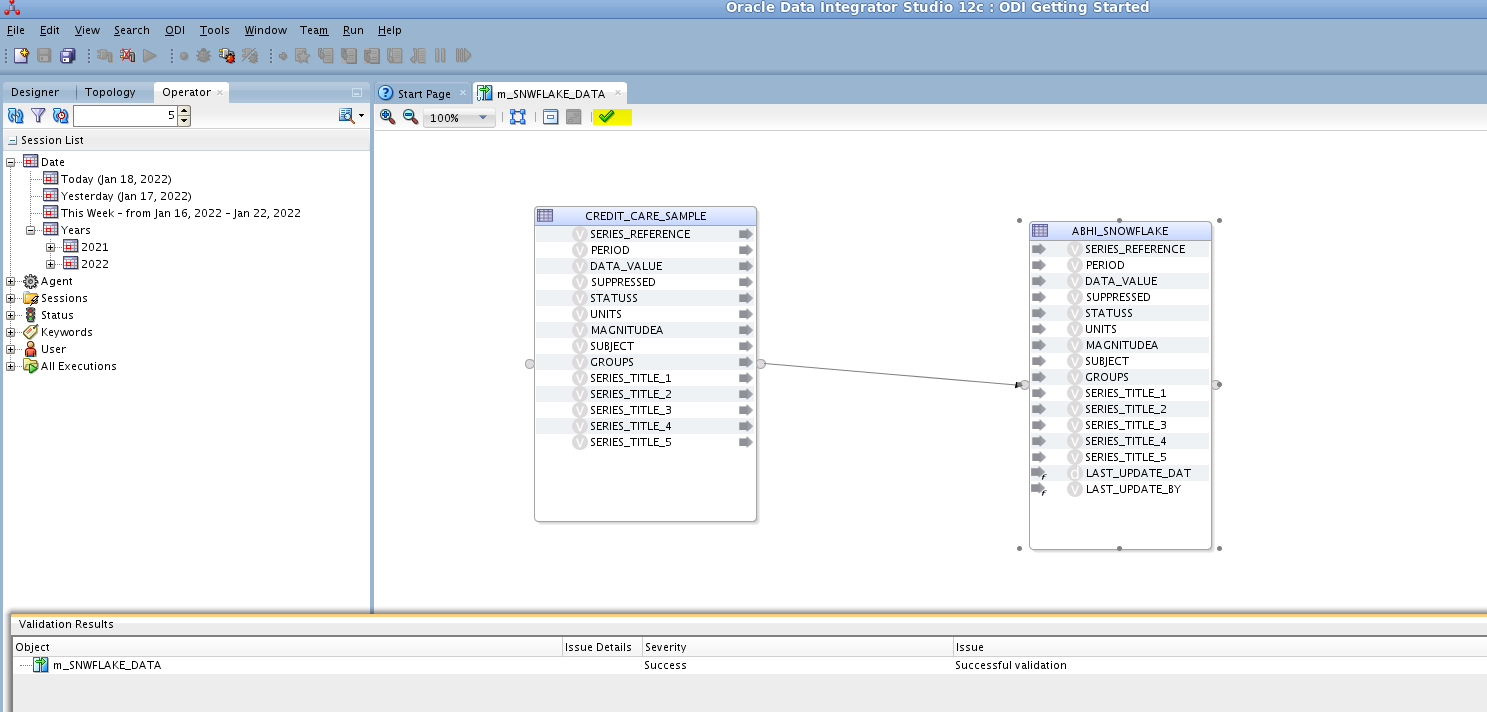
We validate the mapping (highlighted icon) and notice the validation message at the bottom of the screen
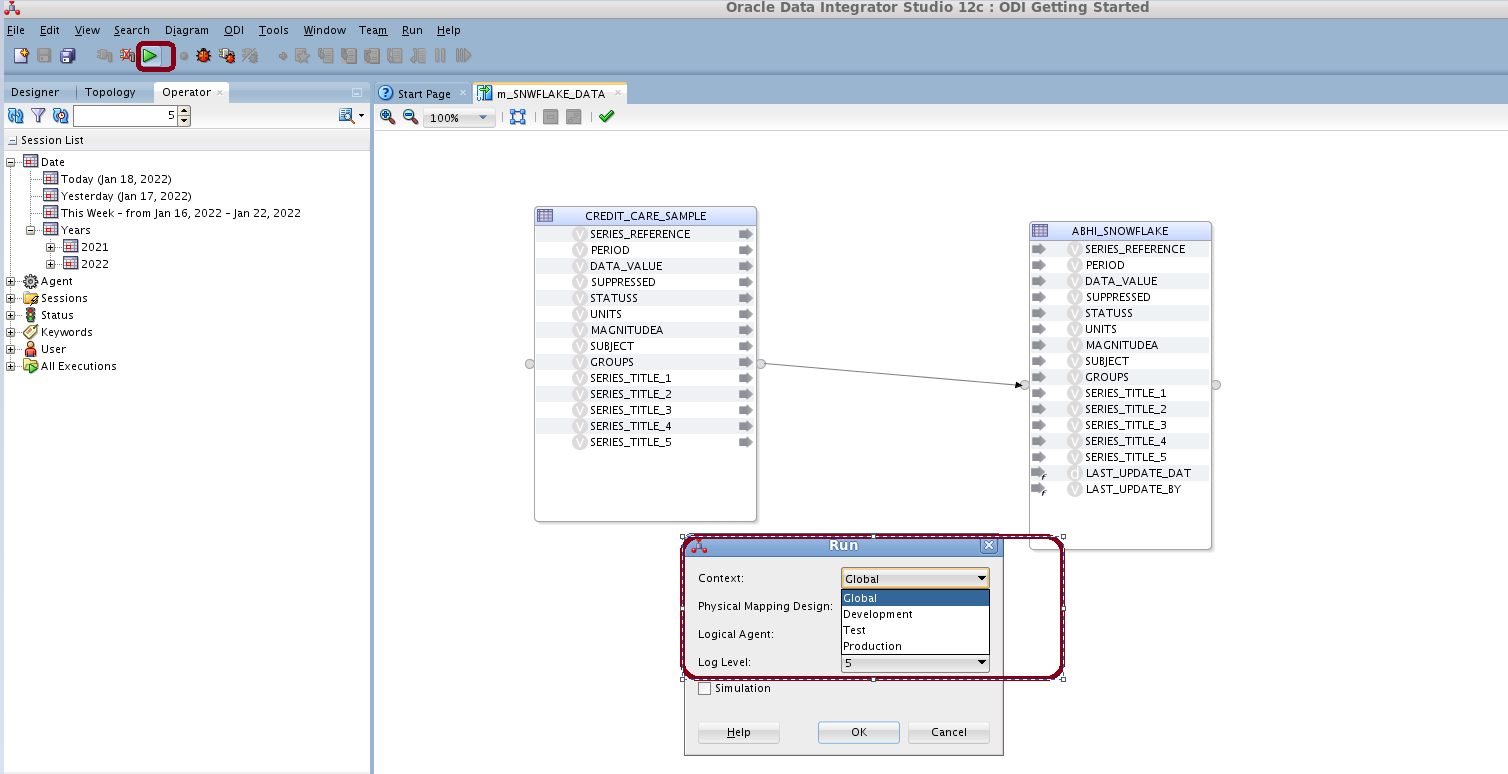
Now click on execute the mapping (highlighted icon), and notice we can change context at run time to Dev, Prod or user defined
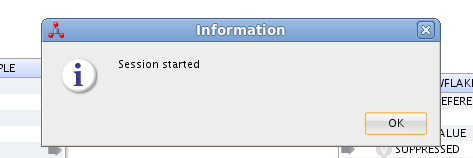
We see a notification that exceute session for our job has started
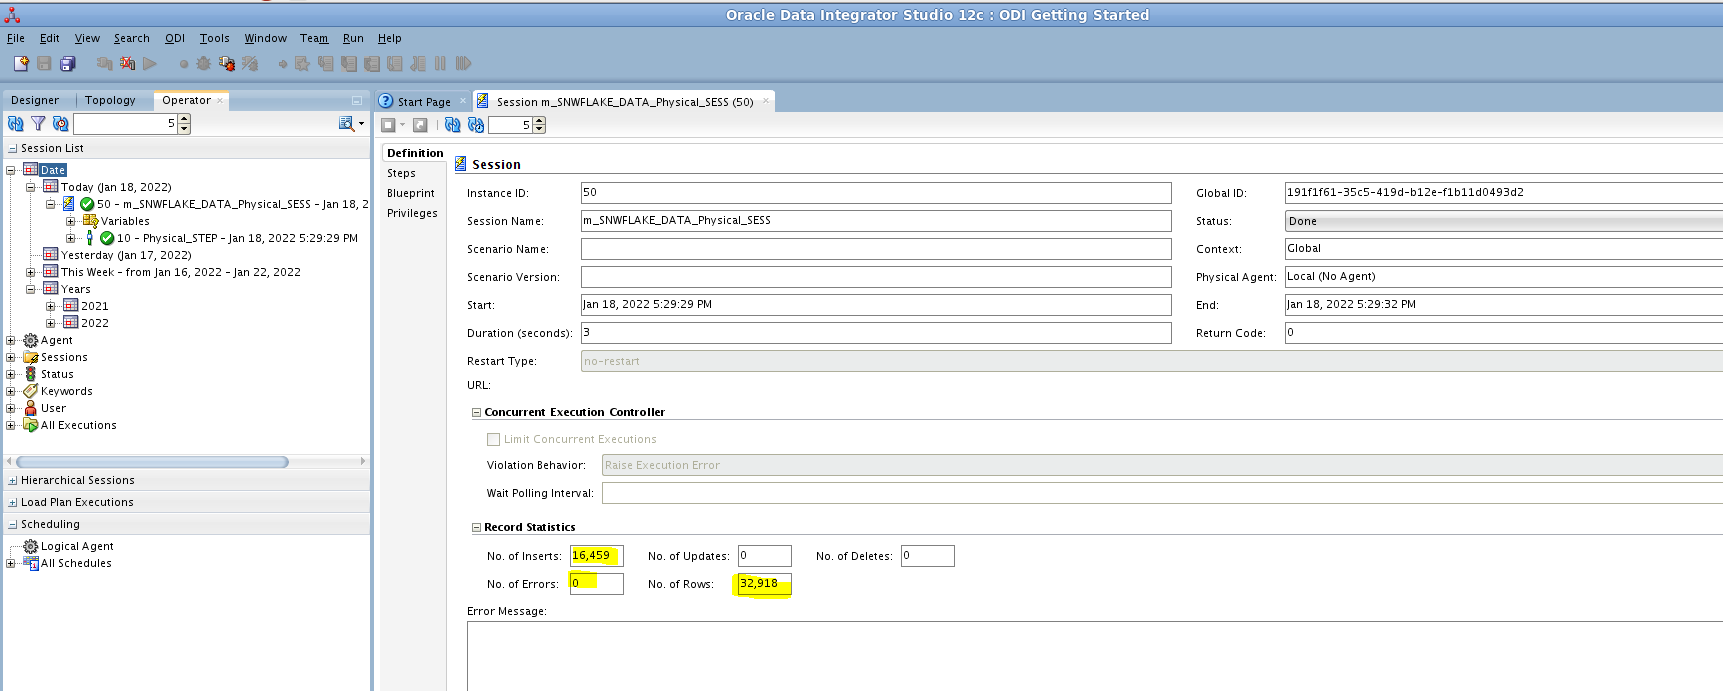
Next navigate to Operator tab and check for exceutions against today. We see there are no errors, and we read 16459 rows and inserted the same number. Hence the total rows processed appears as 32918
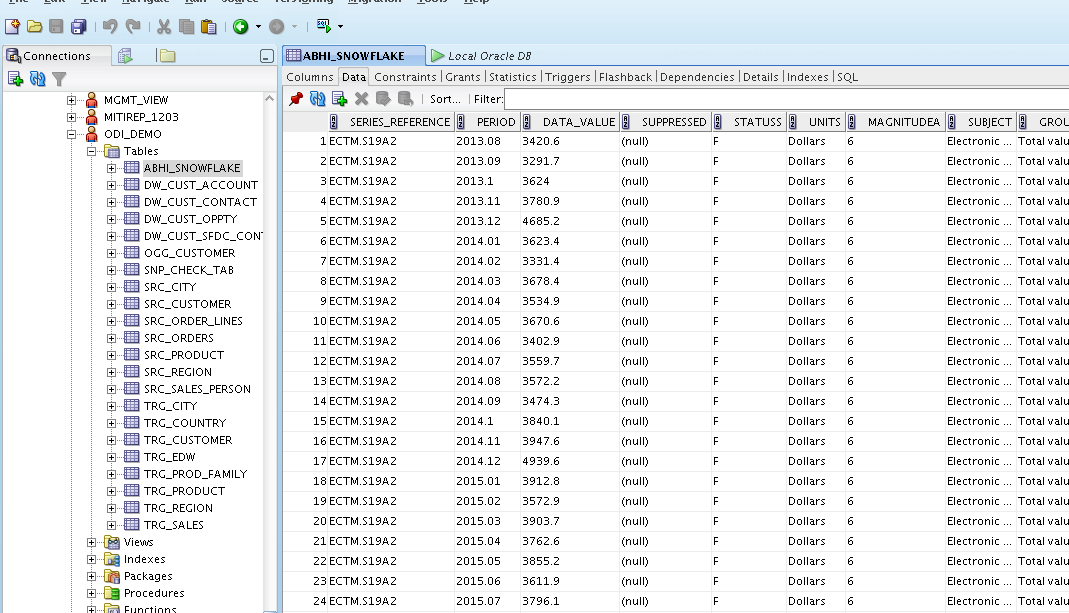
Validate the data loaded in the ADB database target table .
Summary
In this article, we have attempted to showcase how Fusion analytics warehouse can be extended to include Snowflake custom datamodel using OAC dataflows as well as Oracle Data Integerator tool .
References
https://docs.snowflake.com/en/
To learn more about FAW, visit Oracle.com/analytics, and follow us on Twitter@OracleAnalytics.