With inputs from:
Jason Hall, Principal Solutions Architect, Oracle Analytics
Introduction
This article explains how to enable write back in Oracle Fusion AI Data Platform using the Semantic Model Extensions framework and Oracle Autonomous AI Lakehouse (formerly known as Oracle Autonomous Data Warehouse). Using a “Team Building Survey” example, users can submit their activity choice and comments, with only their latest response displayed on the dashboard.
Create database objects
- While creating a custom database schema is highly recommended, we have used OAX_USER in these examples for simplicity. See Create a Custom Database Schema.
- Migrate or Create Database Objects (including the required tables and views) to your Oracle Autonomous AI Lakehouse schema.
- Grant semantic model access. See Grant Semantic Model Access.
- Create the write back table and grant access: Sample Write-Back-Table-Script.txt.
Note: Use a placeholder value (e.g., text or a space) for default write-back columns instead of NULL. NULL values cause write-back operations to fail.
Configure the semantic model
- Configure Oracle Analytics Client Tools. See Configure Oracle Analytics Client Tools – Oracle BI Administration Tool.
- Export the semantic model template or download the imported semantic model if you already applied external application customizations. See Export the Semantic Model Template or Download the Imported Semantic Model.
- Use the Oracle Analytics Client Tool to open the external application semantic model.
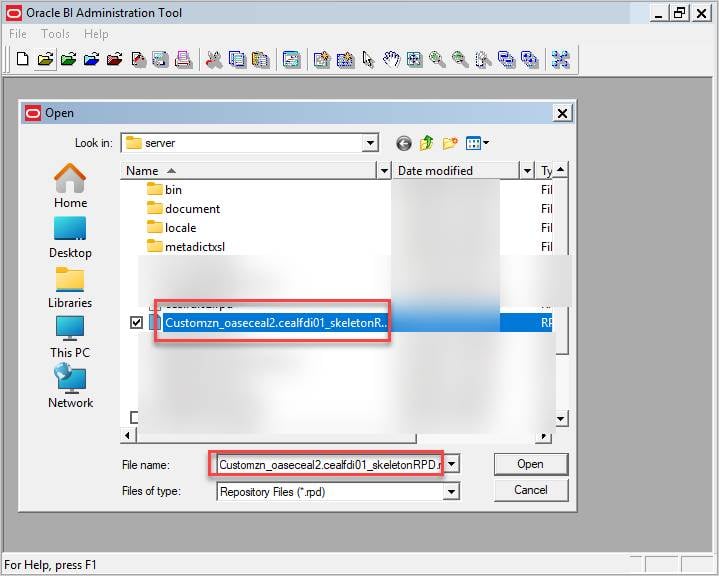
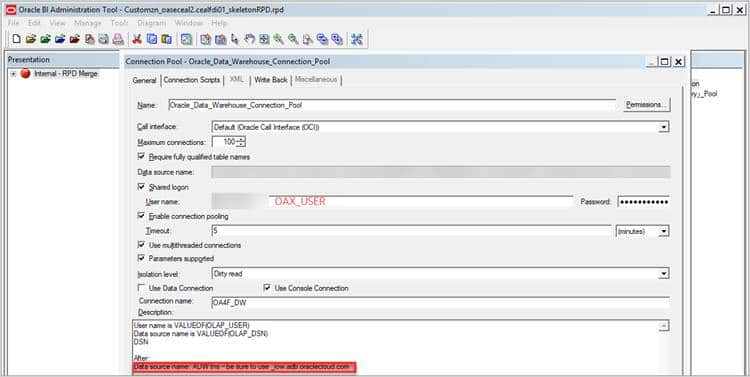
- Temporarily set the connection pool to point to the Oracle Fusion AI Data Platform’s Oracle Autonomous AI Lakehouse. Ensure the Data Source Name uses _low.adb.oraclecloud.com. See Bring in Custom Database Objects.
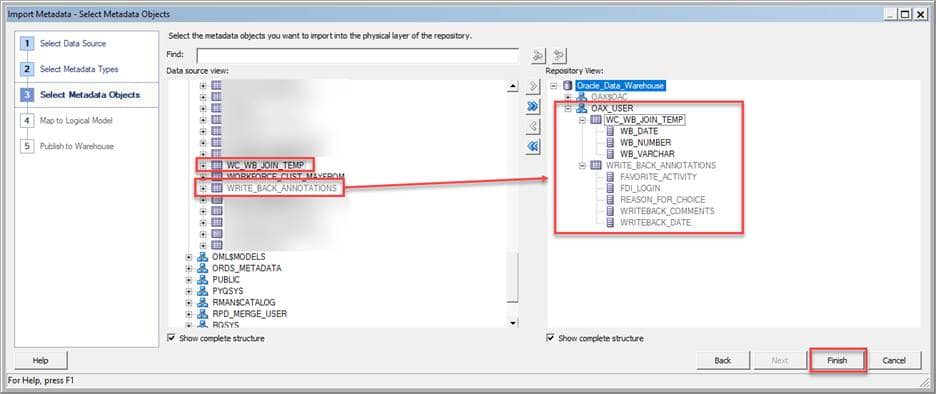
- Import the WRITE_BACK_ANNOTATIONS table into the physical layer. Create and import a dummy table WB_JOIN_TEMP, if required.
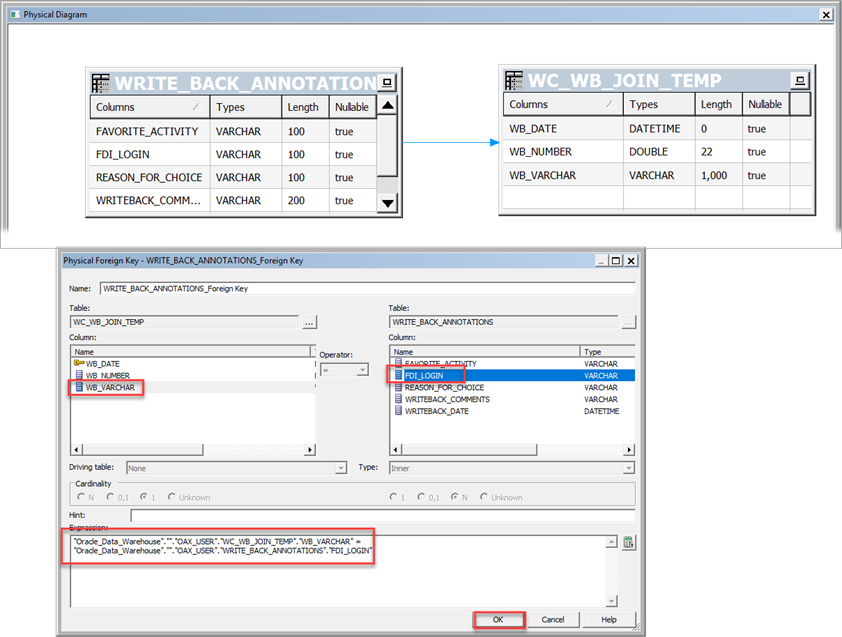
- Join to the dummy table in both the physical layer and Business Model and Mapping.
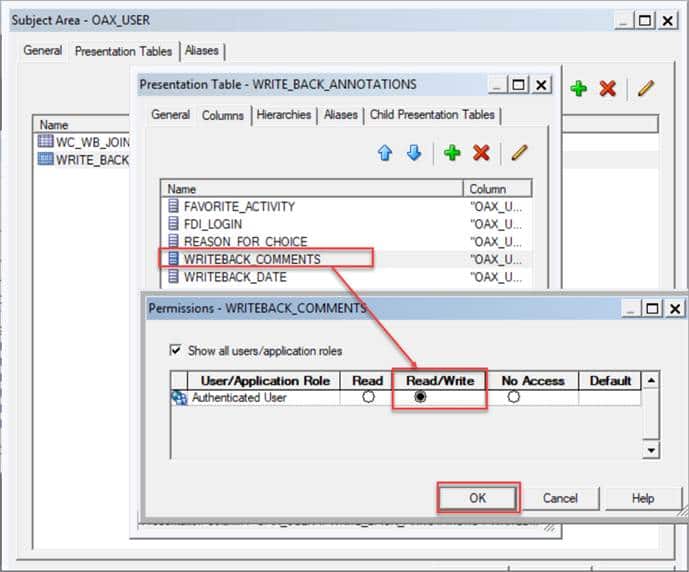
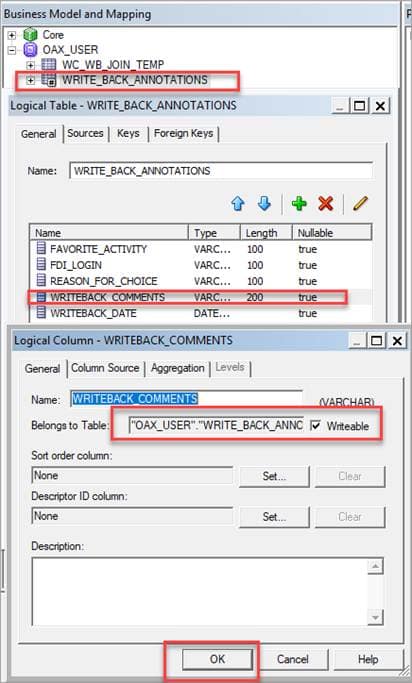
- In the presentation layer, set WRITEBACK_COMMENTS to Read/Write and “writable” in the business model.
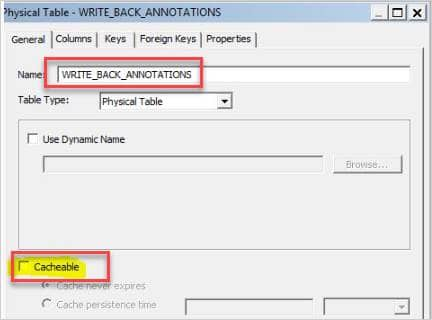
- Disable caching for the table.
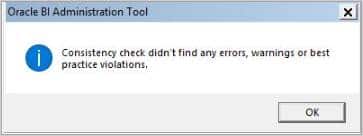
- Validate your model using the global consistency check.
Replace the application or import the semantic model
- Refer to Replace the Application and Import the Semantic Model.
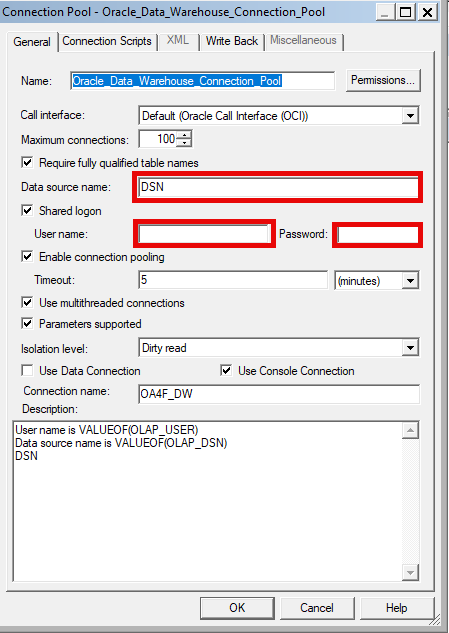
| Ensure you revert to prebuilt setup before uploading and don’t add new connections to the external semantic model. In the Connection Pools, the Data Source name must be DSN, and User name and Password must be blank. |
- Review Merge External Application for complete steps on merging external applications.
| Import a new semantic model version for merging only if it’s missing changes from the current version; importing multiple versions may cause delays due to extra validation and merging. If your updated semantic model includes all prior changes, replace the model—by reusing the existing application name or replacing the application—to avoid creating unnecessary versions. |
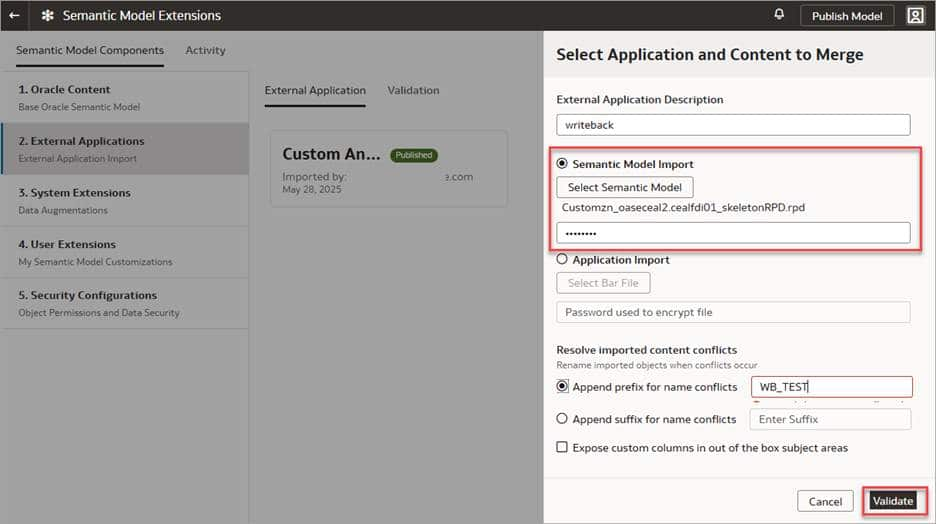
- Navigate to the folder that contains the external application with the newly imported write back table.
- Add a prefix and click Validate.
Oracle recommends you use the same external application name in the description field to replace the application (if it includes all previous changes).
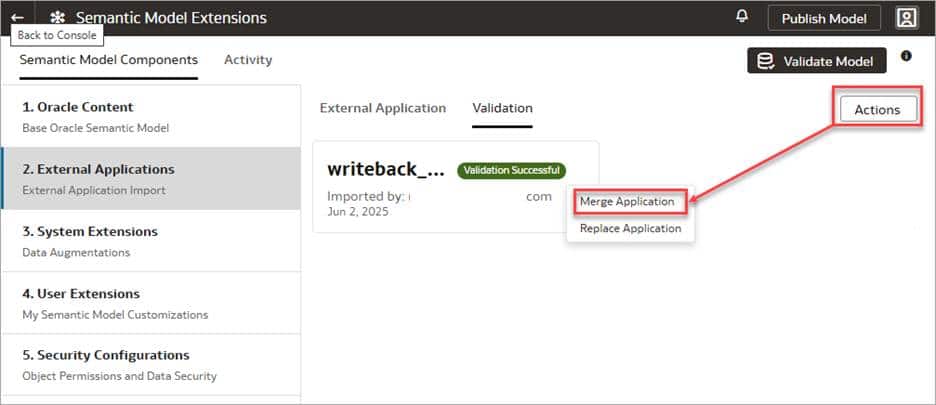
- Merge the external application.
Build the analysis
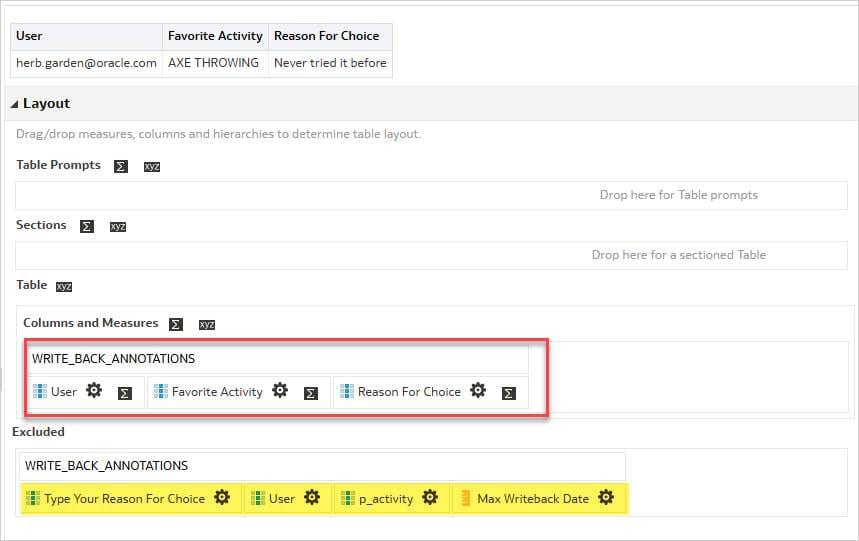
- Add all columns (and rename, if needed) from WRITE_BACK_ANNOTATIONS:
- User: USER()
- Selected activity as a Dashboard Prompt Presentation Variable: ‘@{p_activities}’
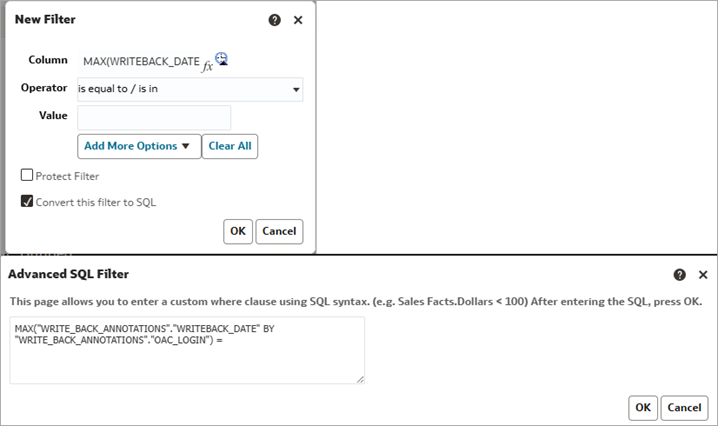
- Most Recent Entry Date per User: MAX(“WRITE_BACK_ANNOTATIONS”.”WRITEBACK_DATE” BY “WRITE_BACK_ANNOTATIONS”.”OAC_LOGIN”)

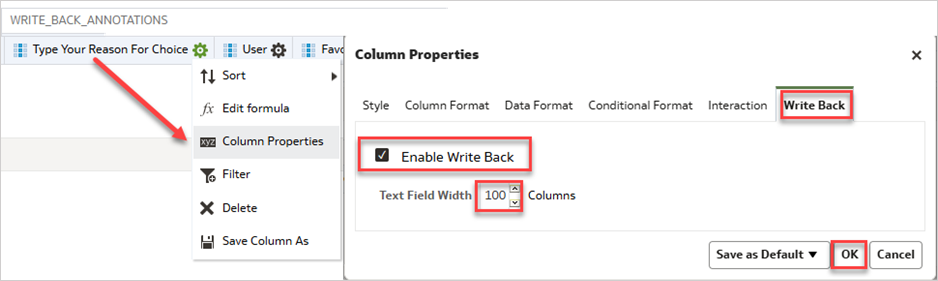
- Enable write back on WRITEBACK_COMMENTS column in Column Properties (Write Back tab).
- Filter results to display only the latest entry per user: MAX(“WRITE_BACK_ANNOTATIONS”.”WRITEBACK_DATE” BY WRITE_BACK_ANNOTATIONS”.”OAC_LOGIN”) = “WRITE_BACK_ANNOTATIONS”.”WRITEBACK_DATE”.
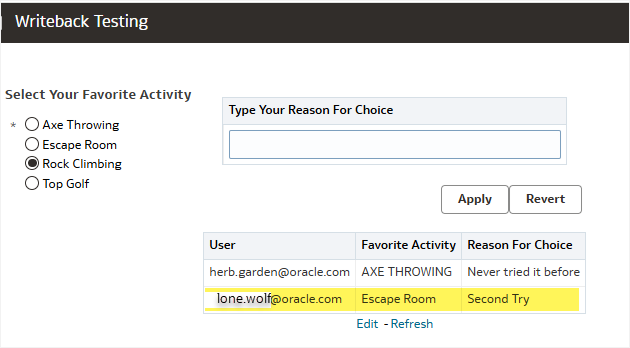
- Create two table views on the Results page:
- Table 1: For user feedback and write back; add USER(), p_activity, and WRITEBACK_COMMENTS (hide USER() and p_activity; exclude other columns).
- Table 2: To display inserted or updated results.

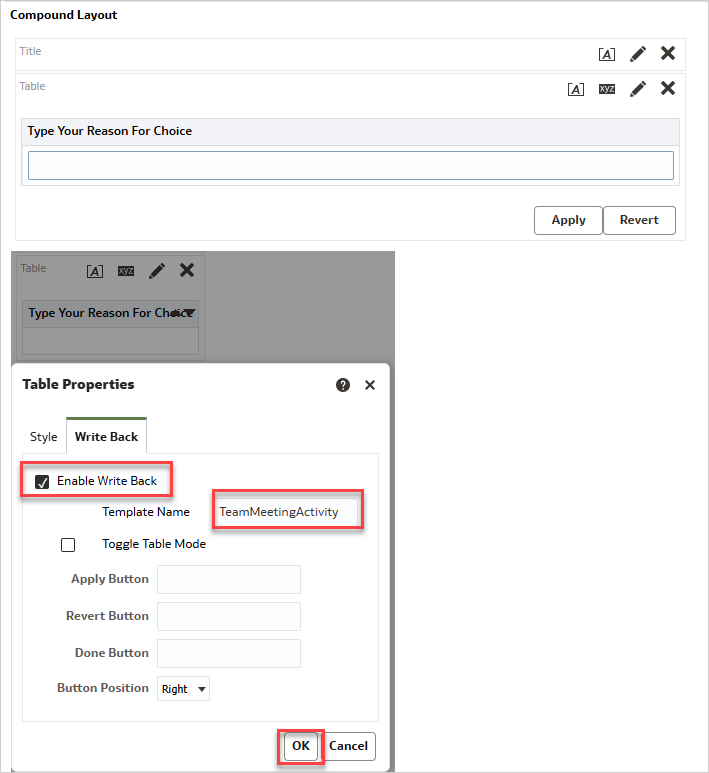
- Enable Write back on Table 1: In View Properties (from the Results tab), go to the Write Back tab, check Enable Write Back, enter a template name, and uncheck Toggle Table Mode.
- Table 2: Add OAC_LOGIN, FAVORITE_ACTIVITY, and REASON_FOR_CHOICE; hide USER(), p_activity, and WRITEBACK_COMMENTS; exclude all other columns.
- Save the Analysis.
Create a dashboard prompt
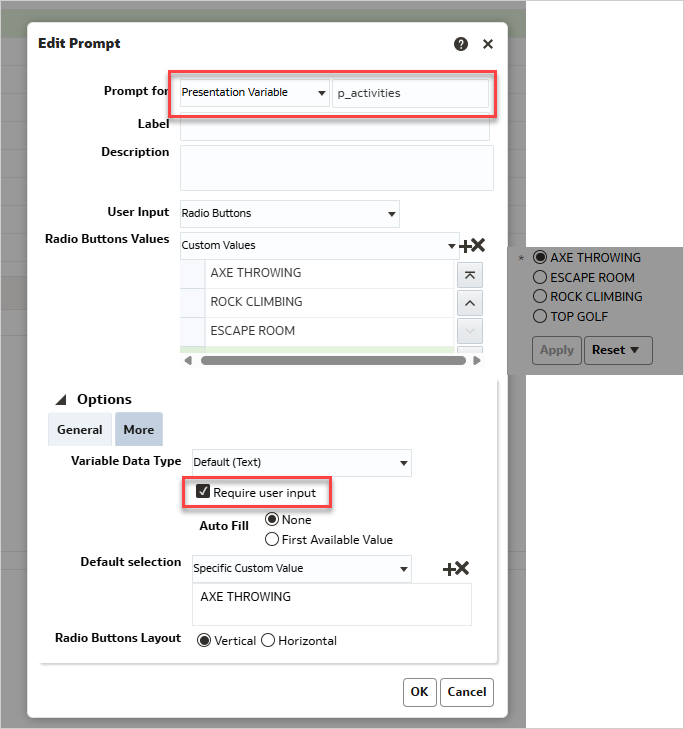
- Create a dashboard variable prompt named p_activities (hide label) using radio buttons with custom values shown below; the selected value is stored in p_activities for use in analysis and write back.
- AXE THROWING
- ESCAPE ROOM
- ROCK CLIMBING
- TOP GOLF
Build a dashboard
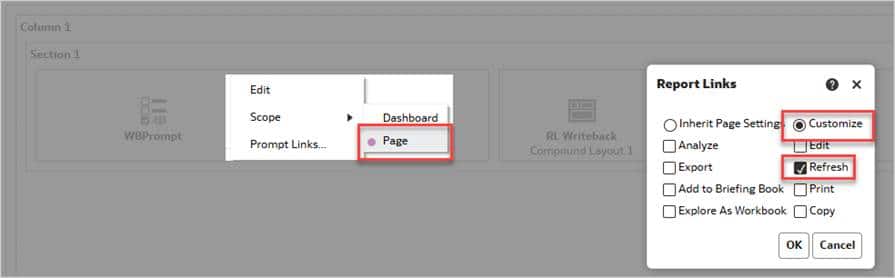
- Add the dashboard prompt and analysis to the dashboard.
- Set Prompt Scope to Page and enable the Refresh report link to avoid caching issues.
Build and test INSERT/UPDATE statements
- In this example, each new submission inserts a row; only the most recent entry per user appears on the dashboard. Test the following statements before adding them to your write back template: INSERT_UPDATE Write-Back TemplateDownload
Update the write back template
- Update the WebMessage name to match the name used in the Analysis Table Properties Write Back tab (e.g., TeamMeetingActivity).
- Set the writeBack connectionPool to the appropriate write back connection pool defined in the physical layer of the RPD.
- Replace the and statements with the tested Insert and Update SQL statements.
- In the template, use variable columnIDs (not hard-coded strings); copy these from the Advanced tab in the Analysis (Analysis XML).
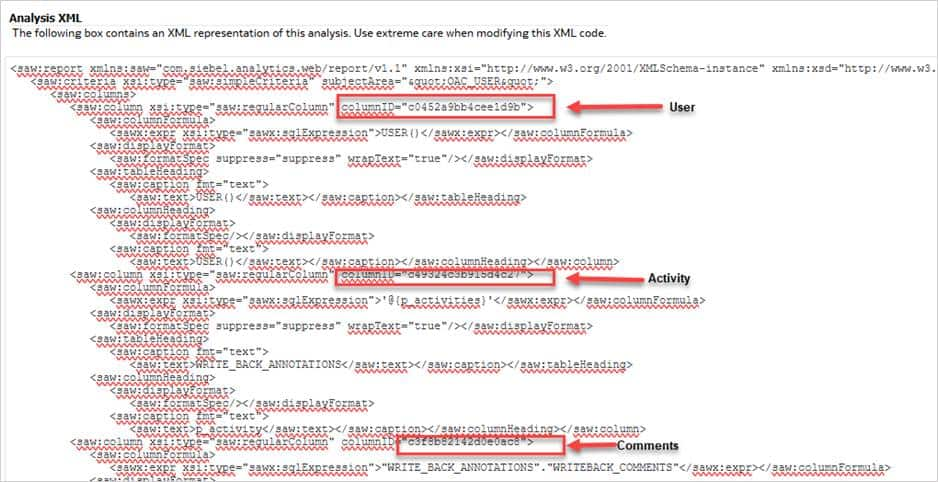
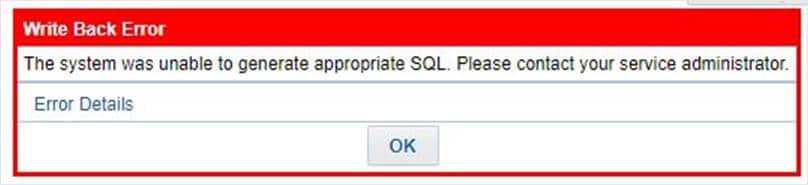
If you receive the following error, it’s most likely related to needing to reference the columns by columnID.
Write Back Error – The system was unable to generate appropriate SQL. Please contact your service administrator.
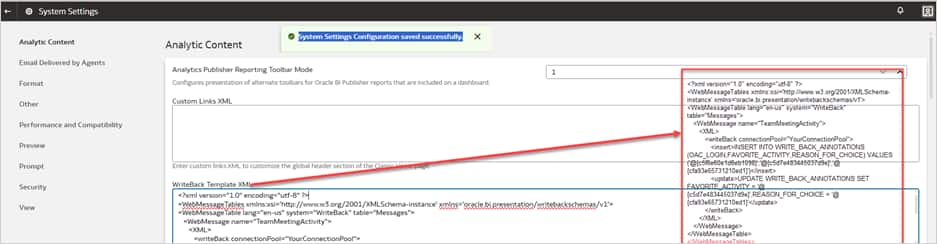
- Navigate to Service Administration, System Settings, and then Analytic Content to copy the write back template. Here’s a Sample Write Back Template.
Test the write back dashboard
- Add a new record and update an existing one.
- Confirm that results refresh automatically after clicking Apply, without needing to manually refresh the page.
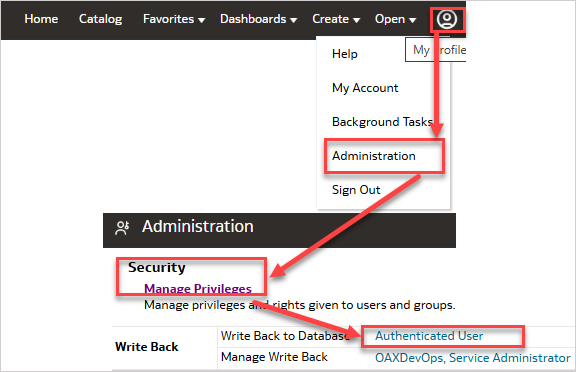
Set write back permissions
Navigate to Classic Home, Manage Privileges, and then Write Back. Write back access can be controlled though granting or removing roles and users.
Summary
This article explained how to enable the write back feature using the external applications feature in Oracle Fusion AI Data Platform’s semantic model framework.
References
For additional information, see the following documentation and blog articles:
- Migrate to the Sandbox Framework for Semantic Model Extensions
- About Semantic Model Customization to learn more about extending the semantic layer using the Sandbox framework
- Use the Enhanced Semantic Model Extension Capabilities
- About Merging External Applications
- Working with the Developer Client Tool for Oracle Analytics Cloud (OAC) with ADW in a Proxy-enabled Network
- Oracle Analytics Cloud (OAC) – Using Write back in Analyses and Dashboards
- Deploying Write-Back in Oracle Analytics Cloud
Now that you’ve read this article, try it yourself and let us know your results in the Oracle Analytics Community, where you can also ask questions and post ideas.
Contribution
Many thanks to Padma Rao Padala and Suzanne Gill for reviewing and all the useful feedback!