Introduction
By enabling Oracle Cloud Infrastructure (OCI) notifications, you can receive alerts for data load completions, estimated load completion events, and prioritized data refreshes. This enables you to effectively monitor and manage custom ETL dependencies with real-time notifications.
You can enable notifications in two ways, depending on your needs: send notifications to email, or push pipeline statistics to OCI Object Storage buckets. You may choose either method, or use both, to best suit your workflow.
1. Set up and receive event notifications
2. Enable functions to push pipeline statistics notifications to OCI Object Storage buckets
Set up and receive event notifications
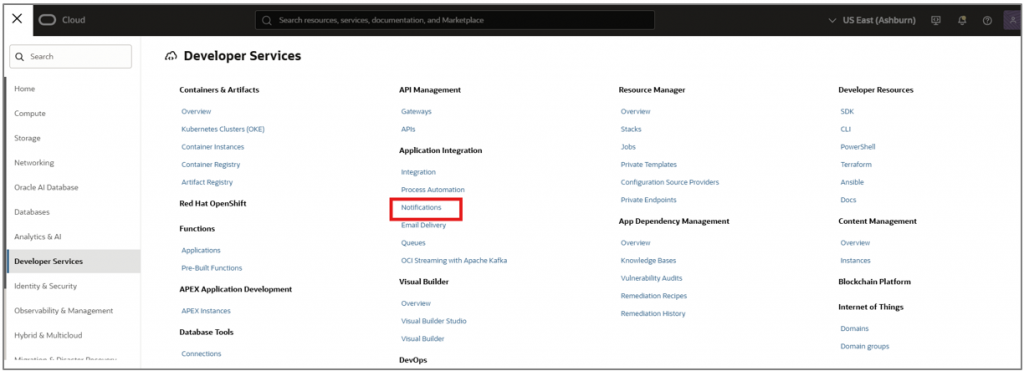
- Navigate to Developer services and select Notifications.
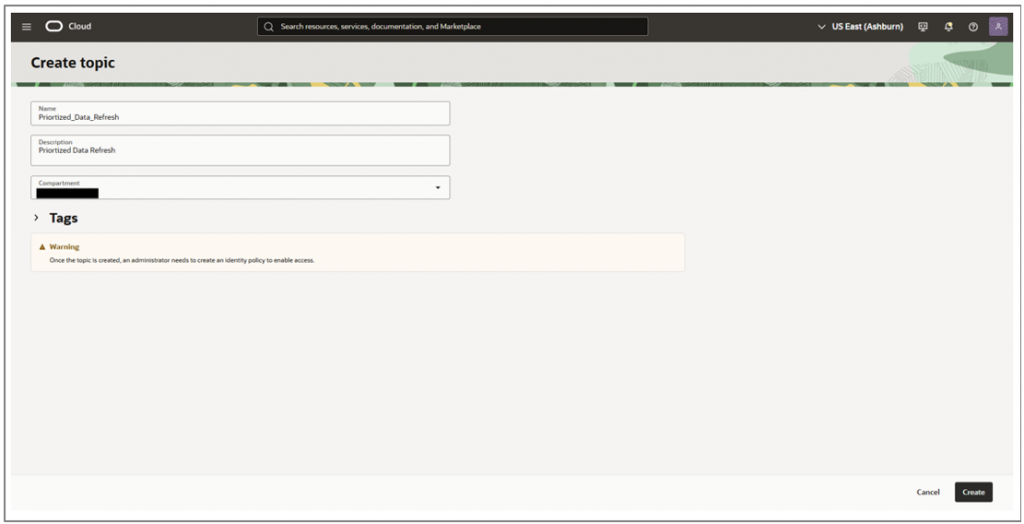
- Click Create Topic and name it, Prioritized_Data_Refresh. Add a description, select your compartment (avoid creating it in the root or tenancy compartment), and click Create.
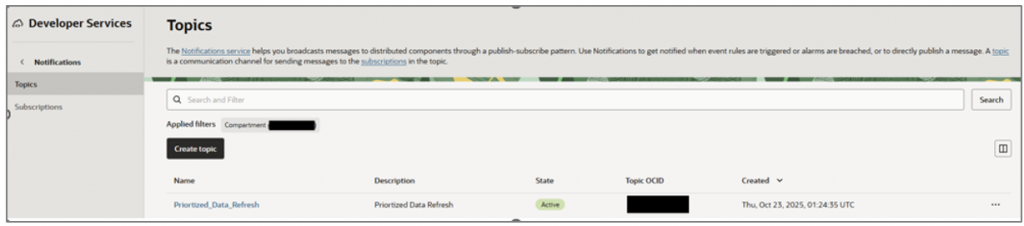
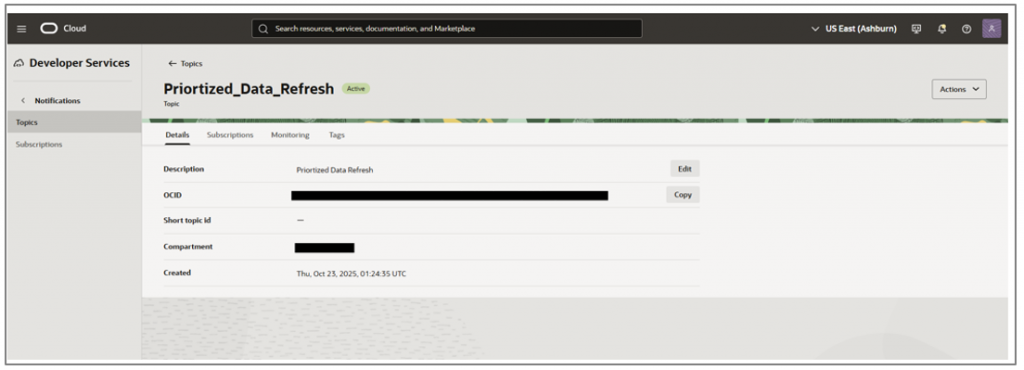
- Select your topic.
- Navigate to Subscriptions.
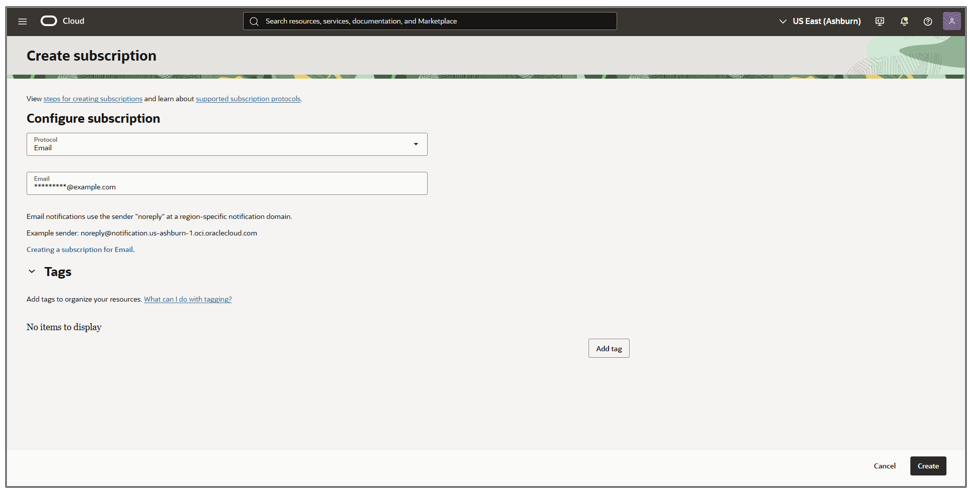
- Click Create Subscription.

- Enter your email address and click Create.
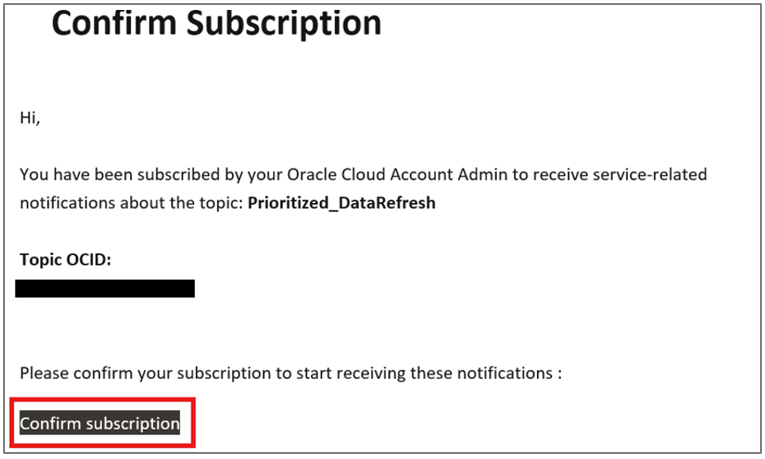
- You will receive an email to confirm your subscription. Click Confirm subscription.
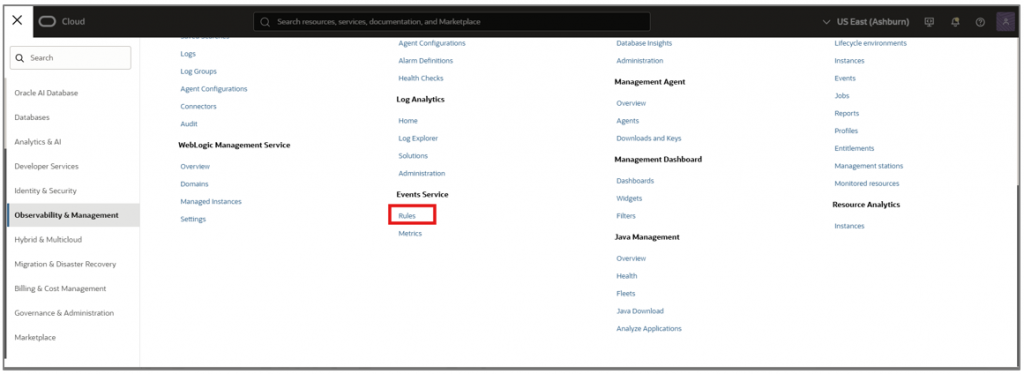
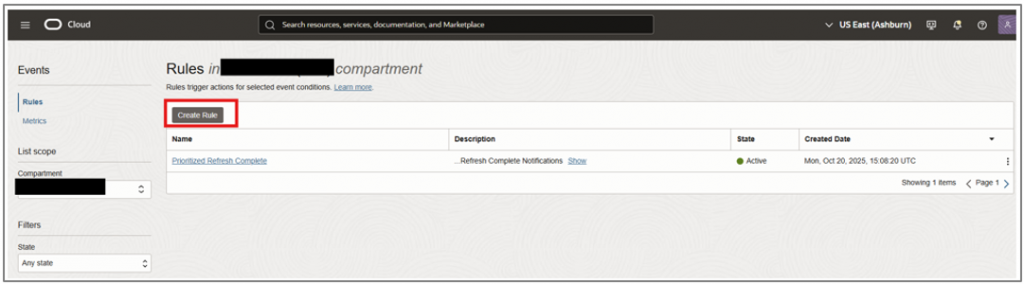
- Navigate to Observability & Management in OCI and select Rules under Events Service.
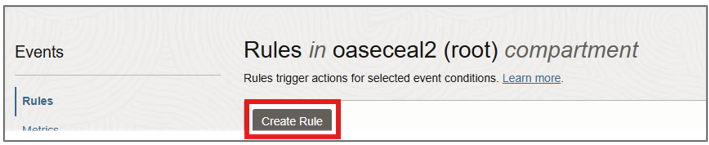
- Click Create Rule.
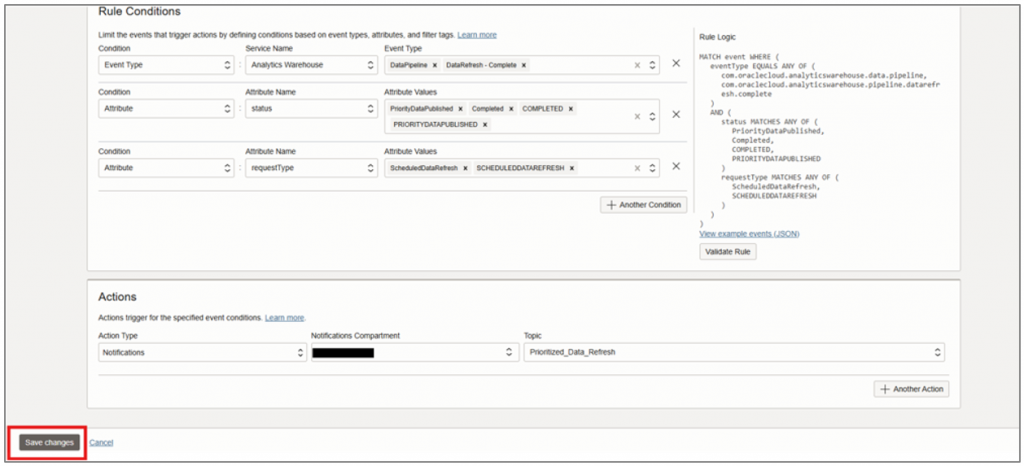
- Provide the required details and configure the rule conditions and attributes to receive notifications upon completion of prioritized data refreshes.
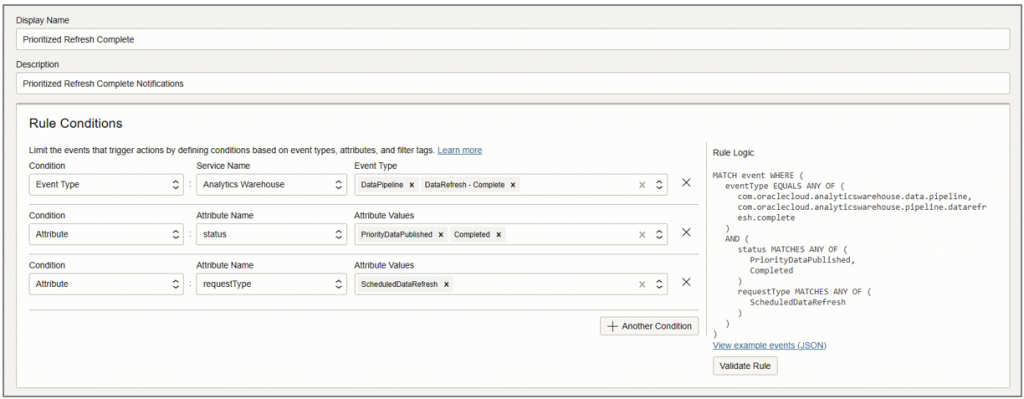
- Set your topic for notifications under Actions.

- Click Save Changes.
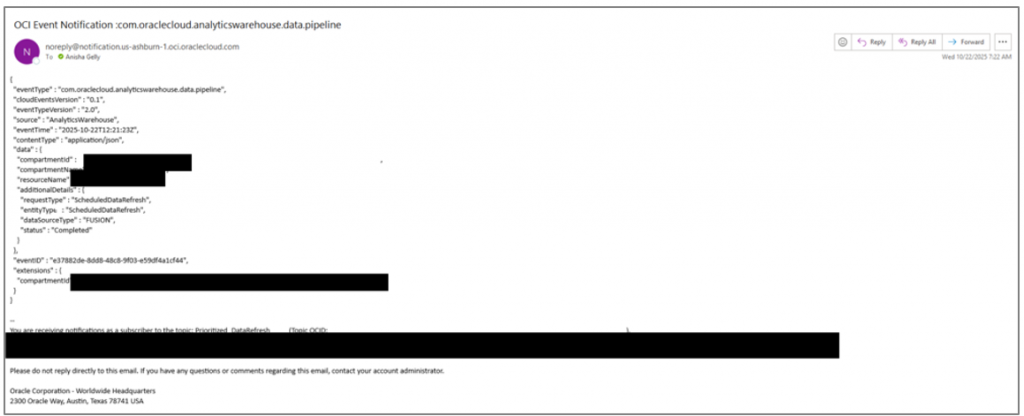
The rule is now ready to use.
You will now receive notifications upon completion of prioritized refreshes.
Enable functions to push pipeline statistics notifications to OCI Object Storage buckets
NOTE: Create the artifacts described in this section within the same child compartment. Don’t create them in the root compartment, as Dynamic Groups and Policies don’t take effect there.
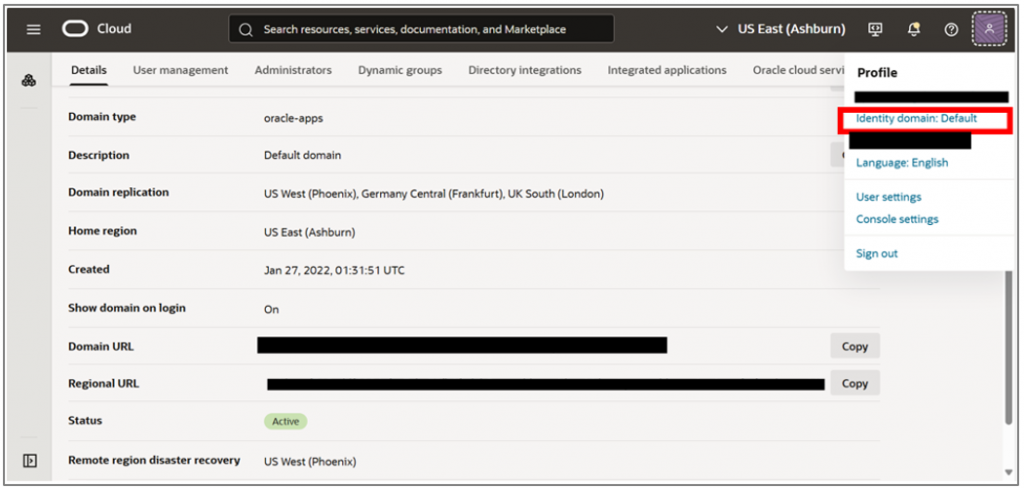
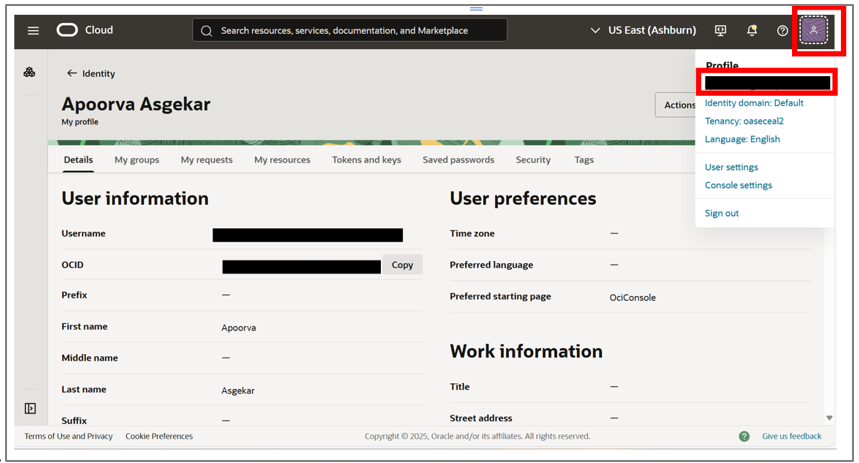
- Navigate to User Profile and select the Identity Domain.
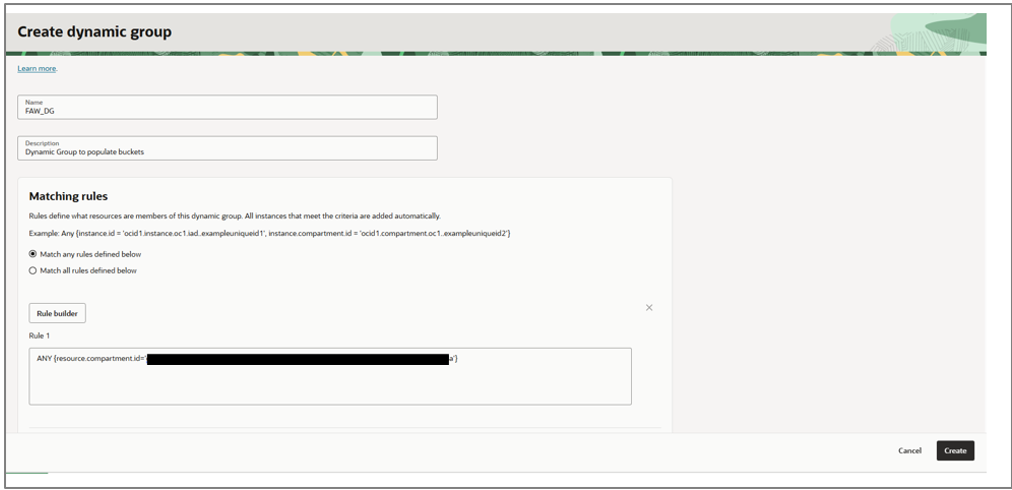
- Under Dynamic groups, click Create dynamic group.

- Enter the group name as FAW_DG and provide a description.
- Enter the matching rule as:
ANY {resource.compartment.id='<OCID of the compartment where the bucket and application are located>'}
- Click Create.
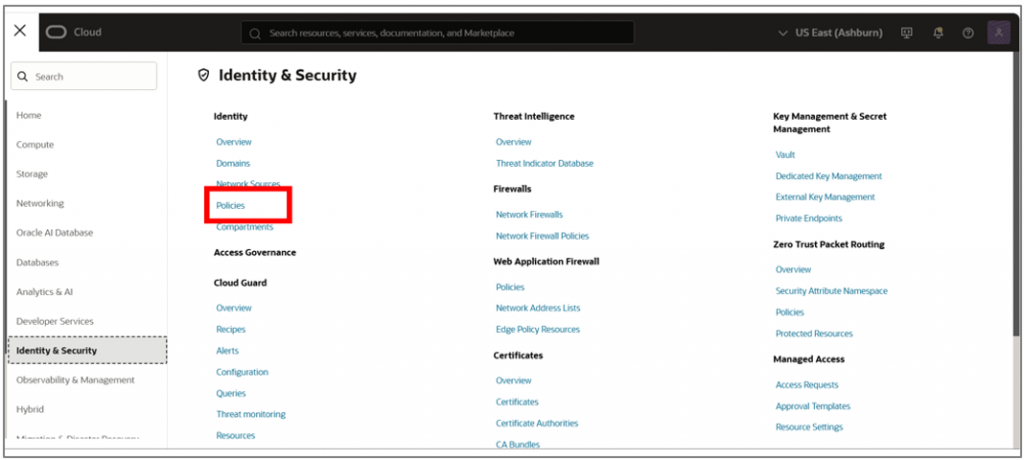
- Navigate to Identity & Security and select Policies.
- Click Create Policy and enter the name as Function_Deploy_Invoke along with a description.
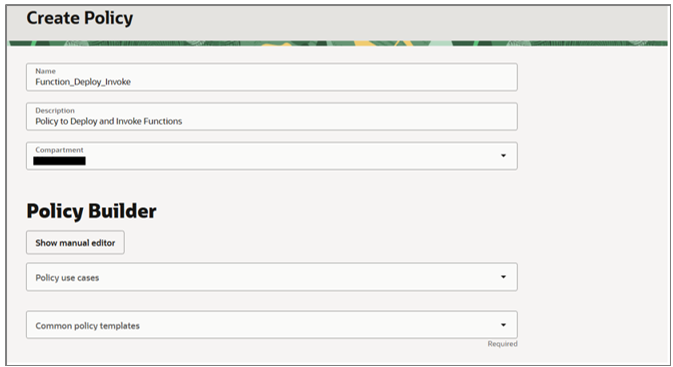
- Click Show Manual Editor and enter the policies as provided.
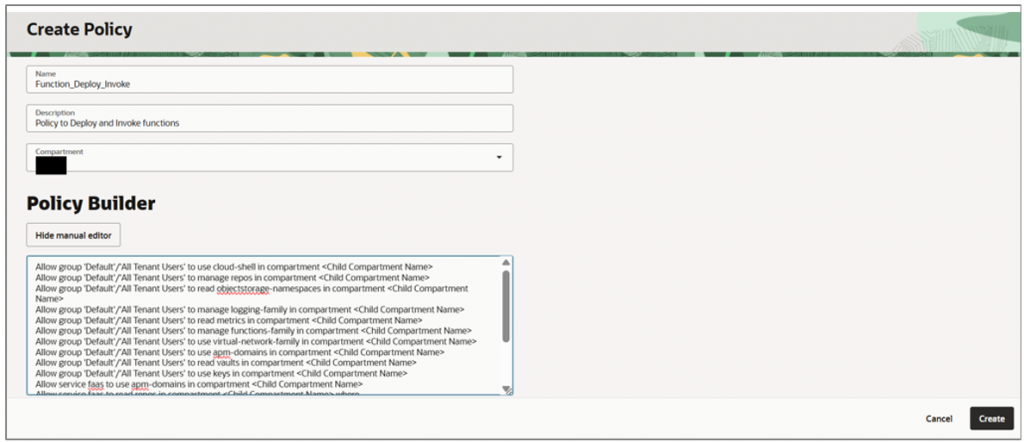
- Enter the listed policies:
Allow group 'Default'/'All Tenant Users' to use cloud-shell in compartment <Child Compartment Name>
Allow group 'Default'/'All Tenant Users' to manage repos in compartment <Child Compartment Name>
Allow group 'Default'/'All Tenant Users' to read objectstorage-namespaces in compartment <Child Compartment Name>
Allow group 'Default'/'All Tenant Users' to manage logging-family in compartment <Child Compartment Name>
Allow group 'Default'/'All Tenant Users' to read metrics in compartment <Child Compartment Name>
Allow group 'Default'/'All Tenant Users' to manage functions-family in compartment <Child Compartment Name>
Allow group 'Default'/'All Tenant Users' to use virtual-network-family in compartment <Child Compartment Name>
Allow group 'Default'/'All Tenant Users' to use apm-domains in compartment <Child Compartment Name>
Allow group 'Default'/'All Tenant Users' to read vaults in compartment <Child Compartment Name>
Allow group 'Default'/'All Tenant Users' to use keys in compartment <Child Compartment Name>
Allow service faas to use apm-domains in compartment <Child Compartment Name>
Allow service faas to read repos in compartment <Child Compartment Name> where request.operation='ListContainerImageSignatures'
Allow service faas to {KEY_READ} in compartment <Child Compartment Name> where request.operation='GetKeyVersion'
Allow service faas to {KEY_VERIFY} in compartment <Child Compartment Name> where request.operation='Verify'
Allow dynamic-group FAW_DG to manage object-family in compartment <Child Compartment Name>
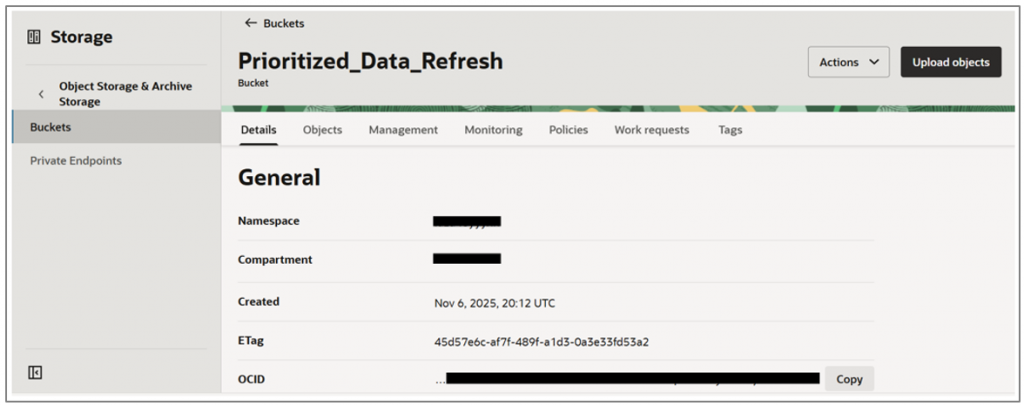
- Click Create. Navigate to Storage and select Buckets.

- Click Create Bucket, enter the bucket name as Prioritized_Data_Refresh, and Enable object versioning and Emit object events.
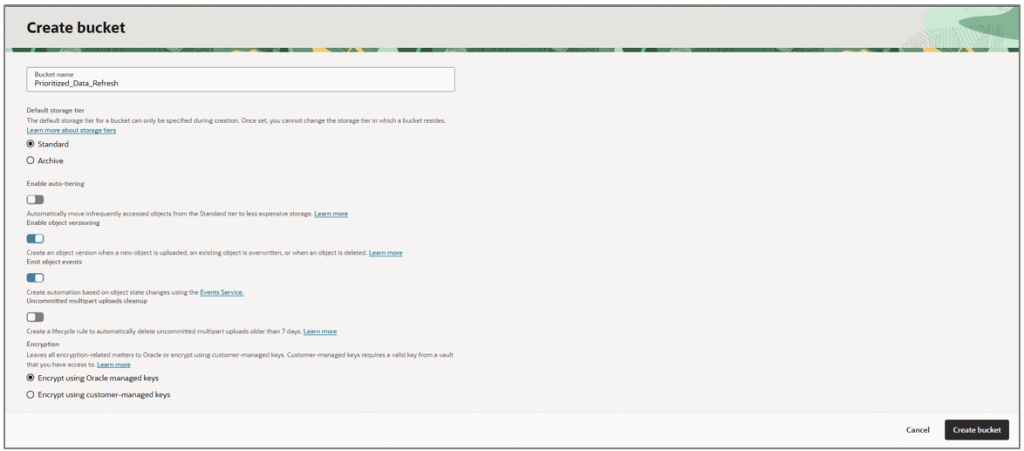
- Click Create bucket.
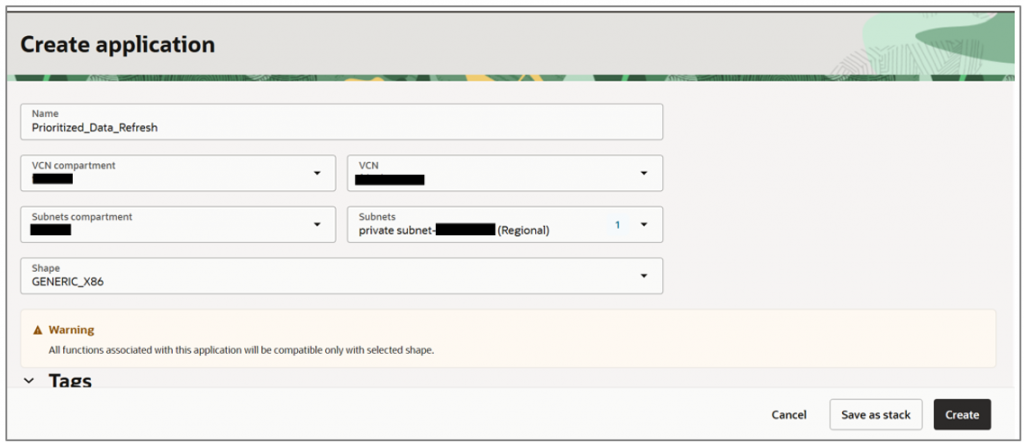
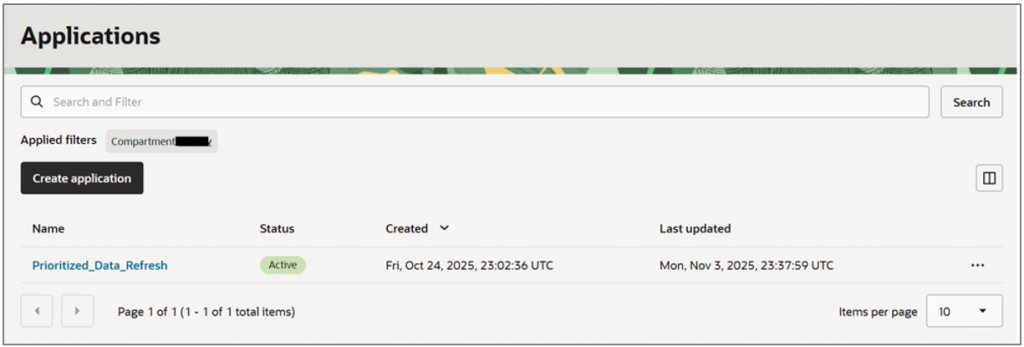
- Navigate to Developer Services and select Applications.

- Click Create Application and name it Prioritized_Data_Refresh in the same compartment.
- Choose a VCN and subnet (private or public) as defined in your tenancy, and then click Create.
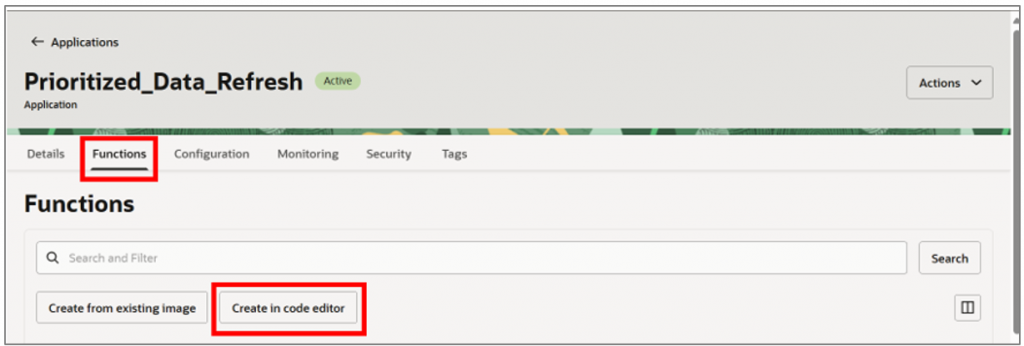
- Select the created application.
- Navigate to Functions under your created application and click Create in code editor.
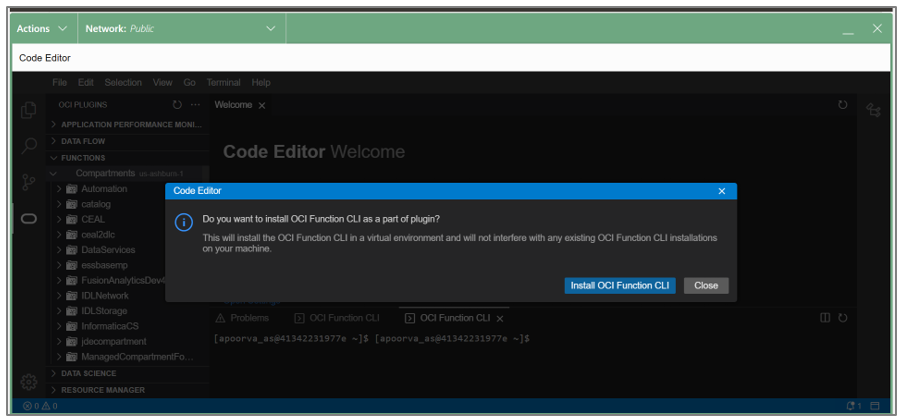
A code editor displays with a prompt to install the OCI Function CLI.
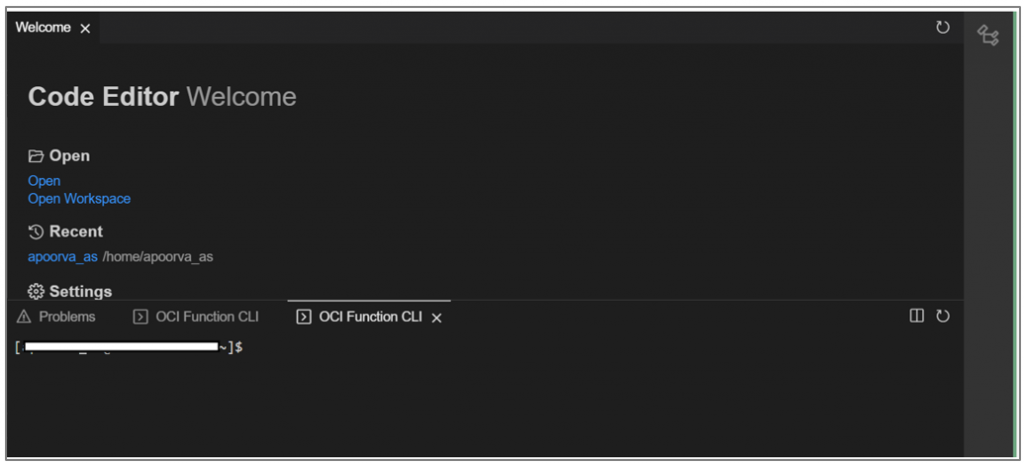
- Click Install OCI Function CLI to open a CLI terminal where you can run your commands.
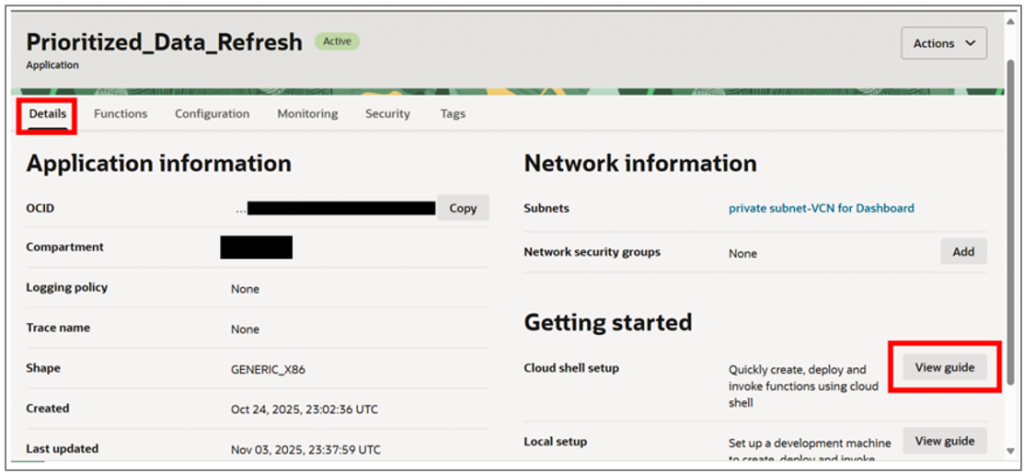
- Minimize the Code Editor window, navigate to the Details tab under your application, and click the View guide to the right of Cloud shell setup.
This opens a tab with the commands you can use in your CLI terminal to set up the function.
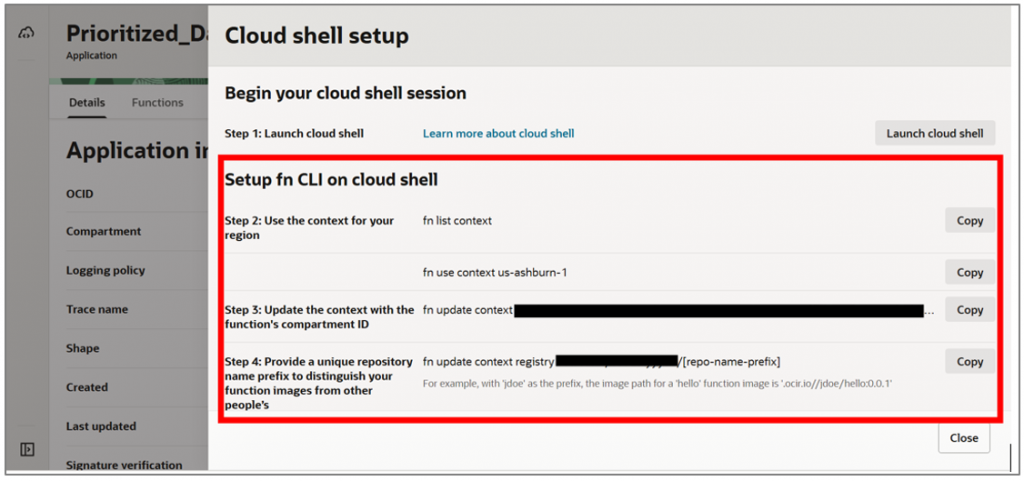
- Run the commands in the cloud shell that you previously minimized.
a: Complete steps a-c provided in the View Guide.
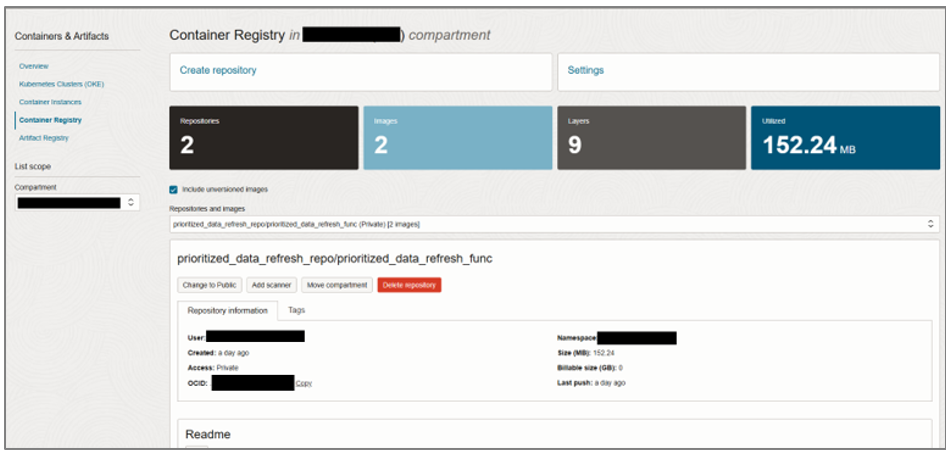
b: Complete step d to create a repository under Container Registry in Developer Services, where your function build images will be stored.
c: Replace the placeholder in the command as follows:fn update context registry iad.ocir.io/obejectstore_namespace/[repo-name-prefix]:
fn update context registry iad.ocir.io/ obejectstore_namespace/prioritized_data_refresh_repo

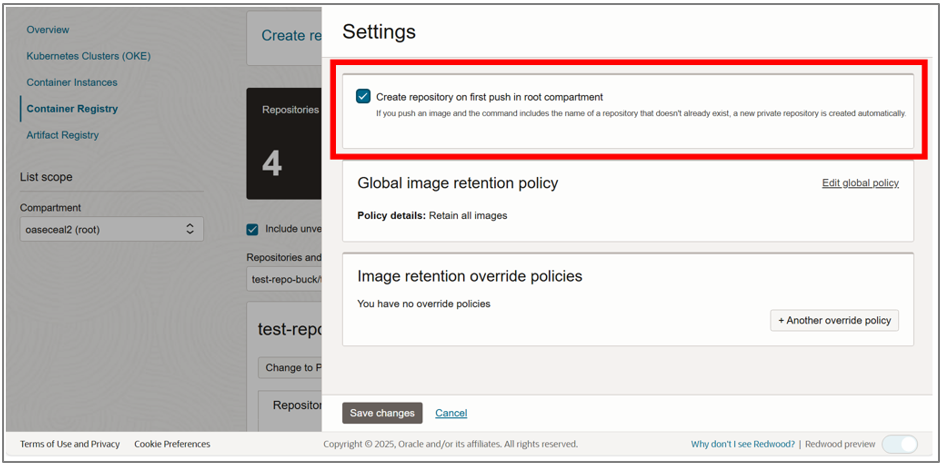
d: Select the Create repository on first push in root compartment option under Settings in the Container Registry to avoid having to create a repository before pushing to it.
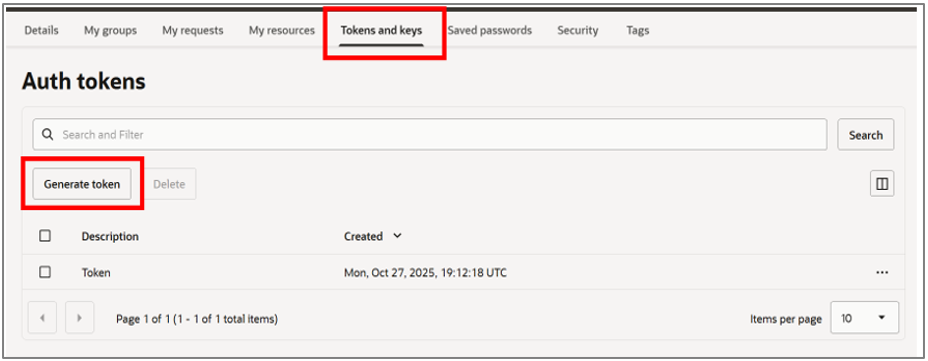
e: Generate the authentication token. Go to the user account that’s being used, create an authentication token, and make a note of it.
f: Change the command to:docker login iad.ocir.io -u ‘objectstore_namespace/username@oracle.com' -p {Generated Auth token}
g: The docker login command should include the user’s IAM Domain if its other than Default:docker login -u ‘objectstore_namespace/username@oracle.com' iad.ocir.io - >
docker login -u objectstore_namespace/OracleIdentityCloudService/username@oracle.com' iad.ocir.io
h: Initializes a new function project in the specified runtime environment. In this example, we are writing Python code.fn init --runtime java hello-java -> fn init --runtime python prioritized_data_refresh_func
i: Navigate to the newly created Python function project directory.cd prioritized_data_refresh_func
j: List the files created under prioritized_data_refresh_func by running the ‘ls’ command.

k: Open func.py using the following command.nano func.py
l: In the func.py file, delete the existing code, and replace it with the new function code provided below for OCI.import io
import json
import oci
from datetime import datetime
def handler(ctx, data: io.BytesIO = None):
try:
payload = json.loads(data.getvalue())
eventTime = payload.get("eventTime", "")
eventType = payload.get("eventType", "")
data_section = payload.get("data", {})
resourceName = data_section.get("resourceName", "")
add_details = data_section.get("additionalDetails", {})
requestType = add_details.get("requestType", "")
status = add_details.get("status", "")
# ---- Build human-readable event summary ----
text_summary = (
"Oracle Fusion Analytics Pipeline Event Summary\n"
"------------------------------------------------\n"
f"Event Time: {eventTime}\n"
f"Event Type: {eventType}\n"
f"Resource Name: {resourceName}\n"
f"Request Type: {requestType}\n"
f"Status: {status}\n"
"\nThis notification was automatically generated by Oracle Fusion Analytics Pipeline.\n"
)
# ---- Alternatively, build a CSV-style summary ----
csv_summary = (
"eventTime,eventType,resourceName,requestType,status,completionTime\n"
f"{eventTime},{eventType},{resourceName},{requestType},{status}\n"
)
# ---- Upload to OCI Object Storage ----
signer = oci.auth.signers.get_resource_principals_signer()
object_storage = oci.object_storage.ObjectStorageClient(config={}, signer=signer)
namespace = "<objectsore_namespace>"
bucket_name = "Prioritized_Data_Refresh"
timestamp = datetime.utcnow().strftime('%Y%m%dT%H%M%SZ')
object_name_text = f"pipeline_event_{timestamp}.txt"
object_name_csv = f"pipeline_event_{timestamp}.csv"
# Upload text summary
object_storage.put_object(
namespace,
bucket_name,
object_name_text,
text_summary.encode('utf-8')
)
# Upload CSV summary
object_storage.put_object(
namespace,
bucket_name,
object_name_csv,
csv_summary.encode('utf-8')
)
print(f"Event summaries uploaded as {object_name_text} and {object_name_csv}")
except Exception as ex:
print('ERROR: Failed to process or upload event data:', ex, flush=True)
raise
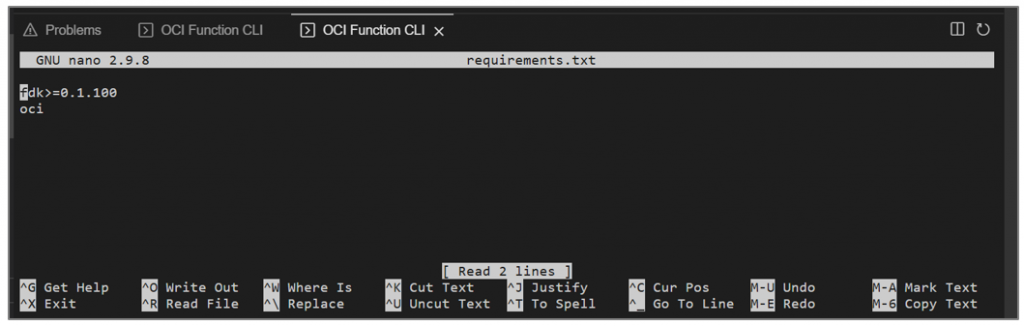
m: Open the requirements.txt file using the command:nano requirements.txt
n: Add oci as a dependency since the code uses that library. Save and close the file.
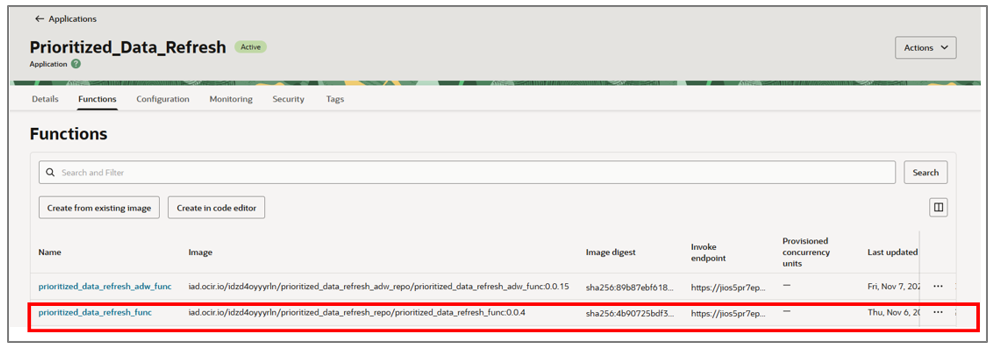
o: Deploy the function to your applicationfn -v deploy --app Prioritized_Data_Refresh
p: To test your function, you can use the following command:fn invoke Prioritized_Data_Refresh prioritized_data_refresh_func
If this command runs successfully, you should see the test function appear as a built image under the application. However, you do not need to run this command if you plan to attach this function as a subscription to a Topic.
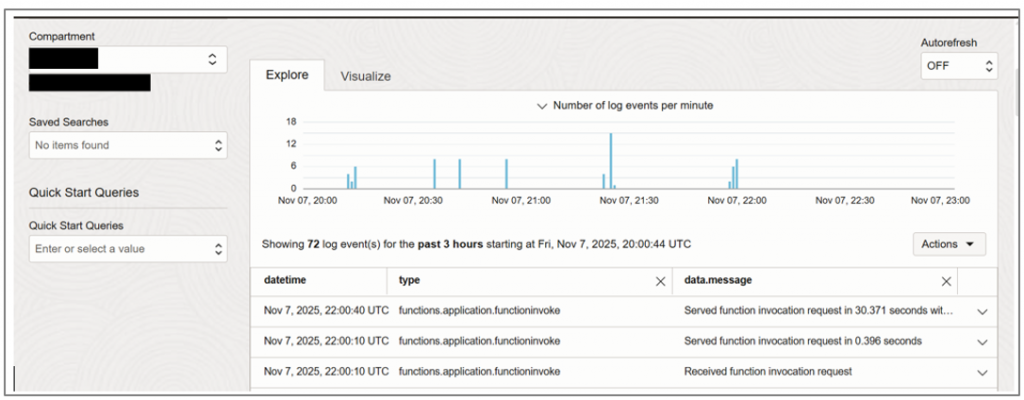
- To monitor the function for any errors during execution, enable log monitoring on the application. This will allow you to review logs and troubleshoot issues as needed.
- Navigate to Monitoring under your application and click Enable log.
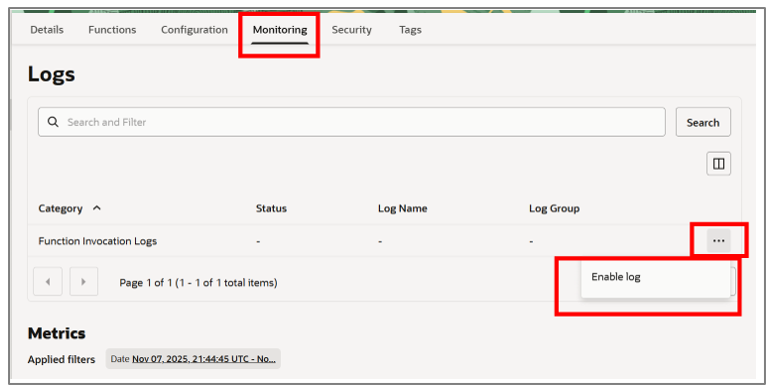
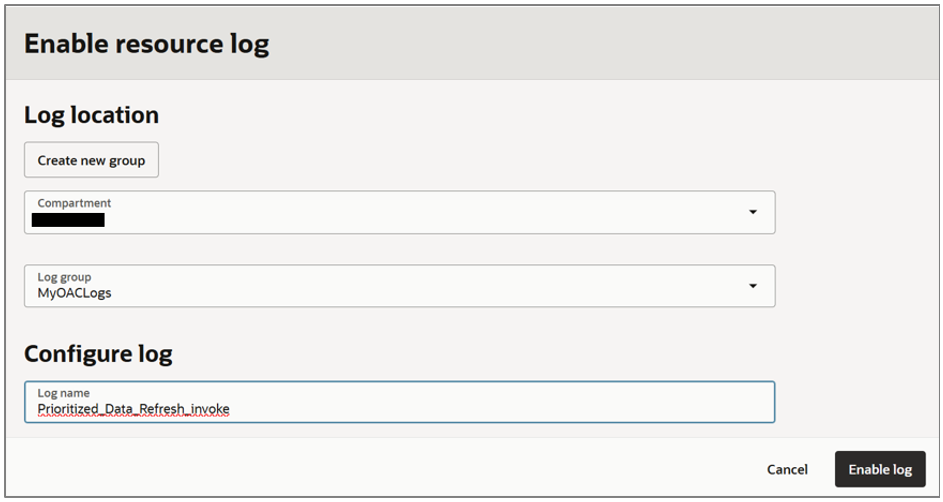
- Create the logs under a Log group defined in your tenancy.
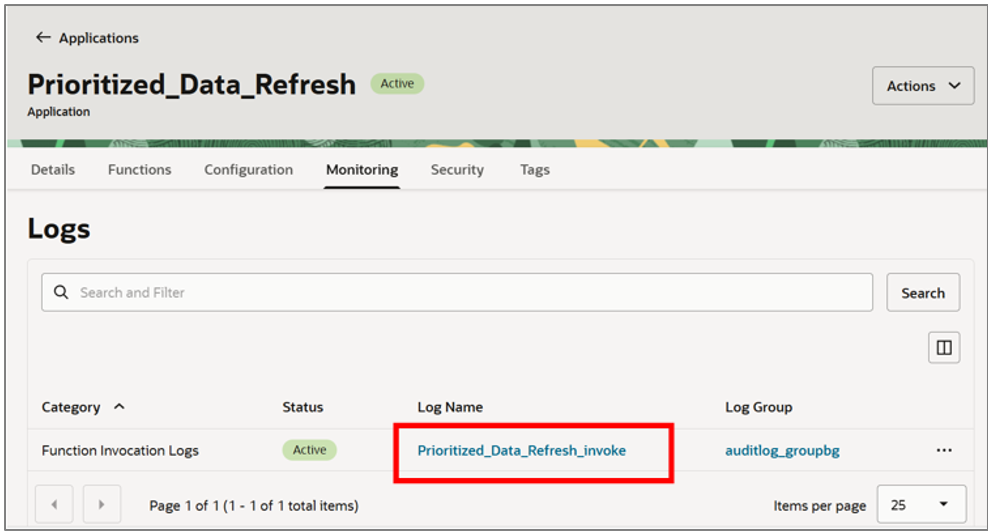
- Click the Log Name once it’s created.
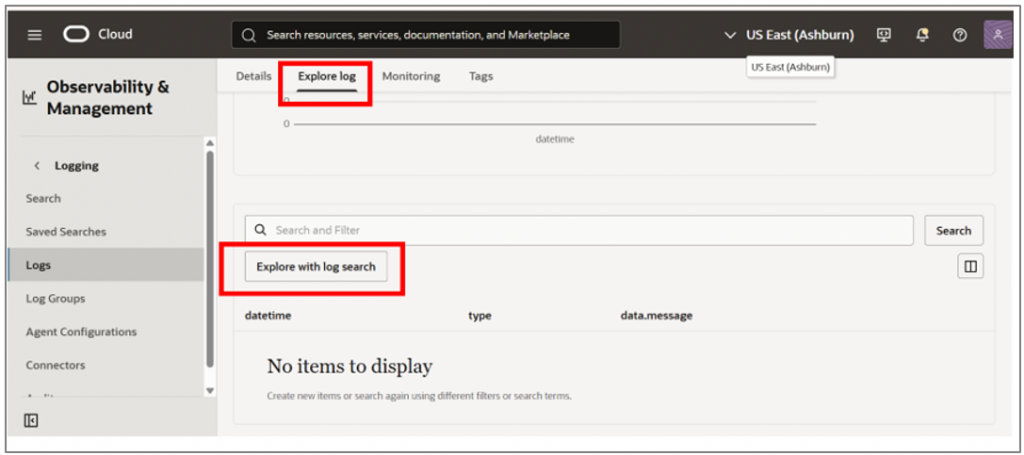
- This takes you to the Observability & Management portal. Clicking on Explore Log allows you to search the logs with specific details, such as the time of execution and detailed errors.
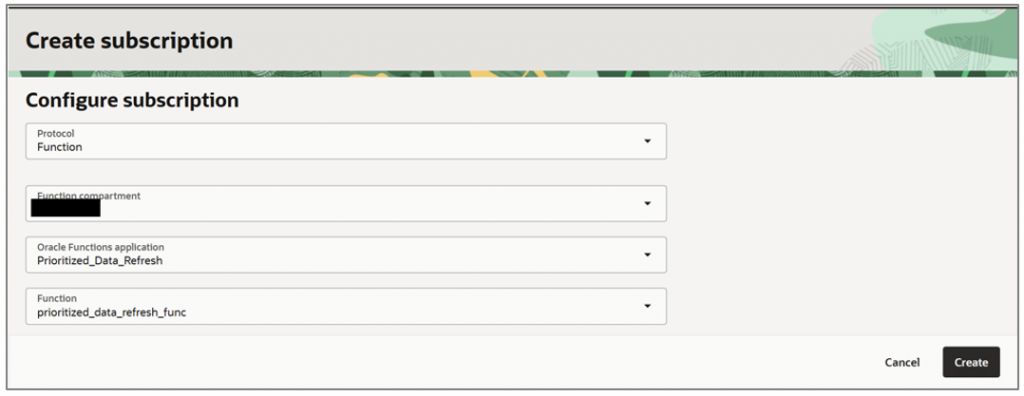
- To subscribe a function to your topic, select Function as the protocol, and then choose the application and function containing your code.
- Click Create.
- To test the function without waiting for the actual pipeline trigger, you can use the Publish Message option associated with the topic you just created.

The message can be in any format such as a JSON payload or even a single-line statement depending on what your function requires as input. The title will be used as the subject of the email you receive, if your email address is subscribed to the topic.

- Click Publish and validate the results. Navigate to OCI bucket and review the files.

Call to Action
Now that you’ve read this post, try it yourself and let us know your results in the Oracle Analytics Community , where you can also ask questions and post ideas. If you have questions or need more details, you can always check the Help Center for Oracle Analytics.