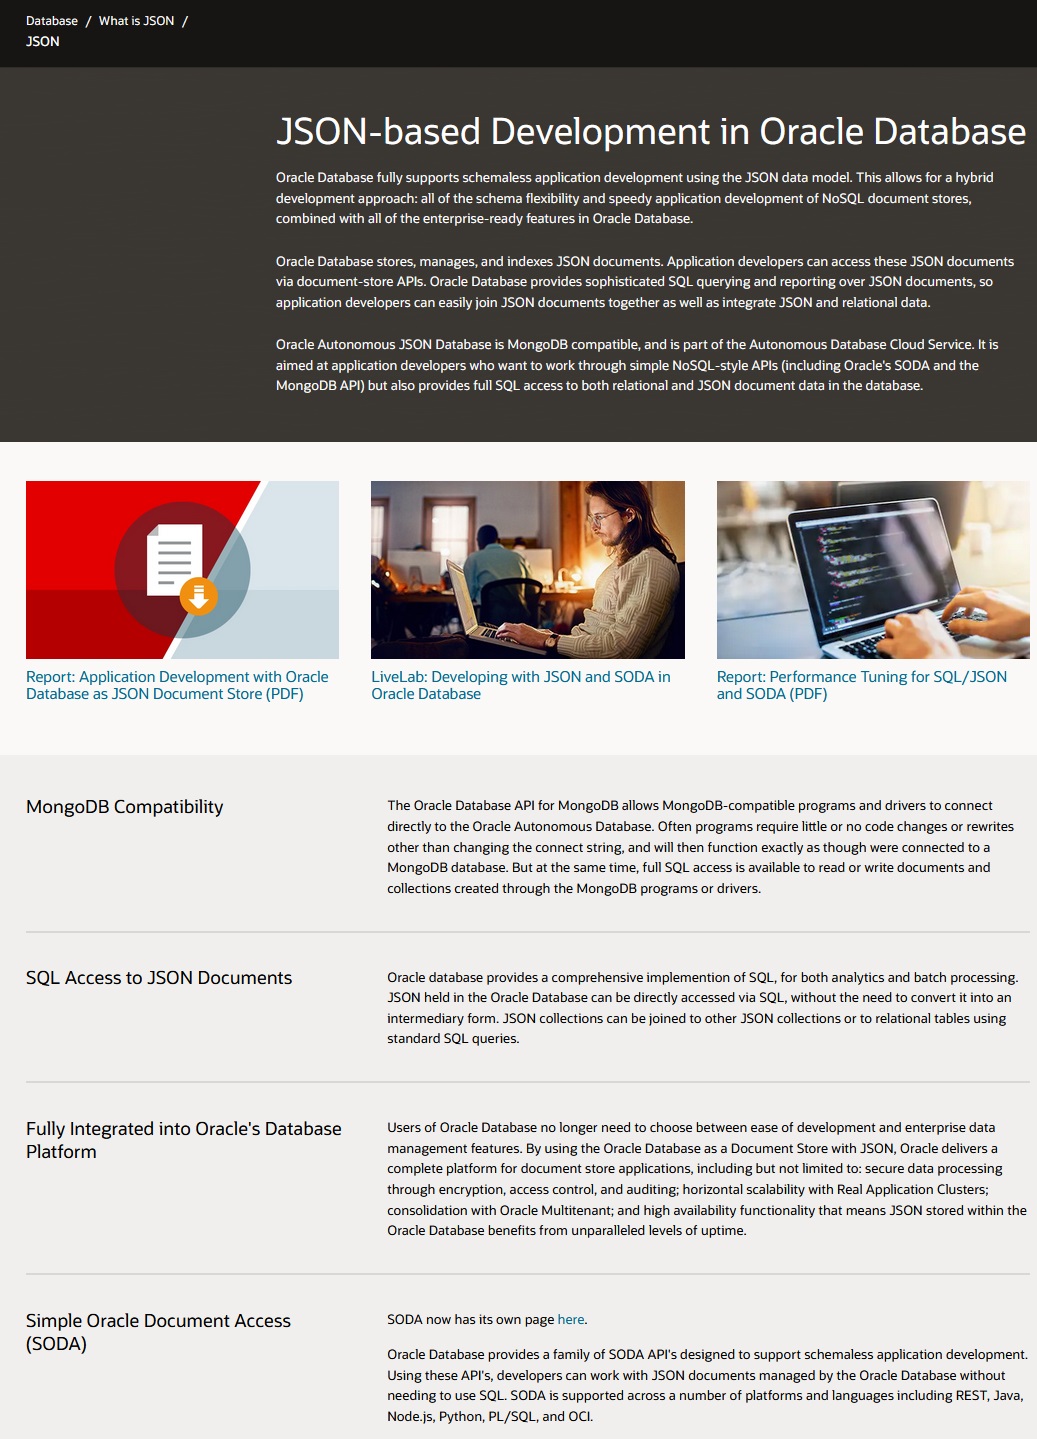
For an introduction to Oracle AJD databases, see Autonomous JSON Database.
Creating a JSON AJD Database
You need to start by getting an account in the Oracle Cloud. You can sign up for a free account. A free account was used to create these screen shots and in some cases that limits the options available. This is the home page. Select the “Create an ATP Database” option.

If you have multiple Compartments, select the correct one in the drop down box on the left side (in a free account, there is only one). Enter a Display Name and Database Name. Change the workload to “JSON” for use with WebLogic Server. If you are using a free account, you should turn on the “Show Only Always Free configuration options”. Enter the credentials for the Administrator. For a non-free database, you would set the number of CPU’s and storage.

The Database API for MongoDB will only be available if you define “Secure access from allowed Ips and VCNs only”. Click that option (it is not the default). If you will just want to connect from your current machine, use the “Add My IP Address” button. If you will want to connect from other machines (such as an Oracle Cloud VM) you can enter the addresses of those as well. If you’re not sure what compute instances you will want to connect from, you can change the IP notation type field to CIDR block, and enter a value of 0.0.0.0/0. That will allow you to connect from anywhere, but naturally you should only use that for testing.
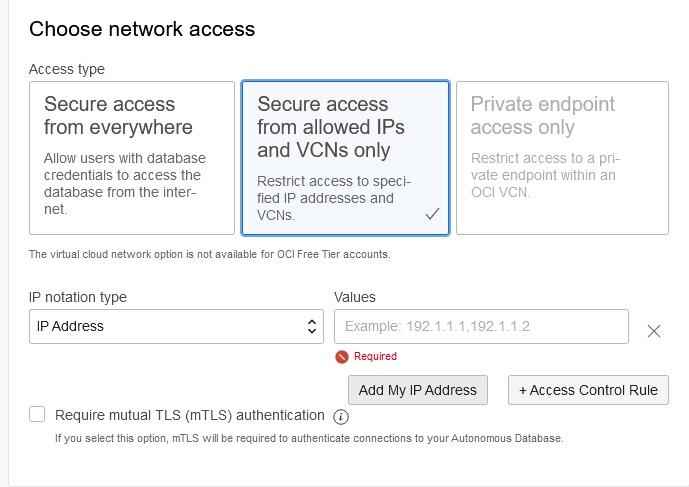
Then click on the “Create Autonomous Database” button.
This brings up the “Autonomous Database Details” page with a “Metrics” view that shows the details and metrics for the newly created database. The Lifecycle State will be “Provisioning” until the setup is complete and the database is “Available” for processing. From this page, you can choose to scale up/down, stop, and backup/restore the database.

The Tools tab takes you to a screen where you can download the Simple Oracle Document Access (SODA) drivers that you will need for development.

It’s important to match up the Soda Driver version with the Oracle JDBC driver version. WLS 12.2.1.4.0 and 14.1.1.0.0 ship with JDBC 19.3.0.0.0. The lowest supported is JDBC 19.6.0.0.0 so it will be necessary to upgrade the drivers. The process for updating the driver jar files is documented at https://docs.oracle.com/en/middleware/fusion-middleware/weblogic-server/12.2.1.4/jdbca/configure-database-connectivity.html. The SODA driver orajsoda-1.1.7.jar works with the 19.6 driver so download this version for later development.
Back up at the detail screen, click on the Database connection tab. Before you forget, note what the name of the “_tp” service is for the database. In this case, it’s “json_tp”. You will need this for generating the URL in WebLogic Server.
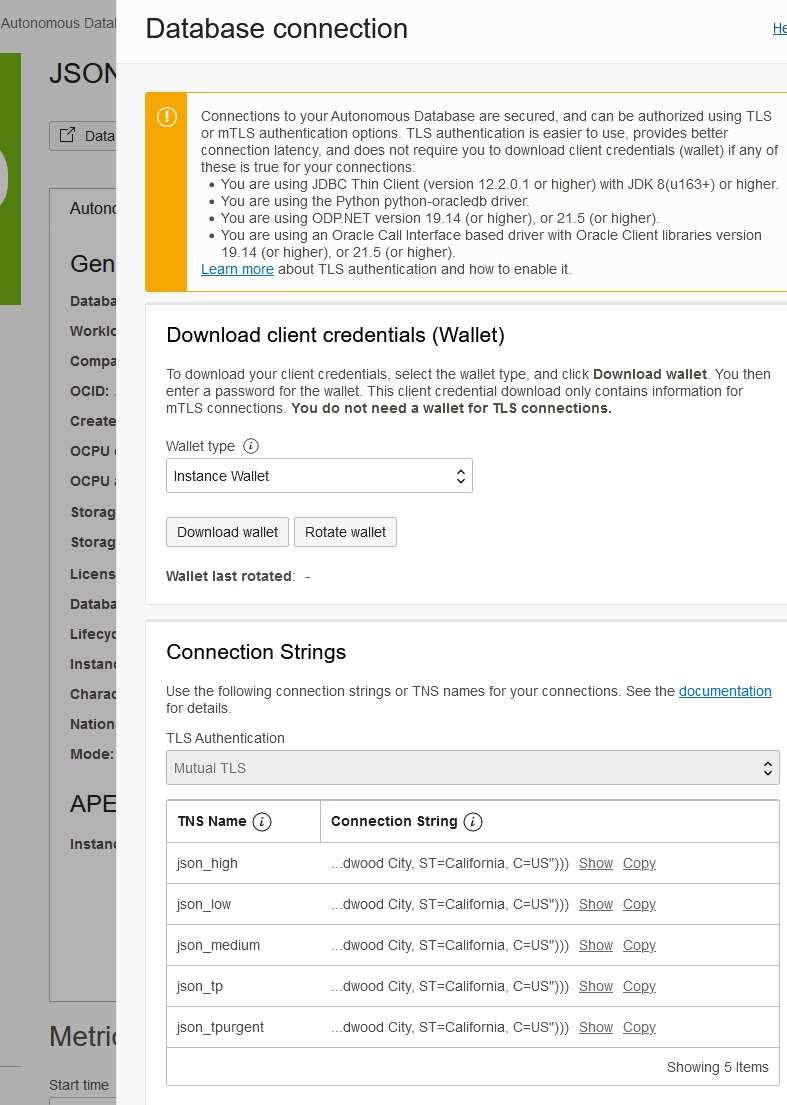
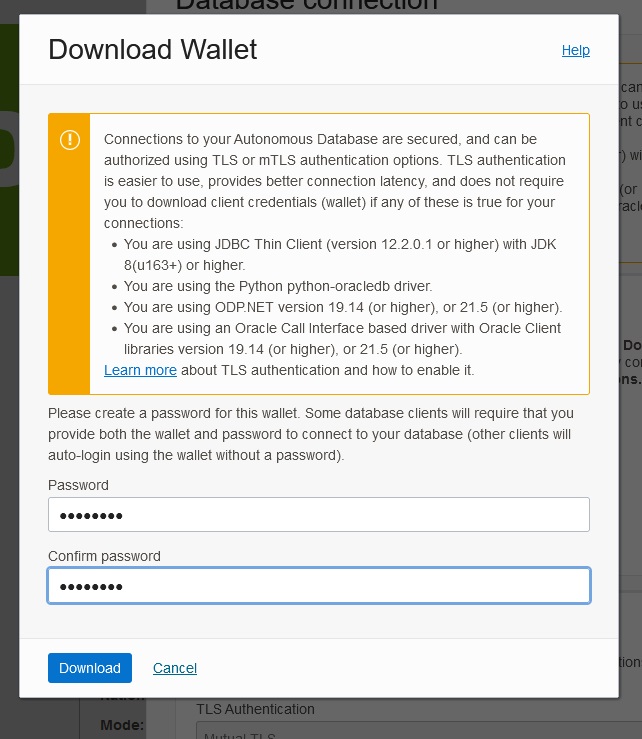
Then download the Instance Wallet that contains the database credentials. Enter the password and download the zip file.
Go back to the details page and select the Database Actions button. There are a lot of options on this page.
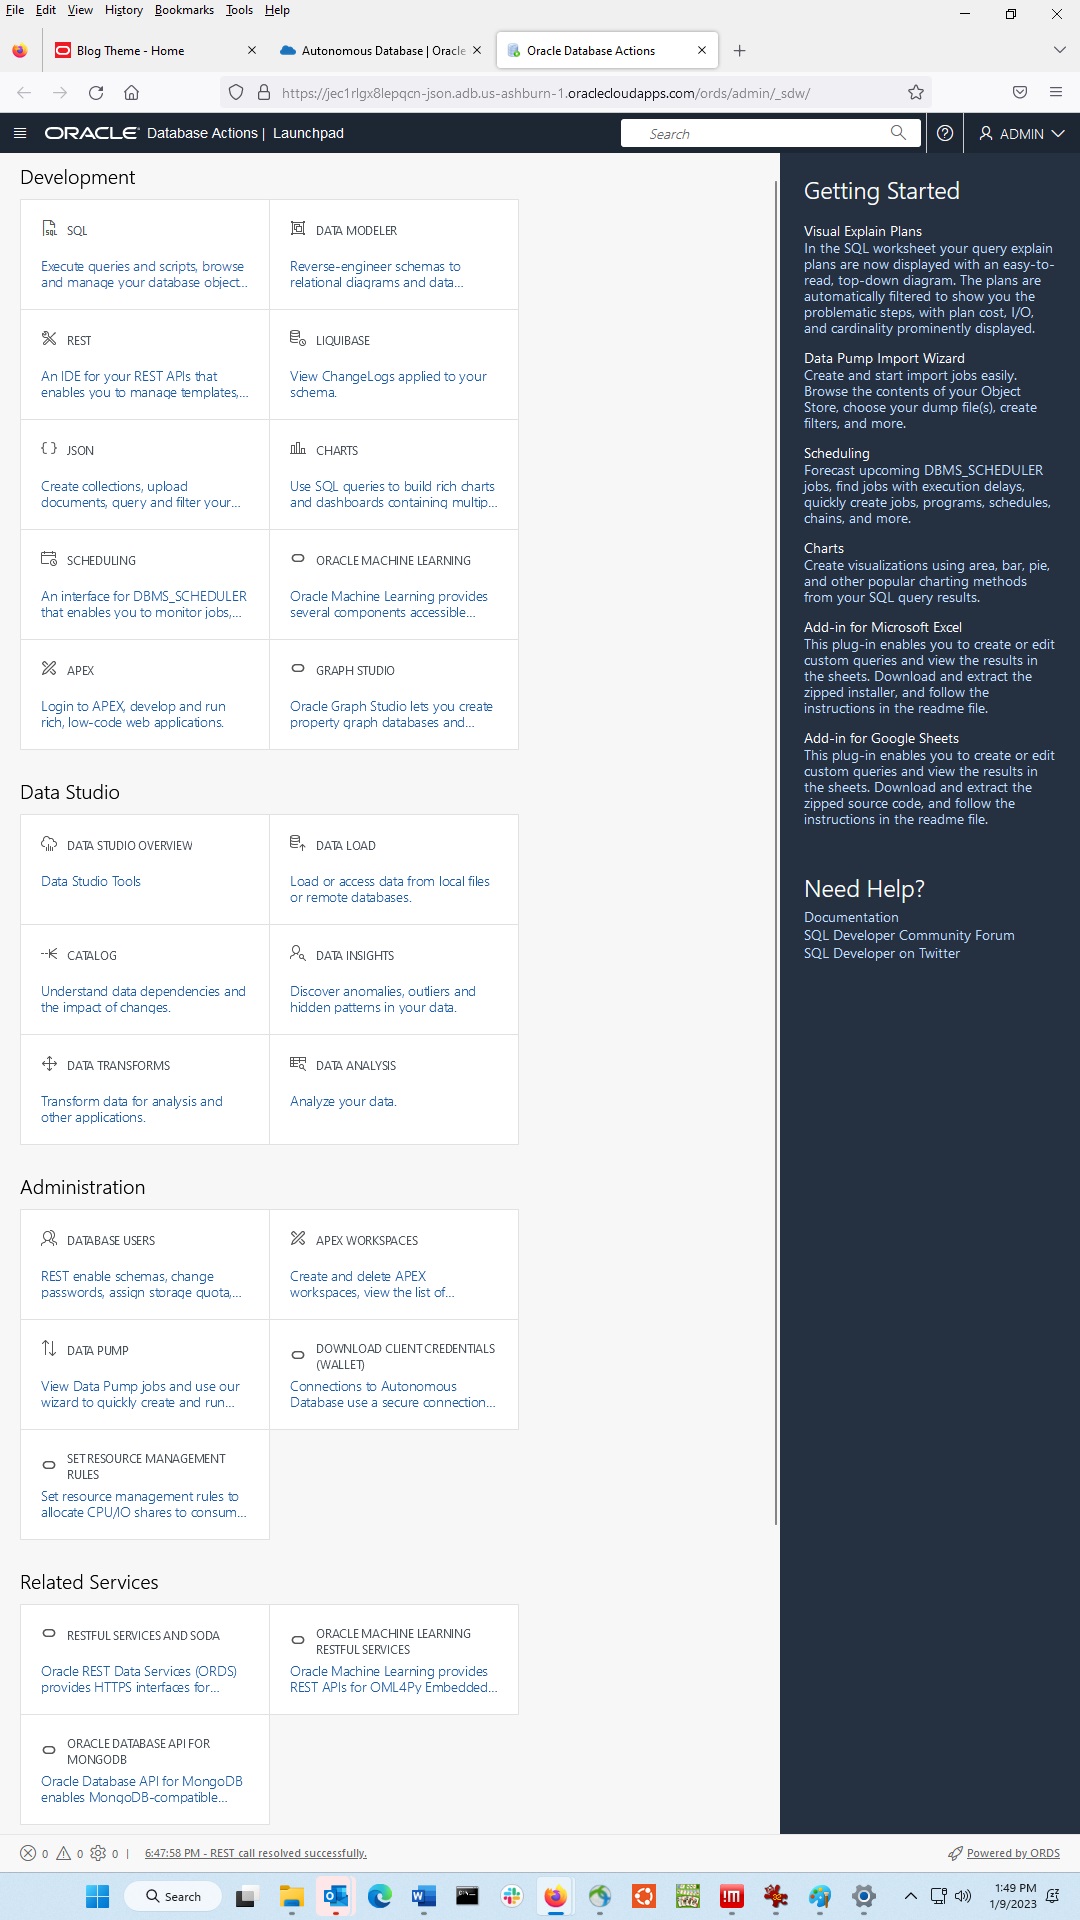
Click on Database Users to create a new user. Enter the name and password.

Then go to the Granted Roles tab to select some privileges. You minimally need CONNECT and SODA_APP.
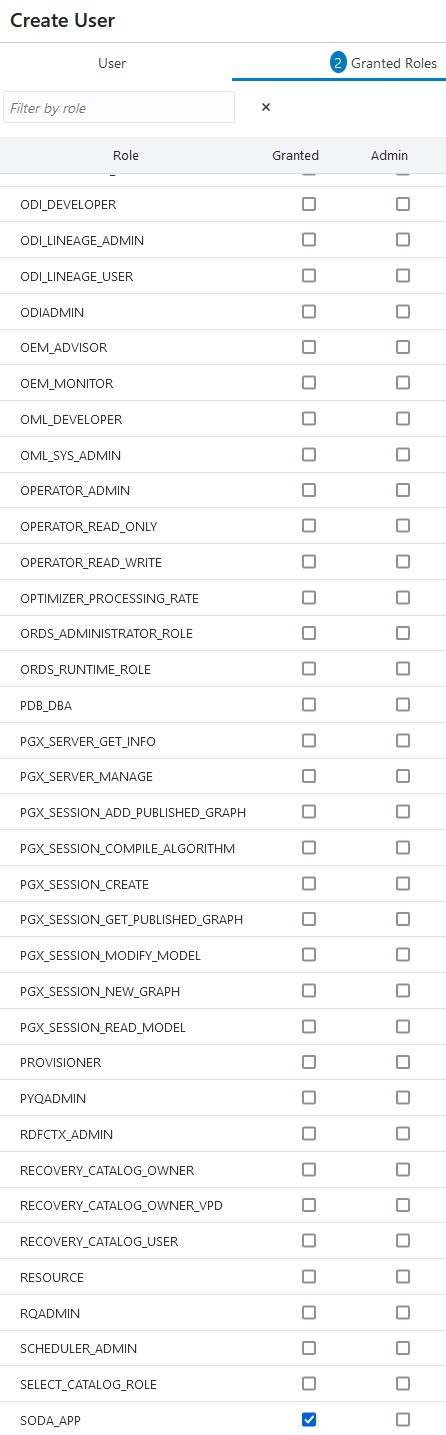
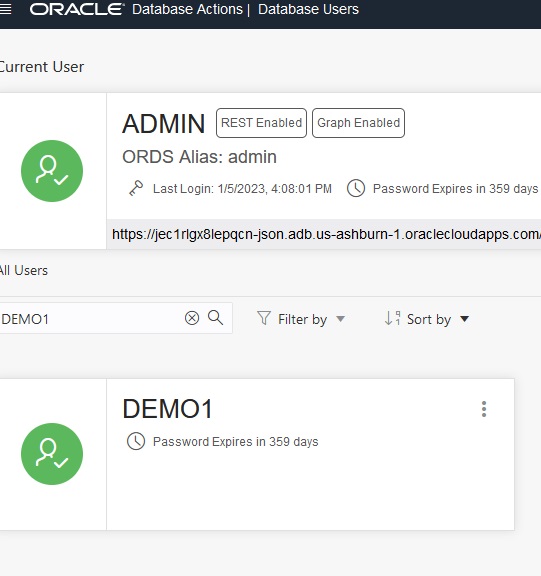
Create the user, DEMO1 in this case.
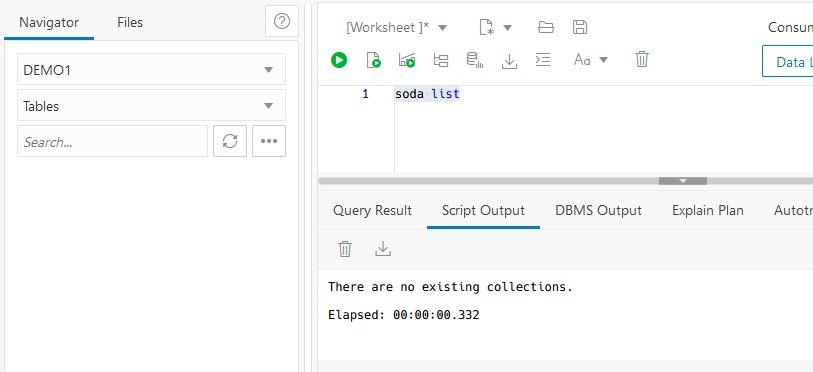
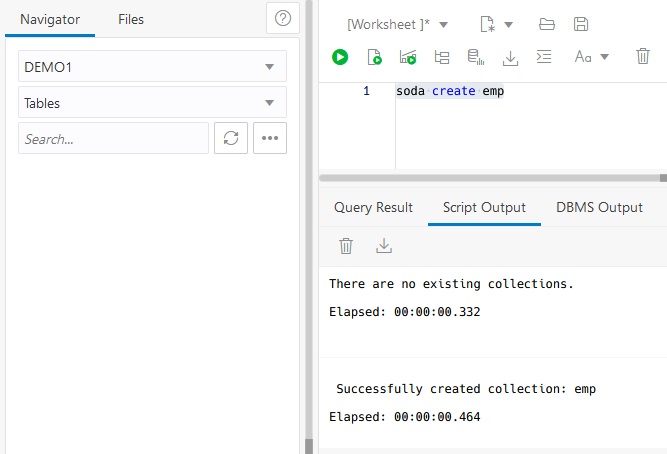
Back on the Database Actions page, select SQL and enter the credentials that you specified earlier. This will bring up a web view that is similar to the standalone SQL Developer tool. Initially there are no Collections and “soda list” will return no collections.
Create a collection named emp.
Then use soda insert commands to enter a few documents.
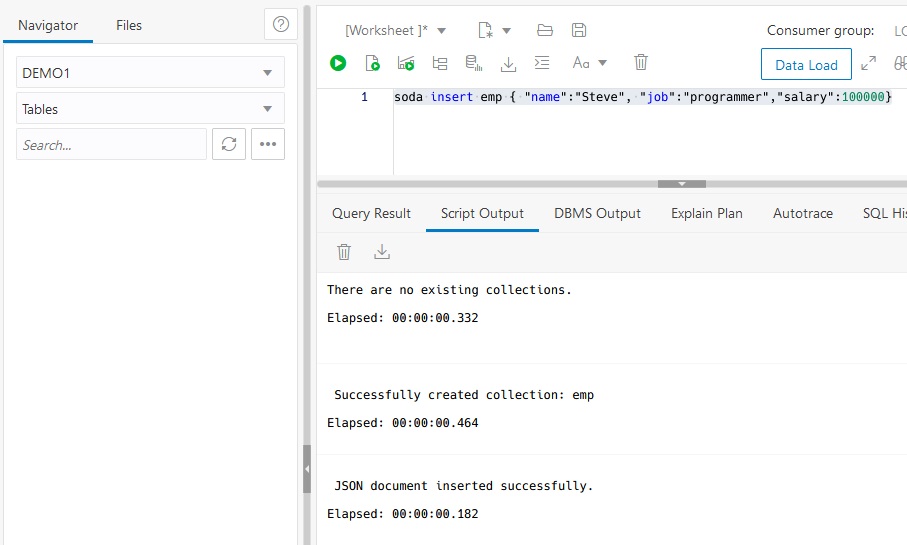
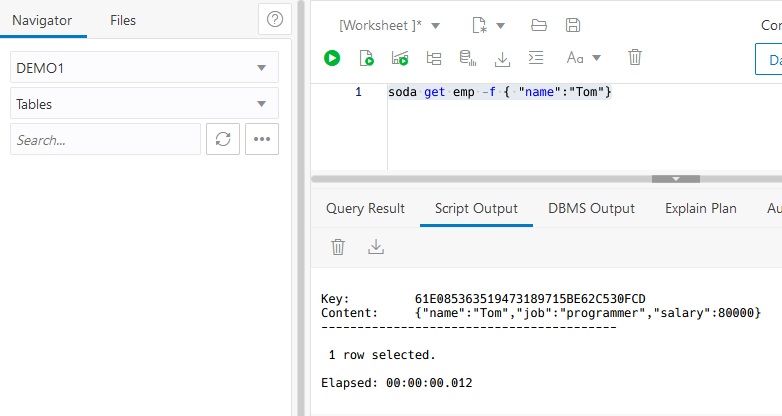
I entered two programmers named Steve and Tom. You can use soda get command with filters to select a subset of records. This uses a simple match.
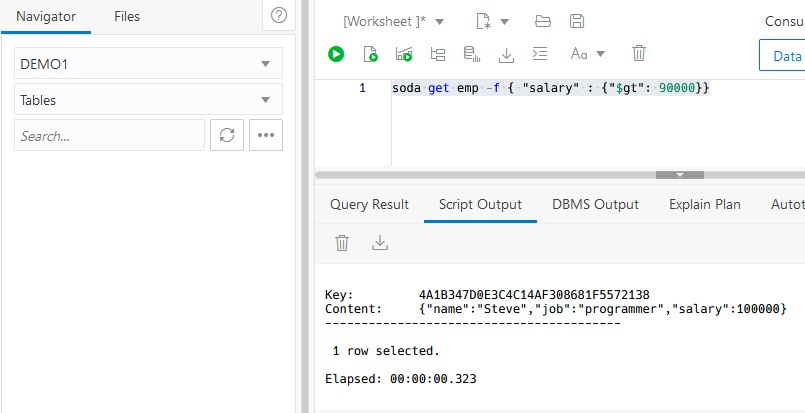
This filter uses the greater than operator.
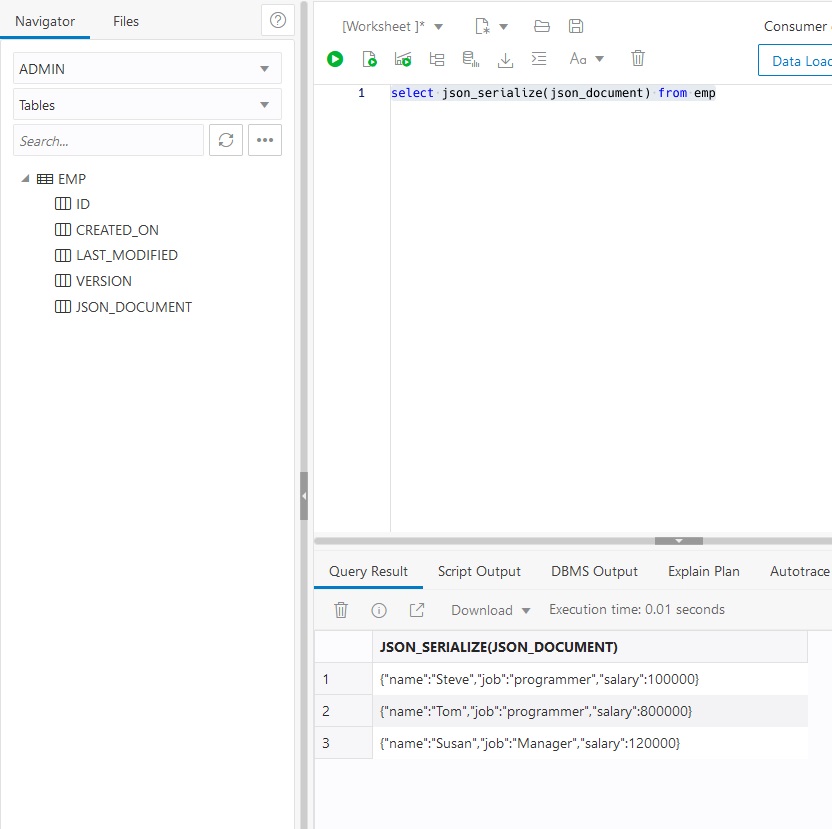
Refreshing the Table list in the left margin shows the columns available for all documents. The JSON_DOCUMENT column has the document data itself. You can print the entire value as a string using json_serialize().
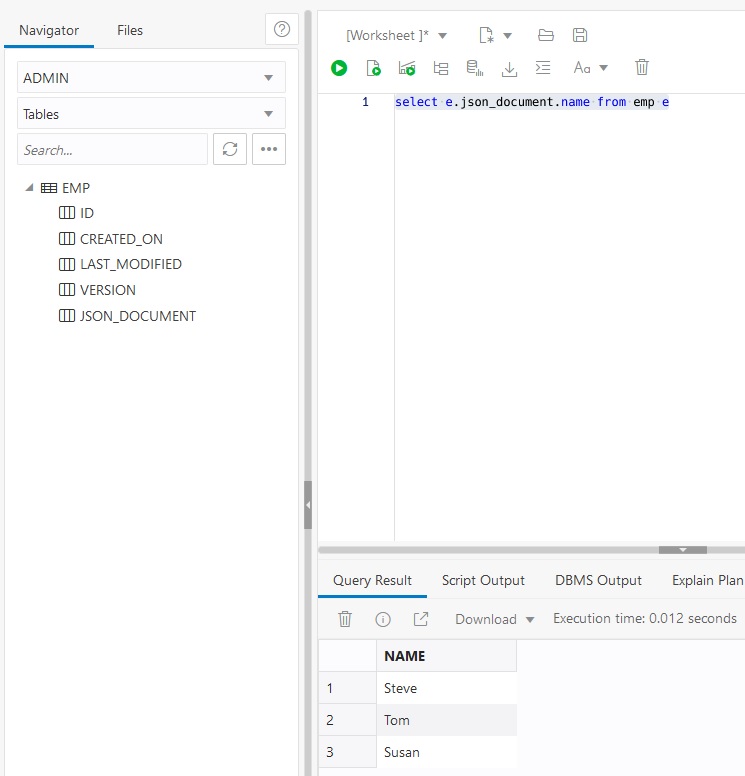
You can also use the JSON_DOCUMENT to access individual field values. This can be used anywhere a normal SQL column can be used – for projection, selection, grouping, etc.
Back on the Database actions page, select JSON. This tool allows manipulating JSON documents directly. You can use this tool to look at documents.

You can also create new JSON documents. Enter the string and select the “Create” button.

If you plan to access the database using MongoDB, you should select “ORACLE DATABASE API FOR MONGBODB” from the Database Actions page and get the required URL.

This completes the creation of the JSON AJD database, but obviously you may want to come back to view database metrics, perform database operations, and use the development tools.
Using the JSON AJD Database with WebLogic Server
This section describes the use of Oracle’s Autonomous JSON Database (AJD) service with a WebLogic Server (WLS) datasource.
This blog assumes you have already downloaded the wallet zip file and unzipped it. The sample scripts use /tmp/demoJSON for the wallet directory.
Configuration using WLST
Now that you have the necessary credential files, JDK, and driver jar files, you are ready to create the datasource.
The online-WLST script is attached at this online WLST script attachment (rename it online.py). To run the script, assuming that a domain has been created, the server is started with the correct JDK and driver jar files, just run
java weblogic.WLST online.py
The script creates the datasource descriptor file and deploy the datasource to a server. Let’s look at scripts to see how the datasource is configured. The variables that you need to set are at the top so you can update the script quickly and not touch the logic. WLST uses python variables.
The alias name (serviceName variable) of the form of the form “name_tp” is taken from the tnsnames.ora file. The URL is generated by using an @alias format “jdbc:oracle:thin:@name_tp”. For this to work, we also need to provide the directory where tnsnames.ora file is located (the “tns_admin” variable) using the “oracle.net.tns_admin” driver property. Note that the URL information in the tnsnames.ora uses the long format so that the protocol can be alternatively specified as TCPS.
The datasource name (variable “dsname”) is also used to generate the JNDI name by prefixing it with “jndi.” in the example. You can change it to match your application requirements.
The recommended test table name is “SQL ISVALID” for optimal testing and performance. You can set other connection pool parameters based on the standards for your organization.
ATP-S provides access to a single Pluggable DataBase (PDB) in a Container DataBase (CDB). Most of the operations on the PDB are similar to a normal Oracle database. For ATP-S, you have a user called ADMIN that does not have the SYSDBA role but does have some administrative permissions to do things like creating schema objects and granting permissions.
ATP-S is configured to not have GRID or RAC installed. That means that FAN is not supported and only WLS GENERIC datasources can be created (Multi Data Source and Active GridLink cannot be used).
To create connections, we need to provide a user and password (variable names “user” and “password”) for the datasource. The example uses the Admin user configured when the database was created. More likely, you will create additional users for application use. The password will be encrypted in the datasource descriptor.
The remainder of the configuration is focused on setting up two-way SSL between the client and the database. There are two options for configuring this and the credentials are available for both in the wallet zip file.
For either option, we set the two driver properties
oracle.net.ssl_server_dn_match=true
oracle.net.ssl_version=1.2 (this should be required only for the 12.x driver)
The first option is to use the Oracle auto-open SSO wallet cwallet.ora. This use of the wallet is to provide the information for two-way SSL connection to the database. It should not be confused with using the wallet to contain the database user/password credentials so they can be removed from the datasource descriptor. When using this option, the only driver property that needs to be set is oracle.net.wallet_location (variable wallet_location) to the directory where the wallet is located.
The second option is to use Java KeyStore (JKS) files truststore.jks and keystore.jks. For this option, we need to set the driver properties for javax.net.ssl.keyStoreType, javax.net.ssl.trustStoreType, javax.net.ssl.trustStore, javax.net.ssl.trustStorePassword, javax.net.ssl.keyStore, and javax.net.ssl.keyStorePassword. We also want to make sure that the password values are stored as encrypted strings.
Using SODA in Java with a WebLogic Server Datasource
Simple Oracle Document Access (SODA) is a set of NoSQL-style APIs that let you use collections of JSON documents in Autonomous Database, retrieve them, and query them, without needing to know Structured Query Language (SQL) or how the documents are stored in the database.
To develop with SODA in a WLS environment, the orajsoda jar must be added to the client CLASSPATH or the server PRE_CLASSPATH where the API’s are used. For example,
export CLASSPATH=”$HOME/orajsoda-1.1.7.jar:$CLASSPATH”
For a client program, this would be done after setting the CLASSPATH for WebLogic Server.
The attached program is a client program that gets the WLS datasource from JNDI and then does the operations on a connection. The code would be similar in a server application.
The program uses oracle.sql.json.OracleJsonObject instead of javax.json.JsonObject when doing the doc.getContentAs() because WebLogic 12.2.1.4.0 has the JEE7 version of JSON-P, but SODA is expecting the JEE8 version.
As with the SQL tool that we looked at earlier, you can access the JSON documents using either SODA or SQL. The attached program is does both.
The code for the attached program is here. Rename it to JSONTest.java.
The following is the output from running the program.
javac JSONTest.java
java -cp “$CLASSPATH:.” JSONTest
Using SODA
name: Steve salary: 100000 job: programmer
name: Tom salary: 800000 job: programmer
name: Susan salary: 120000 job: Manager
Using SQL serialized document
{“name”:”Steve”,”job”:”programmer”,”salary”:100000}
{“name”:”Tom”,”job”:”programmer”,”salary”:800000}
{“name”:”Susan”,”job”:”Manager”,”salary”:120000}
Using SQL columns
name: Steve salary: 100000 job: programmer
name: Tom salary: 800000 job: programmer
name: Susan salary: 120000 job: Manager
Using MongoDB in Java
If you are a MongoDB Java programmer, you can use your Oracle Autonomous JSON database for development. To do the development, you will need to get the MongoDB jar files from https://mvnrepository.com/artifact/org.mongodb for mongodb-driver-core, mongodb-driver-sync, and bson, and add them to your classpath. It might look like the following:
export CLASSPATH=”$HOME/mongodb-driver-core-4.8.1.jar:$HOME/mongodb-driver-sync-4.8.1.jar:$HOME/bson-4.8.1.jar:$CLASSPATH”
Attached is a Java program that uses the MongoDB Java API. Rename it to MongoDB.java. All that you need is the URL, the user name, and the password that we saw from the Database Action page earlier. This code could be embedded within a WebLogic application (remember to add the mongodb jar files to the server classpath).
The WebLogic JDBC connection pool and the Oracle Universal Connection Pool both pool java.sql.Driver or javax.sql.DataSource objects so they don’t handle the normal MongoDB APIs that use MongoClient and MongoDatabase. From the documentation: “The MongoClient class is designed to be thread safe and shared among threads. Typically, you create only one instance for a given database cluster and use it across your application.” You probably don’t want to create a MongoClient for every usage in the application server. We can’t store it in JNDI (the normal way datasources are handled in WLS) because the MongoClient is not serializable. The best alternative seems to be to create a singleton class for the MongoClient. That’s what the sample program does (some details are needed like how the URL and credentials are provided).
java -cp “$CLASSPATH:.” MongoDB
Jan 10, 2023 3:02:45 PM com.mongodb.internal.diagnostics.logging.Loggers shouldUseSLF4J
WARNING: SLF4J not found on the classpath. Logging is disabled for the ‘org.mongodb.driver’ component
{“name”: “Tom”, “job”: “programmer”, “salary”: 800000.0}
{“name”: “Susan”, “job”: “Manager”, “salary”: 120000.0}