In 24.8 we have two new Object Wizards in Web Tools.
- List Applet Wizard
- Form Applet Wizard
Both allow you to create Applets in Web Tools in a guided way.
All these Applet wizards start with the clicking of the wizard icon in Web Tools.

Then, these Applets and future Applet wizards are started using the A (Applet) button.
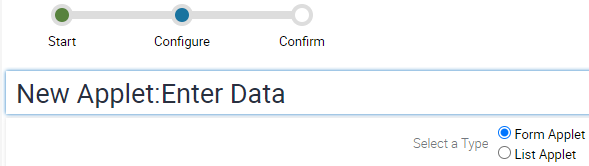
When the wizard starts, pick the type of Applet you wish to make. Initially, there are two choices (List Applet and Form Applet). We will be adding other types to this list.
The wizard will gather all the information needed to create your Applets allowing you to finally visually configure them in the Applet Editor. Rather than duplicate the transfer of information on this topic, I’ll list the steps and anything notable about them.
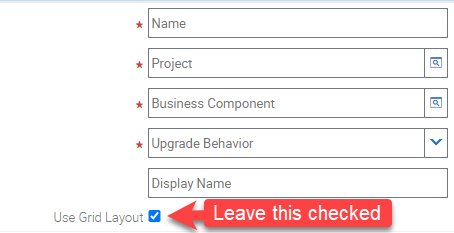
- Add the necessary information about the Applet such as its name and the Business Component it will use.
- Choose the Controls you would like on the Toolbar and Applet Menu such as New Query.
- Choose a Web Template for each Applet Mode such as (Base, Edit, Edit List).
- Note: If creating a Form Applet, it is best to use the Grid Layout Web Template. If you leave the checkbox checked, you will not have to choose a Web Template as it is automatically chosen.
- Choose the Fields from the Business Component to use in your Applet.
- Finally, look at the summary of the information gathered and create the Applet object.
- Then you can go to the Applet in the Object List Explorer and edit it.