Did you know that Change Assistant has the merge feature from PeopleTools (PT) 8.57 as an independent feature? (Surprised!!)
PUM Automated Merge feature was re-introduced in PT 8.59, but this time it was added as part of the PUM change package apply process. This feature brings the capability to merge customized Peoplecode, SQL and XSLT objects in an automated way during your maintenance cycle (i.e. while applying the change package). You can control how the merge behaves since the merge is driven by a set of rules which can be modified or set by the admin/user to control the merge result.
Customers have different processes to deal with their customizations. Typically, retrofitting or merging customizations was done manually by a PeopleSoft developer which is an iterative task. After applying or taking up the new updates, the retrofitting task would be done. With the automated merge feature, Change Assistant can run merge automatically during apply job process, thus saving time and effort in the iterative process of retrofitting customizations.
In this blog post, I’ve provided steps on how you can configure and use the merge feature.
Setting up the environment
- In Change Assistant (tools version 8.59 or greater), configure the PUM Source database (8.59 or newer tools version) and add the target database. The target database, for example, can be your development database or a copy of production.
- Configure general options and PUM Source tab.
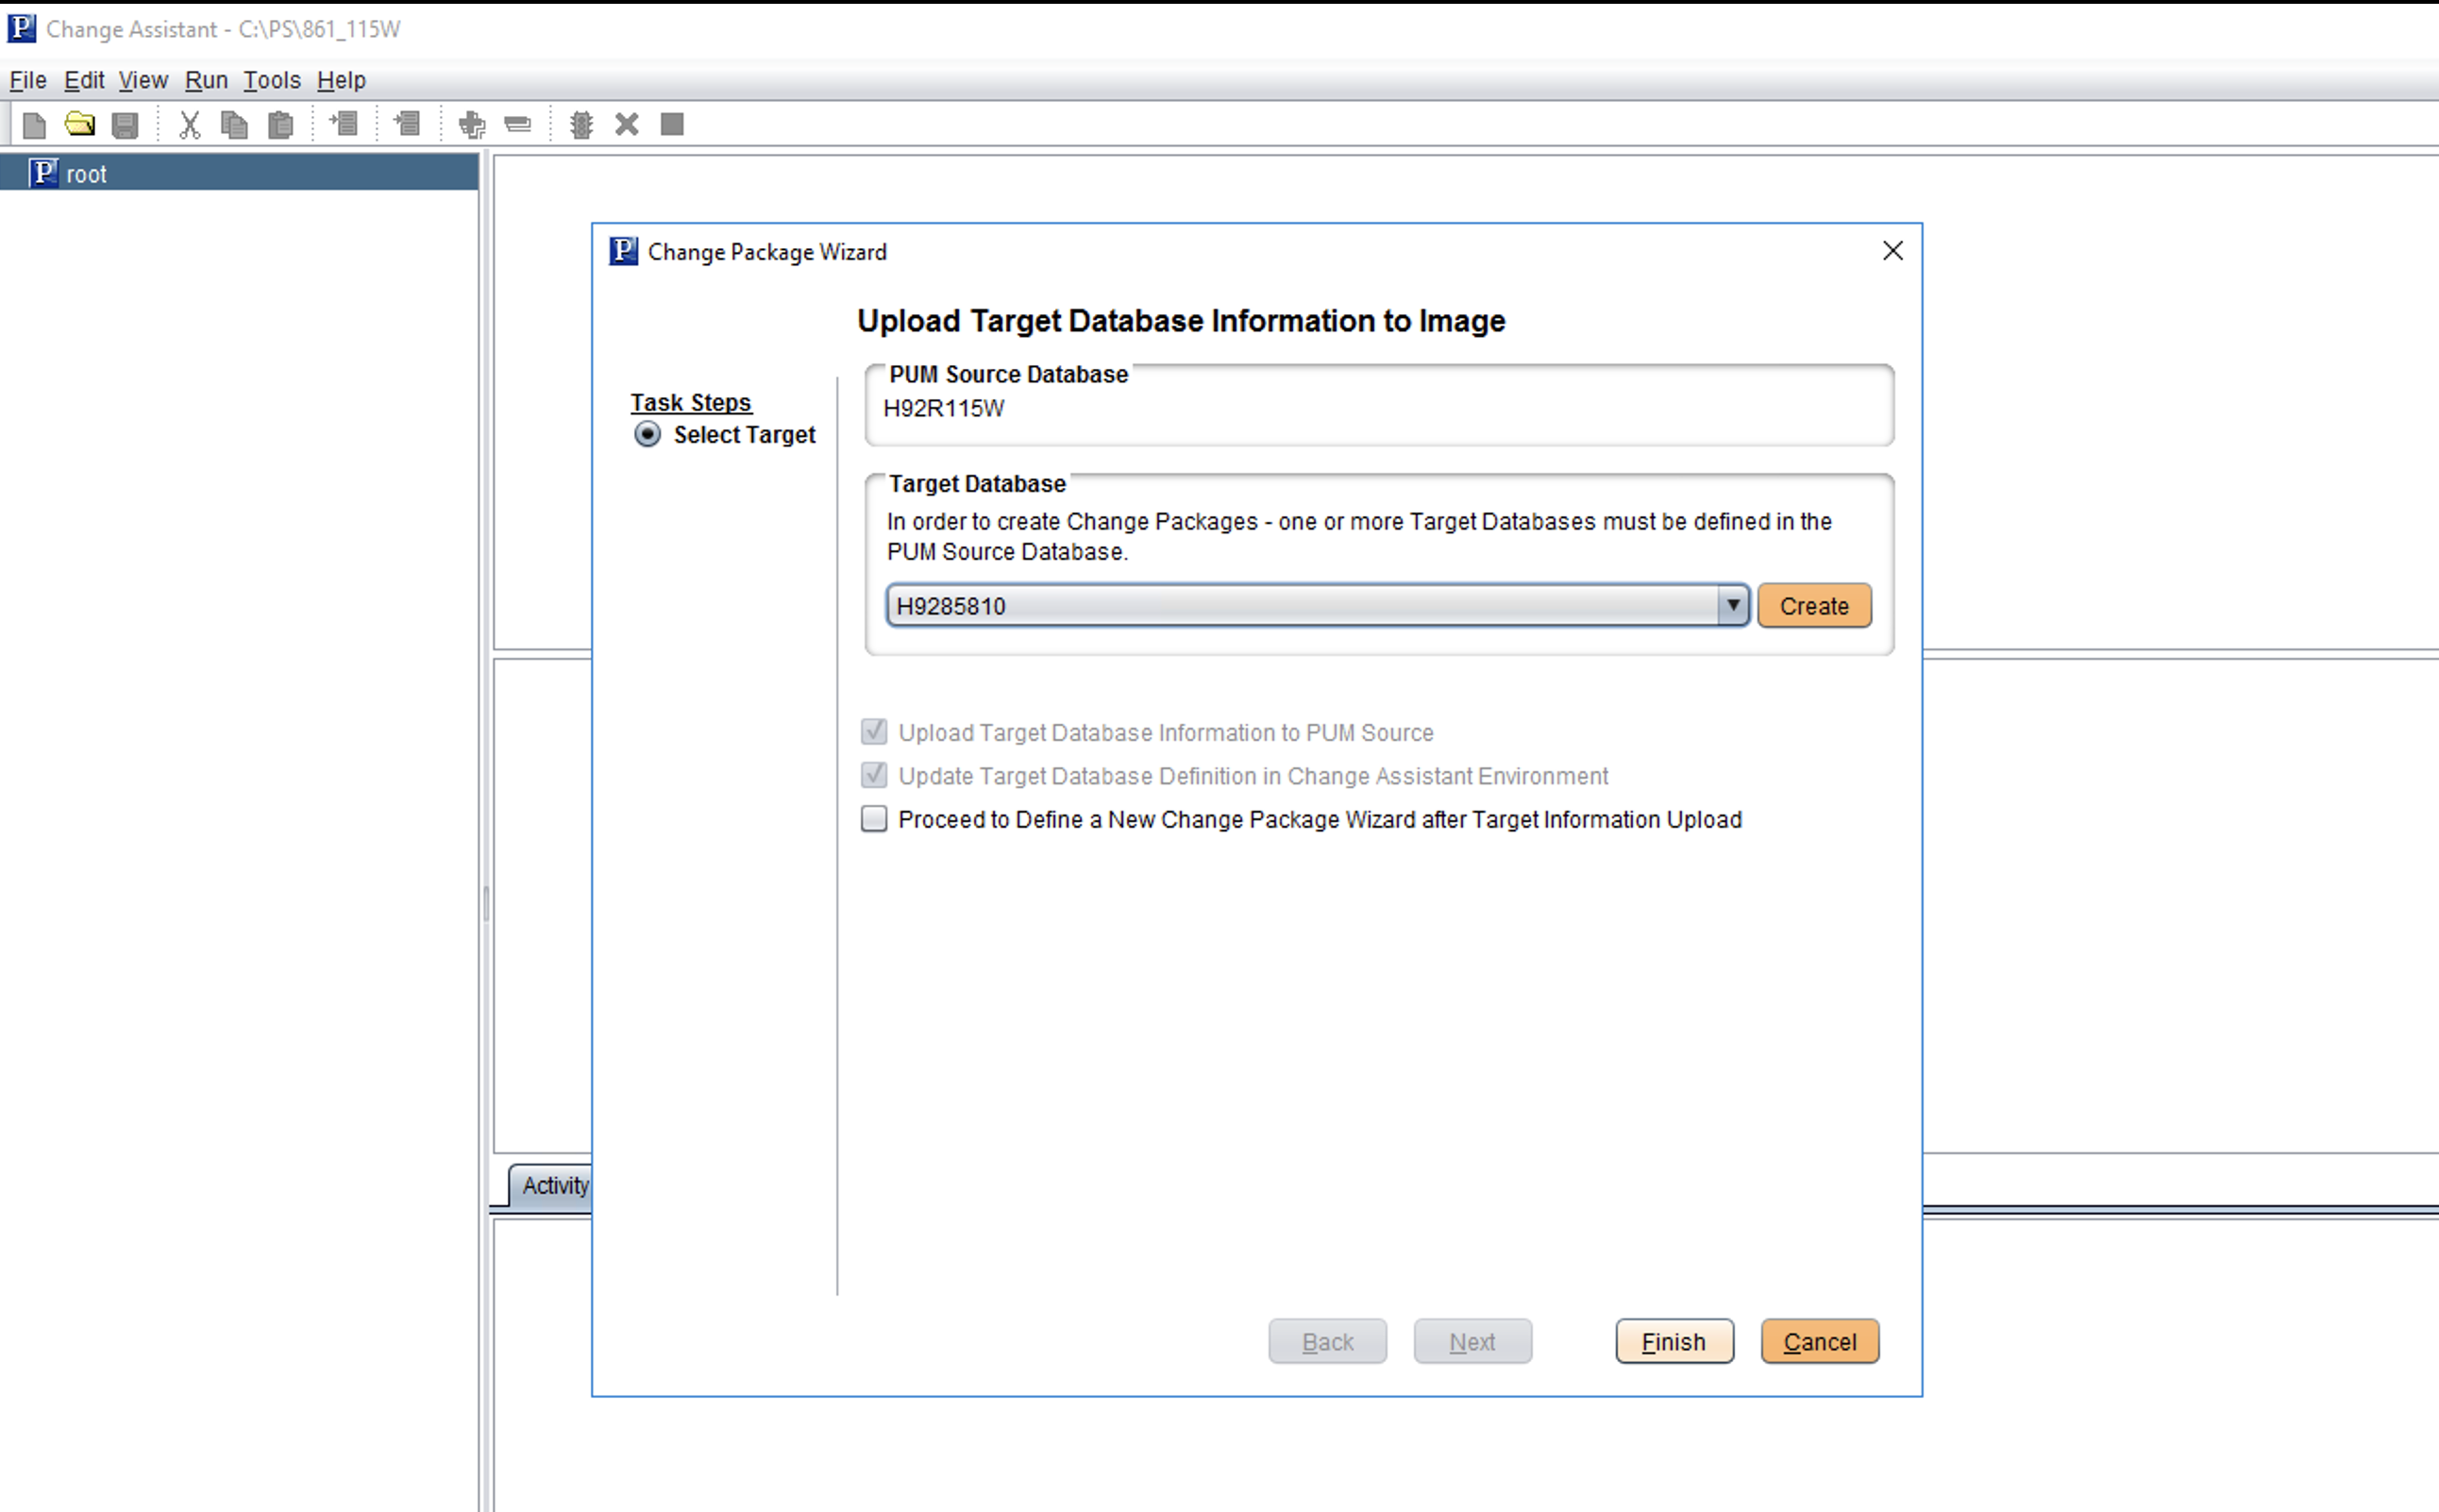
- Upload target database information to Image.
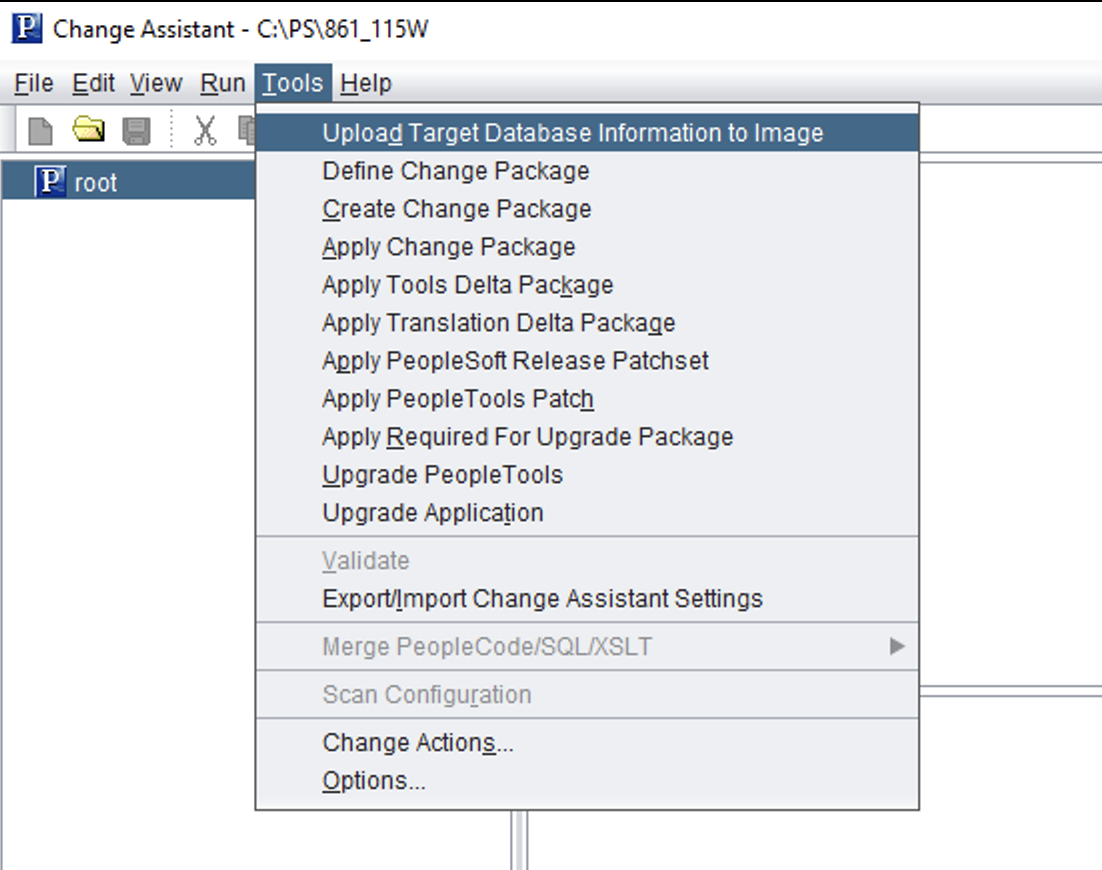
Steps to enable Merge Feature:
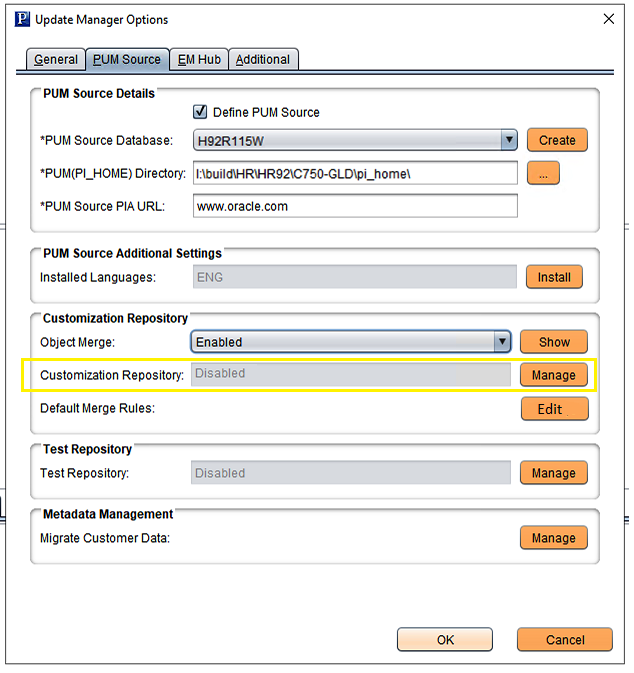
- Go to Tools -> Options -> Navigate to PUM Source tab, look for “Customization Repository” section and enable “Object Merge”. When object merge is enabled, “Show” button “Customization Repository” section will be enabled to view list of supported merge object.
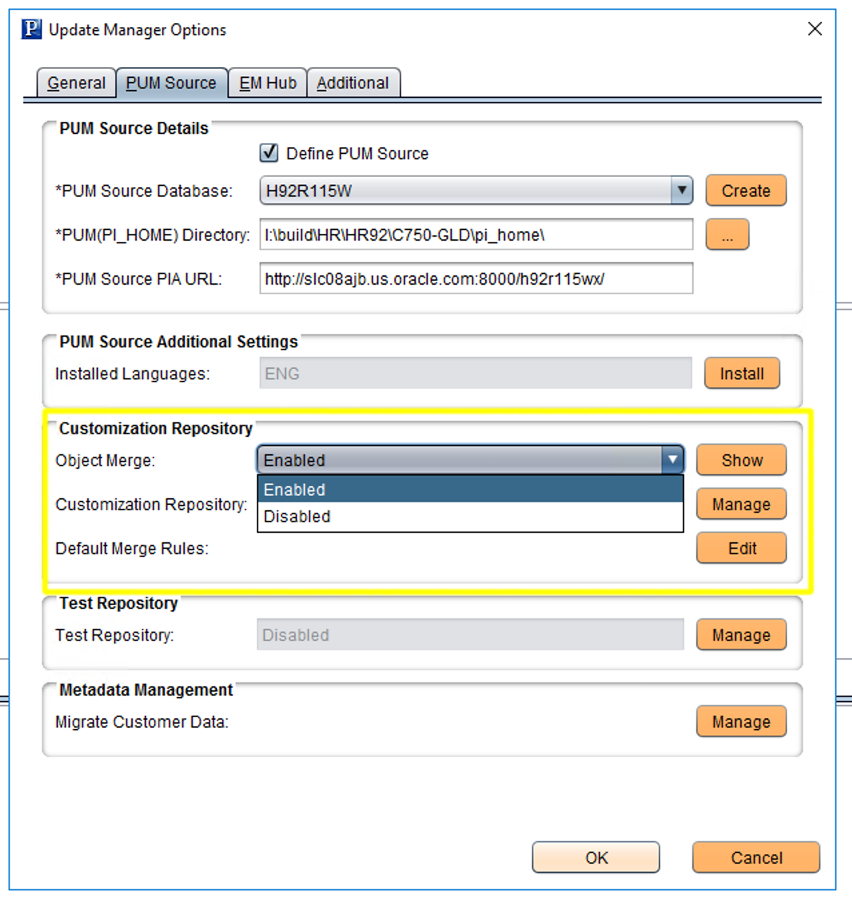
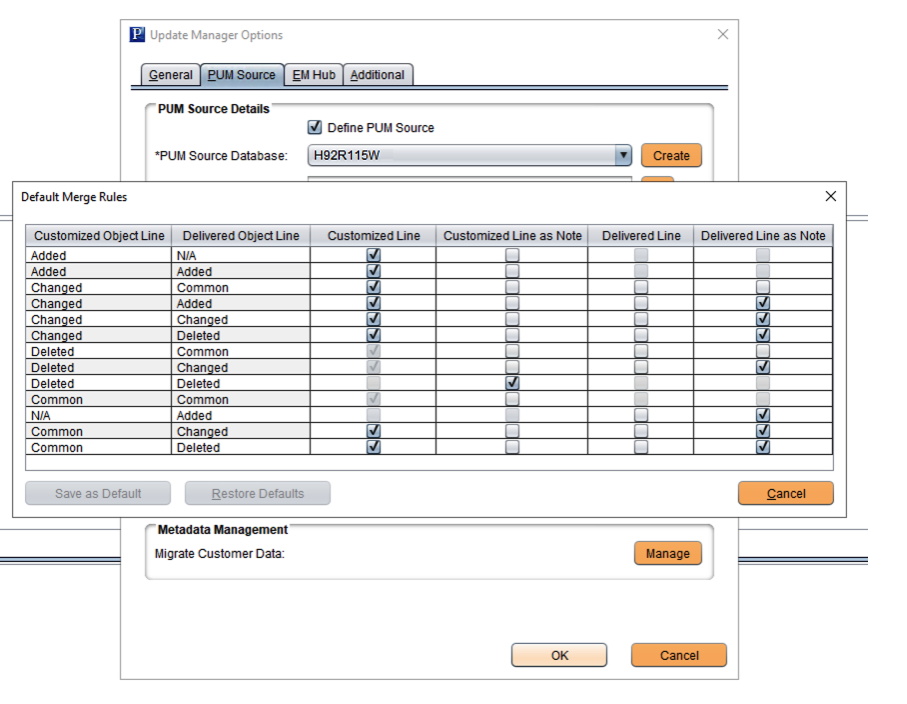
- In the “PUM Source” tab, you can modify the default merge rules by clicking on “Edit” button against “Default Merge Rules” label in “Customization Repository” section.
Note: Oracle delivers a default set of rules for optimal results. These can be modified to control the merge result that suits your needs. If the rules are modified; you can restore the Oracle delivered default rules by clicking on “Restore Defaults”.

Steps to upload customizations in PUM Source
The PUM Automated Merge process requires customization to be uploaded in PUM Source for merge analysis. After enabling merge feature (as mentioned in previous steps), follow the steps below to upload customizations in the PUM Source database.
- In the PUM Source tab, look for the “Customization Repository” section and click on the “Manage” button to upload customizations.
Note: If you are uploading customization for the first time, the “Customization Repository” value will be “Disabled” and will be enabled upon successful upload of customizations.
- Uploading customization project either by selecting existing database project or by creating new database project. Here upload customizations using “Selecting Existing Project from Database”.
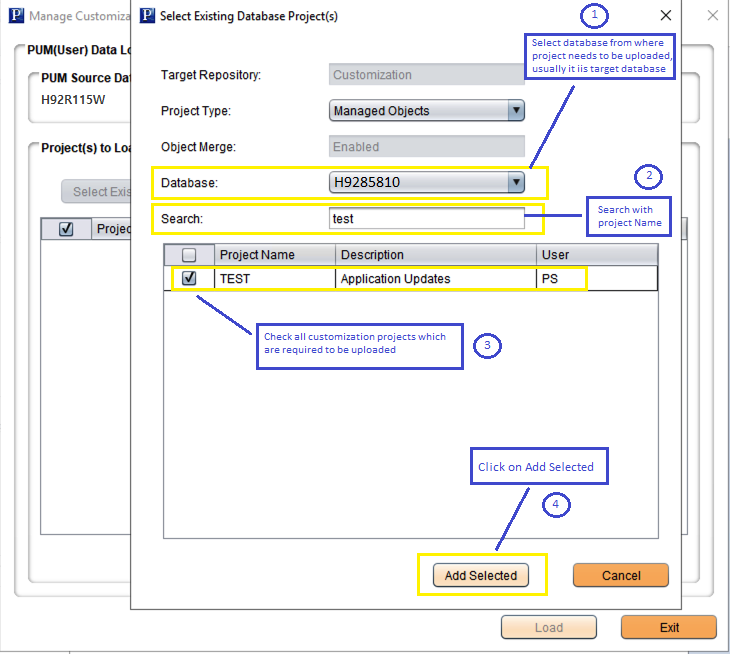
- Click on “Selecting Existing Project from Database”

-
- Query for the customization project you want to upload and click on “Add Selected” as shown below. Note that you will need to add the database in CA that has the customization project.
-
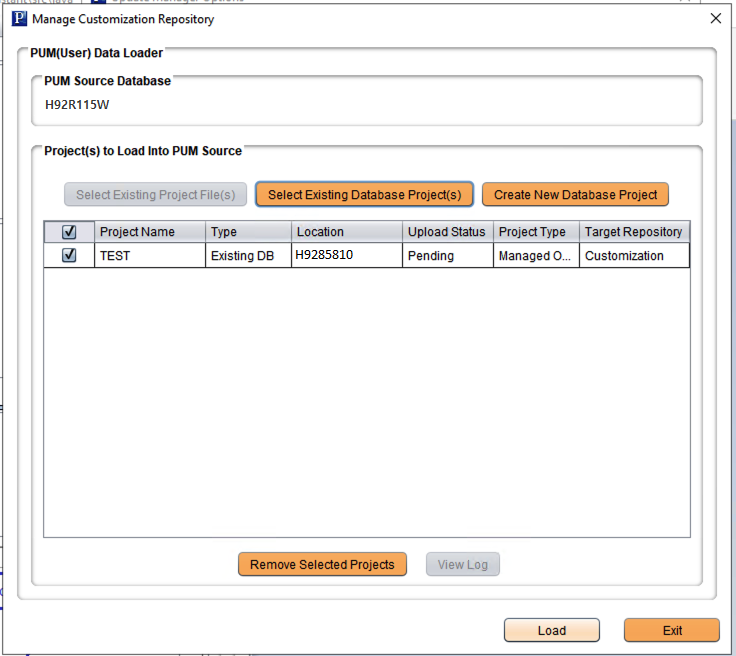
- Click on “Load” to upload the project and customizations in the PUM Source database.
-
- Review Logs to ensure the upload process is completed successfully.
- Review Logs to ensure the upload process is completed successfully.
-
- Observe the change in the “Customization Repository” status which has changed from “Disabled” to “Enabled” when customization is uploaded successfully. This ensures PUM Source has now customization uploaded.

Running Merge Steps
Next, proceed to define, create, and apply a change package. Since you have enabled Object Merge and uploaded customizations, the steps below will do the magic to run merge steps during change package apply process.
- Define Change Package – define a change package using Change Assistant as usual.
When object merge is enabled, <projectname>_CST will be created in the PUM source database. This project is required to run PUM Automated Merge and can be viewed in the app designer for mergeable objects.
- Create Change Package – create a change package using Change Assistant as usual.
- Apply Change Package – Apply the created change package using Change Assistant as usual. In the apply job, you will observe additional steps coming up as shown in the screenshot (highlighted in yellow rectangle):

Just to give you a brief on the merge-related steps, so that you can explore more:
-
- “Running the Merge Analysis process” – Wait for this step to run successfully. Right-click on the step, click on “View Merge Session” context menu. It will open the merge session to analyze the merge results. You can also modify the merge rules, if the results are not satisfactory, and run the step again to run the merge analysis with modified merge rules.
- “Backing up Source Objects prior to Merge Promotion” – This step is responsible to keep a backup of originally delivered mergeable objects which will be restored in a later step.
- “Running the Merge Promotion on the Source” – This step overwrites the PUM delivered objects with corresponding merged version of objects, making the PUM source database ready to export change package that includes merged objects.
- “Exporting change package MO Project from Source” – This step exports the MO project which includes merged version of objects as well.
- “Restoring Source Objects after completing Merge” – This step is required to restore the PUM Image by restoring the objects which were backed up as mentioned in #b.
Analyzing Merge Results
You can run compare reports to view and understand merged objects.
- “Running the CP Compare Reports (8.57 and Above)” – review the compare output of this step to analyze if the customizations are now not shown as customizations.
- “Running Compare of Vanilla Object Project” – review the compare output of this step to understand, without merge steps what would be the impact of the change package apply
This is how PUM Automated Merge works, which tries to simplify the customization retrofitting process. For more information, please refer to this PeopleBook link here.
