AT&T is one of the world’s largest telecommunications providers where delivering the highest levels of service is as important as the privacy and security of our customer’s information. Our DBA team at AT&T is responsible for supporting our high service levels, which we do by monitoring and managing around 11,400 Oracle databases that host our mission-critical applications. We use Oracle Enterprise Manager (EM) to monitor our large fleet of Oracle databases. Along with managing performance and availability, a critical responsibility is to comply with AT&T’s security requirements. For example, one security requirement is to change the EM monitoring account password, which, for purposes of this blog, we assume is DBSNMP, on a regular basis.
With around 11,400 Oracle databases (10,000 Single Instance databases and over 1,400 RAC databases), tasking the DBAs to change the password in the database and within EM is very demanding and time-consuming. On average, it takes 15 minutes per database to change and verify the new passwords. For 11,400 databases, the overall time spent is around 1.5 full-time DBAs per change.
Oracle Enterprise Manager provides a job type named “Change the Password for the Database Monitoring User” that can be used to change the monitoring user’s password for Database Instances and Cluster Database targets in EM. We were challenged with how we could take advantage of this job type to change the password on a regular basis.
The straightforward approach would be to run this job against a group of databases. However, this would not work for us because the day on which the password needed to be changed (and hence run the job) varied across different databases. Another approach we considered is to use the job as a Corrective Action which would be triggered when the DBSNMP account would soon expire, using the “Account Expiry in Hours” out-of-the-box metric. However, we assign a specific profile to the DBSNMP account that does NOT expire the password. This is done to prevent any DBSNMP account from becoming locked and thus not being able to monitor the databases. Due to this profile used by DBSNMP, we could not use the database metric “Account Expiry in Hours” to indicate how soon the password would expire. Instead, we created a metric extension while still using the job as a Corrective Action.
Our Solution
Creating the Metric Extension
To create our Metric Extension (ME) we used SYS.USER$ and queried against the PTIME column to check on how long ago the DBSNMP password had been changed. The ME returns the number of days left before which the password needs to be changed. We designed the ME to collect and evaluate thresholds every 24 hours. The ME was created for both target types, Database Instance and Cluster Database.
Note: For 12c database versions or higher, Oracle no longer permits you to query the SYS schema for a handful of tables, including USER$. See MOS note 2209413.1. For our initial solution, we granted select access to USER$ to DBSNMP directly. We plan to switch over to use the Oracle-recommended SYS.”_BASE_USER” for pre-19c databases or DBA_USERS.PASSWORD_CHANGE_DATE for 19c and higher databases.
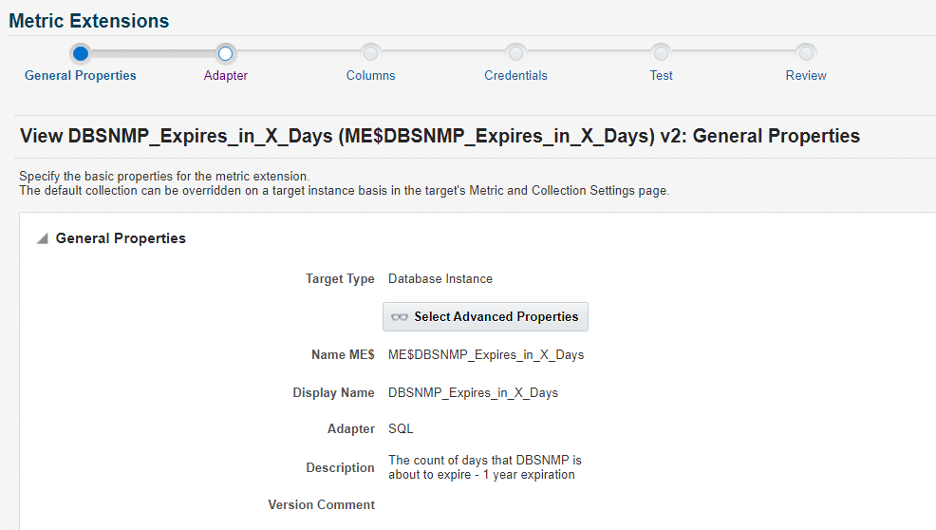
For our illustration purposes, we show an example where you need to change the password every year (365 days) and we will show you the workflow of creating the Database Instance ME below.
Screen 1: In the ME wizard, we define the metric to use a SQL query, scheduled to run once every 24 hours.
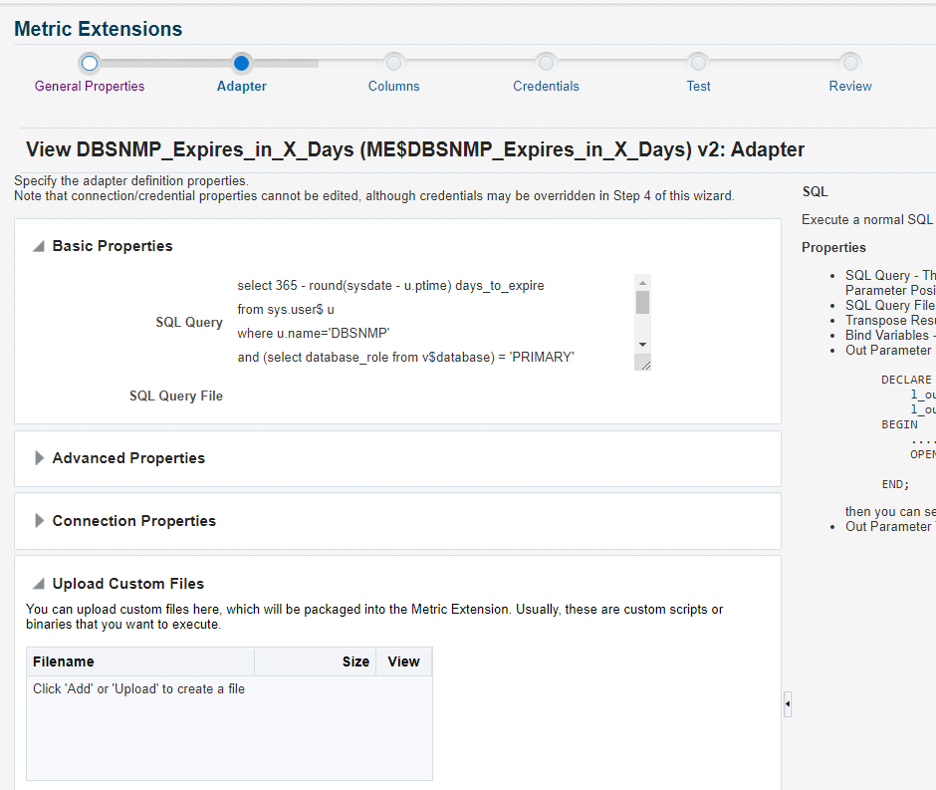
Screen 2: We specify a SQL query to determine the number of days before which the password needs to be changed. Again, in our example, we assume you need to change the password every year (365 days).
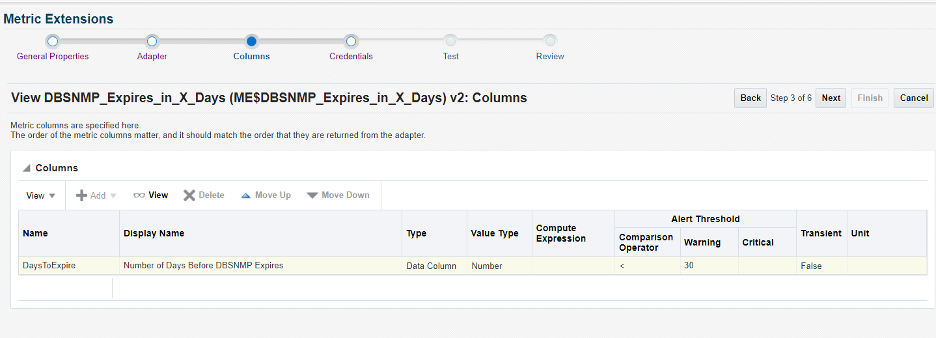
Screen 3: Specify an alert threshold to trigger for N number of days before the password needs to be changed. For illustration purposes, we specify 30 days.
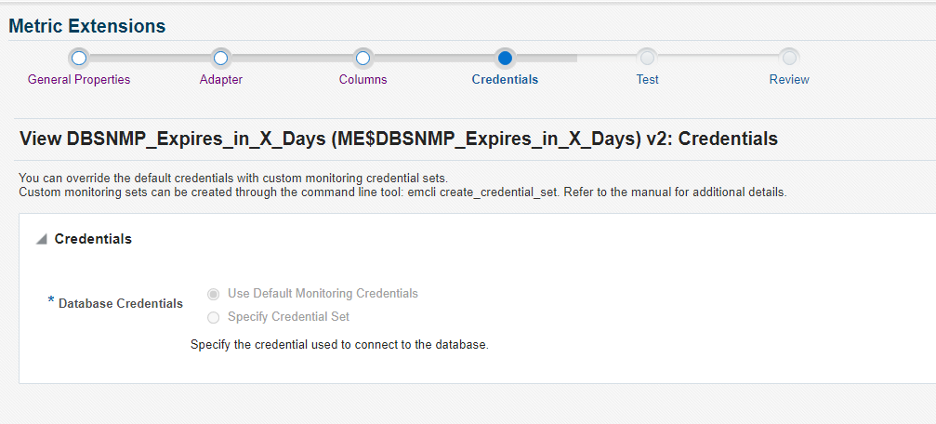
Screen 4: We use the default monitoring credentials for this ME.
Continue to the Test and Review screens of the ME wizard before saving the ME.
At this point, we have a ME that is in Editable status. Once we tested and were satisfied with the results, the ME was Saved as a Deployable Draft and then we Published the Metric Extension.
Creating the Corrective Action
Next, we worked on the Corrective Action that will be called by the ME. In the Enterprise Manager console menu, we click Enterprise -> Monitoring -> Corrective Actions.
Screen 1: We used 2 Corrective Actions: one for Database Instance and one for Cluster Database target types.
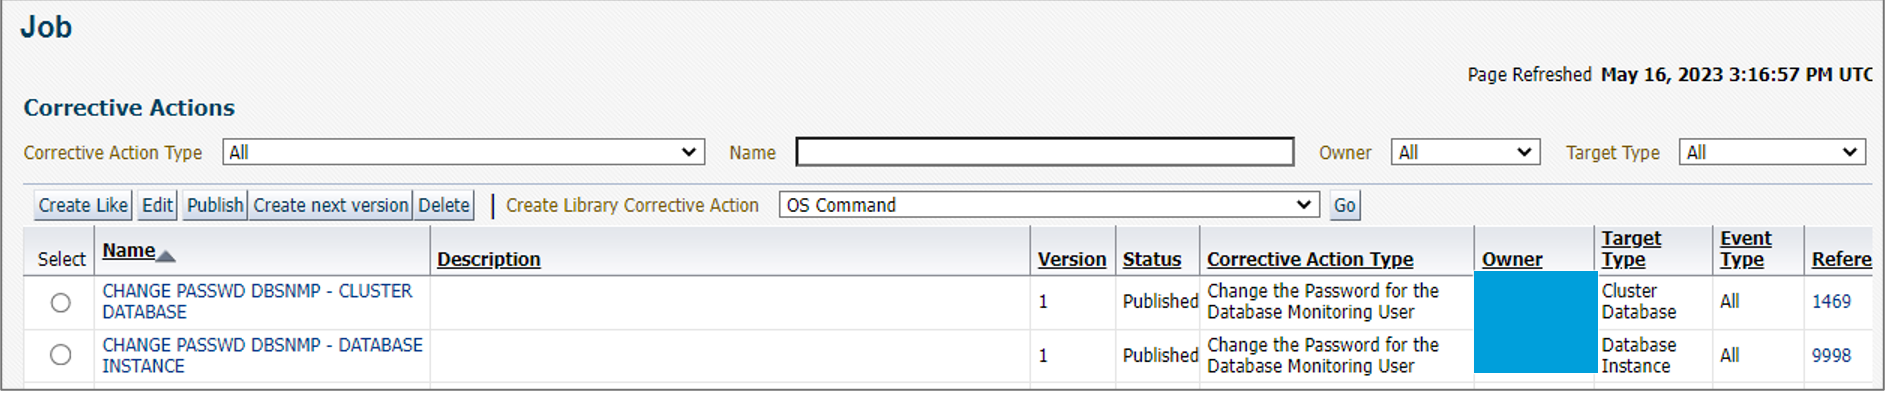
In the following screens, we will be showing the Corrective Action that was configured for the Database Instance.
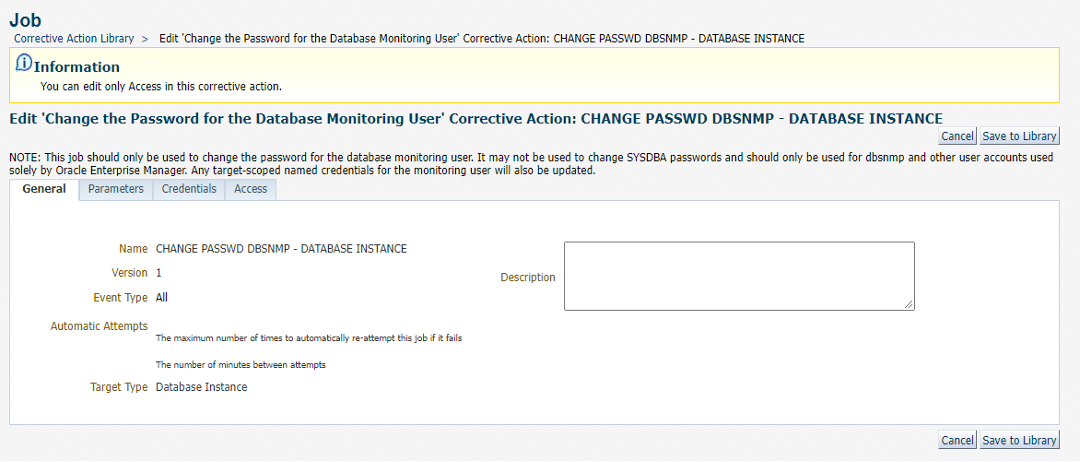
Note: Since we already published the Corrective Action, the UI shows we can no longer edit the definition but can only edit the Access screen.
Screen 2: Notice the Job Type is “Change the Password for the Database Monitoring User”
Screen 3: We choose the option to Auto-Generate a New Password
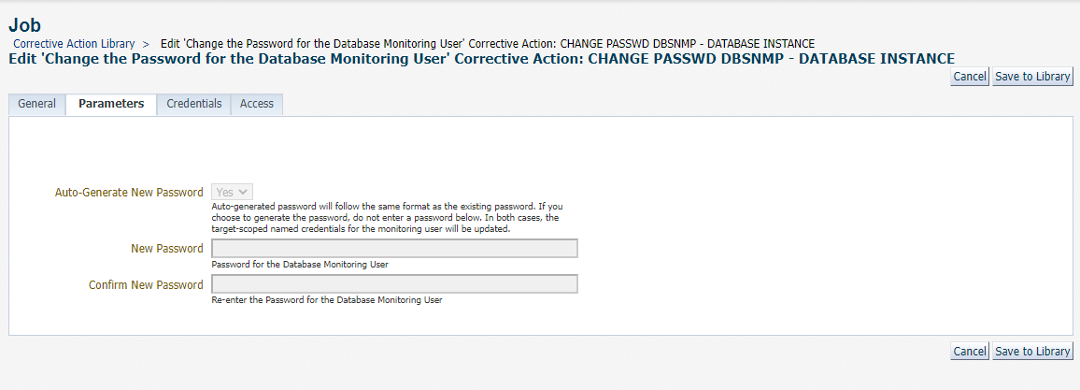
Note: Since we choose the option to have EM auto-generate the password, no user knows the password of DBSNMP thereby providing an additional level of security.
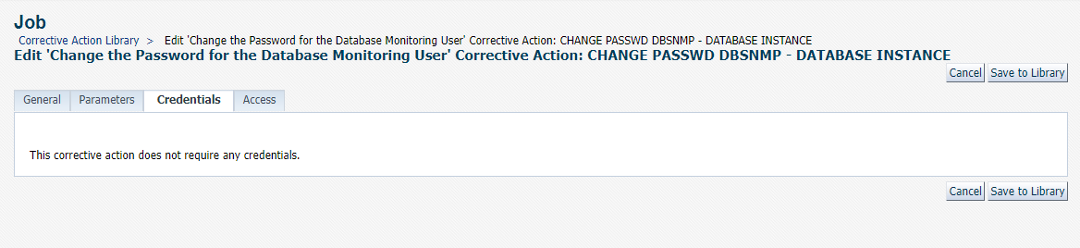
Screen 4: This job type doesn’t require credentials input as it uses the target preferred credentials of the EM user who will associate the corrective action directly with the metric in the target’s metric settings or via monitoring template apply.
Screen 5: You can specify additional users that have access to the corrective action.
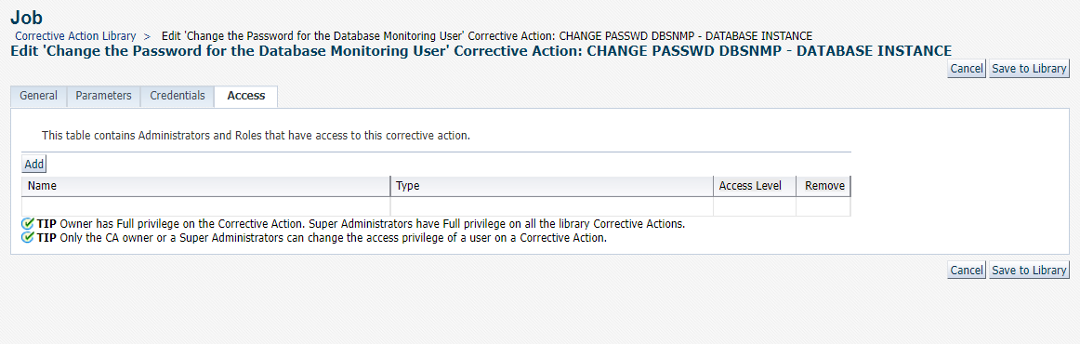
At this point we had the Corrective Action created and we went through the steps to publish it.
Note: Update to the original blog (published on May 10,2022): When we first used the “Change the Password for the Database Monitoring User” job, it did not support databases in a Data Guard configuration with DBSNMP configured with the SYSDBA role.
After working with Oracle to support this, the job has now been enhanced to support changing of passwords for primary and standby databases. The enhanced job is available starting with EM 13.5.0.6 or EM 13.4.0.18, and we plan to adopt this new enhanced job. Refer to Automate Monitoring and Non-monitoring User Credential Password Management in the EM documentation for additional details.
Putting it all together in a Monitoring Template
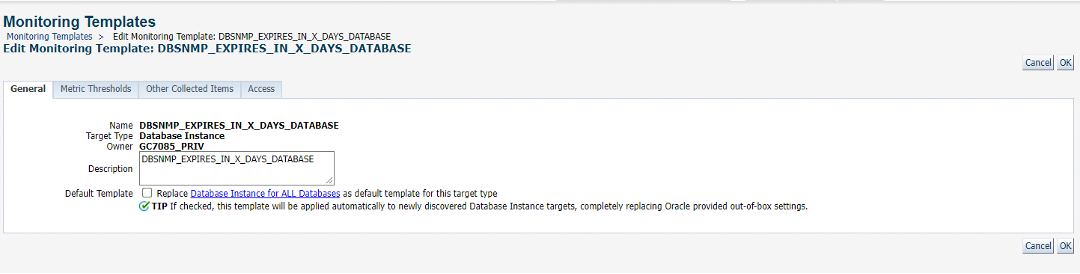
The next step we went through was to create a Monitoring Template (MT) and include the ME. Within this template, we also specified the Corrective Action for the ME.
We created a Monitoring Template for each Target Type: Database Instance and Cluster Database.
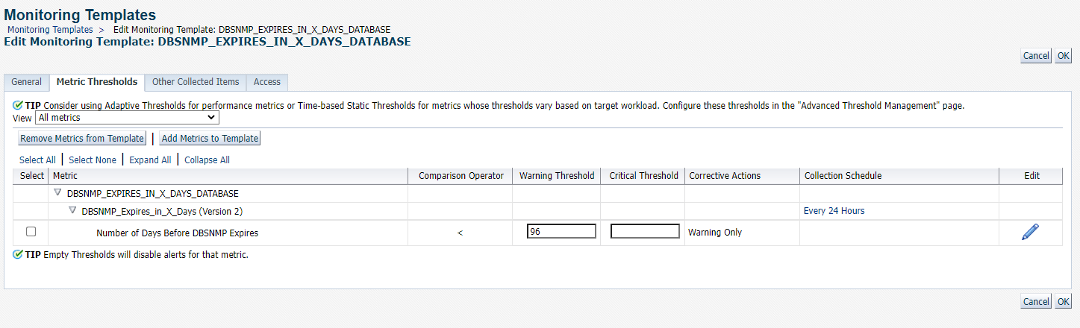
In this example, we show the Monitoring Template for the Database Instance.
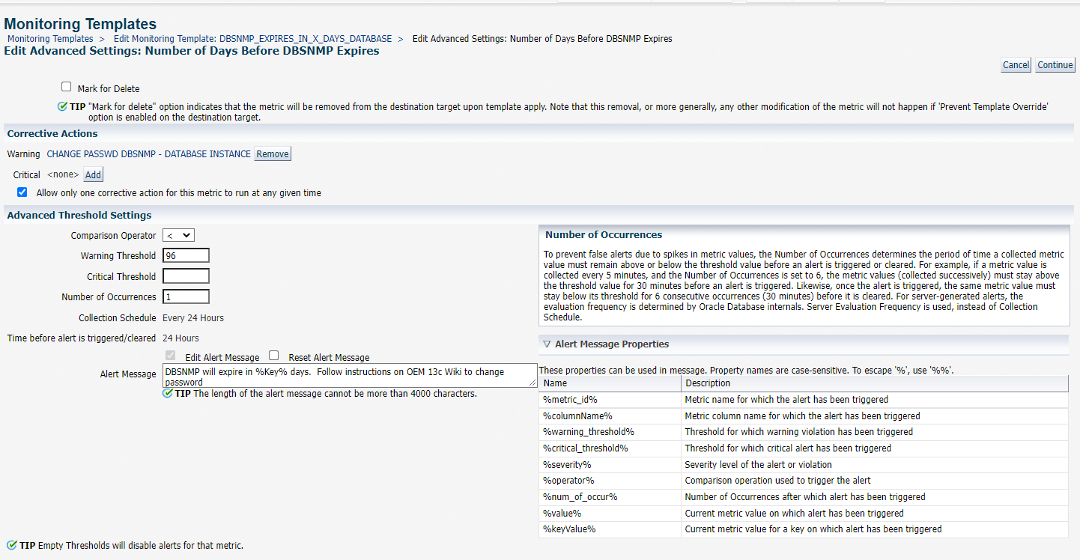
In this monitoring template, we include our ME. For illustration purposes, we specify a warning threshold of 96. We click on the pencil so that we can edit this metric to add the Corrective Action.
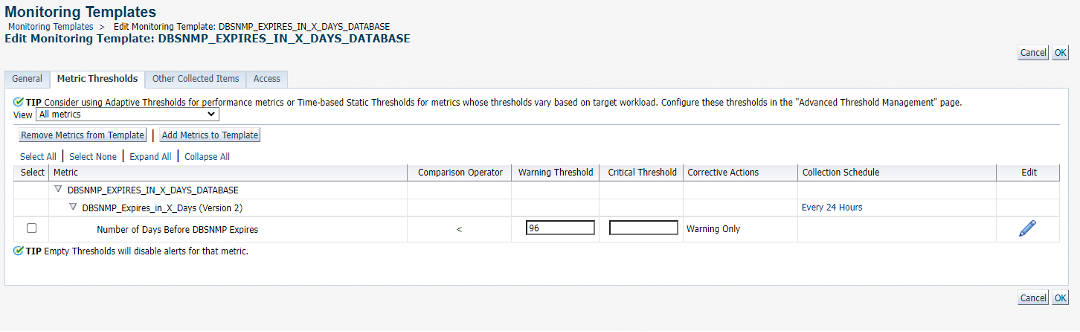
This page allows us to add a corrective action. Also notice since we are setting the Warning Threshold, and leaving the Critical Threshold blank, the only Corrective Action we need is on Warning.
We click on Add next to Warning ….
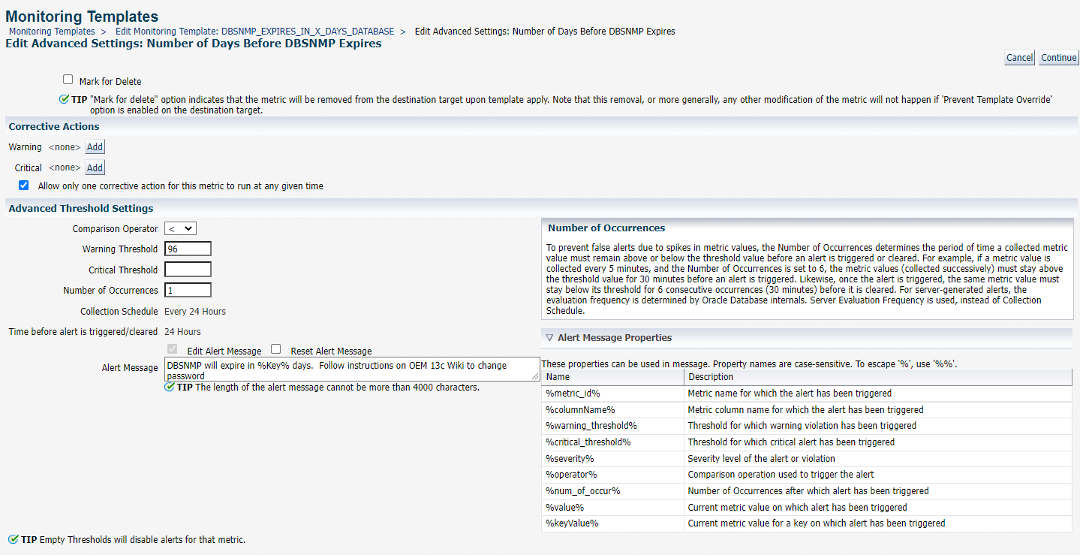
…to add “CHANGE PASSWD DBSNMP – DATABASE INSTANCE” corrective action. We click on Continue.
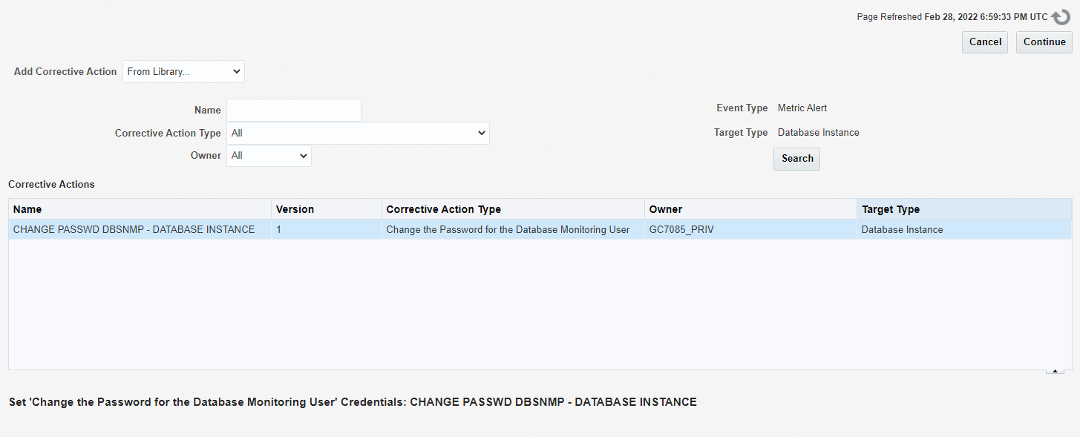
This screen appears to show the corrective action we selected. We click on Continue.
We click OK to save these changes.
This Monitoring Template now contains our metric extension and corrective action and we can now apply this monitoring template to the desired Database Instance targets we choose.
Summary
Using automation in Oracle Enterprise Manager for changing DBSNMP passwords has saved thousands of hours of DBA effort spent on a repetitive, error-prone but important security task. Since implementing this solution, not only do we get predictably repeatable results, the time saved allows us to focus on more strategic work. More importantly, we are in a better position to meet our security compliance requirements across our ever-growing fleet of Oracle databases.
Watch and listen to our presentation and additional details in this video: