Starting with Enterprise Manager Cloud Control 13c, we released a new corrective action called “Add Space to Tablespace”. This corrective action automatically addresses the ‘tablespace full’ problem across different types of tablespaces – locally managed, dictionary managed, permanent, temp and undo tablespaces. When a tablespace is near full and the tablespace full alert has triggered, the corrective action will increase the tablespace by extending existing datafiles, or create new datafiles for Database Instance and Pluggable Database targets.
Add Space to Tablespace corrective action can be used on any of the following Tablespace Full metrics to increase either Smallfile or Bigfile datafiles.
• Tablespace Free Space (MB)
• Tablespace Space Used (%)
• Tablespace Free Space (MB) (dictionary managed)
• Tablespace Space Used (%) (dictionary managed)
• Tablespace Free Space (MB) (Temp)
• Tablespace Space Used (%) (Temp)
• Tablespace Free Space (MB) (Undo)
• Tablespace Space Used (%) (Undo)
See the steps below to setup an “Add Space to Tablespace” corrective action.
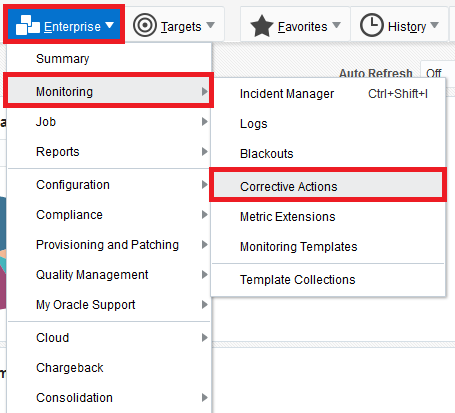
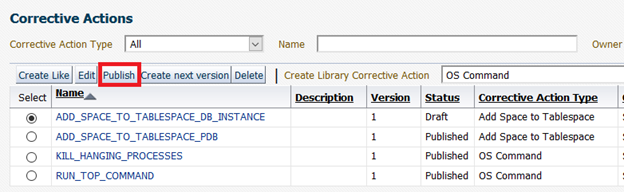
1. Navigate to Enterprise > Monitoring > Corrective Actions.
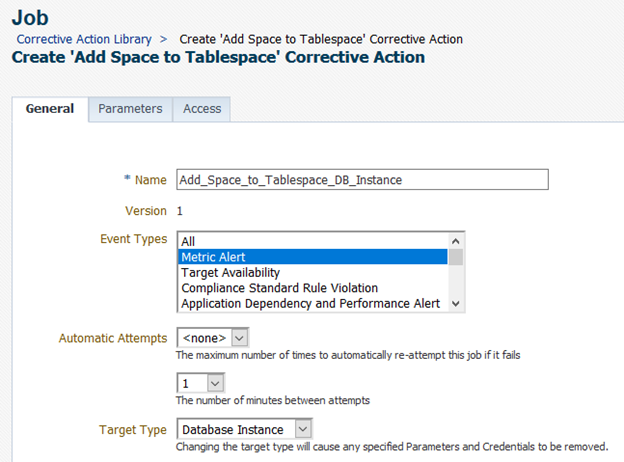
2. Select “Add Space to Tablespace” from “Create Library Corrective Action” drop down and click “Go”.

3. Populate the Name field for the corrective action and select “Metric Alert” event type.
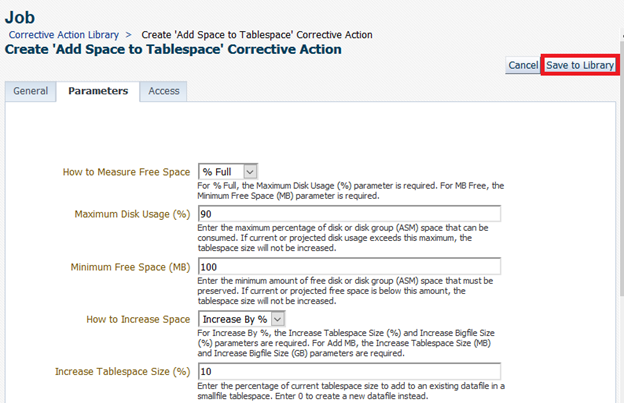
4. Click on the Parameters tab and fill out parameters for the corrective action.

5. Click on “Save to Library”.
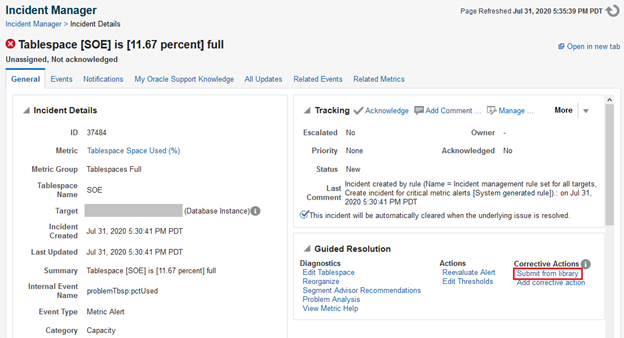
6. The corrective action will be in Draft status. Test the corrective action by generating an alert and manually running the corrective action via Incident Manager.

7. Publish the corrective action after verifying it is working fine.
8. Now that your corrective action has been published, you can start using it by associating it as a corrective action for the Tablespace Full metric. You can do this for a specific database target in its Metric and Collection Settings page, or for many targets as part of your monitoring template for your database targets. Below are instructions for associating the corrective action from Metric and Collection Settings page.
- a. Navigate to target home page and click on [Target menu] > Monitoring > Metric and Collection Settings.
- b. Click on the Edit icon for any Tablespace Full metric.
-

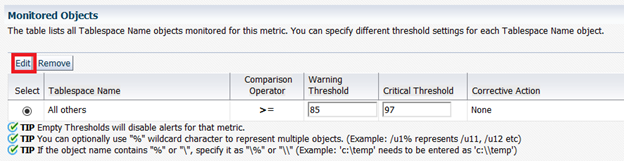
- c. Click “Edit” in the Monitored Objects section.
-
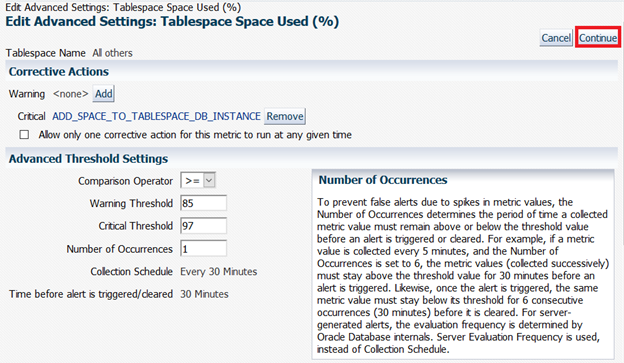
- d. Click on “Add” next to Warning or Critical in the Corrective Actions section.
-

- e. Search for the corrective action and select it.
-

- f. Click “Continue” after the corrective action is added to the metric.
-
- g. Back in the Metric and Collection Settings page, the corrective actions column will display which metric threshold has an associated corrective action.
-

- h. Be sure to save the changes by clicking on “OK” in the Metric and Collection Settings page.
-

- For more information about the Add Space to Tablespace corrective action, see the MOS article “EM 13c How to Use Corrective Action: Add Space to Tablespace” (Doc ID 2640622.1).
- Visit our documentation library for details about how corrective actions work.