Now that you have a new HeatWave DB system and want to experiment with it, but there is no
data, and you’re not ready to upload your production data, you may want to install one of the
example databases available on the MySQL Documentation site. But where do you begin, and
how do you get those files uploaded to your HeatWave DB system efficiently while minimizing
storage fees?
One of the best methods is to use two technologies available in Oracle Cloud Infrastructure
(OCI), which are ready for use with all the features you need: Cloud Shell and MySQL Shell.
This blog demonstrates using these tools and uploading the example Sakila database. Cool!
Let’s get started. Feel free to follow along.
Overview
First, you will need a HeatWave DB system (DB system). Next, we will download the Sakila
example database, set up the Cloud Shell for the first time, and upload the Sakila files to your
Cloud Shell home directory. Finally, we will use MySQL Shell to connect to and load the Sakila
database into our DB system. The only tricky part is that we must create a secure connection for
the Cloud Shell to permit connections to your DB system, but I will show you how to enable
access to the private subnet of your Virtual Cloud Network (VCN).
The first step is to create a HeatWave DB system.
Create a HeatWave DB System
This section will show you how to create a DB system to experiment with example databases.
You can skip to the next step if you already have a DB system you want to use as you follow
along.
Tip: You can read how to create a DB system in the Getting Started section in the HeatWave
documentation, but I will demonstrate the basic steps below.
To create a DB system, click on the OCI main menu to choose Databases | DB Systems, then set
your compartment (I used oci-tutorial-compartment in this example), and finally click
Create DB System, as shown in Figure 1.
Tip: You can learn more about VCNs including how to setup a VCN in the Creating a Virtual
Cloud Network section in the HeatWave documentation.

Figure 1. Create DB System (DB System list)
Next, enter a name for the DB System, such as mysql-example-db as shown in Figure 2.
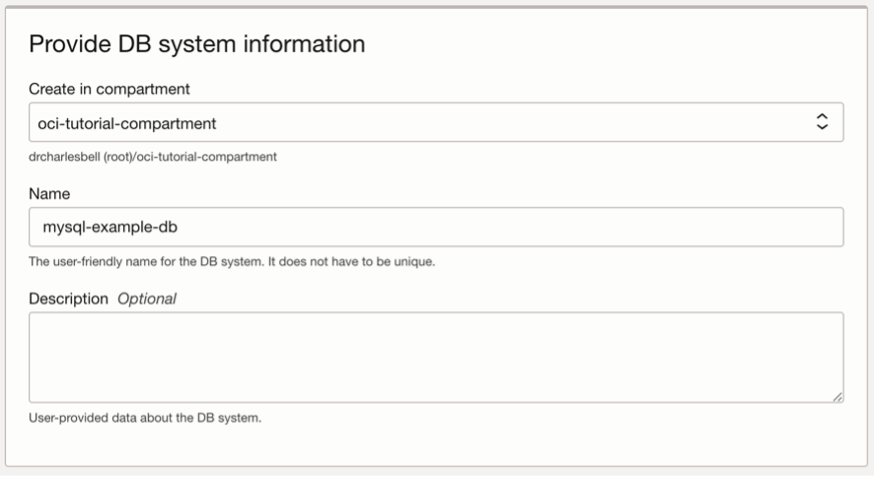
Figure 2. Set name and configuration (create DB System)
Next, set the MySQL admin user ID and password. In this example, I used mysql_admin, as
shown in Figure 3. Remember the password because you cannot reset it yourself if you forget it.
Choose the Standalone option for creating a standalone DB system.
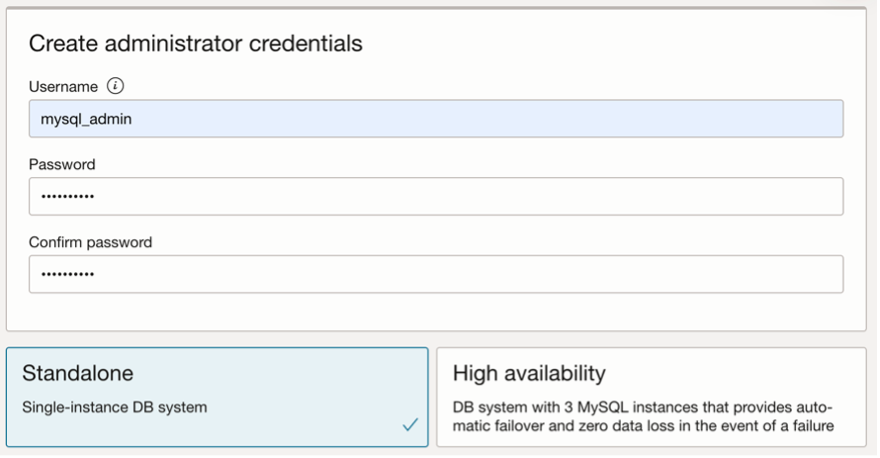
Figure 3. Set MySQL admin user (create DB System)
Notice in this example, I chose to create a standalone DB system. You can also enable high
availability. For more information on these options, see the Creating a DB System section in the
HeatWave documentation.
You can optionally change the shape if you’d like, but if you are experimenting, the cost of the
shape may not be significant since you will likely delete the resource once you finish. You may,
however, wish to change the backup option to turn off the automatic backup and final backup
option. Similarly, you may want to turn off the delete protection by expanding the advanced
options and unclicking the tick boxes in the Deletion plan tab, as shown in Figure 4.
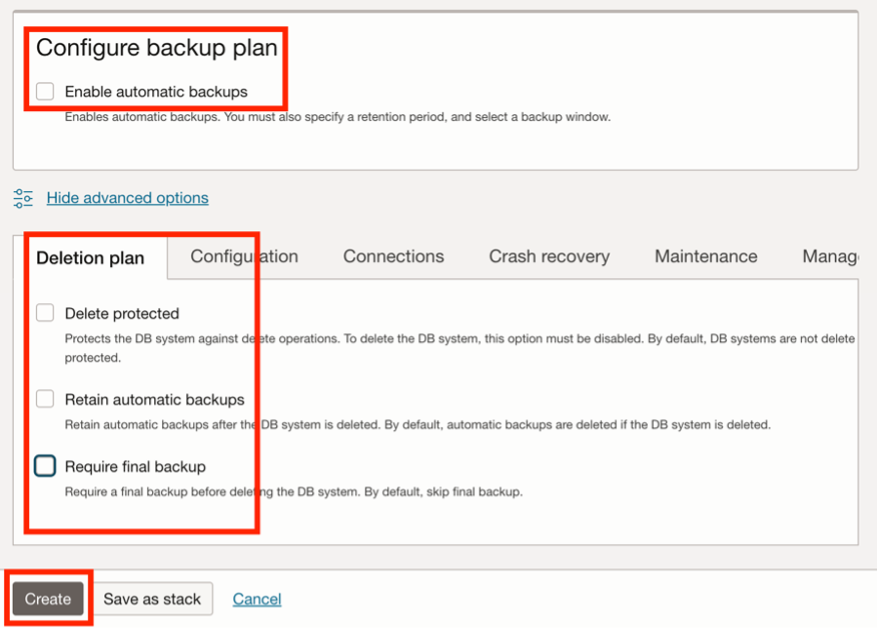
Figure 4. Set backup options (create DB System)
Once the options are selected, click the Create button to create the DB System. You will then see
the DB System details page. Wait until the DB System is ACTIVE, then note the private IP
address on the Connections tab shown in Figure 5. Here, we find the private IP address is
10.0.1.148.
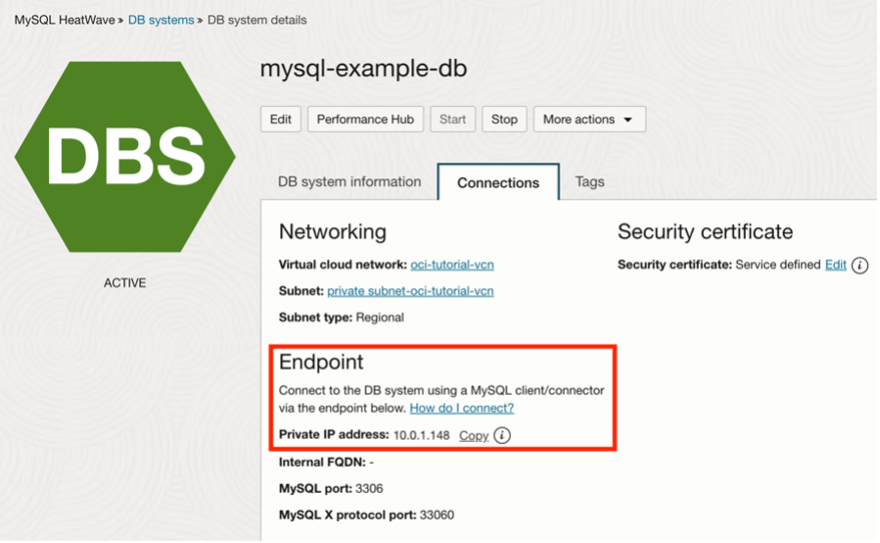
Figure 5. Finding the IP Address
Download the Sakila Example Database
Next, visit mysql.com, click on Documentation, and then More. If you scroll down, you should
see a page with additional documentation and the available example databases. Figure 6 shows
the example databases currently available.
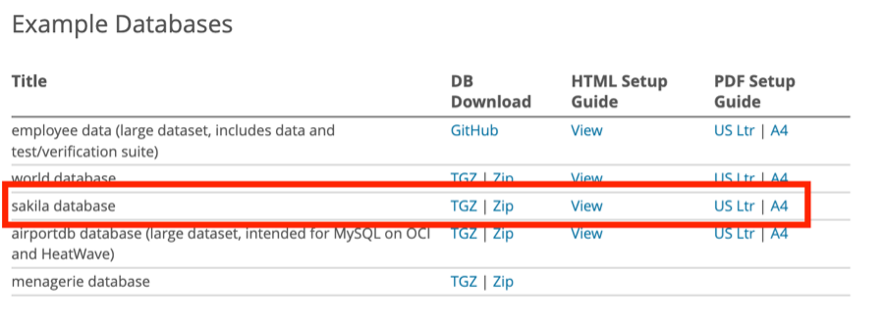
Figure 6. Available Example Databases
To download the Sakila example database, click the Sakila download link as shown, then
uncompress the files once downloaded. The two files we need in the download are sakila-
schema.sql and sakila-data.sql.
Next, we set up the Cloud Shell.
Setup the Cloud Shell
The Cloud Shell is a feature available to all OCI accounts. It is driven by a virtual compute
instance in a terminal-like environment, giving you access to a home directory that you can use
to launch various utilities. It is versatile. Among its many features is the ability to upload and
download files and run applications like MySQL Shell. See the Cloud Shell documentation for
more information about what you can do with the Cloud Shell.
The Cloud Shell is available on your OCI toolbar at the top of the screen. Locate the icon that
resembles a square with two carets, then click on it and choose Cloud Shell, as shown in Figure
7.
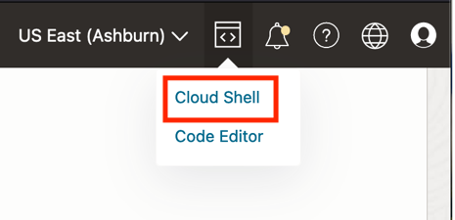
Figure 7. Open the Cloud Shell
Note: This may take a moment to load, and you may see the offer to take a tutorial.
Figure 8 shows what the Cloud Shell looks like. You will first notice that it appears at the bottom
of your web browser, but you can resize it and even make it full-screen. Nice!
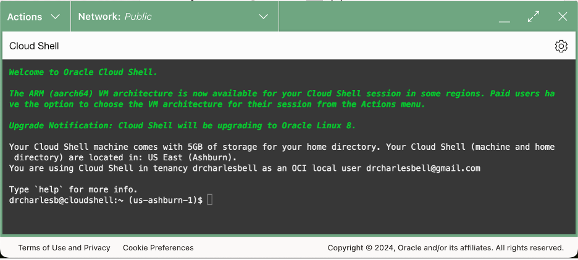
Figure 8. Cloud Shell
Now that the Cloud Shell is open, we can upload the two .sql files for the Sakila example
database.
Upload the Sakila Example Database to OCI
To upload files, click on the gear icon in the upper-right corner of the Cloud Shell window and
then click Upload, as shown in Figure 9.
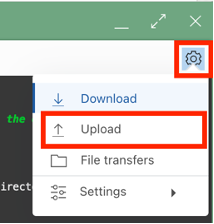
Figure 9. Upload Files
In the open dialog, click Select from your computer, locate the Sakila .sql files, select one, and
click Upload, as shown in Figure 10.
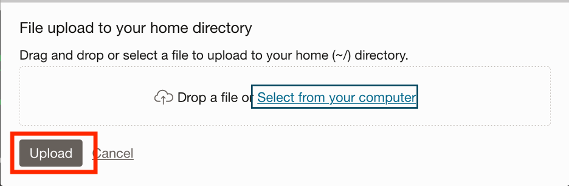
Figure 10. Upload files to Cloud Shell
Repeat the steps to upload the other .sql file. You should see the following two files in your
home directory.
drcharlesb@cloudshell:~ (us-ashburn-1)$ ls
sakila-data.sql sakila-schema.sql
The next step is to connect our Cloud Shell to the private subnet of our Virtual Cloud Network so
that we can log into our DB system.
Create a Secure Network for the Cloud Shell
This step will allow us to connect the Cloud Shell to our private Virtual Cloud Network, where
our DB system resides, and thus avoid setting up a Bastion or VPN or altering the security rules
for our VCN. Nice!
Cloud Shell permits us to connect the shell to other subnets. In this case, we will explicitly create
a private network definition list for the Cloud Shell and connect it to our private subnet. The first
step is to click on the Network section of the shell toolbar and select the Private network
definition list, as shown in Figure 11.
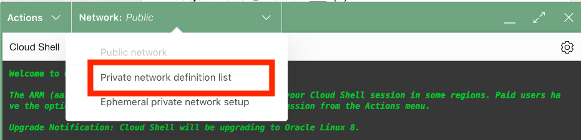
Figure 11. Cloud Shell Network menu
On the Public network definition list dialog, click Create Private network definition, as shown in
Figure 12.
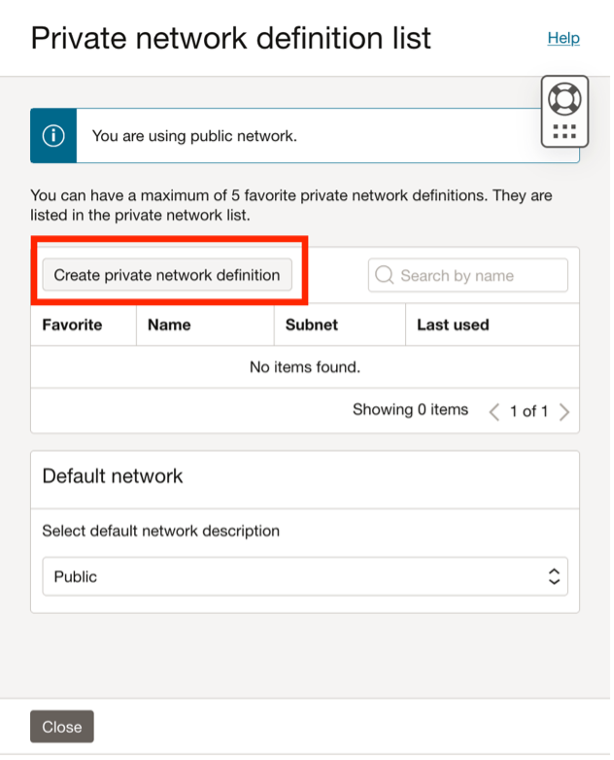
Figure 12. Private Network Definition List
On the following dialog, enter a name for the connection (I used mysql-private-subnet) to
identify it. Then, select your VCN and the private subnet, as shown in Figure 13. Tick Use as
active network to automatically select the list for the Cloud Shell. Click Create when ready.
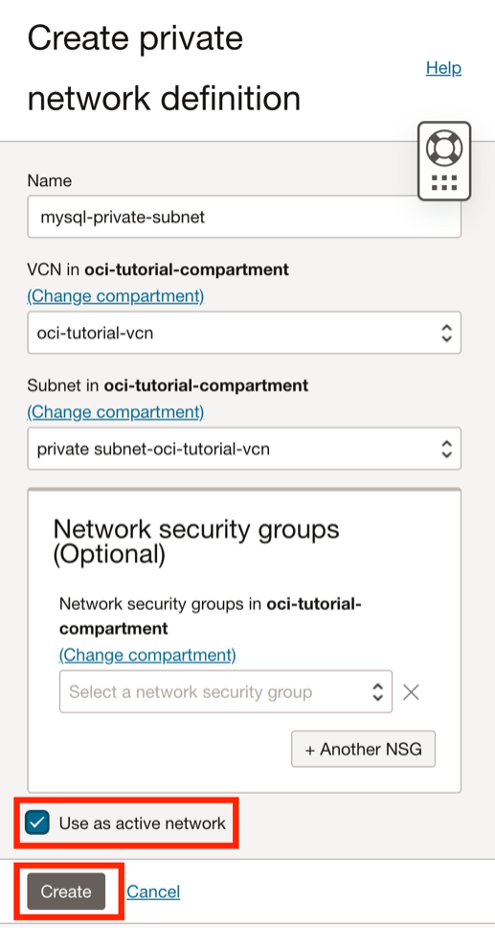
Figure 13. Create a New Private Definition
You can close the dialog and wait while the Cloud Shell is connecting, as shown in Figure 14.
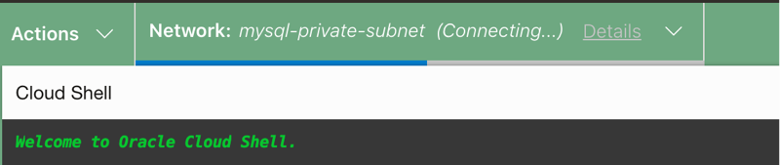
Figure 14. Definition Connection Confirmation
When the connection succeeds, it will appear in the network tab of the Cloud Shell as ready, as
shown in Figure 15.
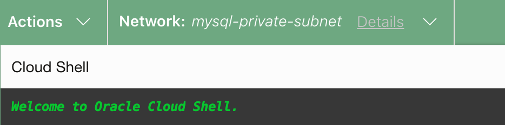
Figure 15. Cloud Shell Network Connection
Once you create the new definition, it will be available whenever you run the Cloud Shell. If you
need to switch back to the public subnet, click on the Cloud Shell’s network tab and select the
subnet you want to use from the list.
Now, we are ready to install the Sakila database.
Use MySQL Shell to Install the Sakila Database
To install the Sakila database, we will use MySQL Shell. Fortunately, the MySQL Shell is
available in the Cloud Shell without additional work. Launch the MySQL Shell with the
following parameters: the node (SQL), MySQL administrator account, and the private IP address
of your DB system. An example command is shown below.
mysqlsh –sql mysql_admin@10.0.1.148
Enter the command in the Cloud Shell, and MySQL Shell will connect to your DB system, as
shown in Figure 16. Once you connect, you will be asked if you want to save the password.
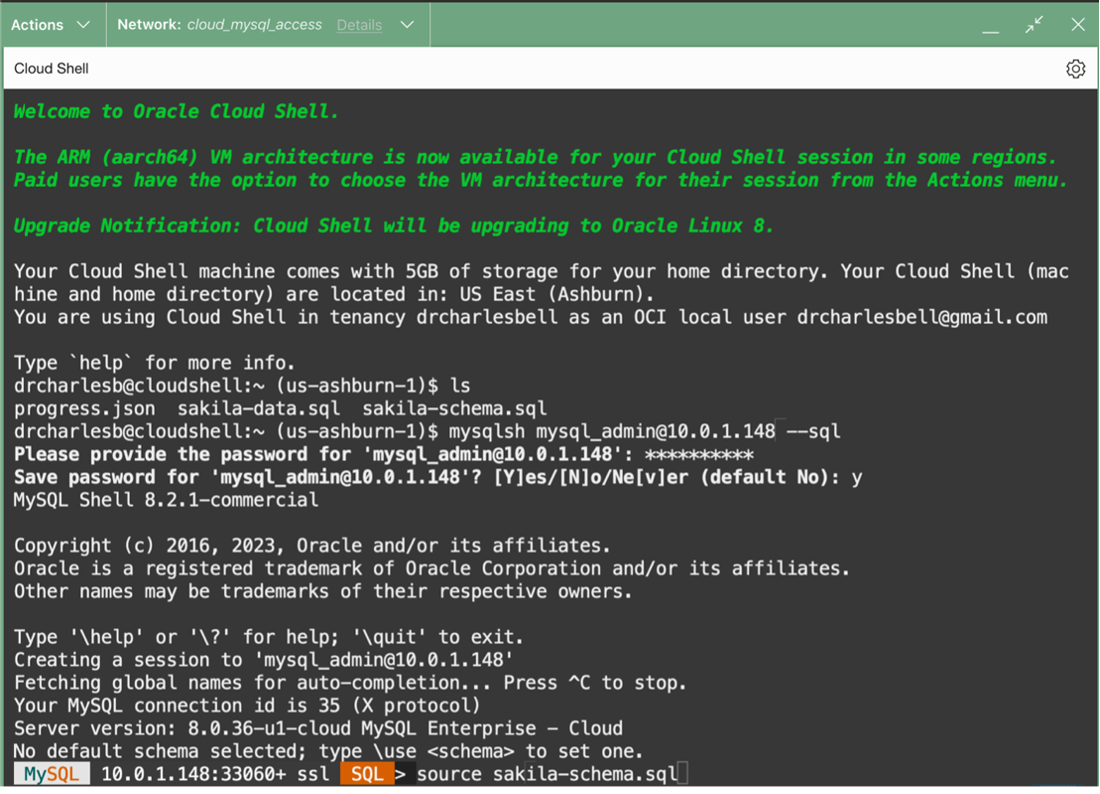
Figure 16. Connecting to DB System with MySQL Shell in Cloud Shell
The next thing we need to do is run two SQL commands. We import (source) the Sakila
metadata (schema) file (sakila-schema.sql) and then import the data file (sakila-data.sql).
Use the following commands to import first the schema and then the data.
MySQL 10.0.1.148:33060+ ssl SQL > source sakila-schema.sql
MySQL 10.0.1.148:33060+ ssl SQL >source sakila-data.sql
Once those commands are complete, you can change to the Sakila database and run a query on
one of the tables, as shown below.
> USE sakila;
> SELECT * FROM sakila.actor LIMIT 3;
+———-+————+———–+———————+
| actor_id | first_name | last_name | last_update |
+———-+————+———–+———————+
| 1 | PENELOPE | GUINESS | 2006-02-15 04:34:33 |
| 2 | NICK | WAHLBERG | 2006-02-15 04:34:33 |
| 3 | ED | CHASE | 2006-02-15 04:34:33 |
+———-+————+———–+———————+
If everything works correctly, you should see the same data! Huzzah!!!!
If something goes wrong, look through the output of the source commands and resolve any
issues.
Clean Up
There are a few more steps if you want to clean up your resources. Exit MySQL Shell and
remove the two files you uploaded so that you won’t be consuming unnecessary storage.
rm sakila*.sql
You may also want to delete the DB system you use for experimentation when you no longer
needed. It is always a best practice to survey your resources before logging off and deleting
those you no longer need.
Note: You do not need to delete the Cloud Shell (other than temporary files like the two .sql
files). OCI will destroy your virtual machine for the Cloud Shell and archive your home
directory. The next time you use Cloud Shell, OCI will create a new machine and unarchive your
home directory.
Conclusion
The method demonstrated in this blog includes some handy Cloud Shell and MySQL Shell
features that you may need to use to load smaller amounts of data, test data, or example
databases.
The following references provide more information about HeatWave DB systems, Cloud Shell,
and MySQL Shell.