Oracle constantly introduces new Exadata generations providing higher performance, lower latency, extended storage, and optimized software and networking. In Oracle Cloud, the new generations become available to everyone as soon as they are generally available. The minimal commitment in Oracle Cloud for an Exadata Infrastructure is only 48 hours. You can migrate your existing Exadata platform to the newer generations to benefit from higher perfromance.
Oracle Data Guard provides an easy way to migrate your Oracle databases from one platform to another with zero to minimal downtime by creating a standby database on the new platform, switching over, and terminating the former primary database.
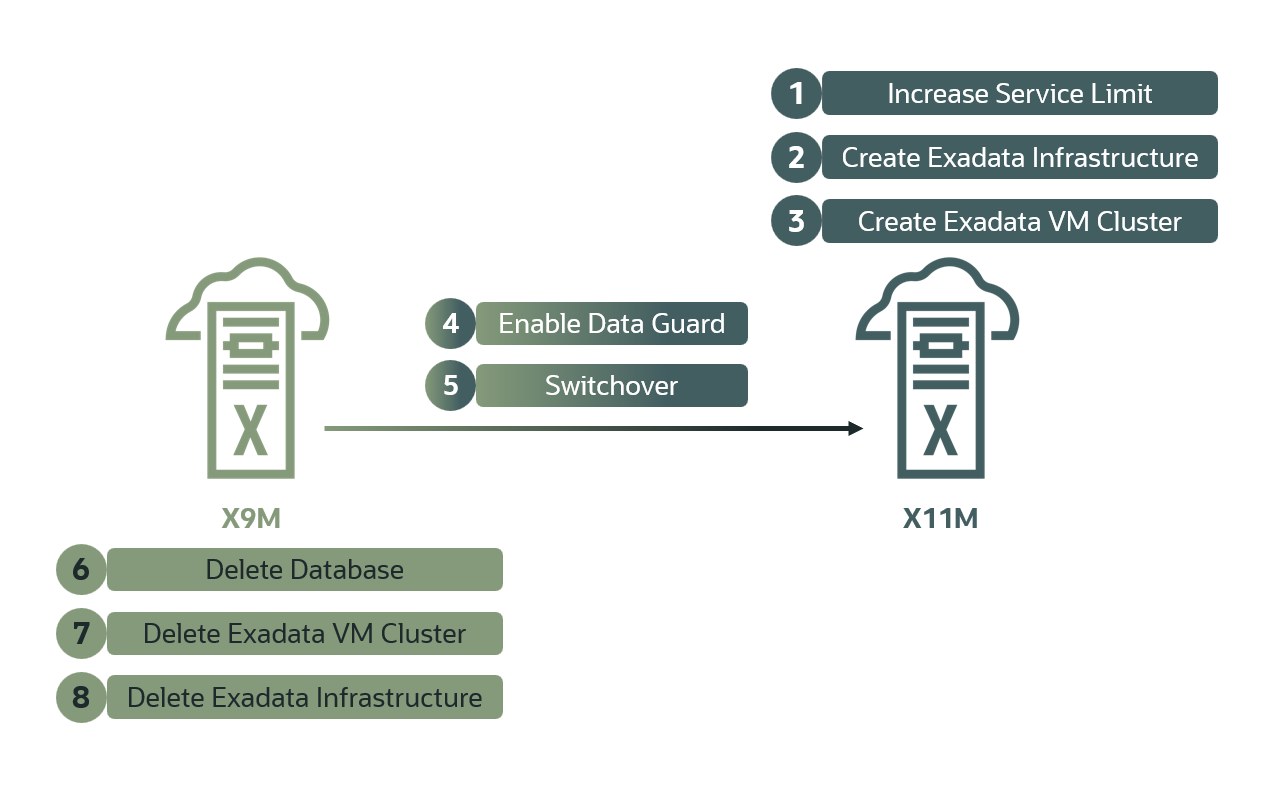
This blog post describes the migration to a new Exadata platform for Oracle Exadata Database Service on Dedicated Infrastructure. In this example, the current Exadata platform is X9M that will be migrated to the newer Exadata platform X11M.
Step 1: Increase Service Limits
Check the service limits and increase them if needed. From the Limits, Quotas and Usage page, choose Database service, the availability domain where you want to create the new Exadata Infrastructure, and the database and storage server resources for your new platform.

If needed, click on the Request a service limit increase button to create a support request to increase the service limits.
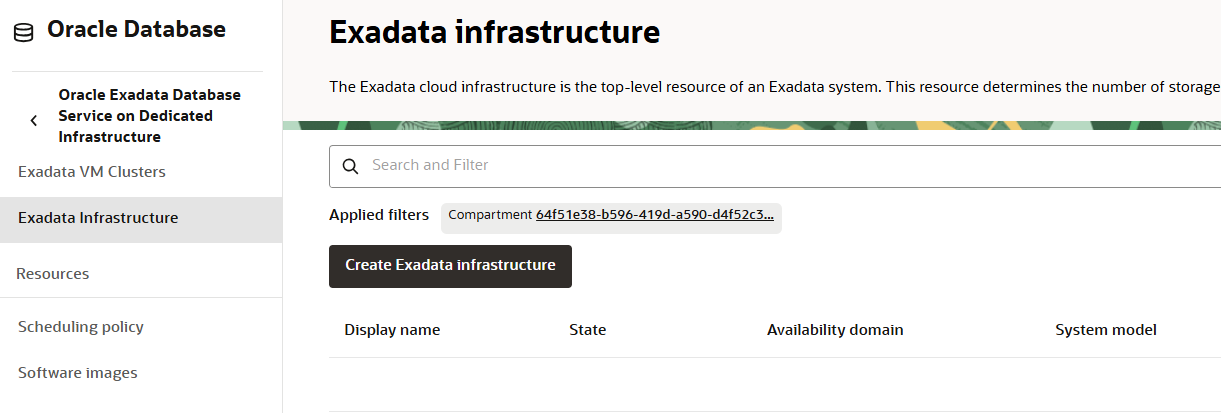
Step 2: Create Exadata Infrastructure
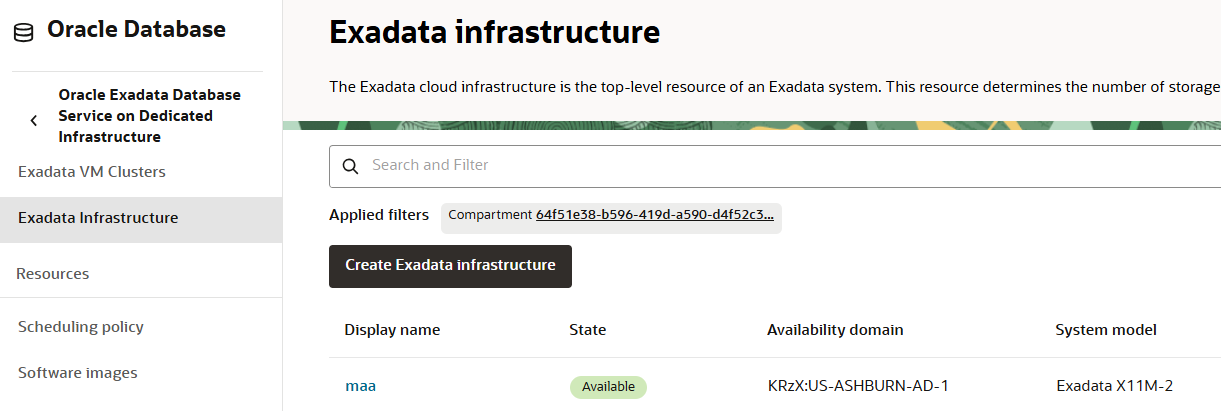
From the Oracle Exadata Database Service on Dedicated Infrastructre page, click on the Exadata infrastructure link, then on the Create Exadata infrastructure button.
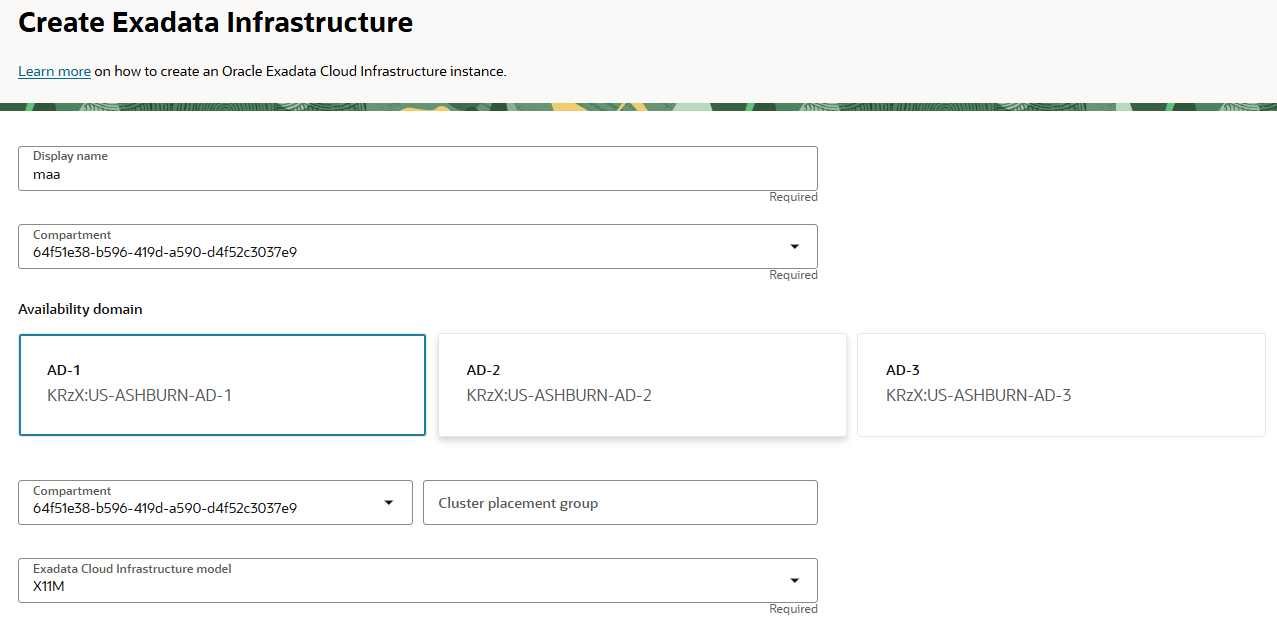
On the Create Exadata Infrastructure page, enter a display name, select an availability domain, and choose the Exadata Cloud Infrastructure model.
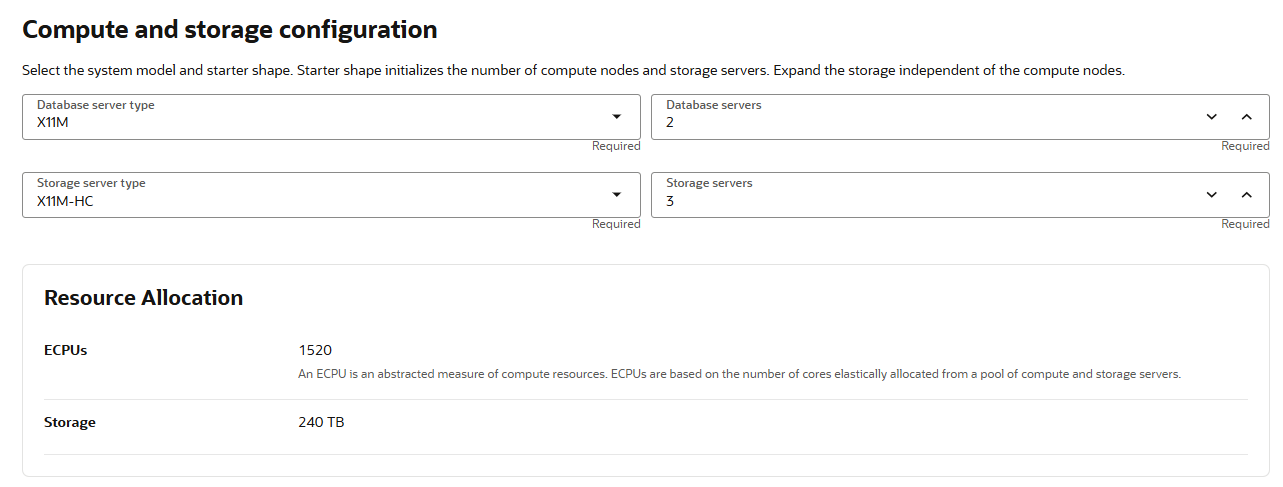
Choose the number of the database and storage servers.
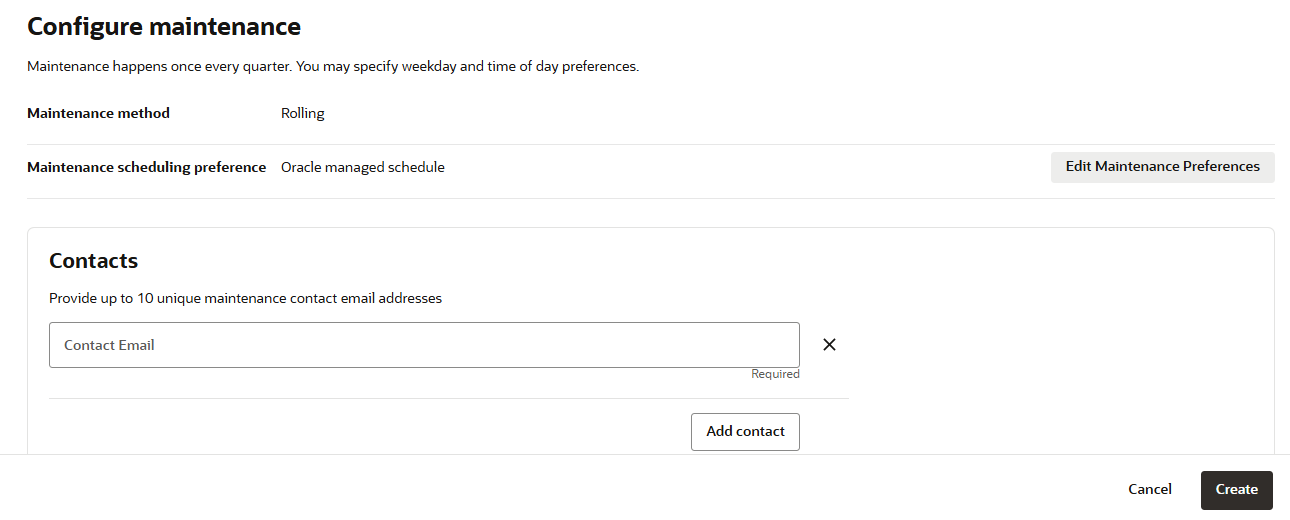
Customize the maintenance schedule if needed and click on the Create button.
Once the Exadata Infrastrucutre is created, it appears on the Exadata infrastructure page with an Available state.
Step 3: Create Exadata VM Cluster
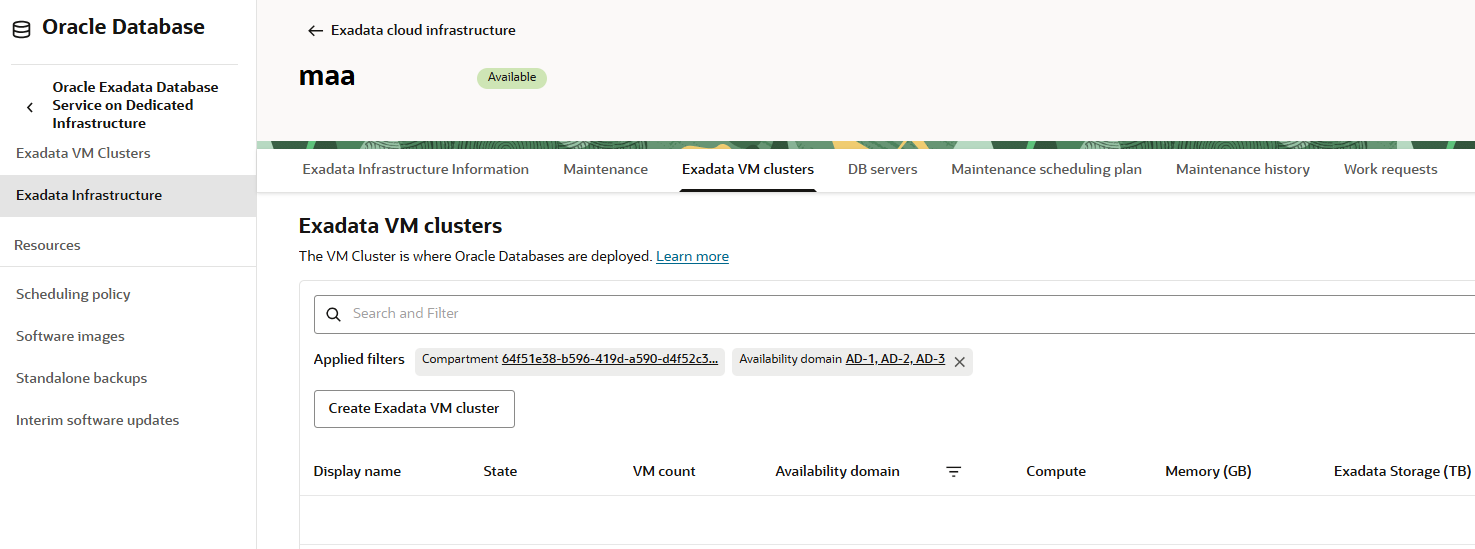
Click on the display name of the newly created Exadata infrastructure to get to the Exadata Infrastructure Information page. Select the Exadada VM clusters tab. Click on the Create Exadata VM cluster button.
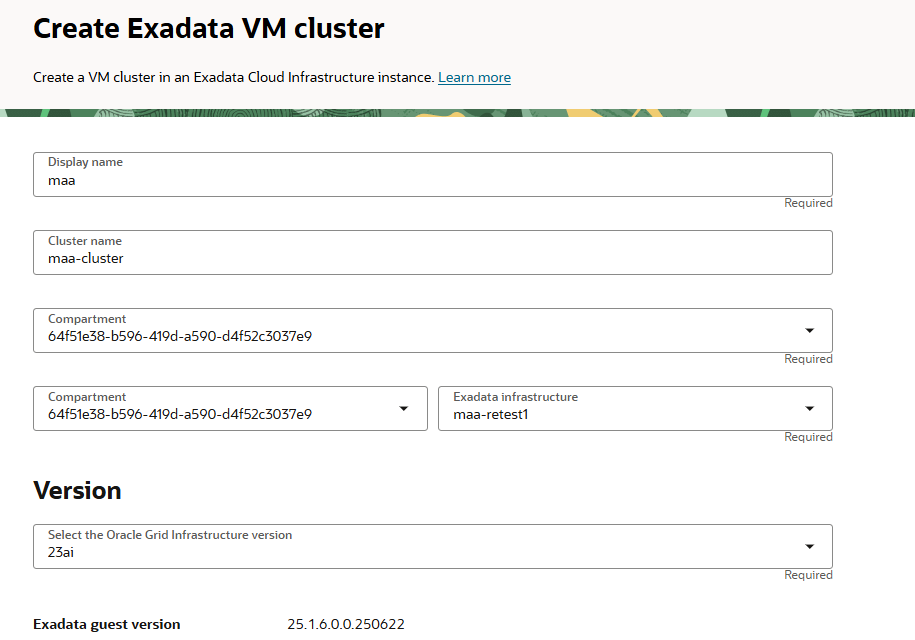
On the Create Exadata VM clustger page, enter a display name and choose the Grid Infrastructure and Exadata guest versions.
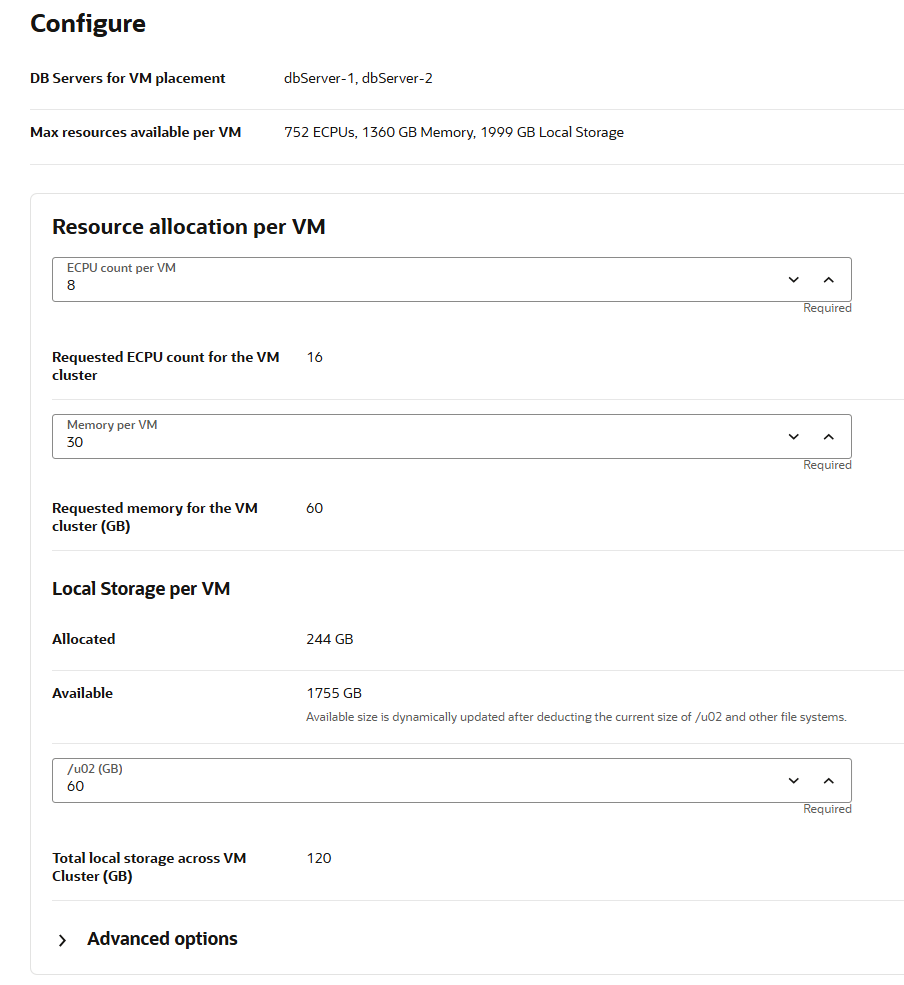
Configure the database servers by choosing the OCPU count, the memory, and local storage allocated per VM.
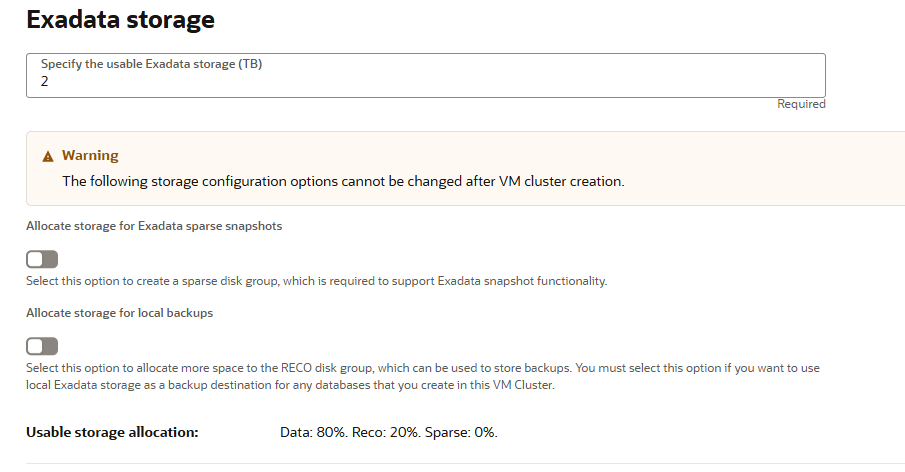
Configure the Exadata storage.
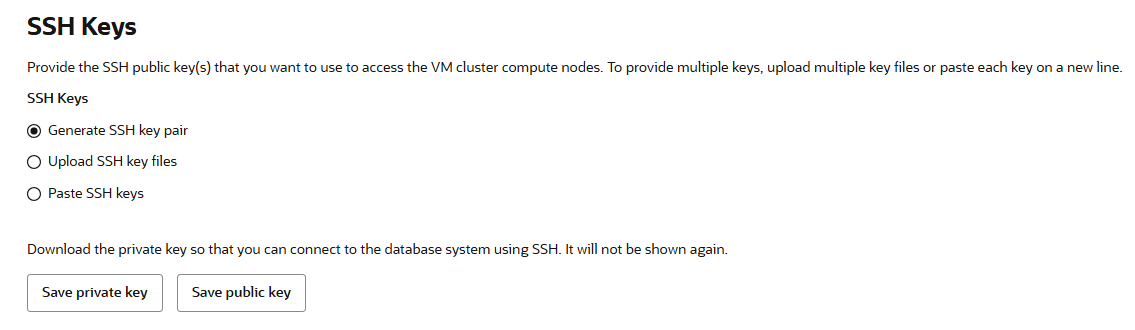
Provide the SSH key to be used to access the VM cluster.
Next, configure the network settings.

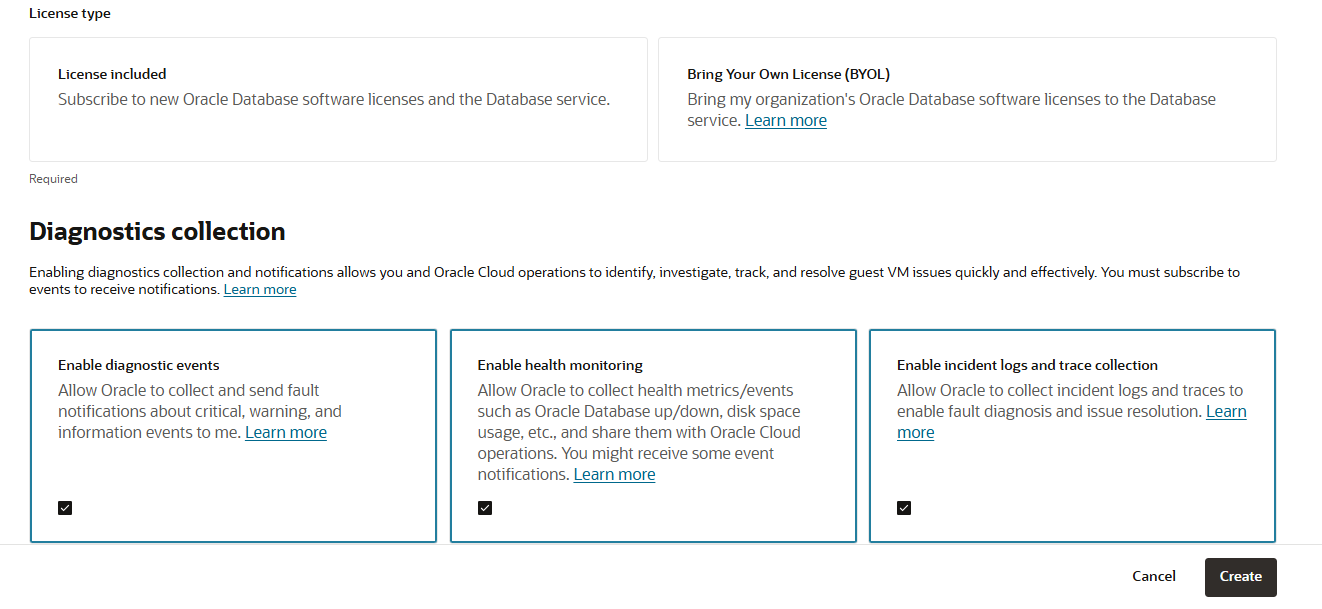
Finally, choose the license type, enable diagnostics collection, and click on the Create button.
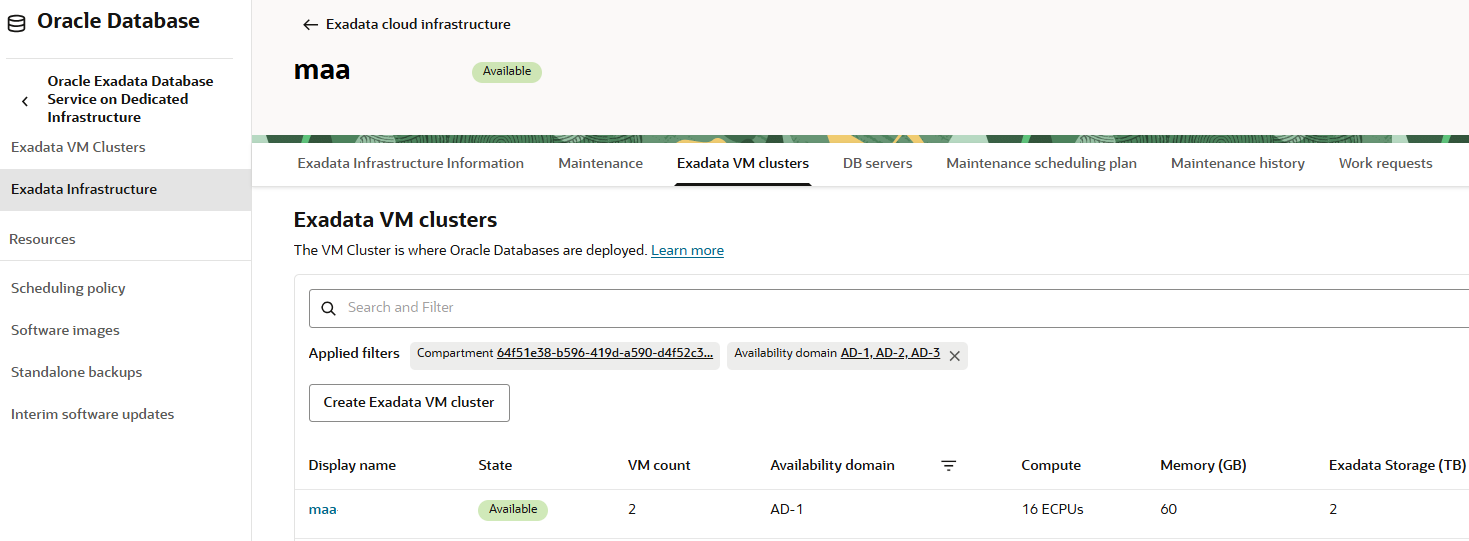
Once the Exadata VM cluster is created, it appears on the Exadata VM clusters page with an Available state.
Step 4: Create an Oracle Data Guard Standby Database
For your Oracle database on the older Exadata infrastructure, create an Oracle Data Guard standby database on the newly created Exadata VM cluster.
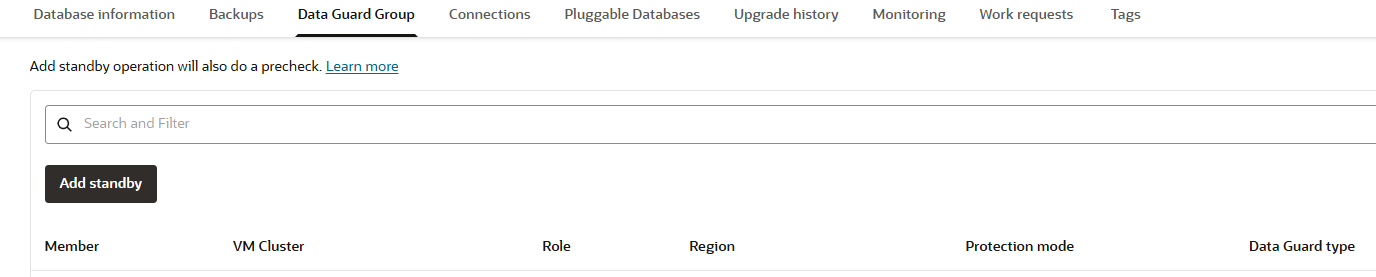
On the Database page, select Data Guard Group tab and click on the Add standby button.
On the Add standby page, select the newly created Exadata infrastructure and VM cluster to host the standby database.
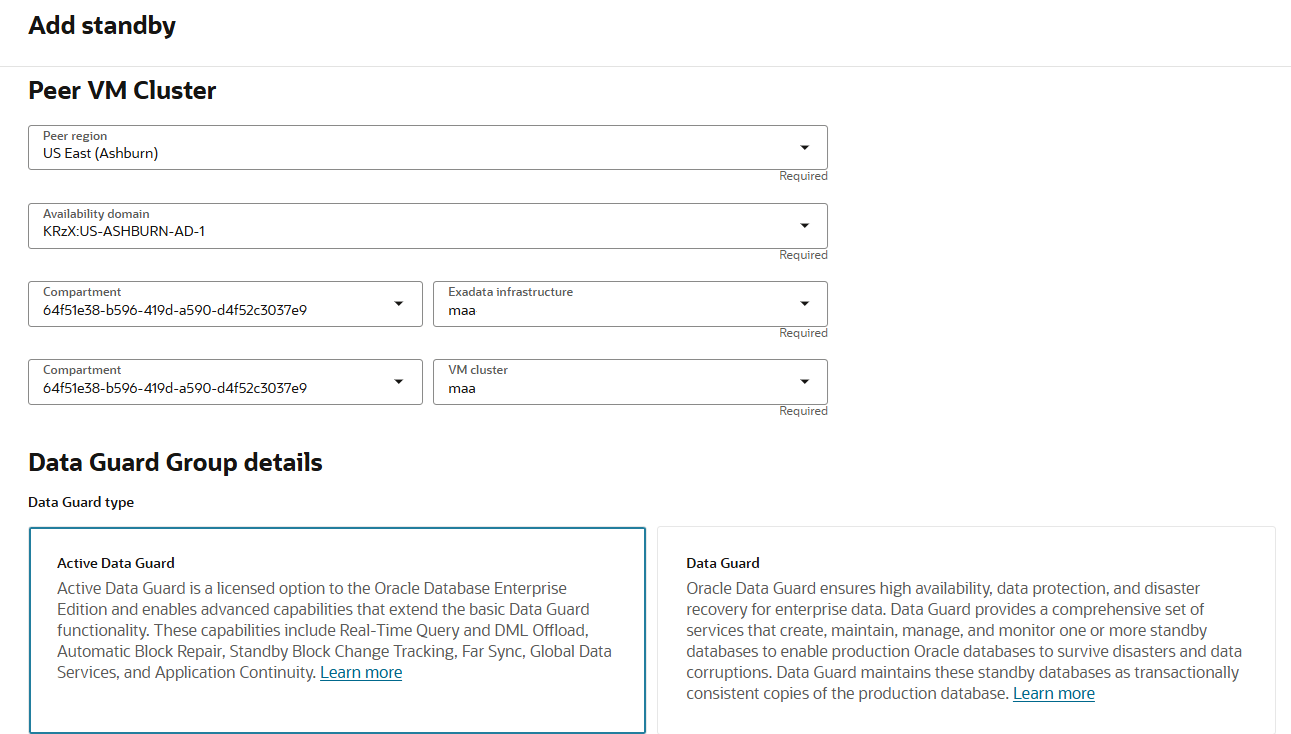
Complete the required configuration details and click on the Add button.
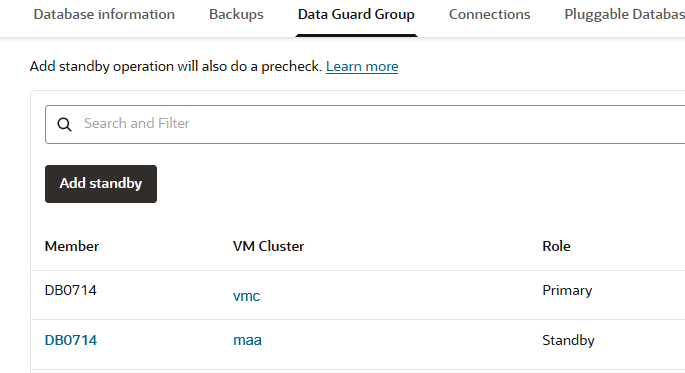
After Data Guard creation is completed, the standby database is visible on the Data Guard Group tab.
Step 5: Switch Over to Data Guard Standby Database
On the Data Guard Group tab, click on the dotted menu for the standby database, then on Switchover to switch the Data Guard roles.
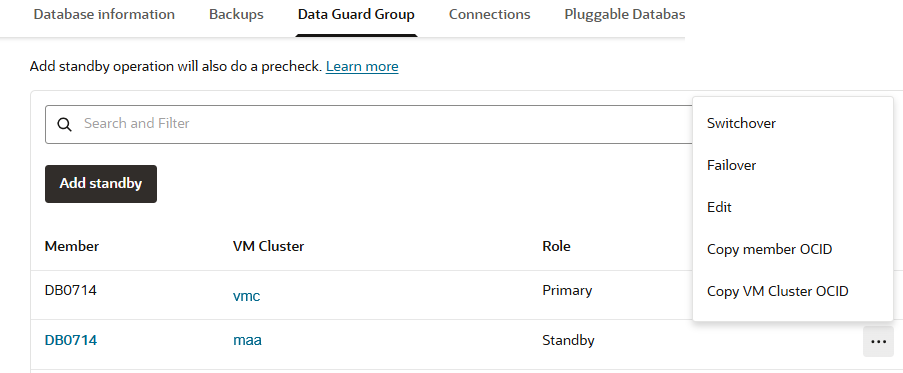
After switchover is completed. The database on the newly created Exadata infrastructure becomes the primary.
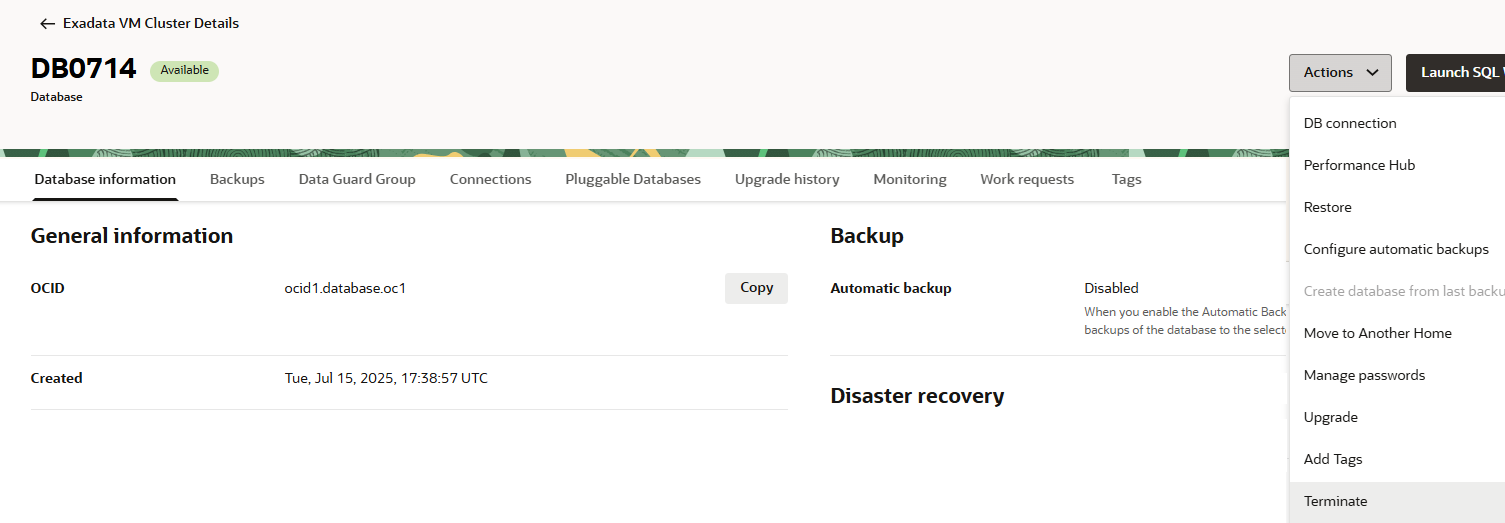
Step 6: Terminate the Database on the Older Exadata Infrastructure
The Database on the older Exadata infrastructure is now in the standby role and can be deleted.
On the Database Information page, click on Actions, then Terminate.
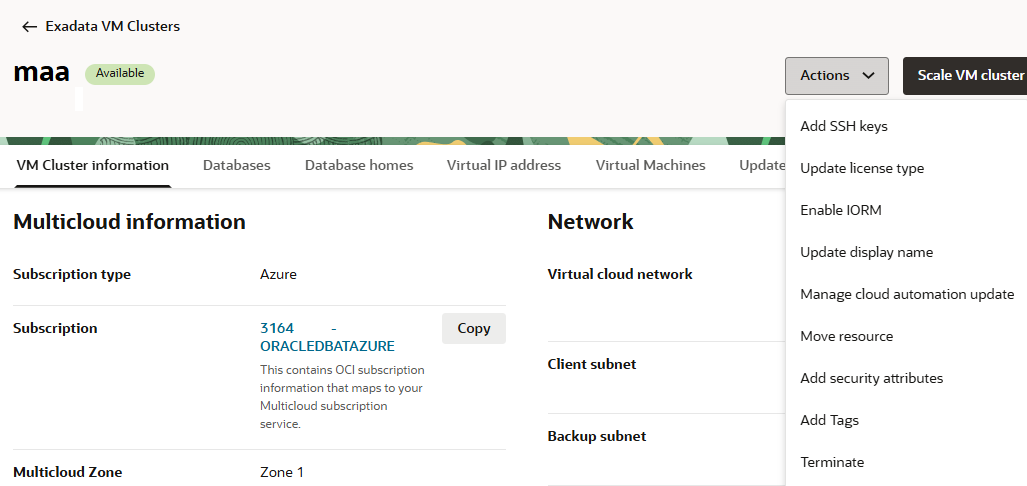
Step 7: Terminate the Older Exadata VM Cluster
Repeat steps 4 to 6 for all your databases on the older Exadata infrastructure. Once there is no databases anymore on the older Exadata infrastructrue, terminate the VM Cluster.
On the Exadata VM Cluster Information page, click on Actions, then Terminate.
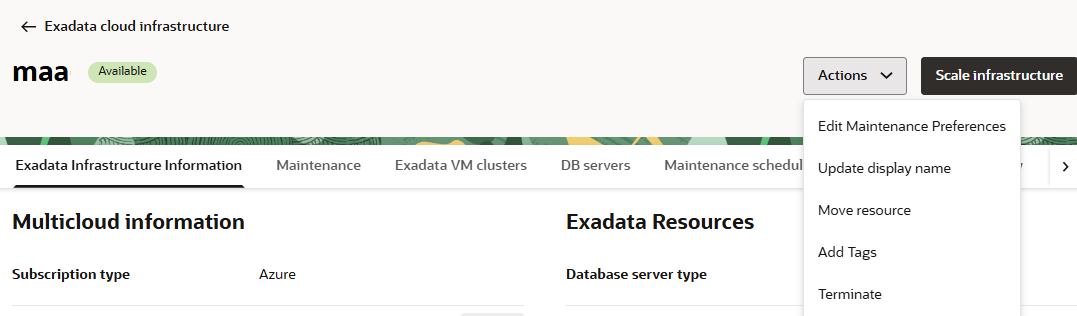
Step 8: Terminate the Older Exadata Infrastructure
On the Exadata Infrastructure Information page, click on Actions, then Terminate.
Application High Availability
To ensure application connectivity and high availability for your application during the migration process, please refer to Configuring Continuous Availability for Applications.
Summary
Automated Oracle Data Guard setup in Oracle Cloud enbales you to migrate your Oracle databases from one platform to another with zero to minimal downtime by creating a standby database on the new Exadata generation, switching over, and terminating the database on the older Exadata platform.