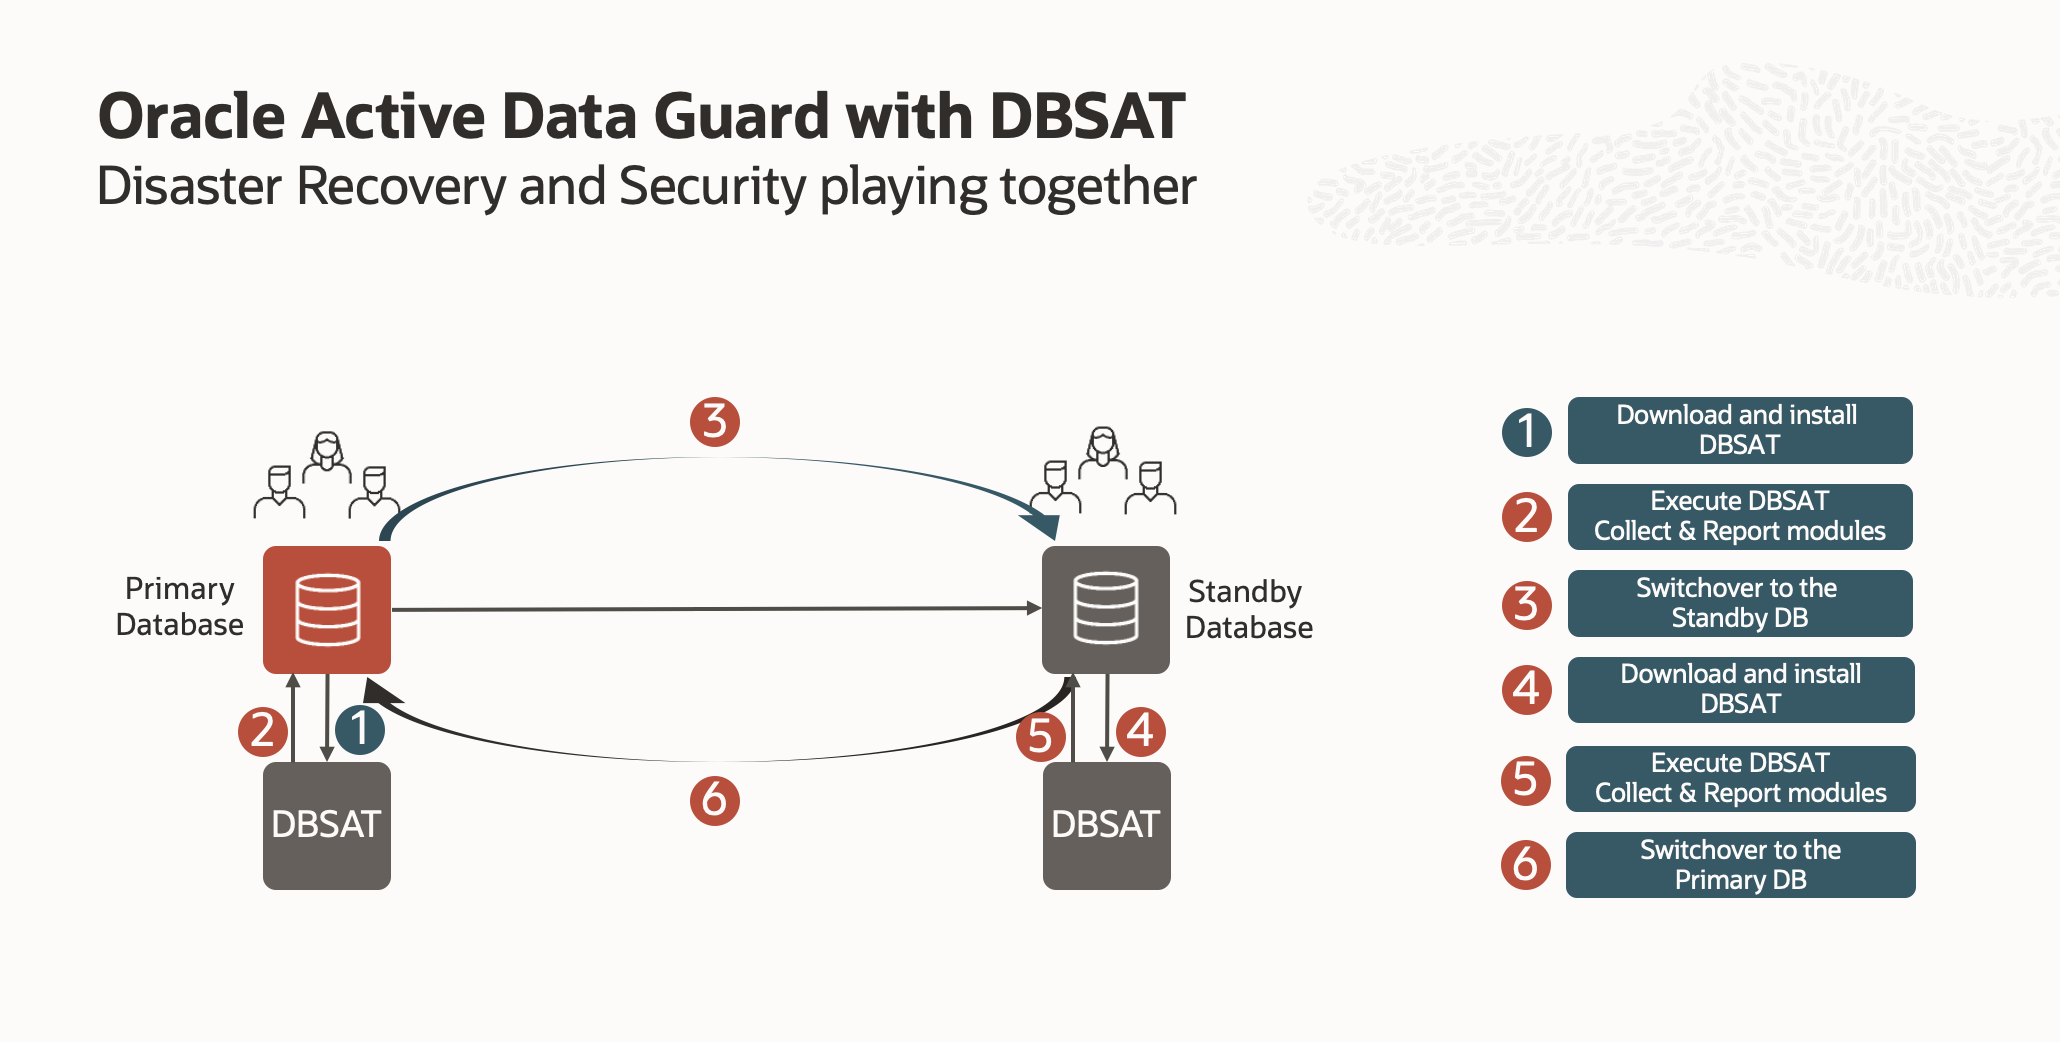
After configuring the whole environment in the first part of this series (you can review it here), it is time to start playing with Active Data Guard (ADG) and Database Security Assessment Tool (DBSAT). In this post, I will begin by executing DBSAT within the primary (by running first the collect module to gather all information from the database and then the report module to generate the report containing all findings to be analyzed). Then, I will test the disaster recovery (DR) environment by executing a switchover to the standby database. From there, I will download, install and run DBSAT to finally complete the exercise by doing a final switchover to leave everything as it was at the beginnig of the activity.
Basic Usage
Running the DBSAT utility with no parameters will display the basic usage details (like a help option).
$ ./dbsat
Database Security Assessment Tool version 2.1 (March 2019)
Usage: dbsat collect [ -n ] <database_connect_string> <output_file>
dbsat report [ -a ] [ -n ] [ -x <section> ] <input_file>
dbsat discover [ -n ] -c <config_file> <output_file>
Options:
-a Report about all user accounts, including locked, Oracle-supplied users
-n No encryption for output
-x Specify sections to exclude from report (may be repeated for multiple sections)
-c Configuration file for discoverer
Running Collect Mode

To run the DBSAT collect mode, all you need to do is run the DBSAT executable plus the following parameters:
- Collect means you are executing the collect module
- Connect_string Specifies the connection string to connect to the database
- Destination specifies the location and file name for the Database Security Assessment report (Do not add an extension).
When running, the collector will prompt you to enter the database password manually, and at the end, it will ask for an encryption key (password) for the zip output file that will be generated.
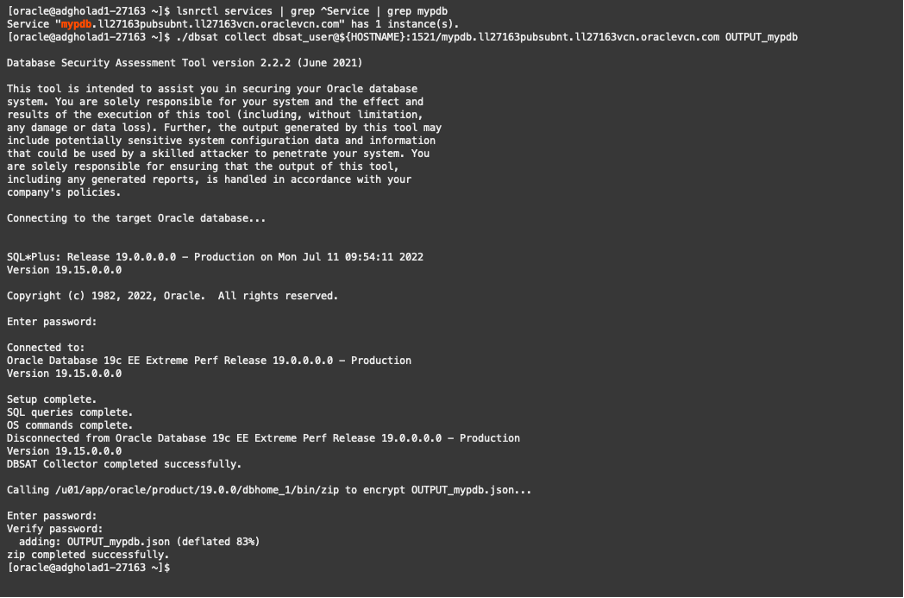
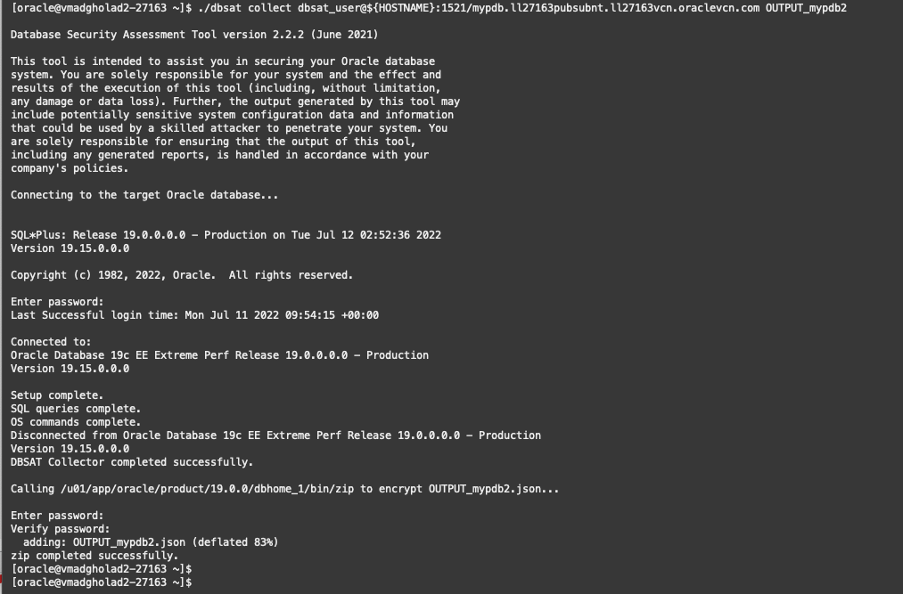
An easy way to discover the name of the service required to connect to our pdb called “mypdb” is by running the command line below:
$ lsnrctl services | grep ^Service | grep mypdb
Service “mypdb.ll27163pubsubnt.ll27163vcn.oraclevcn.com” has 1 instance(s).
Now that we know the service to use let’s run the collect module of DBSAT.
$ ./dbsat collect dbsat_user@${HOSTNAME}:1521/mypdb.ll27163pubsubnt.ll27163vcn.oraclevcn.com OUTPUT_mypdb
Running Report Mode
Now that we collected all the required information, it is time to run the reporter module to analyze all raw data collected by the collector mode previously executed and saved in a JSON file and generate and report in a readable format with findings and recommendations to improve the security of the database analyzed.
To run the DBSAT at report mode, all you need to do is run the DBSAT executable plus the following parameters:
- report meaning you are executing the report module
- -a Includes all the database user accounts in the analysis. (Locked Oracle-supplied accounts are excluded by default as they cannot be used to connect to the database.)
- -n Specifies that the generated reports are not encrypted
- -x Excludes a section from the report
- USER: User Accounts
- PRIV: Privileges and Roles
- AUTH: Authorization Control
- CRYPT: Encryption
- ACCESS: Fine-Grained Access Control
- AUDIT: Auditing
- CONF: Database Configuration
- NET: Network Configuration
- OS: Operating System
- Destination specifies the location and file name for the Database Security Assessment report (Do not add an extension)
The report module will prompt you to manually enter the encryption password used when collecting the data from the database to open the encrypted JSON file. Ultimately, it will ask you for an encryption key (password) for the zip output file generated with all findings.
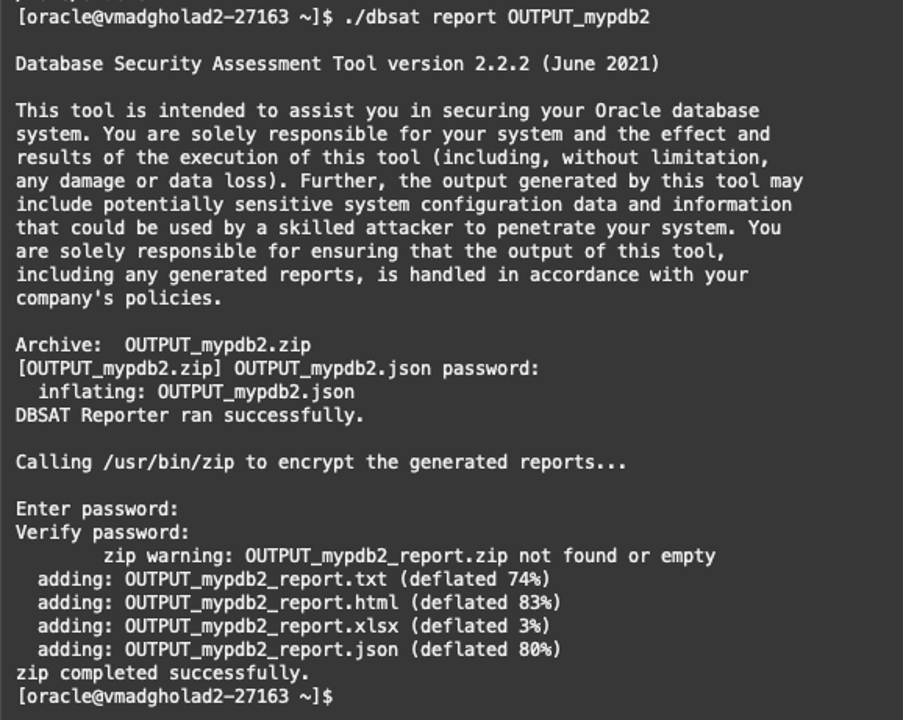
$ ./dbsat report OUTPUT_mypdb
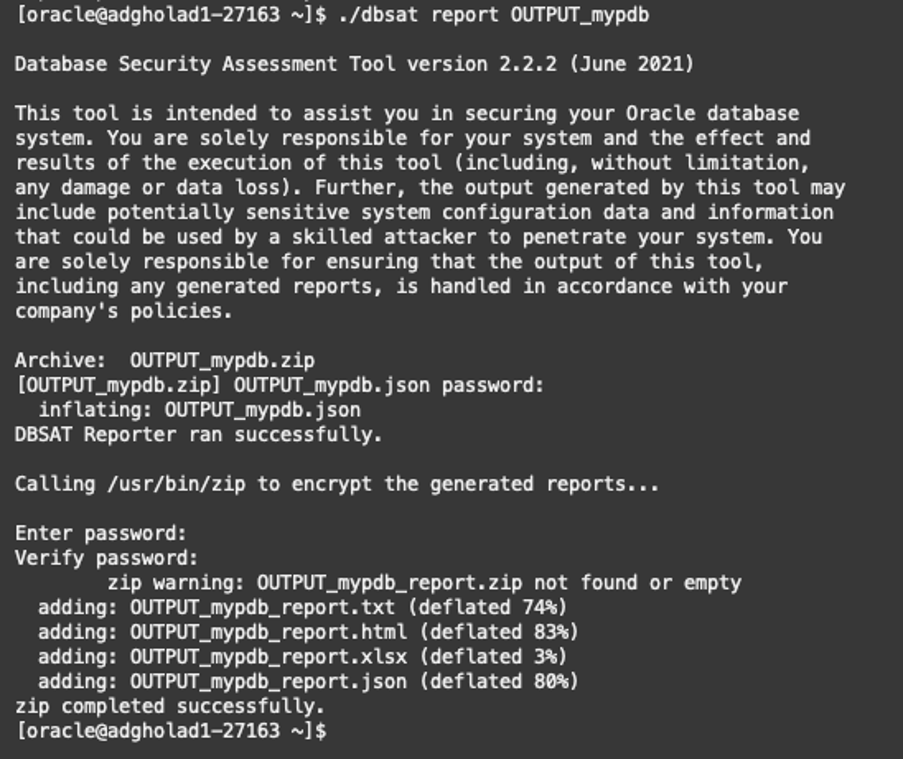
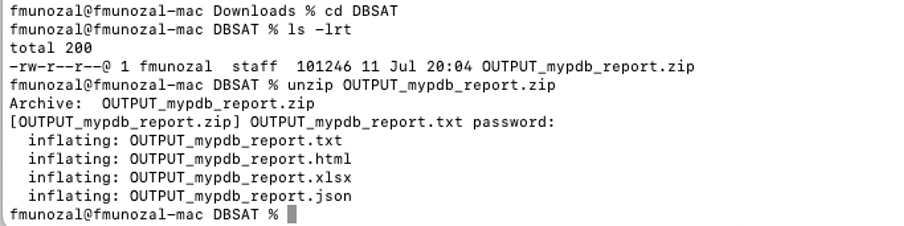
The report module will generate a new zip file containing all findings; in the above example, it would be the OUTPUT_mypdb.zip file. You can review the results by extracting the zip file (using the encryption password entered in the process) and looking at the TXT or HTML versions of the report.
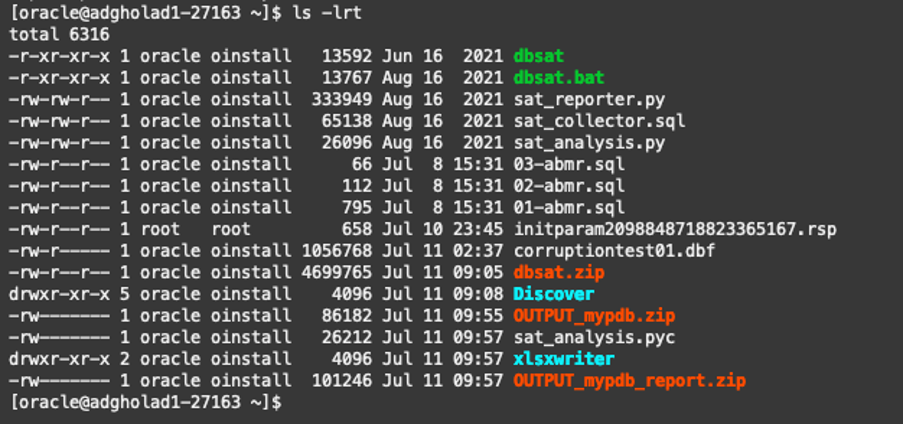
To make everything more accessible, I have copied and extracted the report zip file to my local laptop (you can download a copy here from an external link).
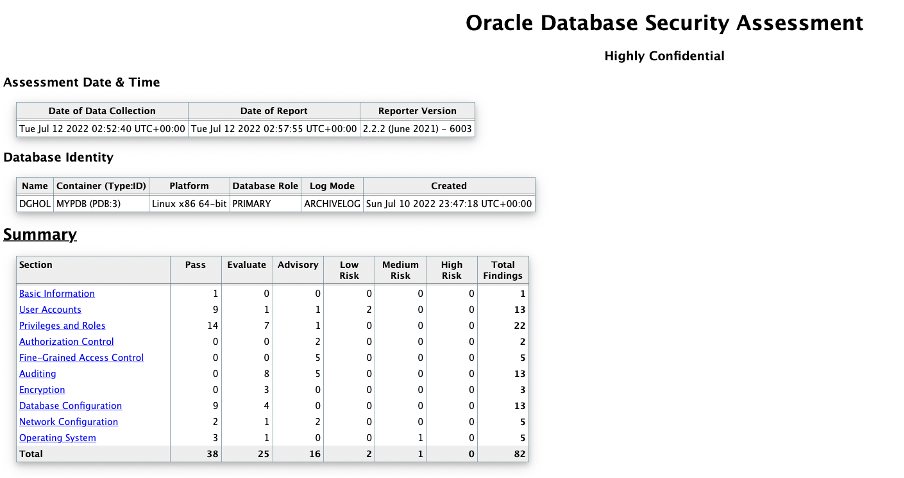
Now, let’s take a quick look at the HTML report.
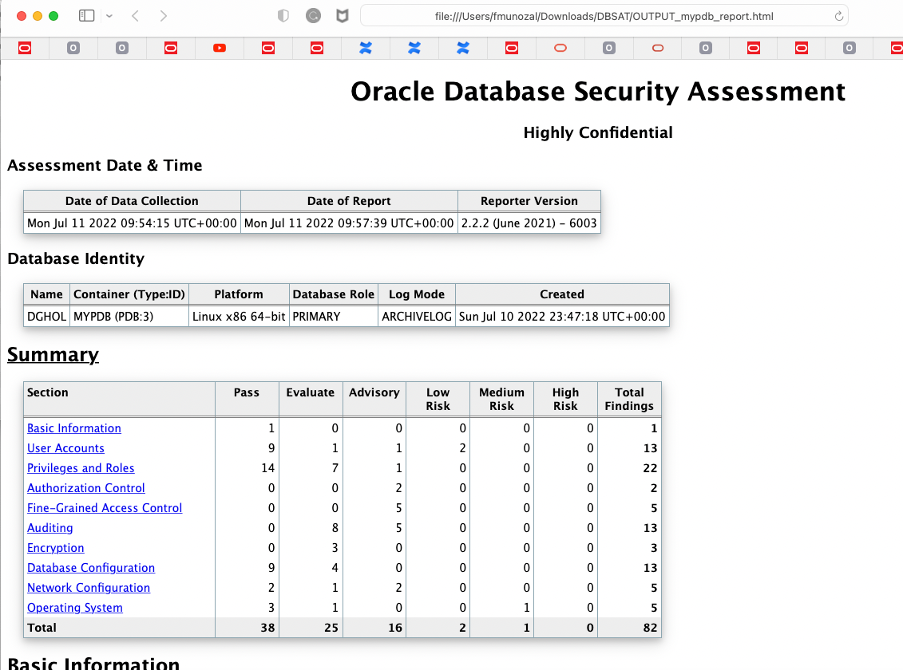
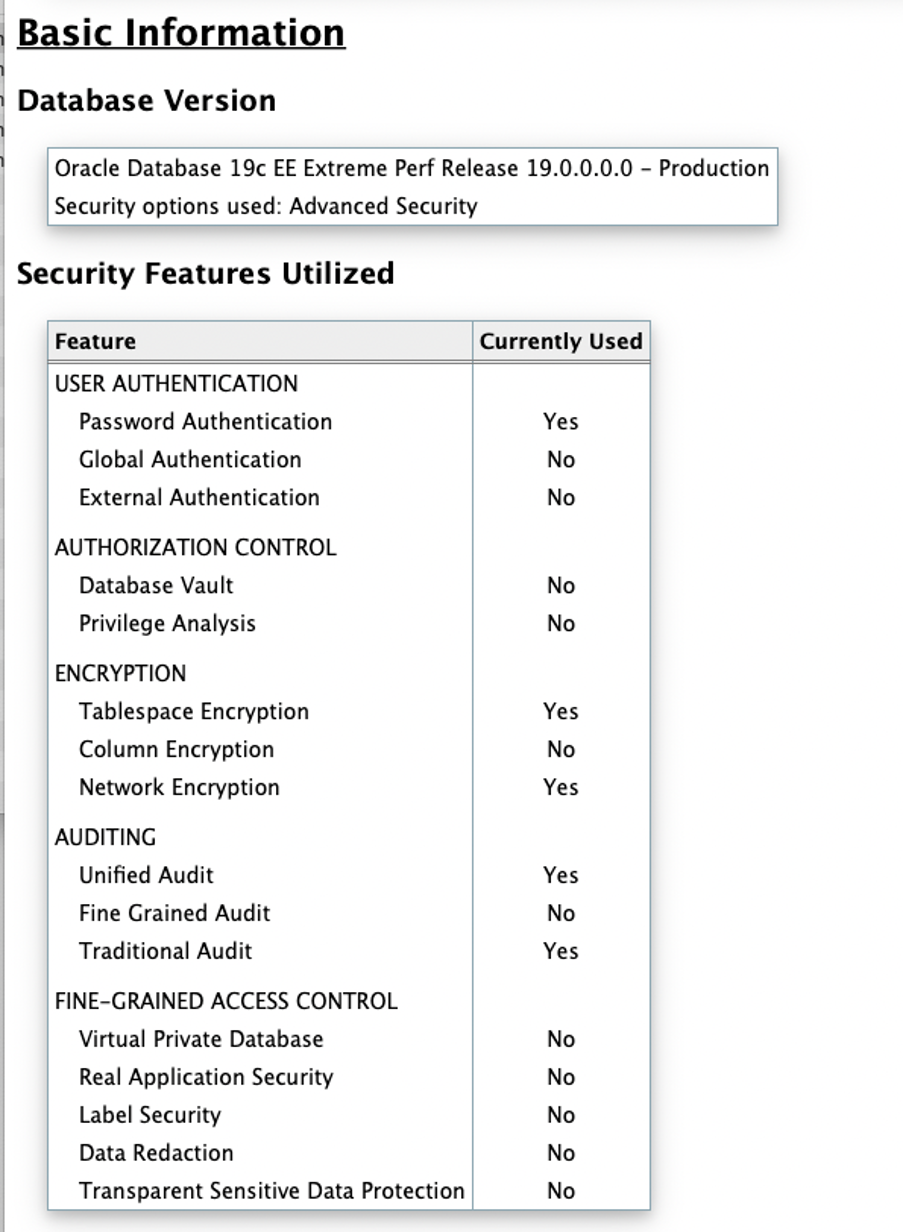
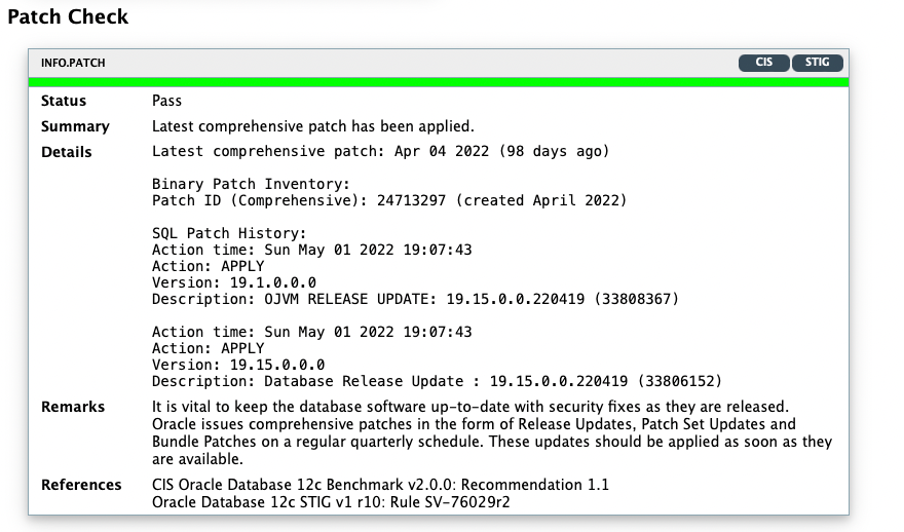
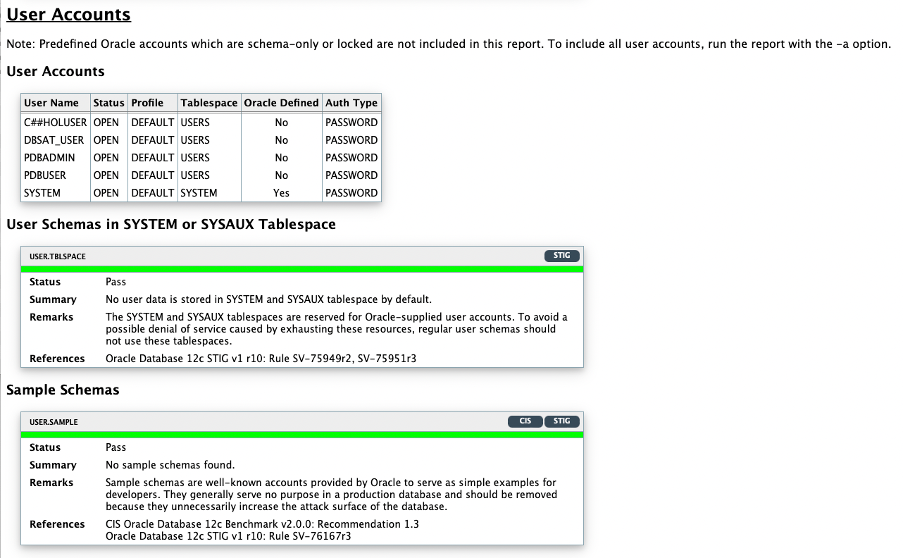
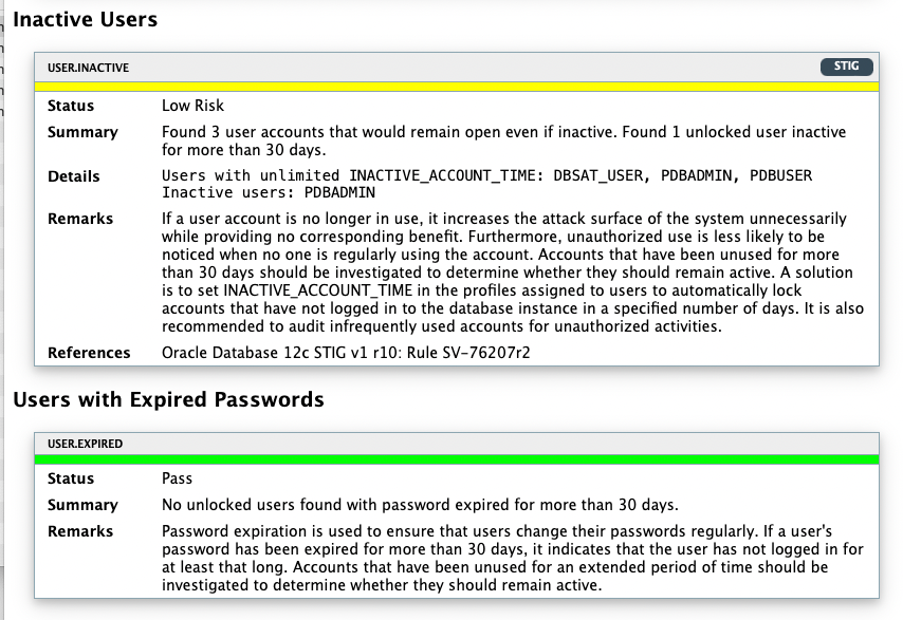
As you can see, the HTML report is straightforward to understand and easy to navigate through. Next, it is time to execute the switchover operation to role transition the standby database into the new primary.
Executing the Switchover

Before doing the switchover, I will check each database’s current role and unique name (primary or standby), as shown below.
SQL> SELECT NAME, DB_UNIQUE_NAME, DATABASE_ROLE FROM V$DATABASE;
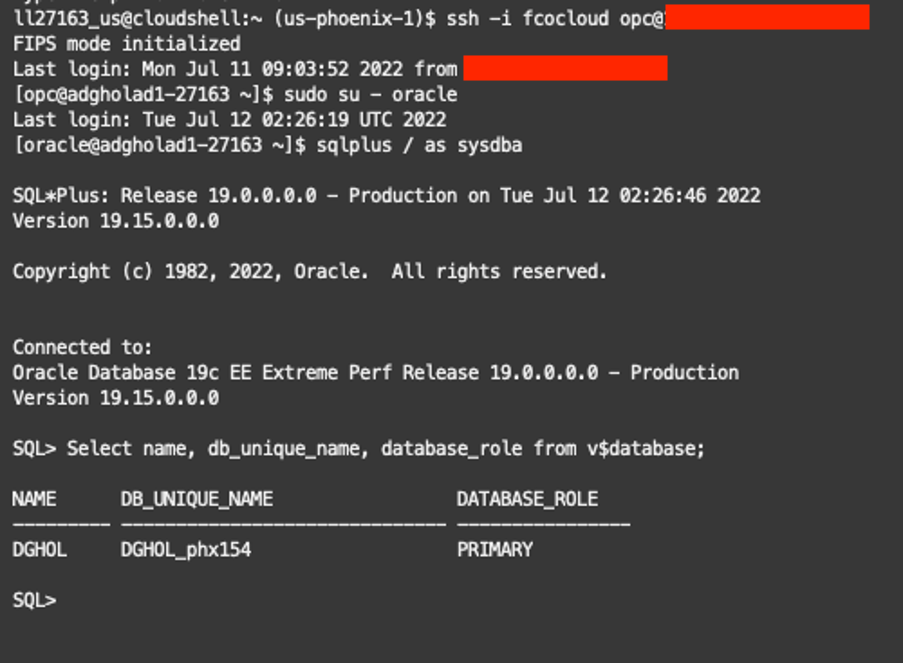
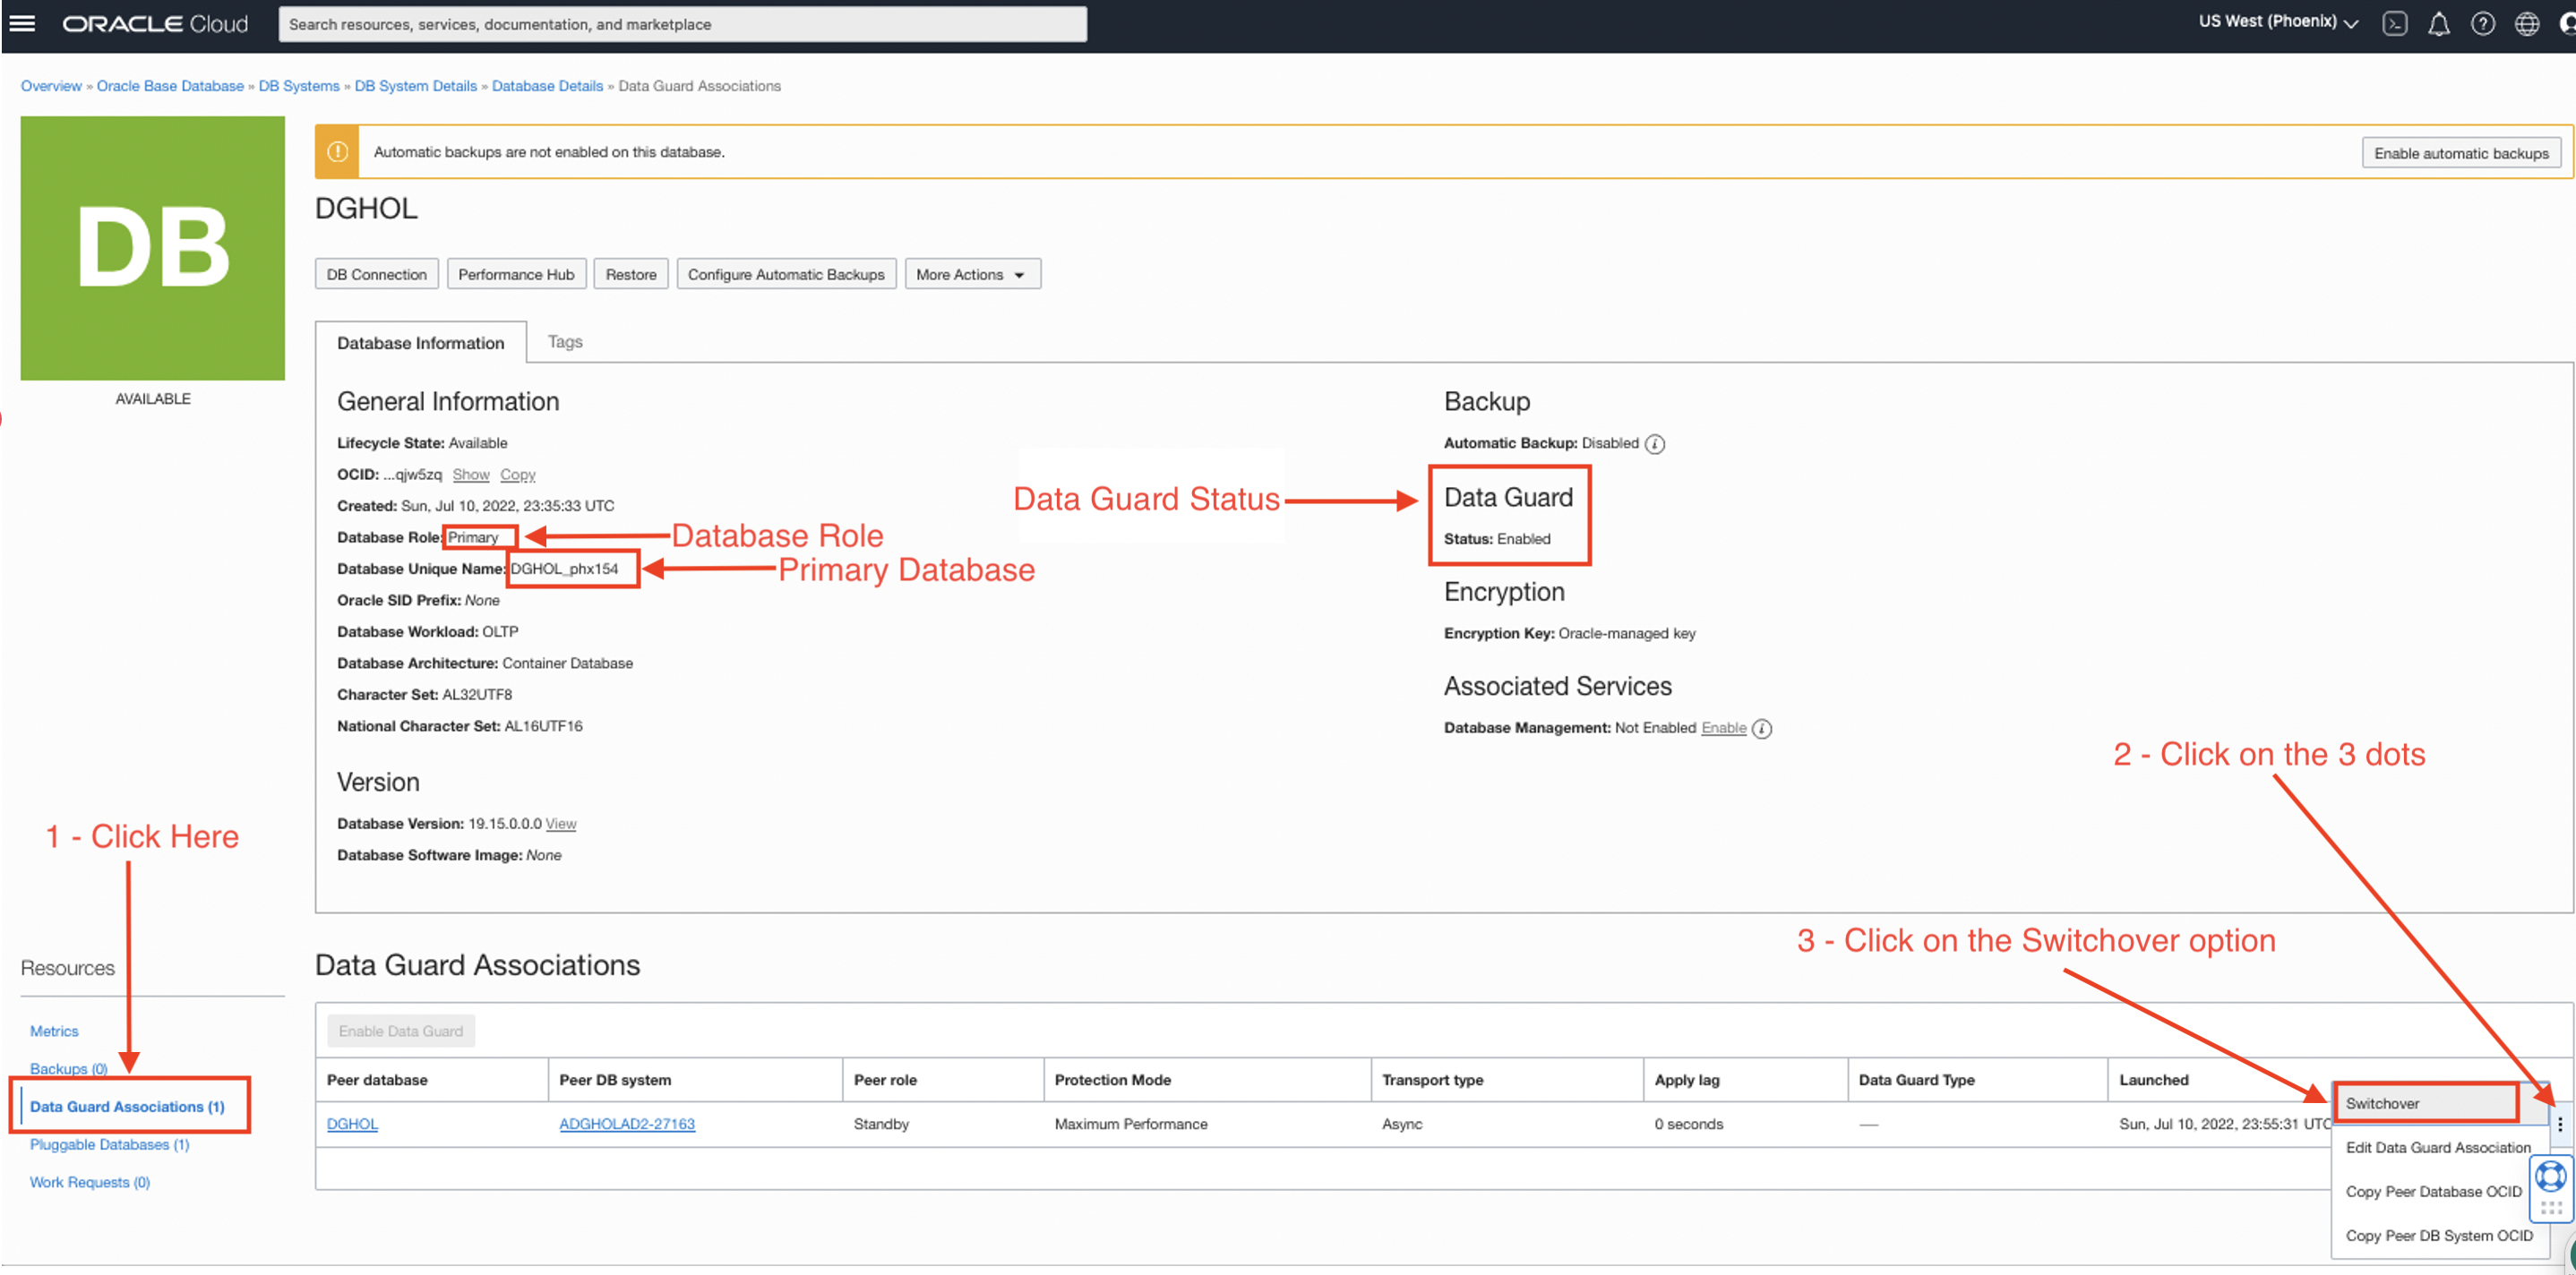
From the Oracle Cloud Infrastructure (OCI) menu, navigate to Oracle Base Databases -> DB Systems, select the primary database per the LiveLabs details, and select/click on the database name at the bottom of the screen. On the database details page, you will find the database’s unique name, database role, and Data Guard status.
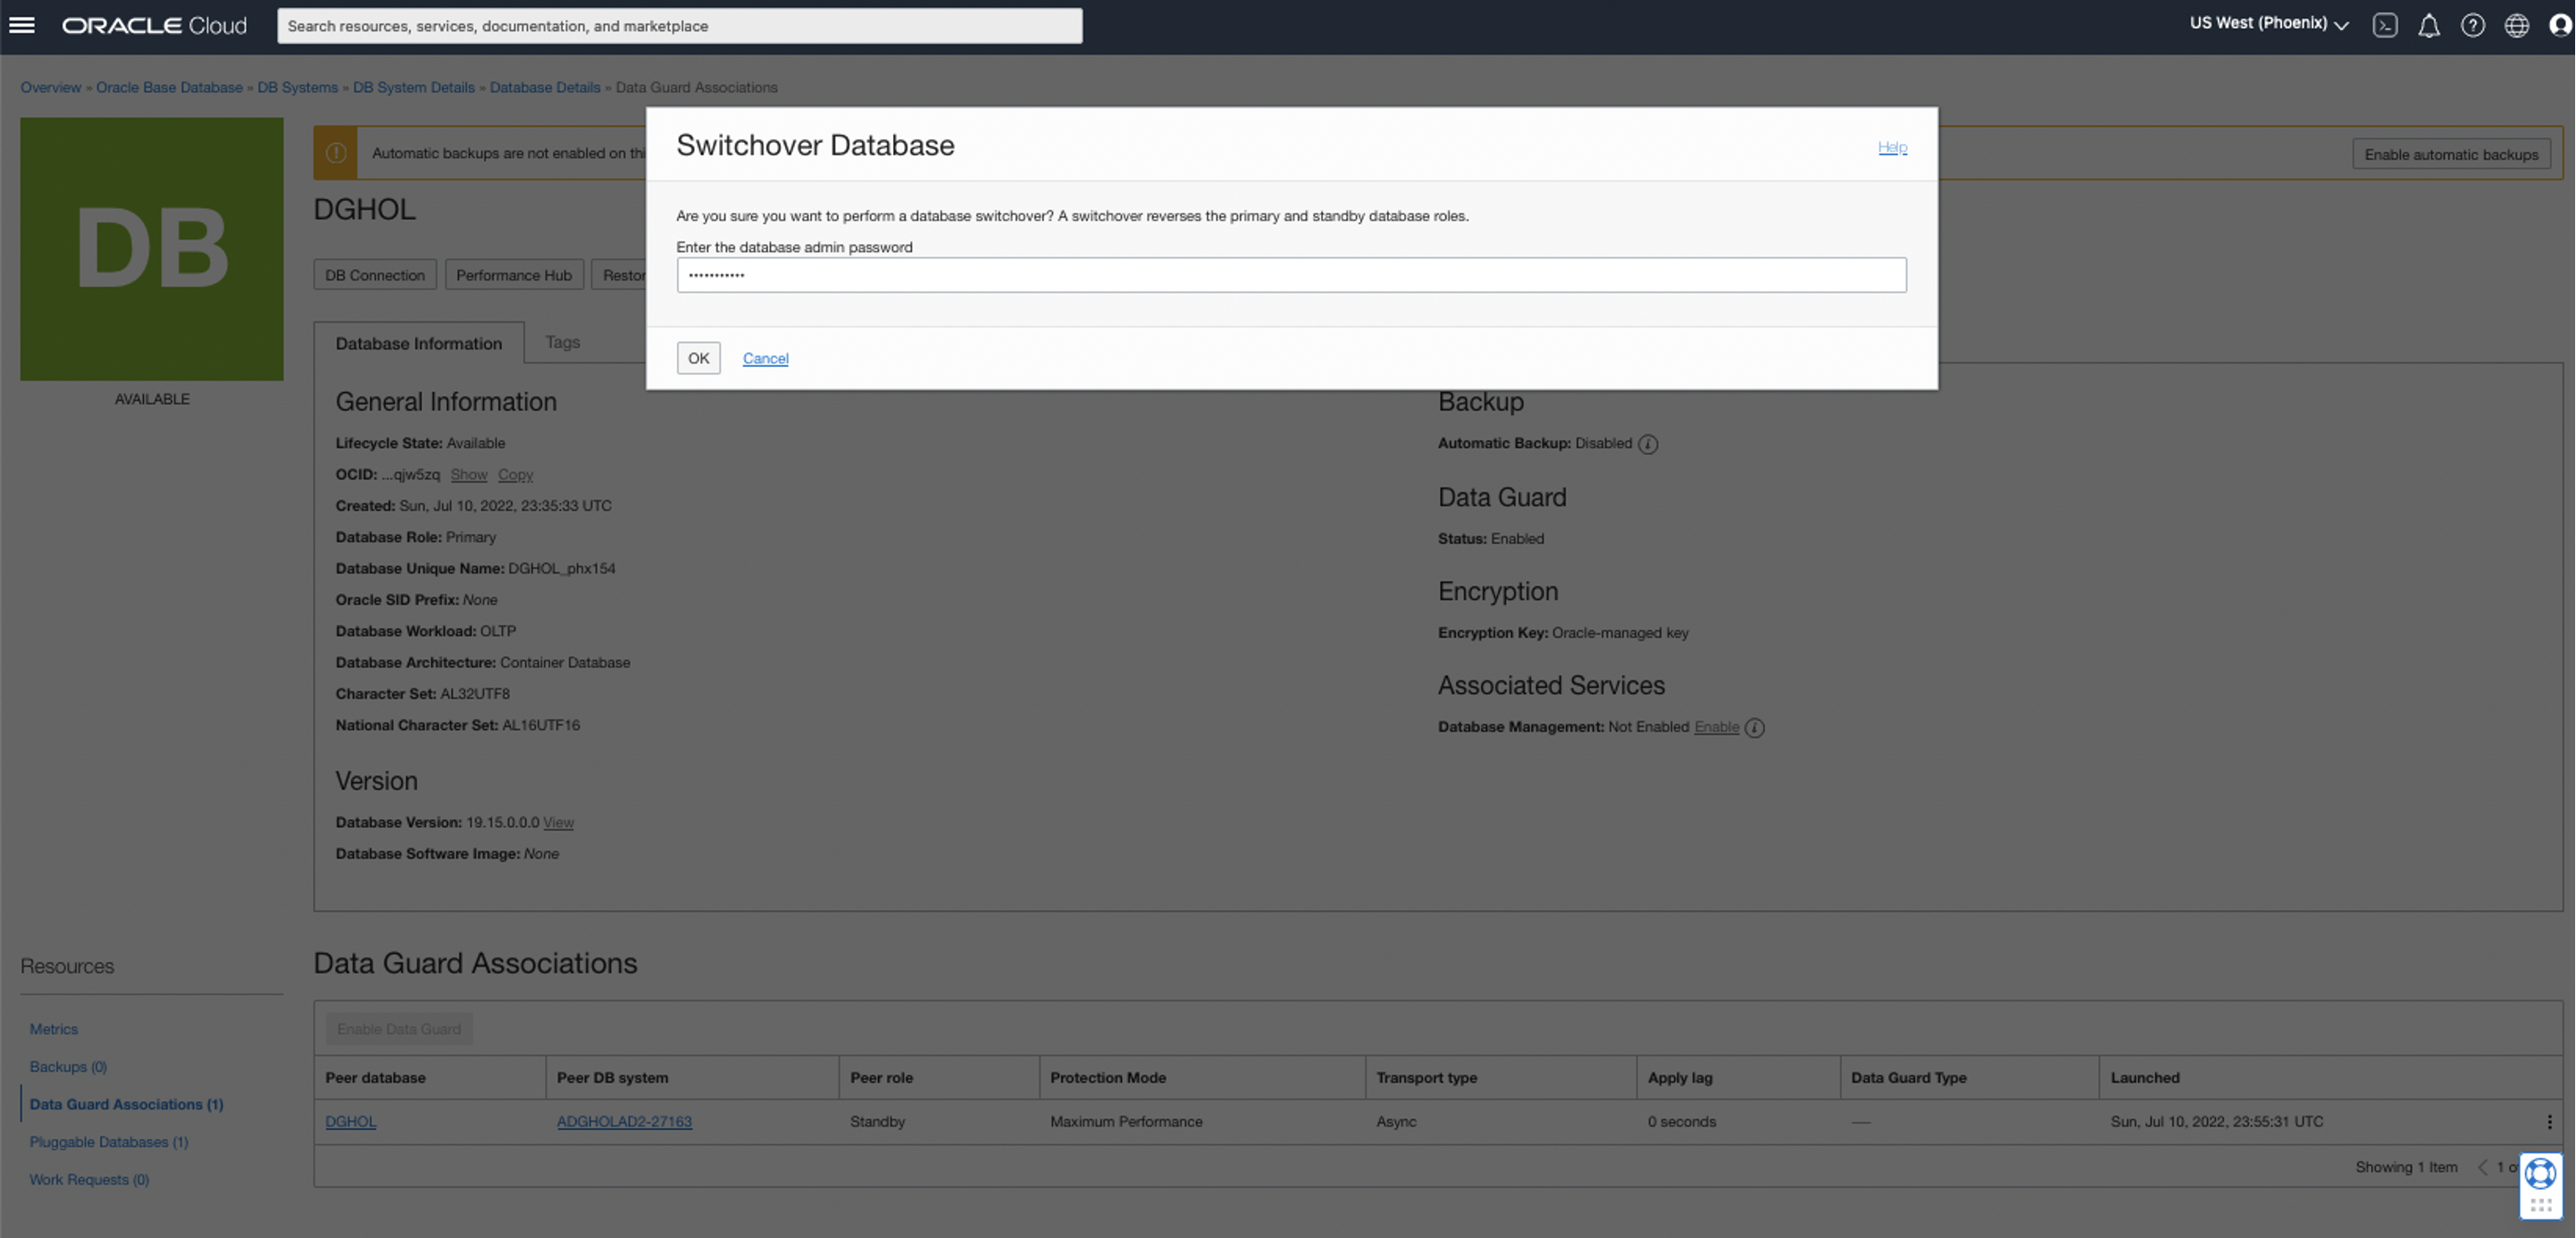
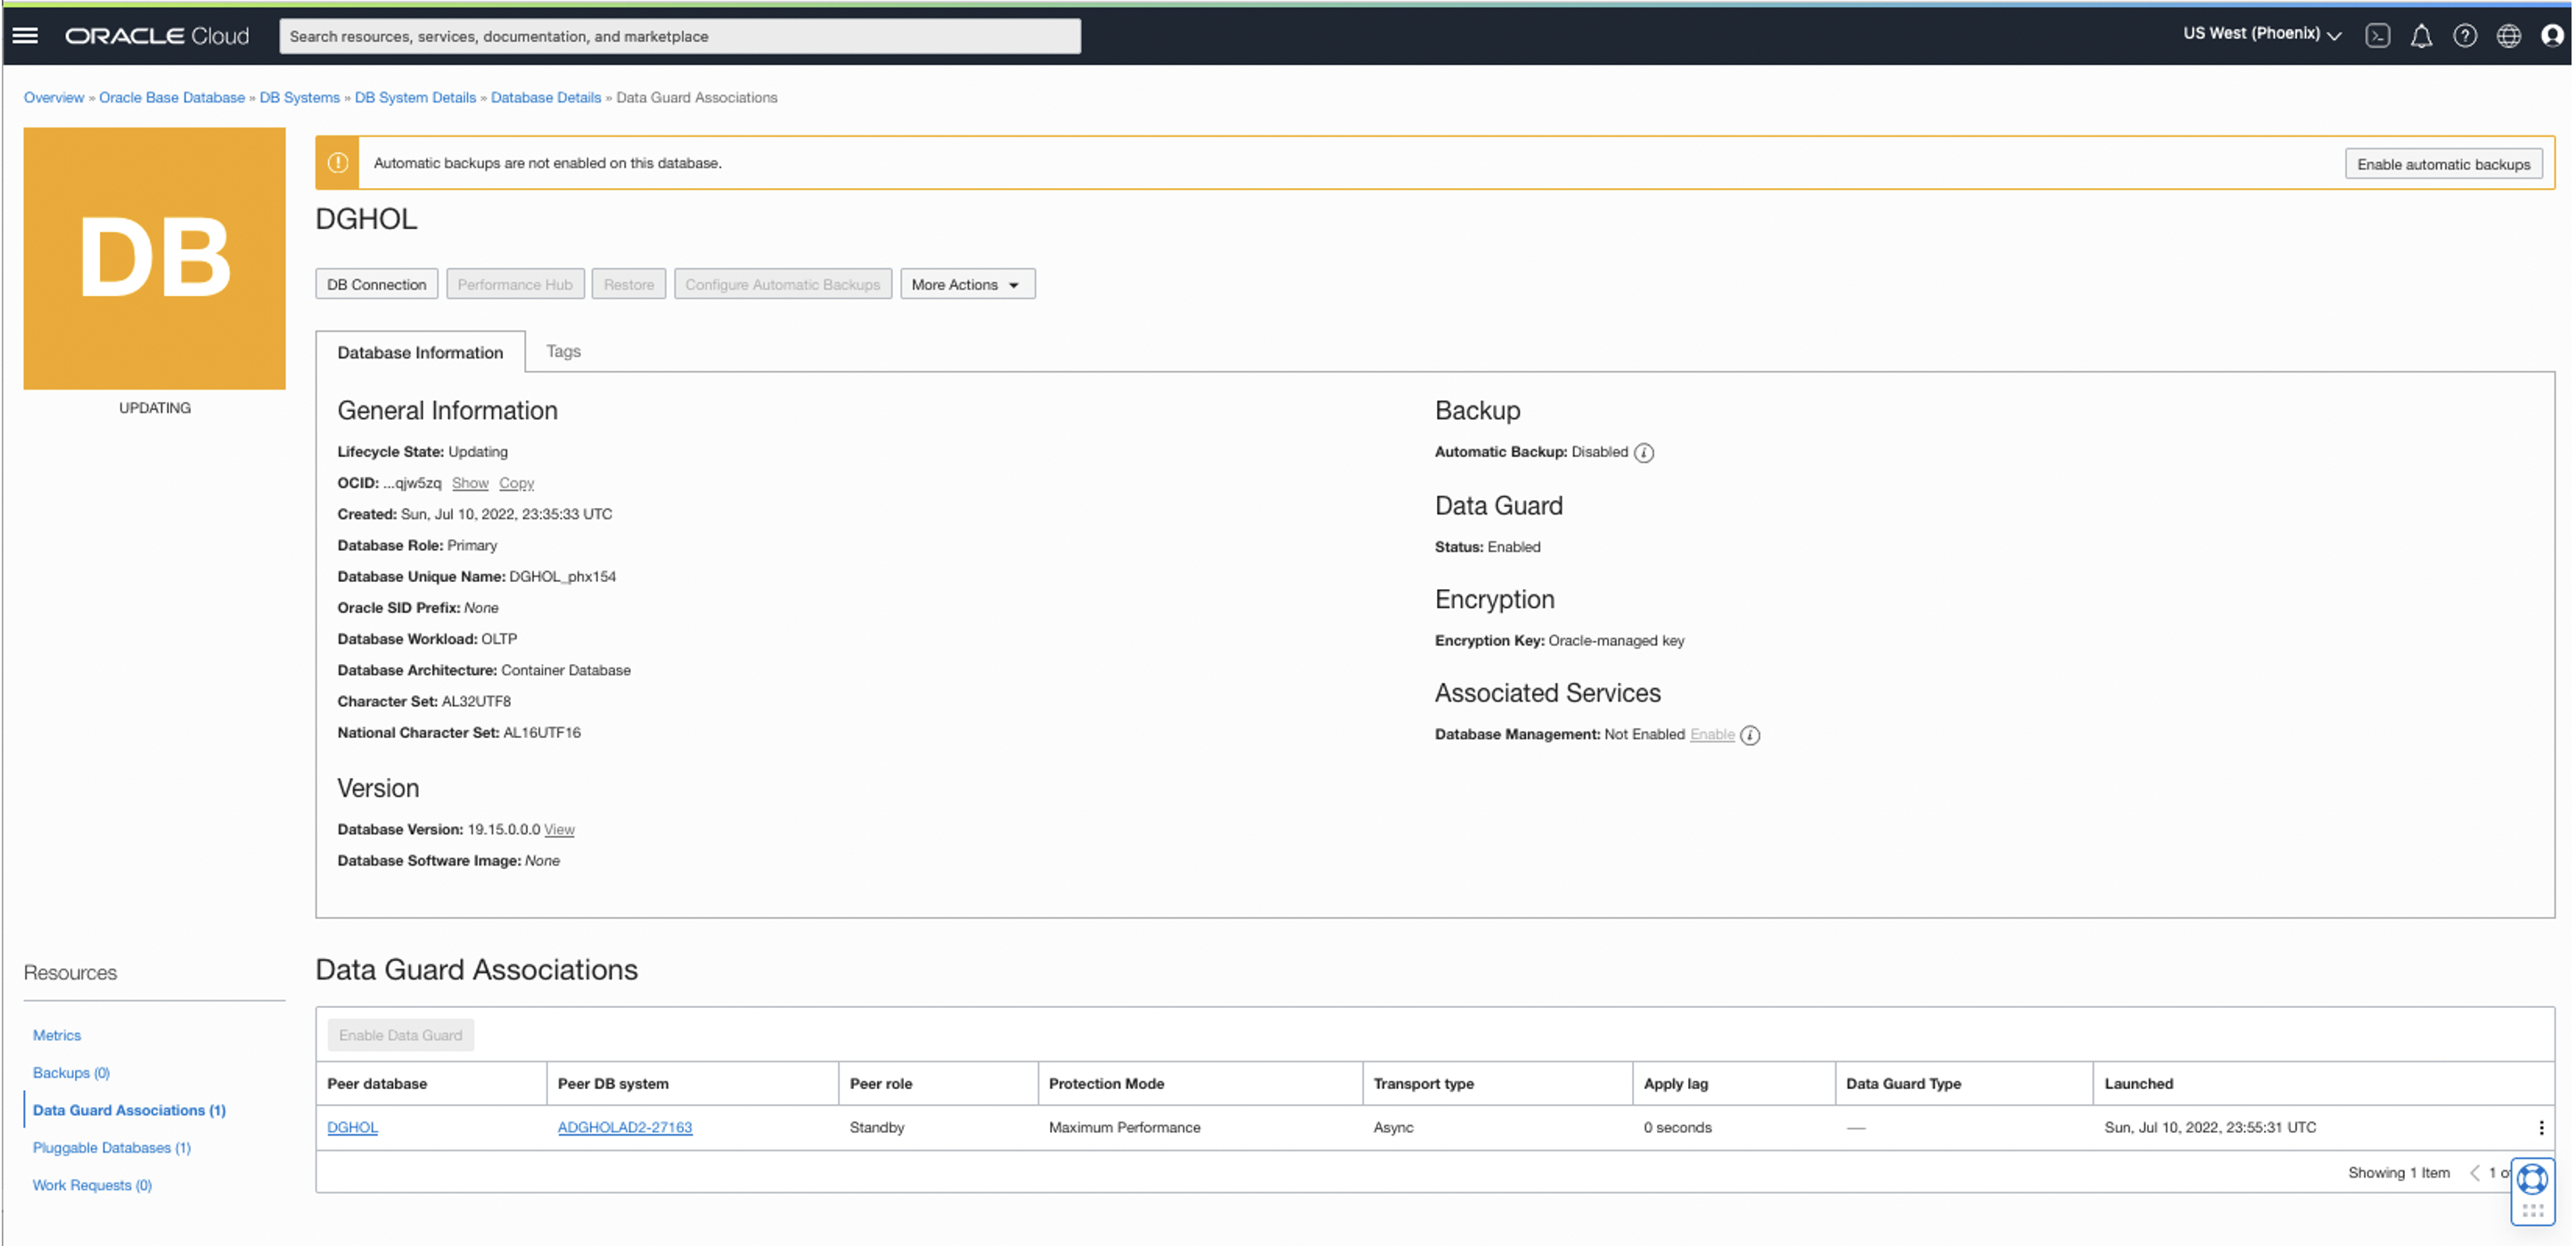
Next, I will select the Data Guard associations (1) and follow steps 2 and 3, as shown below. Then, I must confirm the admin password to continue with the switchover. Finally, after it is processed, the database will show as available again, with the new standby database role.

Now that the switchover is completed, let’s connect to the old standby database (now the primary) and repeat the process to download, install, and execute DBSAT on the new primary.
Running the Collect Module at the new primary
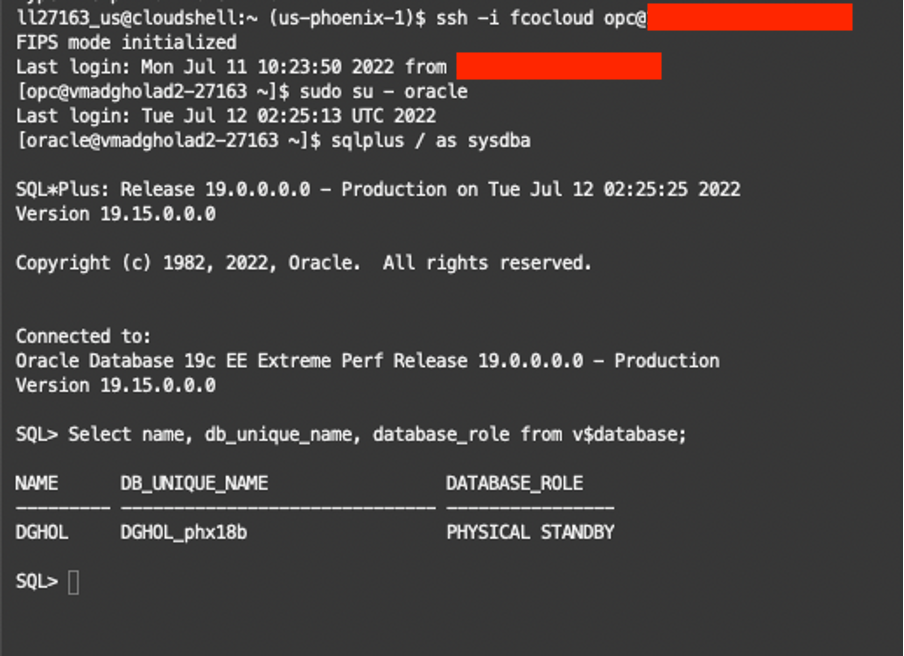
Let’s connect to the server where the new primary is running and check the new database role of the instance.
SQL> SELECT NAME, DB_UNIQUE_NAME, DATABASE_ROLE FROM V$DATABASE;

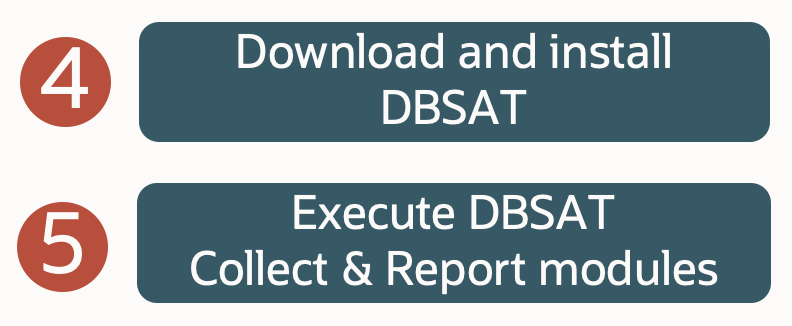
Now, please download and configure DBSAT as explained in the first part of this series (you can review it here) and execute the collect and report modules as previously described.
The report is now generated ready to be reviewed.
Final switchover

All we have left to do now is switch the database back to its previous role to match the configuration at the start of the exercise, and that’s it.
To summarize, we learned how to run the DBSAT collect and report module, and test our DR environment in the process. In the next part of this tutorial blog series, we will use this environment to play with another module of DBSAT that will help us discover any sensitive data within our database. Please stay tuned for our next (and final) blog post of this series!
Want to learn more?
Check these amazing content about Oracle MAA and MSA available for you:
- Oracle Maximum Availability Architecture (MAA) Main Page – https://bit.ly/3ysinDY
- Database Security Main Page – https://bit.ly/3NSJWw3
- Cyber Security Blog – https://bit.ly/3yPVZpG
- Cyber Security Technical Paper – https://bit.ly/3akX1Ao
- Securing the Oracle Database – a technical primer (free 4th edition) – https://bit.ly/3bUYQVa
- DB Security – DBSAT Workshop Free Lab – https://apexapps.oracle.com/pls/apex/r/dbpm/livelabs/view-workshop?wid=699&clear=RR,180&session=15375272388130
- DBSAT FAQ – https://bit.ly/3MHTIDX
- Security Free Labs – https://bit.ly/3NLjCDW
- Disaster and Recovery Free Labs – https://bit.ly/3yms6vK