In conjunction with my previous blog, Revolutionizing Integrations with the Rapid Adapter Builder (RAB) in Oracle Integration, we now delve deeper into the practical implementation of building an adapter using RAB. Join us as we navigate the essential prerequisites, development insights, and step-by-step details in this series of technical blogs.
In this particular blog, we focus on understanding the essential prerequisites for adapter development and invoking the adapter using a Postman collection as input. Our goal is to create an adapter for the Asana application. We’ll illustrate the development steps through a series of upcoming technical blogs.
Now, let’s dive into the detailed steps!
Prerequisites
- Obtain access to Oracle Integration. If you want to create a new OIC instance, please refer to the documentation.
- Create a confidential application in the identity domain with grant type as Client credentials.
Note: Assign the ServiceDeveloper role to the above app for the specific Oracle Integration instance to which you want to deploy your adapter.
- Collect the client ID, client secret, and scope for the upcoming steps.
- Collect the Open API document / Postman collection for the operations you want to encapsulate in the adapter. In this case, I have collected a Postman collection of Asana APIs that I want to maintain in the adapter.
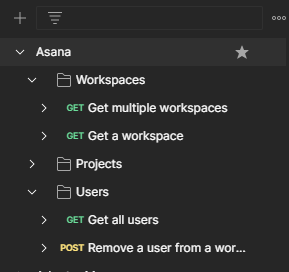
- I have seven operations grouped into three different business objects of Asana applications.
- Ensure that you test these operations and save the responses within the corresponding operations, as shown below.
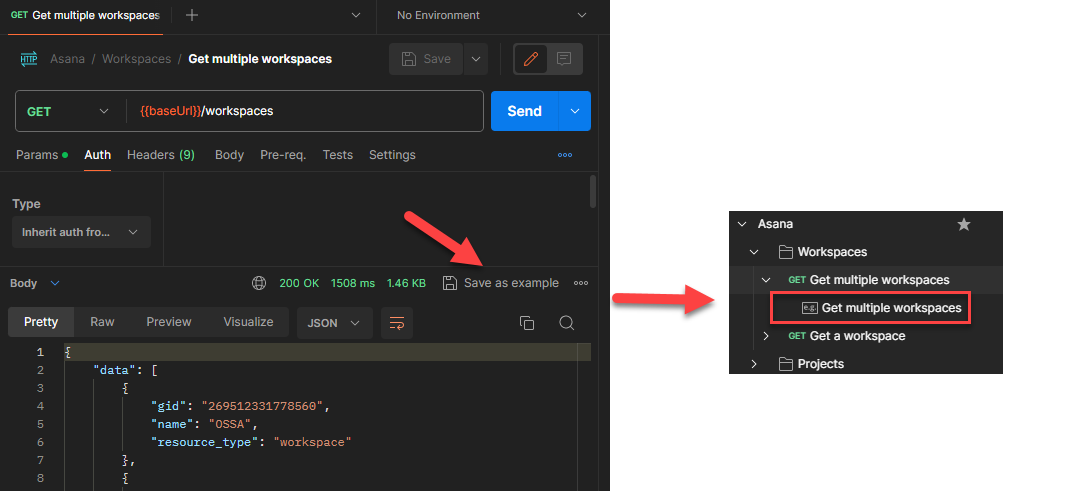
- Saving the response helps the RAB infrastructure generate the required schema.
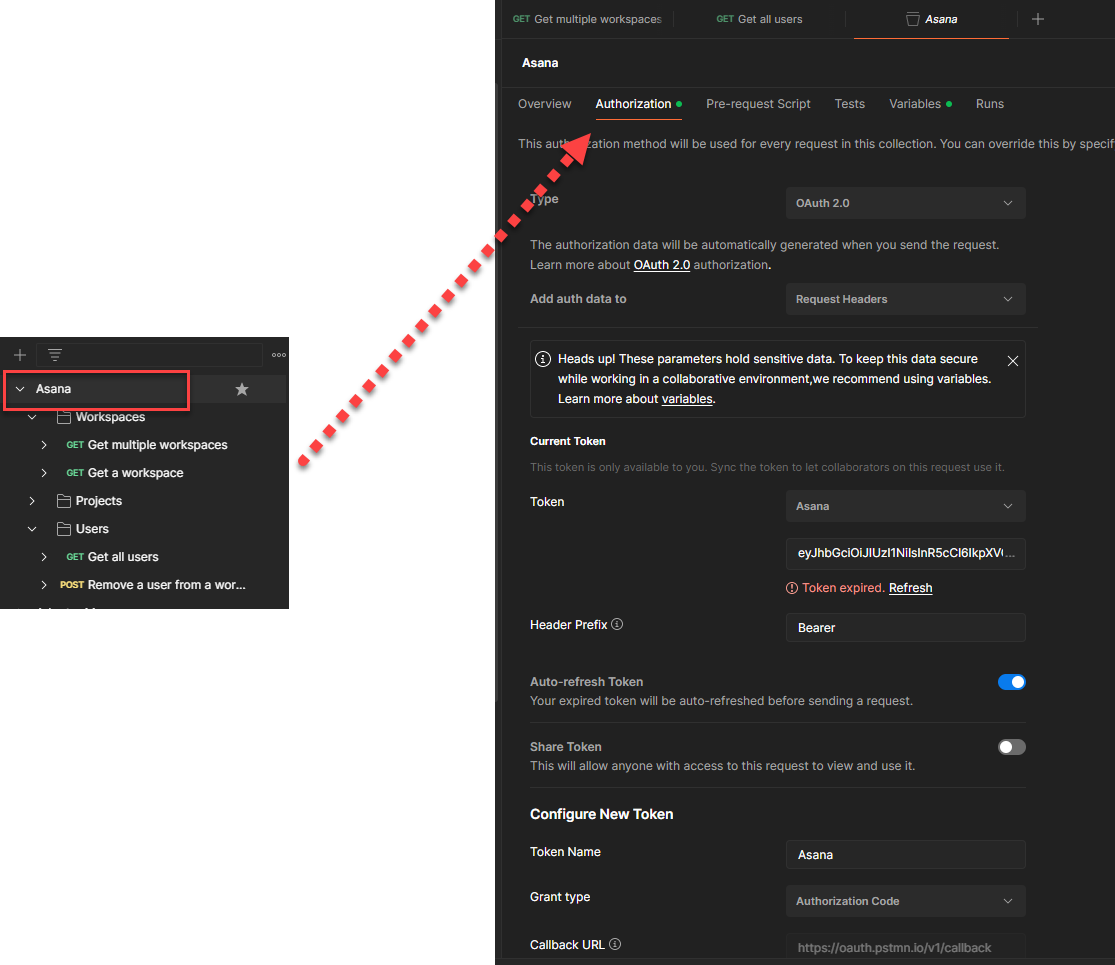
- Maintain authentication security policies on the collection, which helps to auto-populate security policies on the adapter Connection page. For example, I have used OAuth Code Credentials.
Install Visual Studio Code (VS Code) with the Oracle Integration Cloud Rapid Adapter Builder extension from the VS Code store.
Lets start Adapter Development
Configure the Workspace in VS Code
- Select a folder on your computer in which to create the RAB workspace.
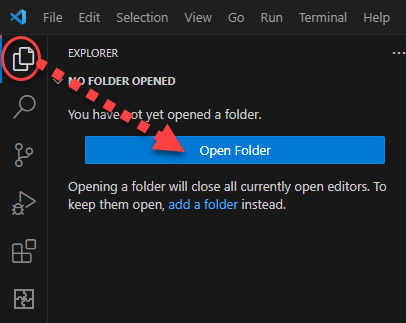
- The folder is initially empty.
- Open a command prompt to initialize the workspace: RAB: Initialize Workspace in the search bar

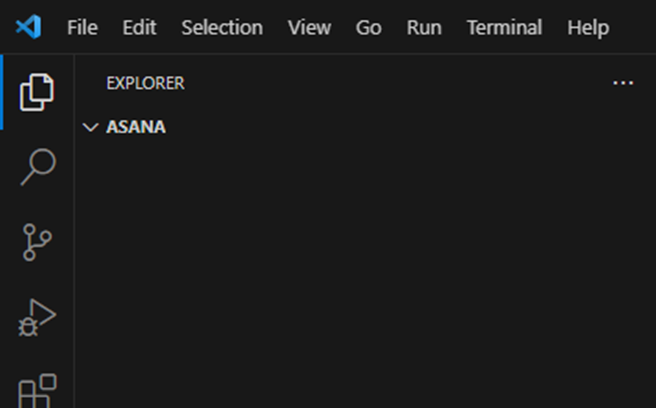
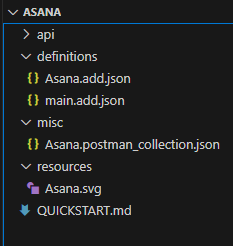
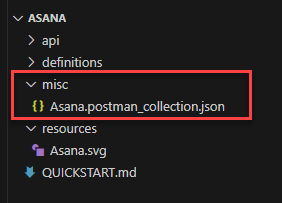
- You see the following prepopulated folders and sample documents created in the folder.
- api: Includes documents that describe the third-party API, such as an OpenAPI document.
- misc: Includes documents that describe the third-party API, such as a Postman collection.
- definitions: Holds the Adapter Definition Document (ADD).
- resources: Holds the i18n files.
- Publisher.yaml: Maintains the Oracle Integration instance information and credentials.
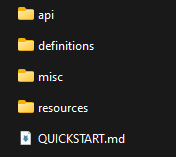
- You see the same folders created in the computer directory.
- Export the Postman collection and place the file into the misc folder. This is the input for adapter development. You can remove the file that was created by default.
- Configure the publisher-profiles.yaml file by clicking OIC Rapid Adapter Builder on the sidebar and edit the profiles.
- Update the client credentials with the information that you created in the prerequisites.
Note: You can maintain multiple Oracle Integration instance details and activate one of them where you want to deploy your adapter.
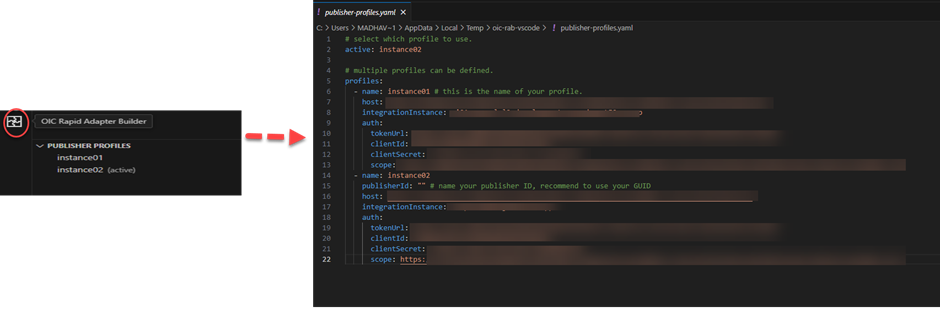

Note: Ensure that you save the .yaml file to reflect the changes.
- Place the adapter icon in the main folder.
![]()
Note: The RAB infrastructure only accepts the .svg file.
With the necessary prerequisites completed, let’s now start developing the adapter. The first step involves generating the Adapter Definition Document (ADD) using the Postman collection we imported into the api folder.
Generate the Adapter Definition Document (ADD)
Let’s create the Adapter Definition Document (ADD) with the RAB VS Code extension, which makes it super easy. It’s just a few clicks away.
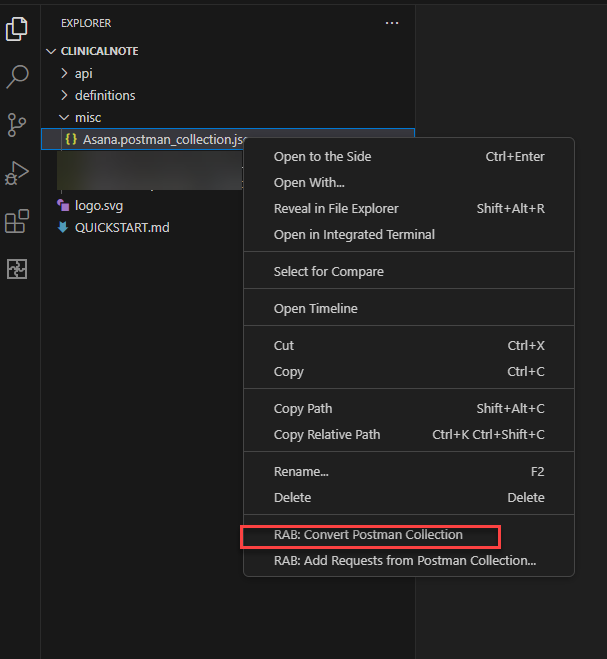
- Right-click the Postman collection and click RAB: Convert Document. It automatically generates the ADD document by taking all the inputs provided in the Postman collection, along with the security policy, operations, schemas, etc.
- You now have the option to select the operations you want in the adapter. I’ve chosen only four operations across three business objects.
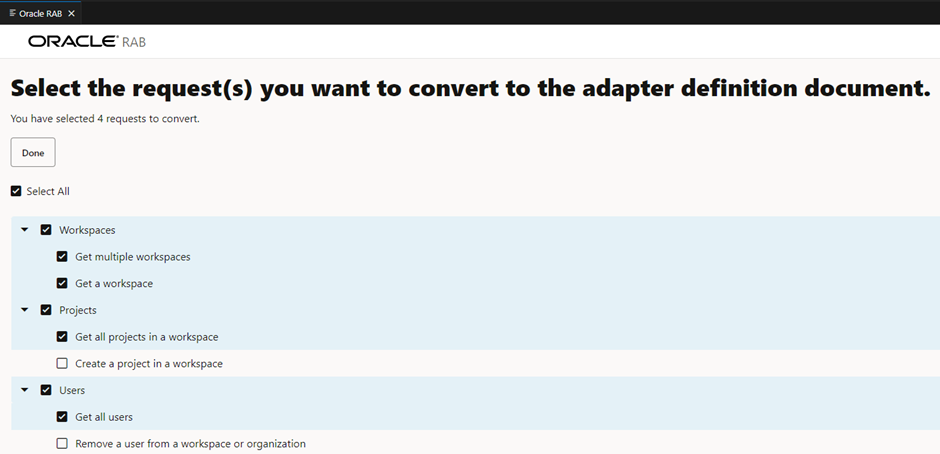
- A choice is given to select an operation for a test connection.

Note: Select one of the get operations, ensuring that the operation does not need an input to execute.
- Click Done, and you’ll be prompted to select the file to create the ADD.
- Click Update main, and save it with the default name main.add.json.
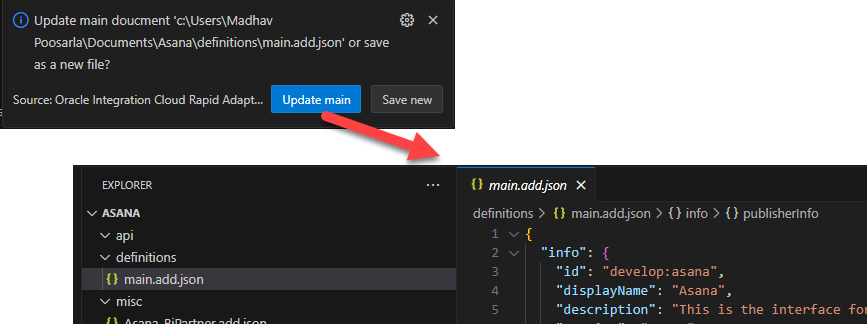
- An ADD typically defines the design and implementation of an adapter. The ADD contains information about the adapter’s behavior and properties, presented as JSON metadata.
- Update the ADD to meet specific requirements, for example:
- Add additional security policies to the Connection page.
- Customize the Adapter Endpoint Configuration Wizard page.
Understand the following sections while updating the ADD:
- info: Defines the branding of the adapter.
- schemas: Defines the contracts for the triggers and action with Oracle Integration orchestration.
- connection: Defines the connection parameters and security policies supported by the adapter.
- triggers: Defines the events the adapter can receive to start an integration.
- actions: Defines the operations to conduct against the third party by the adapter.
- categories: Defines the business objects exposed by the endpoint.
- flows: Defines the implementation logic that drives the adapter modeled as CNCF flows.
- connectionProperties: Defines the fields and their properties that should be available in the Connection page. In this adapter case, let’s create a field base URL and define its properties below.
Let’s now go into each section of the ADD and update it as per the adapter requirements.
Info Section: Let’s update the adapter branding information, such as application info, publisher info, adapter version, and so forth.
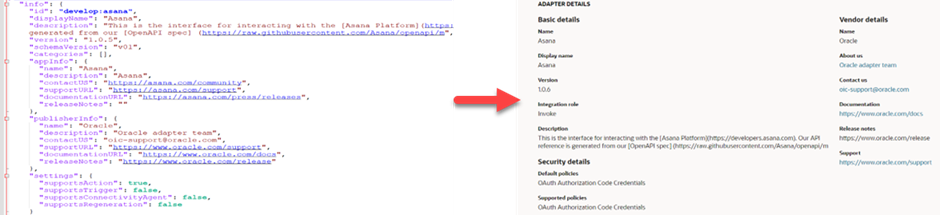
The above screenshot illustrates how the info section updates the adapter tile.
"info": {
    "id": "develop:asanatechtalk",
    "displayName": "AsanaTechtalk",
    "description": "This is the interface for interacting with the [Asana Platform](https://developers.asana.com). Our API reference is generated from our [OpenAPI spec] (https://raw.githubusercontent.com/Asana/openapi/m",
    "version": "1.0.0",
    "specVersion": "1.0",
    "categories": [],
    "appInfo": {
      "name": "Asana",
      "description": "Asana",
      "contactUS": "https://asana.com/community",
      "supportURL": "https://asana.com/support",
      "documentationURL": "https://asana.com/press/releases"
    },
    "publisherInfo": {
      "name": "Oracle",
      "description": "Oracle adapter team",
      "contactUS": "oic-support@oracle.com",
      "supportURL": "https://www.oracle.com/support",
      "documentationURL": "https://www.oracle.com/docs"
    },
    "settings": {
      "supportsConnectivityAgent": false,
      "supportsRegeneration": false,
      "allowNonSSL": false,
      "disableOutboundPayloadSanitization": false,
      "allowedDomains": [
        "app.asana.com"
      ],
      "followRedirects": {
        "enabled": false,
        "allowCrossDomainRedirect": false,
        "followOriginalHttpMethod": false,
        "followAuthorizationHeader": false
      }
    }
  },
Schemas: There is no need to update anything in this section for our current use case because this information comes from the Postman collection. There are some scenarios in which you may need to update this section. We will review those scenarios in our coming blog series.
Connection: This section helps you to design and define the parameters required in the Connection page of your adapter and security policies.
Let’s include a base URL in the connection and one of the security policies supported by Asana. Let’s find out what we should modify on the Connection page.
We have two major parts in the Connection section.
- ConnectionProperties – Defines the fields and their properties that should be available on the Connection page. In this adapter case, let’s create a field-base URL and define its properties as shown below.
- SecurityPolicies – Defines the security policies that you want available in the Connection page. The RAB framework supports a number of managed security policies. You can pick the one that suits your end application. In the Asana adapter case, let’s select Oauth Code Credentials.
- If you observe the default securityPolicies section generated, you already find a managed security policy named OAUTH_AUTHORIZATION_CODE_CREDENTIALS available. This comes automatically from the Postman collection.
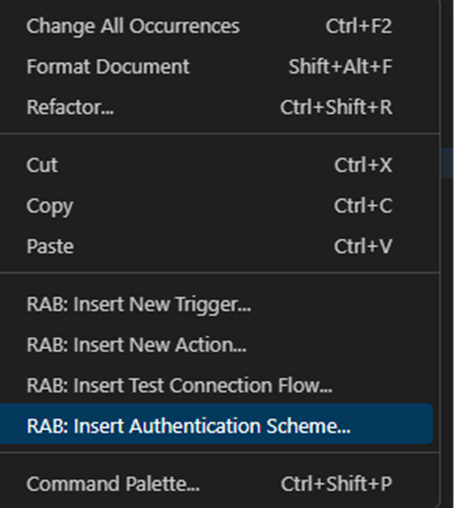
- In case you need to add one more managed security policy into your Connection page, you can right-click ADD and select insert Authentication scheme.
Below is the snippet of the connection properties section with a field named Base URL. It appears on your Connection page during creation.
"connectionProperties": [
      {
        "name": "baseURL",
        "type": "URL",
        "displayName": "Base URL",
        "description": "Endpoint base URL",
        "shortDescription": "Endpoints base URL",
        "default": "https://app.asana.com/api/1.0",
        "required": true,
        "hidden": false,
        "scope": [
          "ACTION"
        ]
      }
    ],
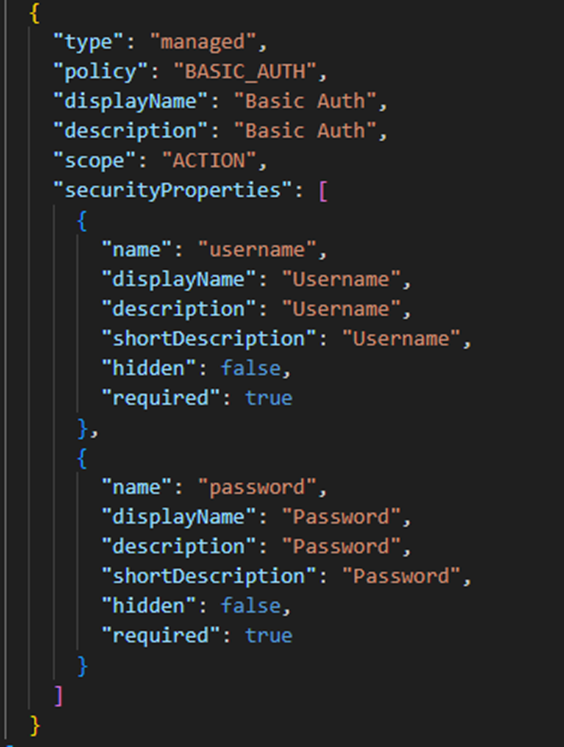
- You will encounter the image below, and you can choose from the available security policies. Let’s select BASIC AUTH.

- It automatically updates the ADD with a snippet of Basic Auth code, as shown below.
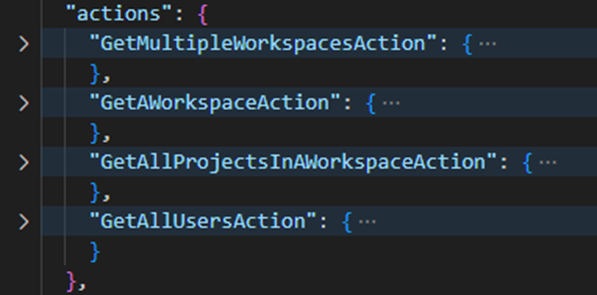
Actions section
I don’t plan to modify this section; I will use the default content. Let’s review the content. This section helps you to design the invoke wizard page of the adapter.
We have already selected all the operations to make available in the adapter during the ADD conversion step. These operations appear in this section.
Categories section
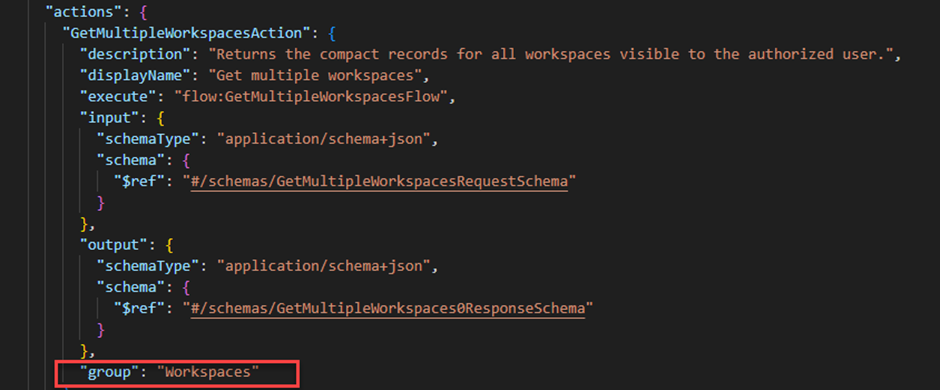
This section works alongside the Actions section. It is used for grouping the operations as per the folder structure in the Postman collection.
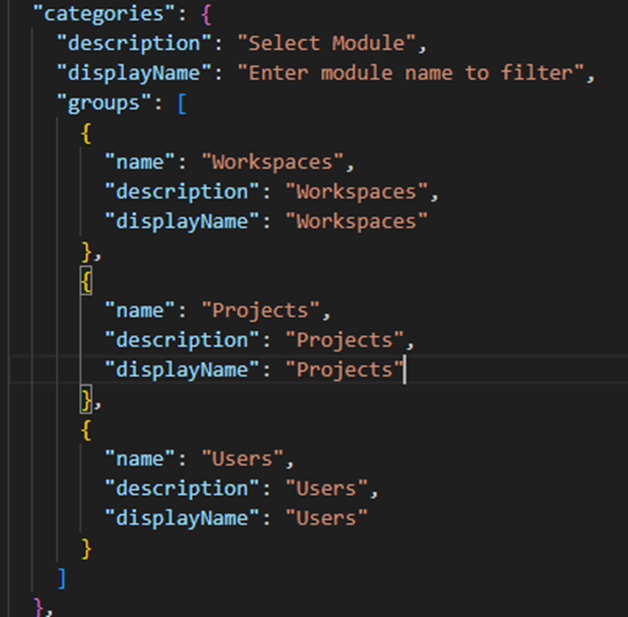
These categories are linked back to the operations mentioned in the Actions section below. All of this occurs automatically through the Postman collection.
Your wizard screen will look as shown below.
Flows section
This section outlines the flow details for every operation mentioned in the Actions section. To execute an action, an endpoint URL and required parameters should be associated with it. The Flows section holds this information.
For example, let’s take one of the actions and see which endpoint URL is associated with it.

Along with the flows for the operations, it also holds a flow for the test connection.
Let’s see how to configure the test connection flow.
You would have selected the following option during ADD conversion.
If yes, you see a flow already created in the Flows section as shown below. You should update the right endpoint URL.
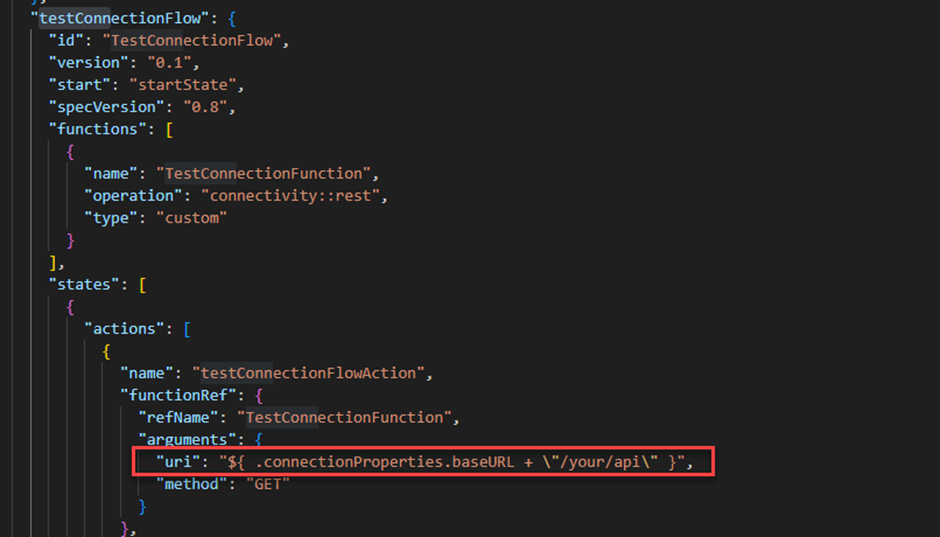
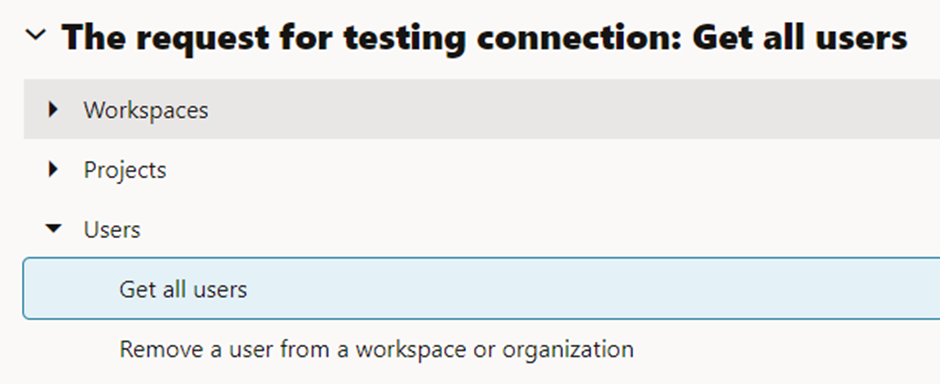
In our case, I wanted to use the Get all users API to test the connection. I will update the right endpoint URL.
"uri": "${ .connectionProperties.baseURL + \"/users/me\" }"
Note: We will enhance the framework to refrain from updating the endpoint URL for the test connection flow if you have selected the appropriate operation during the ADD conversion.
Validate & Publish
- Ensure the ADD’s syntax and semantics are correct. Do this by right-clicking your ADD and validating it as shown below.
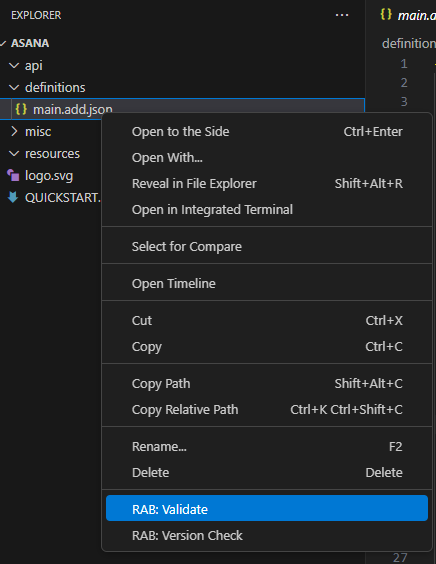
You can correct any errors and revalidate it.
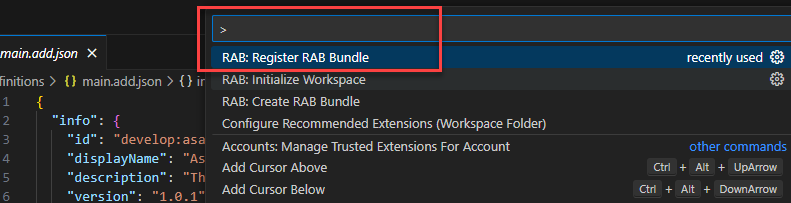
- The last step is to publish the adapter to Oracle Integration using the RAB extension,
- Press Ctrl + Shift + P to open the command palette. From the commands displayed, click the
RAB: Register RAB Bundlecommand.
- Press Ctrl + Shift + P to open the command palette. From the commands displayed, click the
Verify the Published Adapter
Log in to Oracle Integration, navigate to the Adapters page, and search for your adapter.
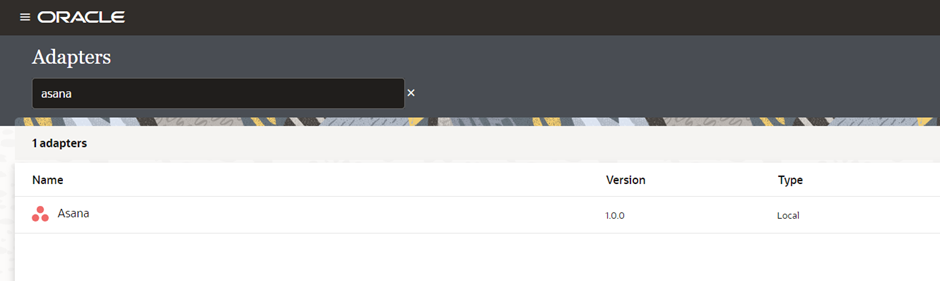
Congratulations on successfully building and publishing your first RAB adapter in Oracle Integration!
Test your connection!
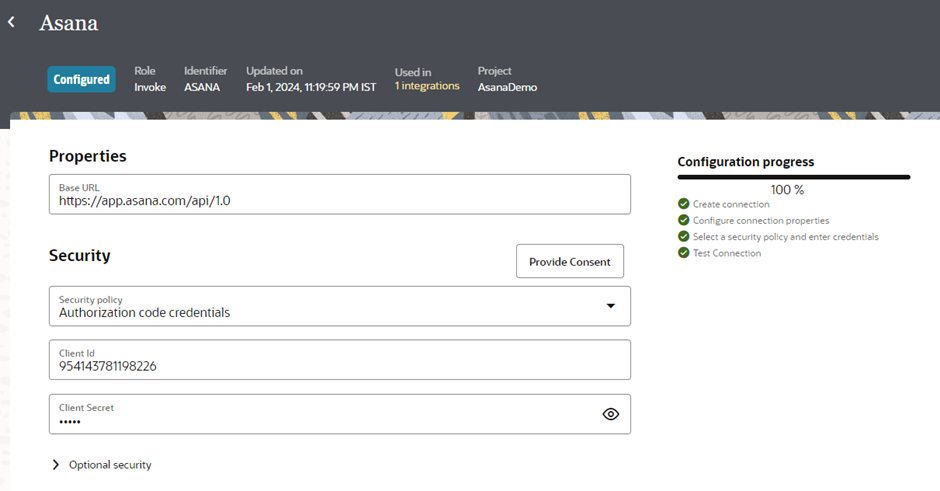
Before testing the connection, take a moment to review how your Connection page appears. If you recall, there is a Base URL field in the Properties section, along with a couple of security properties defined in the connection section of the ADD.
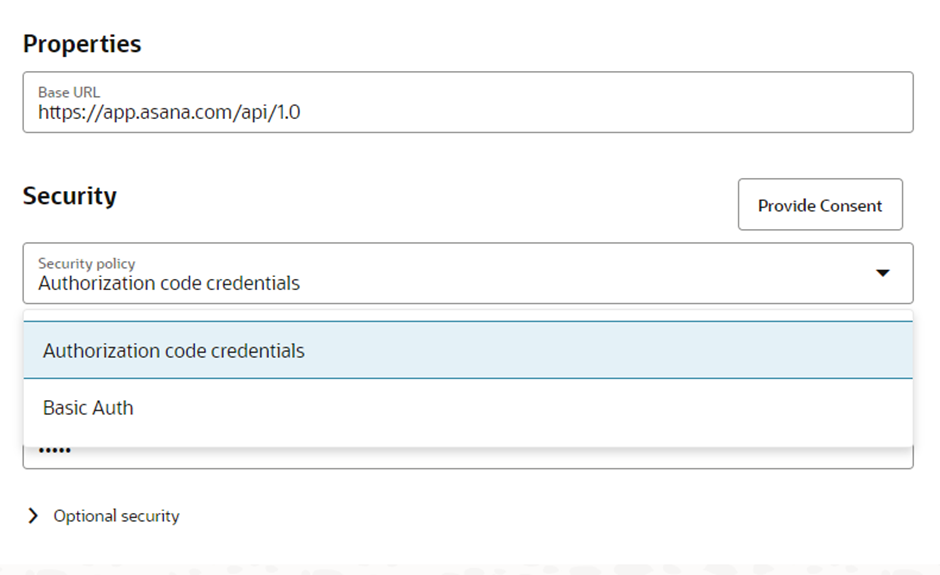
You can see all of them available on the Connection page.
Let’s test the connection. Provide the required details and perform the test.
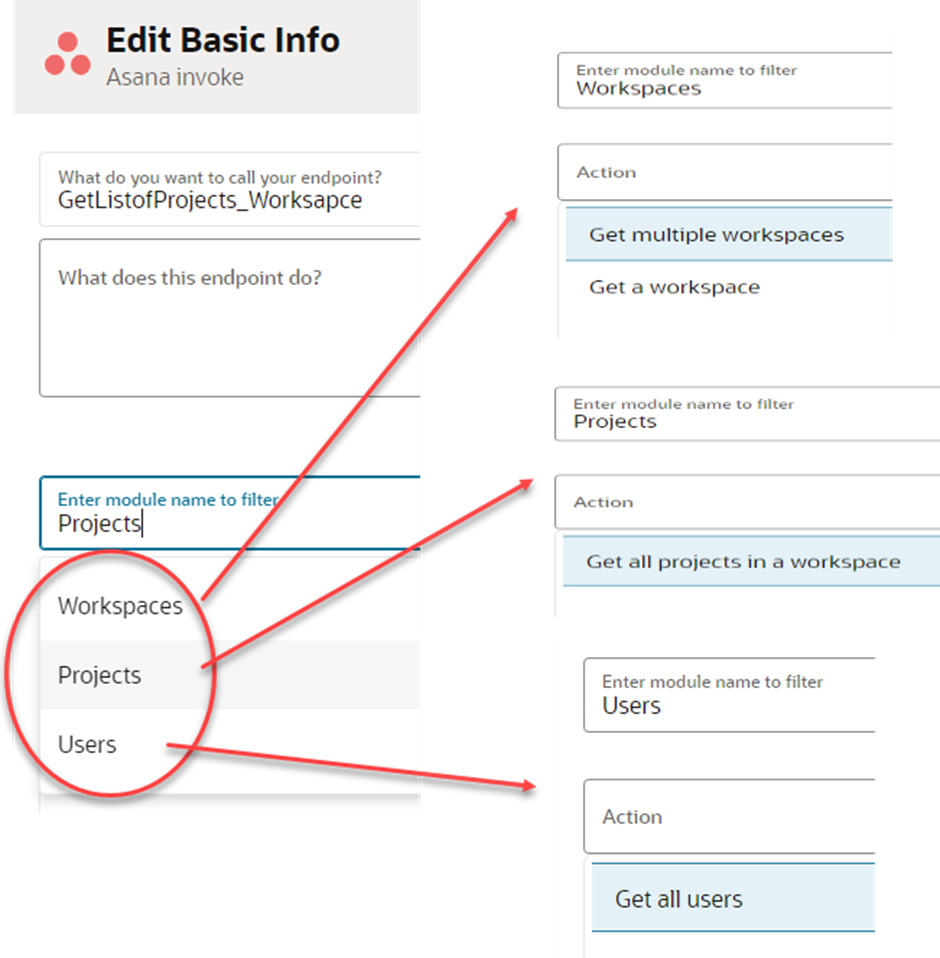
Let’s also check how your wizard page looks, and whether it includes all the operations that we selected during the ADD conversion and grouped against the business objects.
We selected four operations against all three business objects. You can see them in the wizard.
Attached is the ADD for your reference that was used to build this adapter
Please find the next blog in the RAB series is here