Did you know that Intelligent Advisor decision services can now be called by Fusion AI agents?
AI agents often struggle to provide accurate answers to questions that involve complex rules or policies. Questions like “Do I need to file a tax return?”, or “Am I eligible for warranty service?”. In these scenarios there is a lot of detail that regular retrieval-augmented generation (RAG) tools struggle to get right. Intelligent Advisor decision services can be used as a tool by Fusion AI agents to give exact advice for each user’s specific scenario. This can dramatically improve the quality of the advice provided by AI agents.
Let’s walk through how to integrate an Intelligent Advisor decision service with your Fusion AI agent.
Configure Intelligent Advisor Hub to allow access by Fusion AI agents
To begin, we need to do a small amount of configuration to allow a Fusion AI Agent to access a decision service. In Intelligent Advisor Hub:
- Create an API client or use an existing one. Ensure that the API client has the “Assessment APIs” permission for the workspace in which your decision service has been deployed. Note the client identifier and client secret for the API client.
- In the CORS settings, add the host of your Fusion site under “Assessment APIs Access Control”.
Get the endpoint details for the decision service
Now we need to make a note of the endpoint details for our decision service. We will need these later when configuring a tool in Fusion AI Agent Studio. In Intelligent Advisor Hub:
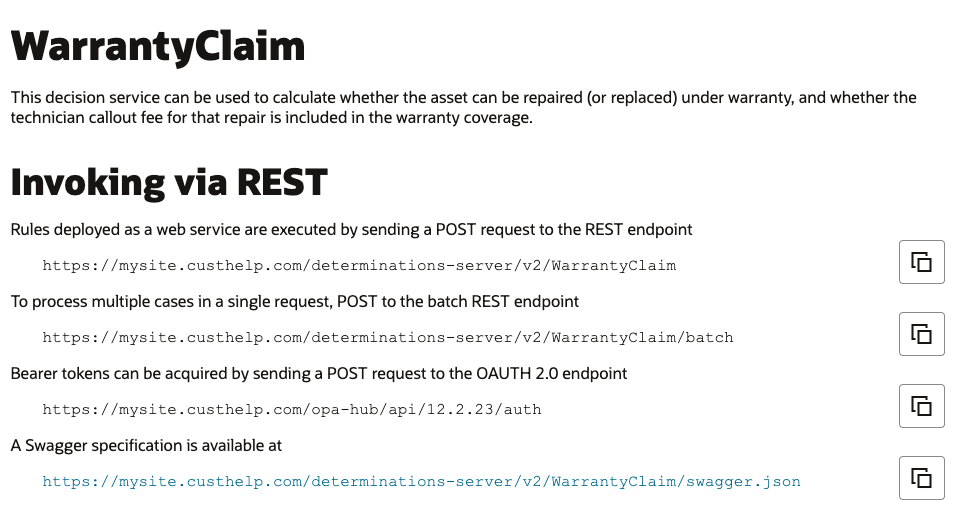
- Go to the detail page for the deployed decision service that you want to use. Now view the endpoint details by clicking on the “Endpoints” link under “Deployment Summary”.
- Make a note of the REST endpoint. The batch REST endpoint is not needed.
- Make a note of the OAuth 2.0 endpoint.
TIP! You may wish to also download the Swagger specification file (swagger.json) at the link provided. This can be useful when defining the POST body for our tool (see “Configure details for making a REST POST request” below).
For the purposes of this walkthrough, we will use the Warranty Claim decision service template which is provided in Intelligent Advisor Hub.
Create and configure a tool in Fusion AI Agent Studio
Let’s now switch to Fusion AI Agent Studio and start defining our tool.
- In Fusion AI Agent Studio, select “Tools” from the bottom navigation bar, then select “Add”.
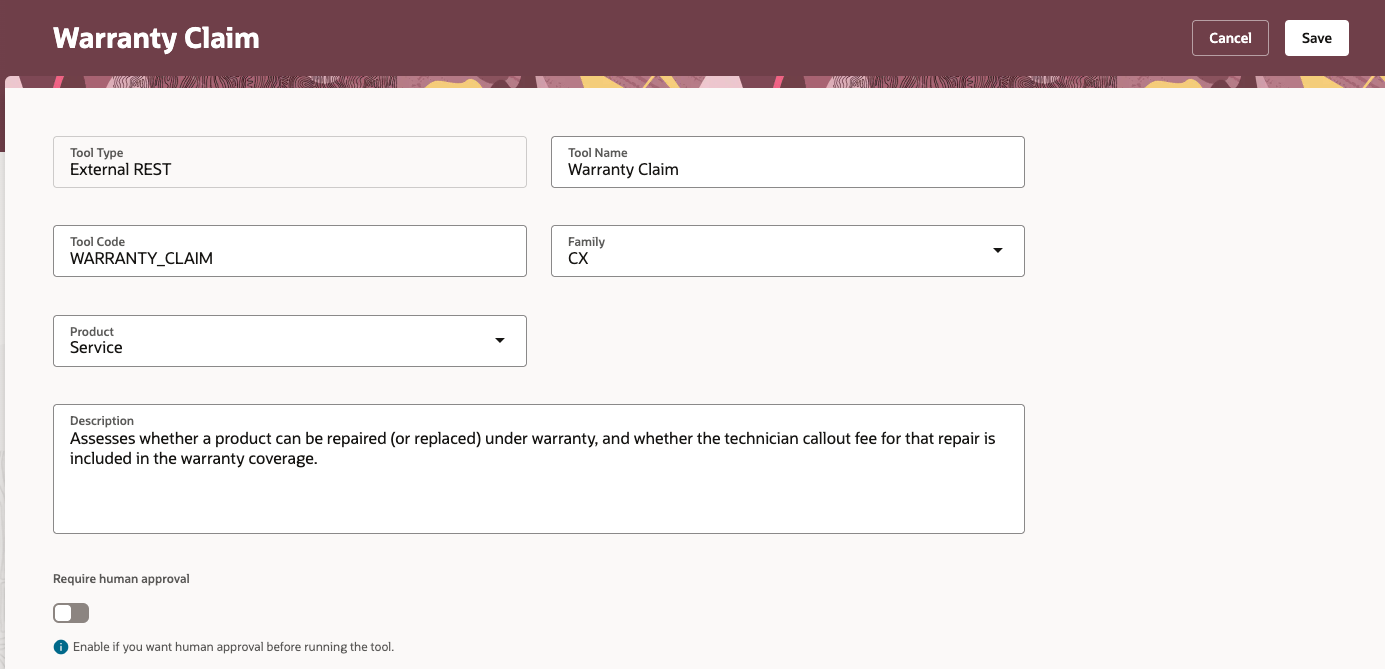
- Under “Tool Type”, select “External REST”.
- Provide a name for your tool, and select the family and product that it will be available for.
- For the description, provide a short statement describing the functionality provided by this tool. In this description, include what information is returned by your decision service.
- Under the “Authorization” tab, click the “Add” button under “Create connection”.
- For the Instance URL, add https:// and the host name of your Intelligent Advisor site, for example, “https://mysite.custhelp.com”.
- Select “OAuth2.0 Client Credentials” from the “Authentication” dropdown.
- For the description, add something like “Intelligent Advisor OAuth”.
- Under “Authentication details”, add the client id and secret for the Intelligent Advisor API client which you noted earlier.
- For the token URL, input the OAuth 2.0 endpoint from the decision service endpoint details that you noted earlier.
- The “Scope” field can be left empty.
- Now click the “Update” button.

Configure details for making a REST POST request
It’s time to configure how the tool will make a REST POST request to the decision service.
For this step you may find it useful to view the Swagger definition for the decision service in a tool such as Swagger Editor. Alternatively, in Intelligent Advisor Hub, you can examine the input contract of the project used to define your decision service.
Add endpoint
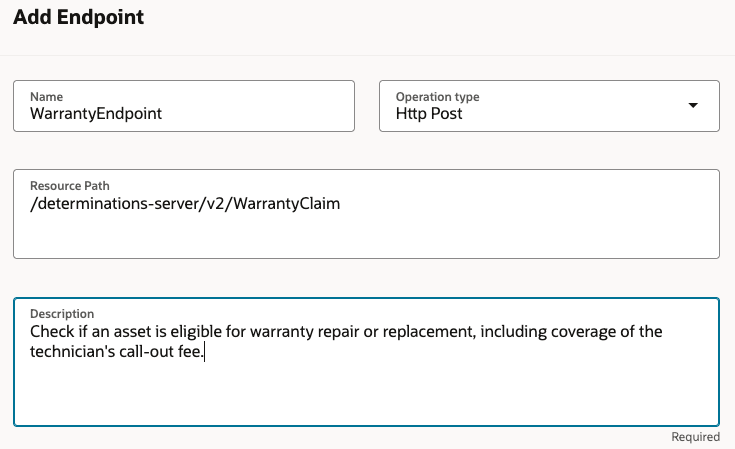
- Switch to the “Functions” tab and click the “Add” button. This will open the “Add Endpoint” view.
- Give the endpoint a descriptive name, for example, “WarrantyEndpoint”.
- Set the “Operation type” to “Http Post”.
- For the “Resource Path”, enter the resource path for the decision service REST endpoint that you noted earlier. This is the part of the URL after “https://” and the host name. It will be something like “/determinations-server/v2/WarrantyClaim”.
- For the description, write a short statement describing the functionality of your decision service. For the warranty example, this would be something like “Check if an asset is eligible for warranty repair or replacement, including coverage of the technician’s call-out fee.”
Define parameters
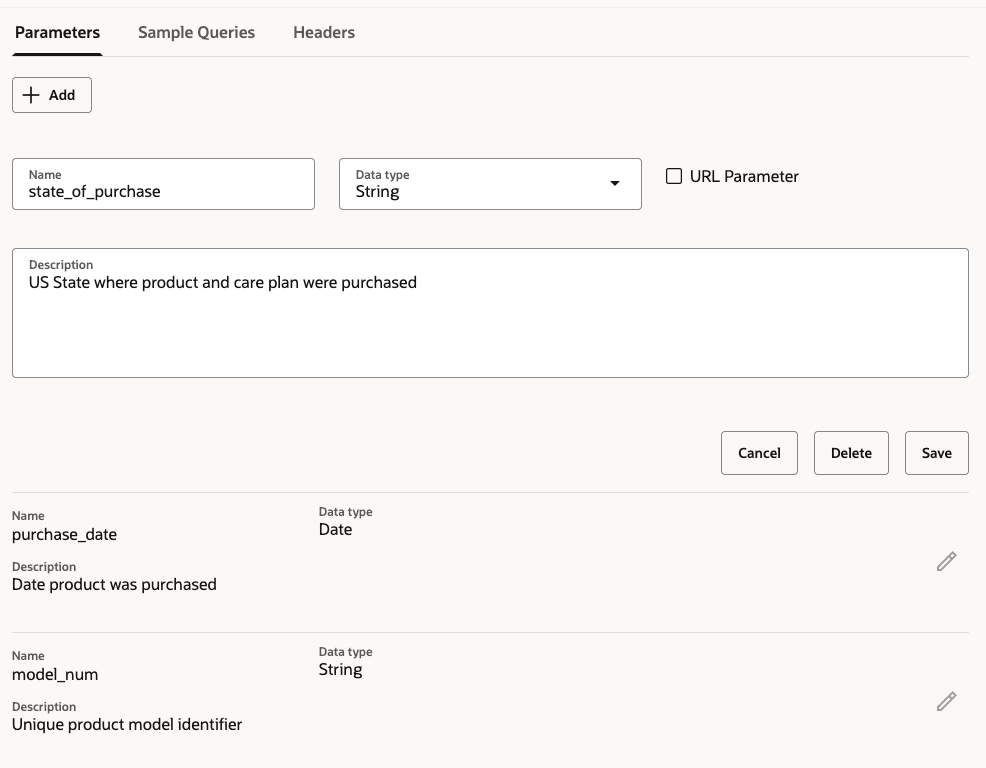
- Under “Parameters”, define parameters that match each field in the input contract of your decision service.
- It is recommended that the name of each parameter matches that of the corresponding input field.
- Ensure that the “Data type” selected matches that of the corresponding input field.
- For the description, add a short statement that describes the input field. You may like to copy this from the Swagger definition of the decision service.
- Leave the “URL Parameter” checkbox unchecked.
- Click the “Save” button once you have entered all the details for a parameter.
Define the POST body template
Once you have selected “Http Post” for the operation type, the “Body Template” field will appear below the “Description” field. The “Body Template” describes the JSON body of the POST request that will be sent to your decision service. It must be a JSON object where the keys exactly match the names of the input fields for your decision service.
- For each key, the value must be a reference to one of the parameters defined in the previous step. A parameter is referenced by enclosing its name in curlybraces: {parameter_name}.
- For string and date parameters, the reference must be enclosed in quotes: “{parameter_name}”. Do not do this for number or Boolean parameters.

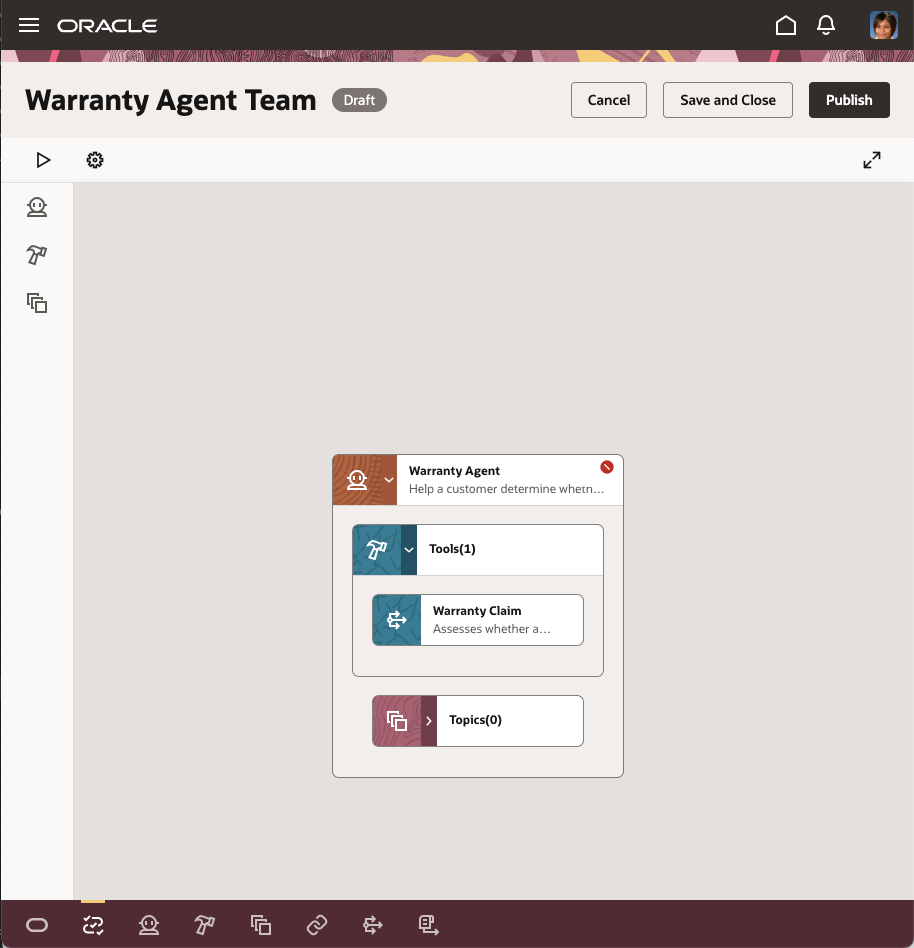
Using the tool
Now that the tool is defined, it can be added to agents in Fusion AI Agent Studio. You can test your Agent team directly in a chat session to see your Intelligent Advisor-powered tool in action. It’s that easy! No special configuration of the default agent prompts is needed, although you may want to experiment with this for advanced scenarios.

How it works
Chat sessions with a Fusion AI agent are driven by large language model (LLM) technology. When the agent has been configured to use our tool, the LLM knows that it has access to the tool when responding to messages. Based on the description of the tool and its endpoint parameters, the LLM will decide to call the tool if the user’s question can be answered using information in the tool’s output. The LLM will use details that the user has already supplied in the chat session when calling the tool. If additional details are needed, the LLM will ask for these in the chat before calling the tool.
Once the LLM has all the details it needs, it will call the tool, sending a POST request to the REST endpoint for the decision service. The LLM then examines the JSON response from the decision service and uses this new information to help answer the user’s question.
Summary
As we have seen, Intelligent Advisor decision services provide a powerful way to enhance the capabilities of Fusion AI agents. Try it out for yourself today!
Further information
If you would like further information on any of the concepts covered in this post, check out these topics in the Intelligent Advisor documentation: