Trigger AI-powered workflows directly from inbound emails, with zero manual intervention.
In today’s fast-paced business environment, manual data entry is a bottleneck. Imagine a world where an inbound email with attachment(s) automatically triggers a workflow to create supplier records in your ERP system. With Oracle Fusion AI Agent Studio, this is not just possible — it’s easy to configure.
What Is the Email Trigger?
The Email Trigger is a built-in capability of workflow agents in Oracle Fusion AI Agent Studio. It allows the workflow agent to monitor a designated mailbox by polling it at a configured interval. When a new unread email appears, it fires the workflow — reading the email body, subject, attachments, and sender details — all without any manual action. The workflow agent can also respond automatically to original sender of the inbound emails.
📬Mailbox Monitoring: Continuously polls a specific folder in third-party mailbox at chosen interval.
📎Attachment Parsing: Reads email content (with file attachments) for downstream processing.
⚡Fully Automated: No user action required. The agent triggers, processes, and responds — end to end.
↩️Smart Reply: Can send a success or error notification back to the original sender’s email automatically.

Think of it as a smart intake desk: emails arrive, the agent reads and acts on them, and replies.
Steps to setup Email trigger
Here is your step-by-step guide to setting up a successful email-driven automation.
The Three Pillars of Configuration
- The Mailbox: Your third-party email provider (e.g., Microsoft or Google).
- The Email Account: The secure connection to The Mailbox within AI Agent Studio.
- The Workflow Agent: The logic that processes the data.
Step 1: Prepare Your Mailbox (The Source)
Before touching Oracle Fusion, your mailbox must be ready to communicate.
- Register an Application: Work with your provider (Google or Microsoft) to create an application that allows API interaction.
- Gather Credentials: You will need the Tenant ID, Client ID, and Client Secret to establish a secure connection later.
- Organize Your Inbox: Create a specific folder in the mailbox (e.g., “Inbound_Suppliers”) where the agent will look for emails.
- Set Mailbox Rules: Configure a Rule so that specific inbound emails (based on filters like sender or subject line) are automatically moved into your new folder.
Step 2: Configure the “Email Account” in AI Agent Studio
Once your mailbox is ready, you need to tell Oracle Fusion AI Agent Studio how to access it.
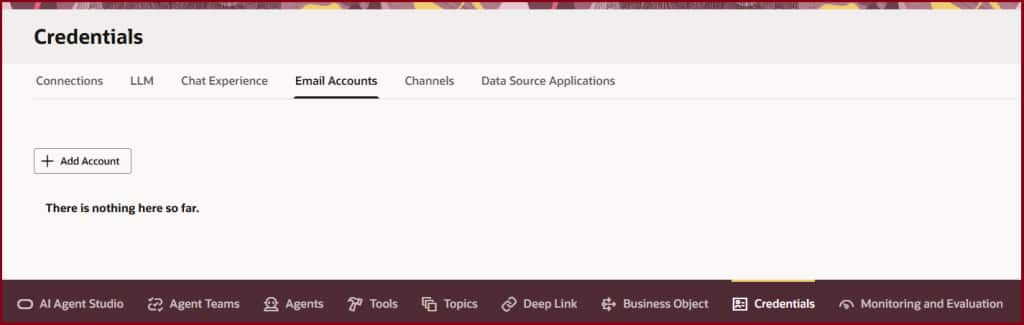
- Navigate to the Credentials tab and then the Email Accounts sub-tab.
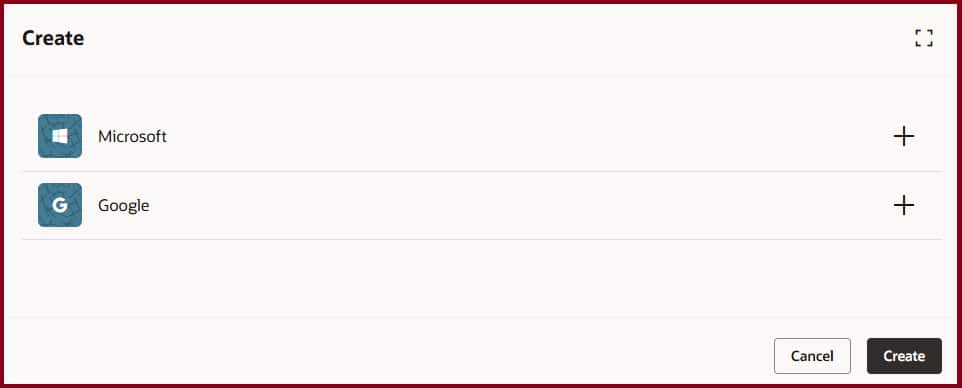
- Add a new account and select your provider (Microsoft or Google).
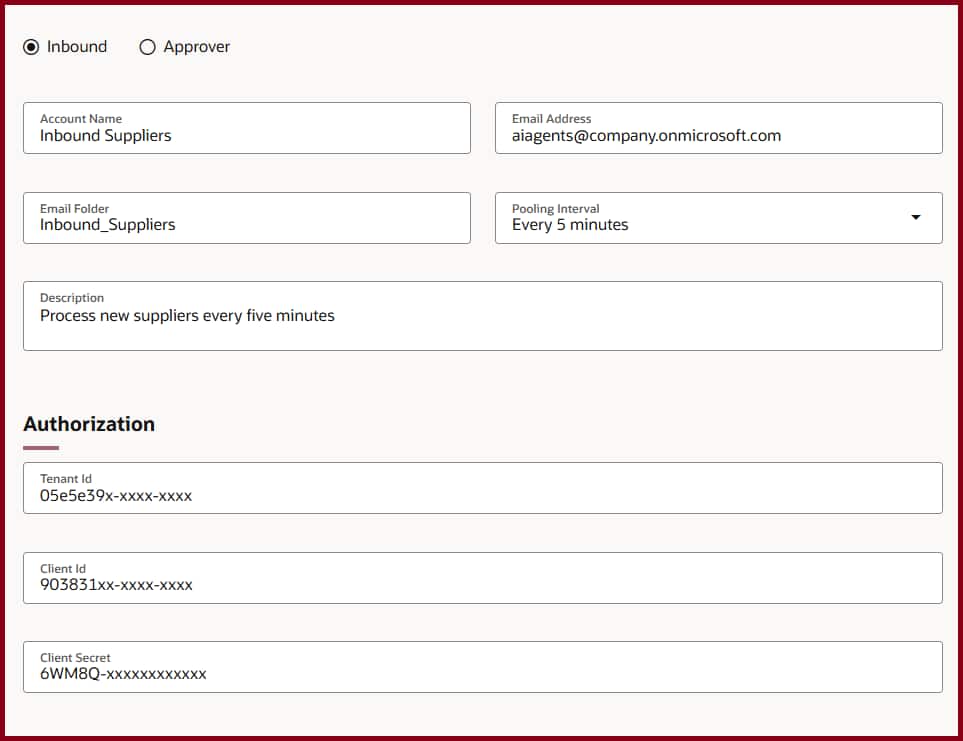
- Select the Inbound type for triggering workflows.
- Enter Connection Details: Use the credentials gathered in Step 1. Ensure the Email Folder name matches exactly what you created in your mailbox.
- Set the Polling Interval: Decide how often the agent should check for new mail (e.g., every 5 or 15 minutes).
Credentials tab to configure Email Accounts
Email Account mailbox provider selector
Email Account details with mailbox folder
Step 3: Build the Workflow Agent
Now, you can create the agent that will do the heavy lifting.
- Create the Agent: Create agent team of type Workflow with business process flow.
- Assign the Trigger: In the agent’s Settings, navigate to the Triggers tab. Under the “Email” section, select the Email Account you just configured.
Email Trigger setup in Workflow Agent

Test and Publish
Before going live, use the Debug mode. You can simulate an email trigger using a Webhook test message to ensure your nodes are processing data correctly.
Once testing is complete, you must Publish the agent. The email trigger will not activate until the agent is in a Published state.
Inside the Workflow: A Supplier Onboarding Example
A typical automated flow might look like this:
Node 1 — Parse Email
A Code node that reads the CSV attachment from the email trigger context and converts it into structured data objects for downstream nodes. It can also be designed to fall back gracefully to a REST webhook input — making it easy to test in debug mode before processing a real email.
Node 2 — Create Supplier
A Business Object Function node that calls the Oracle Fusion Suppliers Business Object to create a new supplier record. Parameters like Supplier Name, Tax Organization Type, DUNS Number, and Taxpayer ID are mapped directly from the parsed CSV output of the previous node. The Prepare HTML node is set as the Error Handler here — ensuring errors are caught and surfaced cleanly.
Node 3 — Prepare HTML
Another Code node that builds the HTML-formatted message. It handles both outcomes: a success message with the new Supplier Name and ID, or an error message with the API response details — along with a prompt to review and resubmit.
Node 4 — Send Notification
A Send Notification node that delivers the HTML result back to the original sender. The recipient address is dynamically extracted from the inbound email’s return-path header.
Pro Tip: You can dynamically retrieve the sender’s email address using the context variable: $context.$triggers.EMAIL.$input.fromAddress.
Supplier Onboarding Workflow Architecture

Supplier Onboarding Workflow ArchitectureThings to Remember
- Avoid Overlap: Do not use the same Email Account as a trigger for multiple workflow agents, as this can lead to unpredictable processing results.
- Security Matters: The agent processes nodes using the Fusion Role Security of the user who created the Email Account.
- Polling Behavior: When the agent reads an email, it marks it as “Read” to ensure it isn’t processed twice.
By following this guide, you can transform your inbox from a static communication tool into a dynamic engine for enterprise automation.
Summary
Oracle Fusion AI Agent Studio’s Email Trigger turns your shared inbox into an intelligent automation gateway. Whether you’re onboarding suppliers, processing purchase requests, or routing data from field teams — any email-driven workflow can be fully automated with just a mailbox folder, an email account configuration, and a workflow agent. The result: fewer manual steps, faster turnaround, and a smarter use of your team’s time.
