Bringing Oracle AI Agents Into Microsoft Teams
Your employees already live in Microsoft Teams. Now your Oracle AI Agents can meet them there — with full identity security, RBAC enforcement, and zero context-switching. Here’s the complete step-by-step guide.
Imagine this: a Compensation Manager opens Microsoft Teams in the morning, types a quick question to an AI agent, and gets salary insights — all without logging into Oracle Fusion Cloud separately. That’s not a future-state vision. That’s exactly what the Microsoft Teams + Oracle AI Agent Studio integration makes possible today.
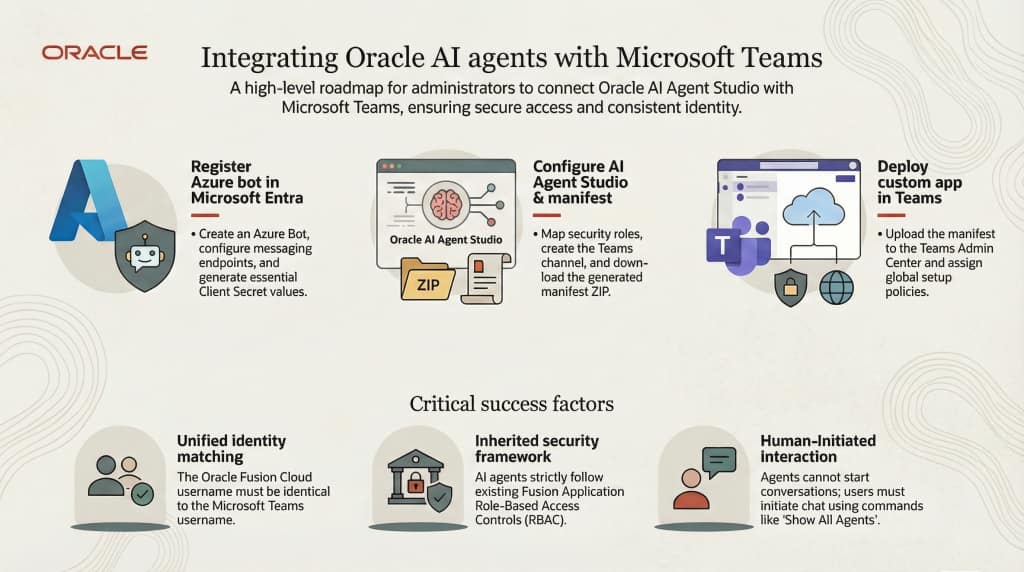
Integrating Oracle AI Agents with Microsoft Teams
This guide walks you through the complete, end-to-end setup: from spinning up an Azure Bot to watching your Oracle AI agent respond in a Teams chat window. Every step is documented with the exact configuration values you’ll need — and a few things to watch out for along the way.
Register Azure Bot: Set up the bridge in Microsoft Entra / Azure Active Directory
Generate Manifest: Use Oracle AI Agent Studio to create the Teams app package
Upload to Teams: Register it as a custom app in the Teams Admin Center
Run AI Agents: Start interacting with your Oracle AI Agents right from Teams
Register an Azure Bot in Microsoft Entra
The Azure Bot acts as the secure relay between Microsoft Teams and your Oracle environment. It handles authentication, routes messages, and enforces your org’s identity policies. Think of it as the switchboard operator — everything flows through it.
Before you begin — verify these Azure resources exist
- Active Azure subscription
- Resource Group
- App Service Plan
- Web App (this is what will host the bot endpoint)
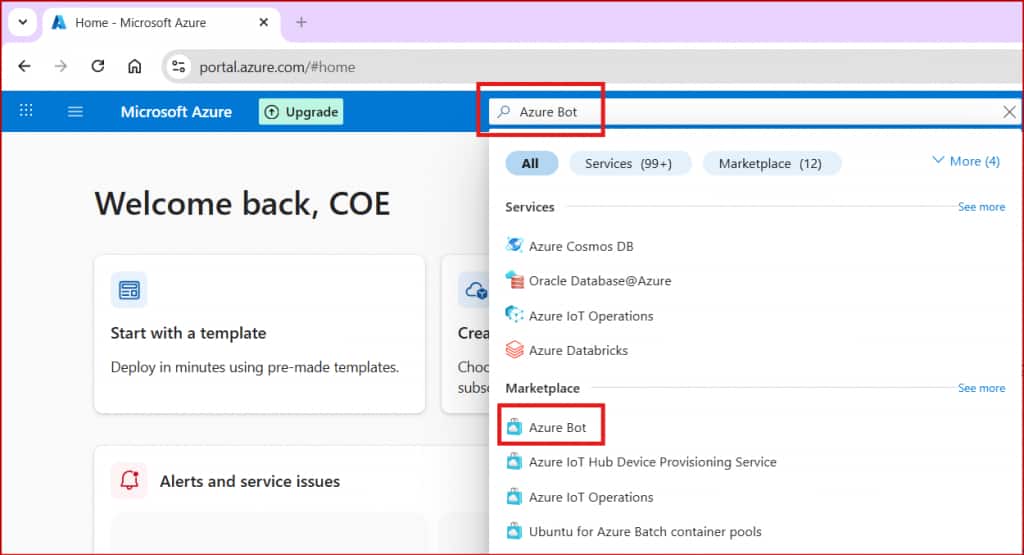
Step 1 — Visit the Microsoft Azure Portal and create an Azure Bot
Sign in to portal.azure.com as an Azure or Exchange Administrator. In the top search bar, type Azure Bot and select it to begin creating a new bot resource.
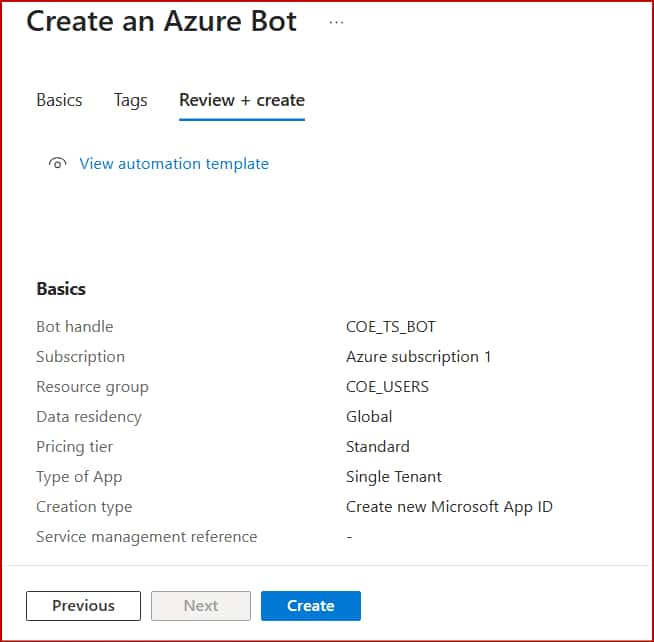
Step 2 — Create a new Azure Bot
Fill in the bot details. These settings matter:
- Enter a unique Bot Handle (display name)
- Select your Azure Subscription and Resource Group
- Set Data Residency →
Global - Set Type of App →
Single Tenant - Set Creation Type →
Create new Microsoft App ID
Click Review + Create, then Create to deploy your bot resource.
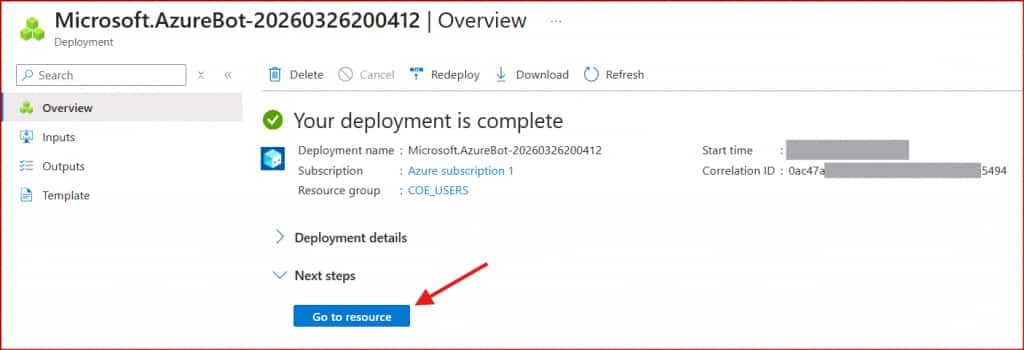
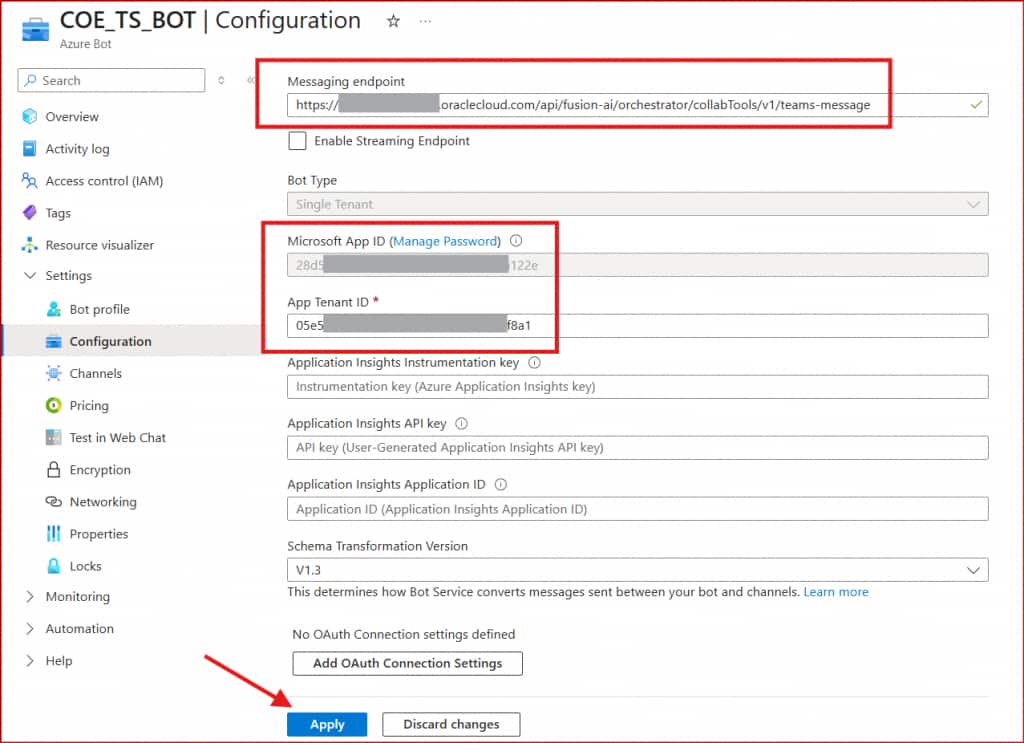
Step 3 — Configure the Messaging Endpoint
Once deployed, click Go to resource. In the left panel, navigate to Settings → Configuration. Set the Messaging Endpoint using this URL pattern:
https://[[pod-name]]/api/fusion-ai/orchestrator/collabTools/v1/teams-messageReplace [[pod-name]] with your Oracle application environment’s base URL, then click Apply.
📌 Save these now: Before moving on, copy your Microsoft App ID and App Tenant ID from this screen. You’ll need both when creating the manifest in AI Agent Studio.
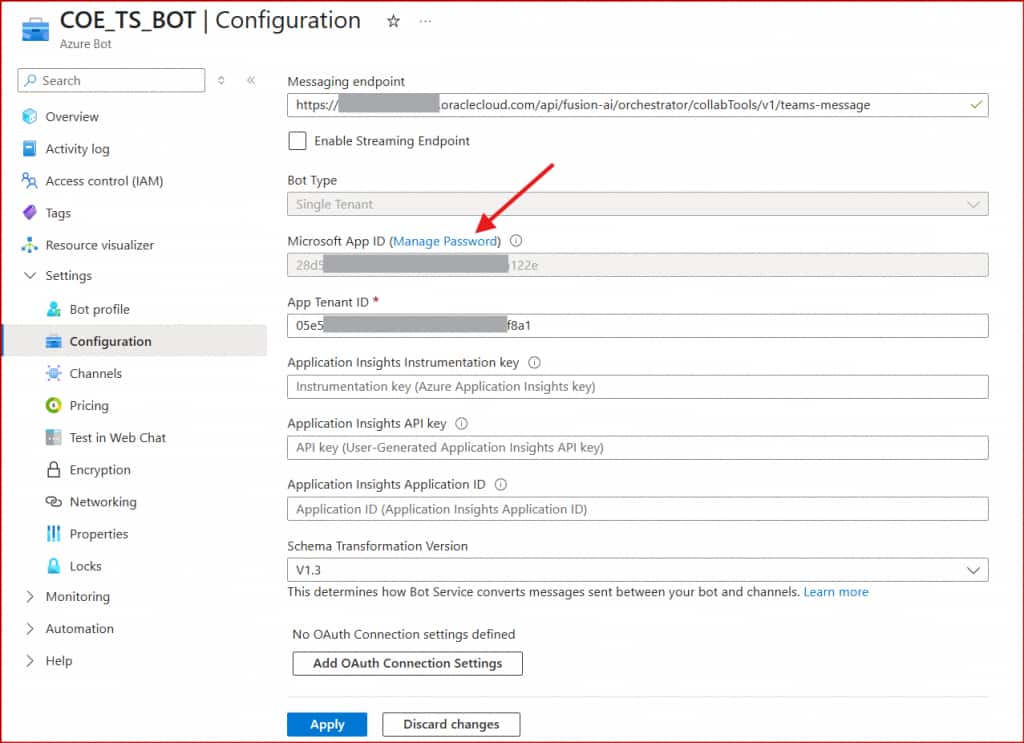
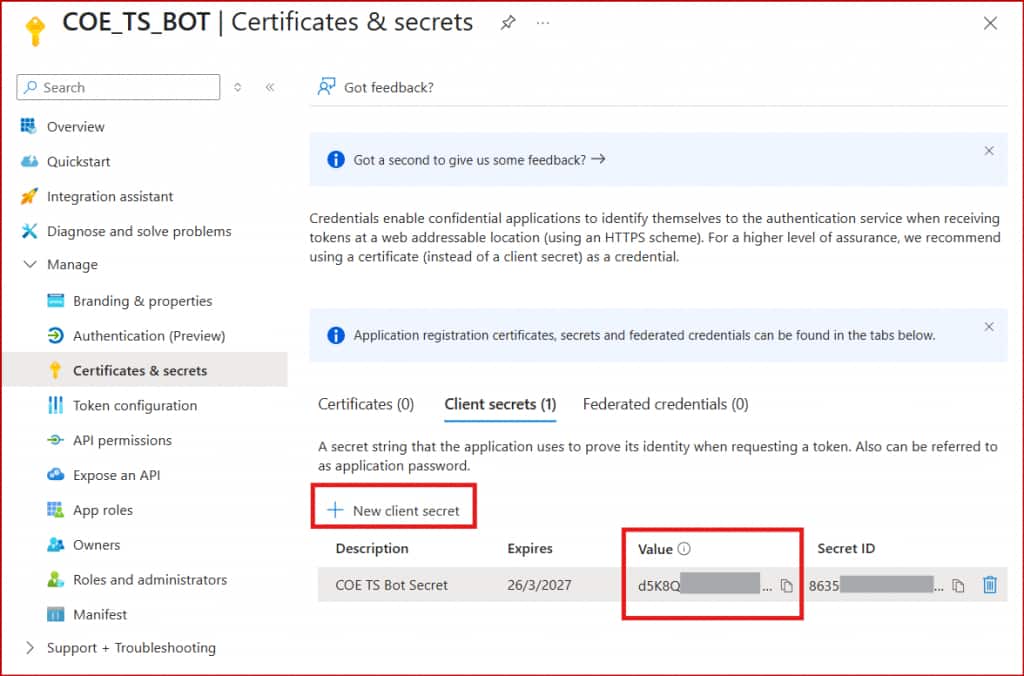
Step 4 — Generate a Client Secret
Next to the Microsoft App ID, click Manage Password. On the Certificates & Secrets page, click New client secret. Provide a description and choose your desired expiry duration.
⚠️ One-time visibility: The secret Value is only shown once. Copy it immediately and store it securely — you won’t be able to retrieve it again.
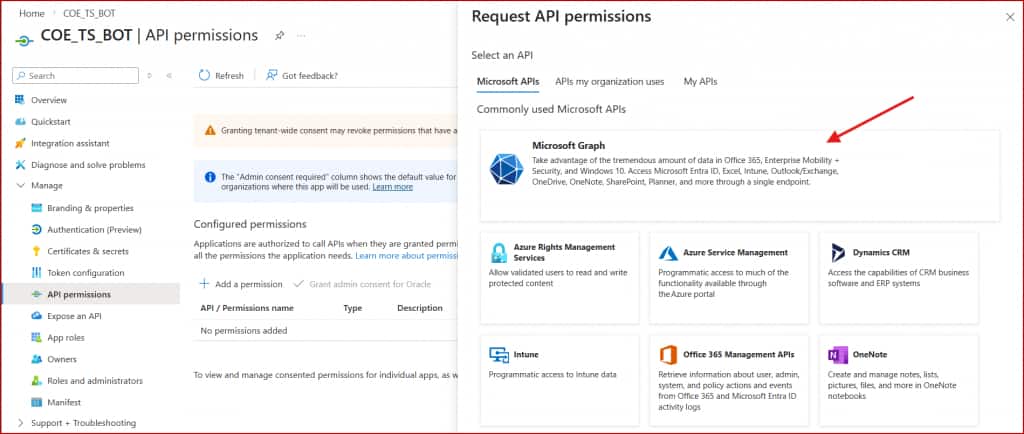
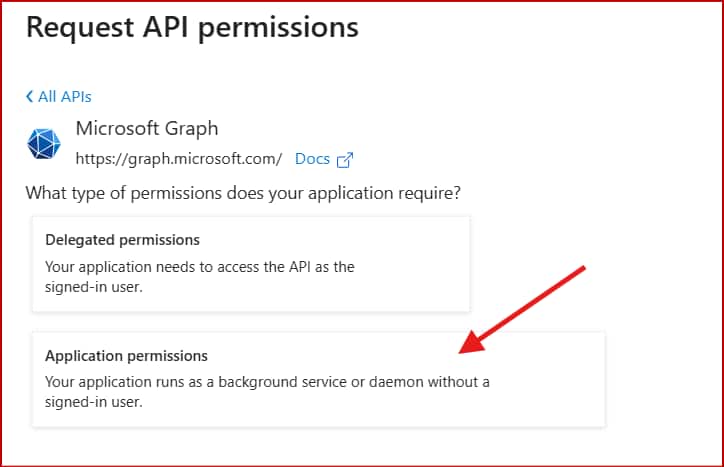
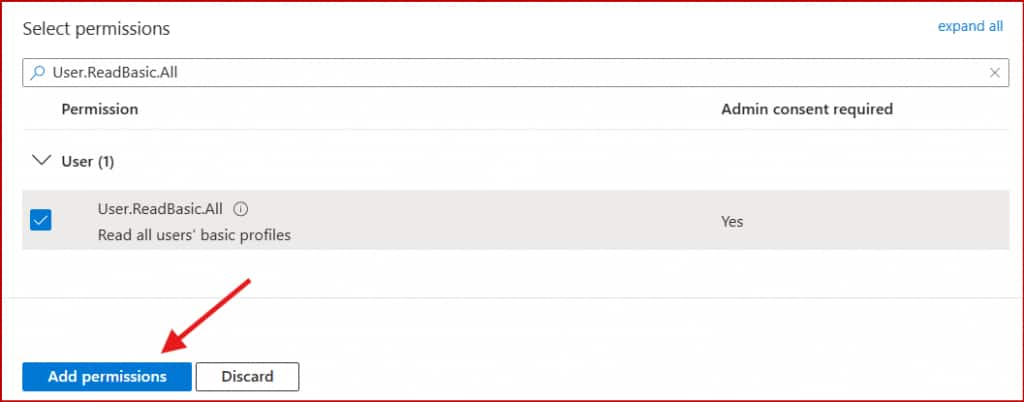
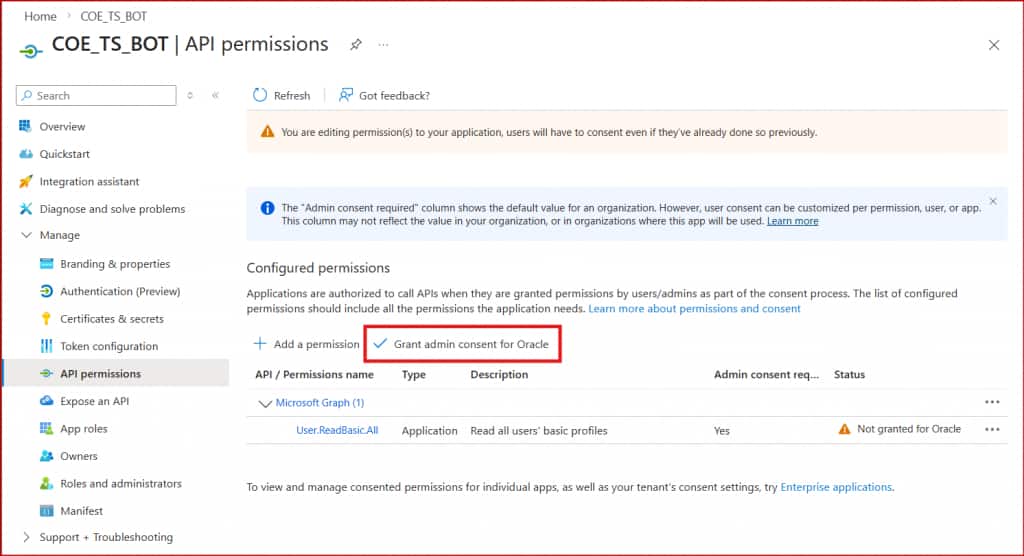
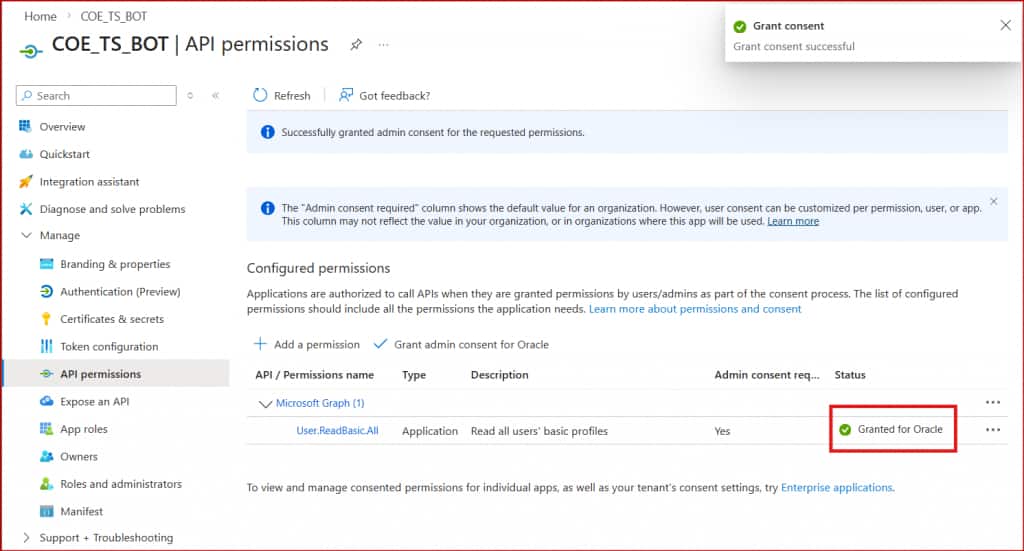
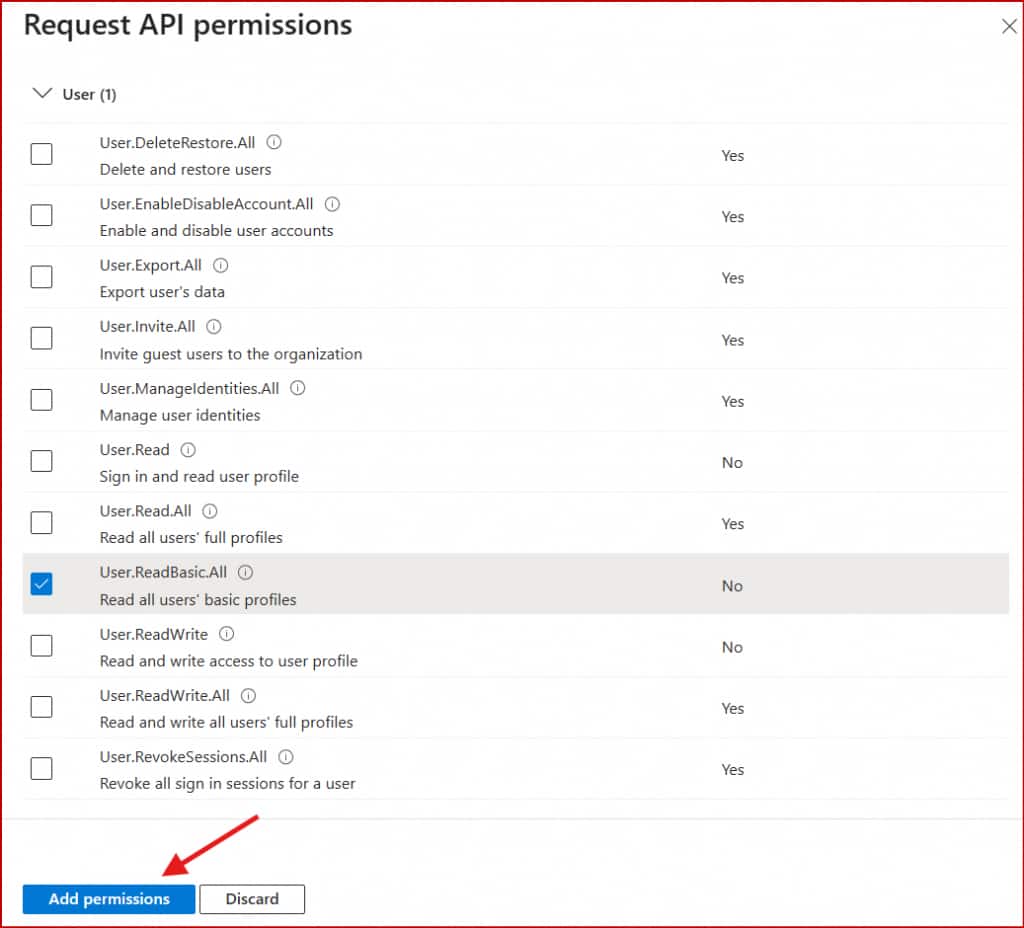
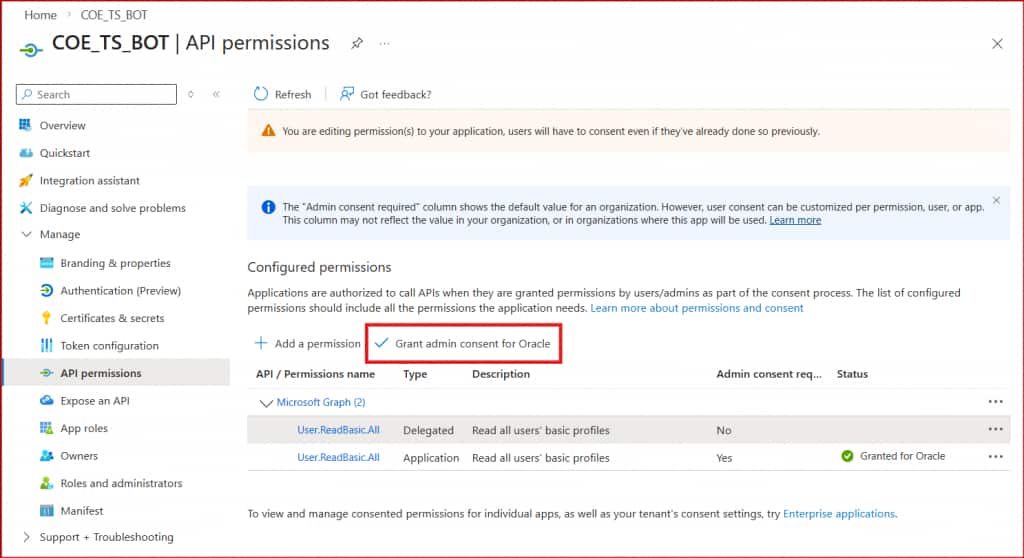
Step 5 — Configure Application Permissions
The bot needs permission to look up user identities across your org. From the left panel, open API Permissions and follow these steps:
- Click Add a Permission → Microsoft Graph → Application Permissions
- In the User folder, search for and select User.ReadBasic.All
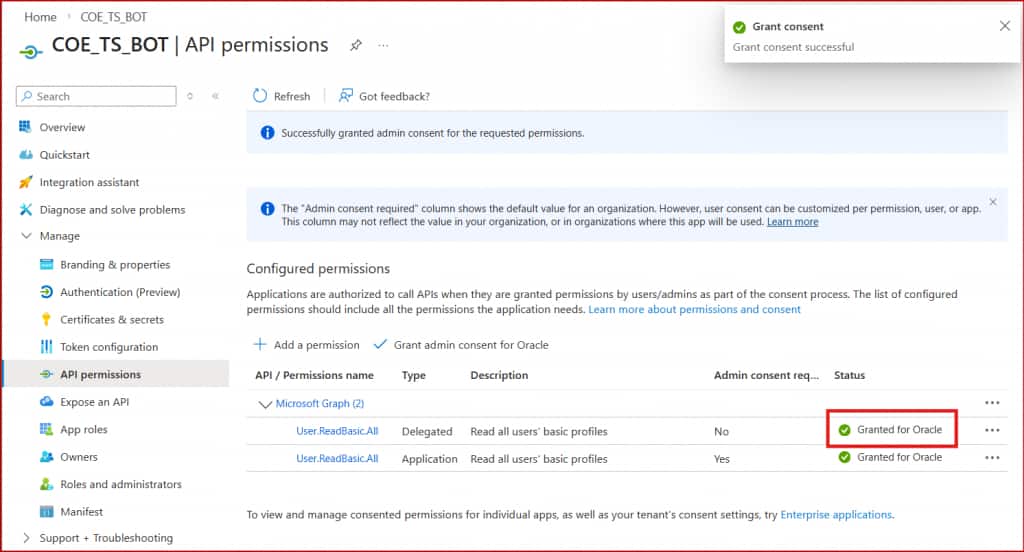
- Click Grant admin consent to activate the permission
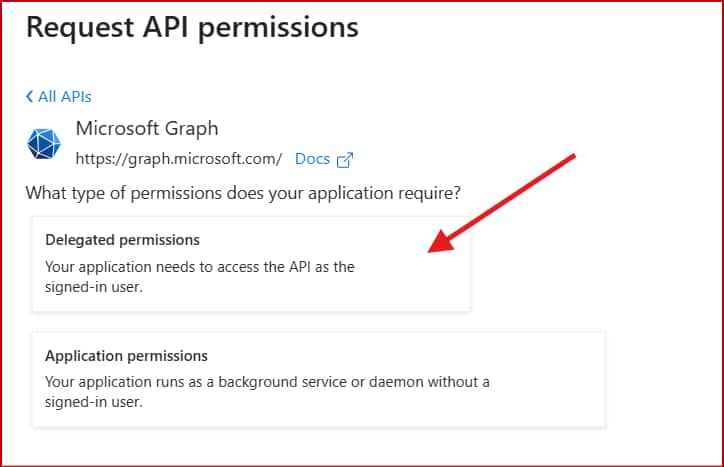
Step 6 — Configure Delegated Permissions
Repeat the same process for Delegated Permissions: API Permissions → Add a Permission → Microsoft Graph → Delegated Permissions. Add User.ReadBasic.All and grant admin consent.
💡 Why both?
Application permissions let the bot act on its own behalf (background operations). Delegated permissions let it act on behalf of a signed-in user. You need both for seamless identity mapping between Teams and Oracle Fusion.
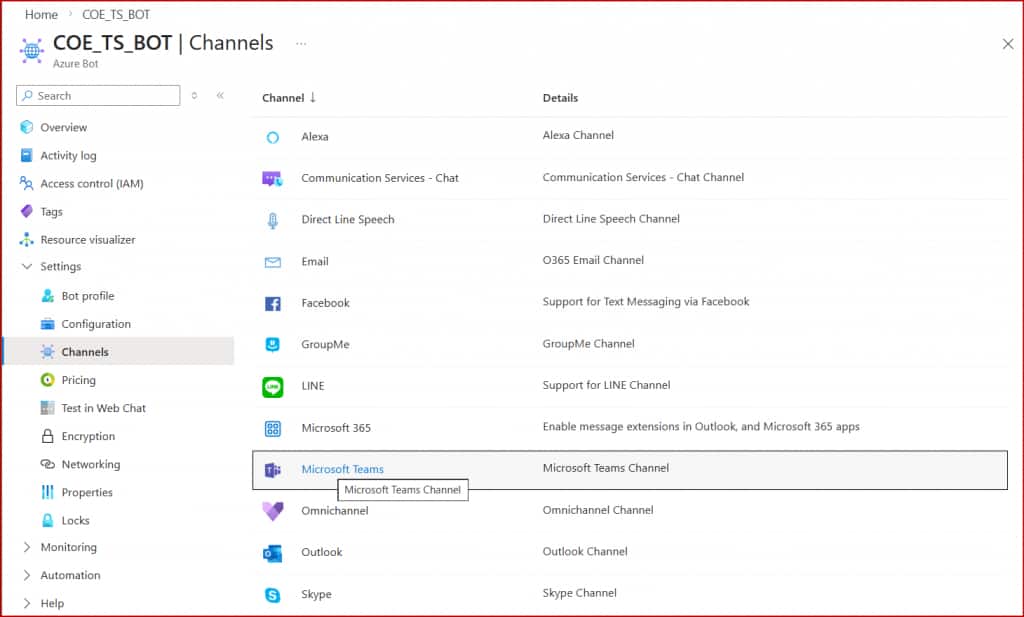
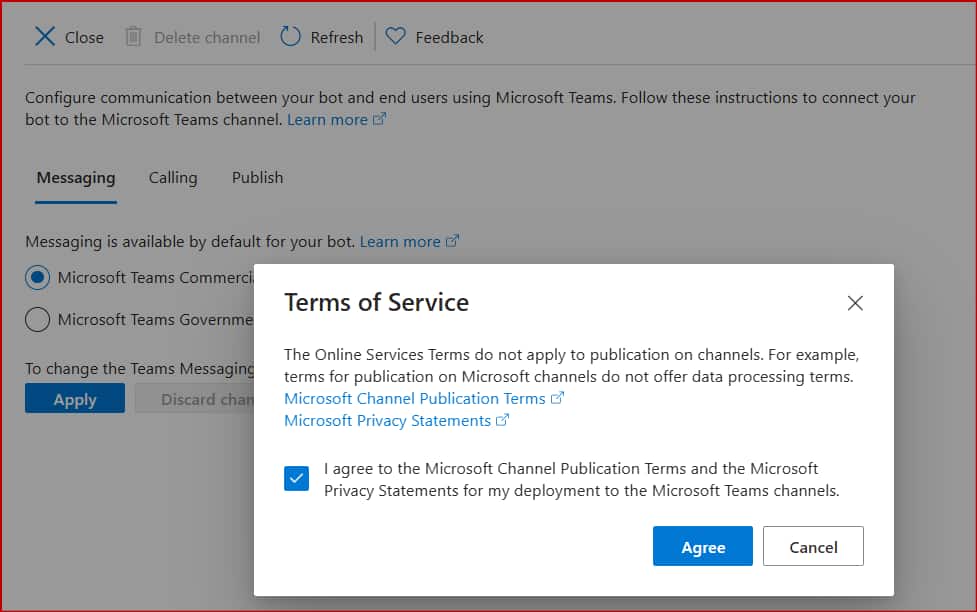
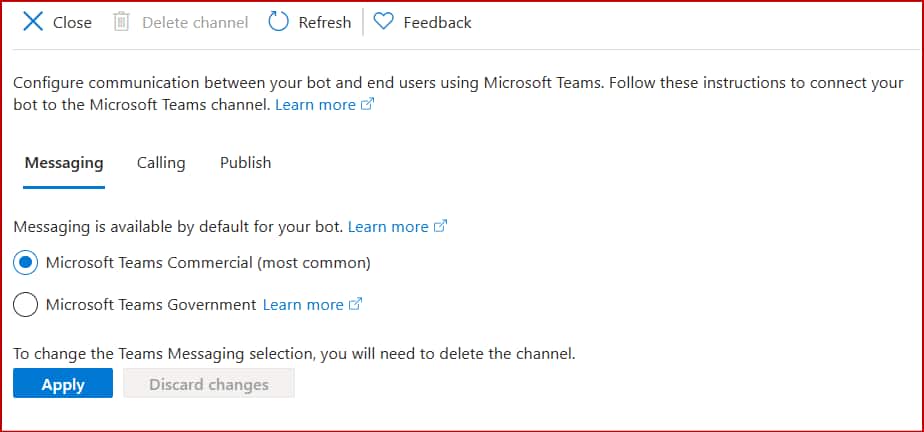
Step 7 — Enable the Microsoft Teams Channel
Navigate back to your bot resource. In the left panel, open Channels. Select Microsoft Teams, accept the terms of service, and click Apply. Your Azure Bot is now configured and ready to bridge communications to Teams.
Generate the Manifest File in AI Agent Studio
With the Azure Bot configured, the next step is to register it inside Oracle AI Agent Studio and generate the Teams app manifest — the package that tells Microsoft Teams who your app is, where it lives, and what it can do.
Prerequisites: Roles and Permissions
Before you can configure Teams channels in AI Agent Studio, the right duty role and permission groups must be in place. Create a duty role mapped to the Fusion AI Studio Channel User job role:
ORA_DR_FAI_GENERATIVE_AI_CHANNEL_ADMINISTRATOR_DUTY
Add following permission groups to that duty role, and add the AllRowsAllFields security view to each:
| Permission Group | Type |
|---|---|
| create:ChannelManifest | Create |
| create:ExternalChatCorrelation | Create |
| delete:ChannelManifest | Delete |
| read:ChannelManifest | Read |
| read:ExternalChatCorrelation | Read |
| update:ChannelManifest | Update |
| update:ExternalChatCorrelation | Update |
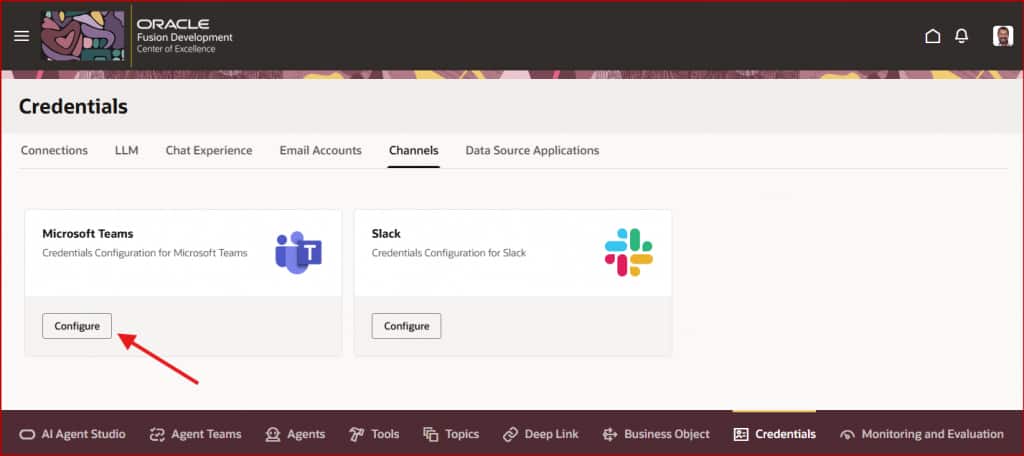
Step 1 — Navigate to Microsoft Teams Configuration in AI Agent Studio
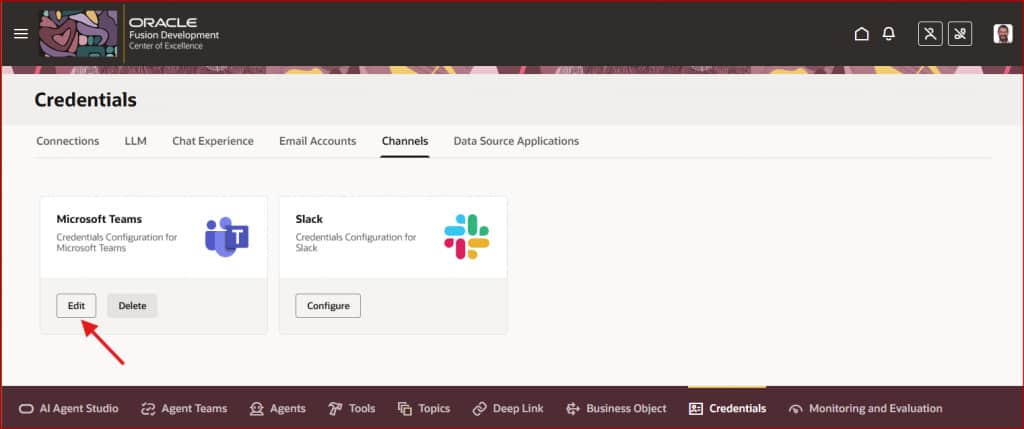
Log in to Oracle AI Agent Studio. Navigate to Credentials → Channels. Locate Microsoft Teams and click Configure (this option appears during first-time setup).
Step 2 — Create the Microsoft Teams Channel
Fill in the channel configuration form with the Azure Bot details you captured earlier:
- Manifest Short Name — App display name in Teams (keep it concise)
- Manifest Full Name — Descriptive full name
- Version —
1.0 - Manifest Schema Version — Select
Latest - Bot ID / App ID — Microsoft App ID from Azure
- Tenant — App Tenant ID from Azure
- Secret — Client Secret value from Azure
💡 26A and above The Oracle Instance URL field is not required from Release 26A onwards.
Click Create to register the channel.

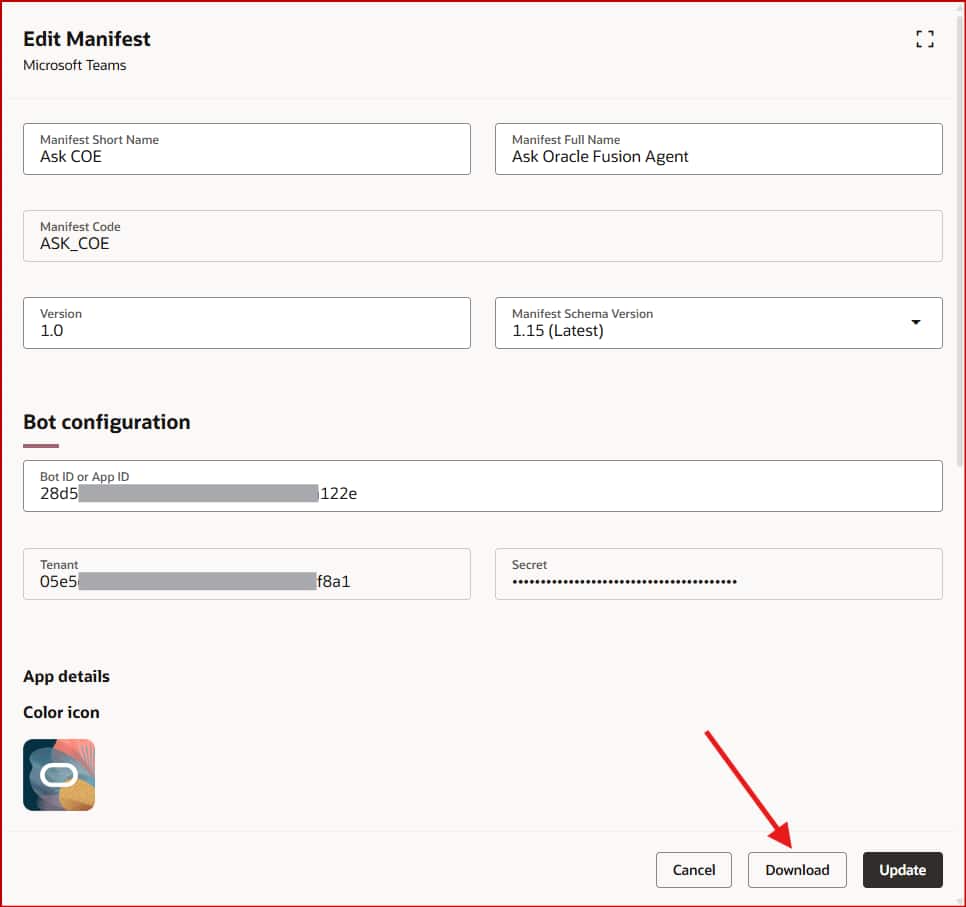
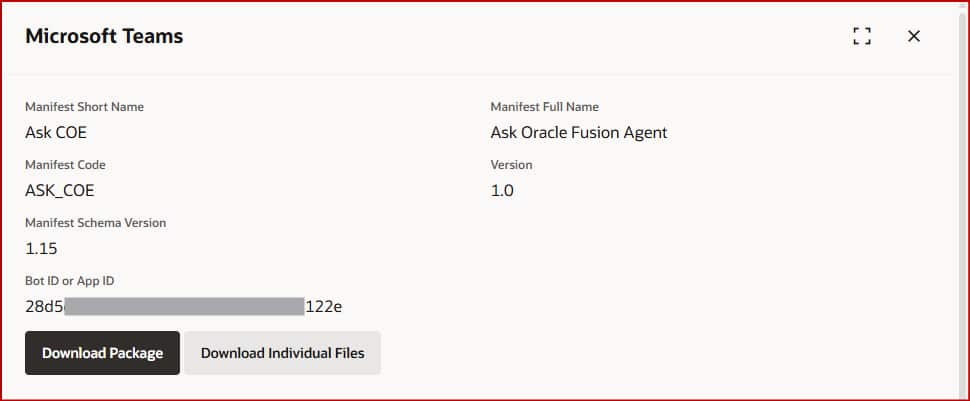
Step 3 — Download the Manifest Package
Return to Credentials → Channels → Microsoft Teams and click Edit. On the edit screen, click Download to open the manifest page, then click Download Package to save the manifest ZIP file locally.
📦 What’s inside the ZIP? The package contains: manifest.json (app names, descriptions, Azure Bot reference, available commands like “Show All Agents”) plus icon assets required by Teams.
💡 Made a change? If you update the channel configuration after initial setup, simply re-generate and re-download the manifest ZIP from Agent Studio and re-upload it to the Teams Admin Console.
Upload the Manifest File in Microsoft Teams
With the manifest ZIP in hand, it’s time to register your Oracle AI Agent as a custom app in the Microsoft Teams ecosystem. This is done through the Teams Admin Center, and takes just a few minutes.
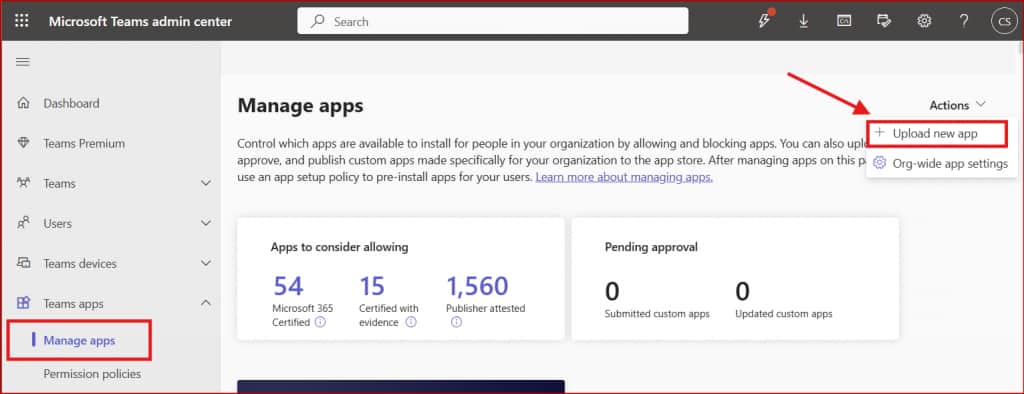
Step 1 — Sign in to the Microsoft Teams Admin Center
As a Teams Administrator, navigate to admin.teams.microsoft.com and sign in.
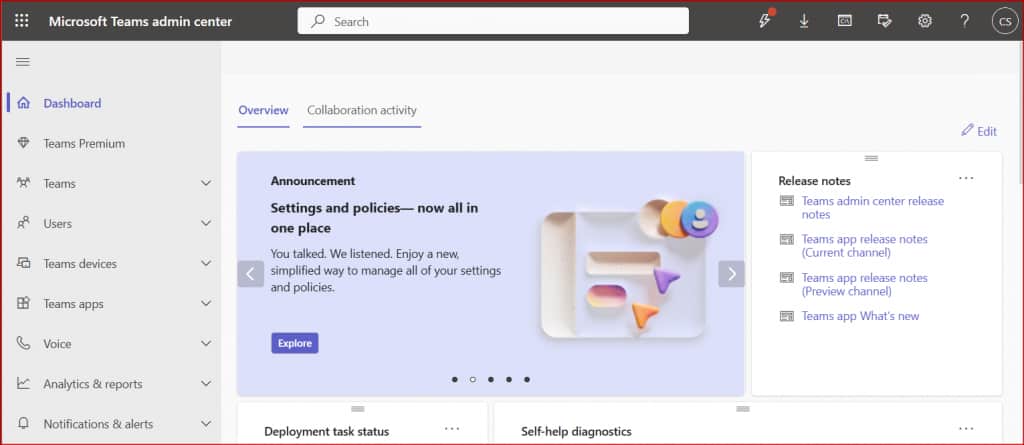
Step 2 — Upload the Custom App
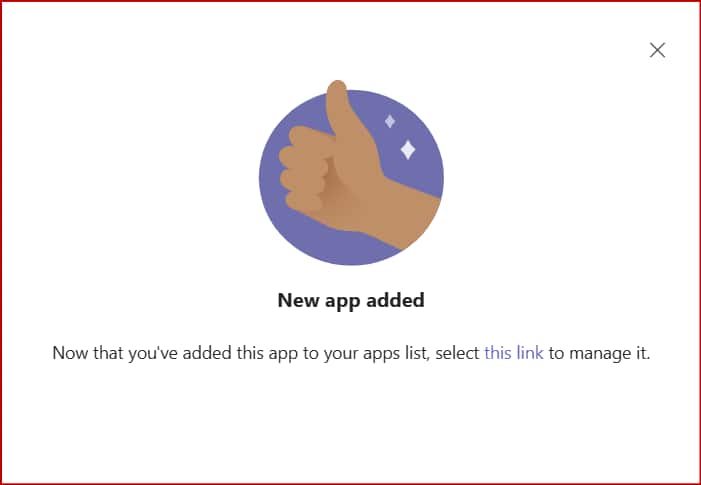
In the left navigation, open Teams apps → Manage apps. From the Actions menu at the top, select Upload new app. Upload the manifest ZIP file downloaded from AI Agent Studio.
On success, you’ll see a confirmation with a link to the newly registered custom app. It will now appear in the available apps list for your organization.
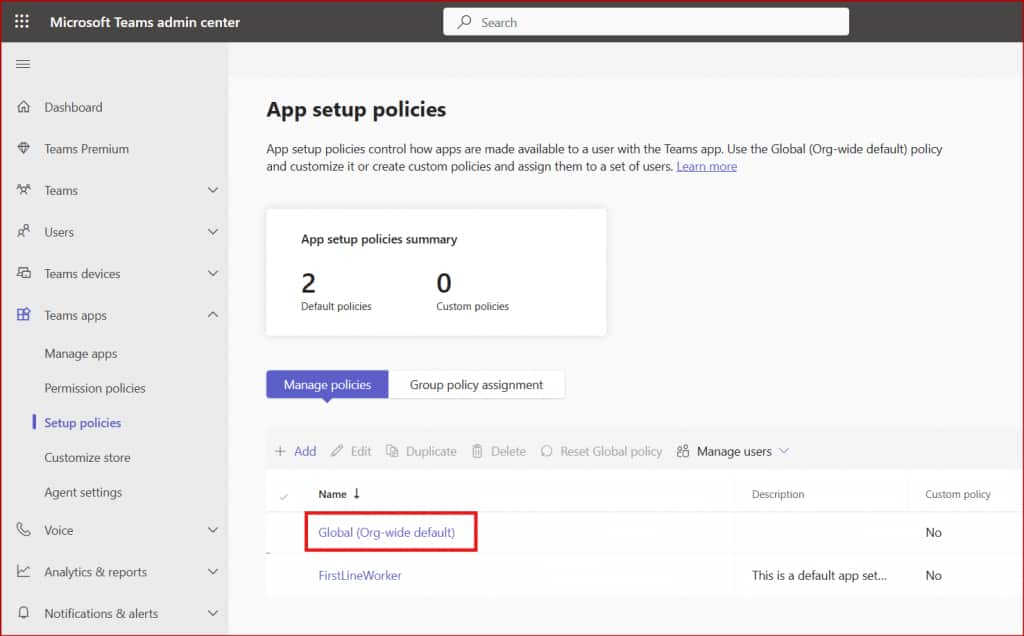
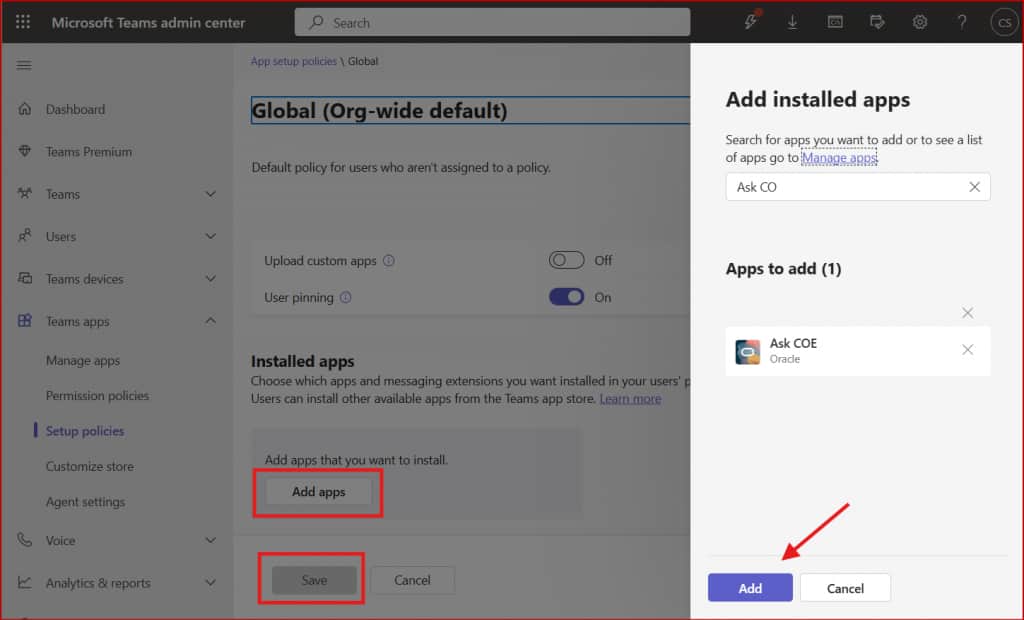
Step 3 — Set up the Custom App Policy
To make the app available across your organization, navigate to Teams apps → Setup policies → Global (Org-wide default). Add your new custom app to this policy and save. Users in your tenant will now be able to discover and add the app from their Teams Apps menu.
Run Oracle AI Agents from Microsoft Teams
The plumbing is complete. Now for the exciting part — actually talking to your Oracle AI agents from within Teams.
Step 1 — Set Up the Oracle Fusion Cloud User Account
Oracle AI Agents operate within the Fusion Applications security framework — they respect and enforce your existing RBAC controls. This means the same user who logs into Teams must have a matching user account in Oracle Fusion Cloud.
🔑 Critical requirement: Microsoft Teams username must exactly match Oracle Fusion Cloud username.
Once the user account is set up with the right roles in Fusion (enabling access to the relevant AI Agents), they’re ready to interact from Teams.

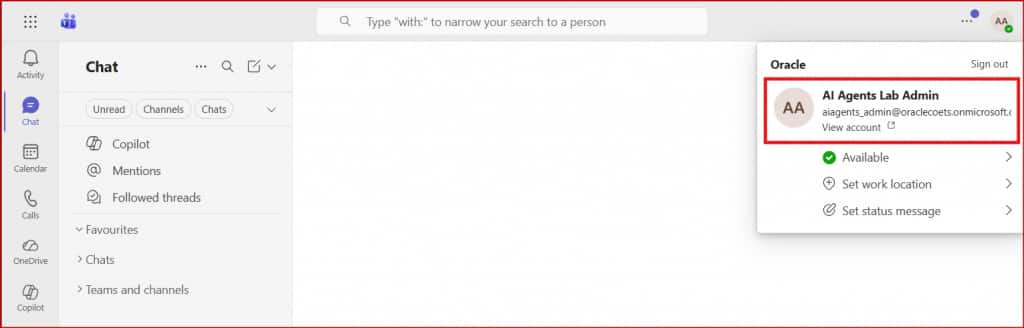
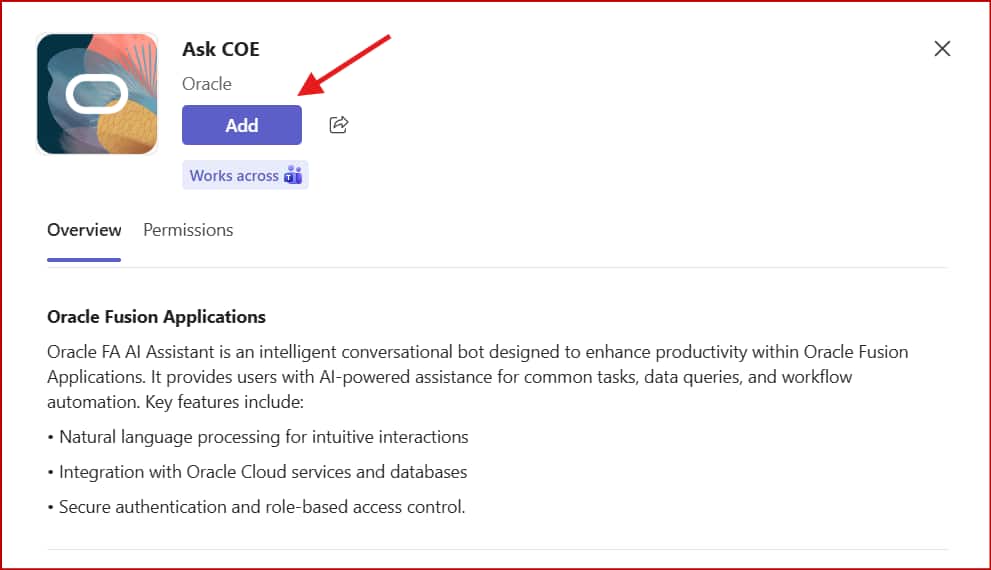
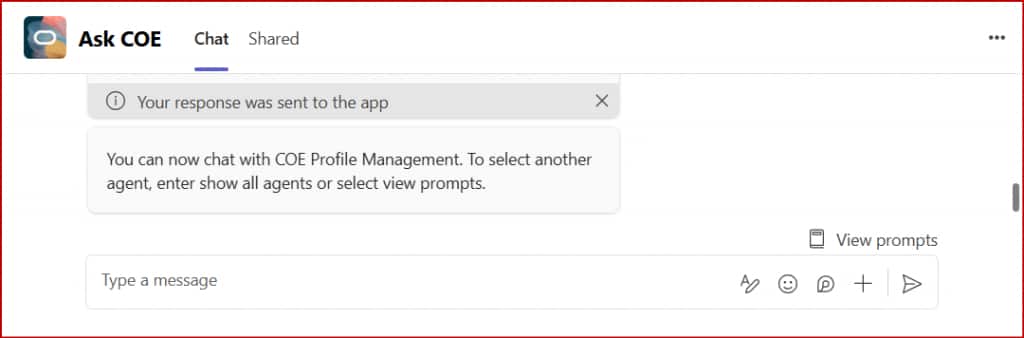
Step 2 — Access the Custom App in Microsoft Teams
Sign in to teams.cloud.microsoft. Open the Apps section from the left rail and locate your custom Oracle AI app. Click Add to pin it to your sidebar for easy access.

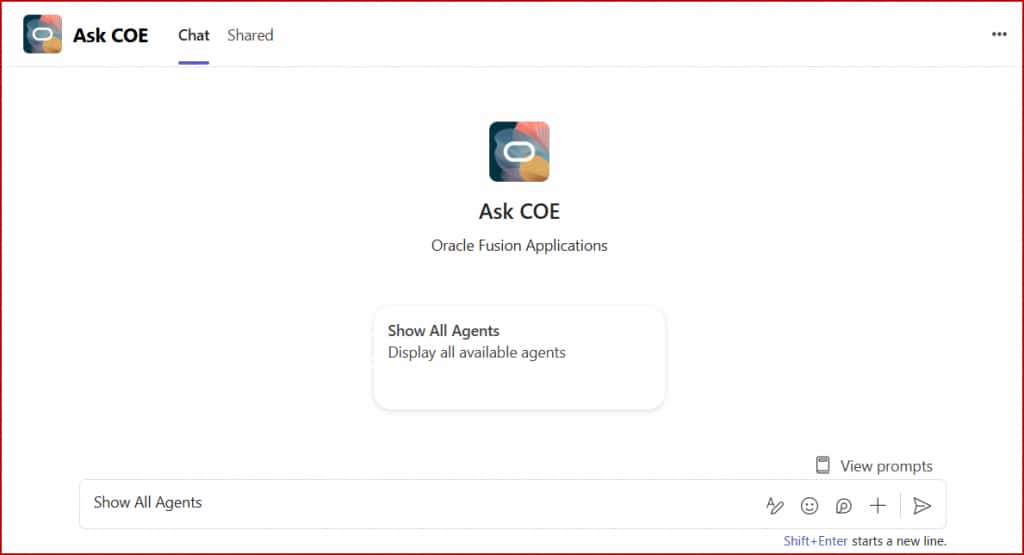
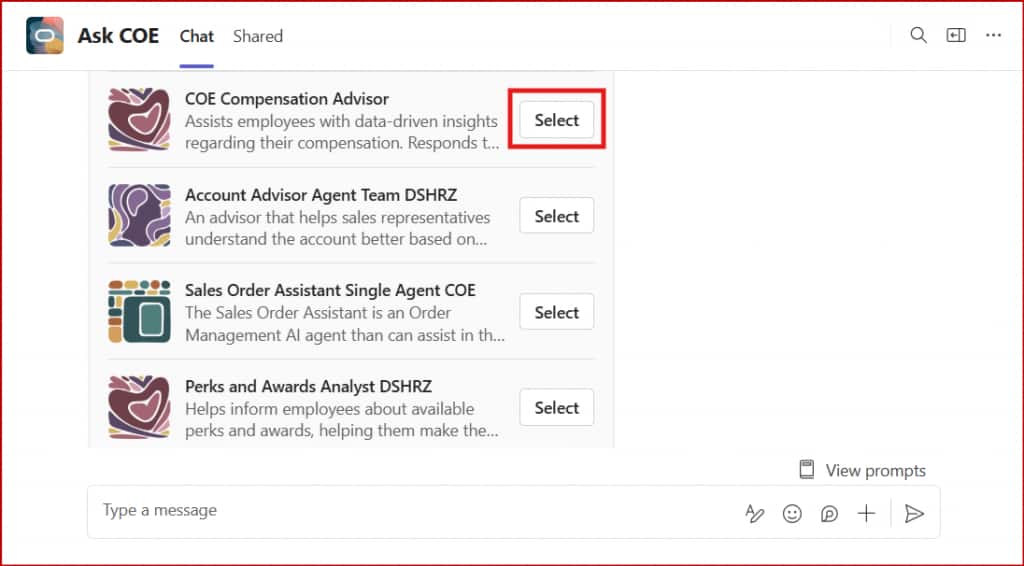
Step 3 — Discover Your Available AI Agents
Open the custom app and type “Show All Agents”. The app will return a personalized list of all published Oracle AI Agents this user has access to — filtered by their Fusion RBAC roles. No agent appears here unless the user is authorized to use it.
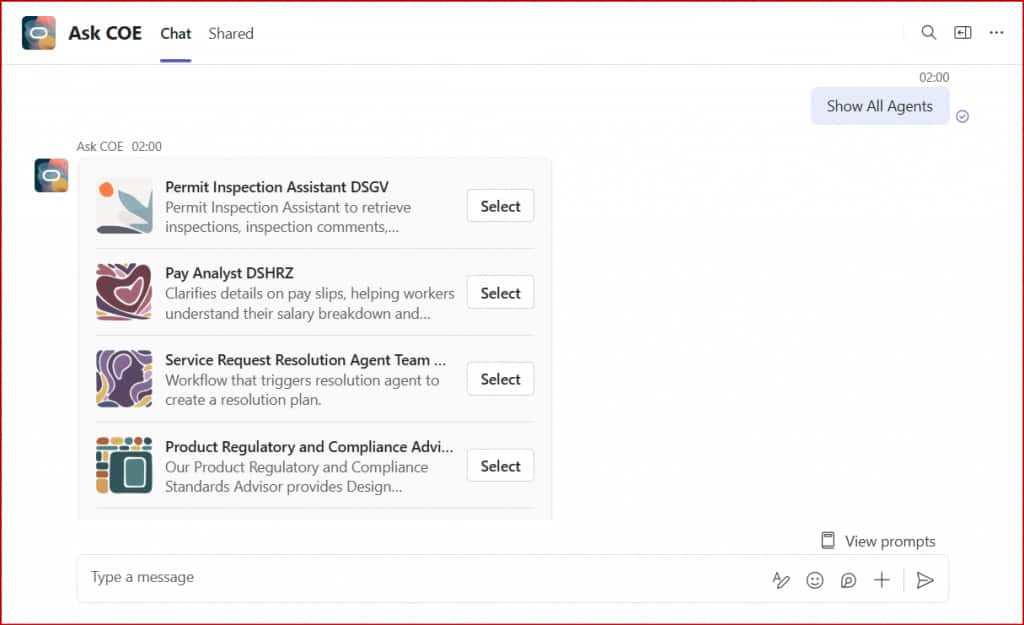
Step 4 — Interact with Oracle AI Agents
Run any agent from the list by clicking Select to open a chat session. The agent experience maps directly to how it’s configured in Oracle AI Agent Studio. Published agents shown here are specific to the Oracle COE instance.
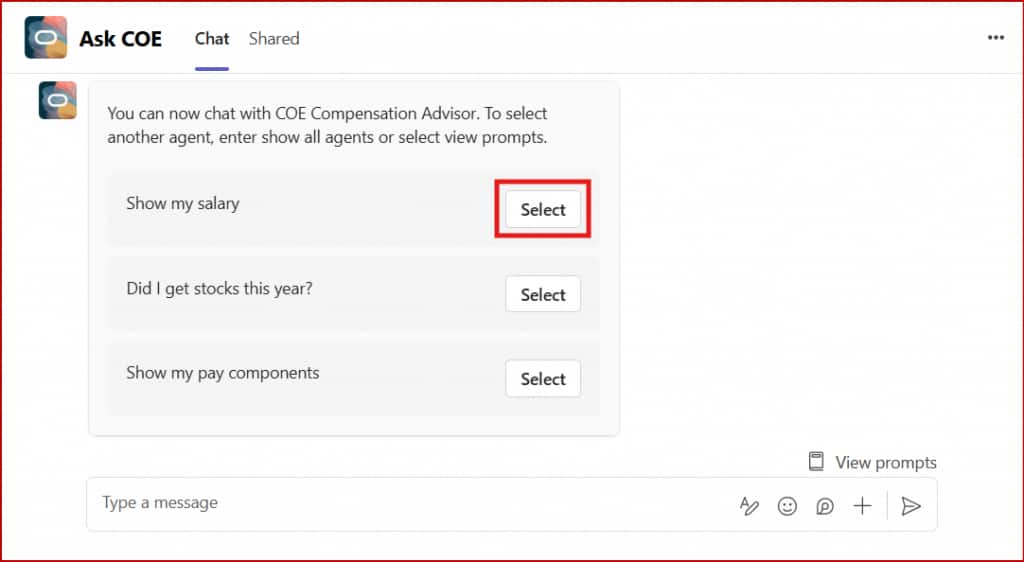
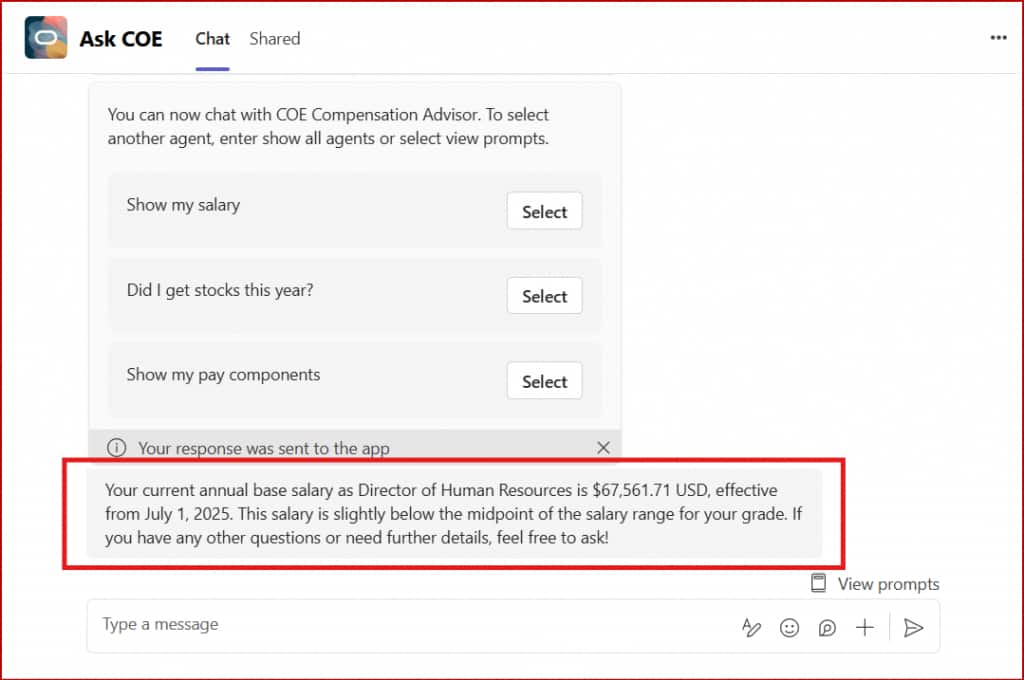
🤖 Supervisor Agent Example
The COE Compensation Advisor agent presents startup questions when opened. Selecting “Show my salary” returns the user’s salary data pulled from Fusion — right inside the Teams chat window.
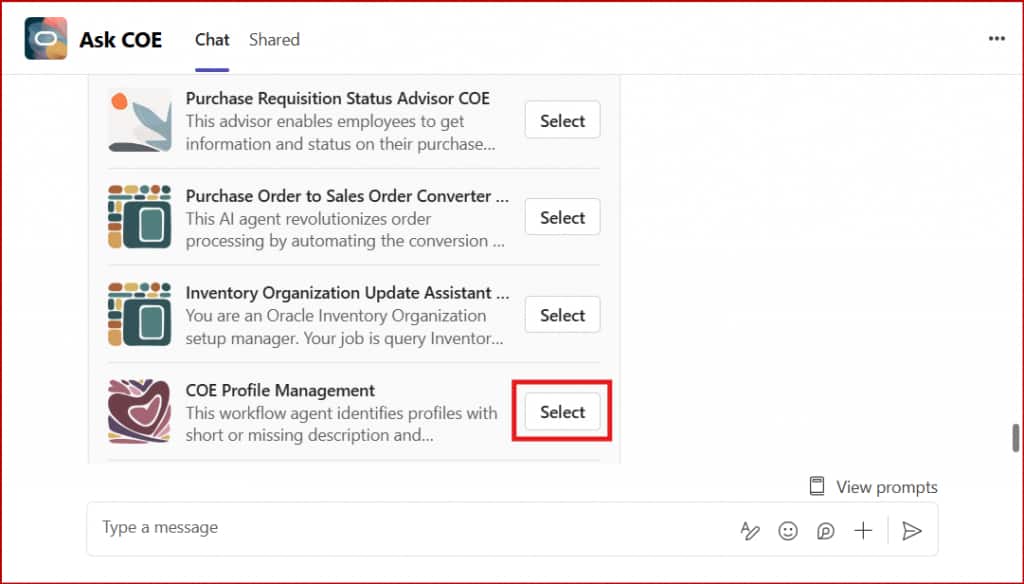
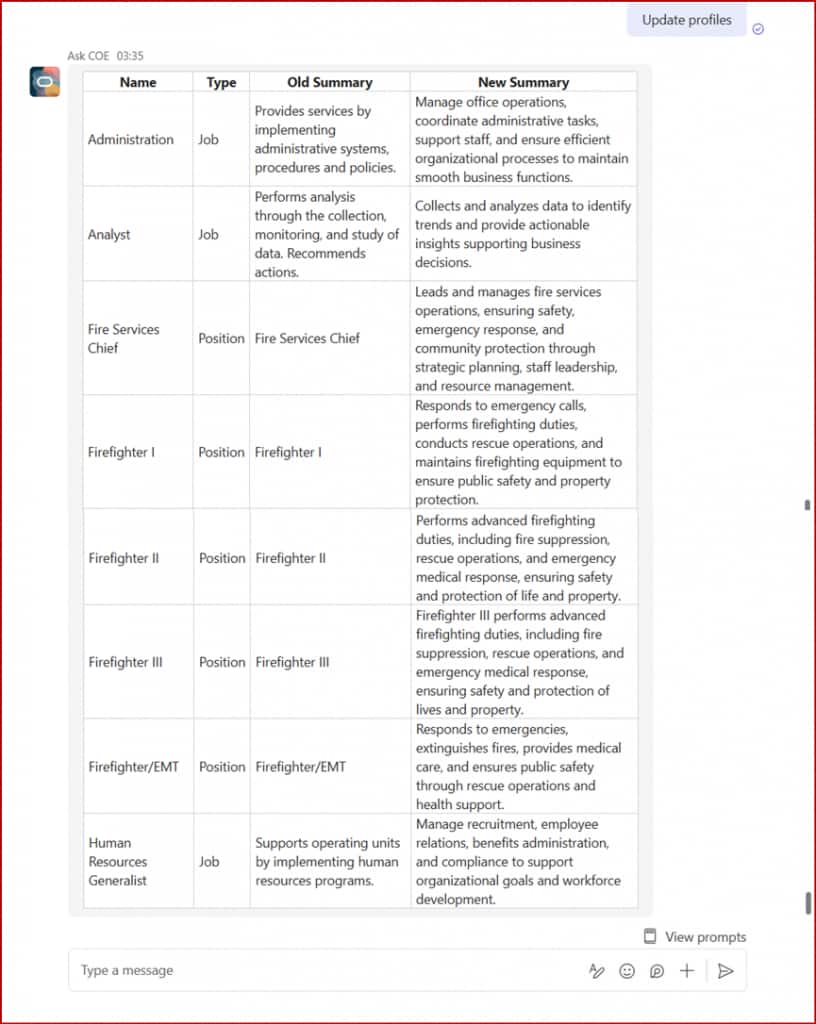
⚙️ Workflow Agent Example
The COE Profile Management agent identifies job/position profiles with short descriptions, regenerates them using an LLM, and returns a formatted table of updated profiles — all initiated with a single chat message.
⚡ Key Things to Remember
- The Oracle Fusion Cloud username must exactly match the Microsoft Teams username — this is how identity is mapped between the two systems.
- Channel permissions must be granted alongside required AI Agent Studio roles for proper access.
- Agents should be in Published status to appear in Microsoft Teams list.
- Agents cannot proactively start conversations — every interaction must be initiated by the human user. The agent never sends you a message unprompted.
- Only one app instance is allowed per Teams channel per Oracle environment. You can’t install multiple instances of the same app in the same channel.
- If you modify your channel configuration in AI Agent Studio, re-generate the manifest ZIP and re-upload it to the Teams Admin Center to apply changes.
Wrapping Up
The integration between Microsoft Teams and Oracle AI Agent Studio is a meaningful step toward meeting employees where they already work. Rather than requiring users to switch contexts or learn a new interface, the AI agent comes to them — inside the collaboration tool they use all day.
The full-stack identity security model is particularly noteworthy: because Teams usernames are mapped to Fusion RBAC at the agent layer, there’s no backdoor to data users shouldn’t see. A compensation analyst sees compensation agents. A supply chain manager sees SCM agents. The same role-based guardrails that govern Fusion Cloud govern the Teams integration automatically.
Whether you’re piloting with a single supervisor agent for HR queries or deploying a fleet of workflow agents across HCM, ERP, and SCM — the path starts here. Happy building!
New to Oracle AI Agent Studio?
Check out the Fusion AI Agent Studio Learning Path — a full blog series from zero to production-grade AI agents, with deep dives on every agent pattern, node type, and tool integration.