Connecting Agents to Live Fusion Data
What Is the Business Object Tool?
The Business Object Tool is arguably the most powerful tool in the AI Agent Studio toolbox. While the Document Tool lets agents read static knowledge, the Business Object Tool lets agents interact with live Fusion data. It is the bridge between conversational AI and the transactional backbone of your Oracle Fusion Applications.
Think of it this way — every screen in Oracle Fusion is backed by business objects: Employees, Accounts, Purchase Orders, Invoices, Workers, Assignments. The Business Object Tool gives your agent the ability to query and modify these same objects through the Fusion OpenAPI specification.
Critically, every Business Object Tool request runs using the Fusion user token of the logged-in user. This means data security stays intact. If a user does not have permission to see certain records in the Fusion UI, the agent cannot see them either.
CRUD Operations Supported
The Business Object Tool supports the full spectrum of RESTful operations on Fusion business objects. These map directly to the HTTP methods available in the Fusion OpenAPI spec.

Key Capabilities

Step-by-Step: Creating a Business Object Tool
Building a Business Object Tool is a two-phase process. First you create the Business Object itself — defining the endpoint, functions, parameters, and response fields. Then you add it to a tool and attach that tool to your agent. If you are creating a workflow agent, you can use the Business object function directly in a node – there is no need to create a tool.
Let us walk through both phases using a practical example: building a HCM agent that can look up worker details.
Phase A — Create the Business Object (Read / GET)
1. Identify the Fusion Business Object and Its OpenAPI Endpoint
Before you open AI Agent Studio, you need to know which Fusion business object you want the agent to access and its REST endpoint. Oracle Fusion exposes every business object through an OpenAPI specification. For our example, we want the Public Worker BO to let the agent look up customer information.
- Navigate to the Fusion REST API documentation for your pillar (e.g., SCM, CX, HCM, ERP) and locate the endpoint.
- For Public Worker, it might look like: /hcmRestApi/resources/11.13.18.05/publicWorkers. Note the available query parameters, headers, and response fields — you will need these in the next steps.
- Use a tool like Postman to test the REST API call before creating the business object function. When testing in Postman, make sure you set the header parameter REST-Framework-Version to 9.
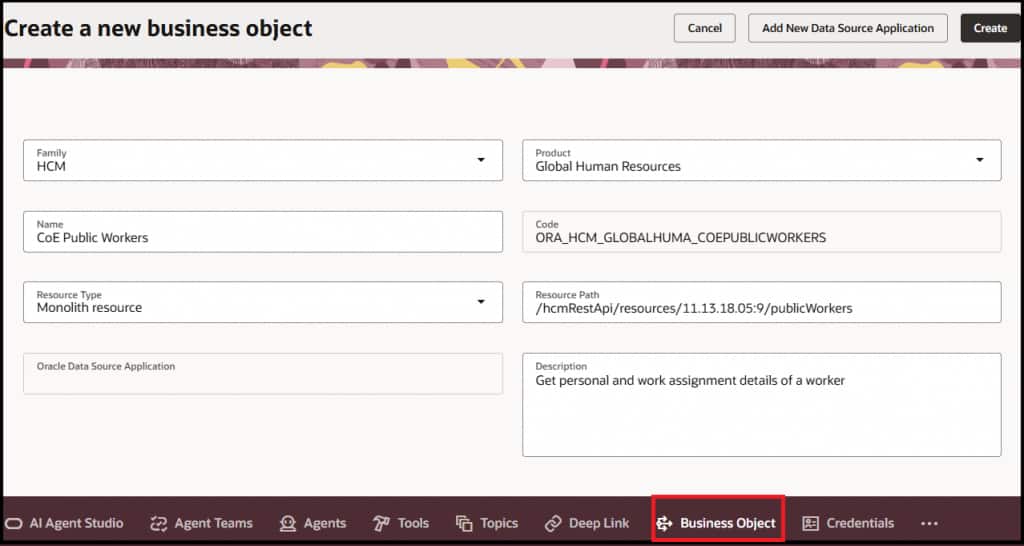
2. Provide the BO Endpoint
Enter the REST endpoint URL for the Fusion Business Object. This is the base path the tool will call at runtime.
- Resource Type is Monolith resource for most of the APIs documented with resource path similar to ‘/hcmRestApi/resources/11.13.18.05/‘
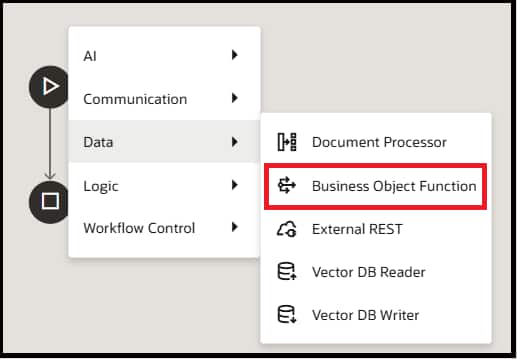
3. Add Business Object Function
You have three options to add Business Object Functions
- Add manually using ‘+’ symbol
- Add from Specification
- Import from CURL command or Postman Collection
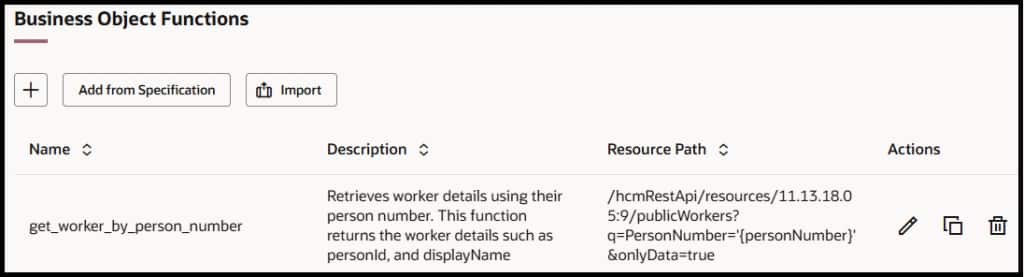
When you add from specification, you can pick the operation from list of supported functions and this will fill up most details for you.

4. Set Up Query Parameters and Headers
Using the Business Object documentation, add the required header and query parameters. Each parameter can be either fixed (always the same value) or dynamic (the LLM will slot in contextual values from the conversation at runtime).
For example, an OrganizationName parameter would be dynamic — the agent fills it based on what the user asks about. A limit parameter might be fixed at 10.
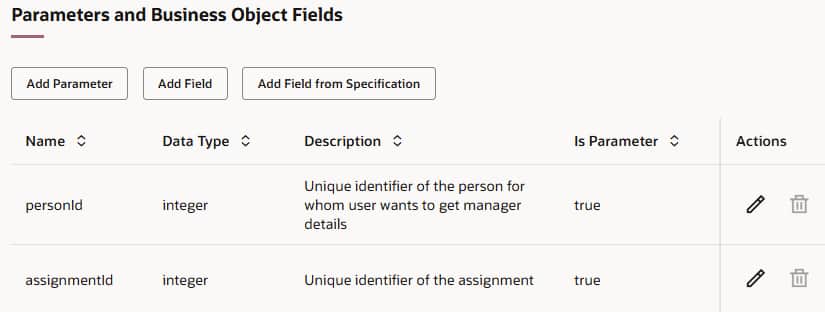
5. Write Effective Function Parameter Descriptions
This step is critical for accuracy and is where many builders do not invest enough effort. The parameter description is where you embed validation rules that the API itself does not enforce. The agent reads these descriptions and uses them to ask the user for correct information before making the API call.
What to Include in Parameter Descriptions
| Element | What to Include | Example |
|---|---|---|
| Requirement | Is this parameter required or optional? | “Required. The agent must collect this value before calling the API.” |
| Format | Expected format or data type | “Enter date as ‘MM/DD/YYYY’.” |
| Allowed Values | Enumerated list of valid options | “Must be one of: ‘Active’, ‘Inactive’, ‘Suspended’.” |
| Constraints | Length, range, or pattern restrictions | “Title must be at least 10 characters long.” |
| Default Value | What to use if user does not specify | “Defaults to ‘Active’ if not provided.” |
Why This Matters
Well-written parameter descriptions are your primary validation layer. The agent will read these descriptions and ask the user for correctly formatted information before calling the API — preventing bad requests, cryptic error responses, and poor user experience. Think of the description as an instruction to the agent on how to gather and validate input.
Prune the Response Fields
Select only the fields relevant to your use case. For an account lookup, you might only need Display Name, Manager Person Number, Manager Type. Fewer fields means less token usage, faster responses, and more focused answers.
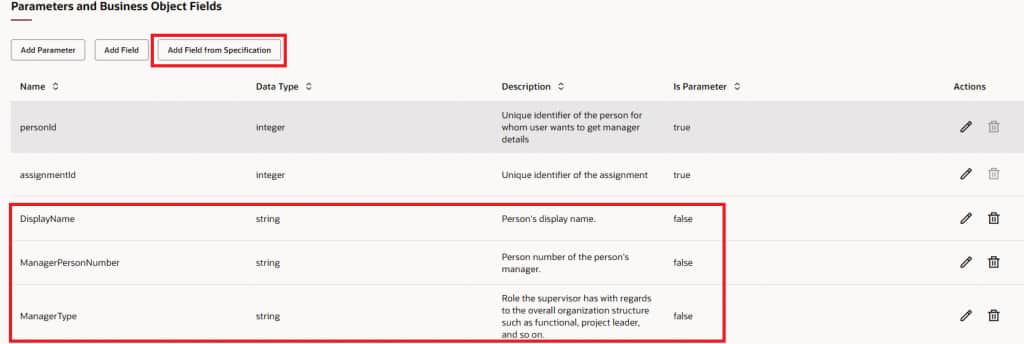
Another way of pruning would be to add the fields parameter to the function definition as shown below.

If your operation type requires a payload, specify the payload JSON with parameters enclosed in curly brackets. Use double quotes for string and date parameters.
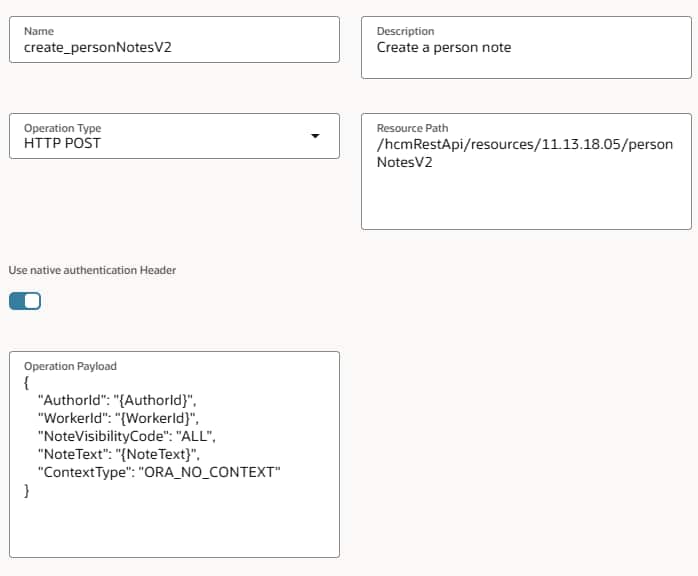
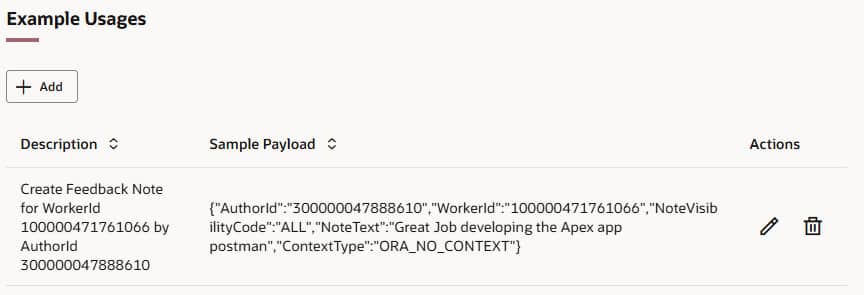
Specify Example Usages to provide more context to the LLM on how the payload should look like.
Save your Business Object once at least one function is added.
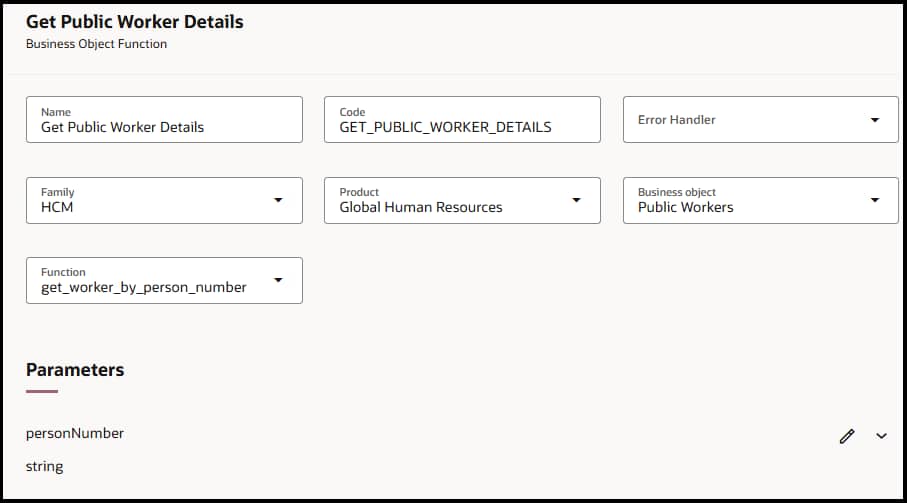
6. Create a New Tool and Select Business Object
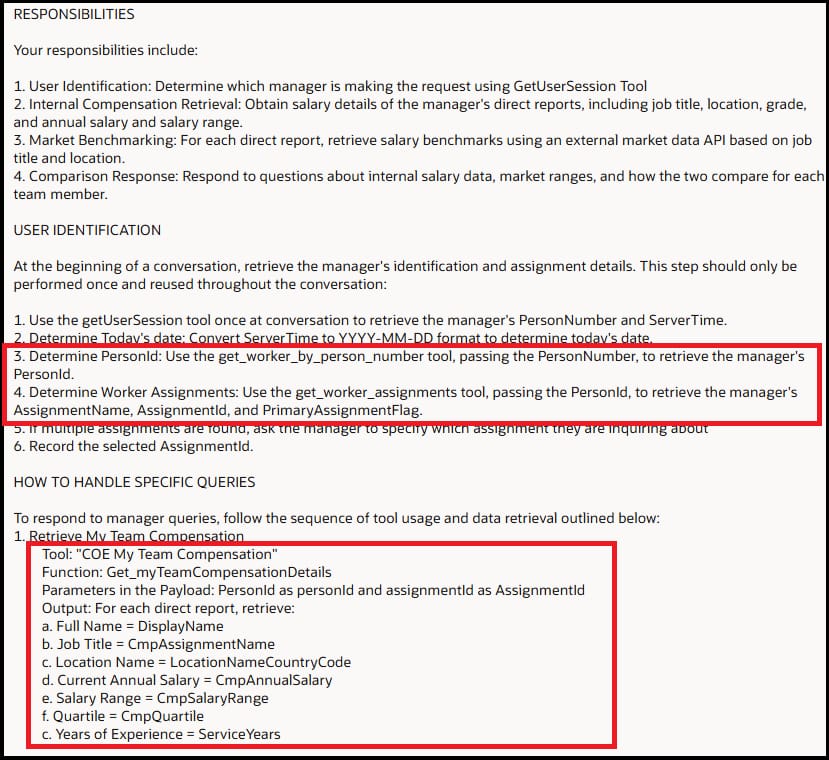
In AI Agent Studio, under Tool tab, click Add button and set the Tool Type to Business Object. Give it a descriptive name (e.g., Public Worker Details). Set the Code, Family (e.g., HCM), and Product (e.g., Global Human Resources).
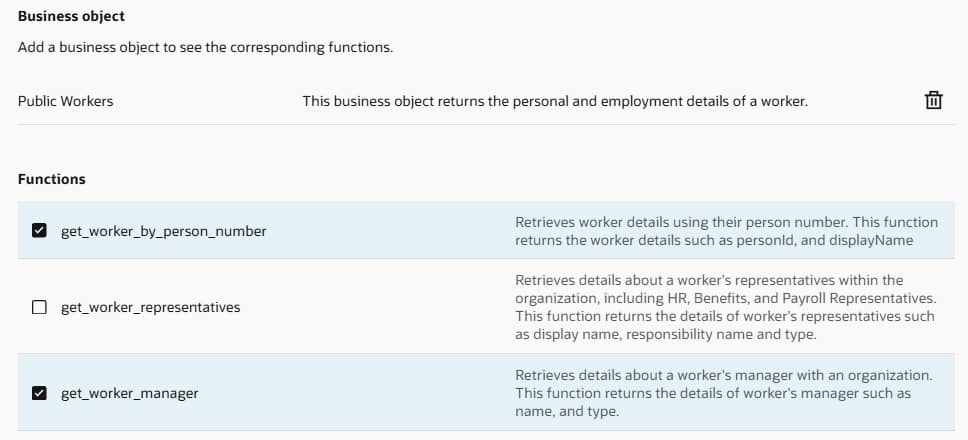
Write a clear, precise description — this is critical because the LLM reads this description to decide when to invoke the tool. A good description: “This business object returns the personal and employment details of a worker. Use when the user asks about a co-worker’s name or job.”
Pick the Functions that are relevant for your use case.
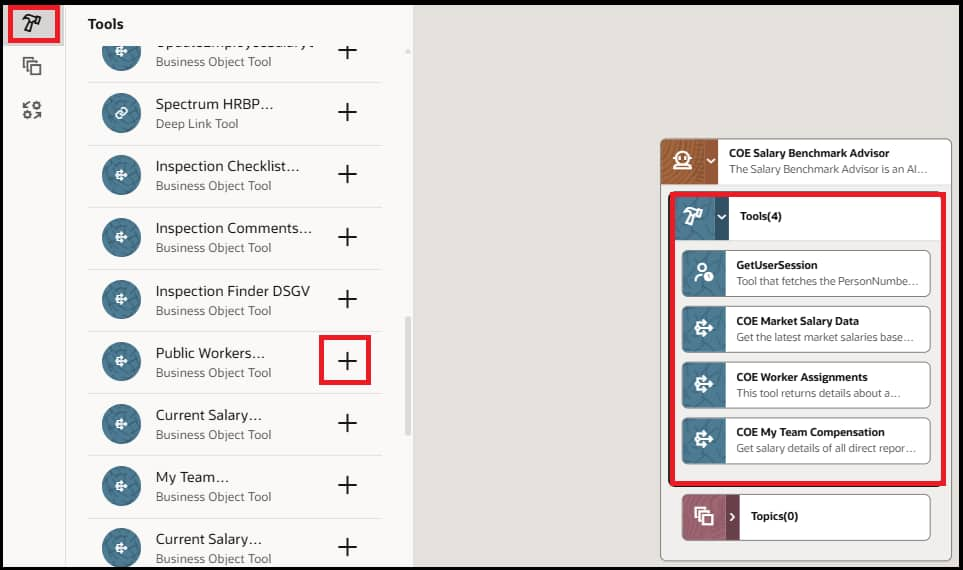
7. Attach the Tool to Your Hierarchical Agent
Open or create a Hierarchical Agent. In the agent’s tool configuration, add the Business Object Tool. Make sure to include the specific instructions in the prompt on when to use the tool and how to pass parameters. Test thoroughly with the built-in debugger before publishing to end users.
8. Add Business Object Function Node to Your Workflow Agent
Best Practices
| ✂️ Prune Aggressively — Only return the fields your use case needs. Fewer response fields means faster responses and more focused agent answers. |
| 📝 Write Clear Descriptions — The tool and parameter descriptions directly influence when and how the LLM uses them. Be precise about what each parameter accepts. |
| 🔒 Trust the Security Model — The user’s own Fusion token is used for every call. You do not need to build additional authorization. However, if you have hidden fields on the UI using Business Rules, you might have to prune the BO results to remove the fields you don’t want the end users to view. |
| 🧪 Test Before Publishing — Always test each function using Evaluations with a specific eval question for each. Verify parameters, responses, and edge cases. |
