Abstract
If you build SuiteScript apps, you can now wire NetSuite to your own LLMs—hosted privately on Oracle Cloud Infrastructure (OCI)—and drive workflows from case triage to quote help, with full control over prompts, data, and cost. NetSuite’s N/llm module lets SuiteScript talk to LLMs supported by NetSuite and (when enabled) OCI-hosted services; alternatively you can call your own HTTPS endpoints with N/https (RESTlets, API Gateway, Functions, etc.).
This post shows (1) what fine-tuning and T-Few are—in plain English—and (2) a step-by-step path to fine-tune a model on OCI, deploy it, and call it from NetSuite.
T-Few and Fine-tuning with Cohere Command-R
Understanding T-Few: Efficient Training for Powerful Language Models
Imagine you move from the U.S. to Europe. Your laptop’s plug doesn’t fit the new outlets. You have two choices, rewire your entire apartment’s electrical system (a huge job), or use a simple plug adapter that lets your existing devices work instantly.
Fine-tuning a large language model (LLM) normally means “rewiring the whole apartment.” The model has billions of connections—tiny numerical values stored inside matrices (big tables of numbers) that tell the model how to process text. Training or re-training all those numbers from scratch is expensive and slow.
T-Few (Task-Finetuned Few-Shot) is more like bringing a specially designed toolbox that makes fine-tuning much faster and more efficient. Instead of updating every connection in the model, T-Few focuses on updating only small, highly relevant parts of the model—often with just a handful of new examples (“few-shot”). The base model remains mostly unchanged, but it quickly learns to adapt to new tasks from examples you provide.
Fine-tuning at a glance — teaching the model your company’s language
Large Language Models (LLMs) like cohere.command-r are trained on an enormous mix of text from books, articles, and code. They know a lot about general language—but very little about your company’s specific terminology, rules, or workflows.
Fine-tuning is like giving that model an advanced “on-the-job training course.”
Instead of starting from zero, you take the base model (which already speaks fluent general English) and teach it your specialized dialect using your own examples.
A practical example
Imagine your company manages a high volume of customer support cases in NetSuite, with agents referencing past tickets and resolutions to help users efficiently. Traditionally, using a standard large language model (LLM) would require you to supply relevant historical case details in every prompt—an approach known as Retrieval-Augmented Generation (RAG), where the model fetches context documents for each new inquiry.
With fine-tuning, you can train the model once on real examples from your NetSuite support case history. The model learns the common issues customers raise and the best-fitting responses your team provides. This means the model “remembers” patterns from your historical data internally, and you no longer need to provide the same support scripts or resolutions each time—the knowledge is embedded.
Think of it as on-boarding a new team member:
RAG: “Here’s our ticket archive—please review it before answering every case.”
Fine-tuning: “After training, you know how to respond like an experienced member of our support team.”
Using well-prepared, representative support cases from NetSuite enables you to create a model tailored specifically to your unique customer service context.
What you need to fine-tune with Cohere Command-R and T-Few
Fine-tuning on OCI Generative AI is a guided process—no deep ML background required. You’ll need three things:
A base model
Pick an existing LLM (e.g., cohere.command-r) from OCI’s Model Explorer. This is your “employee” before training.
A dataset
Prepare examples that show correct behavior. They’re usually in JSONL format, one example per line, like this:
{"prompt": "How do I give a user access to the billing dashboard in NetSuite?", "completion": "Go to Setup > Users/Roles > Manage Users. Edit the user’s role to include the Billing Dashboard permission, then save your changes. The user will now have access after their next login."}The more consistent and representative your support case examples are, the better the model will generalize with T-Few.
A place to train
OCI handles this through its fine-tuning jobs. You upload your dataset to Object Storage, choose a compute cluster, set training parameters (epochs, batch size, learning rate), and launch the job.
When the run finishes, OCI creates a custom model—your private version of the base model—and hosts it behind a secure endpoint. You can then query it directly or connect it to NetSuite via N/llm or your own HTTPS proxy.
In short
Fine-tuning with T-Few and Cohere Command-R lets the model internalize your rules, tone, and domain logic. RAG, by contrast, only borrows that information at runtime.
Both have their place—RAG is great when information changes often, while fine-tuning shines when your knowledge base is stable and needs to be applied instantly to every request.
With OCI, you can even combine them: a fine-tuned model that already speaks your business language, plus RAG to feed it the freshest data.
Step-by-step: fine-tune on OCI
Once you log in to your tenancy, navigate to Analytics and AI (on the side menu) and then choose Generative AI (under AI Services).
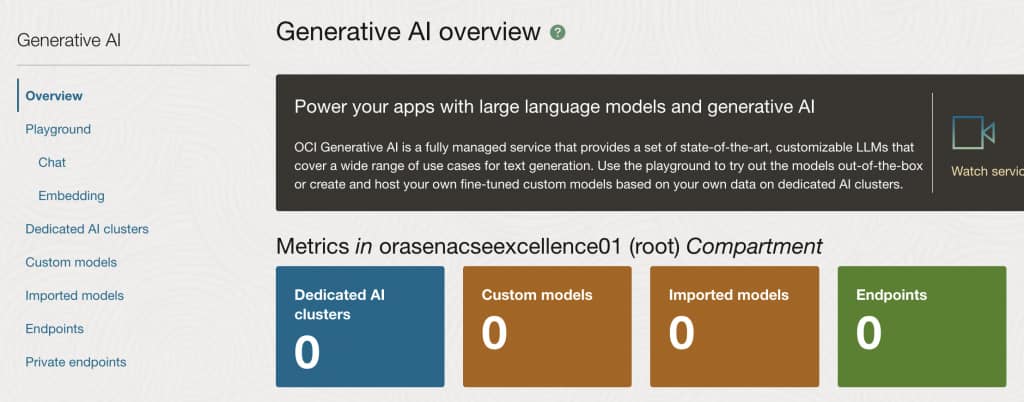
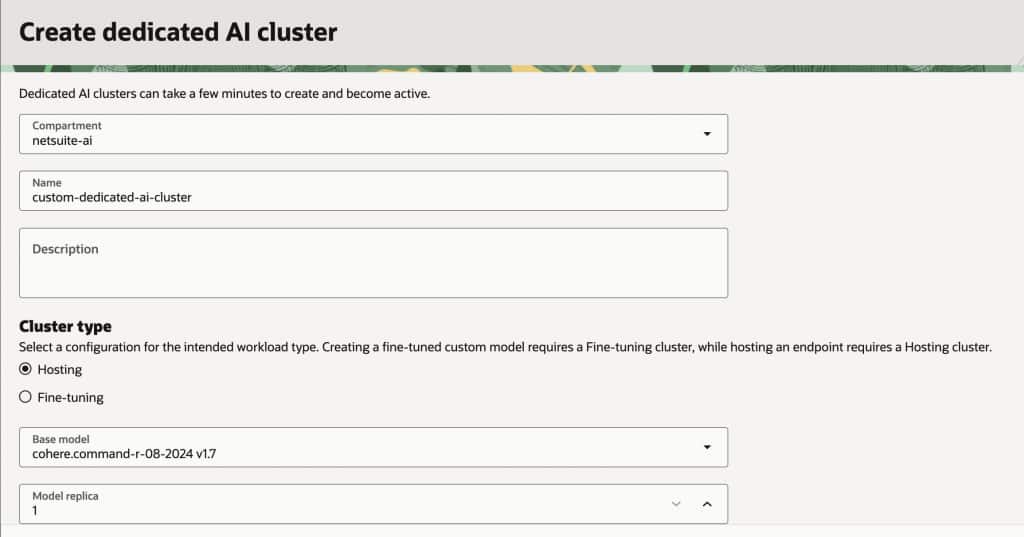
In order to fine tune an existing model you will have to create a Dedicated AI cluster, so click on the blue button.
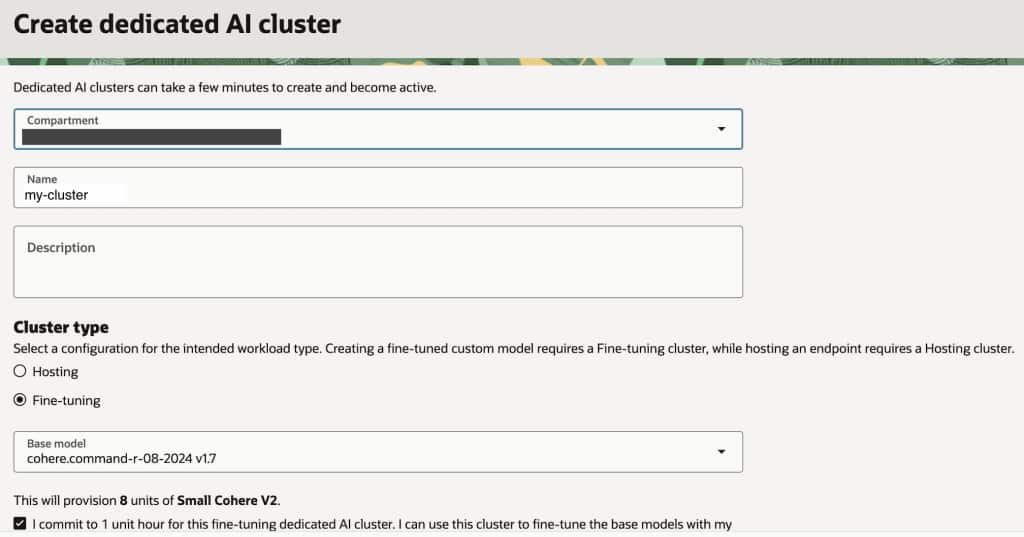
Give a name to your custom cluster and choose Fine-tuning option, select the base model you would like to work with and click no the commitment checkbox.
Once the cluster hast been created you should see something like this

When fine-tuning a custom Generative AI model in OCI, it is crucial to carefully prepare your training data to meet specific requirements. The training dataset must be formatted as a JSONL (JSON Lines) file, where each line contains a valid JSON object with two properties: “prompt” and “completion.”
These pairs represent the input and the desired output the model should learn to produce. At least 32 prompt/completion pairs are required, and each should be encoded in UTF-8 with each object on its own line. Once the dataset is prepared, you will need to upload this file to an OCI Object Storage bucket, as the fine-tuning process in OCI requires the training data to be securely hosted in Object Storage. Carefully following these guidelines ensures the custom model is trained effectively and securely within OCI’s generative AI framework.
So, the next step would be to create our bucket and upload the JSONL file with the training data to it. For this purpose select Storage in the left side menu and then click on Buckets and finally on Create Bucket. A bucket is a storage container in OCI, used to organize and manage objects such as files, images, or datasets. A bucket serves as a logical grouping for your data, making it easy to store, retrieve, and control access to your files securely.

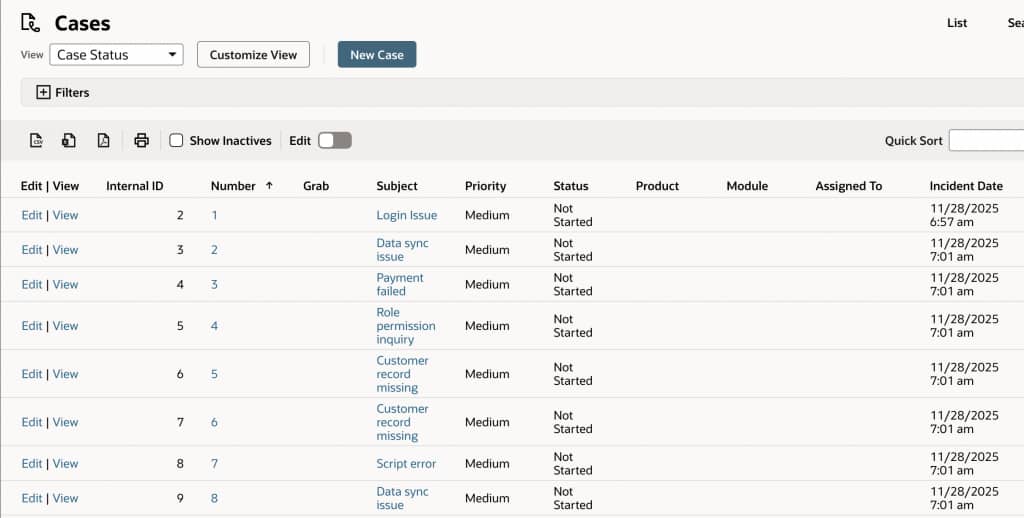
Once you have created your standard bucket, upload your training data file. It is recommended to create a Map/Reduce script in NetSuite that retrieves case and solution records, then generates a JSONL file in the File Cabinet using the required structure and actual data.
The training data file should contain at least 32 entries and the file format should be JSONL. A JSONL file contains a new JSON value or object on each line. The file isn’t evaluated as a whole, like a regular JSON file. Instead, each line is treated as if it is a separate JSON file. This format is ideal for storing a set of inputs in JSON format. Here is an example:
{"prompt": "Access denied error\nUser reports receiving an 'access denied' message.", "completion": "Verify user permissions in the admin console and reset as necessary."}
{"prompt": "Billing inquiry\nQuestion about recent invoice charges.", "completion": "Provide a breakdown of the charges and refer to billing if further clarification is needed."}
{"prompt": "Password reset issue\nCustomer unable to reset password using self-service.", "completion": "Guide the customer through the password reset process or escalate to IT if unresolved."}
{"prompt": "Slow system performance\nSystem takes too long to load dashboard.", "completion": "Suggest clearing browser cache and restart browser. Escalate to IT if issue persists."}
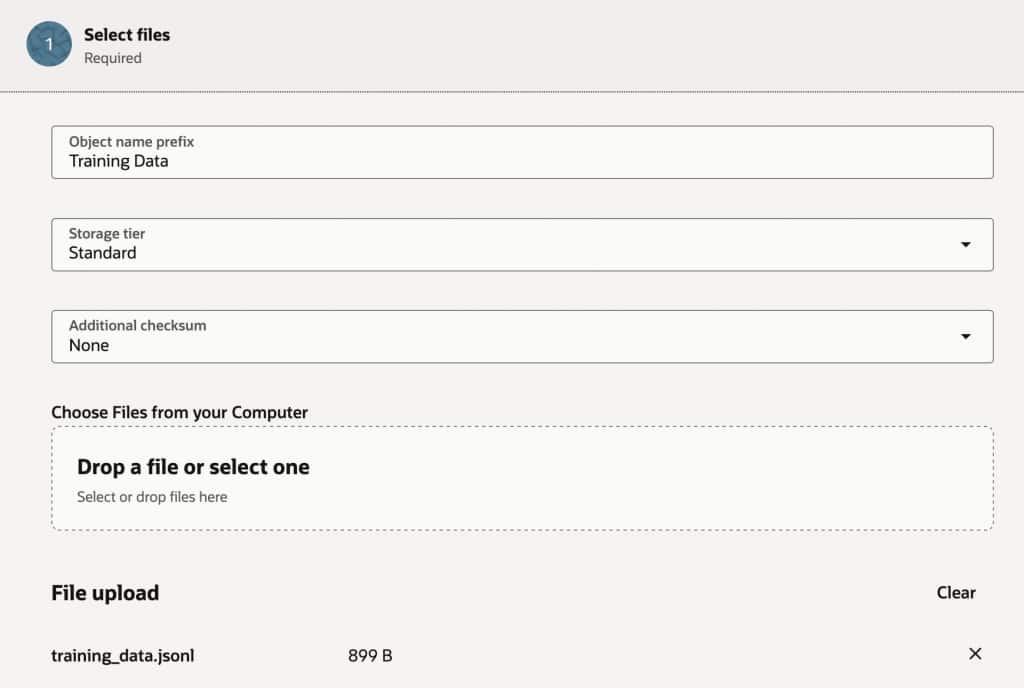
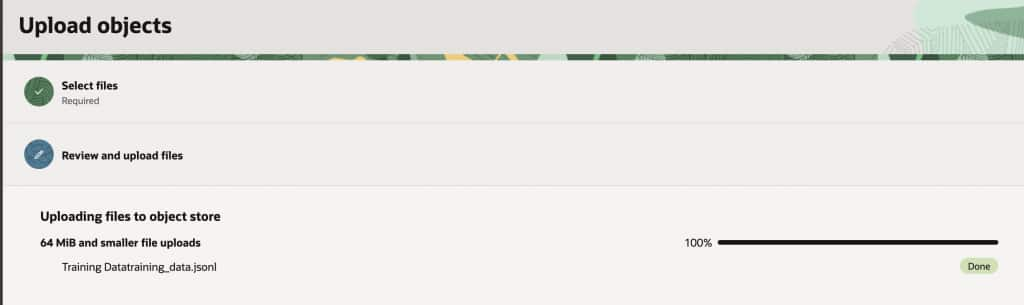
{"prompt": "Feature request\nRequesting a new integration with third-party tools.", "completion": "Acknowledge the request and forward to product management for review."}The file then should be uploaded to the bucket as follows. Go to Storage -> Buckets, click on the bucket you have created and then click on Objects -> Upload objects
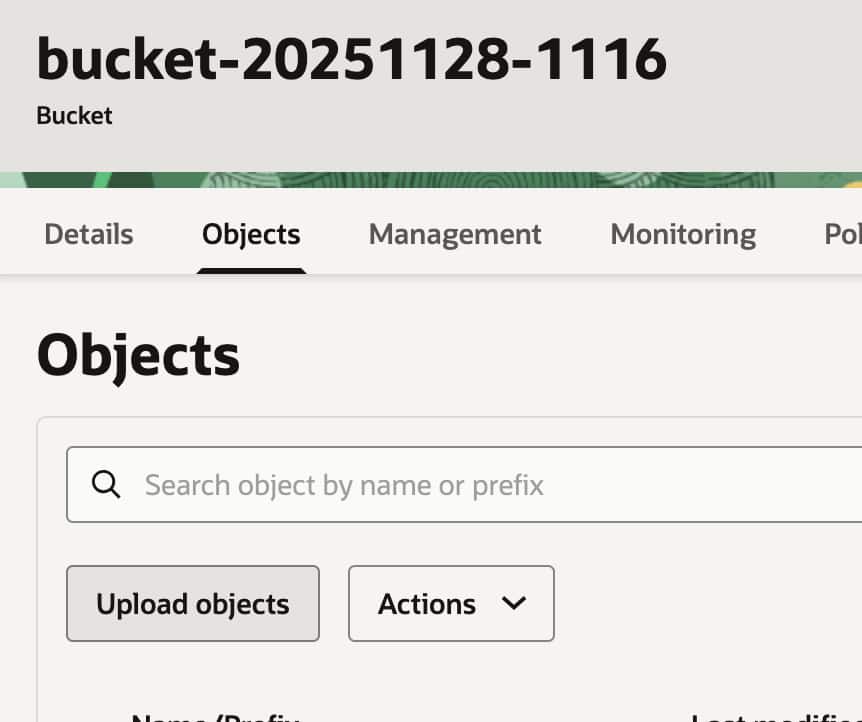
Then complete the fields and upload the JSONL format file you have created.
Important: Remember to give access permission to the uploaded file so it can be accessed when creating the Custom Model
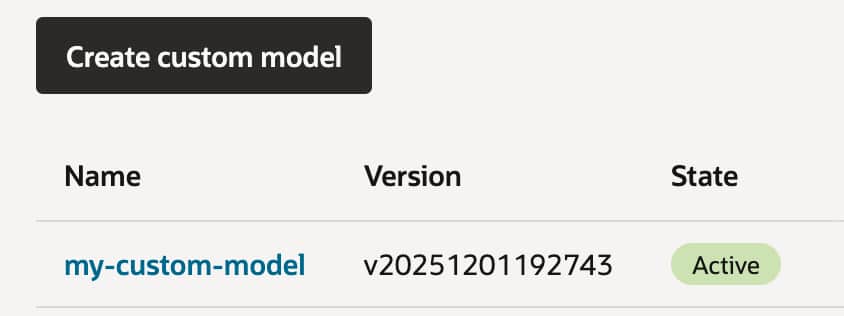
Once this is complete you can go ahead and create the Custom Model, under Generative AI click on Custom Model
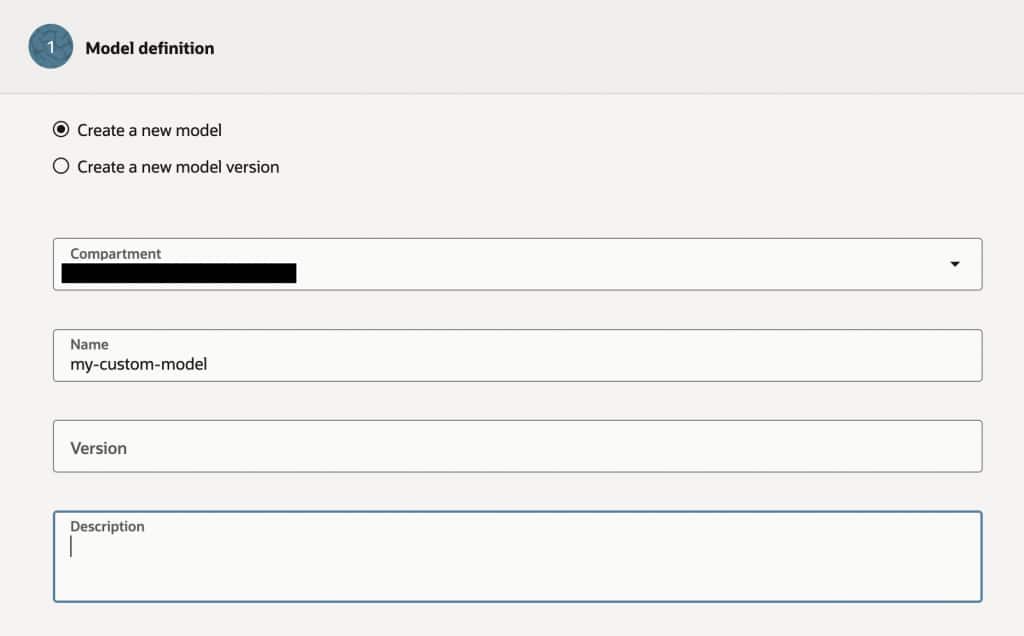
Give your model a name, select the base model, the Fine Tuning method and the custom cluster you have previously created.
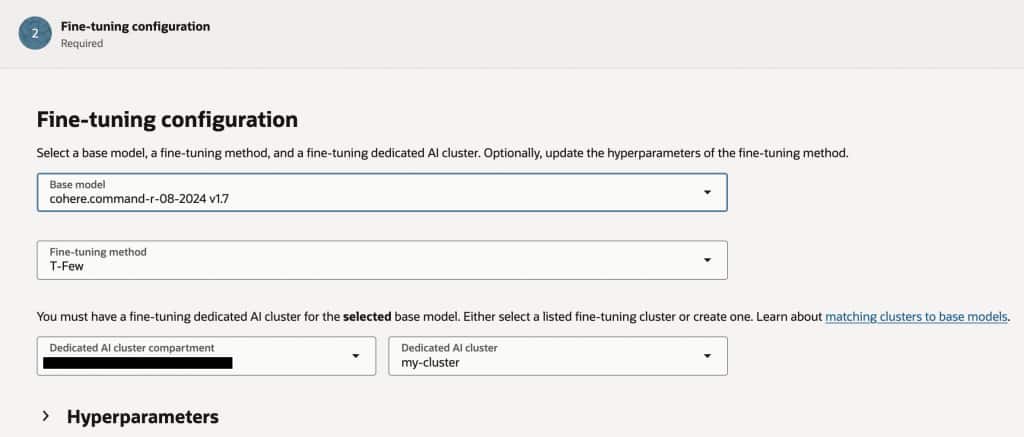
Finally, select the bucket and training data file.
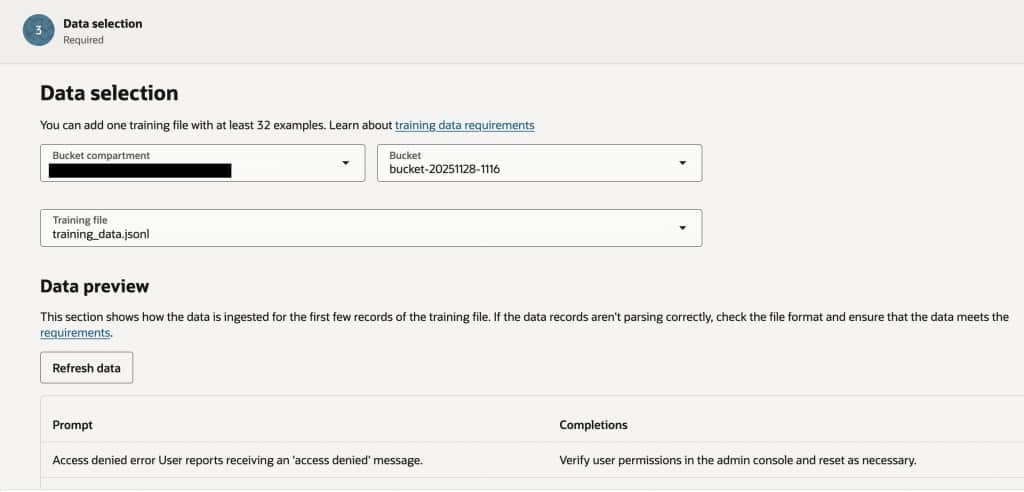
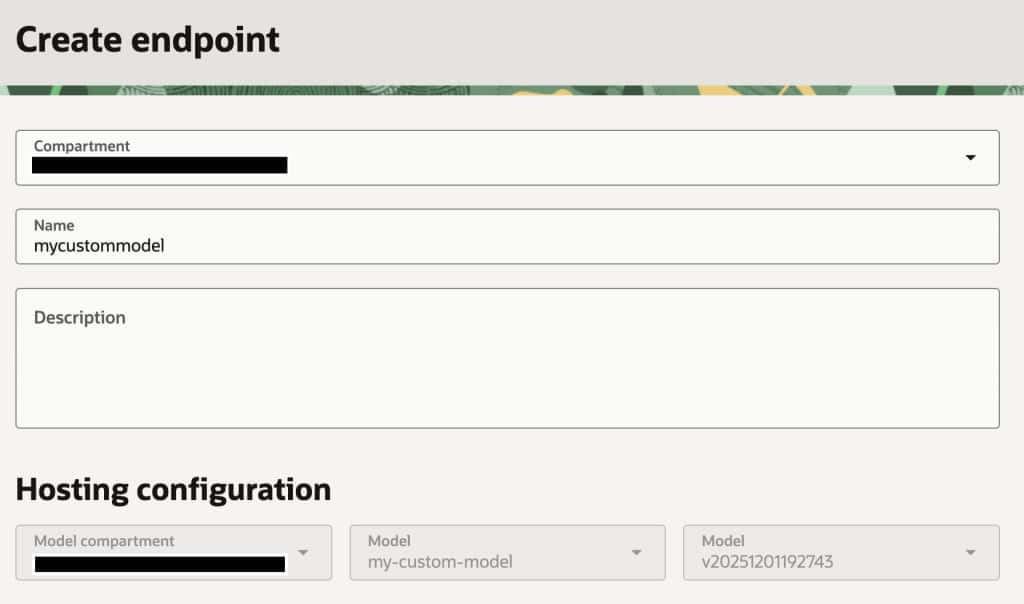
The training process may take several hours to complete. Once it finishes, you can create an endpoint to access your model. To do this, first select your active custom model, then proceed to define and configure the endpoint.

For this example, we will create a public endpoint for the model; however, it’s also possible to create a private endpoint and use an API Gateway to control access and apply the desired security measures.
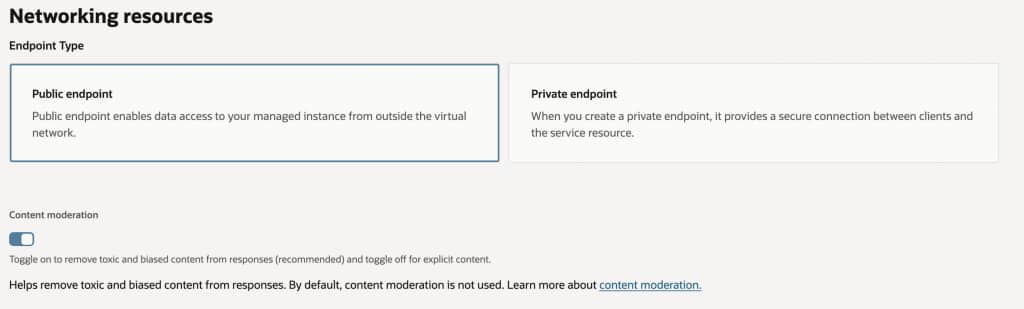
Enabling the content moderation option when creating an OCI Generative AI endpoint is highly recommended to help ensure that generated responses are free from toxic, abusive, or harmful language. By activating this feature, you add an extra layer of protection against hate and harassment, self-inflicted harm, ideological harm, and exploitation, significantly reducing the risk of exposing end users to inappropriate or unsafe content. This is especially important in production environments or use cases involving public or broad internal audiences, as it supports responsible AI deployment and helps organizations maintain trust and compliance with ethical guidelines and legal requirements.
Another important consideration to get your own custom model endpoint is that Oracle requires that you have a dedicated AI Cluster Compartment that must match the same type of model you selected for tuning. It is possible to create this new cluster from this screen by clicking on the Create new dedicated AI cluster button.

Consuming the custom model from NetSuite
Once your custom model endpoint is active, integrating it with NetSuite is straightforward. From SuiteScript, you can invoke the OCI endpoint using the N/https module, sending a POST request with the user’s prompt and any relevant context (for example, case details, transaction information, or item data). The script can run inside a Suitelet, RESTlet, Map/Reduce, or scheduled workflow depending on the use case. NetSuite then receives the model’s response and can automatically enrich records, suggest resolutions to support agents, generate summaries, or assist users directly within the UI. In more advanced architectures, the endpoint can also be fronted by an OCI API Gateway or serverless function to handle authentication, rate limiting, and logging before requests reach the model. This approach allows SuiteScript applications to leverage privately hosted, fine-tuned LLMs on OCI while keeping full control over prompts, security, and operational costs.
/**
 * @NApiVersion 2.1
 */
define(['N/https'], (https) => {

    function callCustomLLM(promptText) {

        const endpointUrl = 'https://your-oci-endpoint-url/generate';

        const payload = {
            prompt: promptText,
            max_tokens: 300,
            temperature: 0.3
        };

        const response = https.post({
            url: endpointUrl,
            headers: {
                'Content-Type': 'application/json'
                // Add Authorization header if your API Gateway requires it
                // 'Authorization': 'Bearer YOUR_TOKEN'
            },
            body: JSON.stringify(payload)
        });

        const result = JSON.parse(response.body);

        return result.output || result.text;
    }

    return { callCustomLLM };

});
This function could be used in several NetSuite scenarios:
- Support case assistance: Suggest resolutions based on case description.
- Quote generation: Generate product descriptions or proposal summaries.
- Record summarization: Create quick summaries of long notes or activities.
- Workflow automation: Enrich transactions with AI-generated insights.
Because the model is hosted on OCI, organizations retain full control over data residency, cost management, and model behavior, while still benefiting from NetSuite’s workflow automation.
Final Thoughts
Fine-tuning LLMs with T-Few on OCI provides a practical path to build AI systems that truly understand your organization’s language, processes, and data. Instead of repeatedly supplying context through prompts, the model itself learns your patterns and workflows, enabling faster and more consistent responses.
When combined with NetSuite’s SuiteScript platform, this architecture opens the door to powerful enterprise use cases—from smarter support automation to AI-assisted quoting and operational insights. By hosting the model on OCI and exposing it through a controlled endpoint, companies gain the flexibility to integrate advanced AI capabilities into NetSuite while maintaining strict governance over security, performance, and cost.
As AI capabilities continue to evolve, this pattern—fine-tuned models hosted on OCI and consumed by SuiteScript applications—provides a scalable foundation for building the next generation of intelligent SuiteApps.