One of several built-in tools in the Oracle Autonomous Database, the Data Load tool can be used to load data from cloud object stores, or local files, into database tables. Data loading can be one-off, scheduled or enabled for live feed. This blog will show you how to set up the live feed capabilities, which are especially useful when working with large volumes of data that are continuously collected into cloud object storage, but which participate in data analysis and other tasks that are normally centered on the database.
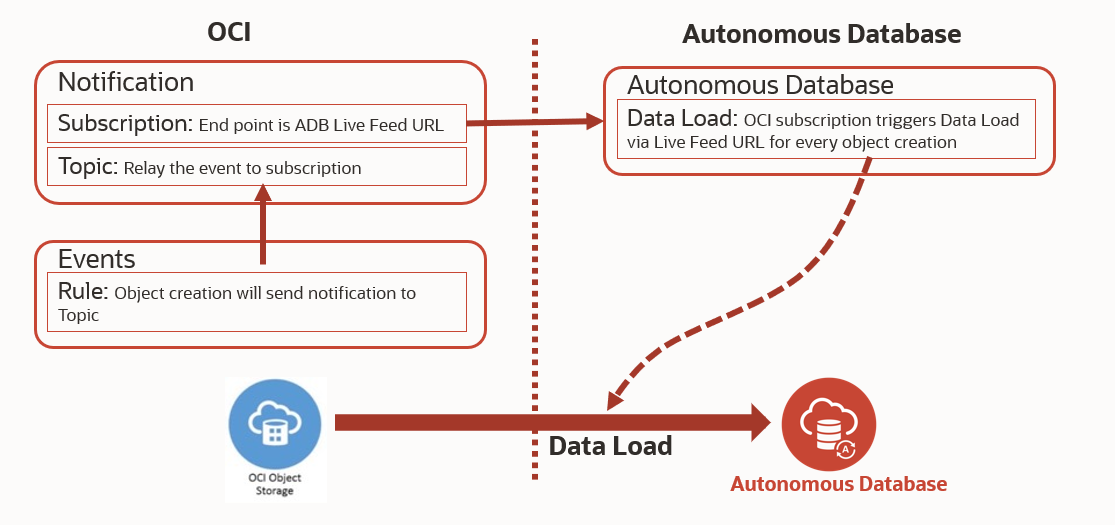
When a load job is enabled for live feed, it is connected to the OCI event notification and subscription mechanism, so that every time a new object is created in the object store bucket, it triggers the live feed, loading the contents to the database.
The following diagram shows the entire flow.
Now let us go through step by step:
OCI: Object Store bucket setup
Step 1: Create an Object store bucket if it does not exist already and note down its URL.
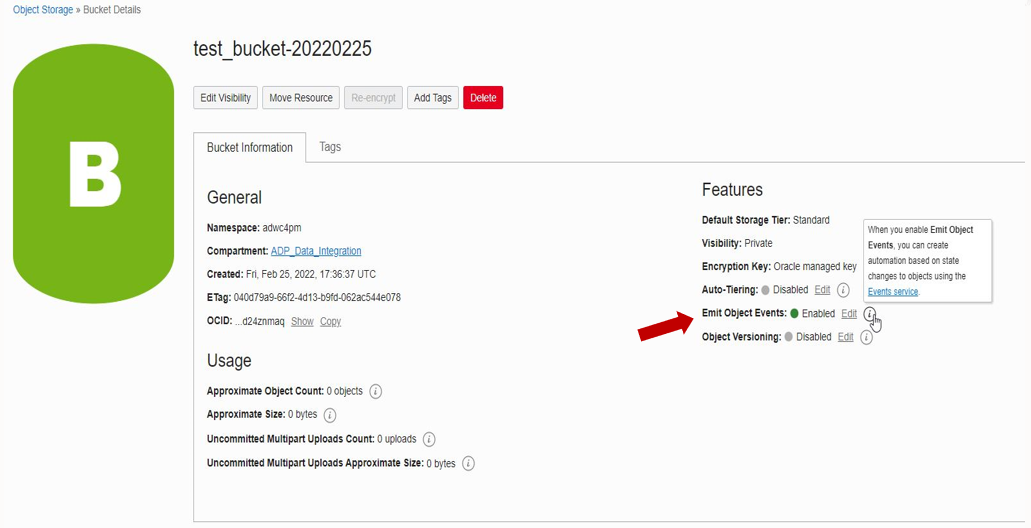
Step 2: Enable “Emit Object Events” for the Object Storage bucket. This is available in the Bucket Information properties window:
Autonomous Database: Live Feed setup
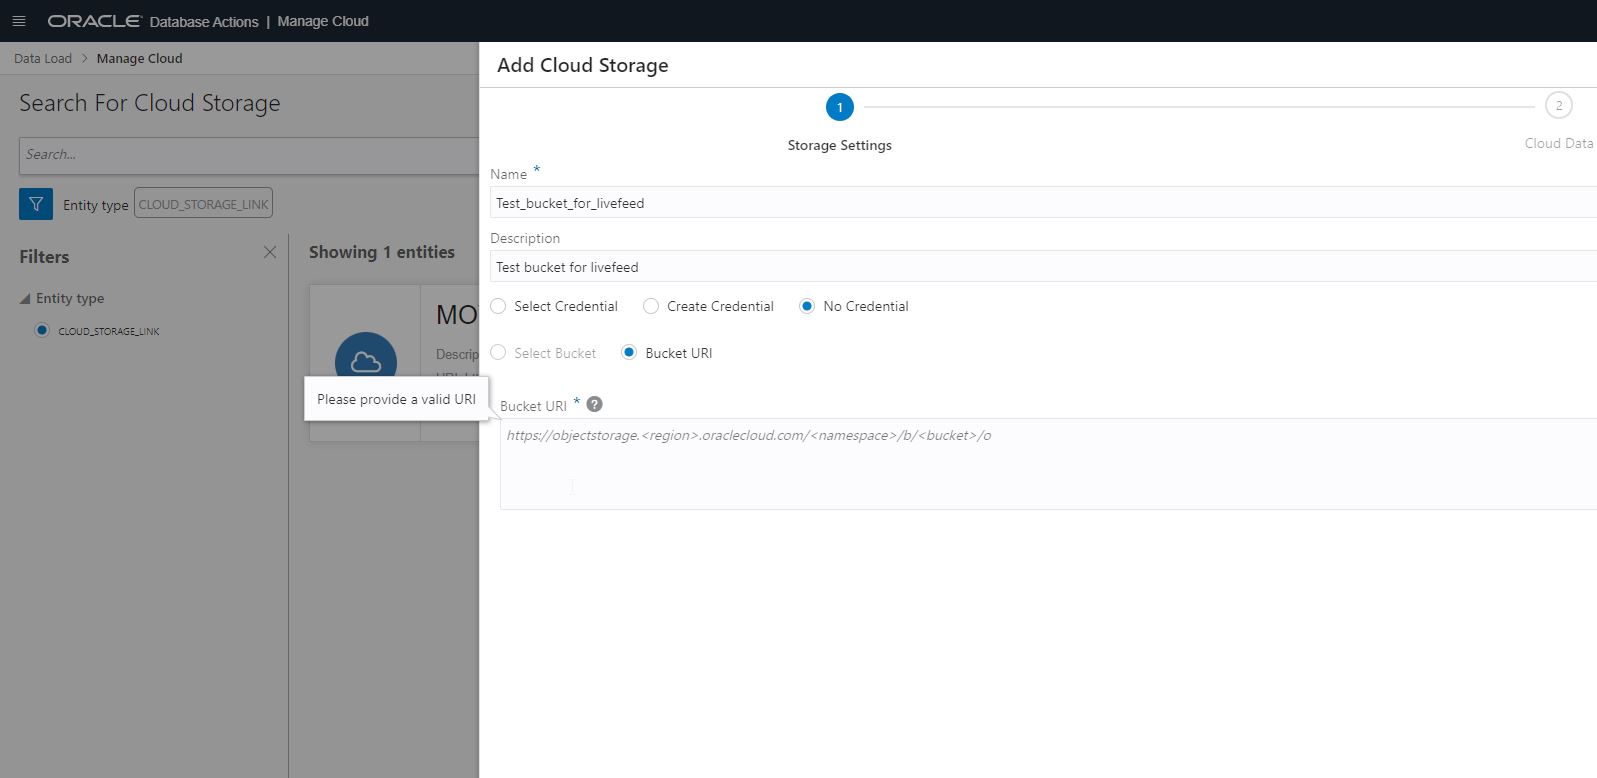
Step 3: In the Autonomous Database’s Database Actions menu, go to Data Load and add Cloud Storage using the URL for the Object Store bucket. Select the appropriate authentication mechanism.
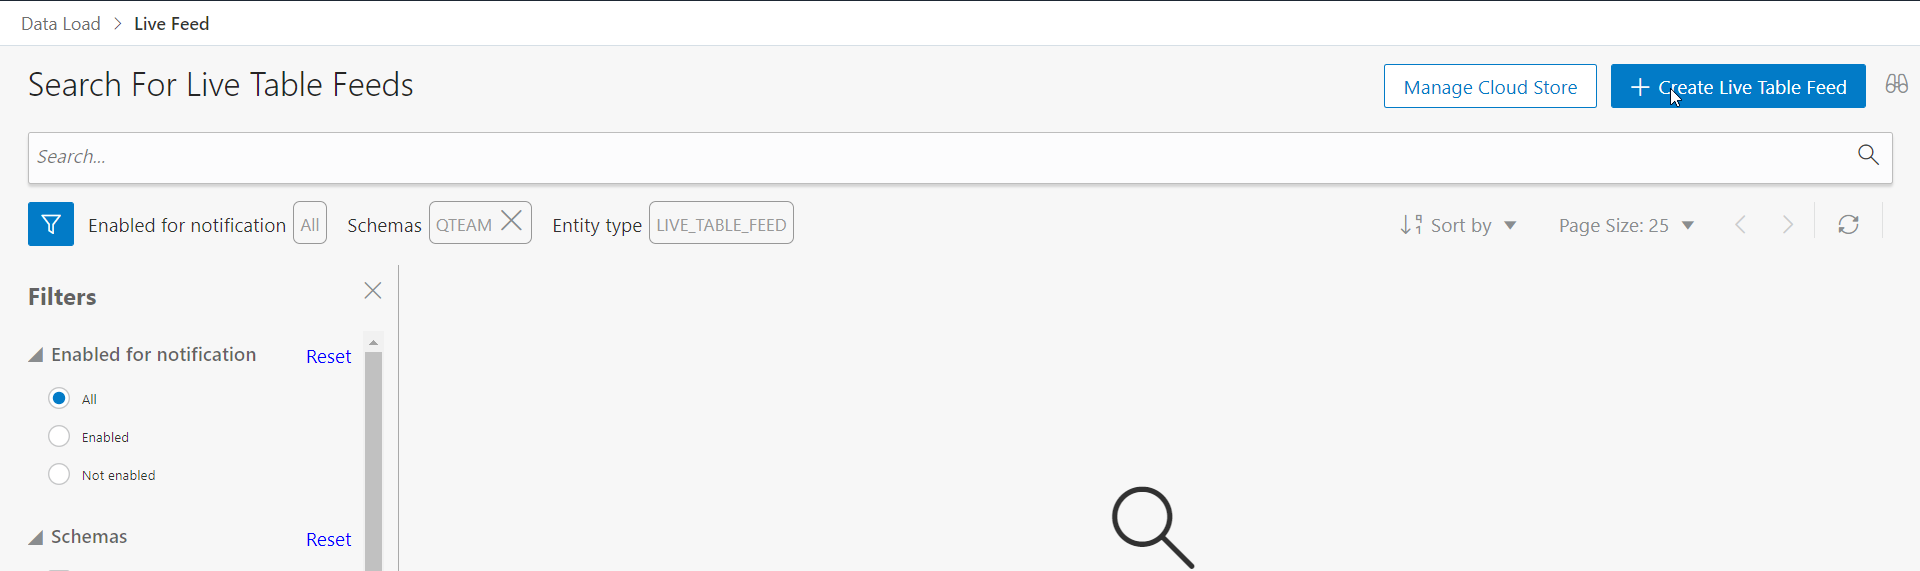
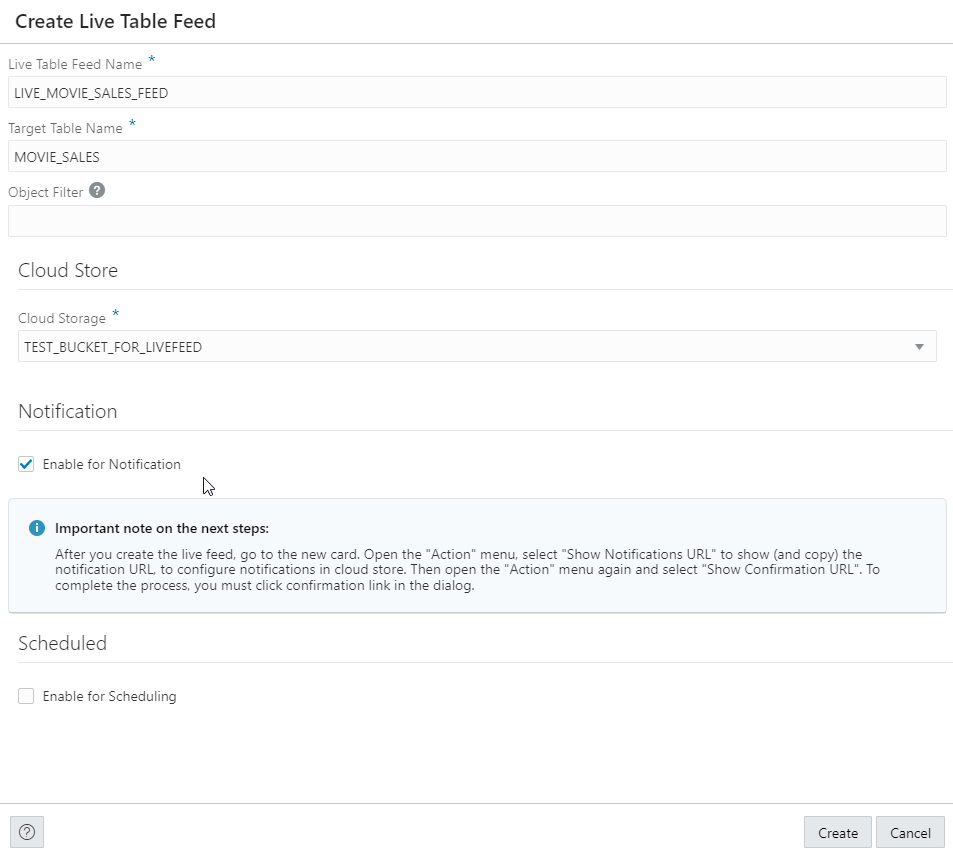
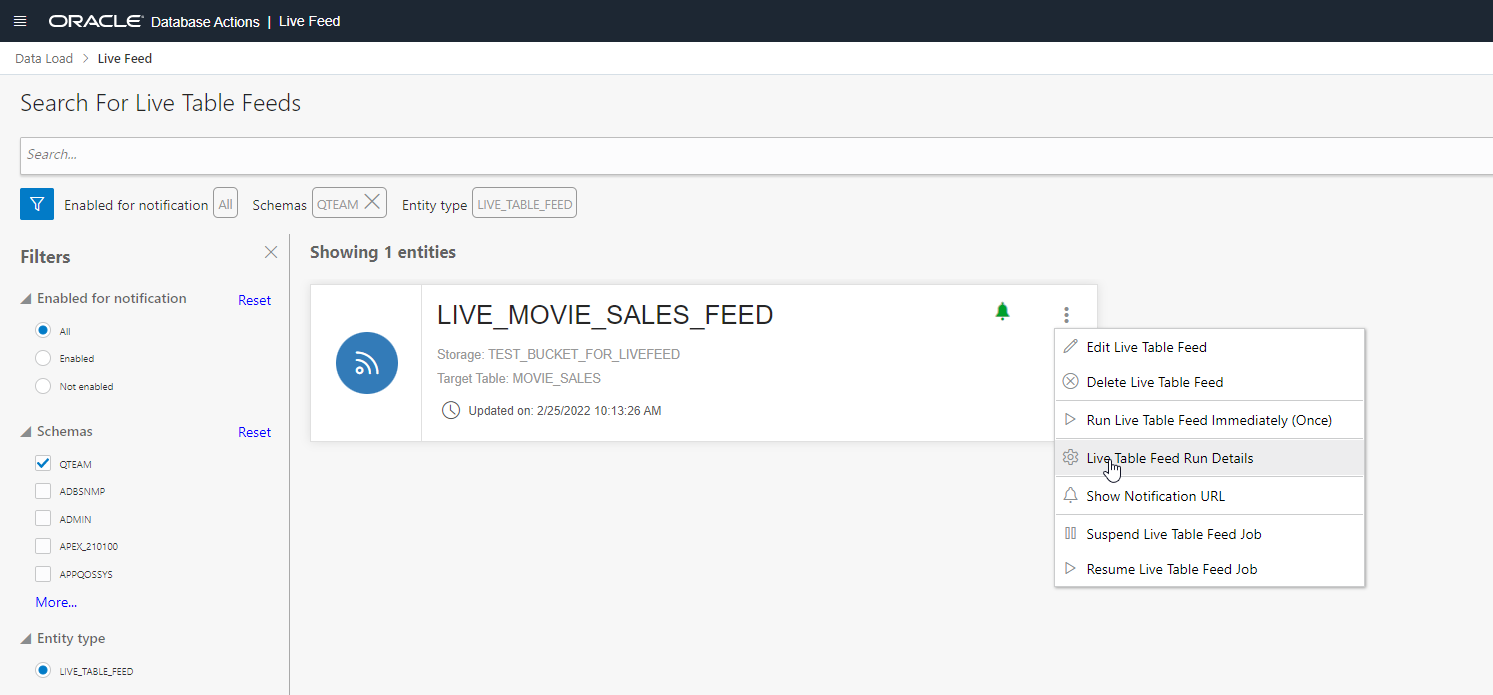
Step 4: Navigate to Data Load: Feed Data, and create a Live Data Feed with the following properties:
| Live Table Feed Name: |
<User given name> |
| Target Table Name: |
<table to be loaded in ADB> |
| Cloud Storage: |
<previously added cloud storage URL> |
| Enable for Notification: |
Checked |
| Scheduled: |
Unchecked |
(Note: We are enabling it only for notification. It means live feed will kick off anytime an object is loaded into the bucket. This is enabled by the notification mechanism that we will setup for the object store bucket in rest of the steps. It is possible that both time-based scheduled feed and notification-based feed are enabled but in this case we are only interested in notification based feed
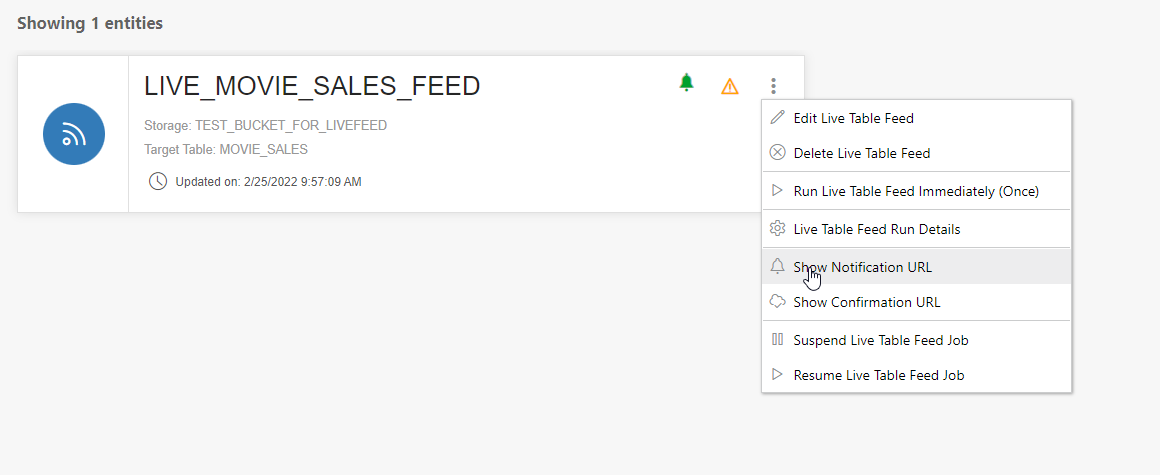
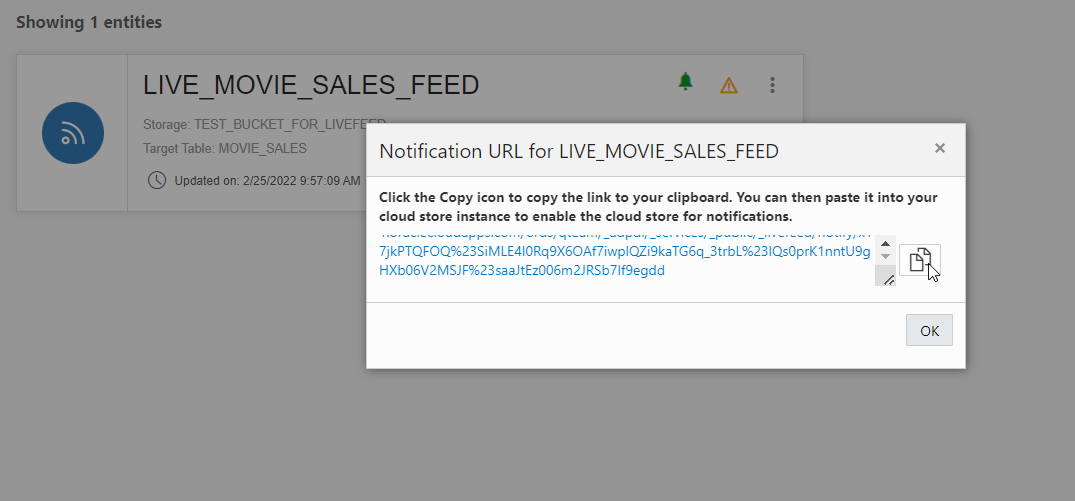
Step 5: Copy the notification URL for the live table feed, so that we can use it to link up with the OCI event generation mechanism. The live feed is triggered using the URL. (refer to the diagram in the beginning of this blog to see the entire flow).
OCI: Event generation, notification, and subscription setup
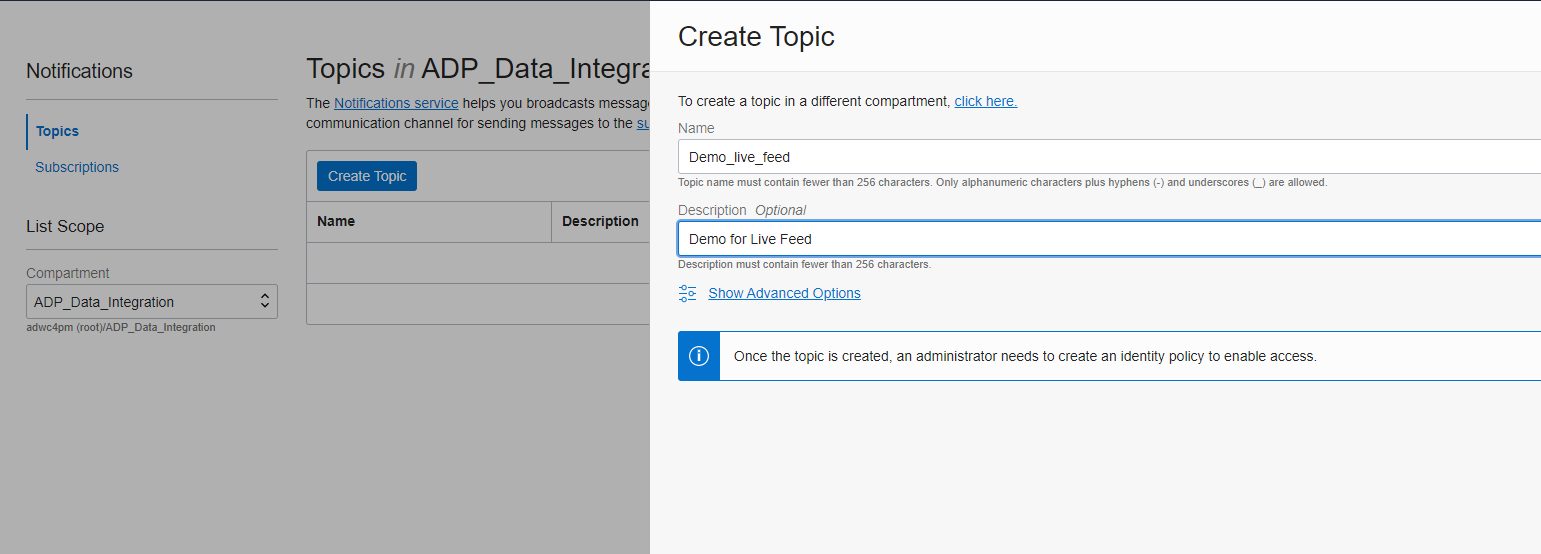
Step 6: In OCI’s Notification menu, create a topic. Give it a user-friendly name
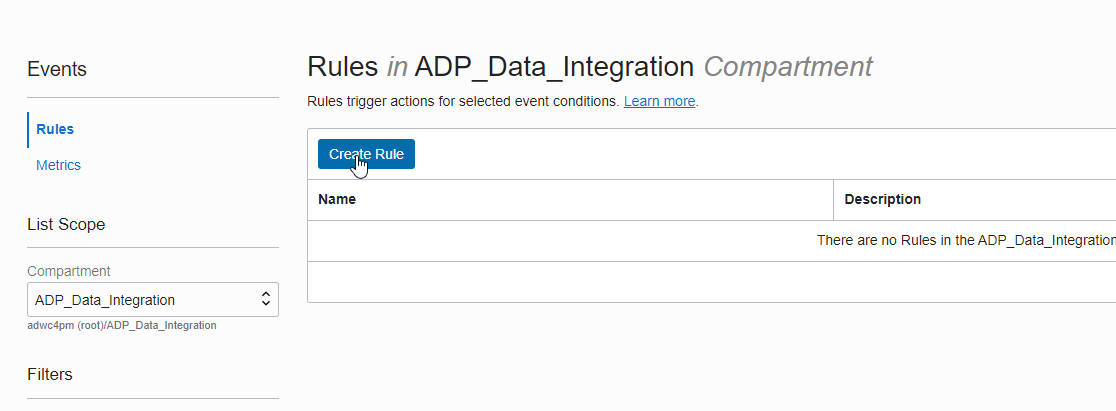
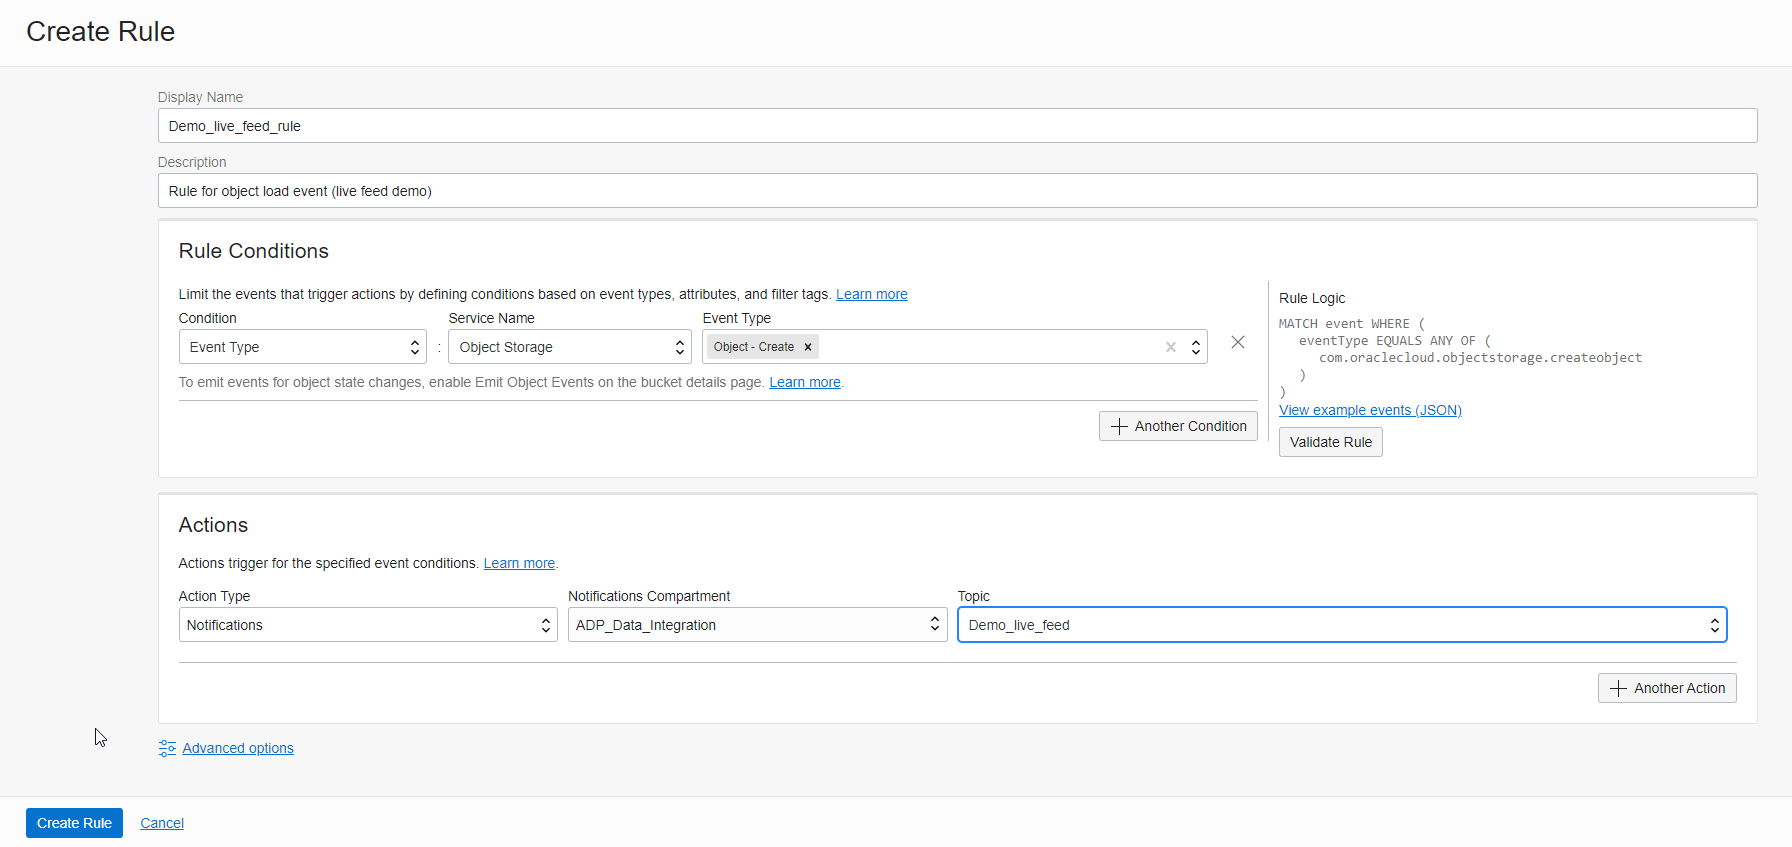
Step 7: In the Events menu, create a Rule. Fill in the following sections for the rule:
| Display Name: |
<user given name for the rule> |
| Rule Condition section: |
|
| Condition: |
Event Type |
| Service Name: |
Object Store |
| Event Type: |
Object Create |
| Actions: |
|
| Action Type: |
Notification |
| Notification Compartment |
<your compartment> |
| Topic: |
<earlier created Topic> |
Note: Rules in OCI support rich capabilities for tracking specific events, including update of existing objects. The above configuration provides a simple way to trigger notifications when new files are created in the bucket.
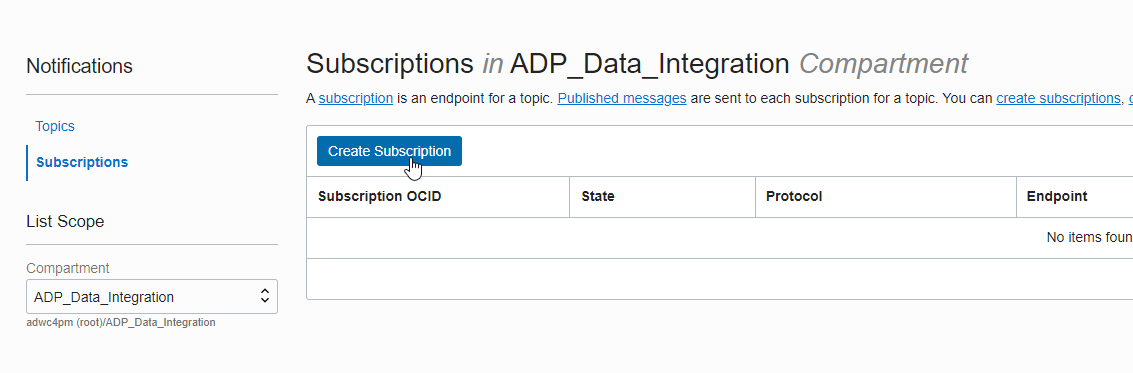
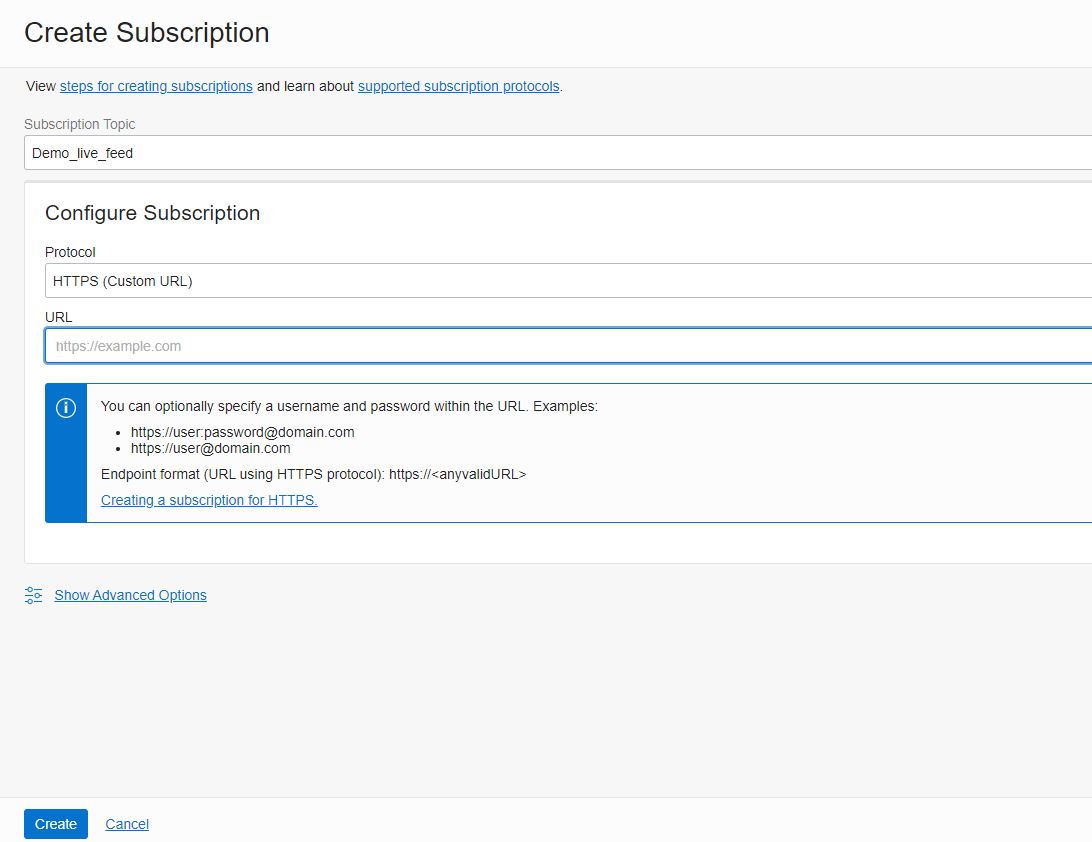
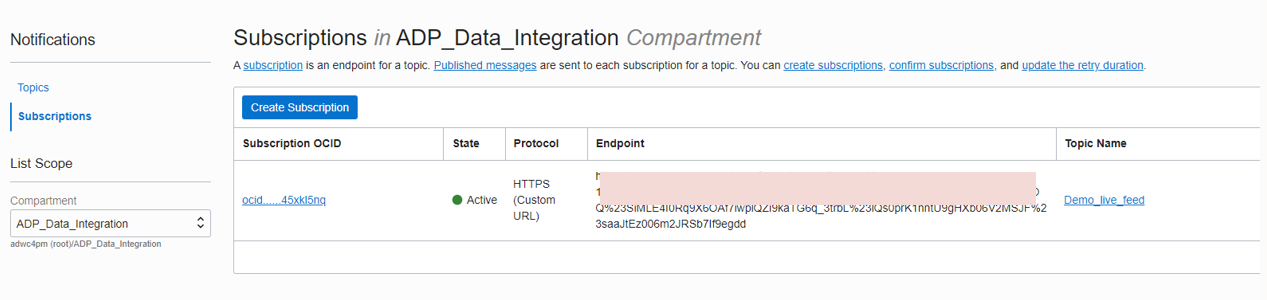
Step 8: In the Notification menu, create a subscription with the following properties:
| Subscription Topic: |
<the name of the Topic you just created> |
| Protocol: |
HTTPS (Custom URL) |
| URL: |
<the Live Table Feed URL created earlier in the Autonomous Database setup section> |
Now everything is set up, and the Live Table Feed is waiting for objects to be created in the bucket. The subscription will show in pending status immediately after creation. It takes couple of minutes for it to turn into “Active”.
Now will try loading a file in the bucket. This will notification event.
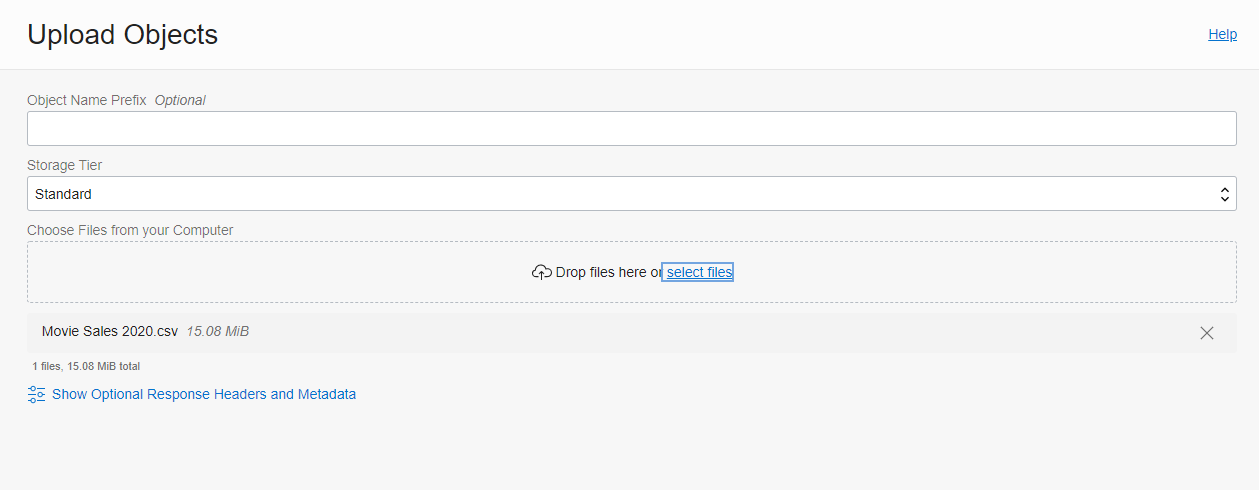
It may take a few minutes for the event to be generated and the Live Table Feed to start loading the data to the target table. See below for monitoring the run details.
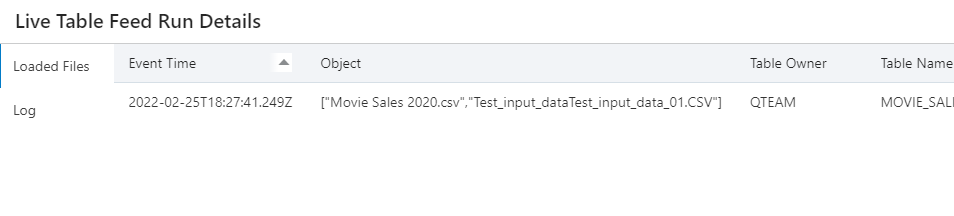
You can see that the object Movie Sales 2020.csv has been loaded to the target table MOVIE_SALES. Anytime a new version of movie sales data file is uploaded to the object store, the data will be loaded into MOVIE_SALES table. You may want to refer to the diagram in the beginning of this blog to see the entire chain of events that make it happen.
Final Comment: It is important to note that although we have set up this Live Feed from Oracle Object Store, the same mechanism for subscribing to events can be setup for other Object Stores, such as Amazon Web Services S3, or Azure Data Storage. All you need is the Live Table Feed URL – this can be linked to the event notification mechanisms in most other object storage platforms.