Oracle Cloud Infrastructure (OCI) Data Integration has introduced a new feature to provide a seamless experience for customers to run their tasks on OCI Dataflow service and be in control of the compute shape for those jobs. Customers can leverage the benefits of pool feature for cluster readiness and private endpoints for secure connectivity using this new feature.
Customers can simply design tasks in the data integration service and run in OCI Dataflow easily by leveraging features in OCI Dataflow such as autoscaling of their Spark jobs, use of cluster pools of compute and control the compute for their workloads.
Pre-requisites
To run the Oracle Cloud Infrastructure (OCI) Data Integration tasks in the OCI Data Flow service, ensure that you have set up the following resources and policies.
- Data assets used in the tasks
- Must be configured to use OCI Vault secrets for the passwords to connect to the data sources. This is required for passing credentials securely across OCI services. See OCI Vault Secrets and Oracle Wallets
- Must be specified using the fully qualified domain name (FQDN) for the database hosts. The OCI Data Flow service does not allow connections through direct IP addresses.
- OCI Object Storage
- An Object Storage bucket for the OCI Data Flow service to upload Data Flow application run logs.
- An Object Storage bucket for the Data Integration service to upload the artifacts for run jobs such as jar and zip files.
- The relevant permissions and IAM policies to access Object Storage, as described in Policy Examples to Enable Access to OCI Object Storage.
- OCI Data Flow service
- A pool. See Creating a Pool in the OCI Data Flow documentation. This is optional but we would recommend to create a pool to have your own set of resources for spark jobs.
- For running Data Integration service tasks in the OCI Data Flow service, the required pool must have a single configuration with at least two compute shapes.
- A private endpoint. See Creating a Private Endpoint in the OCI Data Flow documentation.
- If the Data Integration service tasks access data sources that are only available using private IPs, a private endpoint is required to give OCI Data Flow access to a private network in your tenancy for working with those data sources.
- Relevant policies to publish from the Data Integration service the tasks that have the Data Flow service run configuration enabled, and run the tasks on the Data Flow service (with or without private endpoints).
- A pool. See Creating a Pool in the OCI Data Flow documentation. This is optional but we would recommend to create a pool to have your own set of resources for spark jobs.
For Data Integration to run tasks on the Data Flow service:
allow any-user to manage dataflow-family in compartment <compartment-name> where ALL {request.principal.type = ‘disworkspace’, request.principal.id = ‘<workspace-ocid>’}
For user to access the Data Flow service directly:
allow group <group-name> to read dataflow-application in compartment <compartment-name>
allow group <group-name> to manage dataflow-run in compartment <compartment-name>
For user to manage Data Flow private endpoints and secret bundles:
allow any-user to read dataflow-private-endpoint in compartment <compartment-name> where ALL {request.principal.type = ‘disworkspace’, request.principal.id = ‘<workspace-ocid>’}
allow any-user to read secret-bundles in compartment <compartment-name> where ALL {request.principal.type = ‘disworkspace’, request.principal.id = ‘<workspace-ocid>’}
For Data Integration service to fetch Application Metrics –
ALLOW SERVICE dataflow TO READ objects IN tenancy WHERE target.bucket.name=’logBucketName’
For non-administrator users, these policies are required:
allow group <group-name> to inspect dataflow-private-endpoint in compartment <compartment-name>
allow group <group-name> to read secret-bundles in compartment <compartment-name>
Let’s begin creating a pool in OCI DataFlow service.
I have selected E4.Flex for better performance and select 2 OCPUs with 16GB memory. You can also Schedule when you want to start and stop the pool and configure idle timeout in minutes to stop the pool when it is not in use.

Figure-1: Create a pool in OCI Data Flow service
Create Data Integration Dataflow with incremental extractions from Fusion Application PVO
Now we create a DI DataFlow to extract CodeCombinationExtractPVO VO in the Finance subject area and load into an Autonomous Data Warehouse.
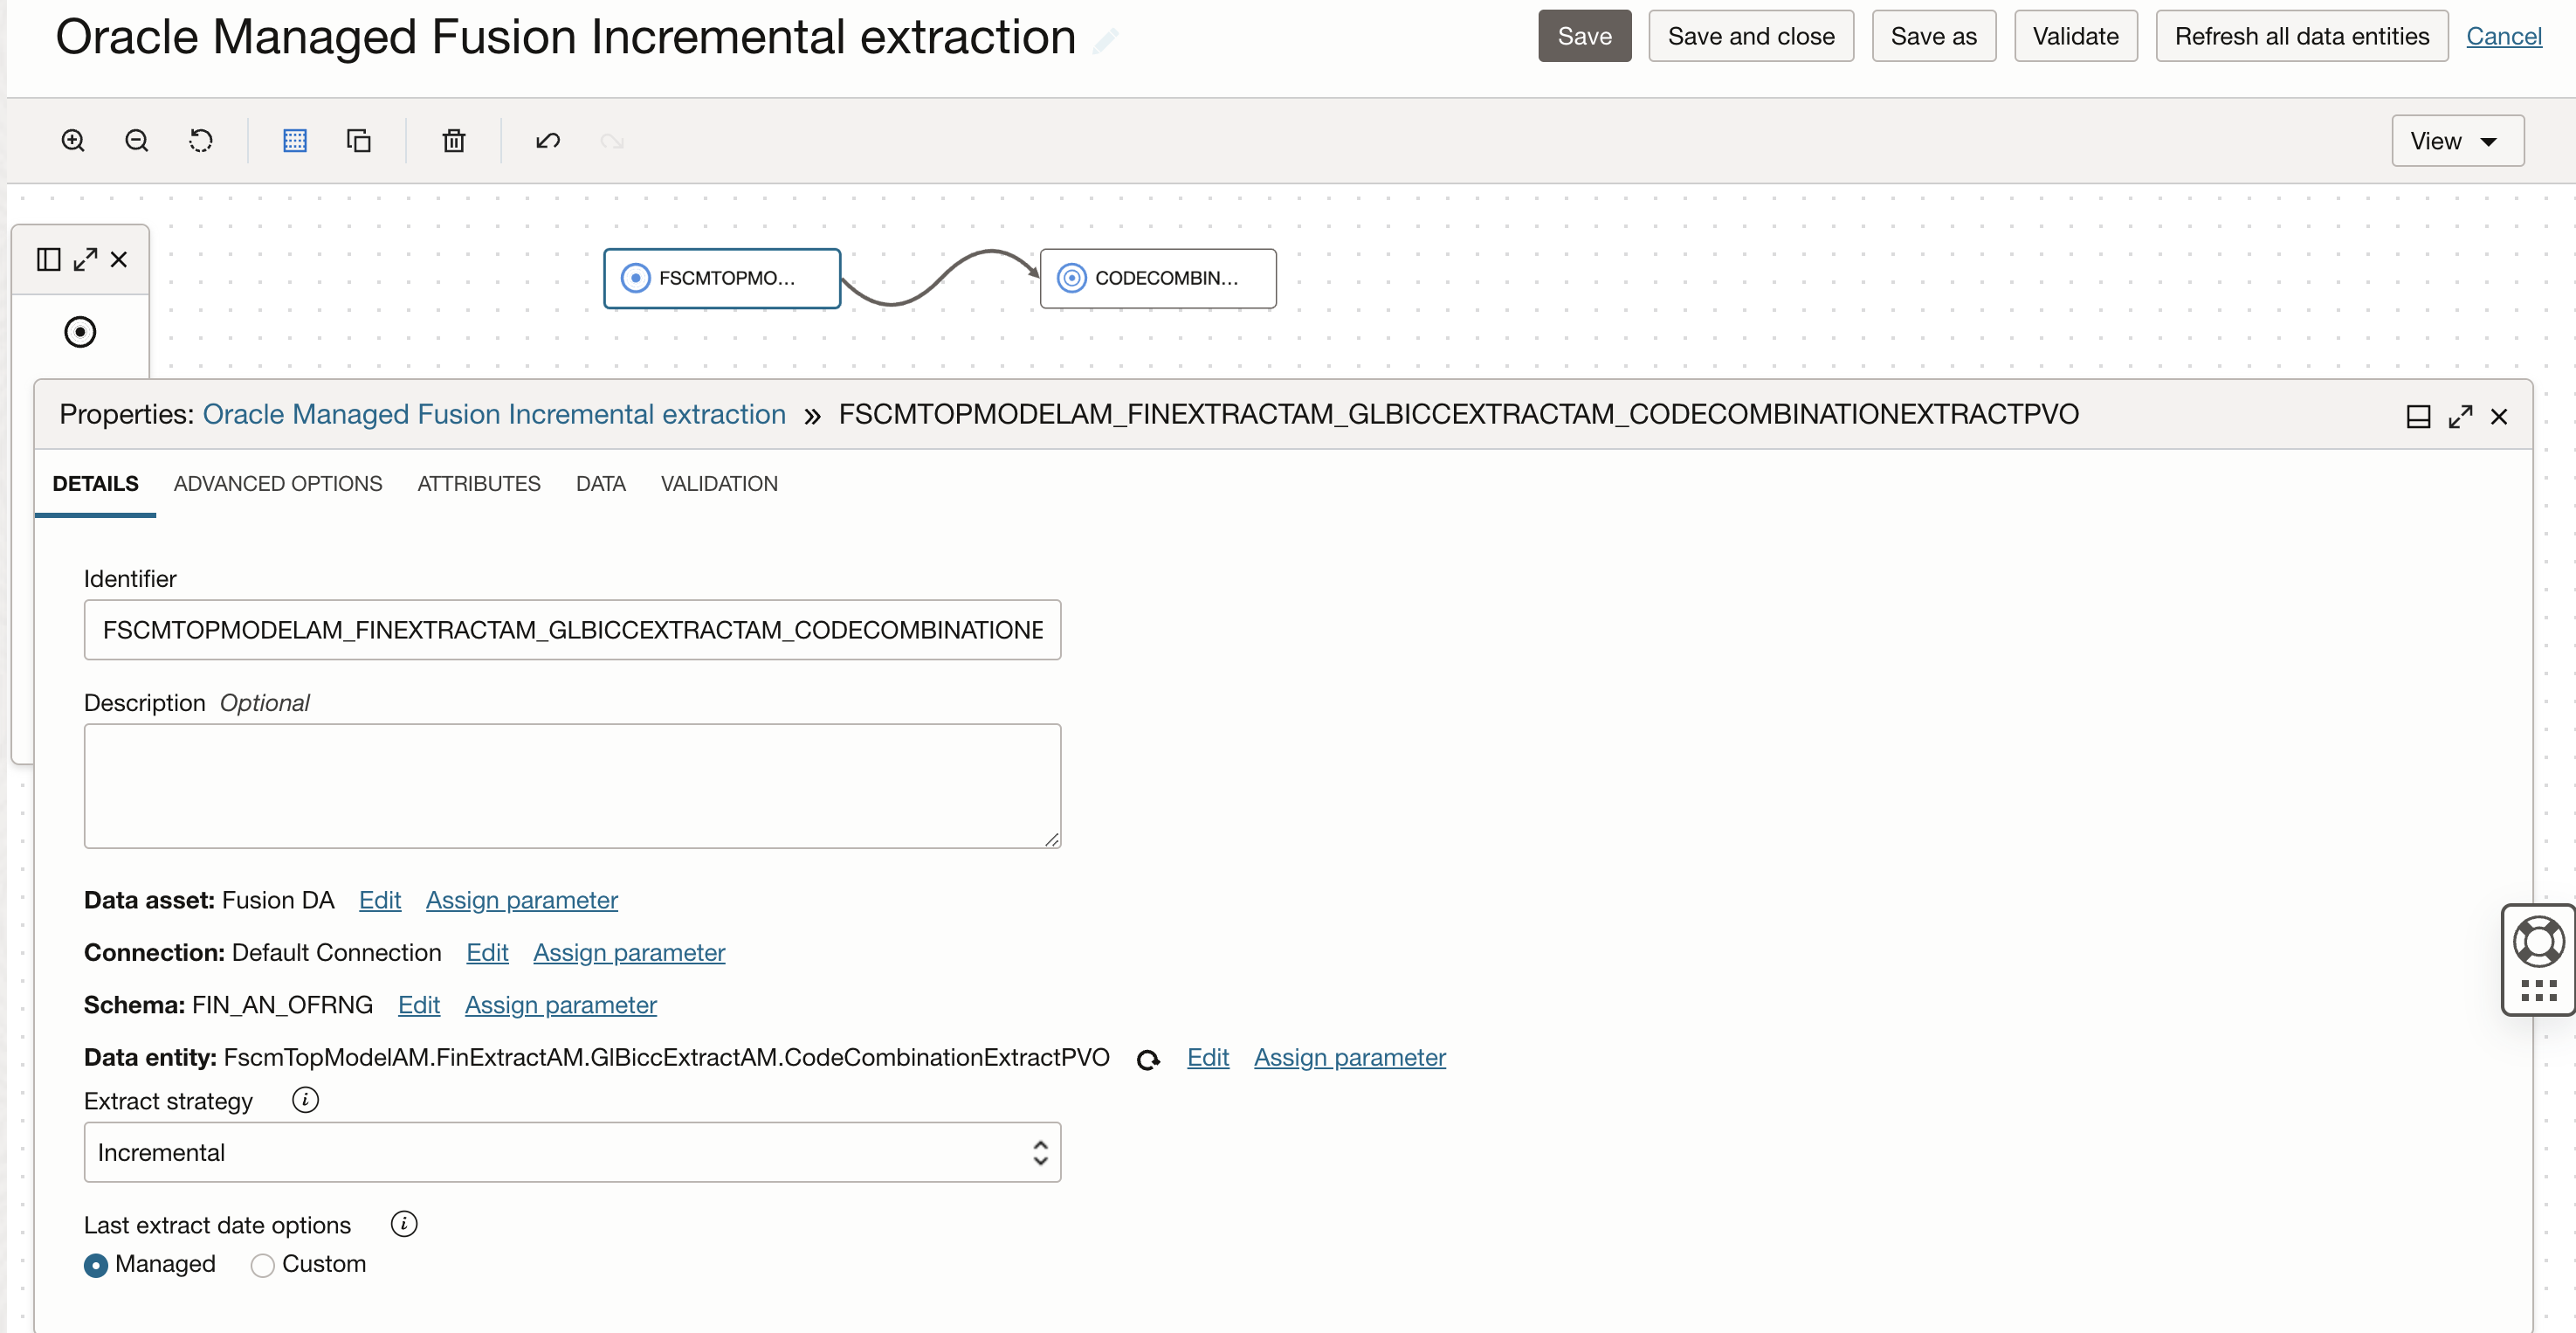
Figure-2: DataFlow configured for managed Incremental extraction
Once the data flow design is completed, save the data flow and create an Integration Task by selecting Integration option from Create Task drop down in Task page.
Create Integration task to run in the OCI Data Flow service
Once Dataflow is selected in the Integration task, click on edit run configuration of the task and click OCI Data Flow service option. This shows Task Run Configurations required to be configured to run a task in the OCI Data Flow service.
Please note, By default, all tasks that you first create in Data Integration are configured to run in the OCI Data Integration service, as indicated by the label Task run service: OCI Data Integration service.
Now select the run properties for OCI Data Flow service. You can refer the document to understand each of these properties.
The OCI Data Flow run configuration properties can be parameterized when updating a task’s run configuration. By parameterizing the properties, you have the flexibility to use the same task with different default parameter values atdesign/run time and across development, test and production.

Figure-3: Configure runtime configuration properties
Give a name to the Integration task, save it and publish to your application.
Running Integration Task
You can manually run this published task from your application in Data Integration, a panel opens to let you edit the runtime configuration parameter values for the run. You can override these parameter values or keep the default values and run the task.

Figure-4: Run the task from Application
The Runs section of the application details page lists all task runs, including OCI Data Flow service task runs, that have been executed for published tasks in a Data Integration application.
You can monitor the task run status in this OCI DI Application Run page and click on Refresh button to get latest status or once the task run is in QUEUED status, you can click on context menu of task run and select View Logs option, this page provides a link Data Flow application run page, click on this link to go to OCI-DataFlow run page.
Figure-5: View the task execution in OCI Data Flow service
Configuring OCI Data Flow runtime configuration in a pipeline
Create a pipeline in your project, Drag and drop an Integration task to the pipeline canvas, select your published Integration task from your application.
Figure-6: Create a Pipeline
In the properties bar, click on Configuration tab and then on Configure where you have Incoming Parameters Configured: 0/6. A window to Configure Incoming Parameters pops up. Click on Configure for the OCI_DF_POOLparameter.
In the new windows that is displayed:
- Select Assign a parameter option, to specify a pipeline parameter to set a different value when the pipeline is run.
- Use user defined parameters, click Add parameter to create a parameter in the pipeline for selection.
- In the Add parameter panel that displays, enter a name and optional description for the parameter. You cannot change the data type, which is the same as the type of the incoming parameter. How you define the rest of the fields for a parameter depends on the incoming type. To create the parameter, click Add.
- Click Done.
On the Configure incoming parameters page, review the Default value and Configured value for the parameter you just reconfigured. A configured value can be a user-defined parameter name with the configured value shown in parentheses.
Figure-7: Configure runtime configuration properties in the pipeline
Repeat these above steps to configure other input values, as needed. On the Configure incoming parameters page, click Configure when you have finished configuring values for incoming parameters in the task.
Connect the Integration task operator to the END operator. In the End operator, select the option of All Success, for the ‘Incoming Link Condition’ in END operator, this makes the pipeline successful when all operators are successful and marks it failed when any one of the operators fail.
Give the pipeline a name, click on Global validate button (and ensure validation is successful) and save the pipeline.
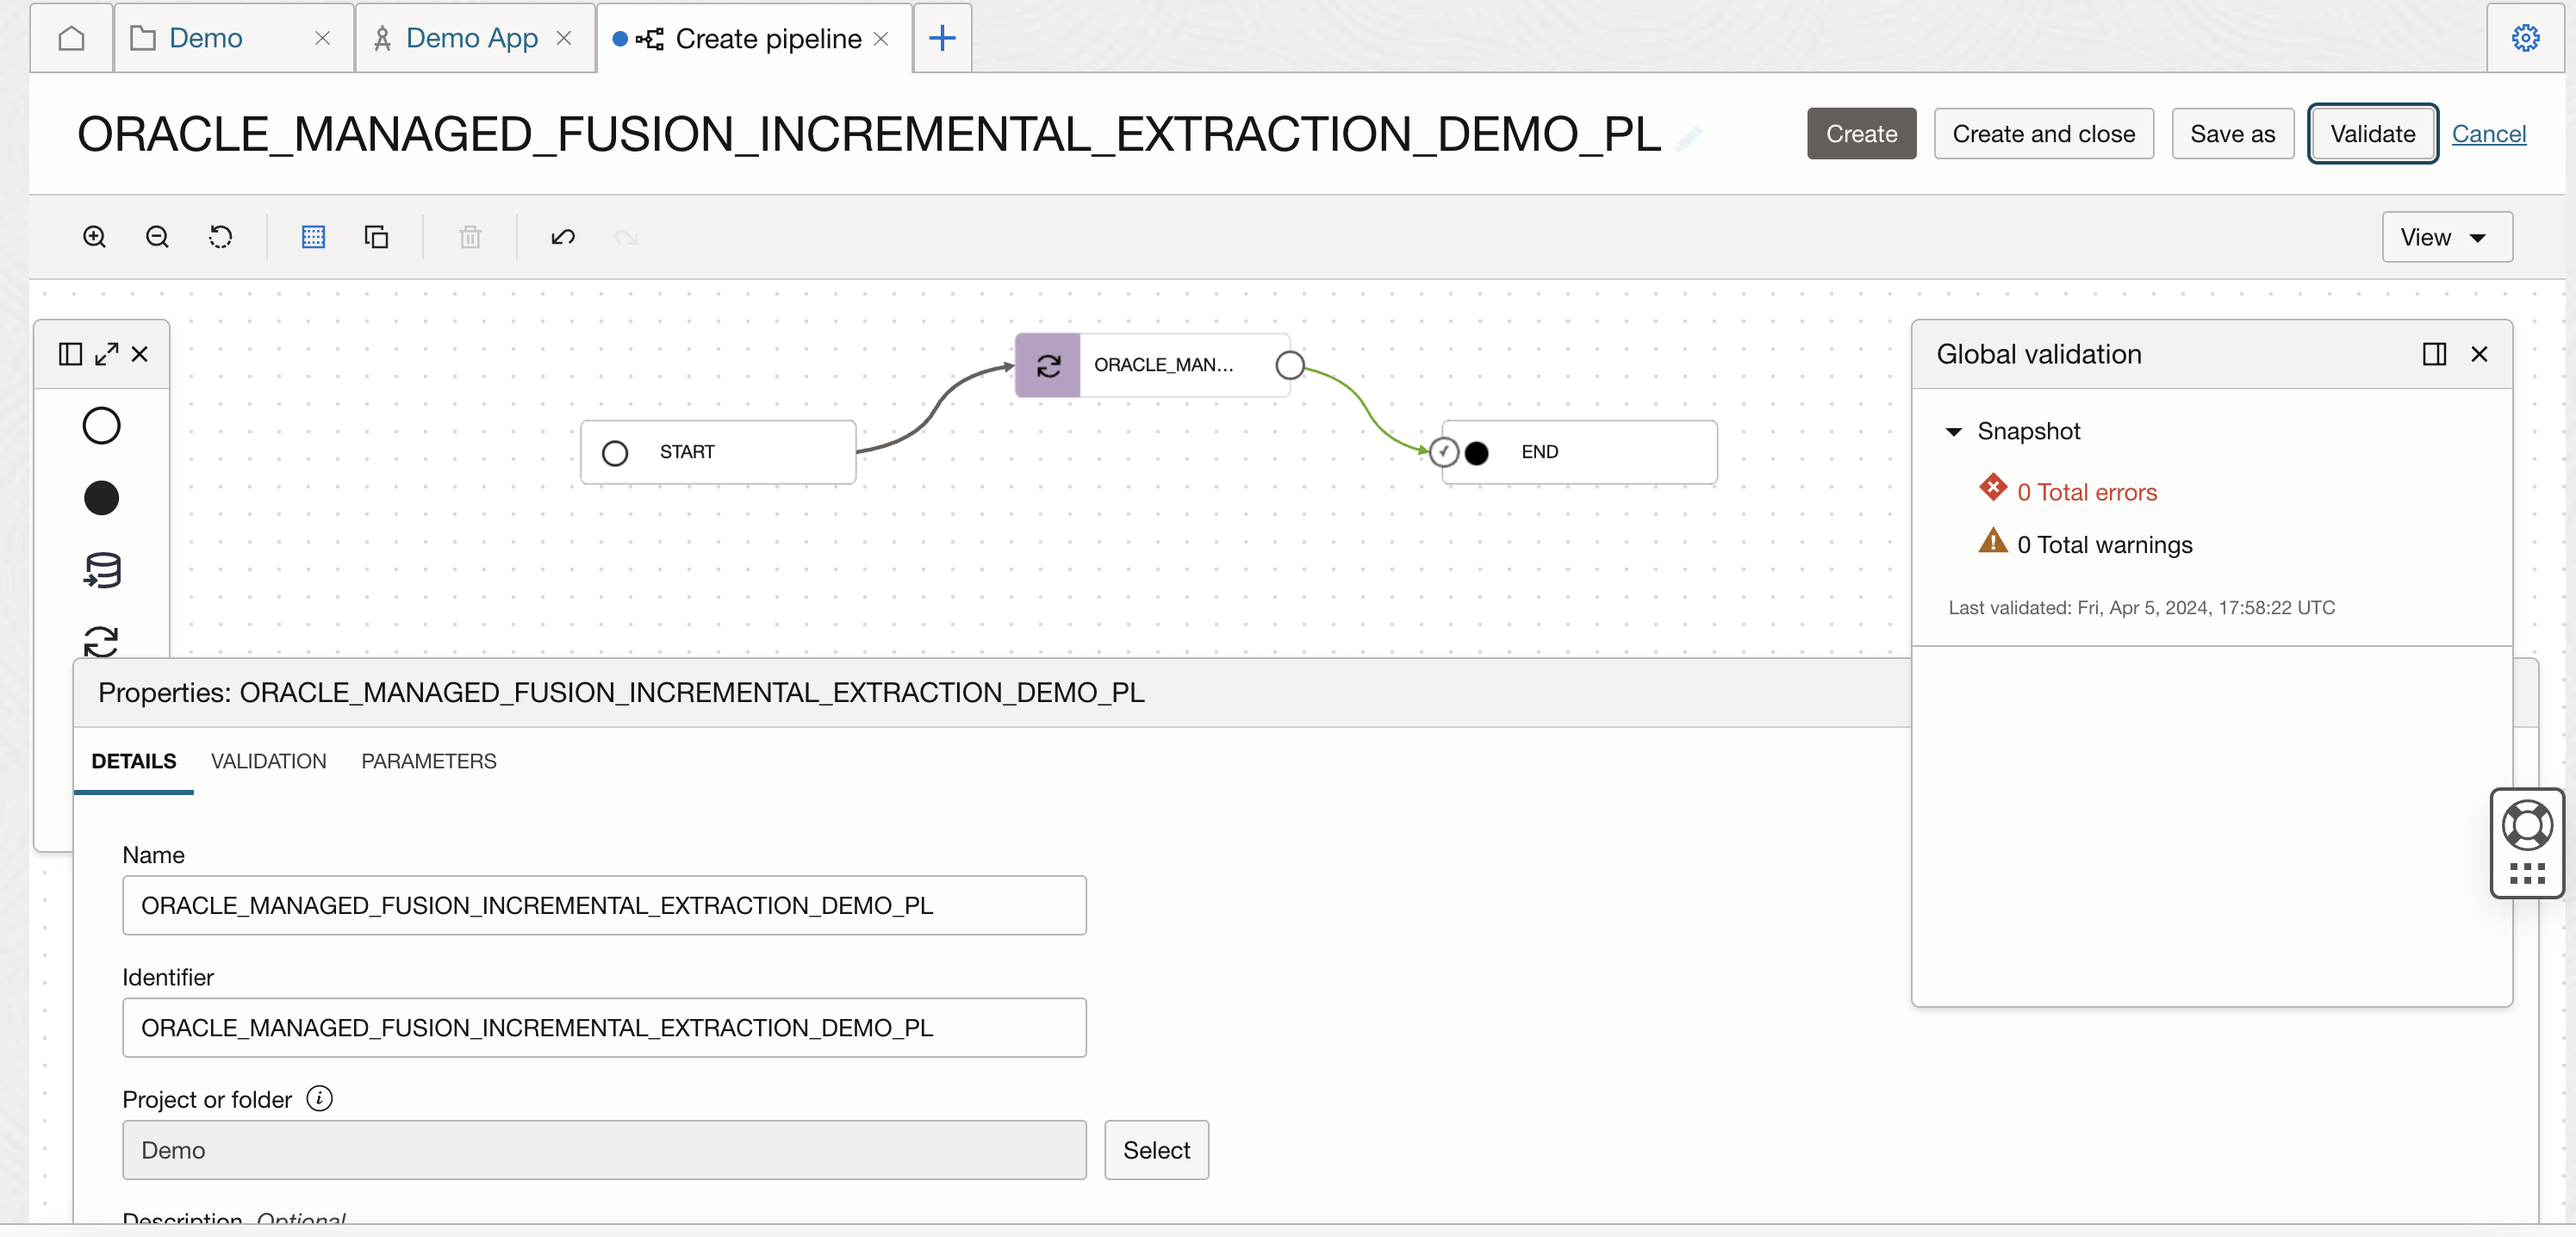
Figure-8: validate the pipeline
After this, create a pipeline task for this pipeline, you can see OCI DataFlow runtime configuration properties values are exposed at pipeline task level, publish this pipeline task to your Application to run it.

Figure-9: Create pipeline task
Running pipeline task
You can manually run this published pipeline task from your application in Data Integration, a panel opens to let you edit the runtime configuration parameter values for the run. You can override these parameter values or keep the default values and run the task.
Figure-10: Run pipeline task from the Application
You can monitor the task run status in this OCI Data Integration Application Run page and click on Refresh button to get latest status or you can go to OCI Data Flow service and open your pool and monitor the Task execution.
Figure-11: Viewing the job run from OCI Dataflow
In conclusion, this feature offers a seamless and cost-effective experience for customers, providing control over compute shape usage and costs. By utilizing the power of pool features, including intuitive start, stop, and scale-up capabilities, customers can optimize their resource utilization, streamline their workflow, and achieve significant cost savings with ease.
We hope that this blog helps as you learn more about Oracle Cloud Infrastructure Data Integration. For more information, check out the tutorials and documentation. Remember to check out all the blogs on OCI Data Integration!
