What are GoldenGate Profiles?
Oracle GoldenGate provides options to set up managed Extract and Replicat processes and control how its trail files are encrypted. These options are stored in reusable Profiles. There are two different types of Profiles in GoldenGate:
- Managed Processes Profiles controlling the lifecycle of GoldenGate processes
- Encryption / Key Management System (KMS) Profiles defining the encryption technique used to encrypt trail files
Why use Profiles in OCI GoldenGate?
We will start with Managed Processes Profiles. We can have Extracts and Replicats with different priority levels since you can have your tables and schemas split across distinct processes.
We can save a lot of time if we prepare our profiles for different configurations and reuse them whenever required.
We can have profiles for important tables that cannot be stopped, and if it happens, we can configure the process to restart as soon as possible automatically. On the other hand, you can have processes that can be stopped for a while and do not need immediate intervention. For those processes, a different configuration can be applied. Having one unique profile that fits all your needs would be challenging.
Encryption Profiles allow users to pick their preferred Key Management System (KMS): Oracle Key Vault (OKV) or Oracle Cloud Infrastructure (OCI) Vault. Encryption Profiles define how trail files are encrypted, which may be required for compliance reasons. Furthermore, your organization may not allow auto-generated keys, and you must use your own keys to encrypt trail files. In addition to encrypting trail files at rest, we recommend deleting unused trail files regularly using purge trail tasks.
Configuring Profiles
Managed Process Profile
To create a Managed Processes Profile, open your OCI GoldenGate Deployment console, click on the Console menu, and select Profile:
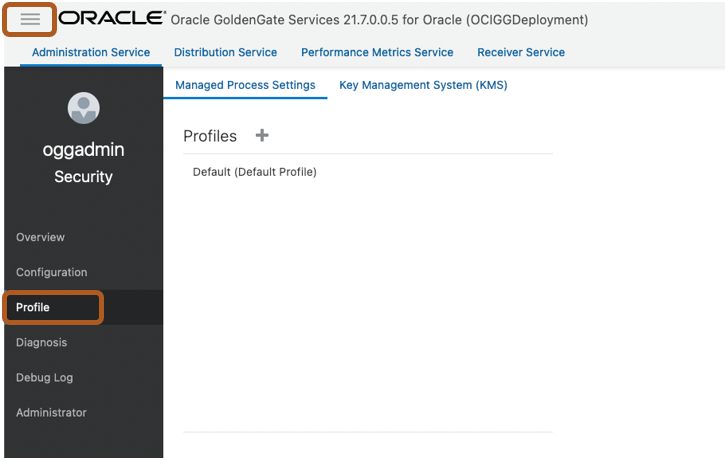
In the Managed Process Settings tab, click on the ‘+’ (plus) sign to add a new Profile:
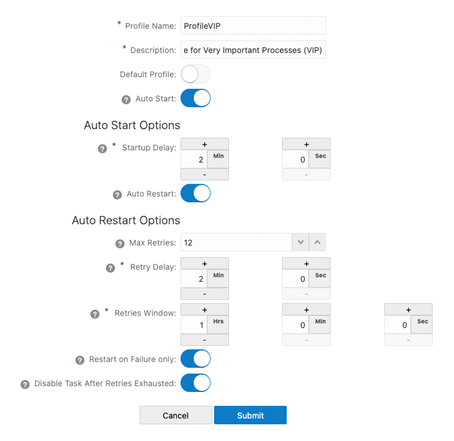
| Option | Description |
| Profile Name | Provides the name of the autostart and autorestart profile. You can select the default or custom options. |
| Critical to deployment health | (Oracle only) Enable this option if the profile is critical for the deployment health. |
| Auto Start | Enables autostart for the process. |
| Startup Delay | Time to wait in seconds before starting the process |
| Auto Restart | Configures how to restart the process if it terminates |
| Max Retries | Specify the maximum number of retries to try to start the process |
| Retry Delay | Delay time in trying to start the process |
| Retries Window | The duration interval to try to start the process |
| Restart on Failure only | If true, the task is only restarted if it fails |
| Disable Task After Retries Exhausted | If true, the task is disabled after exhausting all attempts to restart the process. |
Click Submit to create the profile.
Encryption / Key Management System (KMS) Profile
Now, let’s create an Encryption Profile using OCI Key Vault. In this article, we are assuming that you have already created an OCI Vault. Oracle Cloud Infrastructure Vault enables you to centrally manage encryption keys that protect your data and secret credentials that you use to secure access to your resources in the cloud.
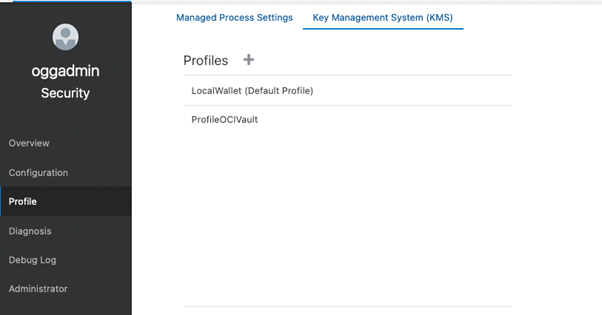
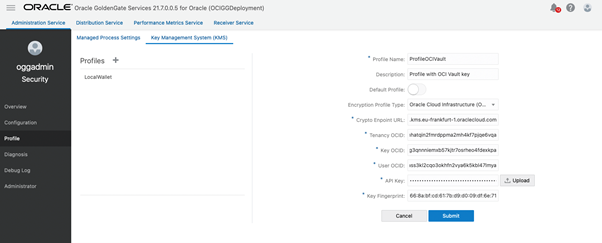
Click on Key Management Systems (KMS) tab and add a new Profile.
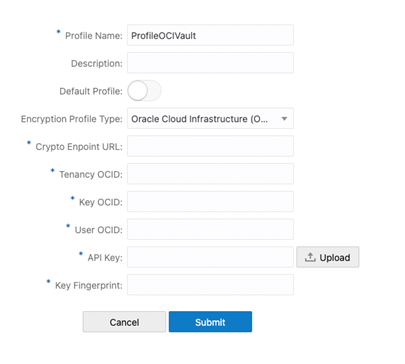
Select Oracle Cloud Infrastructure (OCI) as the Encryption Profile Type, then specify the following information:
- Crypto Endpoint URL
- Tenancy OCID
- Key OCID
- User OCID
- API Key
- Key Fingerprint
You can copy the Crypto Endpoint URL from your OCI Vault. Click on the OCI Console Menu, select Identity & Security, and then Vault.
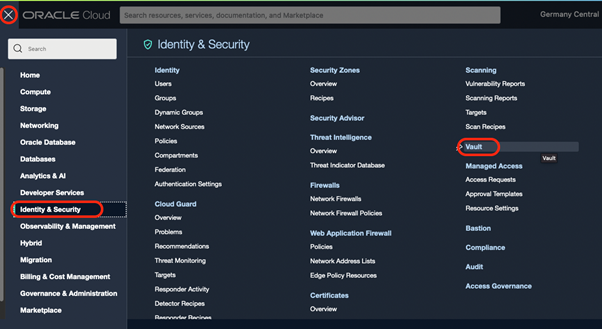
Click on your Vault:

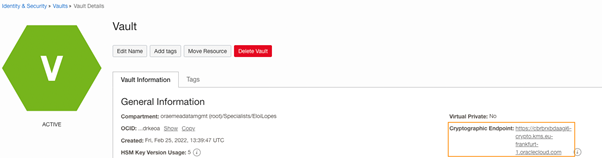
Copy the Cryptographic Endpoint URL from the Vault details page.
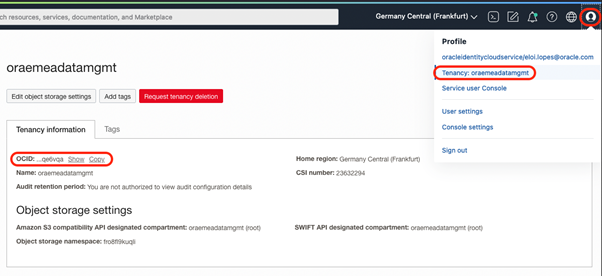
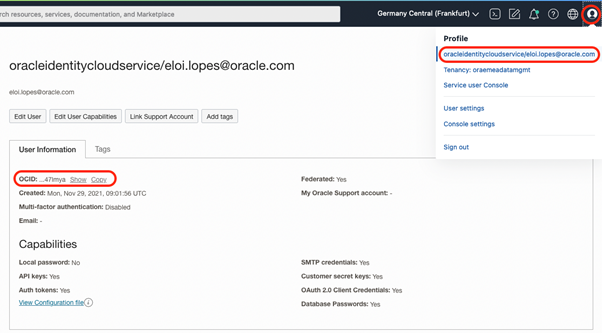
To find your Tenancy OCID, click on your user in the OCI Console bar, click on Tenancy and copy the OCID:
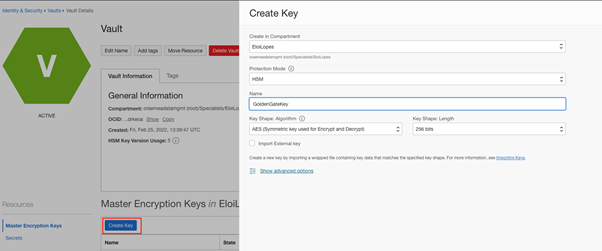
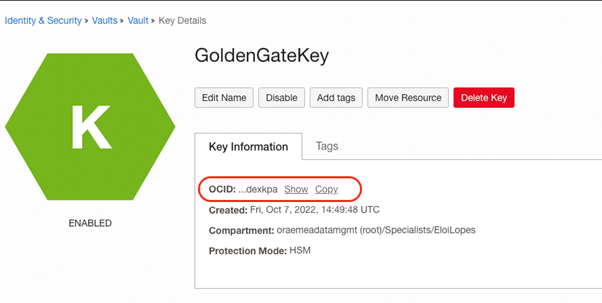
Now, create a new Key in Vault.
Go back to your Vault. Click on Create Key in the Master Encryption Keys page in your Vault, and make sure the Key Shape Algorithm is set to AES (the other algorithms are not supported today):
Now, copy the Key OCID:
To find User OCID, click on your user in the OCI Console bar and copy the OCID:
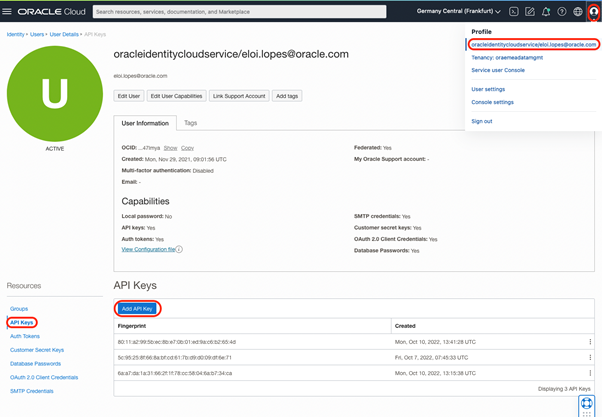
The Key API is the private key that has been used to create an API Key and the Key Fingerprint that has been generated for it. This information is also found in your Profile in the API Keys panel:
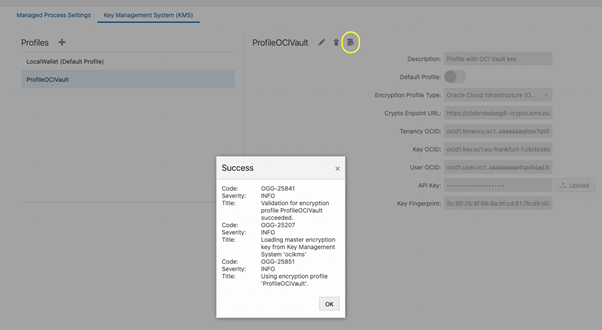
Finally, click on Submit and check if the Profile is valid:
Now, let’s test our new Profiles.
Adding an Extract
Go to the OCI GoldenGate Console, and add a new Extract:

In the Encryption Profile, select the newly created Profile: ProfileOCIVault. For Managed Options, select profile “ProfileVIP”:
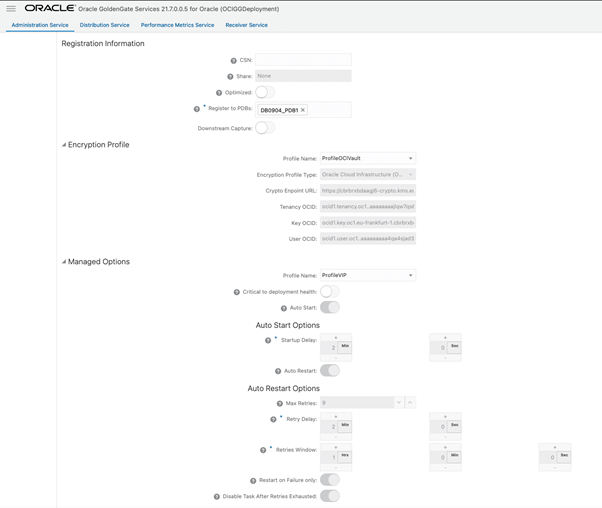
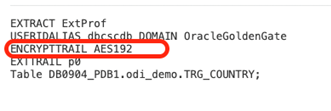
Next, you must add ENCRYPTTRAIL AES(128/192/256) to the Parameters.
The same configuration can be applied to Replicats. You can create different profiles for Extracts and Replicats.
Next, we will open up a Trail File using logdump in Cloud Shell and look at the differences between a regular file and an encrypted one.
Verifying Encrypted Data in Trail File
Using Cloud Shell to open the trail file
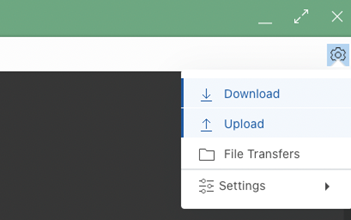
To get a trail file from OCI GoldenGate, you can create a backup, download it, and upload the trail file to Cloud Shell. Check this article on how to use OCI GoldenGate with Cloud Shell.
After downloading the OCI GG backup, extract the archive, and you will find the trail files in the following location: /<path>/Deployment/var/lib/data.
Select the trail file you want to open and upload it into OCI Cloud Shell:
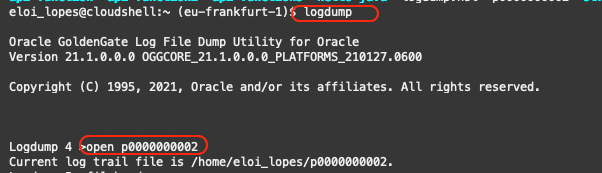
Now, using the logdump utility, we can open the trail and check the data. Type logdump at the prompt, and then open the trail file (p0000000002 below):
Let’s run some logdump commands to prepare the trail file:
fileheader on
ghdr on
detail on
detail data
reclen 2000
pos 0
next
We start at position 0 of the trail file, and we type “next” (or “n”) to display the next record or records in the file:
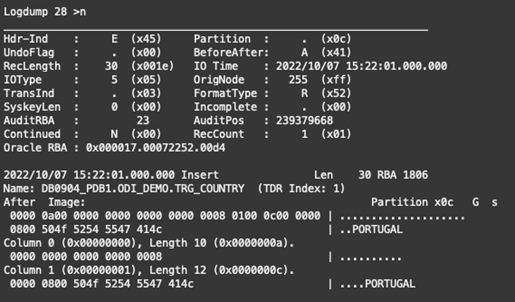
From the trail file, we can see an insert operation (IOType is 5), and in column 1, we inserted the value “PORTUGAL”.
Now, let’s do the same but with a trail file coming from an Extract / Replicat using an Encryption Profile:
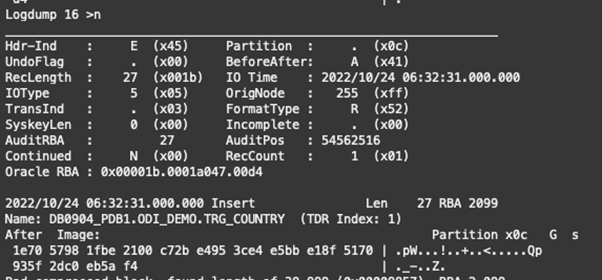
We can still see the operation type, but all the data is encrypted, and as expected, it is impossible to read.
Conclusion
GoldenGate profiles are a great feature that is provided out of the box. Profiles save time and help avoid performing repetitive tasks. Encrypting Trail Files with your own key is also a must-have for some organizations. We have seen in this article how to create both a Managed Process Profile and an Encryption Profile for Extracts, Replicats, and Distribution Paths.
Stay tuned for new blogs coming up in the future!