Almost a year ago, we announced MongoDB capture support with GoldenGate for Big Data and I blogged about no downtime migrations from MongoDB to Autonomous JSON Database. Now, MongoDB capture support is available with OCI GoldenGate.
Oracle Cloud Infrastructure GoldenGate is a fully managed, native cloud service that moves data in real-time, at scale. On top of core GoldenGate for Big Data capabilities, it brings additional advantages of a fully managed service like auto-scaling, flexible/ data throughput-based licensing, improved user experience.
In this blog, we will go through the detailed steps for configuring OCI GoldenGate for no downtime migrations from MongoDB to Autonomous JSON.
I’ll start with what is supported in the source MongoDB side.
- MongoDB 3.6 and later versions are supported for extract. A few notes here:
- Recently, we identified an issue with change data capture from MongoDB 5.5 and this version is not supported temporarily. We have not observed it in other 5.x versions.
- If customer migrated MongoDB from 2x to 3x, we should confirm that they migrated both storage engine and database engine. Also, make sure that setFeatureCompatibilityVersion step is performed during migration. If customer only migrates database engine; but not the storage engine, it is likely that they’ll hit issues with change data capture from MongoDB.
- Also, MongoDB Atlas Dedicated is not supported as of today.
- BSON and Extended JSON data types are supported for capture.
- By default, OCI GoldenGate MongoDB CDC Extract includes a parameter named BINARY_JSON_FORMAT. Using BINARY_JSON_FORMAT is more performance efficient. If BINARY_JSON_FORMAT is not specified, then documents are represented in Extended JSON format which is human-readable and less performance efficient compared to using BINARY_JSON_FORMAT.
- Operation types supported by OCI GoldenGate change data capture are Insert, Update and Delete. DDL operations (Create/ Alter/ Drop Collection) are not supported currently. You can manage extract behaviour with two different parameters for MongoDB DDL operations. If you use NO_ABEND_ON_DDL in your MongoDB extract parameter, extract process skips DDL operations and continue processing the next operation. If you use ABEND_ON_DDL, the extract will abend in case of a DDL.
Another pre-requisite is replica set configuration in the source MongoDB. OCI GoldenGate reads the changed data from MongoDB oplog files and because of that, you need a replica set configured in your MongoDB environment. If not, OCI GoldenGate cdc extract will fail.
OCI GoldenGate for Big Data has 2 different extract types:
- Initial Load Extract: It scans the full MongoDB database/ collections and writes them into a file format that can be used by initial load replicat process for different targets.
- Change Data Capture (CDC) Extract: CDC Extract captures supported operations from MongoDB database/ collection and writes them into a trail file which can be used to replicate the captured data to a supported target.
In this blog, I assume that you already have a supported MongoDB configured with replica set and an Autonomous JSON Database instance up & running. If you need to set up an Autonomous JSON Database, you can check this blog posted by Roger Ford.
We can configure no downtime migration in 5 steps:
- Create Connections
- Create and run MongoDB Chand Data Capture Extract
- Create and run MongoDB Initial Load Extract
- Create and run Autonomous JSON Initial Load Replicat
- Create and run Autonomous JSON Change Data Capture Replicat
1. Create Connections
We need to configure two different connections: MongoDB connection and Autonomous JSON connection.
To configure MongoDB connection:
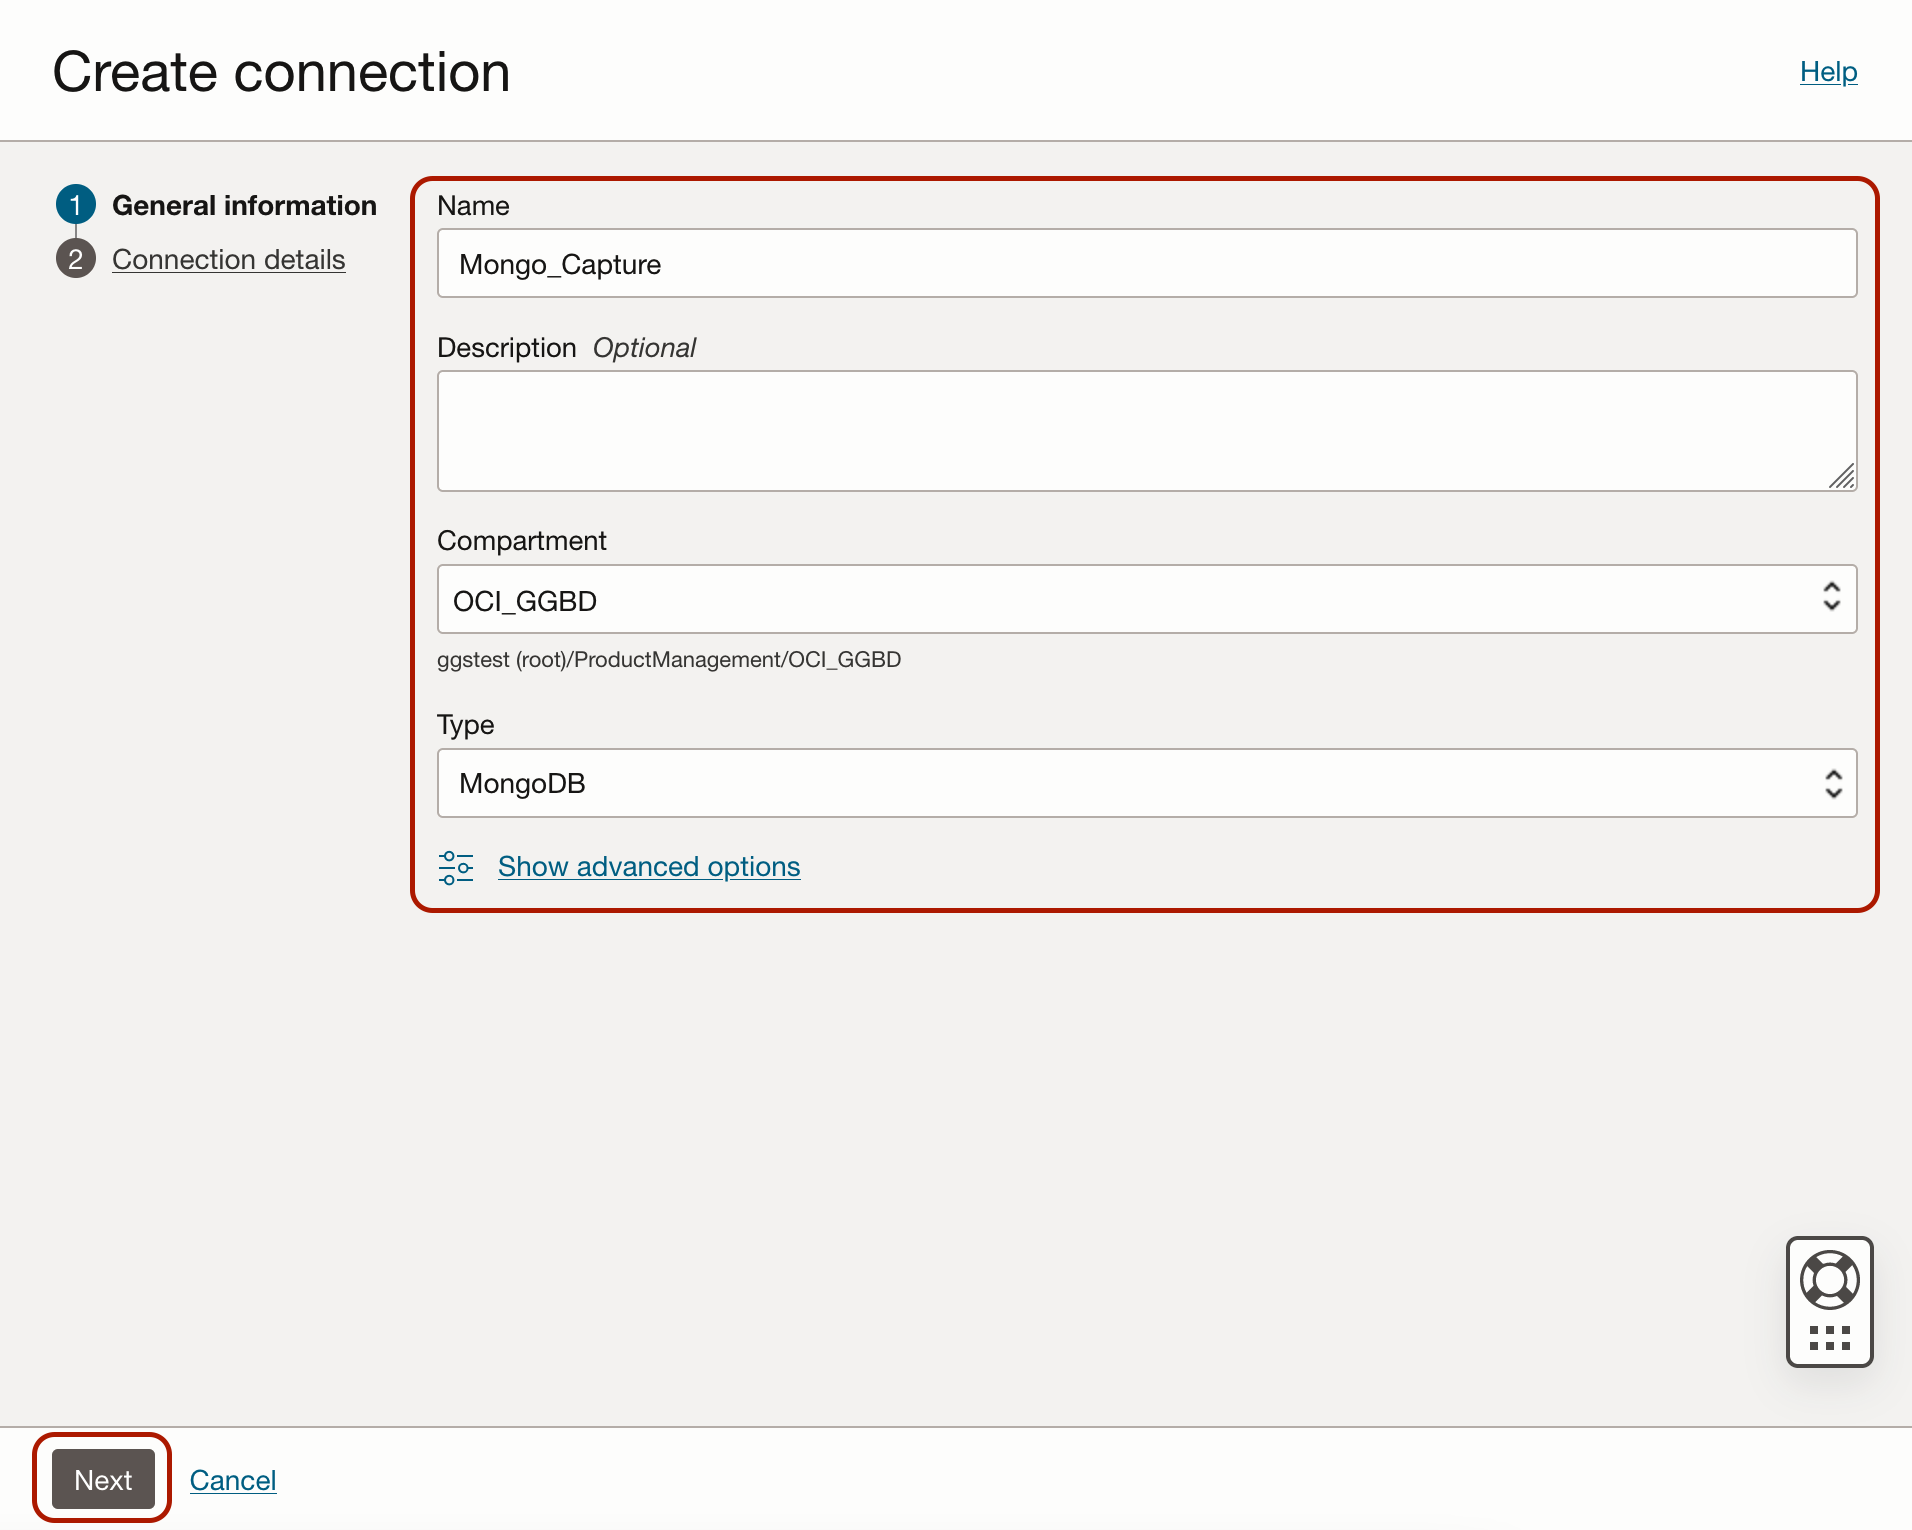
Click on Create Connection in OCI GoldenGate. Provide a Name, select a Compartment and select Type as MongoDB. Click Next.
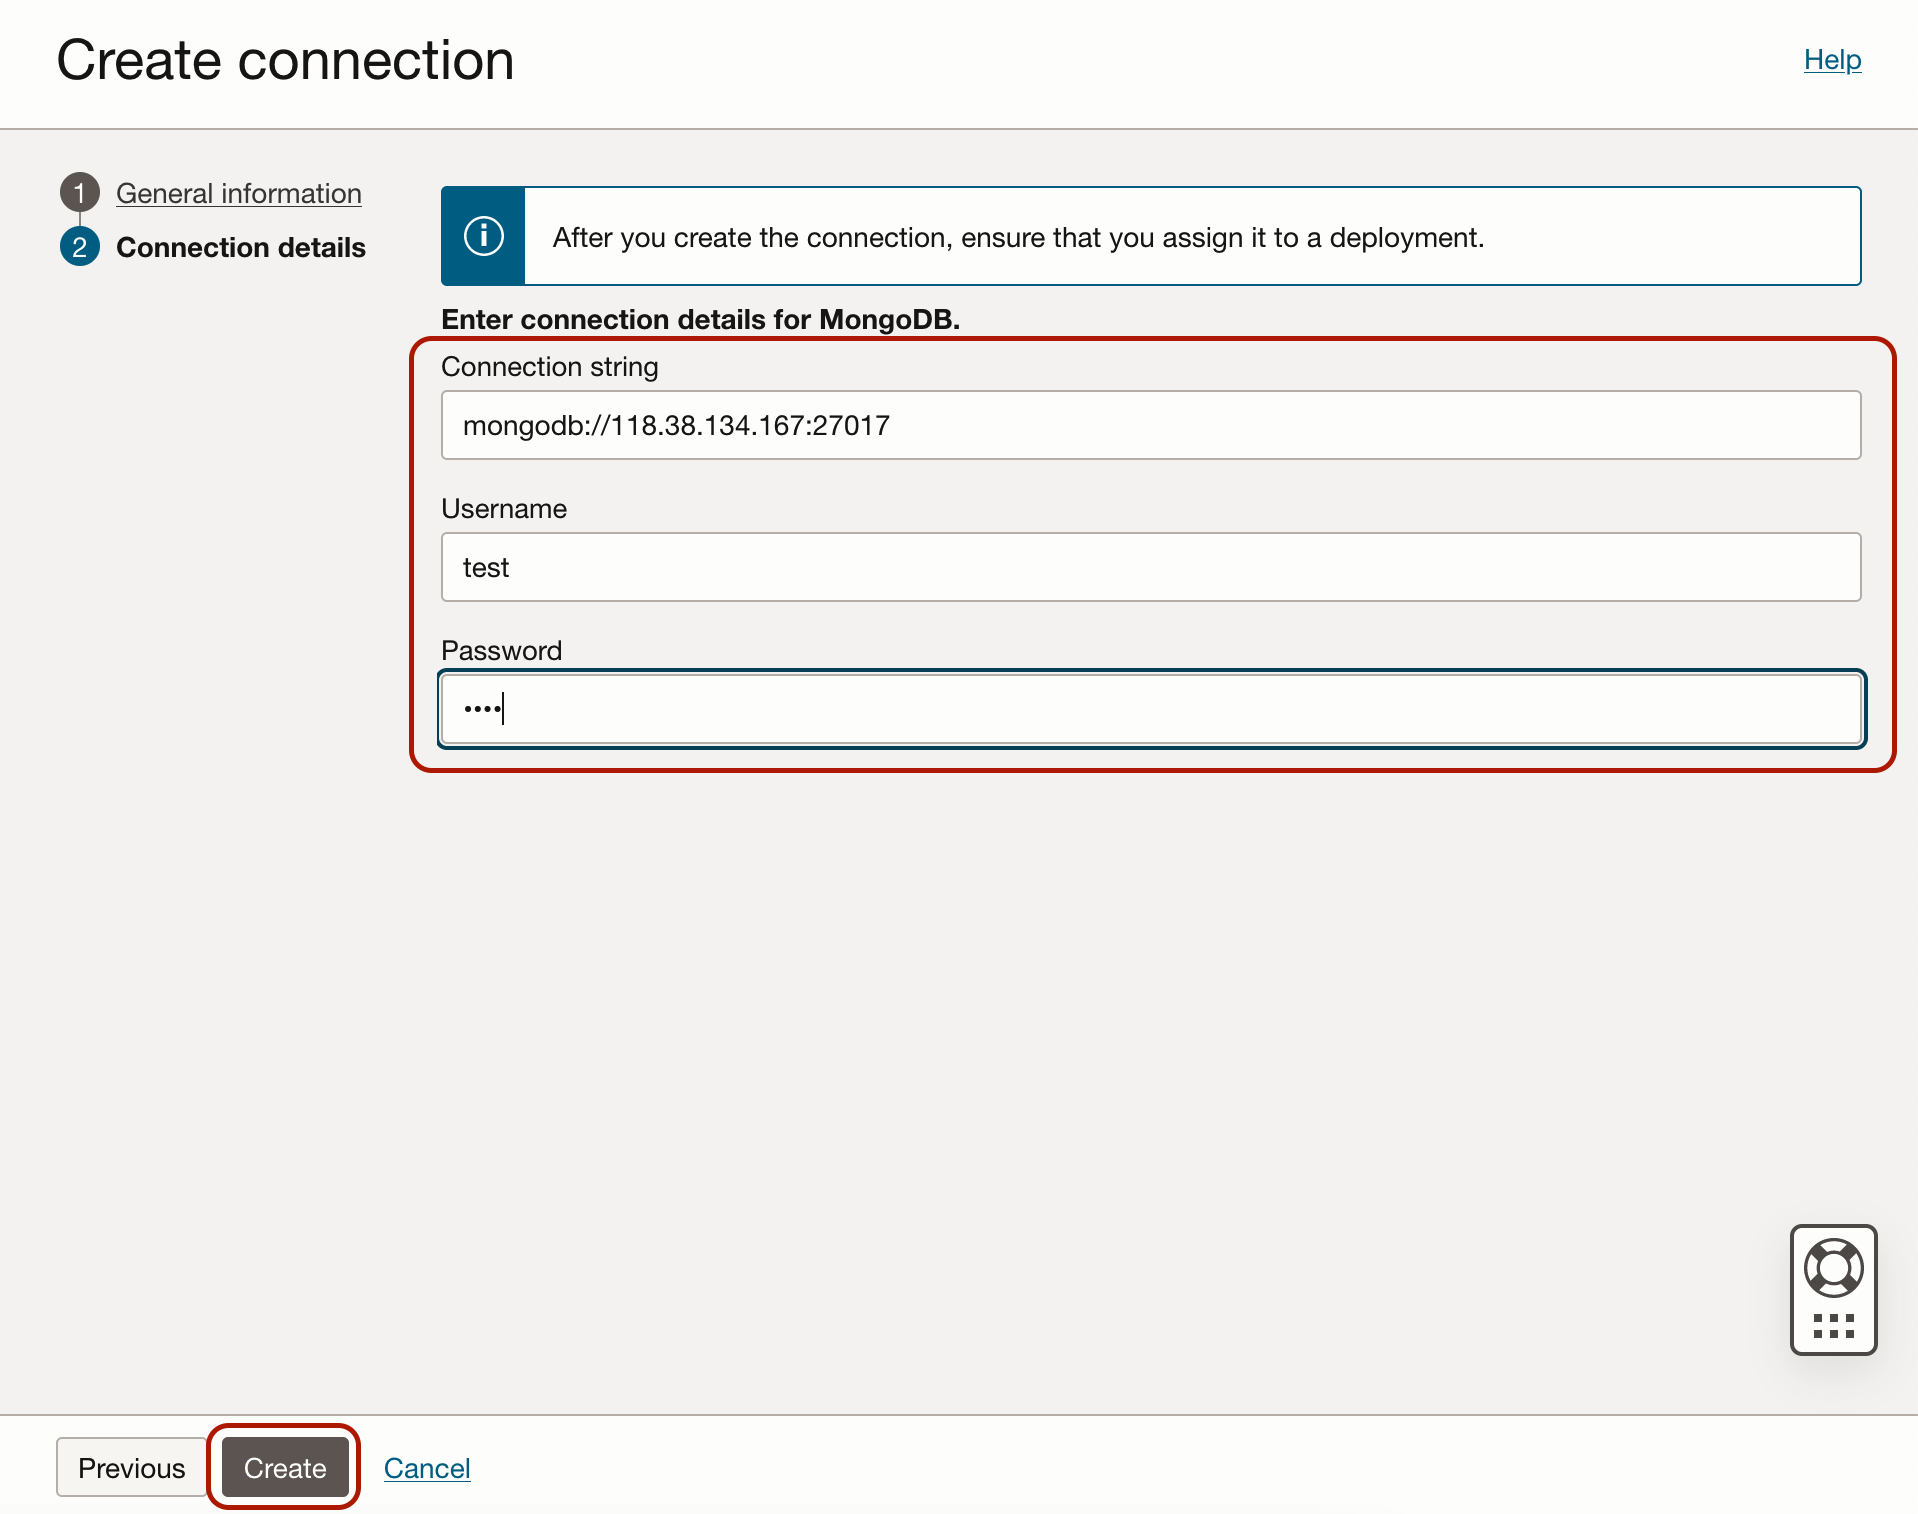
Provide the Connection String without Username and Password. For example, if I use “mongodb://test:test@118.38.134.167:27017” for connecting to my MongoDB instance from a client, I need to provide the connection string as mongodb://118.38.134.167:27017. Then I need to provide the Username and Password in the dedicated fields. Click Create.
!!! MongoDB capture uses Oracle GoldenGate credential store to manage user IDs and their encrypted passwords (together known as credentials) that are used by Oracle GoldenGate processes to interact with the MongoDB database. The credential store eliminates the need to specify usernames and clear-text passwords in the Oracle GoldenGate parameter files.
OCI GoldenGate uses connection URI to connect to a MongoDB deployment. Authentication and Security is passed as query string as part of connection URI. You can check security and authentication document for more details.
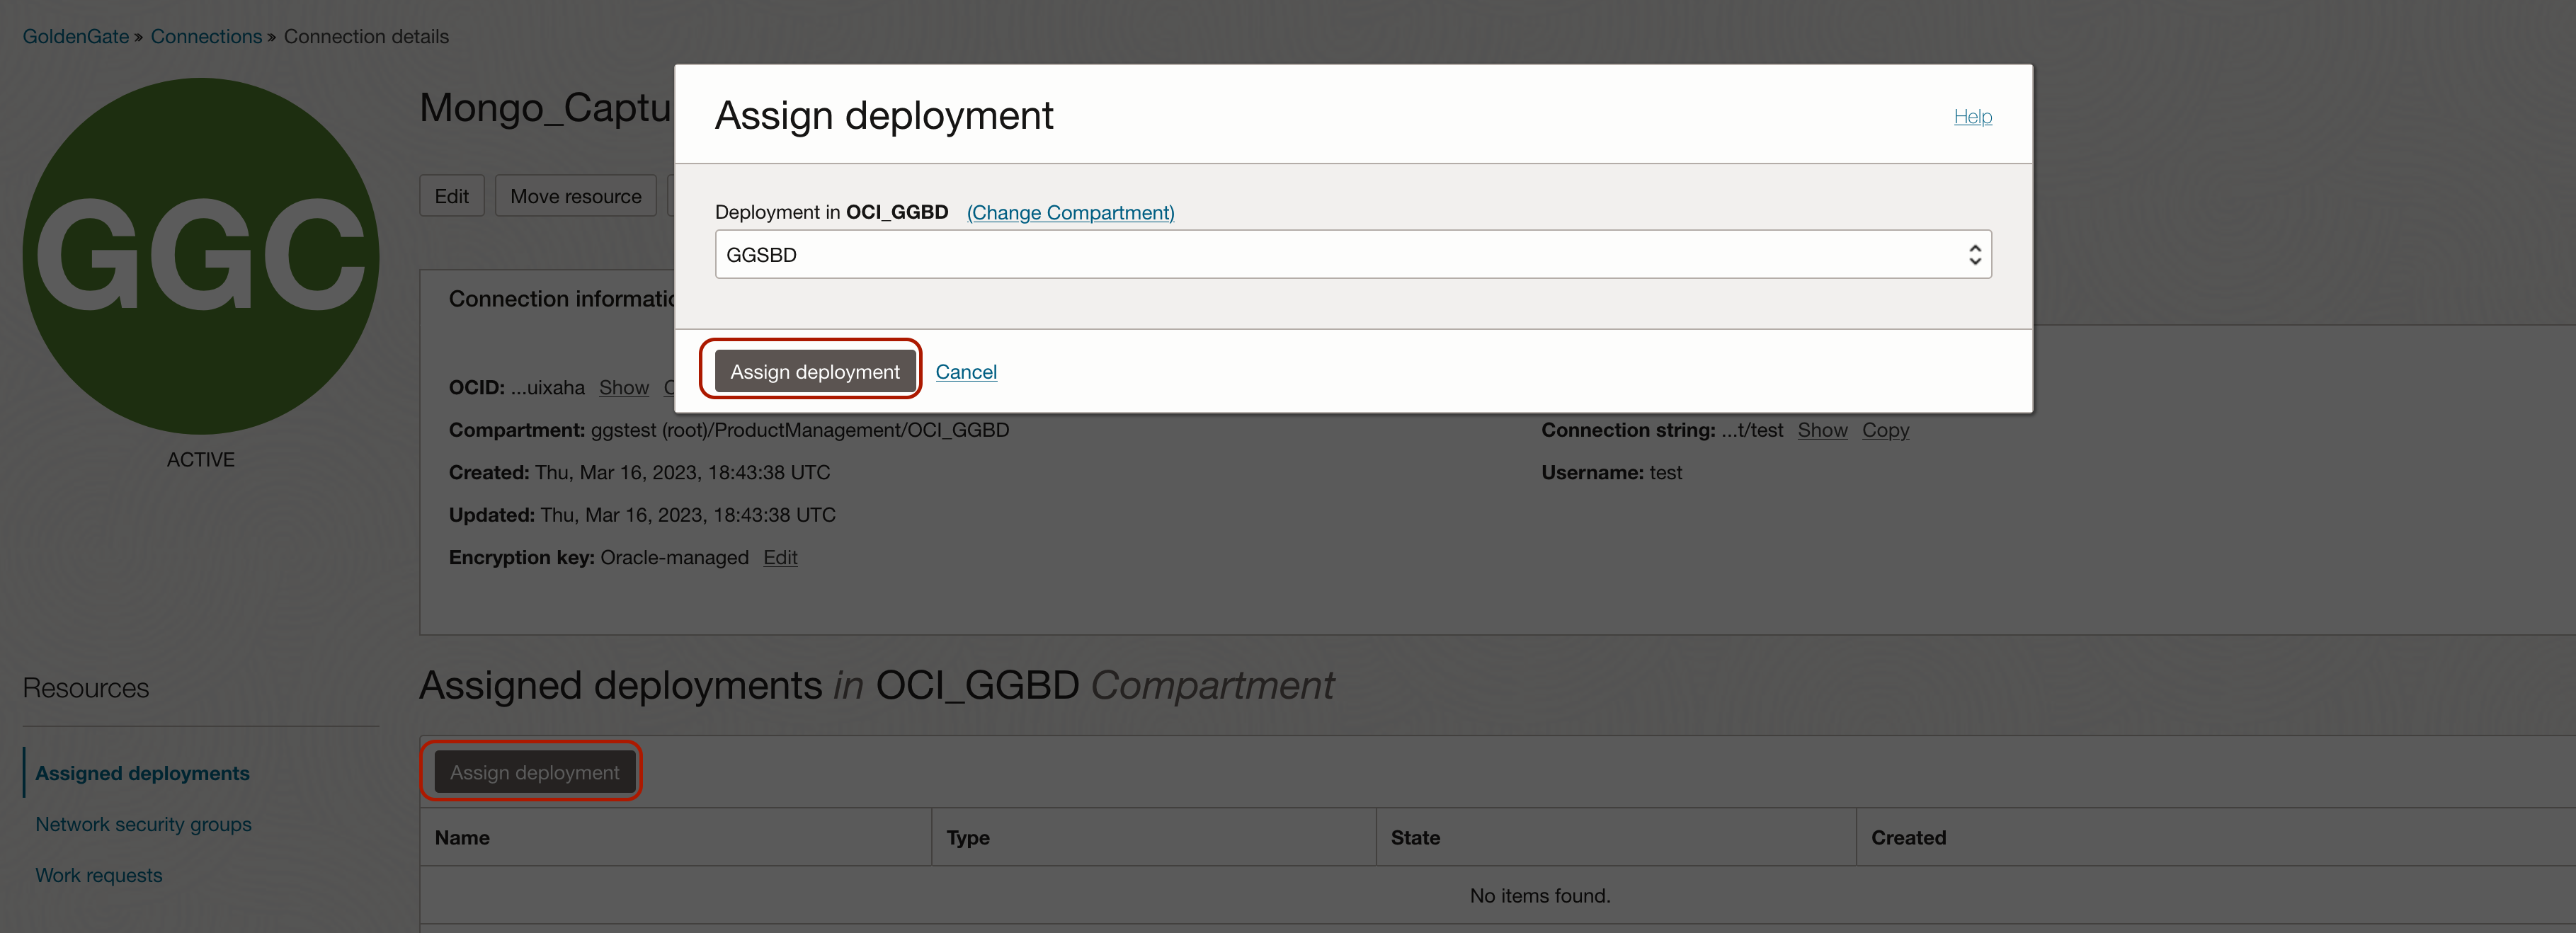
When connection is available, assign it to your OCI GoldenGate Big Data deployment.
To configure Autonomous JSON connection:
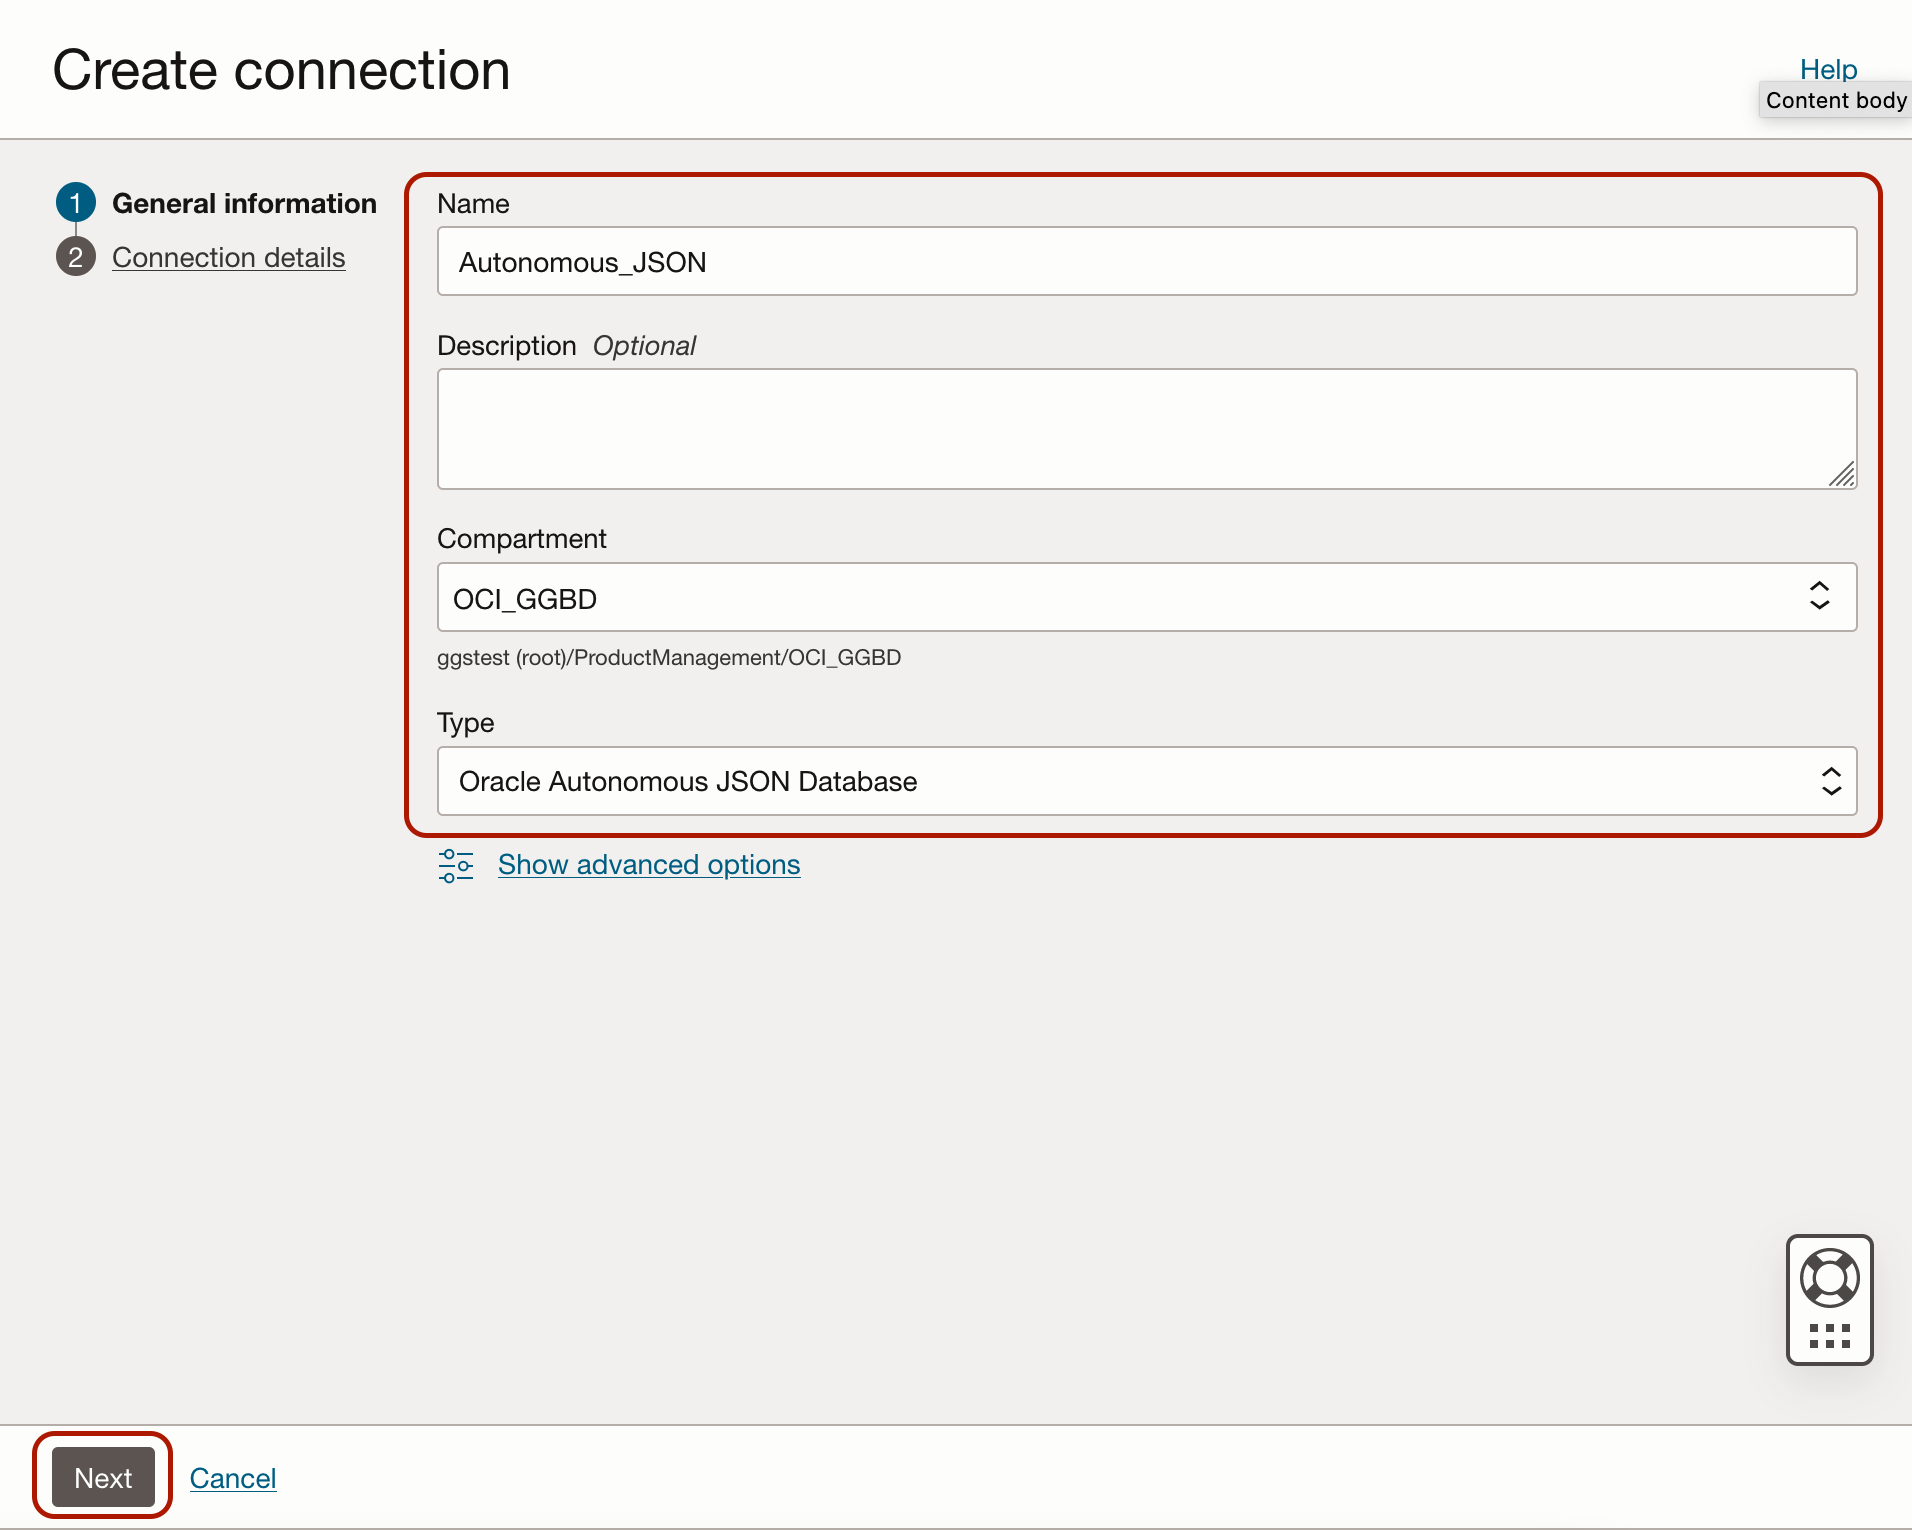
Click on Create Connection in OCI GoldenGate. Provide a Name, select a Compartment and select Type as Oracle Autonomous JSON Database. Click Next.
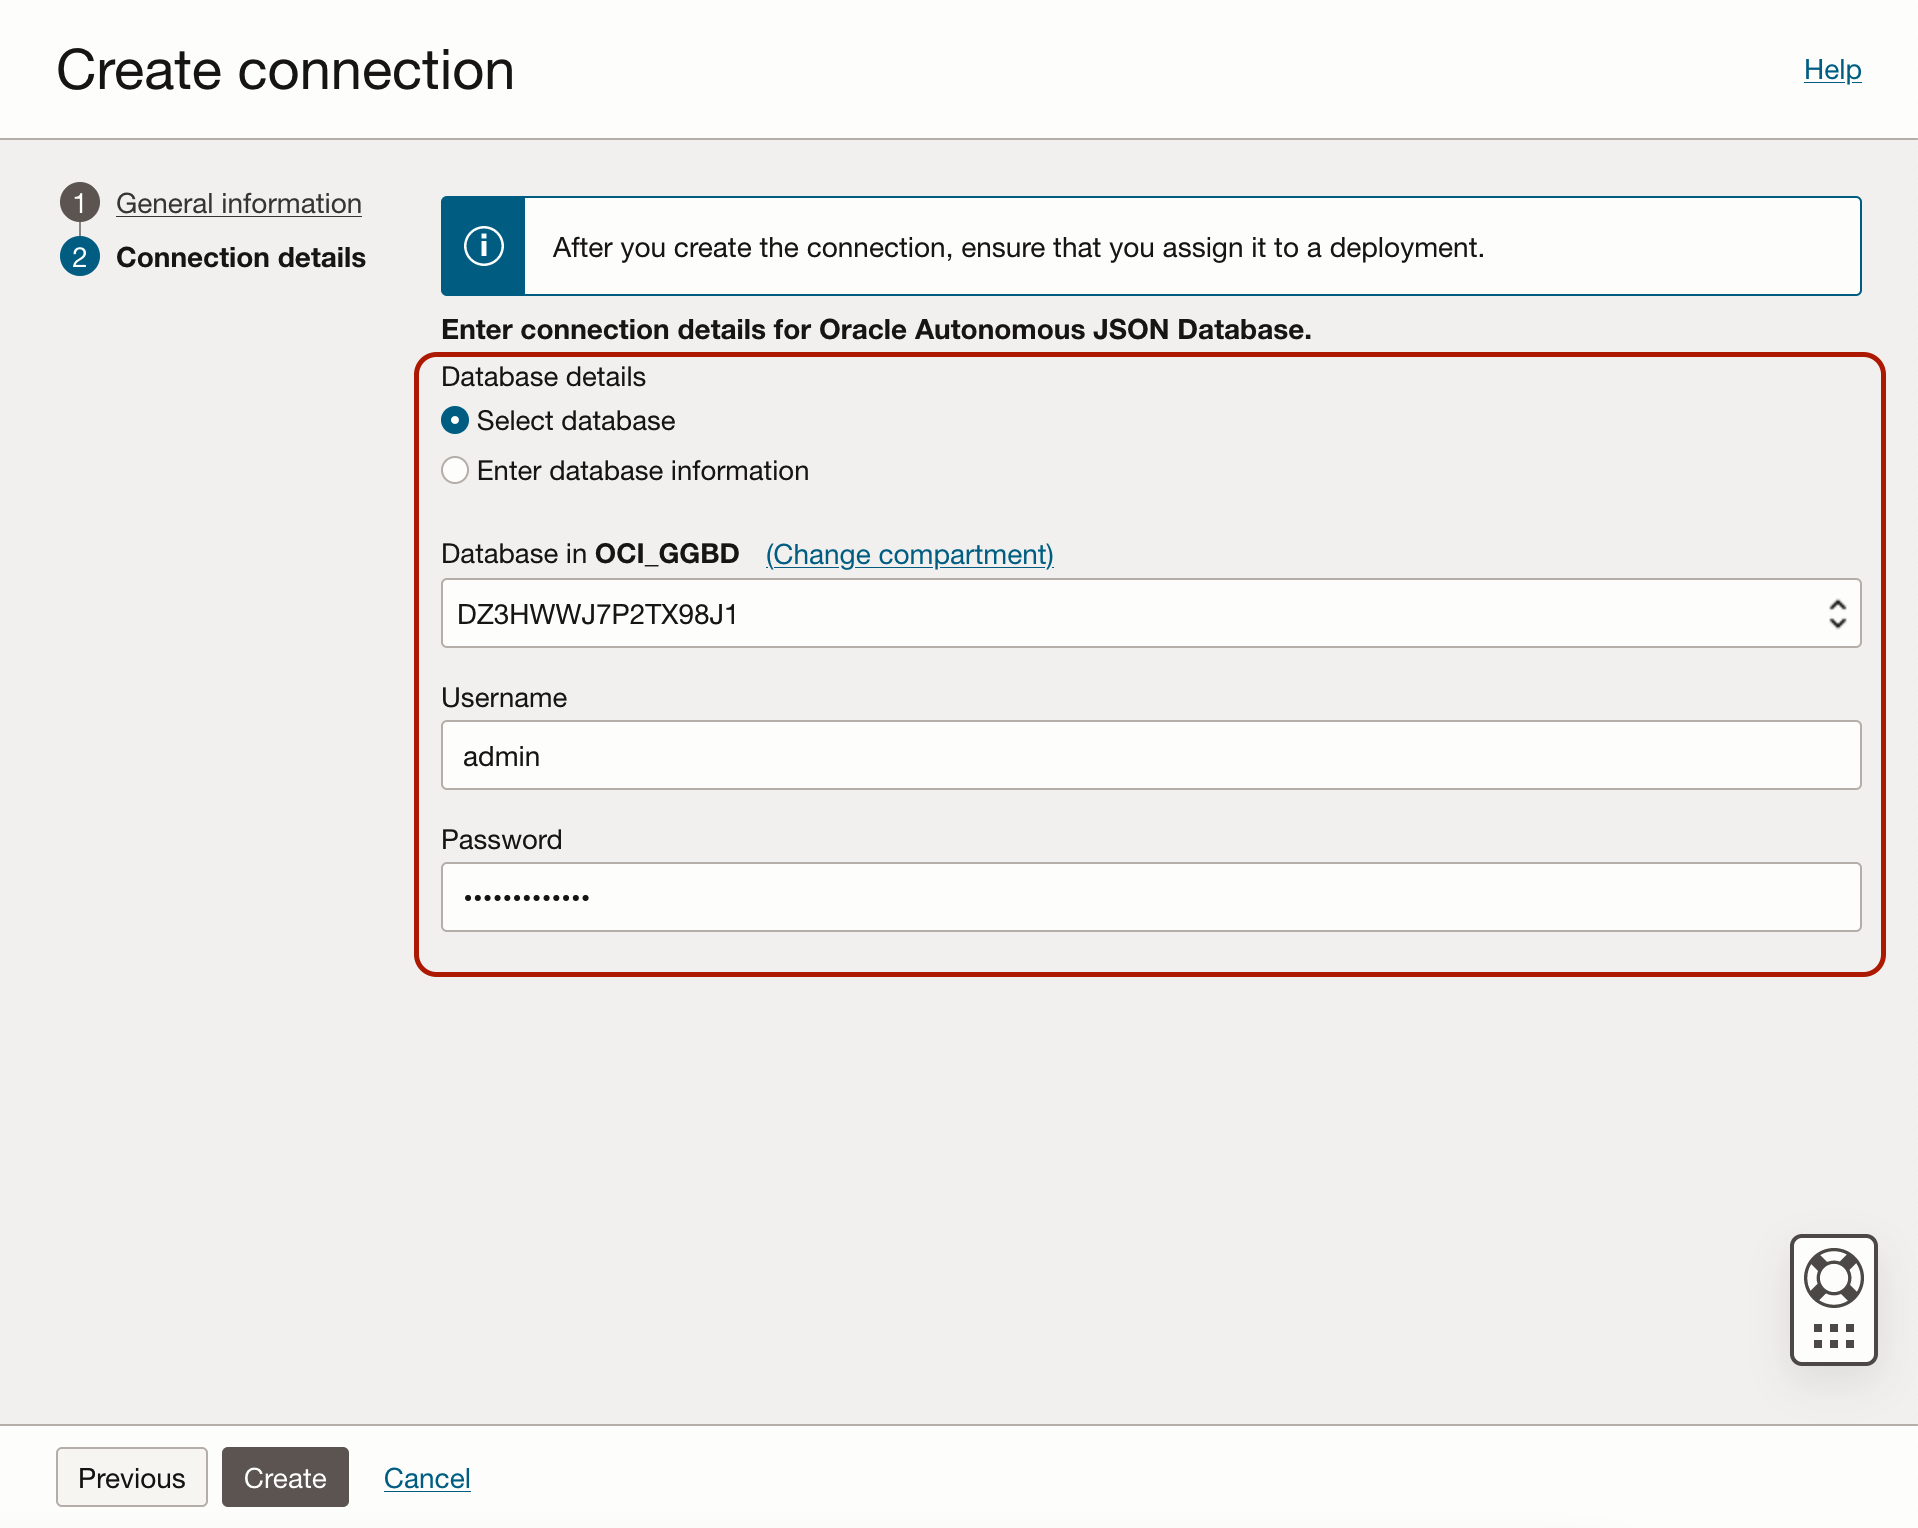
Click Select Database, change to Compartment where you run the Autonomous JSON Database, Select your target Autonomous JSON Database from the list, provide Username and Password. Click Create.
When connection is available, assign it to your OCI GoldenGate Big Data deployment.
2. Create and run MongoDB Change Data Capture Extract
Log into OCI GoldenGate console and click Add Extract.
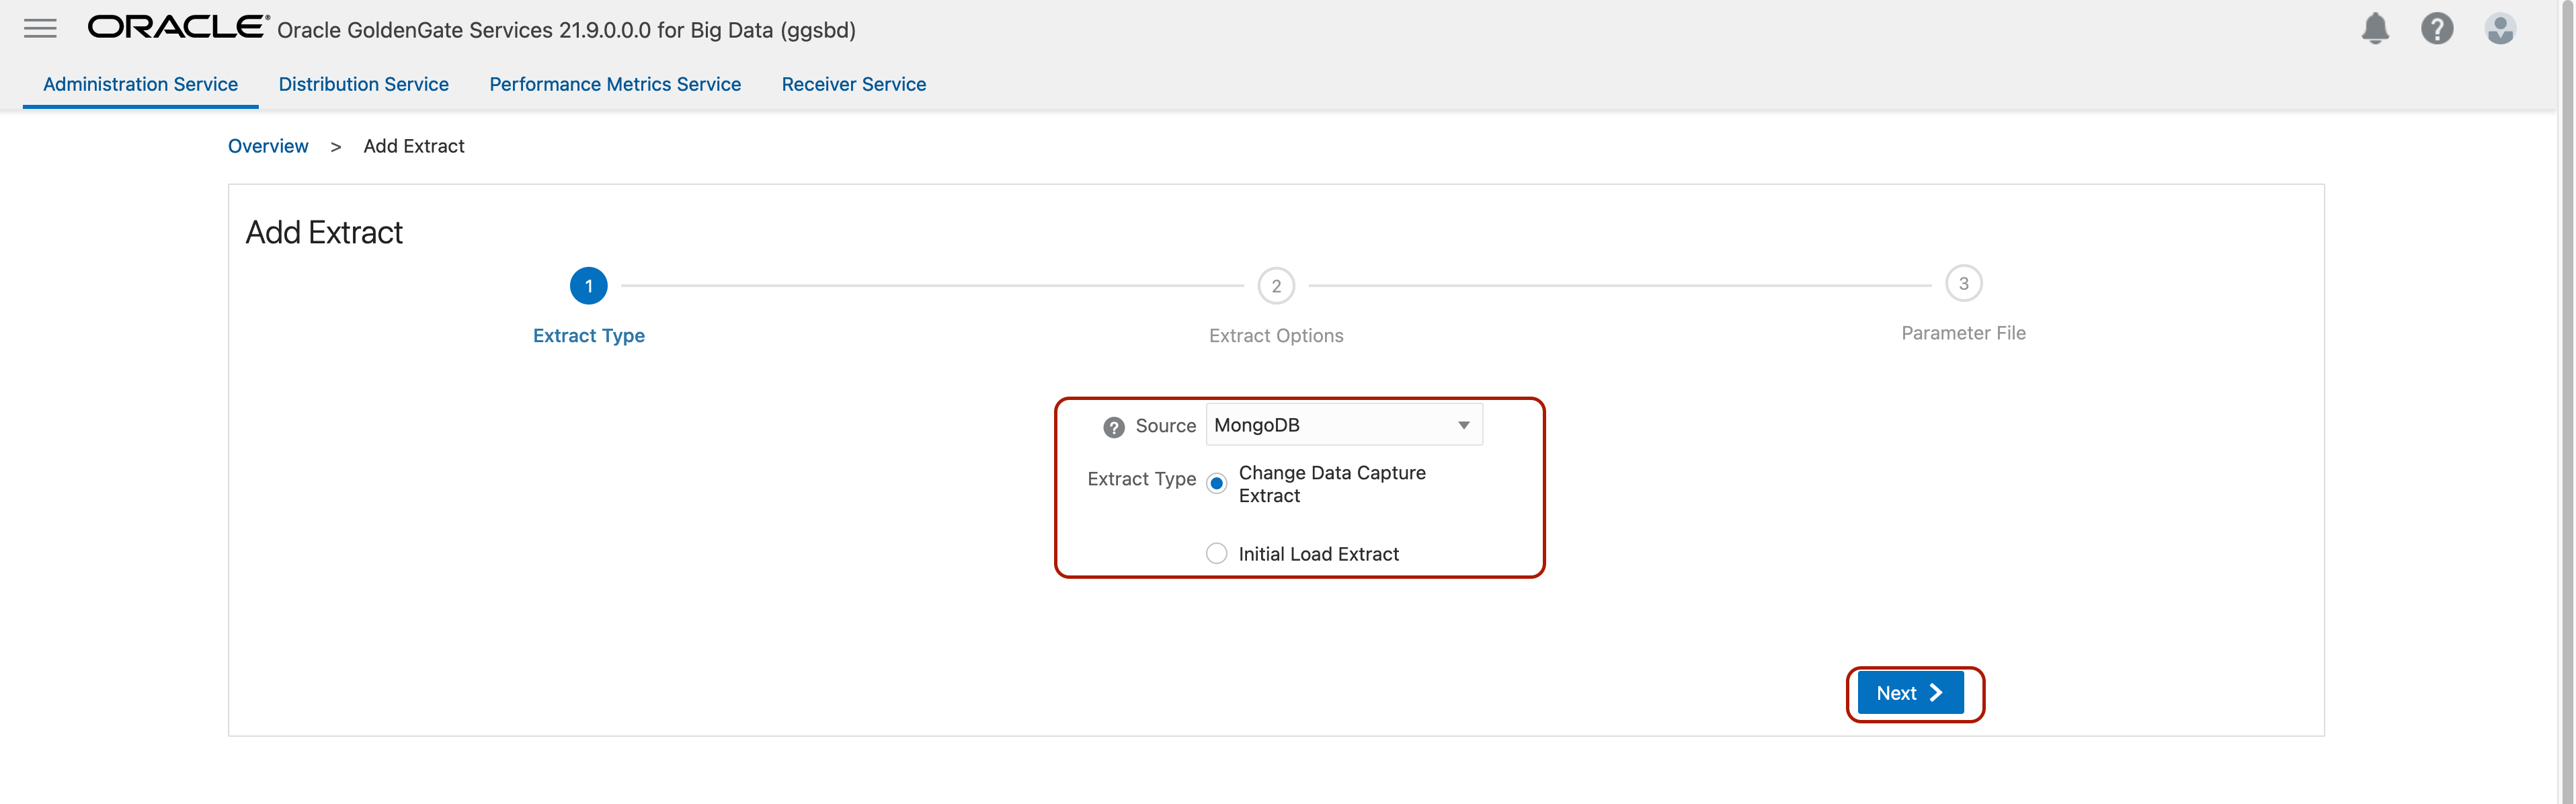
Select Source as MongoDB and Extract Type as Change Data Capture Extract. Click Next.
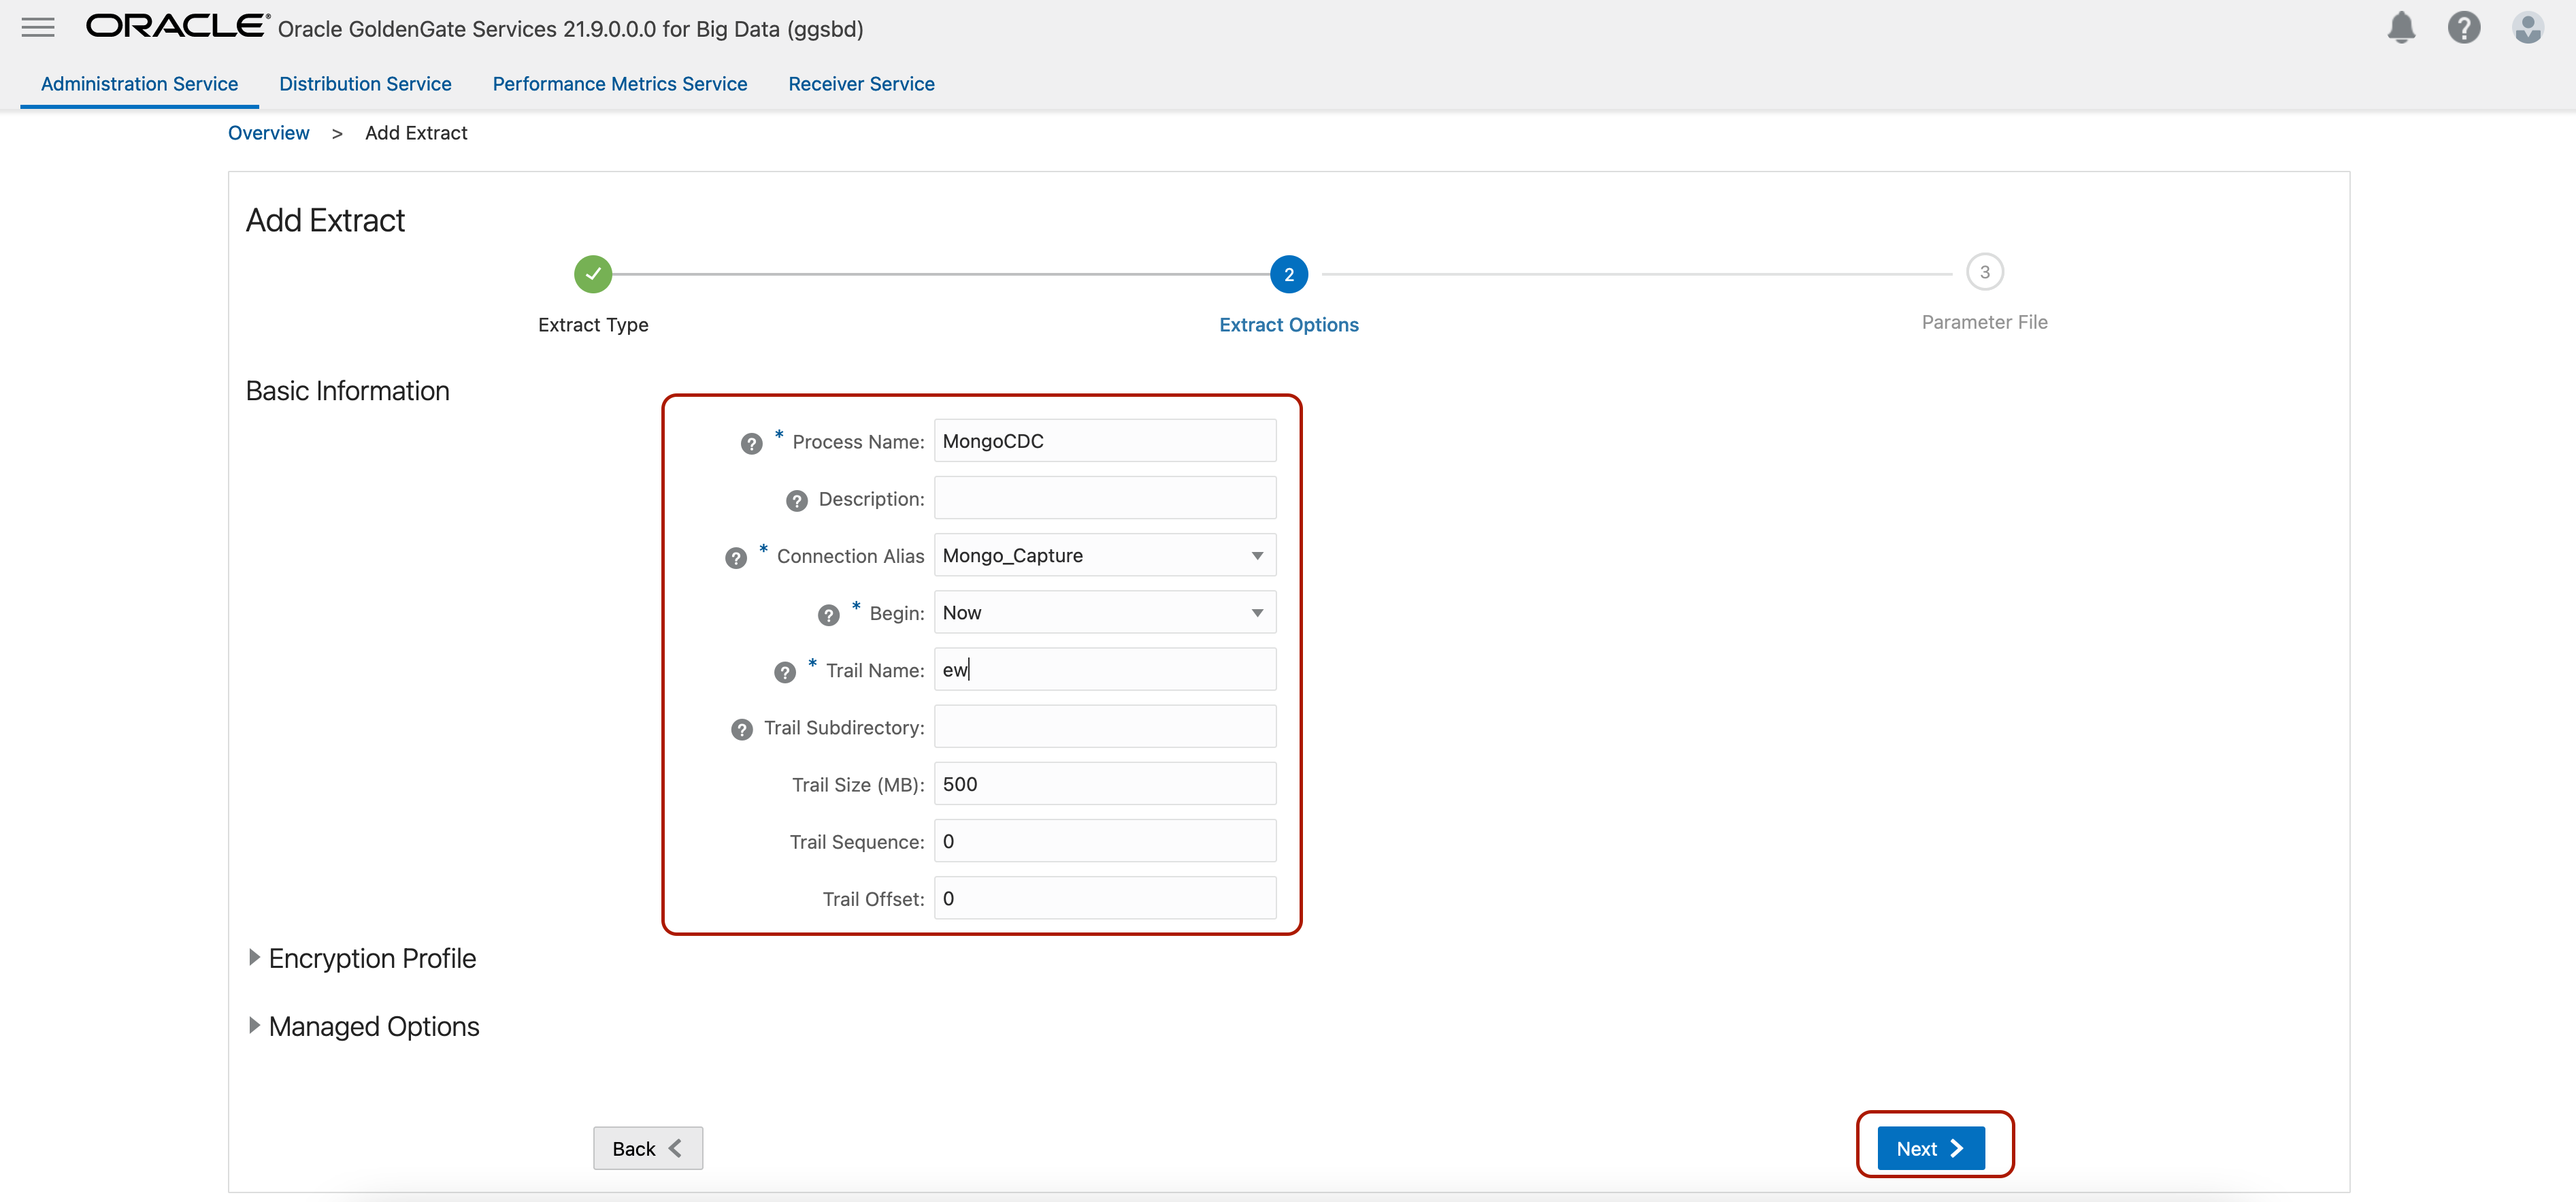
Enter Process Name, select the assigned connection in Connection_Alias, leave Begin as Now, enter two-character Trail Name and click Next.
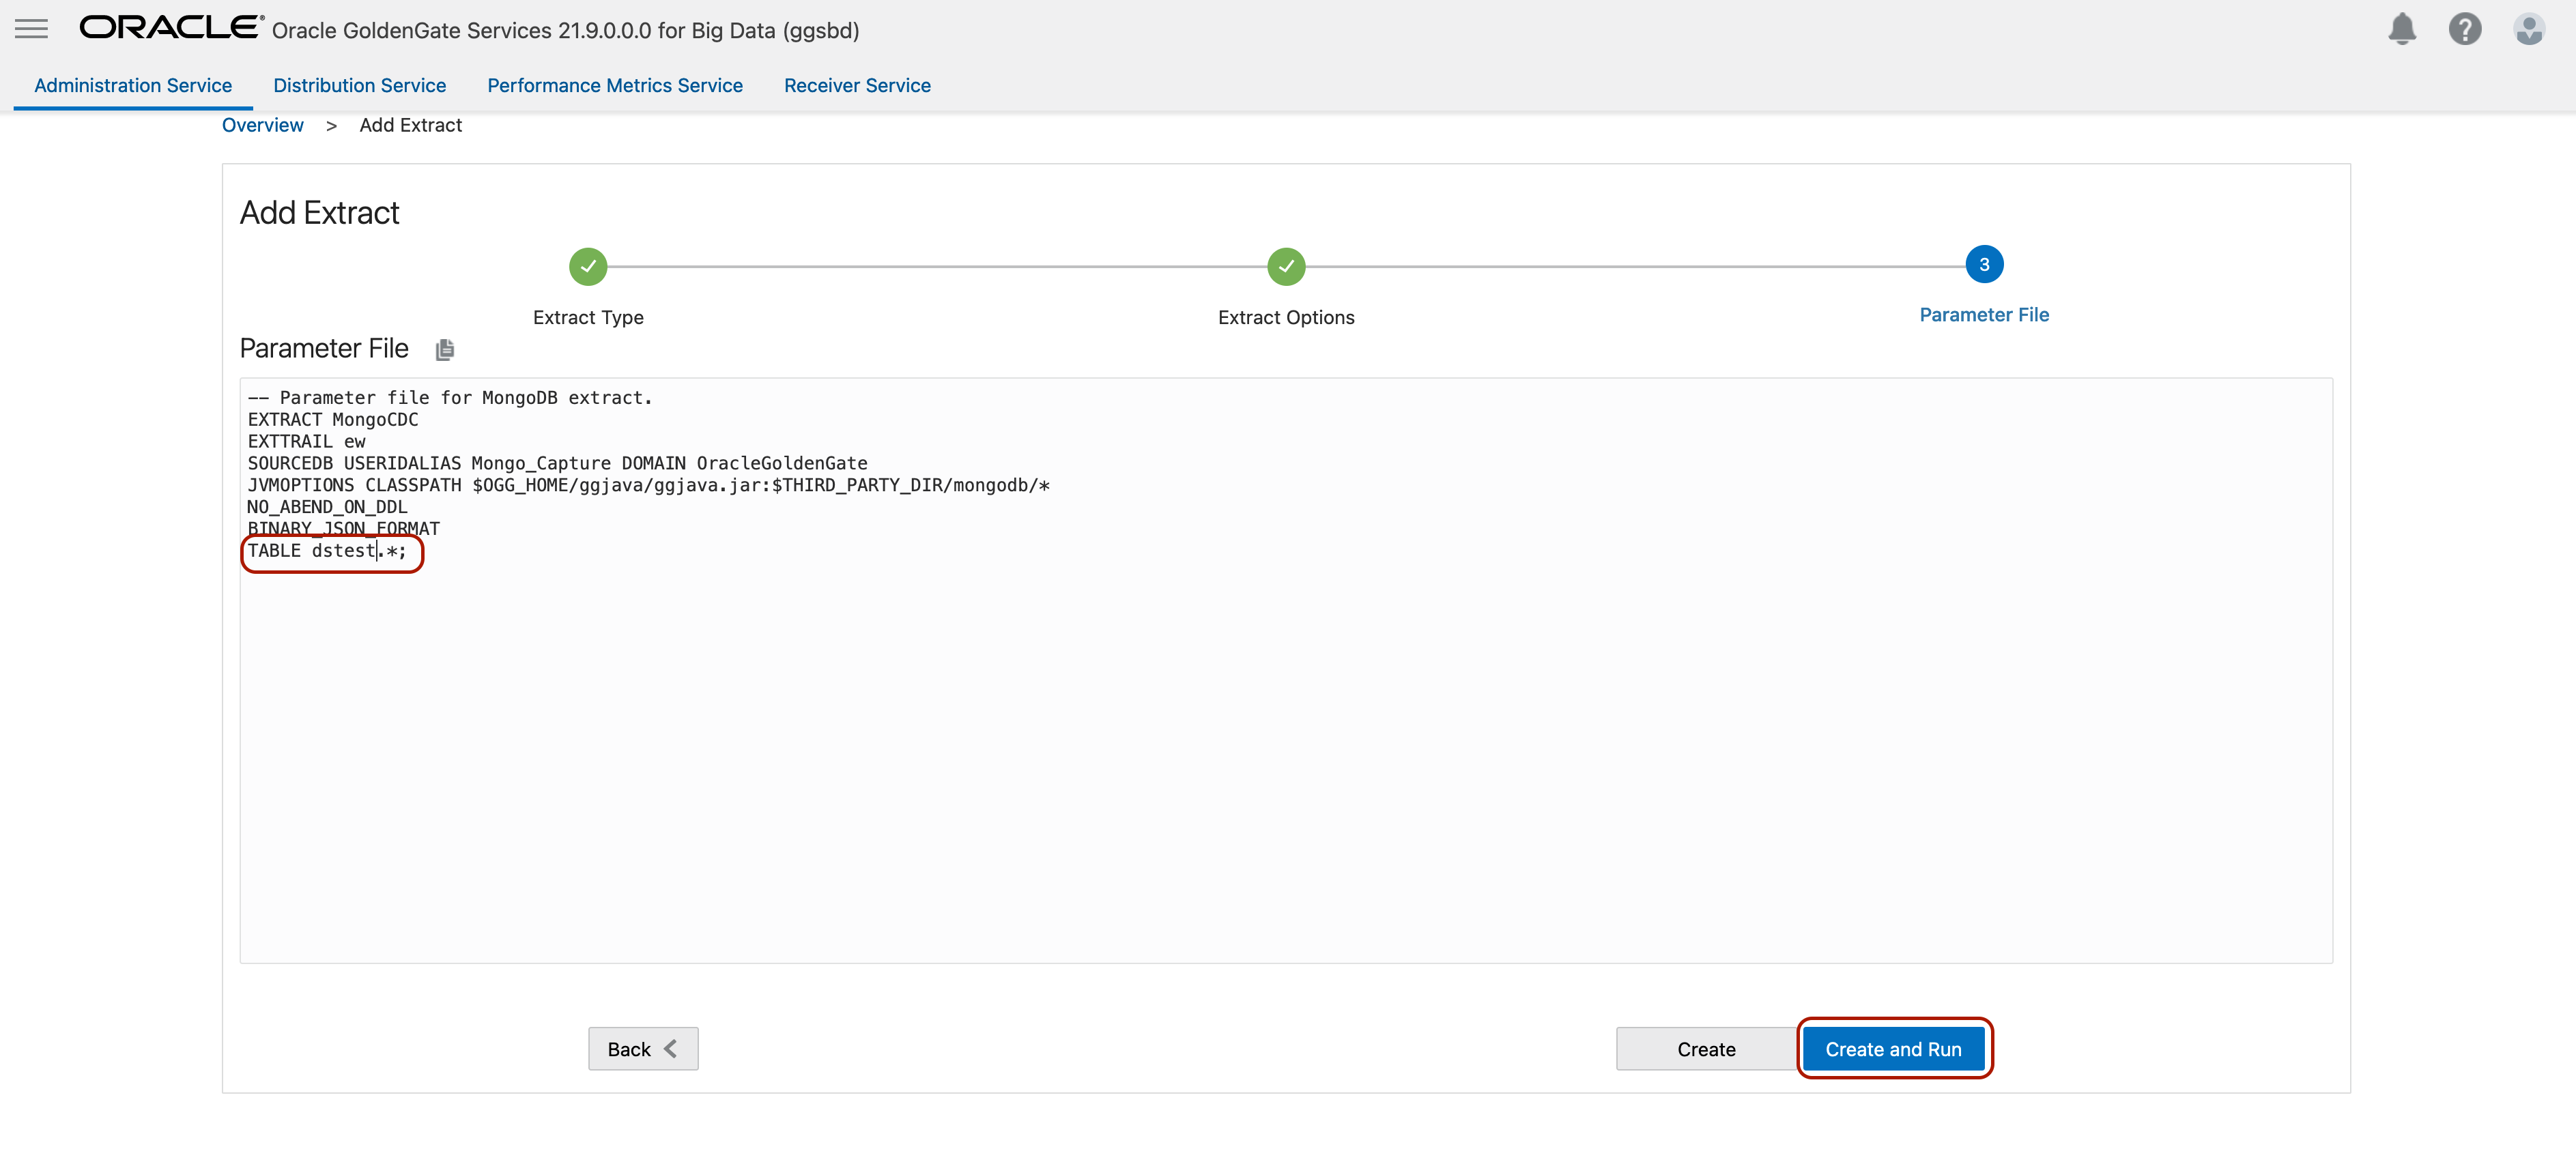
Update source database/ collection mapping with TABLE source.*; First part represents the database and second part represents the collection. For this blog, I’ll run extract from all collections in a database called dstest. I’ll update as TABLE dstest.*;
Click Create and Run.
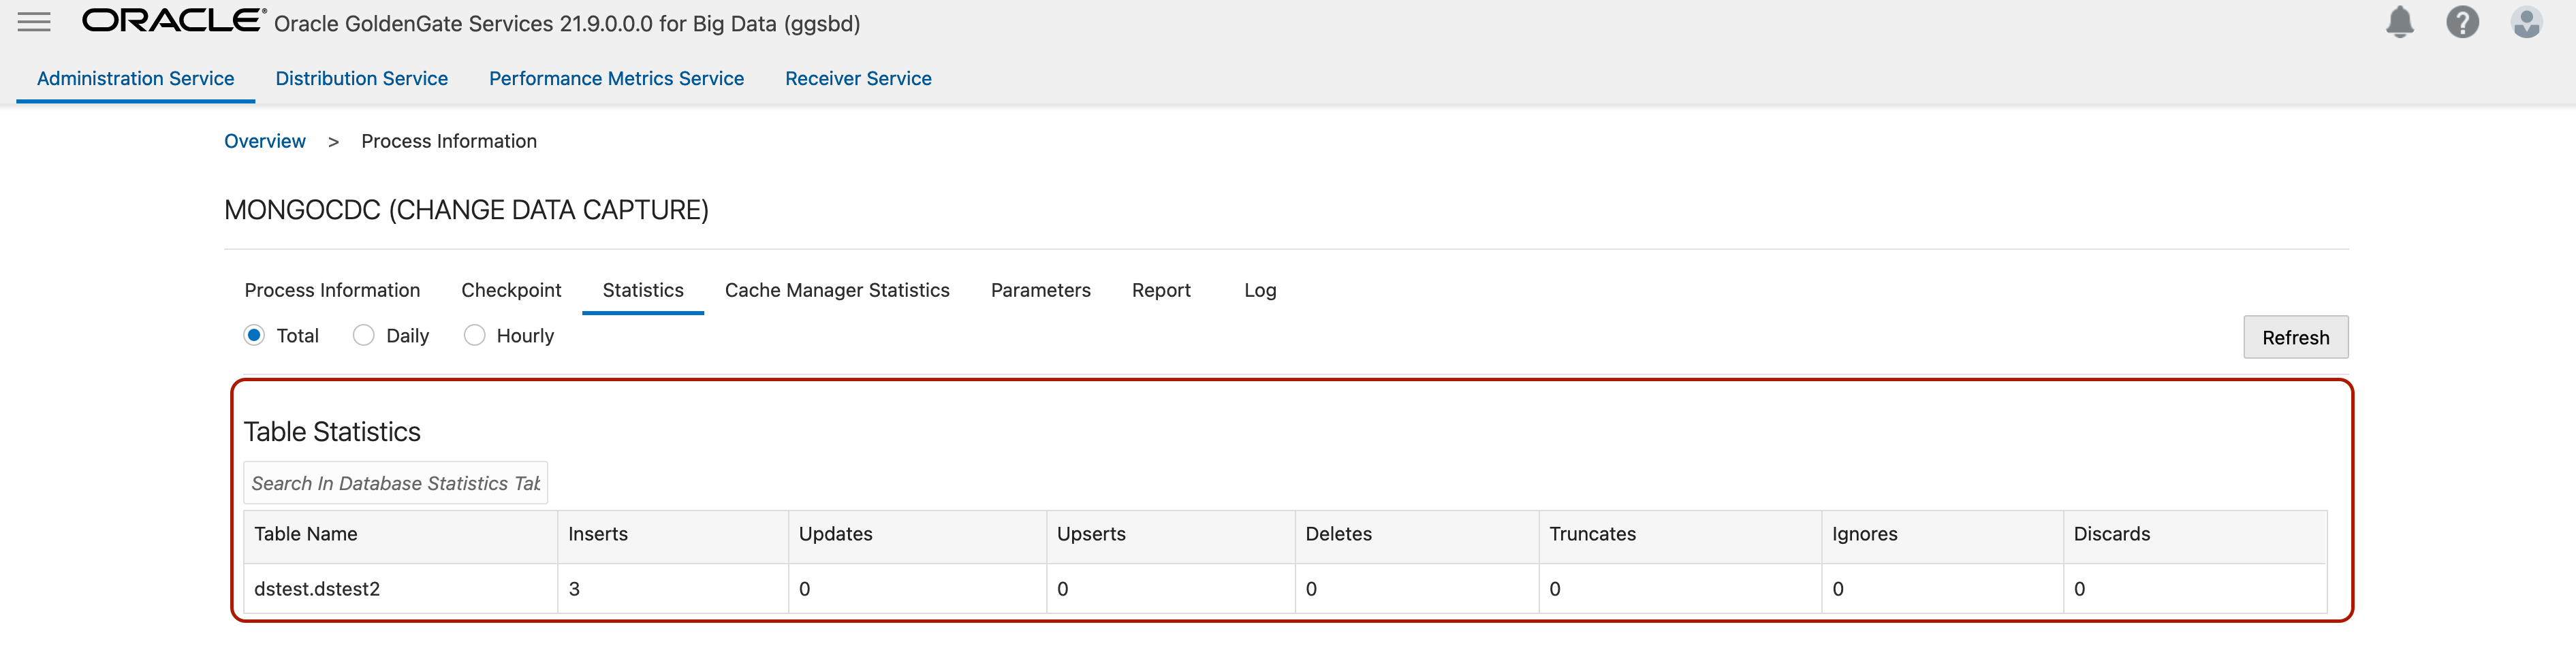
You’ll see your extract in a running status with a green check. Go to Extract Actions, Details, Statistics to observe extract statistics.
3. Create and run MongoDB Initial Load Extract
Log into OCI GoldenGate console and click Add Extract.

Select Source as MongoDB and Extract Type as Initial Load Extract. Click Next.

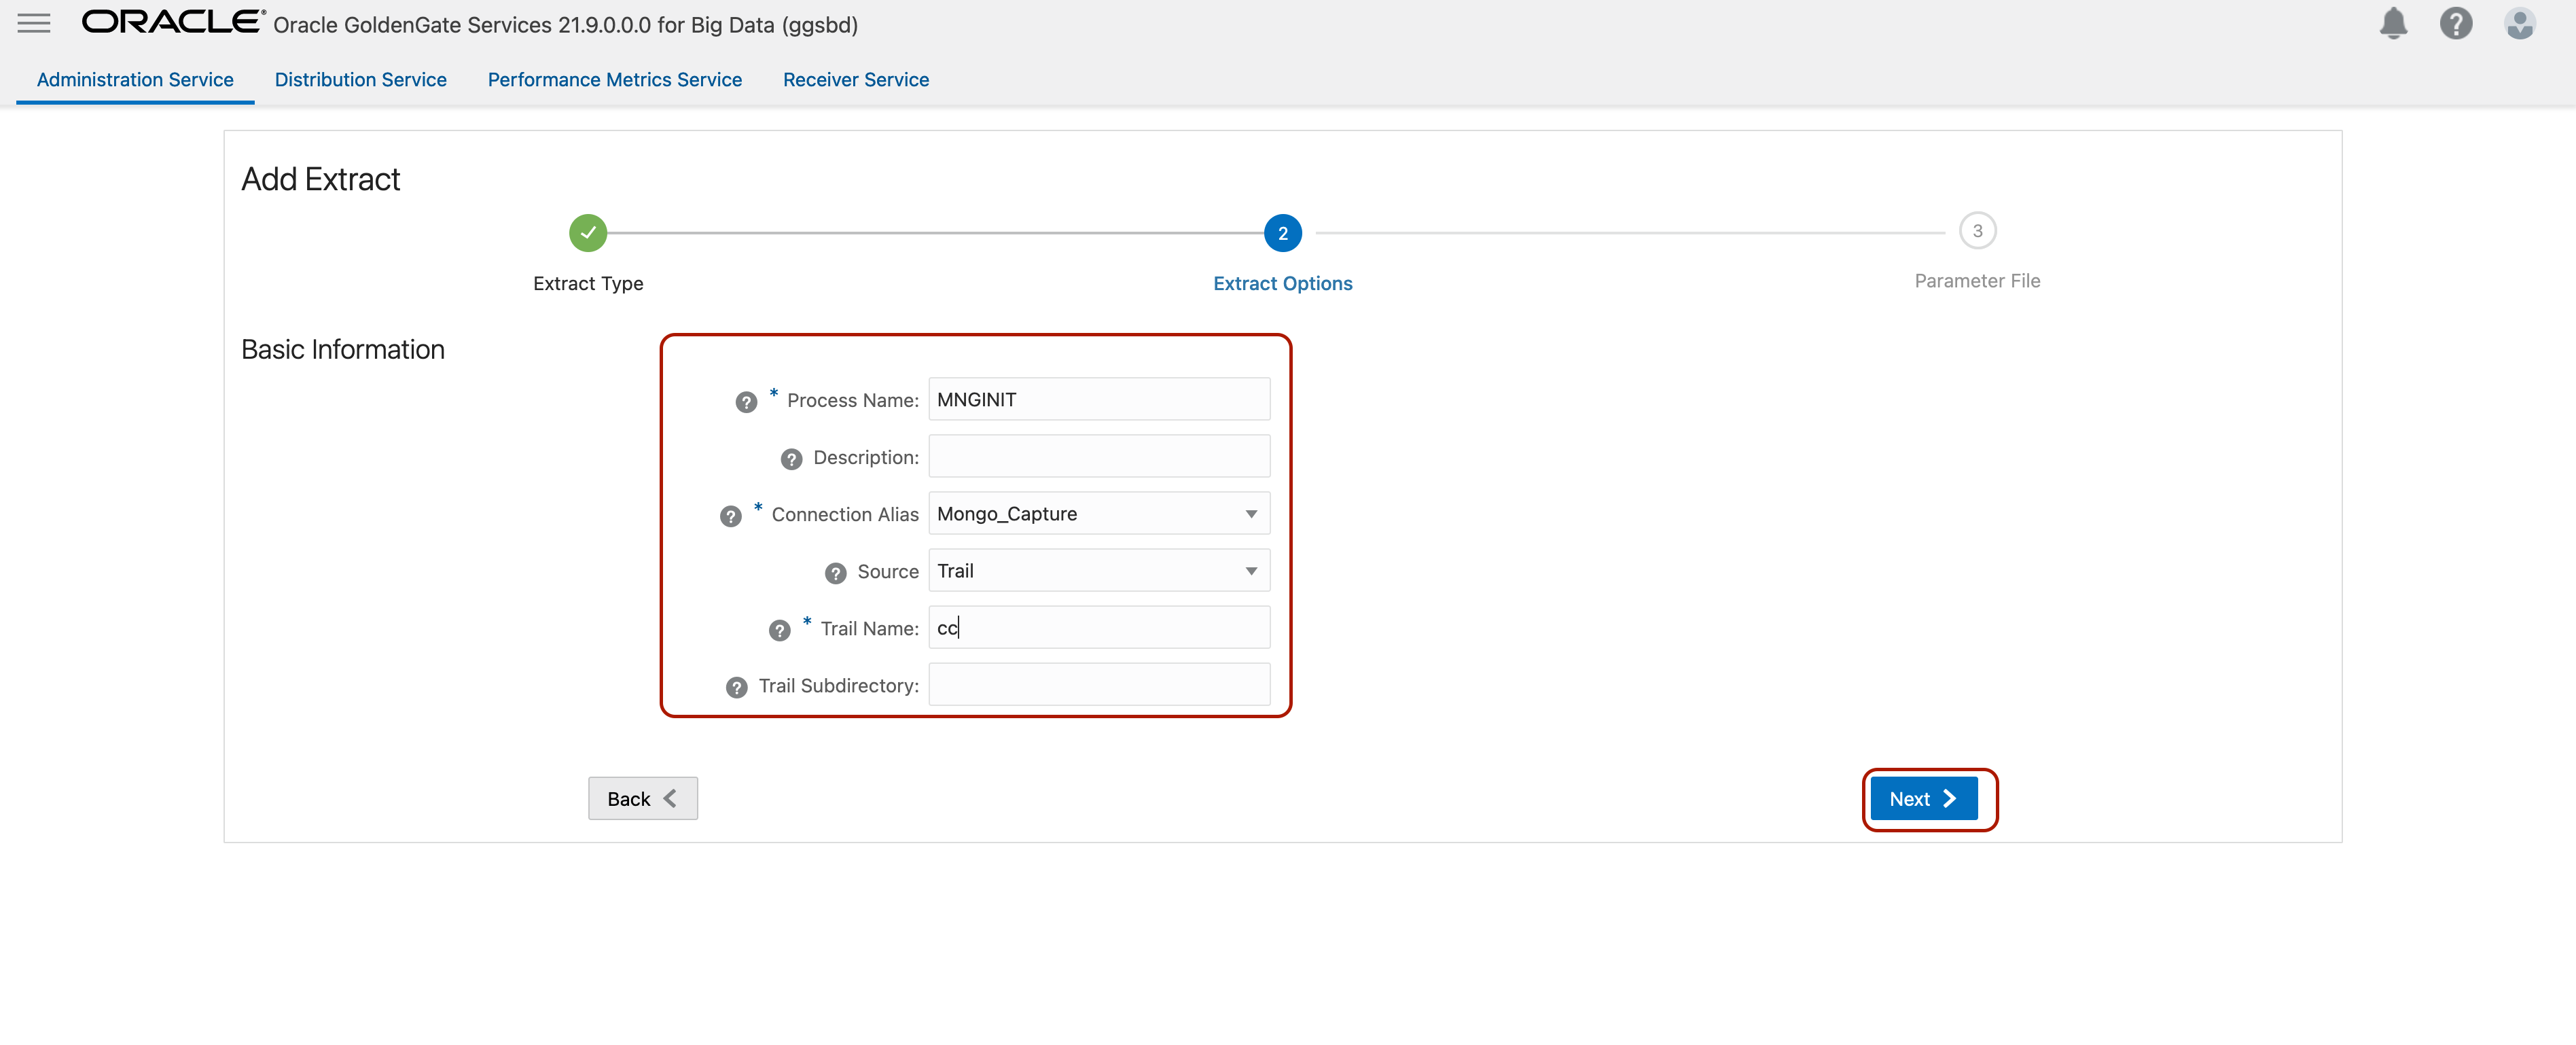
Enter Process Name, select the assigned connection in Connection_Alias, keep Source as Trail, enter two-character Trail Name and click Next.
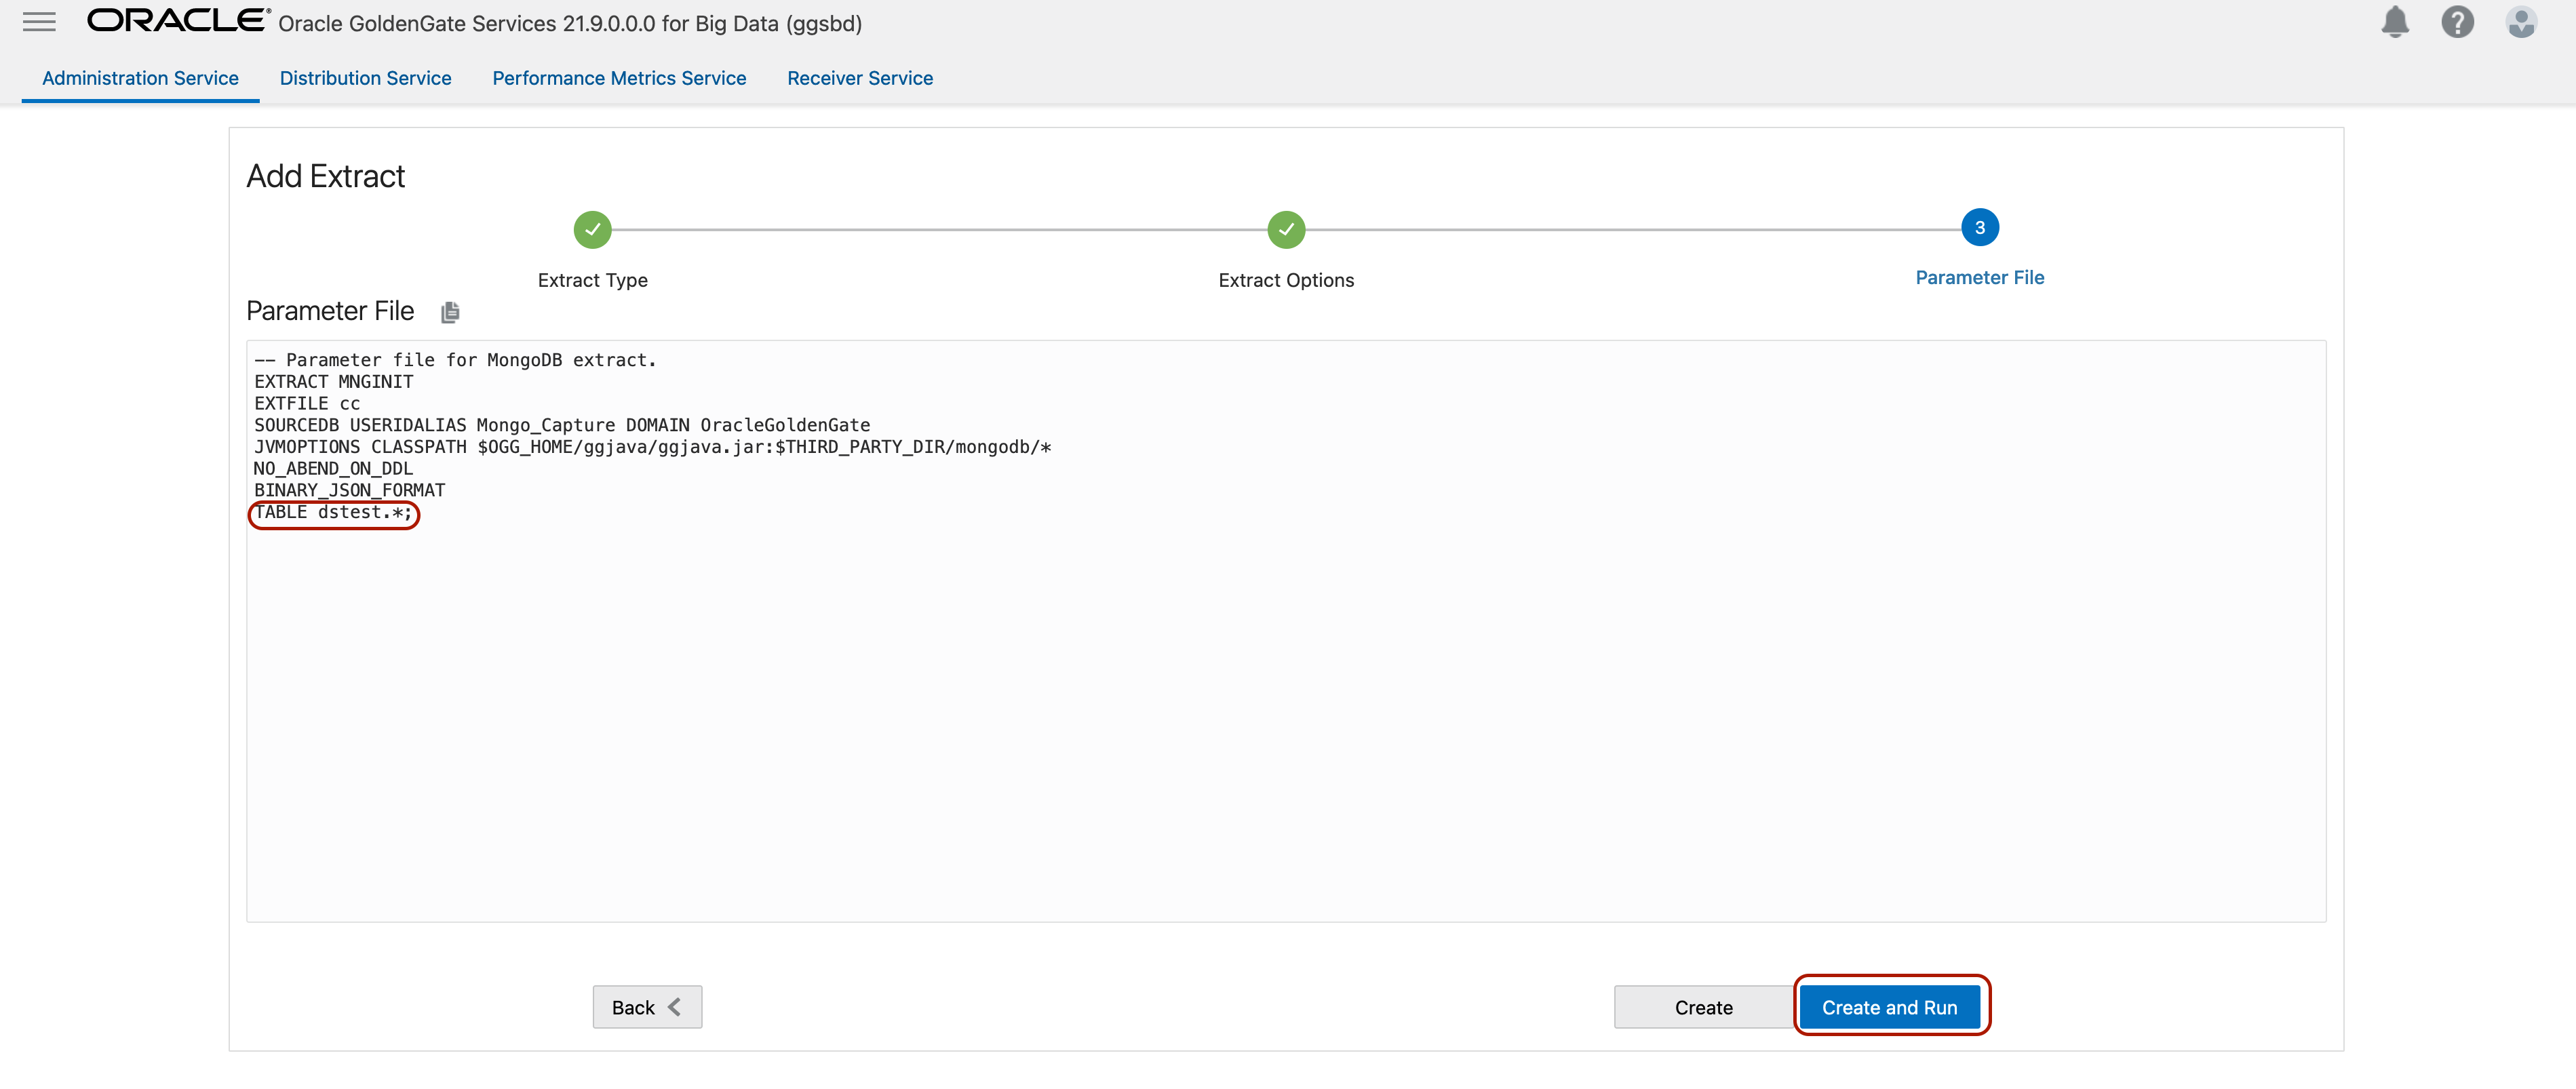
Update source database/ collection mapping with TABLE source.*; First part represents the database and second part represents the collection. For this blog, I’ll run the initial load from all collections in a database called dstest. I’ll update as TABLE dstest.*;
Click Create and Run.
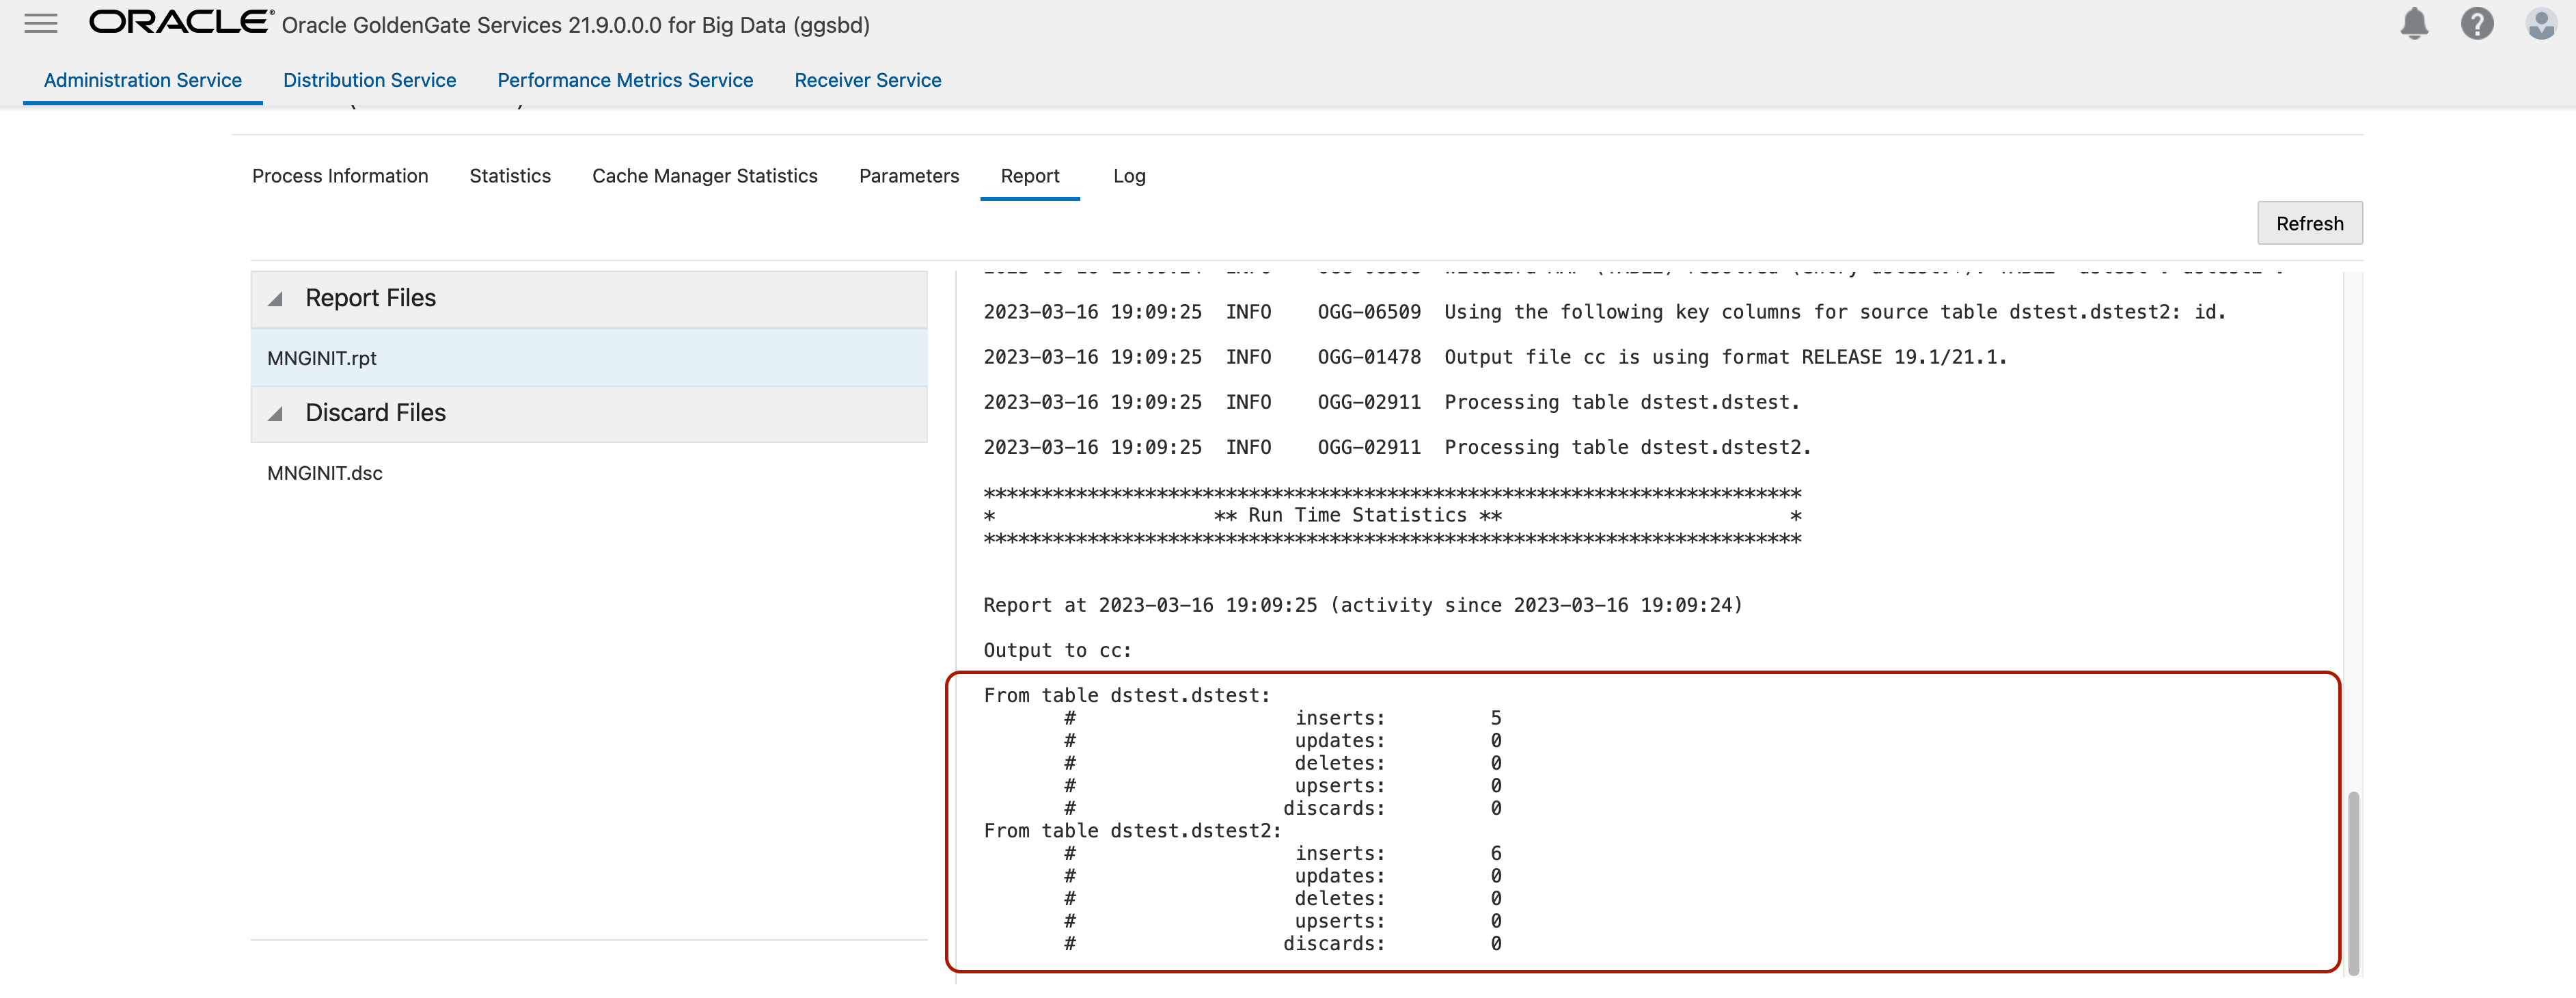
To see the results, click Extract Details/ Report and scroll down in the report.
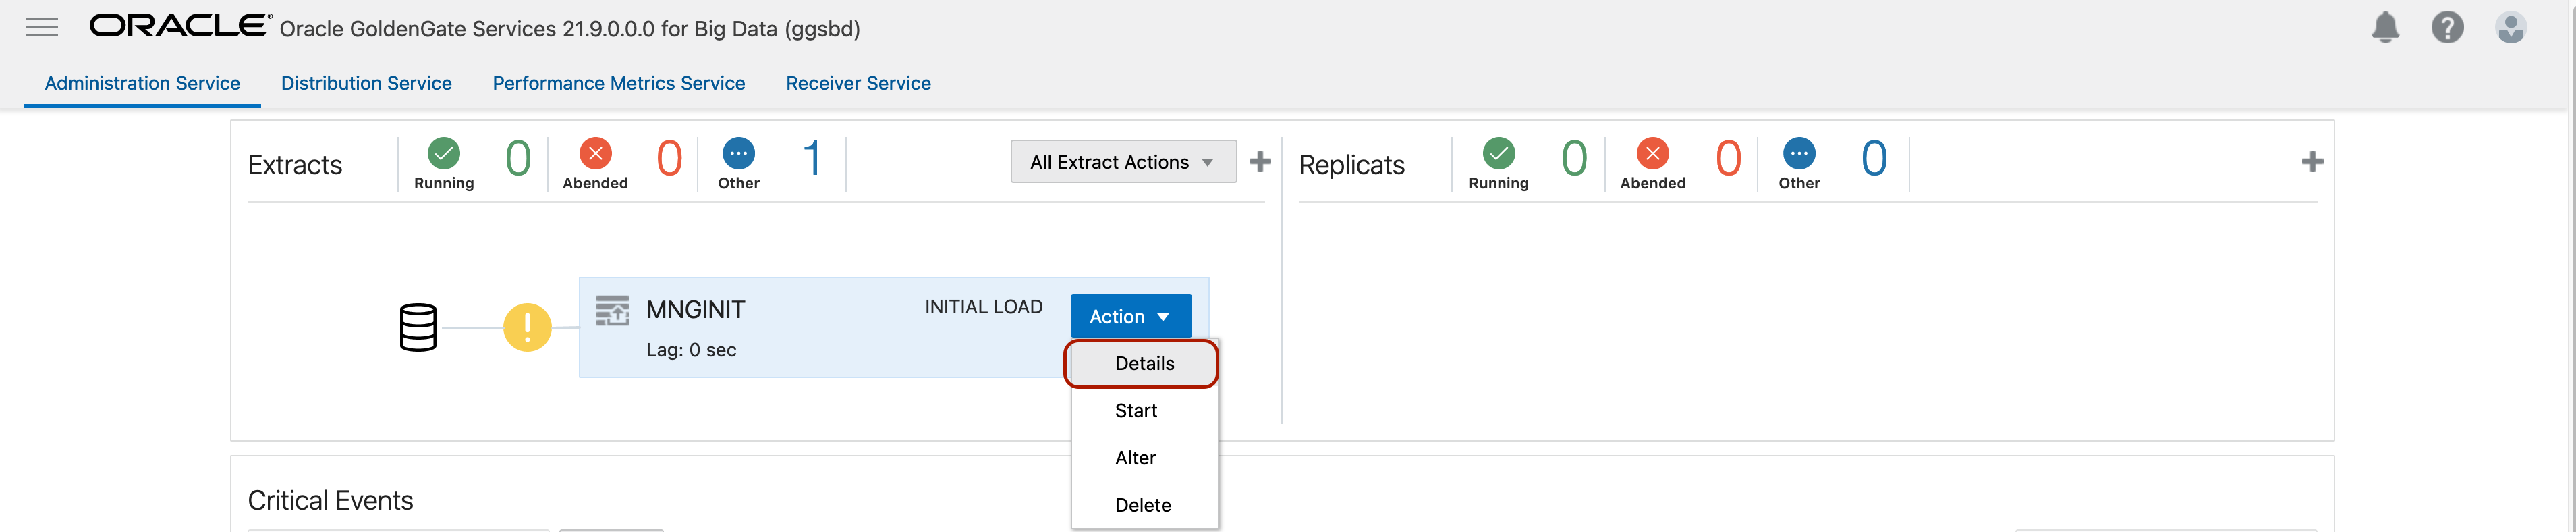
It’s ok to see a yellow notification for your Initial Load Extract. When completed, you’ll see the statistics at the end of the report file in extract details.
4. Create and run Autonomous JSON Initial Load Replicat
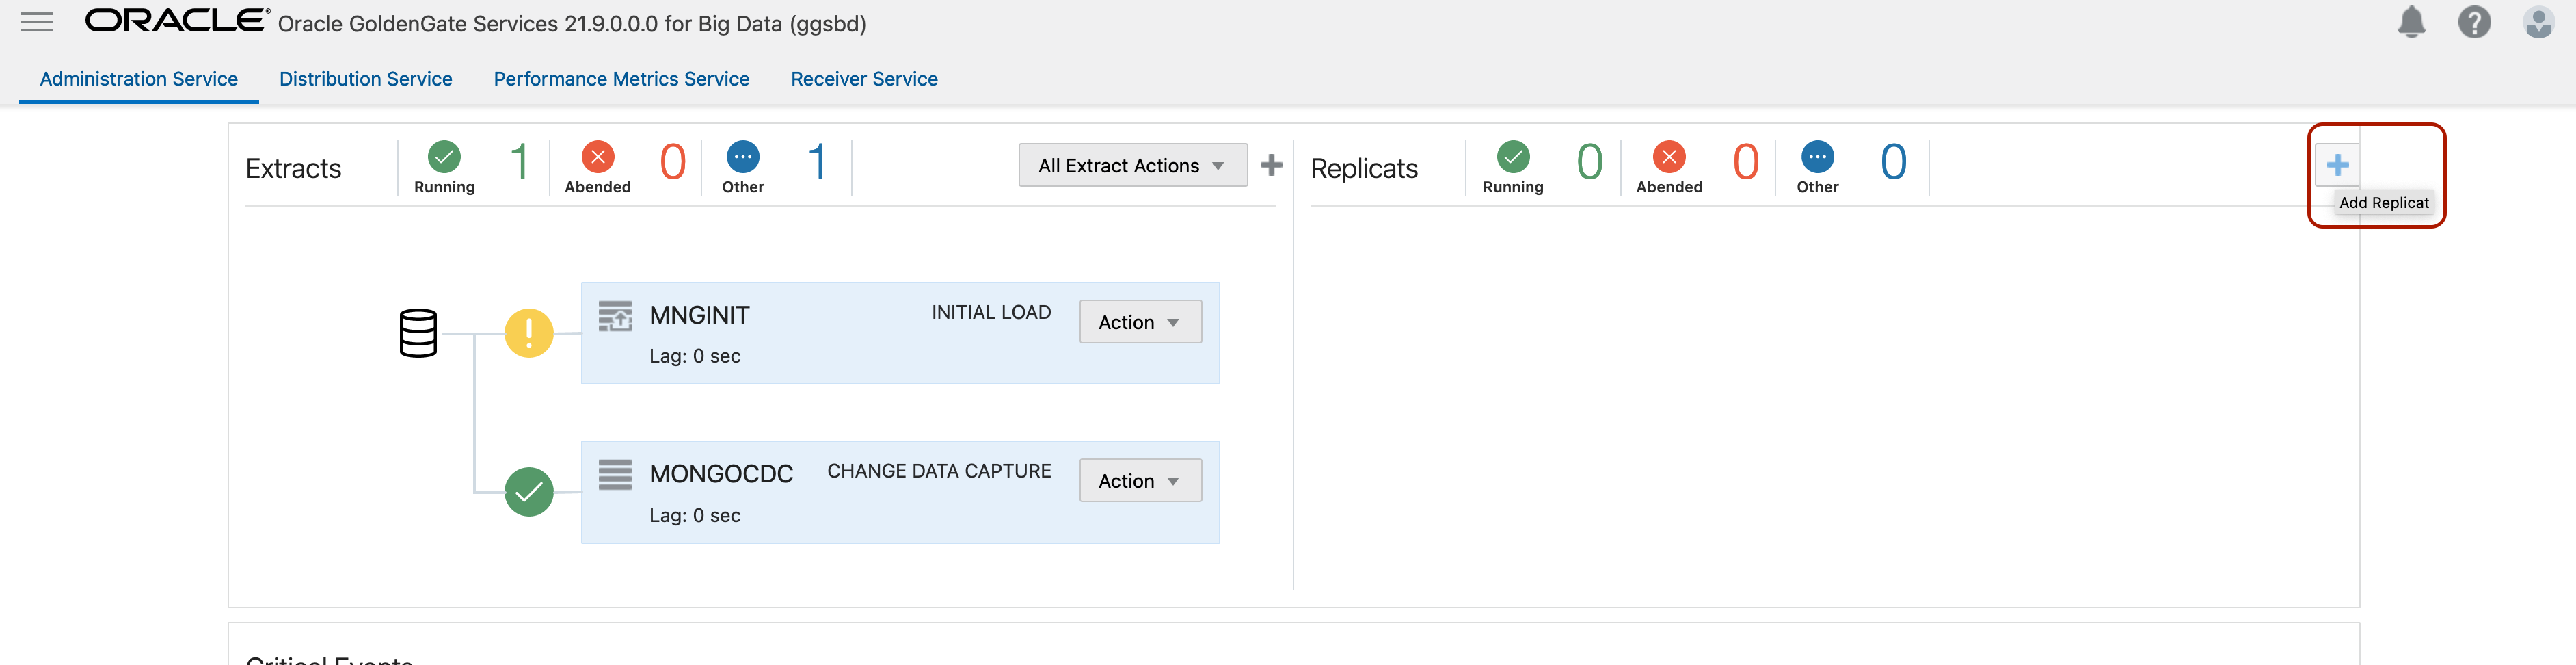
Log into OCI GoldenGate console and click Add Replicat.
Select Classic Replicat and click Next.
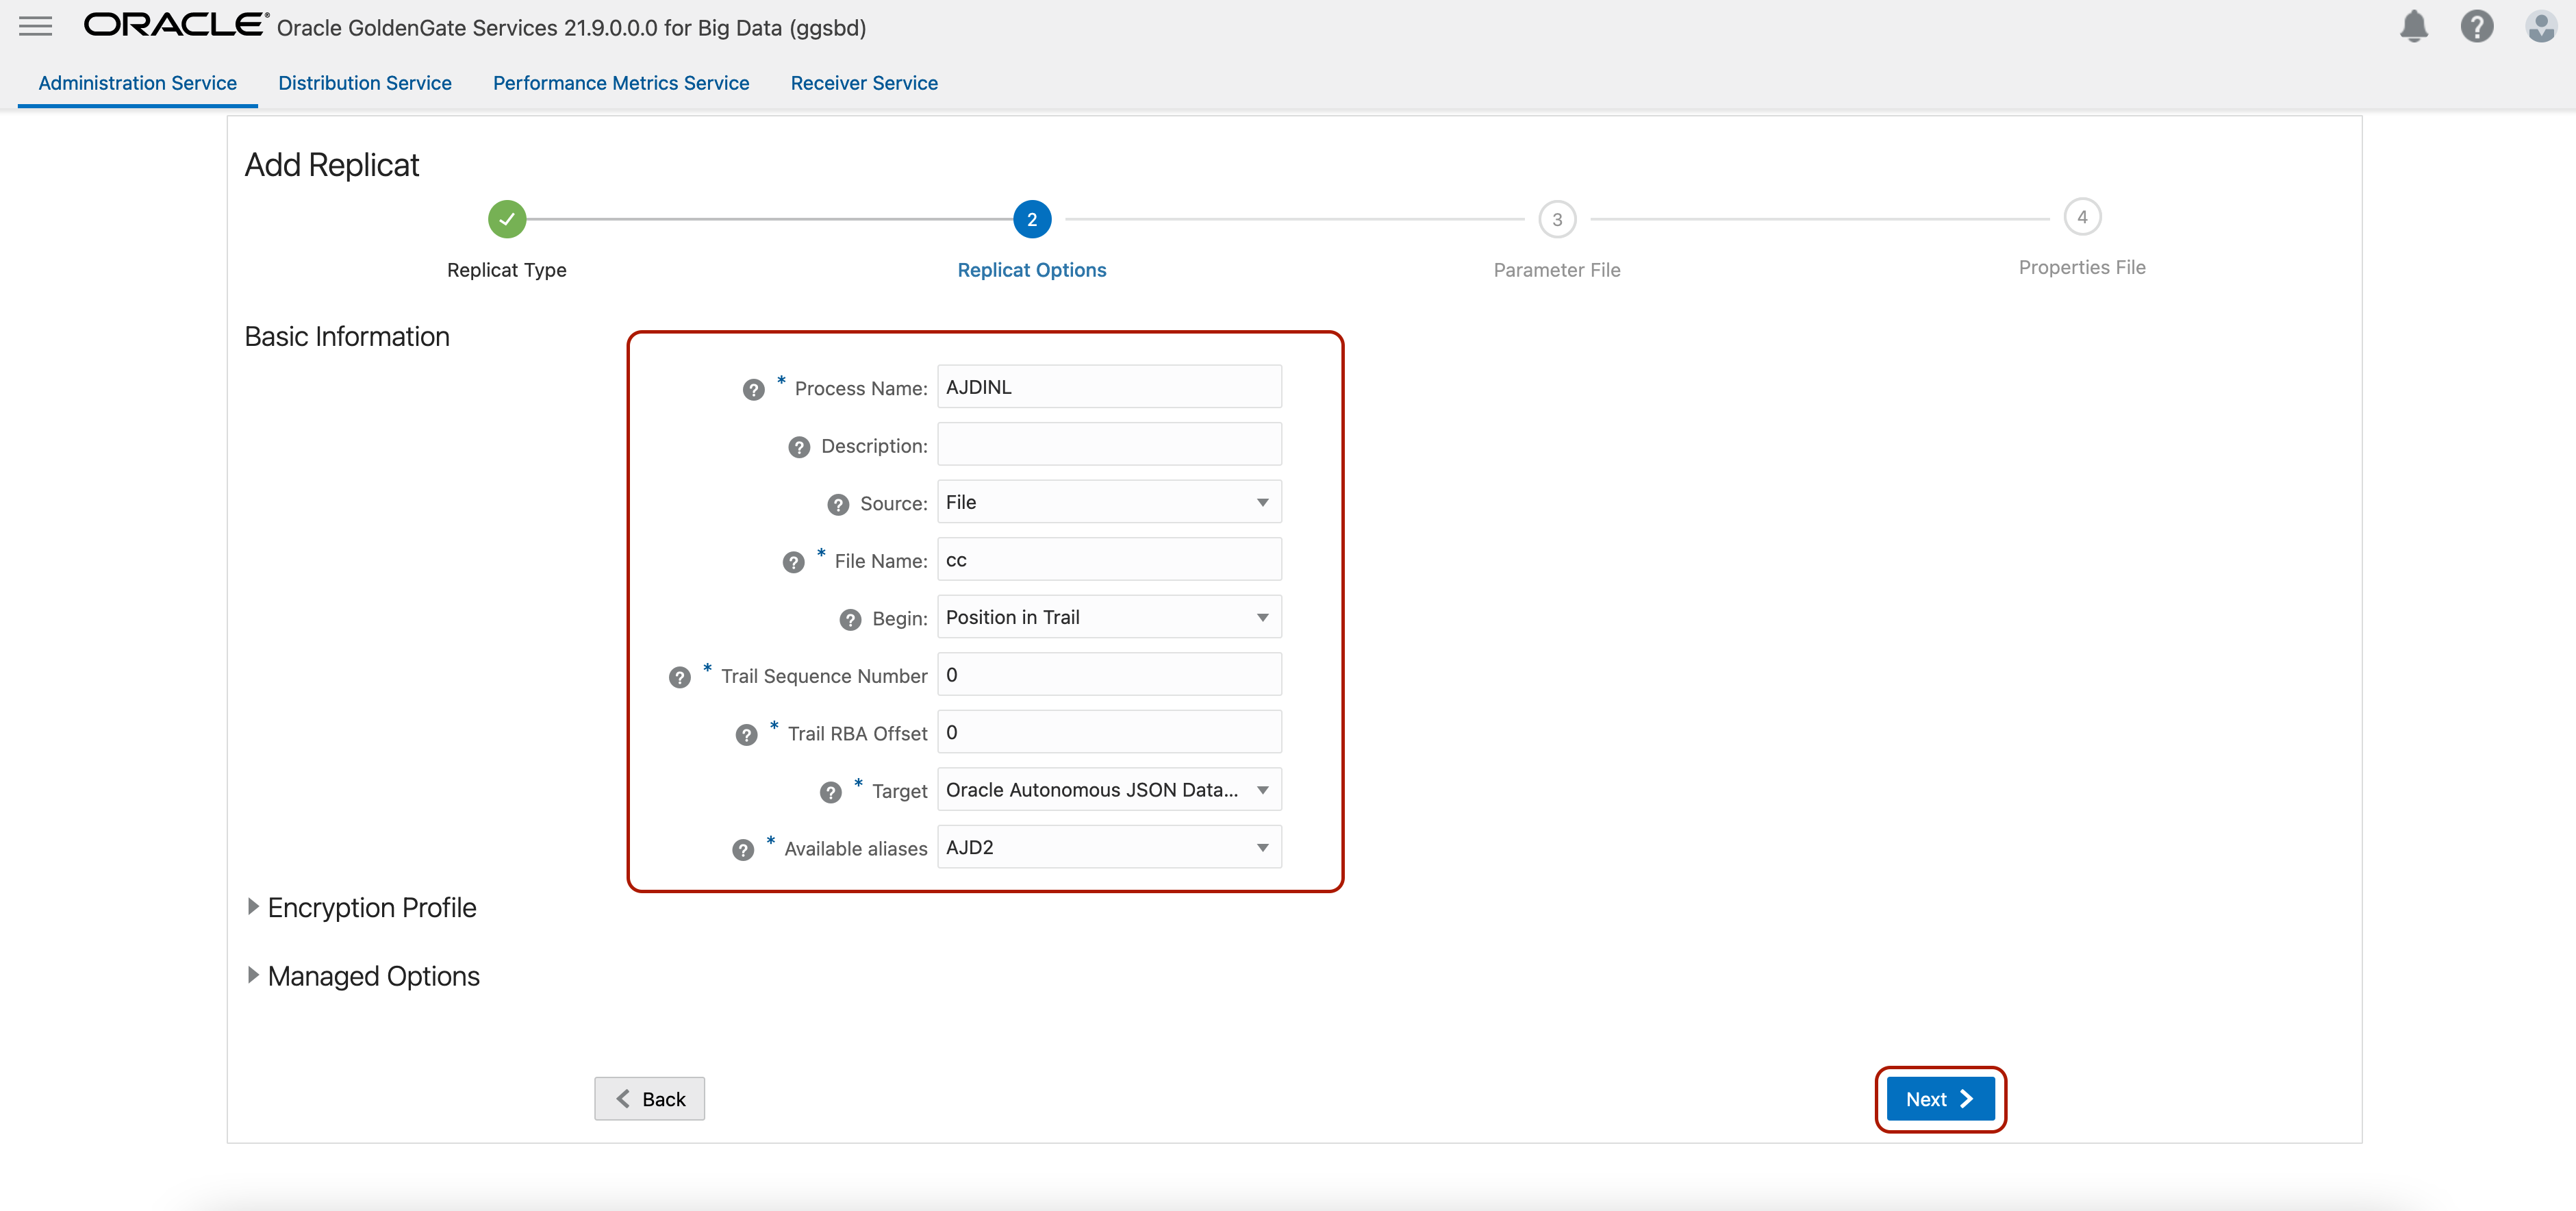
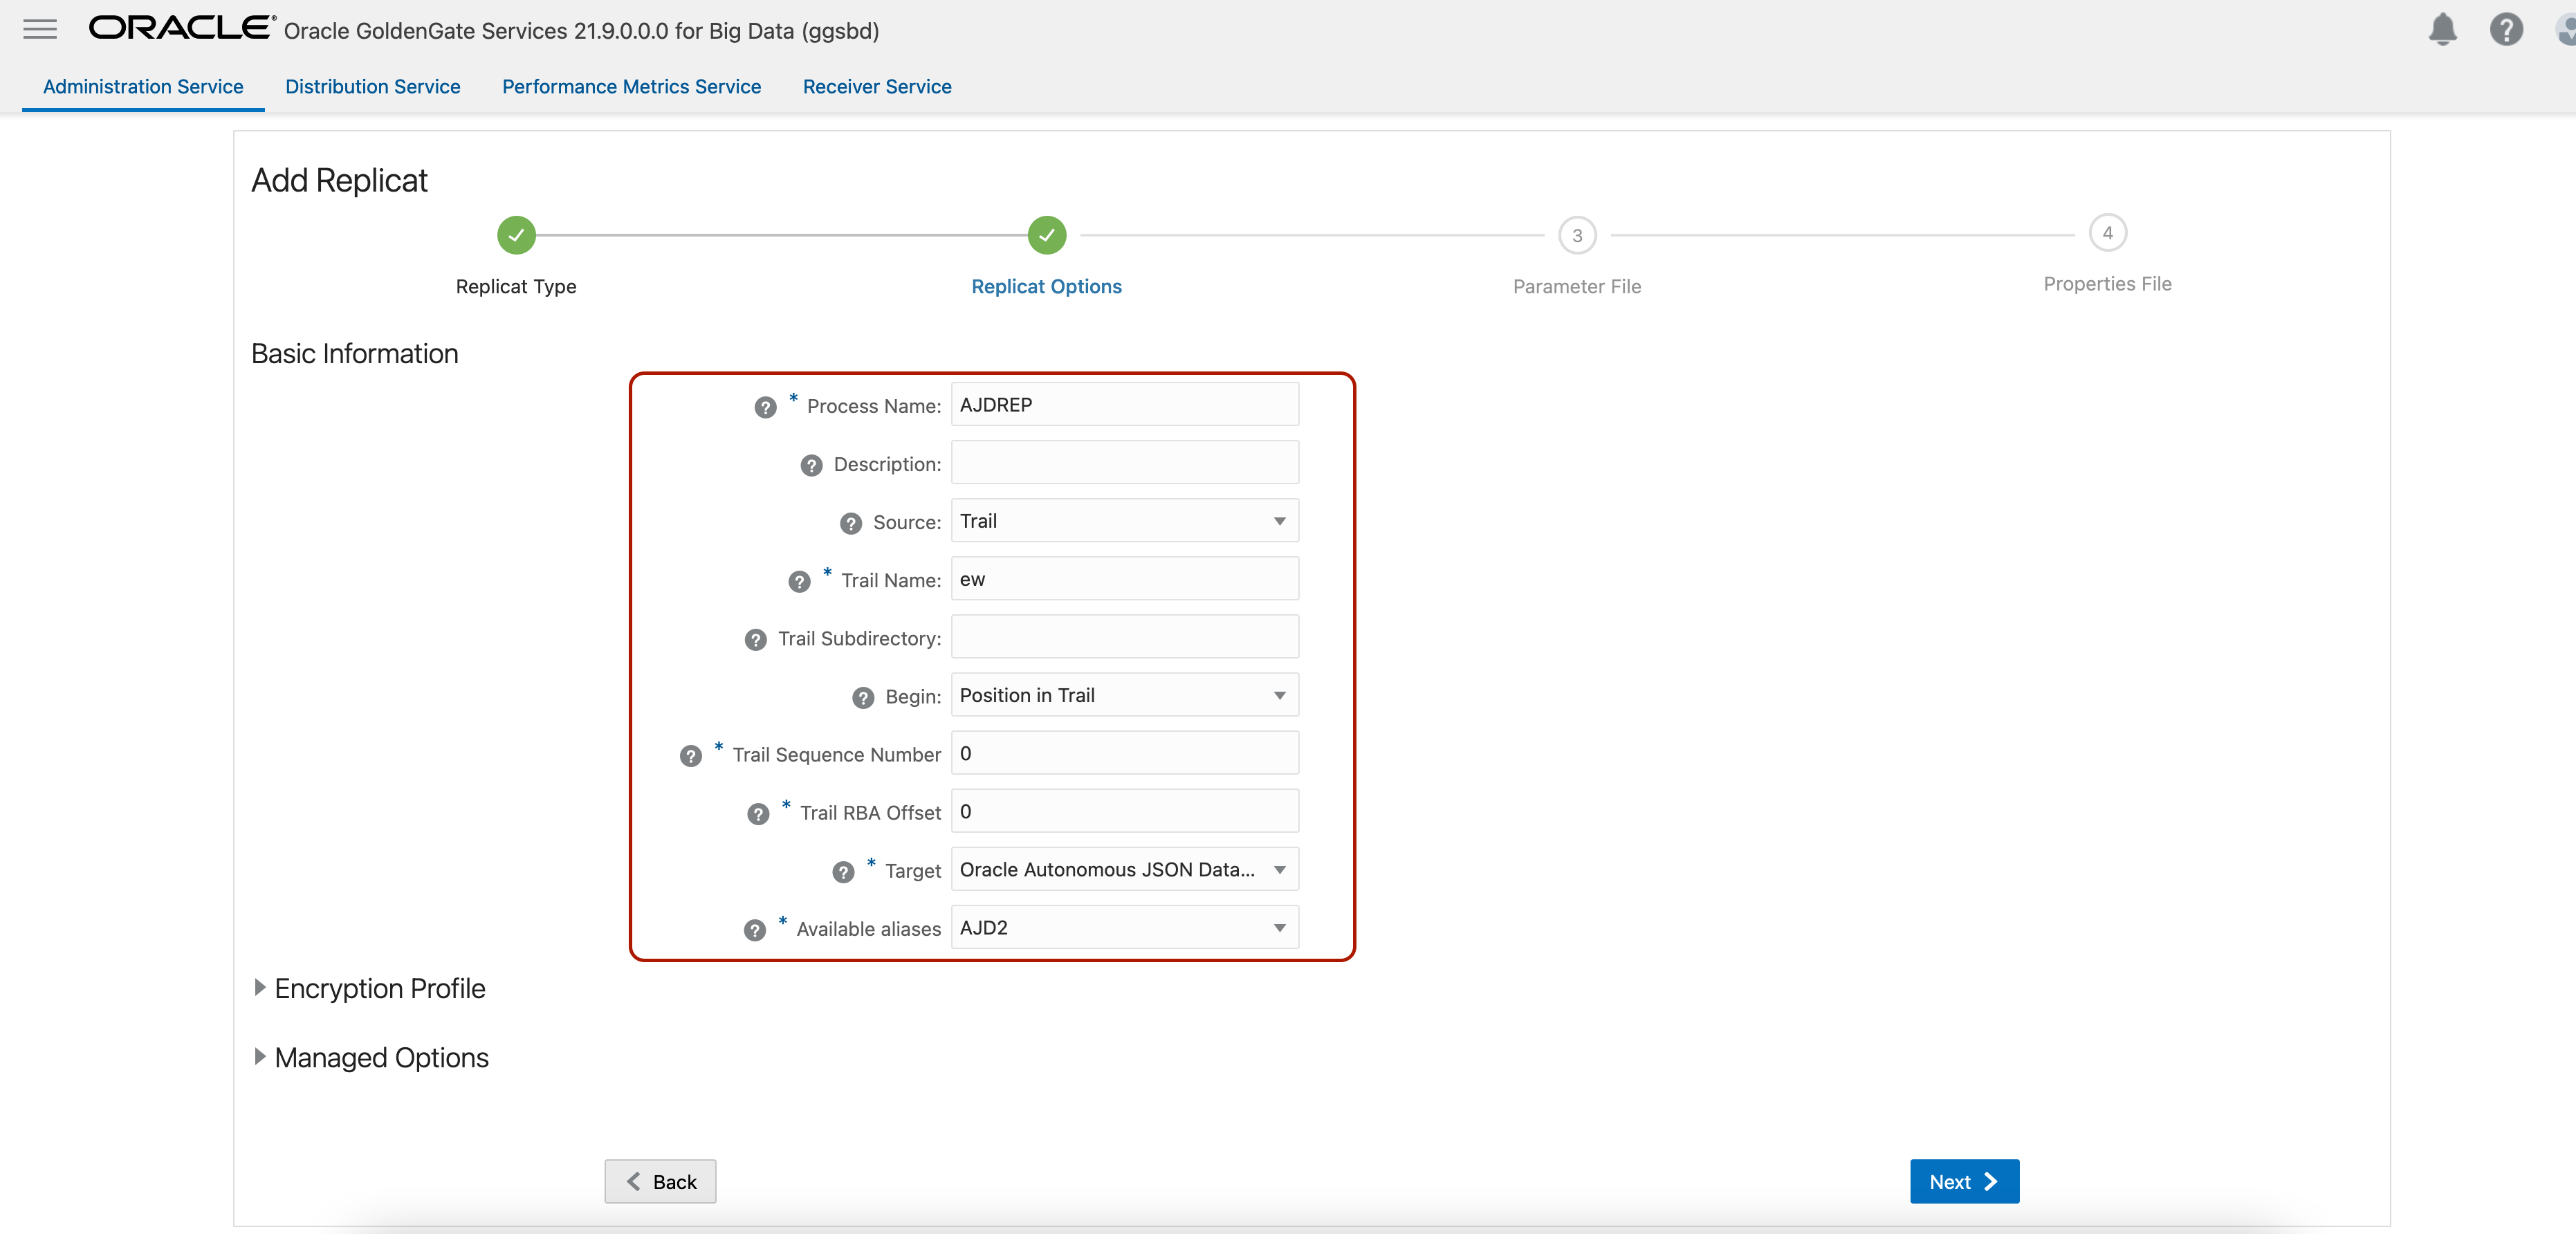
In Replicat Option, provide a Process Name, select Source as File, enter the file name (that you created in previous step) into File Name. Select Target as Oracle Autonomous JSON Database and for Available Alias select the Autonomous JSON connection that you assigned previously. Click Next.
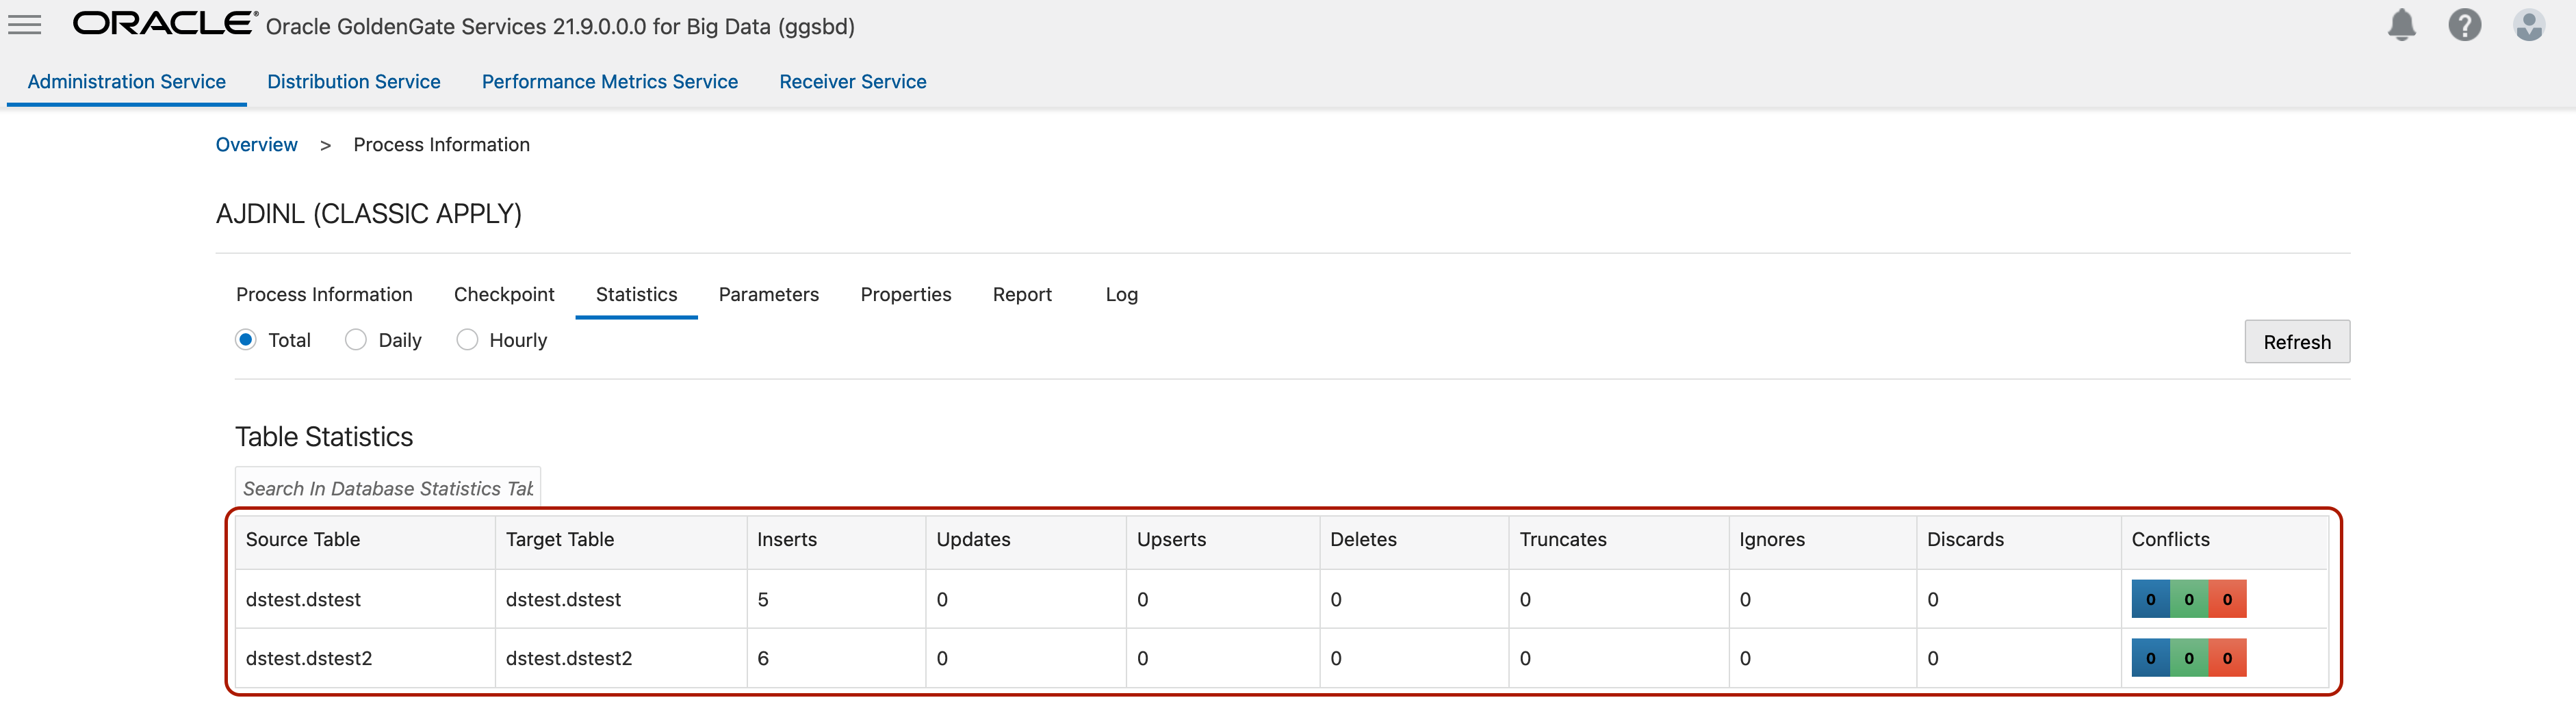
In Parameter File, you can define source & target mappings. You’ll see it as MAP *.*;*.* by default. For this blog, I’ll leave as is. In my source MongoDB, I have a database called dstest, two collections named as dstest and dstest2. When I leave as MAP *.*;*.* OCI GoldenGate will auto-create the database and collections in Autonomous JSON Database as they don’t exist there.

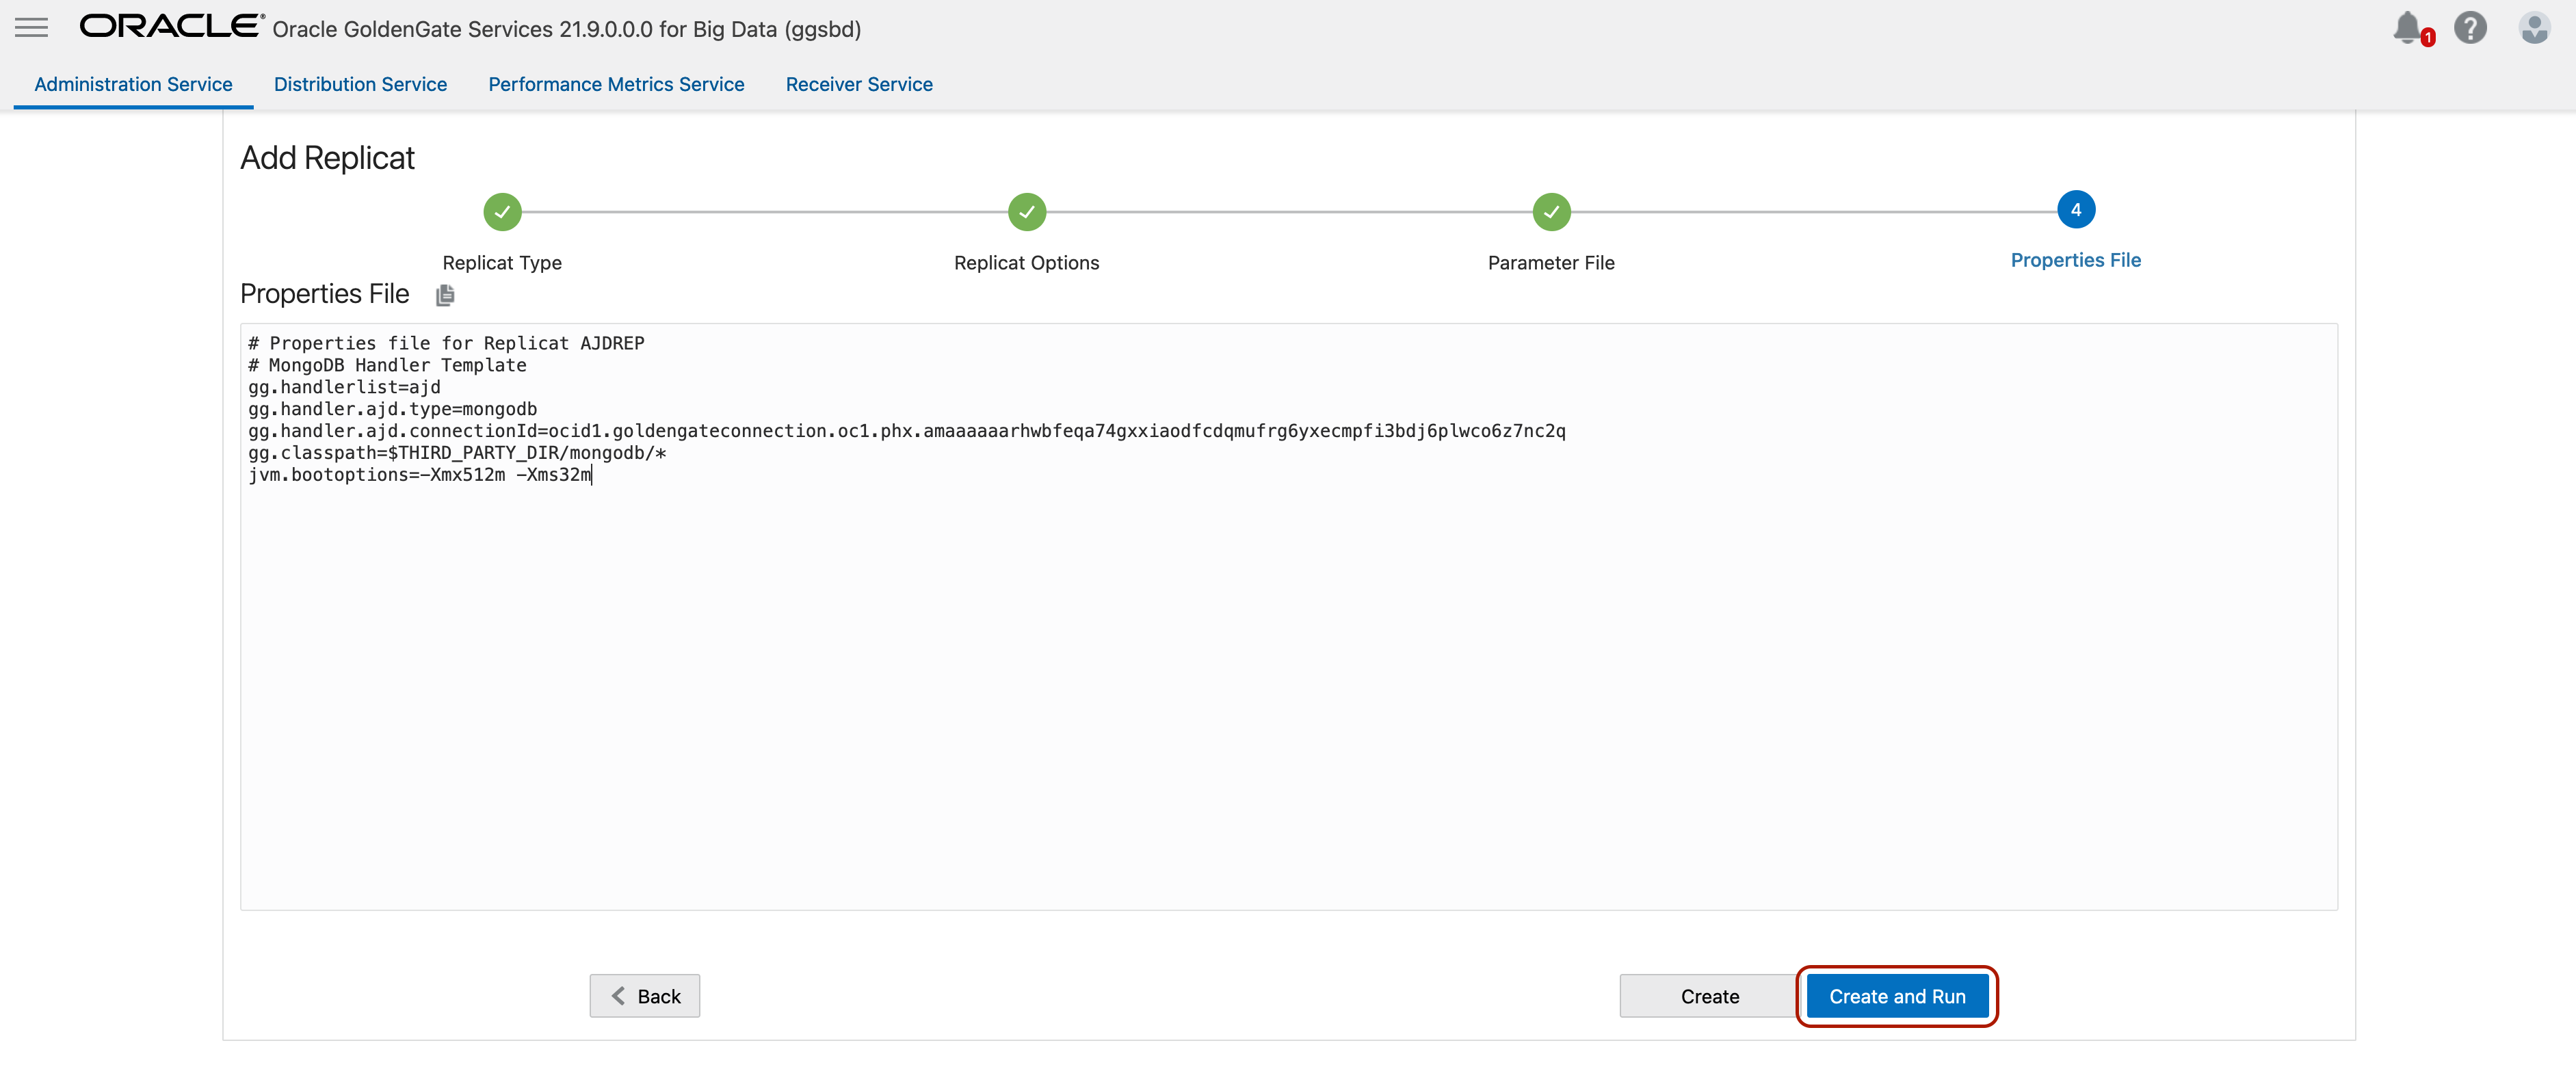
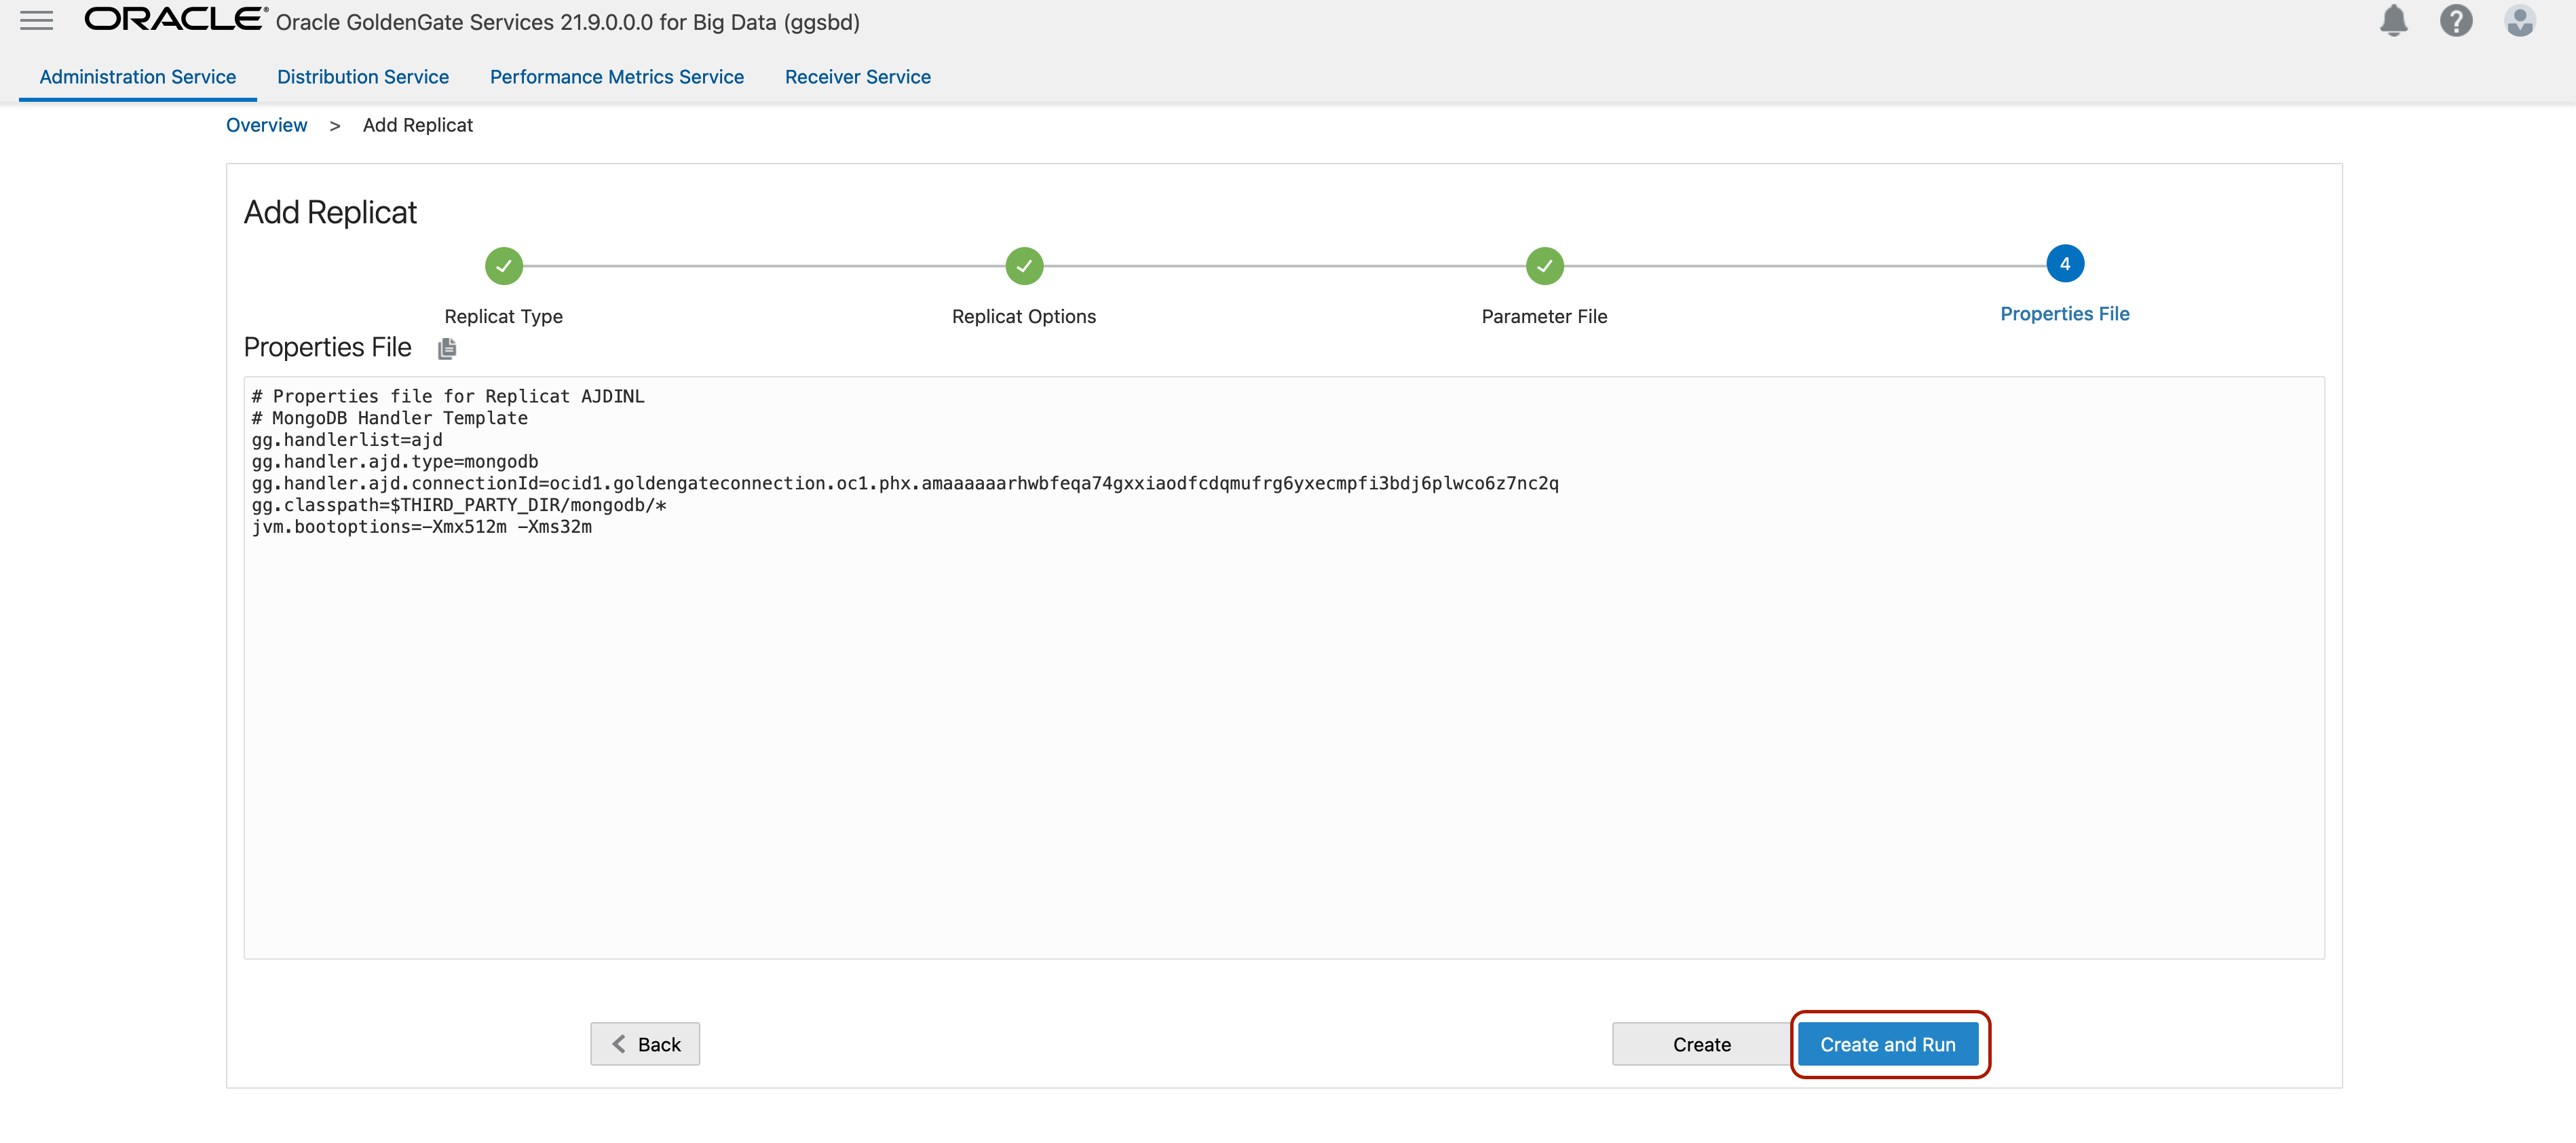
In Properties File, I don’t need to make any changes. I can click Create and Run.
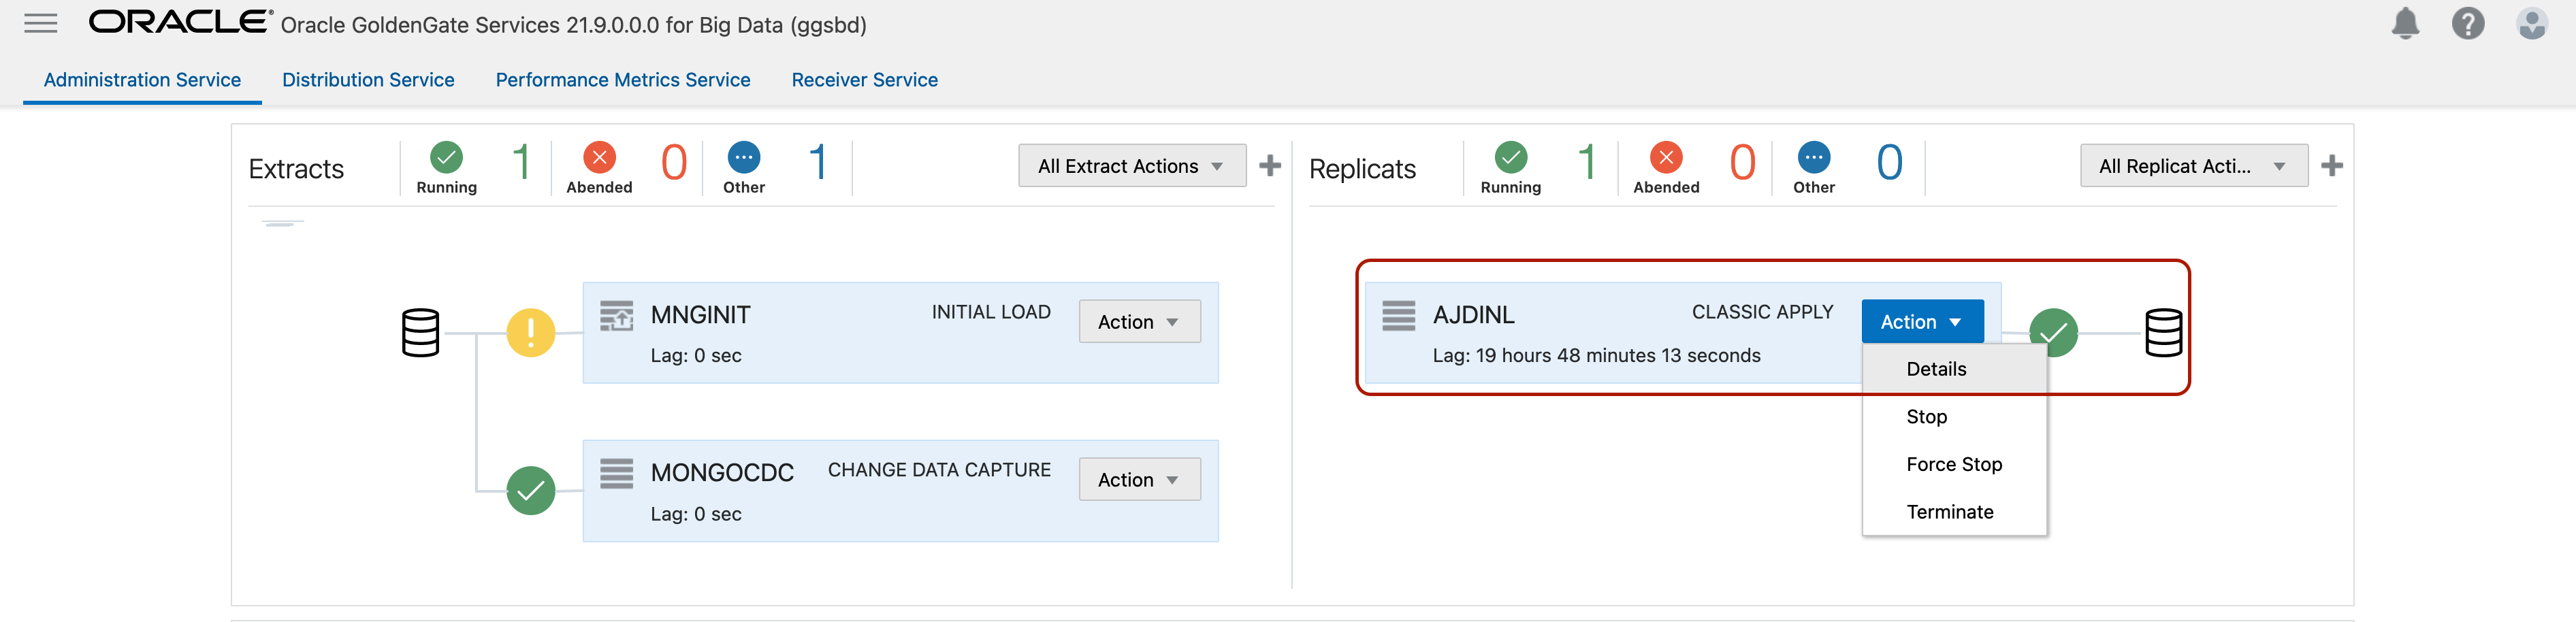
When your replicat runs successfully, you’ll see it in a running state with a green check. You can go to replicat actions, details, statistics to monitor the number of replicated operations per collection.
!!! We observed that some customers have multiple part collection names in their source MongoDB. For example: dstest.collection.test.deniz
If you use wild card mapping (MAP *.*, Target *.*;) your replicat will fail with the following error: ERROR OGG-15051 Java or JNI exception: oracle.goldengate.util.ConfigException: Table names only support [catalog.][schema.]tablename.
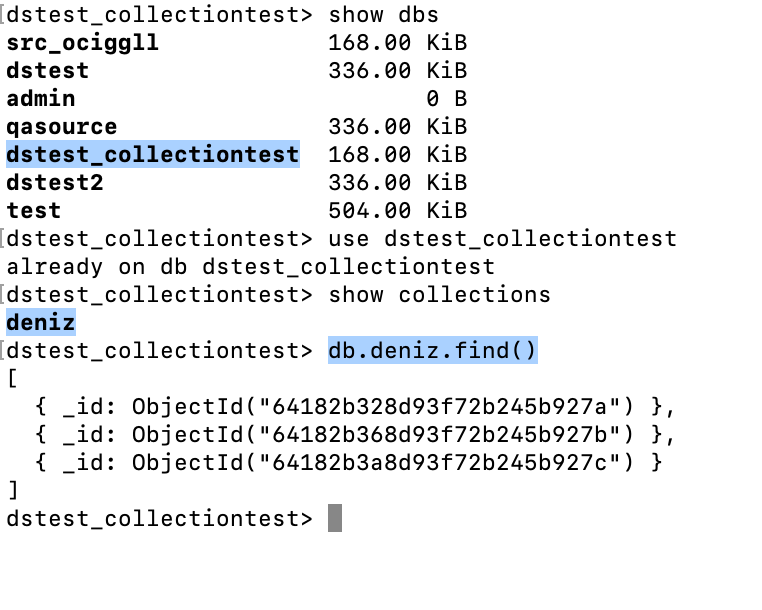
To solve this issue, you can group the mapping by ” ” and also merge the collection name in the target. For example: MAP “dstest”.”collection.test.deniz”, TARGET “dstest”.”collectiontest.deniz”;
This mapping will create a database named dstest_collectiontest and a collection named deniz in target Autonomous JSON environment.
5. Create and run Autonomous JSON CDC Replicat
When your initial load replication completes successfully, configure Autonomous JSON cdc replicat.
Log into OCI GoldenGate console and click Add Replicat.
Select Classic Replicat and click Next.
In Replicat Option, provide a Process Name, select Source as File, enter the file name (that you created in step 2) into File Name. Select Target as Oracle Autonomous JSON Database and for Available Alias select the Autonomous JSON connection that you assigned previously. Click Next.
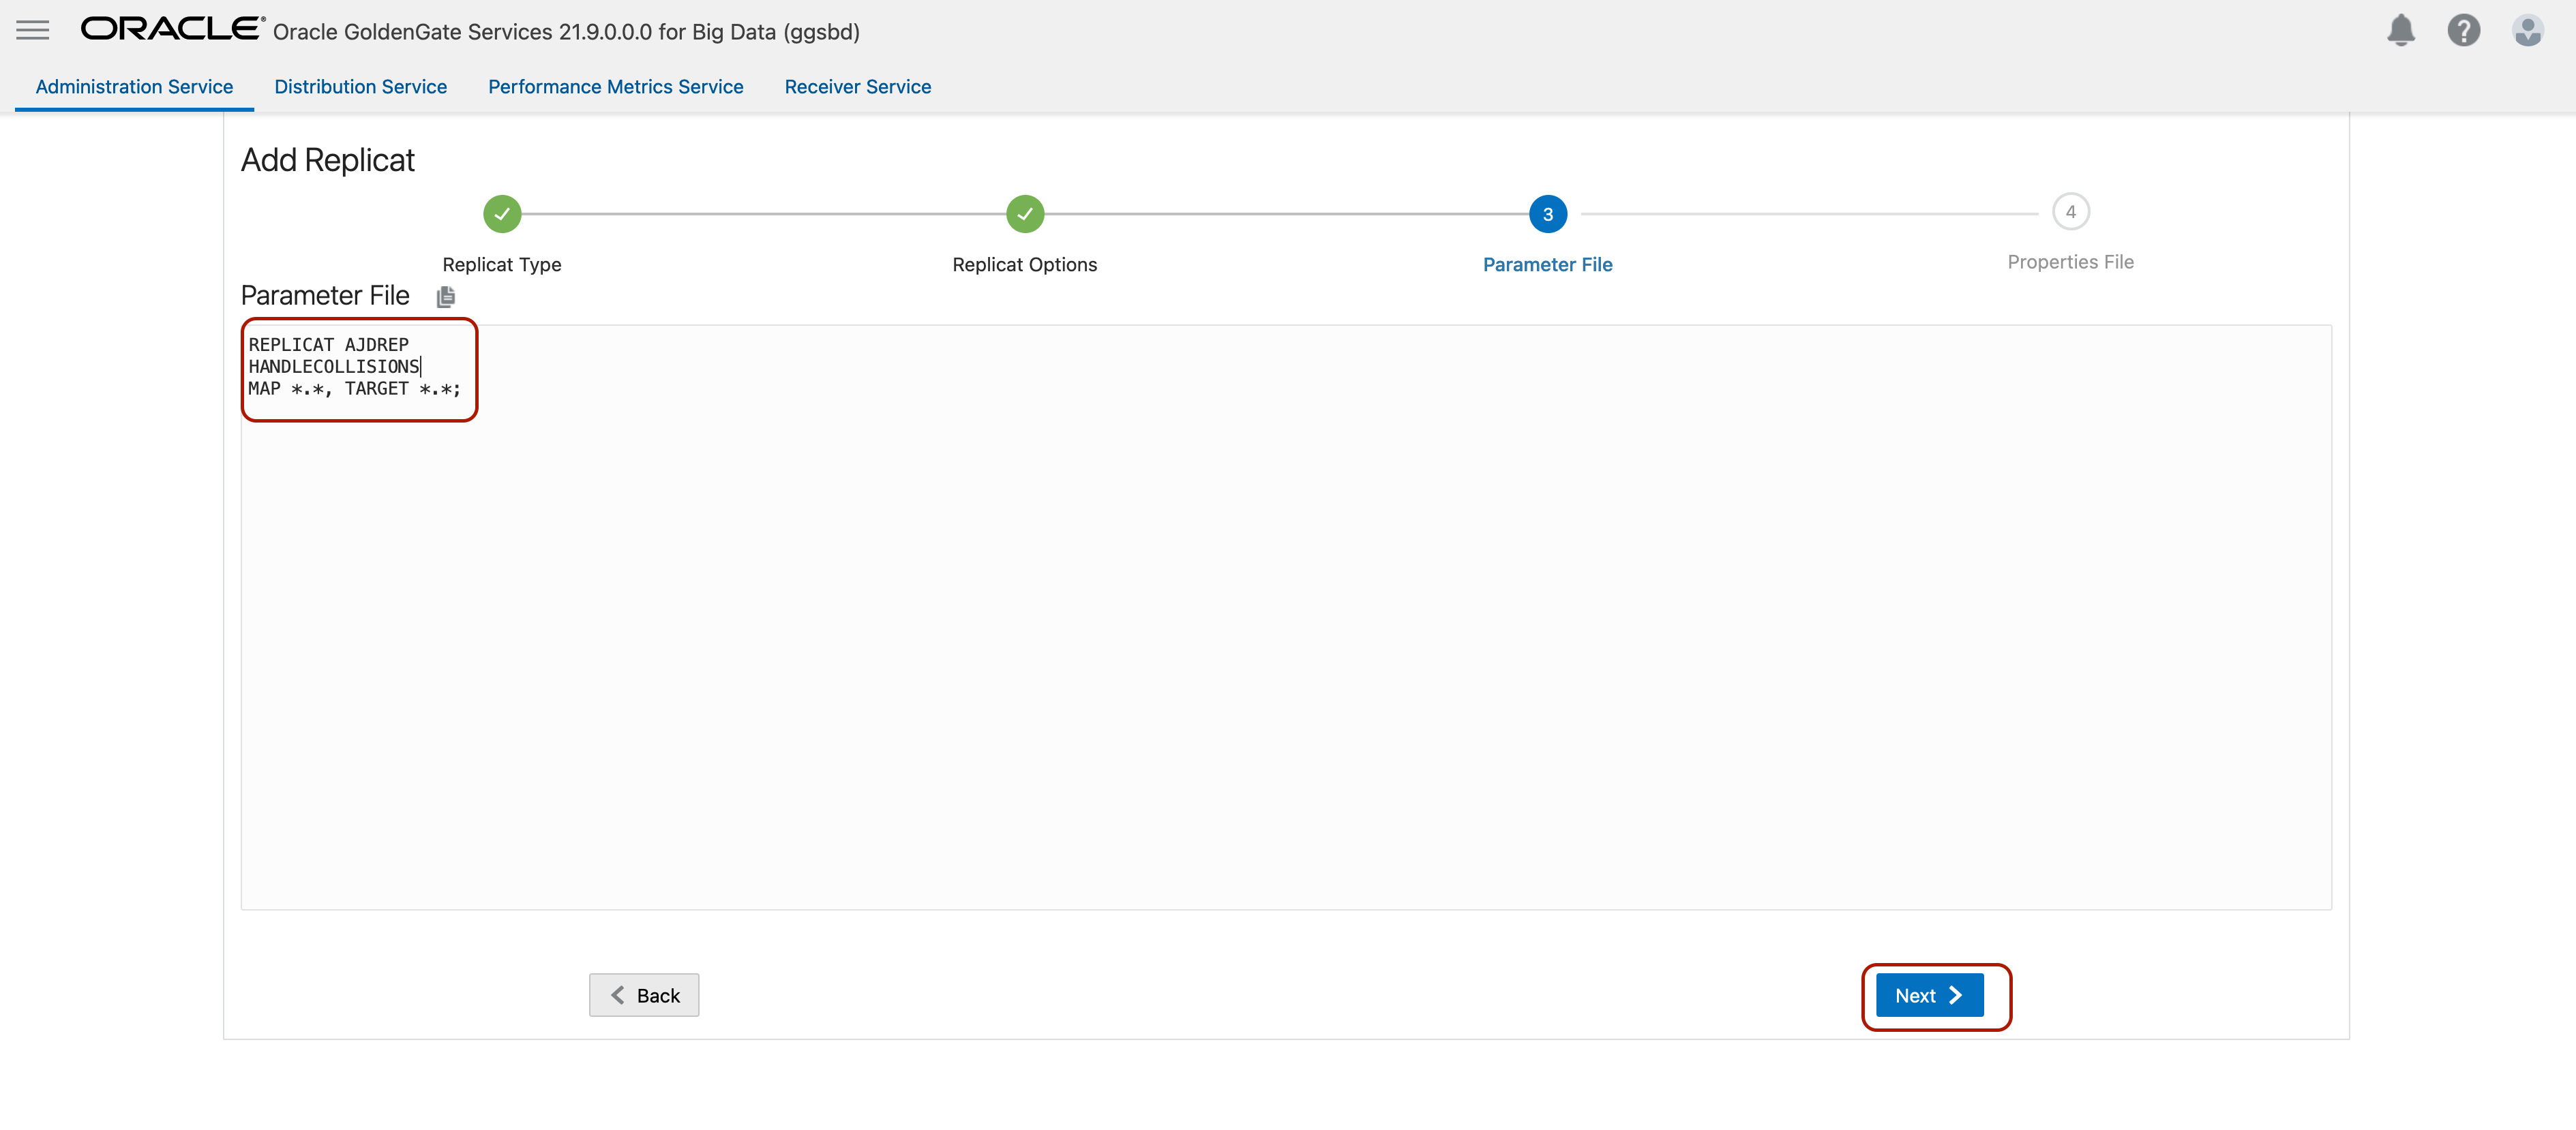
In Parameter File, you can define source & target mappings. You’ll see it as MAP *.*;*.* by default. We’ll also add HANDLECOLLISIONS parameter here. HANDLECOLLISIONS helps with resolving duplicate and missing records while synching CDC replicat with initial load. When your source & target is synced, you can stop the CDC replicat, remove HANDLECOLLISIONS and re-start the replicat. HANDLECOLLISIOS has a negative impact on the performance and that’s why it is recommended to remove it.
In Properties File, I don’t need to make any changes. I can click Create and Run.