OCI Data Integration offers powerful capabilities such as schema drift handling and bulk transformation with pattern matching, which are critical for modern data integration in today’s dynamic and ever-evolving data ecosystems.
- Schema Drift Handling
In real-world environments, data source schemas often change due to updates in applications, databases, or APIs. Manually adjusting transformation logic for each change can be labour-intensive, error-prone, and lead to delays. OCI Data Integration’s schema drift feature automates this adaptation, enabling seamless and continuous data processing without manual intervention. - Bulk Transformation with Pattern Matching
Large-scale data integration frequently involves repetitive transformations across multiple fields or datasets particularly in file-based systems. Manually implementing these changes is inefficient and inconsistent. Bulk transformation, augmented with pattern matching, allows users to apply standardized operations across multiple attributes simultaneously, based on naming patterns or structural rules. This significantly reduces development time, improves consistency, and ensures scalability when processing high volumes of data.
Together, these capabilities empower organizations to manage schema variability with ease, streamline transformation workflows, and accelerate time-to-value all while maintaining accuracy and consistency across complex data pipelines.
In this scenario, we will create a single data flow to ingest and transform two heterogeneous files from object storage into corresponding ADW tables. The source file and target table are parameterized to be selected at runtime.
Prerequisites
- Object Storage bucket with .csv files.
- Autonomous Database schema with read/write access.
- ADB user with ‘DWrole’.
- OCI Data Integration workspace, project, and application.
Getting Started
We begin by working with two CSV files stored in Object Storage: AvailSeats.csv and SeatsSold.csv.
The first step involves defining Data Assets for both Object Storage and Autonomous Database (ADB), followed by the creation of a Data Flow named SEAT_DETAILS within the OCI Data Integration (OCI DI) project.
By default, OCI DI interprets all attributes from a CSV source as VARCHAR. To enable accurate date-based filtering or numeric calculations, it’s essential to convert date fields to the appropriate DATE data type and numeric fields to NUMBER.
To streamline this process, bulk transformations can be applied to perform mass data type conversions and mass functions and transformations. This capability allows you to execute functions—including user-defined ones—across multiple attributes that match a predefined pattern, thereby reducing manual effort and improving consistency across the data flow.
Attribute naming standards are an essential element in order to ensure bulk transformations perform accurately.
Create a Data Flow
- In the project, navigate to ‘Data Flows’ and select ‘Create Data Flow’
- Assign a name for the data flow, and ensure the correct project or folder is selected
Create parameter for the source file
To make the data flow reusable, we’ll parameterize the data entity name by creating a source file parameter.
Follow these steps to configure the parameter:
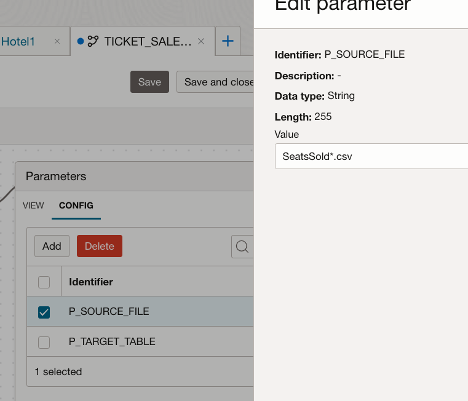
- On the designer canvas, select View and enable the Parameters option.
- Click Add to create a new parameter.
- Define the parameter as follows.
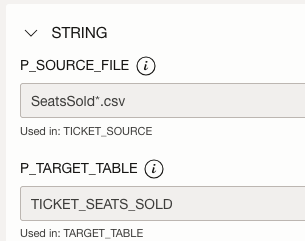
- Identifier: P_SOURCE_FILE
- Data Type: String
- Length: 255 or long enough for your filename
- Default Value: SeatsSold*.csv
Create Source Operator
Drag the Source operator onto the data flow canvas and configure it to reference one of the input files. In this example, SeatsSold*.csv.
If the data is contained in multiple files, you can use wildcard characters to process all of them in one run.
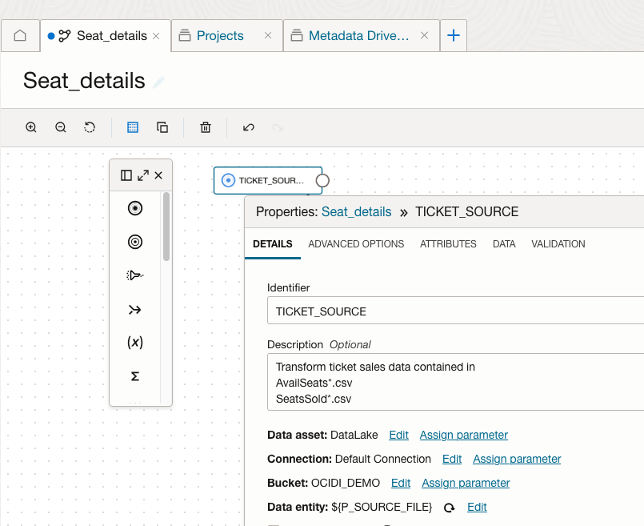
- Configure the Object Storage connections as required.
- Assign the Data Entity using the parameter: ${P_SOURCE_FILE}
Enable Schema Drift
Navigate to Advanced Options tab
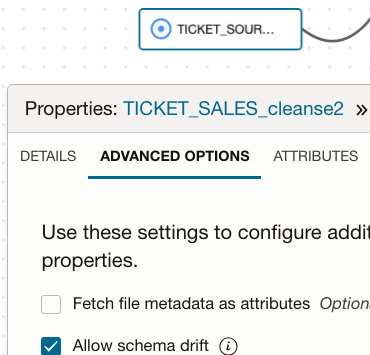
Check the Allow Schema Drift setting. This allows the data flow to dynamically adapt to changes in the source schema without manual reconfiguration.
Rename Source Attribute group
The attribute group name is derived from the source file name, by default, but since we will reuse the dataflow for other source files, this can become confusing as you work with other data files, and in some cases can be quite long. It is helpful to rename to a more generic name, such as ‘SOURCE’
Navigate to Attributes tab and review the attributes from the csv file

- Click the three dots to the right of the attribute group name, and select Rename
- Enter the new name.
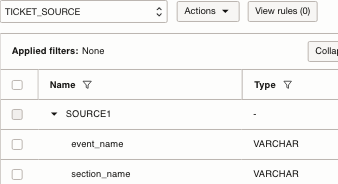
- Rename as ‘SOURCE1’
Convert Datatypes
Depending on your source and usage, you may need to convert datatypes. Since the source in this scenario is a CSV file, all attributes are initially assigned a default data type of VARCHAR.
If you intend to use an attribute as date filter or in calculations, it is necessary to convert these attributes to their appropriate date, numeric, Boolean, etc data types.
You can use an expression to perform these conversions in bulk.
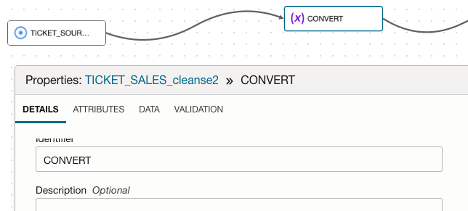
- Drag an Expression Operator onto the canvas and name it as ‘CONVERT’.
- Connect ‘SOURCE’ to Expression Operator ‘CONVERT’ the and perform the necessary data type conversions.
To convert the ‘PRICE’ attributes from VARCHAR to NUMERIC, follow these steps:
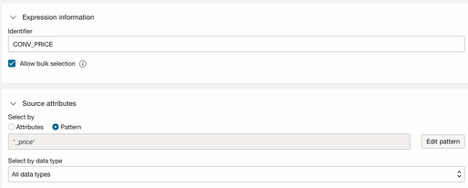
- Add an expression and name it as ‘CONV_PRICE’.
- Enable ‘Allow bulk selection’, then select Pattern as the method for selecting source attributes.
Alternatively, you may select attributes by datatype or choose individual attributes manually.
The Bulk Select option will apply the expression to all matched attributes.

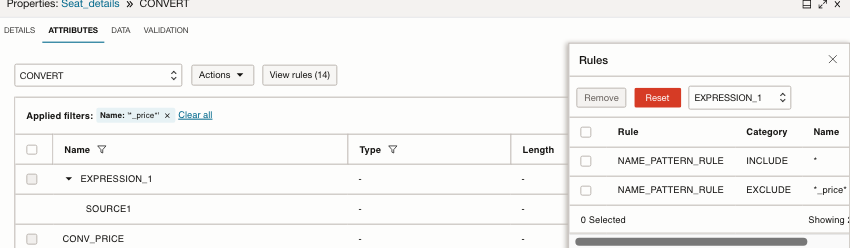
- Within the Expression Builder, the matched attributes are represented by the macro variable ‘%MACRO_INPUTS%’ in the Expression builder.
- In the Pattern Builder, enter the pattern ‘*_price*’ and click Edit Pattern.
- Expand the tree under the Pattern Editor. The Pattern Editor will display all attributes matching the pattern. You can refine the selection until the desired columns are included, then confirm the pattern selection.
- Once you have confirmed that the correct attributes are displayed, click Save Changes.
Define the Name and Data Type for the resulting converted attribute
Choose the name and datatype for the new attribute
(Optional)Define the target attribute name using a regular expression
- ‘$0’ will retain the same name, or you can add prefix or suffix, for example, $0 _conv
- In the Edit Expression window, uncheck ‘Use source attribute data types’ and set the datatype to Numeric, specify a Scale of 2 and a Length of 12.
- Set the resulting attribute a datatype to NUMERIC, specifyi a Scale of 2 and a Length of 12..
- Define the function to be applied to the matched attributes
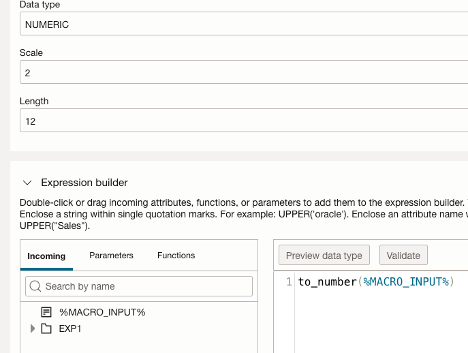
Within the Expression Builder, the incoming attribute %MACRO_INPUTS% represents all attributes that match the defined pattern.
- Enter a function to_number(%MACRO_INPUT%)
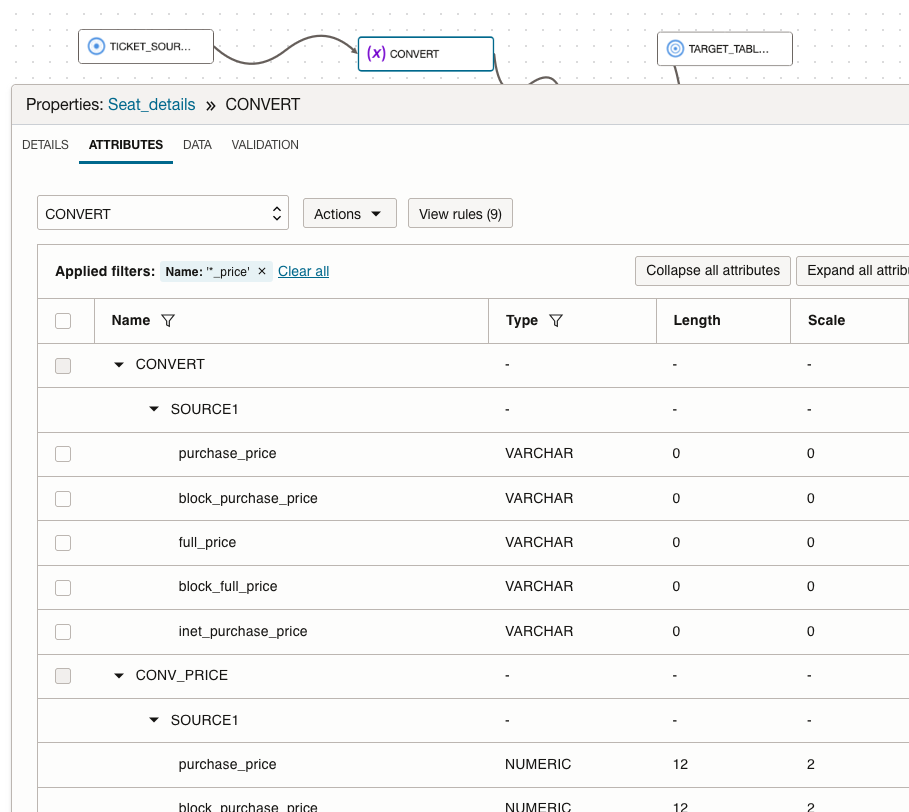
Navigate to the Data tab and view the newly added attributes with data preview
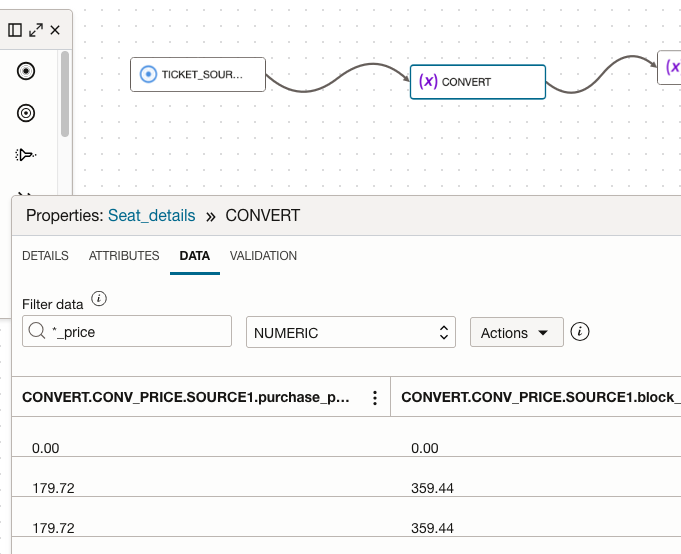
- Use the filter to search for the attribute matching pattern and datatype NUMERIC
- Filter data ‘*_price’
- Datatype ‘NUMERIC’
- Examine the newly added attributes
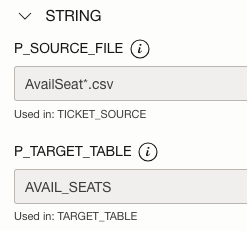
Create Parameter for Target table
Add a new Parameter for the default Target table name
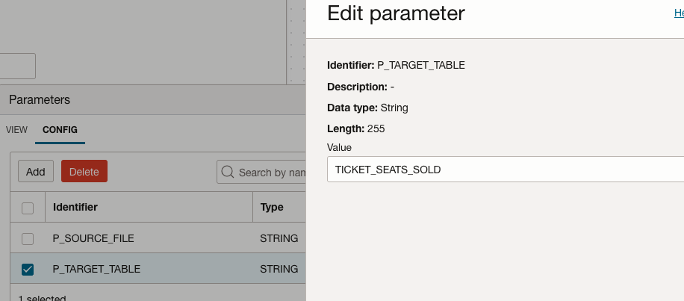
Create a parameter for the target table name and set its default value to TICKET_SEATS_SOLD.
Define target table
Add a table to receive the transformed data.
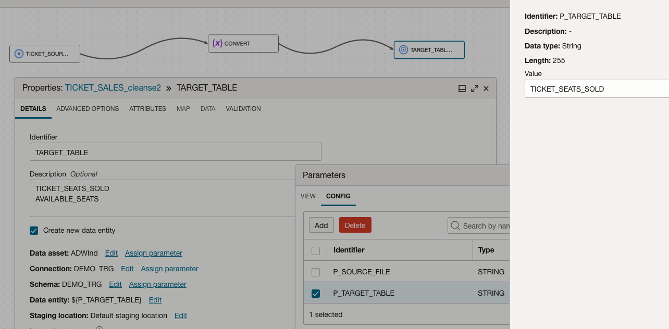
- Drag the Target Operator onto the Data Flow canvas and connect the ‘CONVERT’ Expression to the new target.
- Assign identifier ‘TARGET_TABLE’
- Select ‘Create new data entity’
- Configure the ADB schema connections as required.
- Assign the Data Entity using the parameter: ${P_TARGET_TABLE}.
- Finally, validate and save the data flow to ensure all configurations are correctly applied.
Exclude unnecessary attributes from being included in the Target table
The Expression builder will create new attributes with the prescribed datatype, You may want to remove the original, or any other attributes you don’t need.
The original VARCHAR attributes still exist in the SOURCE attribute group
- Add Name filter ‘*_price’
- View the attributes that match the pattern include both VARCHAR and NUMERIC datatypes from ‘SOURCE’
(Optional) remove original varchar datatype attributes
Create an Expression to exclude unwanted attributes, using patterns
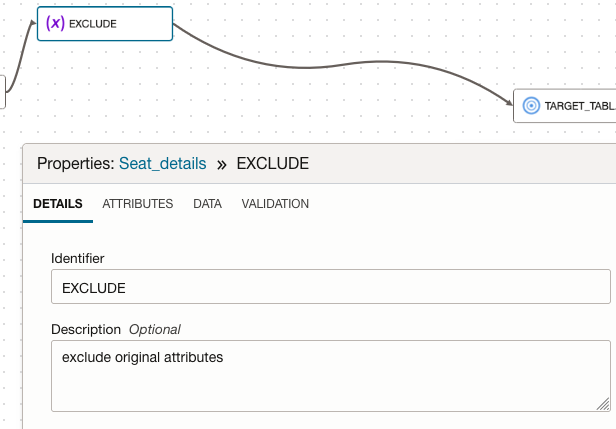
- Right click on the line from ‘CONVERT’ expression to the target operator, select ‘Insert’, then ‘Expression’
- Name the expression ‘EXCLUDE’
- Navigate to ATTRIBUTES tab
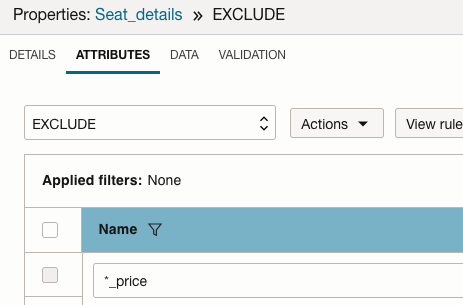
- Click on the filter next to the ‘Name’ header
- Enter the pattern ‘*_price’ as in the bulk select in the filter
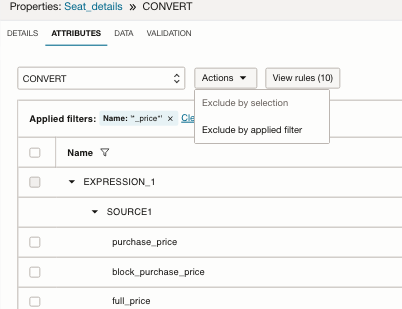
- Click on the filter icon next to ‘Type’, by VARCHAR
- Select ‘Exclude by applied filter’ from the ‘Actions’ button
Validate and save the data flow
Add the Data Flow to an Integration Task and publish to application
Create an Integration Task
- Return to the Project and navigate to the Tasks menu within your project and click ‘Create Task’.
- From the dropdown, select ‘Integration Task’.

- Select the project and select the ‘Seat Details’ data flow.
- Click ‘Configure’ next to ‘Configure Parameters’ and verify the parameter values
- Configure the task parameters as follows
- Set P_SOURCE_FILE to SeatsSold*.csv
- Set P_TARGET_TABLE to TICKET_SEATS_SOLD
- Click ‘Configure’ to apply the settings.
- Save the task
Publish and run the task
- Publish the ‘Seat Details’ integration task to the application.
- Navigate to the application and verify that the patch was successfully applied.
- Navigate to Tasks on the application console, click the three-dot menu next to ‘Seat_Details’, and select ‘Run’.
- Leave the parameter values at their defaults and click ‘Run’.
Validate Results
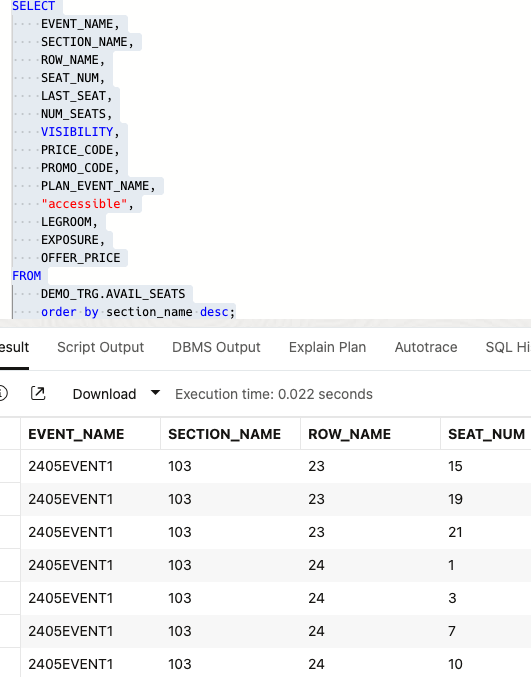
Upon successful completion, validate the data in the Target table within the database schema to ensure accuracy.
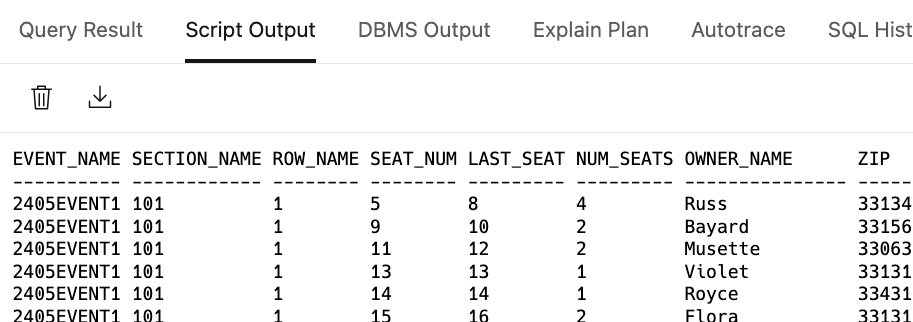
Run it again, (from Tasks canvas, do not rerun the job, it will not prompt for parameters) this time using the input file for Available Seats to process the corresponding dataset.
Verify the table exists and examine the data.
You may also define multiple Tasks for the same Data Flow, each task with different default parameters, which can be changed at runtime.
To preview the calculations and data in the Data Flow for additional files:
- alter the P_SOURCE_FILE parameter default value with the csv file naming pattern (make sure a matching file exists in the bucket)
- click on ‘Refresh all data entities’.
This will refresh the Data Flow designer with the new file’s format and data.
Summary
By incorporating parameters and standard naming conventions along with pattern matching, the same integration logic can be applied across heterogeneous datasets. This approach enhances reusability, reduces development time, and minimizes the amount of code required.
We hope this blog has been helpful in enhancing your understanding of Oracle Cloud Infrastructure (OCI) Data Integration. For further learning, explore the comprehensive Blogs and official Documentation.
Be sure to explore our full collection of blogs on OCI Data Integration to deepen your knowledge and stay up to date with best practices and new features.