Oracle GoldenGate 23ai enables high-performance, real-time data replication across both homogeneous and heterogeneous databases using logical replication. It provides a robust and flexible solution for enterprises looking to synchronize data across different platforms with minimal latency and overhead.
GoldenGate already supports a wide range of PostgreSQL flavours, including Amazon Aurora PostgreSQL, Amazon RDS for PostgreSQL, Google Cloud Alloy DB, Microsoft Azure for PostgreSQL, and more. With the latest enhancements, Oracle GoldenGate now also supports capture and delivery to OCI PostgreSQL Database Service, further expanding its reach in multi-cloud and hybrid environments.
This powerful replication capability supports a variety of use cases:
- Bi-directional replication, including active-active configurations, enabling high availability and seamless data sharing across systems.
- Minimizing downtime during planned maintenance or unplanned outages by ensuring continuous data availability.
- Offloading reporting and analytics workloads to dedicated environments, reducing the load on production systems while maintaining up-to-date data for insights and decision-making.
Whether you’re looking to build a hybrid cloud strategy, ensure high availability, or offload operational workloads, Oracle GoldenGate 23ai provides a flexible, enterprise-grade solution for resilient and scalable data replication.
In this blog, we’ll walk you through how to set up a GoldenGate Extract on an OCI PostgreSQL Database Service using the OCI GoldenGate Service to capture real-time changes on PostgreSQL tables. These captured changes can then be replicated to any GoldenGate-supported target, enabling a wide range of use cases such as real-time analytics, cross-region replication, or active-active deployments.
We will follow these key steps to set up change data capture from an OCI PostgreSQL database using OCI GoldenGate Service:
- Step 1: Create a custom configuration setting for the OCI PostgreSQL Database to enable required replication parameters.
- Step 2: Provision a new PostgreSQL Database using the above configuration.
- Step 3: Set up an OCI GoldenGate connection to the newly created PostgreSQL Database and associate it with your GoldenGate deployment.
- Step 4: Create a GoldenGate Extract to capture changes from the OCI PostgreSQL database.
- Create PostgreSQL Configuration:
For Goldengate extract to capture changes on PostgreSQL database we need to set some values in the OCI PostgreSQL database. To do this we create a configuration file in OCI PostgreSQL DB Service with these settings as discussed in the documentation
PostgreSQL Database Configuration
Wal_level = logical # set to logical for Capture
max_replication_slots = 1 # max number of replication slots,
# one slot per Extract/client
max_wal_senders = 1 # one sender per max repl slot
track_commit_timestamp = on (1*) # optional, correlates tx commit time
# with begin tx log record (useful for
# timestamp-based positioning)
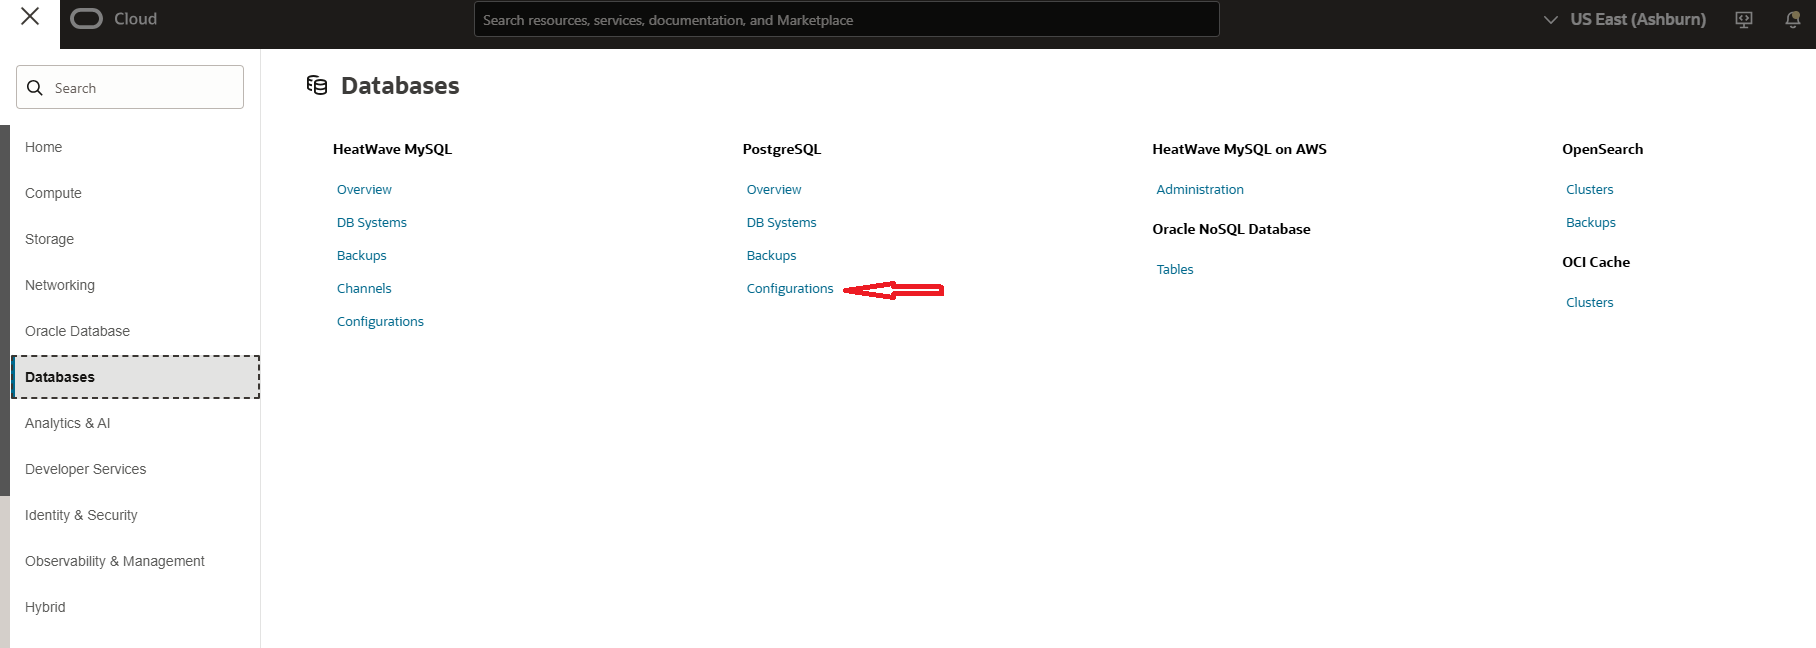
- To create a configuration file, navigate to the OCI Console, open the hamburger menu (☰) in the top-left corner, and go to PostgreSQL > Configurations. This is where you can manage and create custom configuration files for your PostgreSQL DB system.
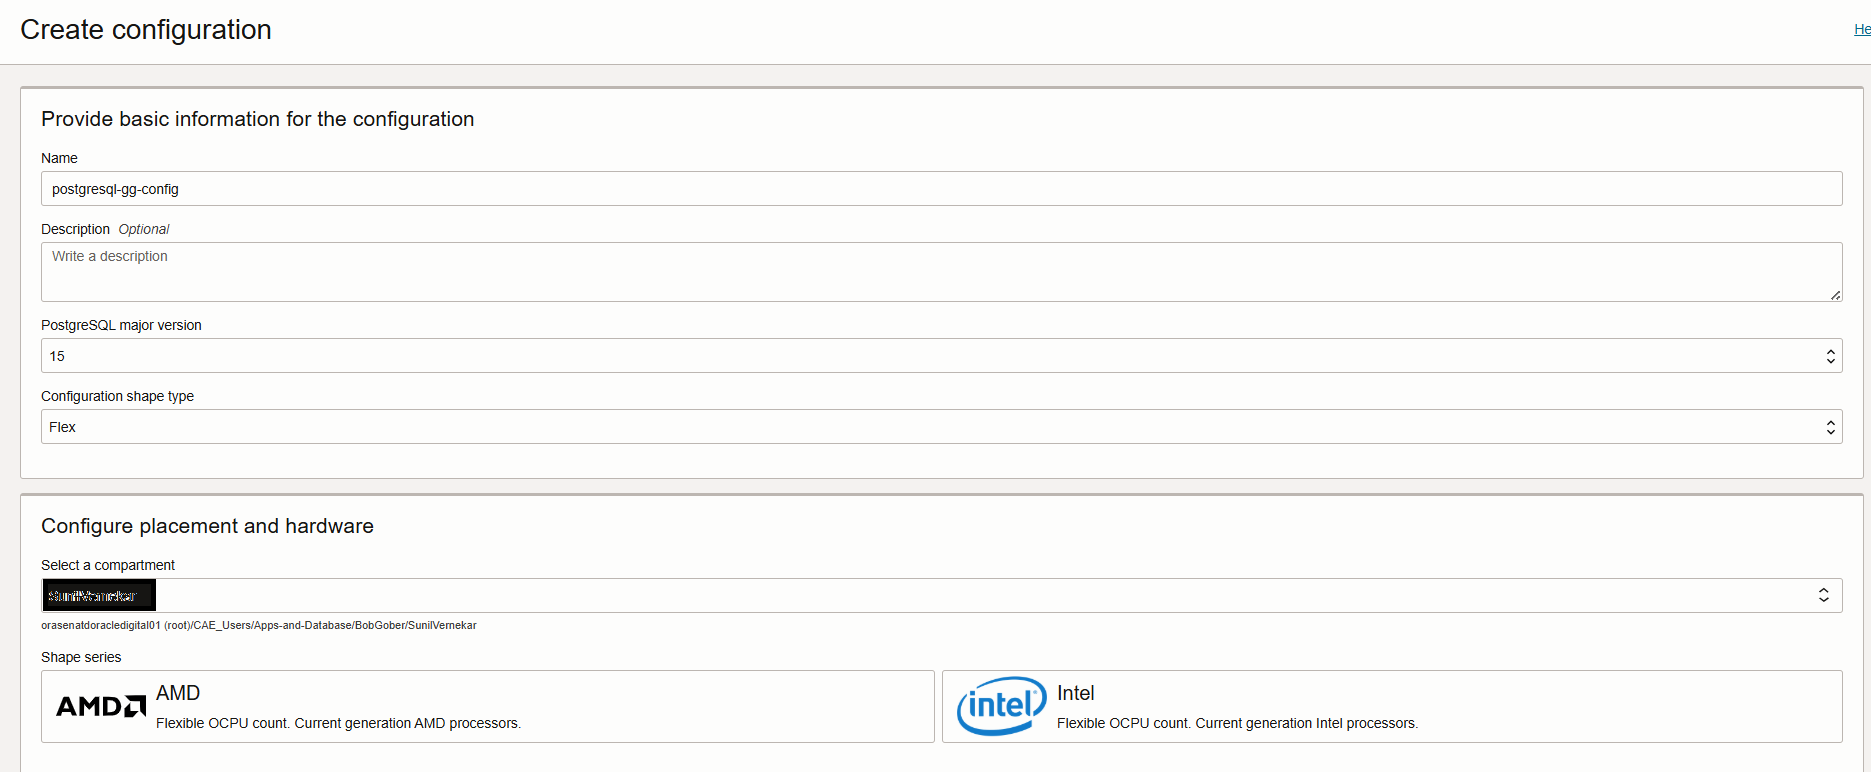
- Next, click on the Create Configuration button. In the configuration setup, provide the name for the configuration and select the major version 15, as Goldengate supports OCI PostgreSQL 15 and above. Choose the appropriate configuration shape type. And Shape Series either AMD or Intel
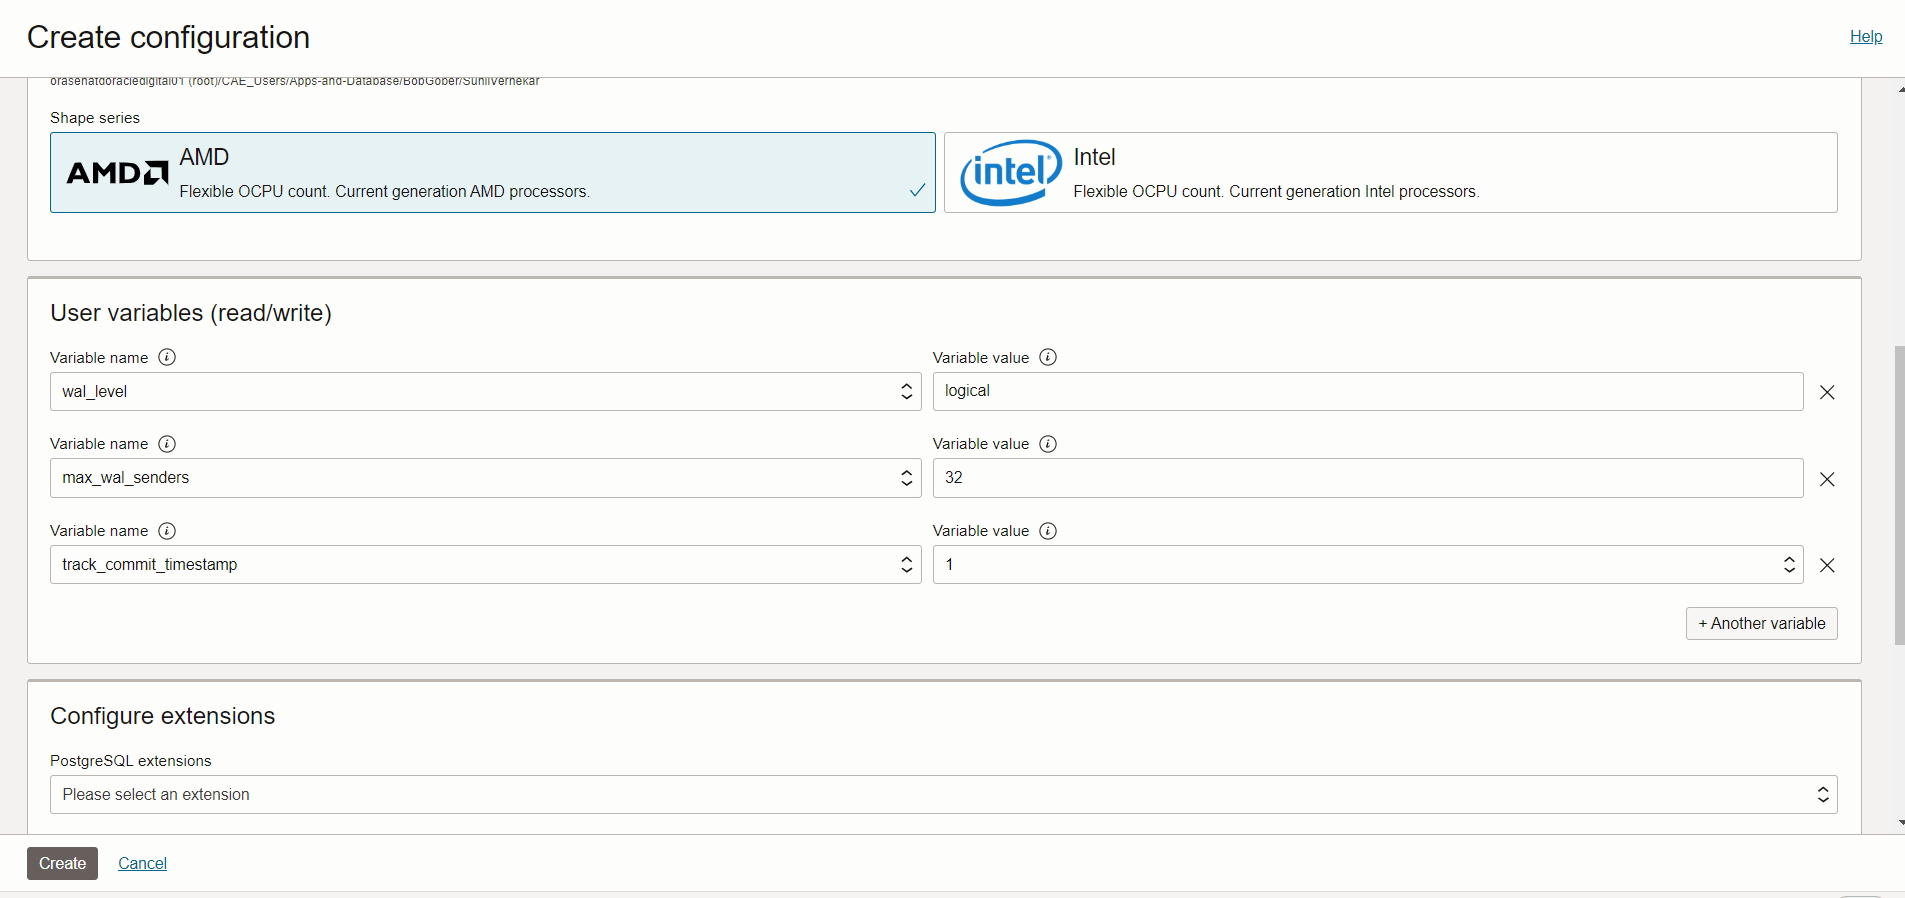
- Next, In User Variable section search the above-mentioned parameters such as wal_level, max_wal_senders and track_commit_timestamp
**max_replication_slots is already set to 32 so you can leave it as it is.
- Create PostgreSQL Database Systems:
Once we have the configuration ready next, we can create the PostgreSQL Database on OCI.
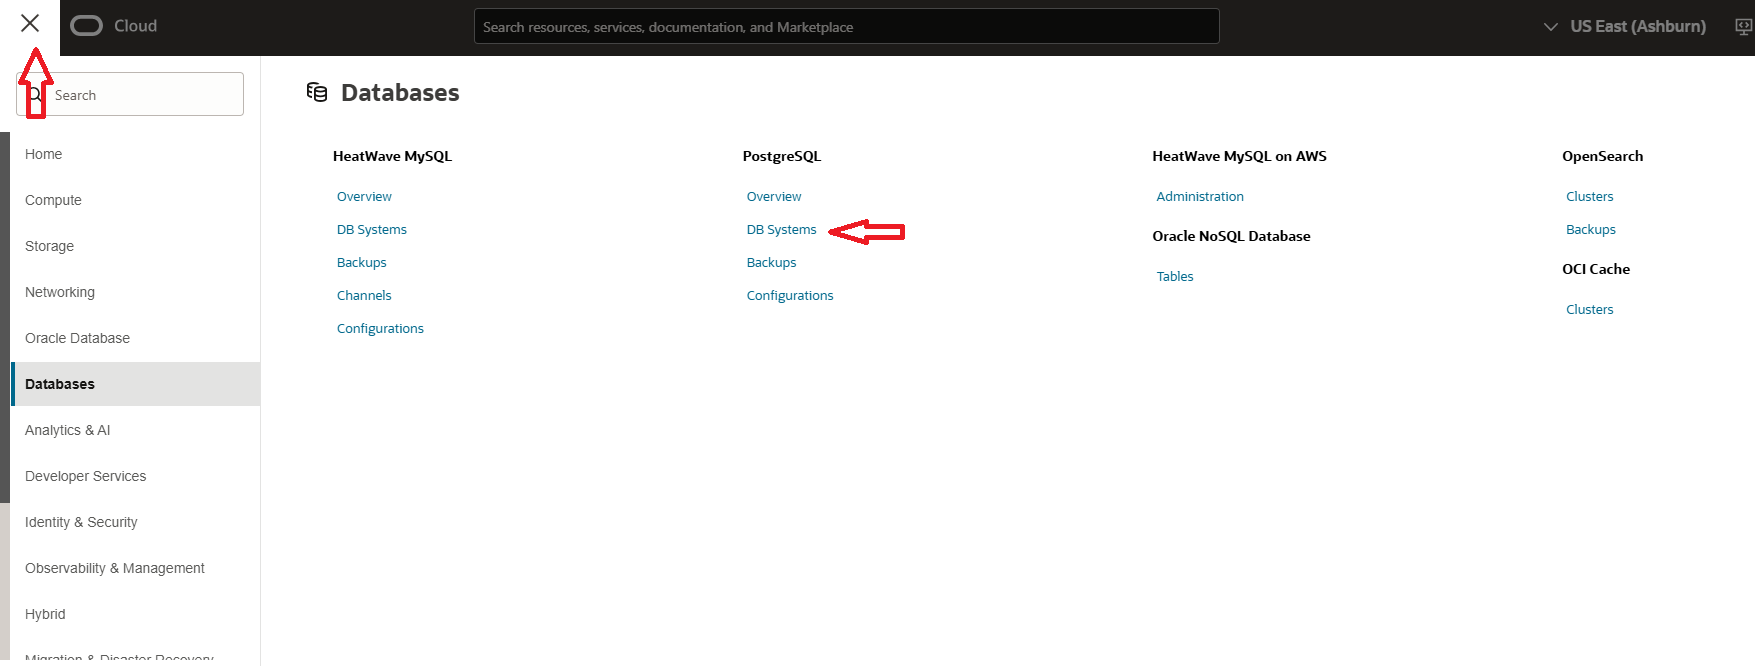
- To create a PostgreSQL DB, navigate to the OCI Console, open the hamburger menu (☰) in the top-left corner, and go to PostgreSQL > DB Systems. This is where you can manage and create your PostgreSQL DB system.
- Next, click on the Create PostgreSQL Database System button, Select Create new Database System, and click on next. In this page provide Database Name and select Database Version 15.
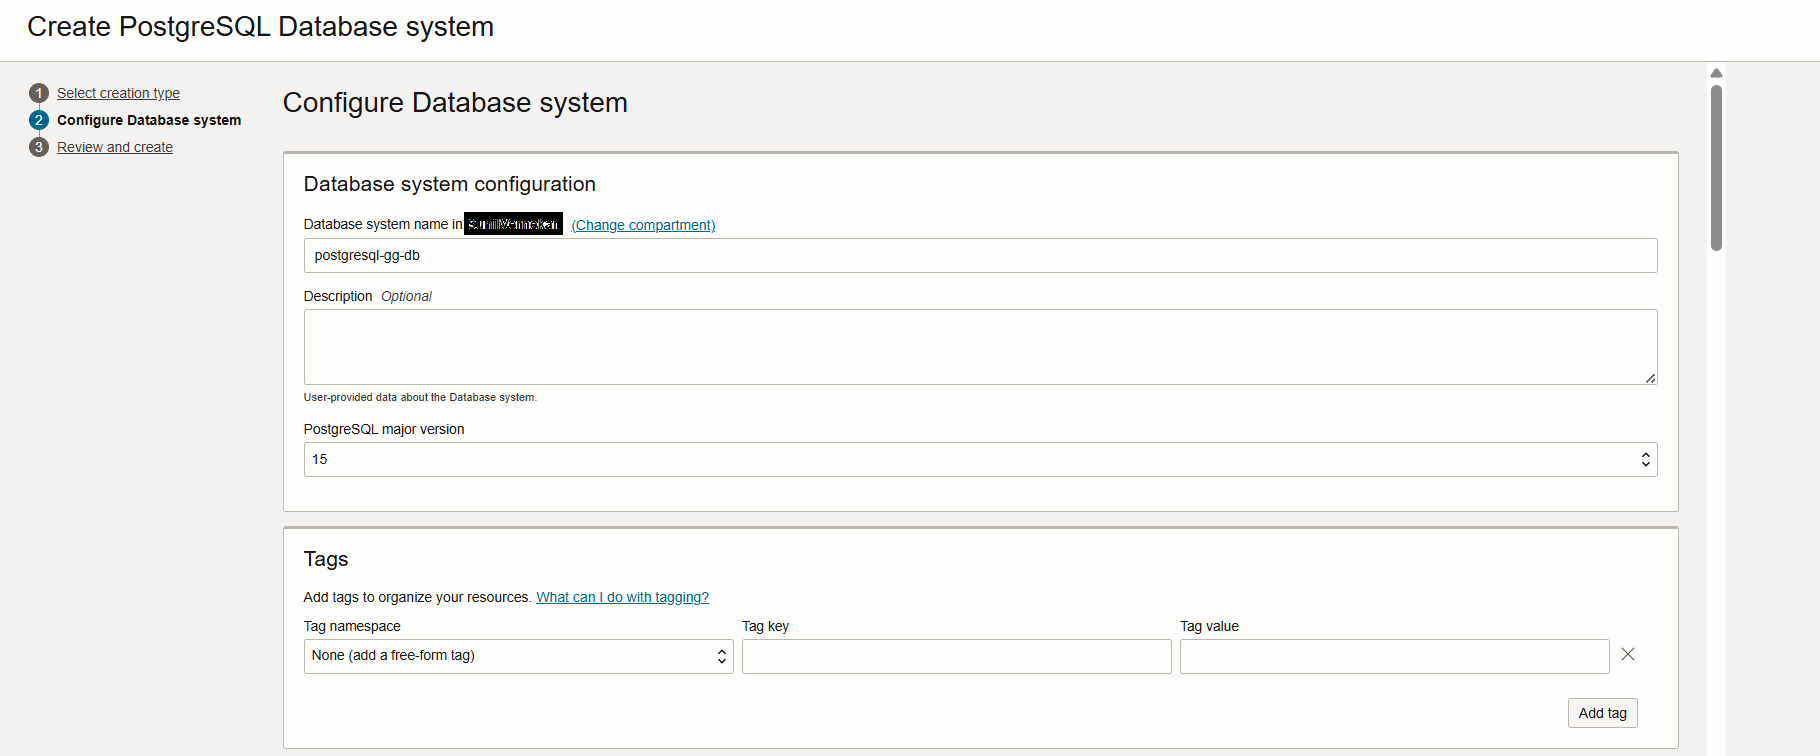
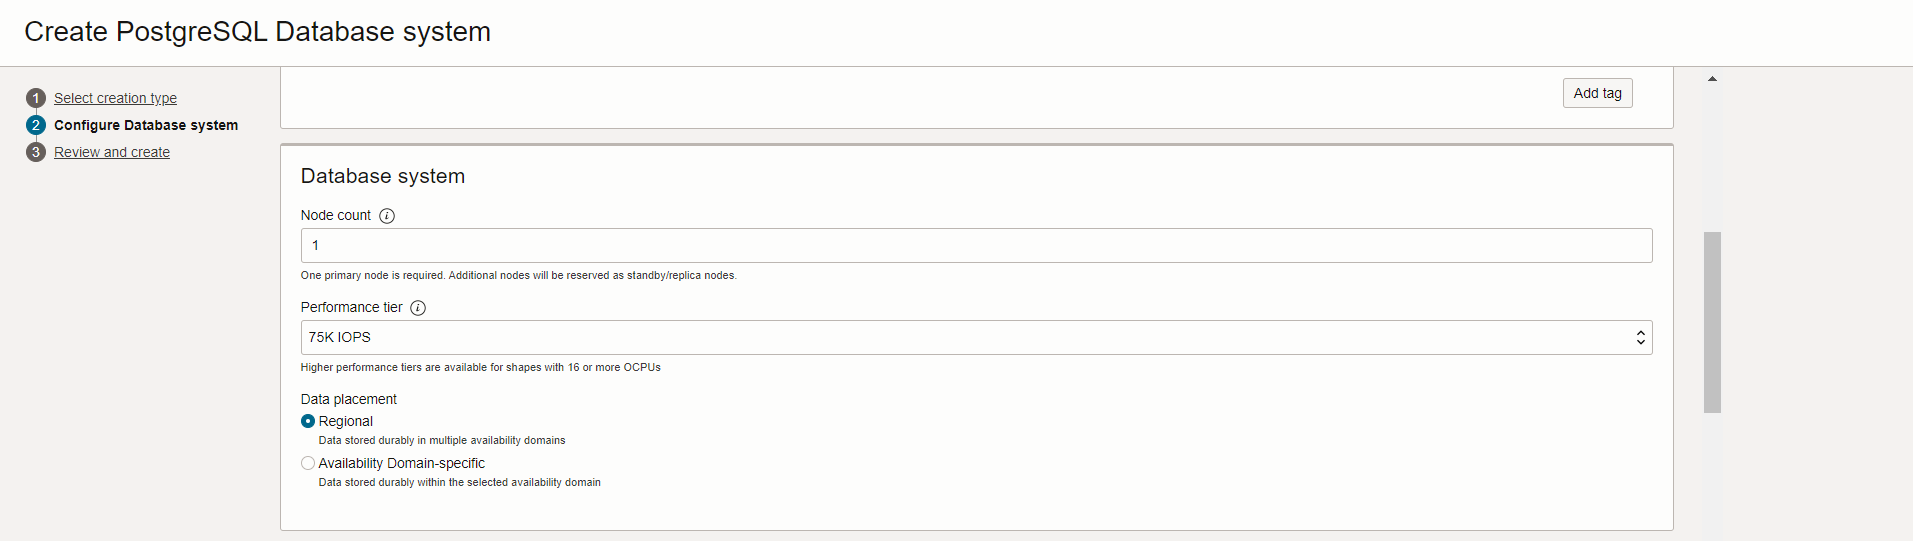
- Next, In the same page fill in the details for Database System section.
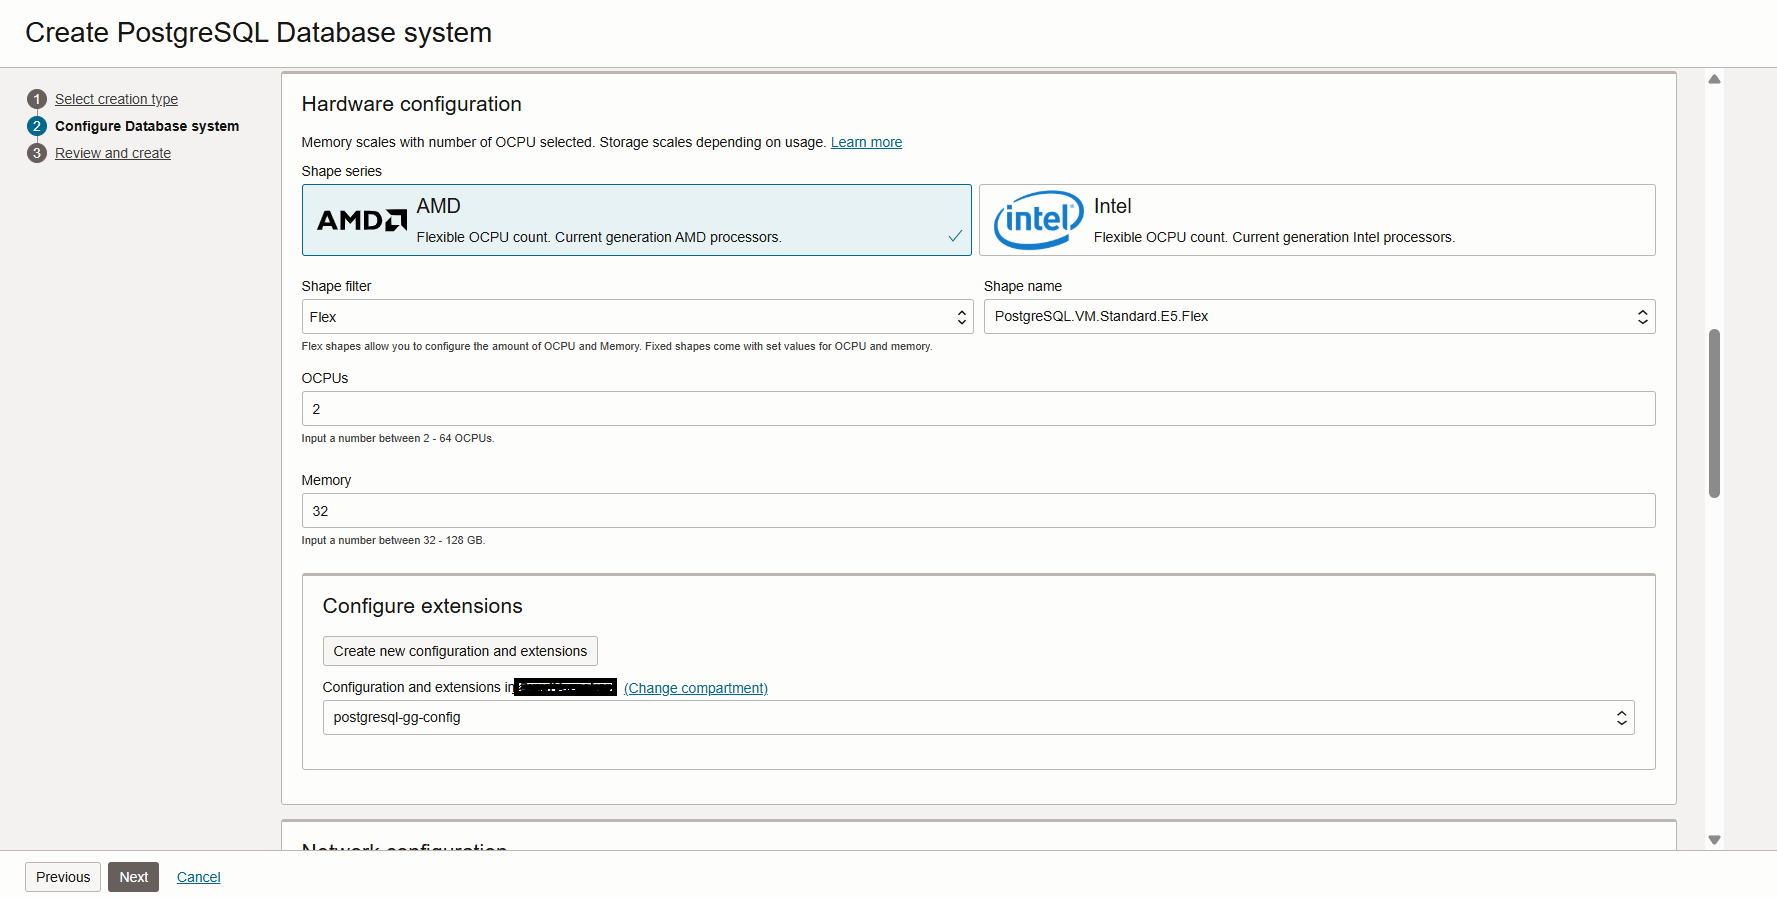
- Next, In the same page fill in the details for Hardware Configuration section. Select the same shape series, shape filter as selected in the configuration setup in Step 1b. Also select the configuration from the dropdown.
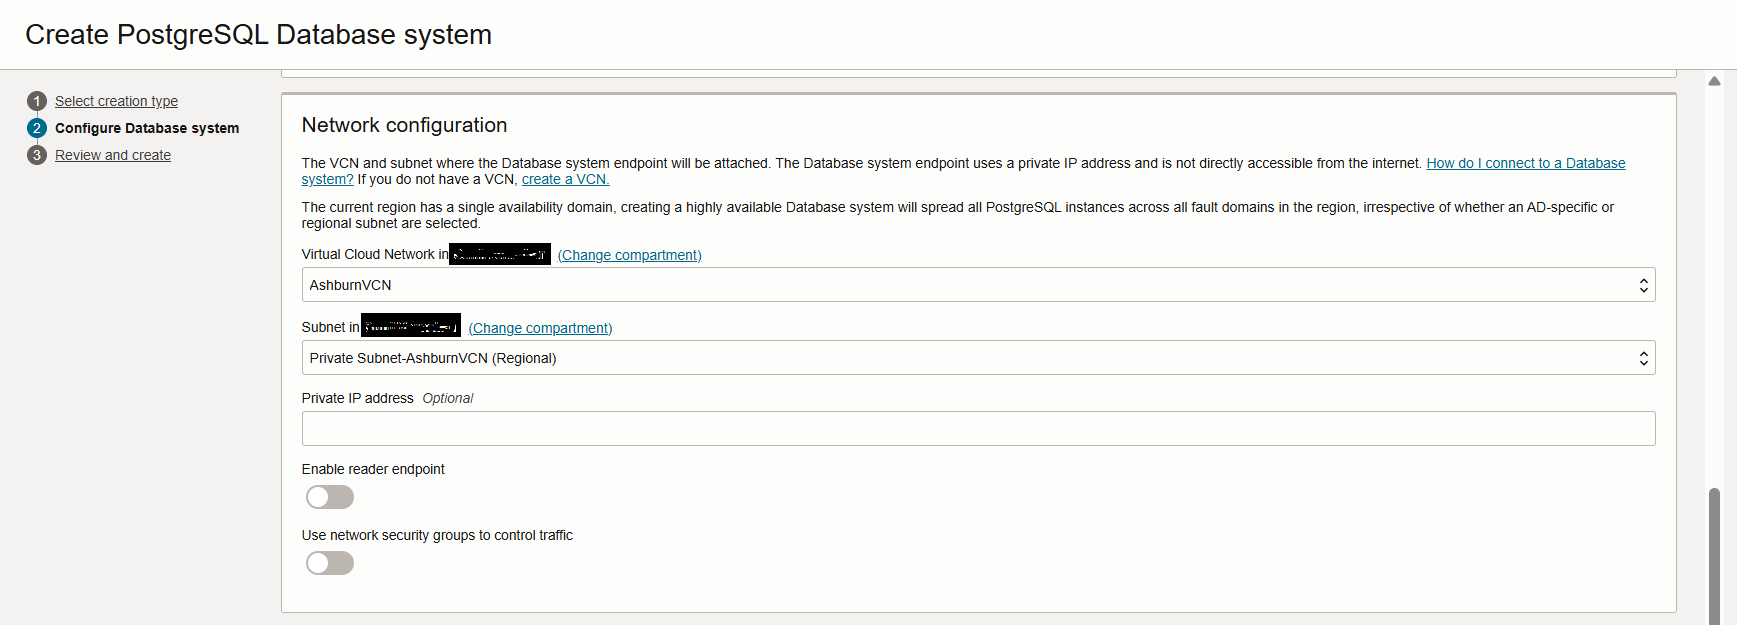
- Next, In the same page fill in the details for Network Configuration.
- Next, In the same page fill in the details for Administrator Credentials. Here provide the system username and for password you can either choose to input the system password or choose OCI Vault for the system password.
Also, you can choose Backup and Maintenance policies as required.

Click on Next and review the setup and click on submit button for creating the Database.
- Create Connection for PostgreSQL Database in OCI Goldengate Service:
Before creating the connection to OCI PostgreSQL DB, you should have a OCI Goldengate for PostgreSQL deployment created and ready. Below is the documenation on how to create a OCI Goldengate deployment.
Create an OCI GoldenGate deployment
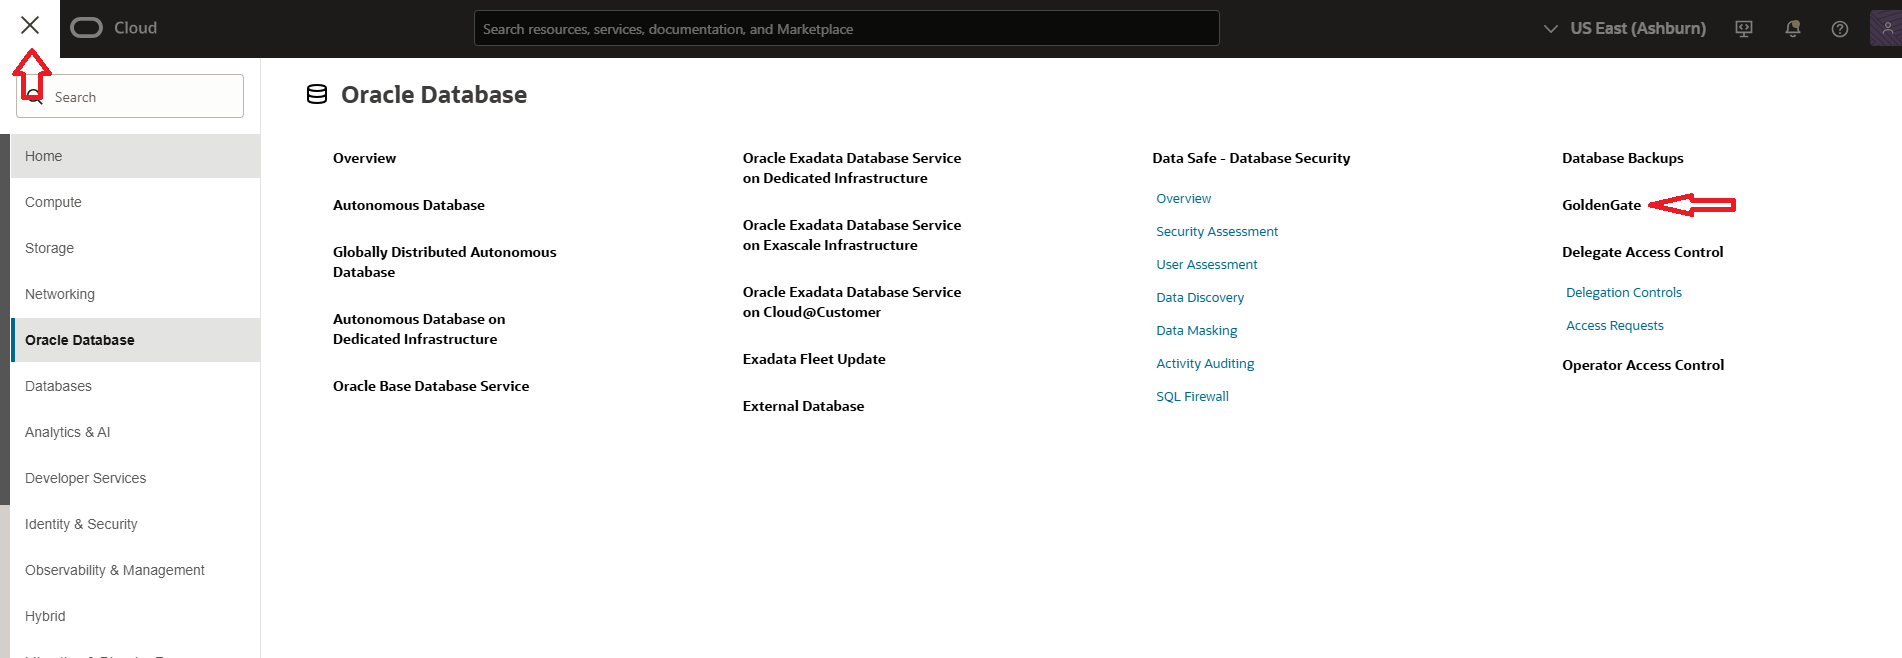
- Now create the connection to the PostgeSQL database from OCI Goldengate. For that to your PostgreSQL database, navigate to the OCI Console, open the hamburger menu (☰), and go to the GoldenGate section.
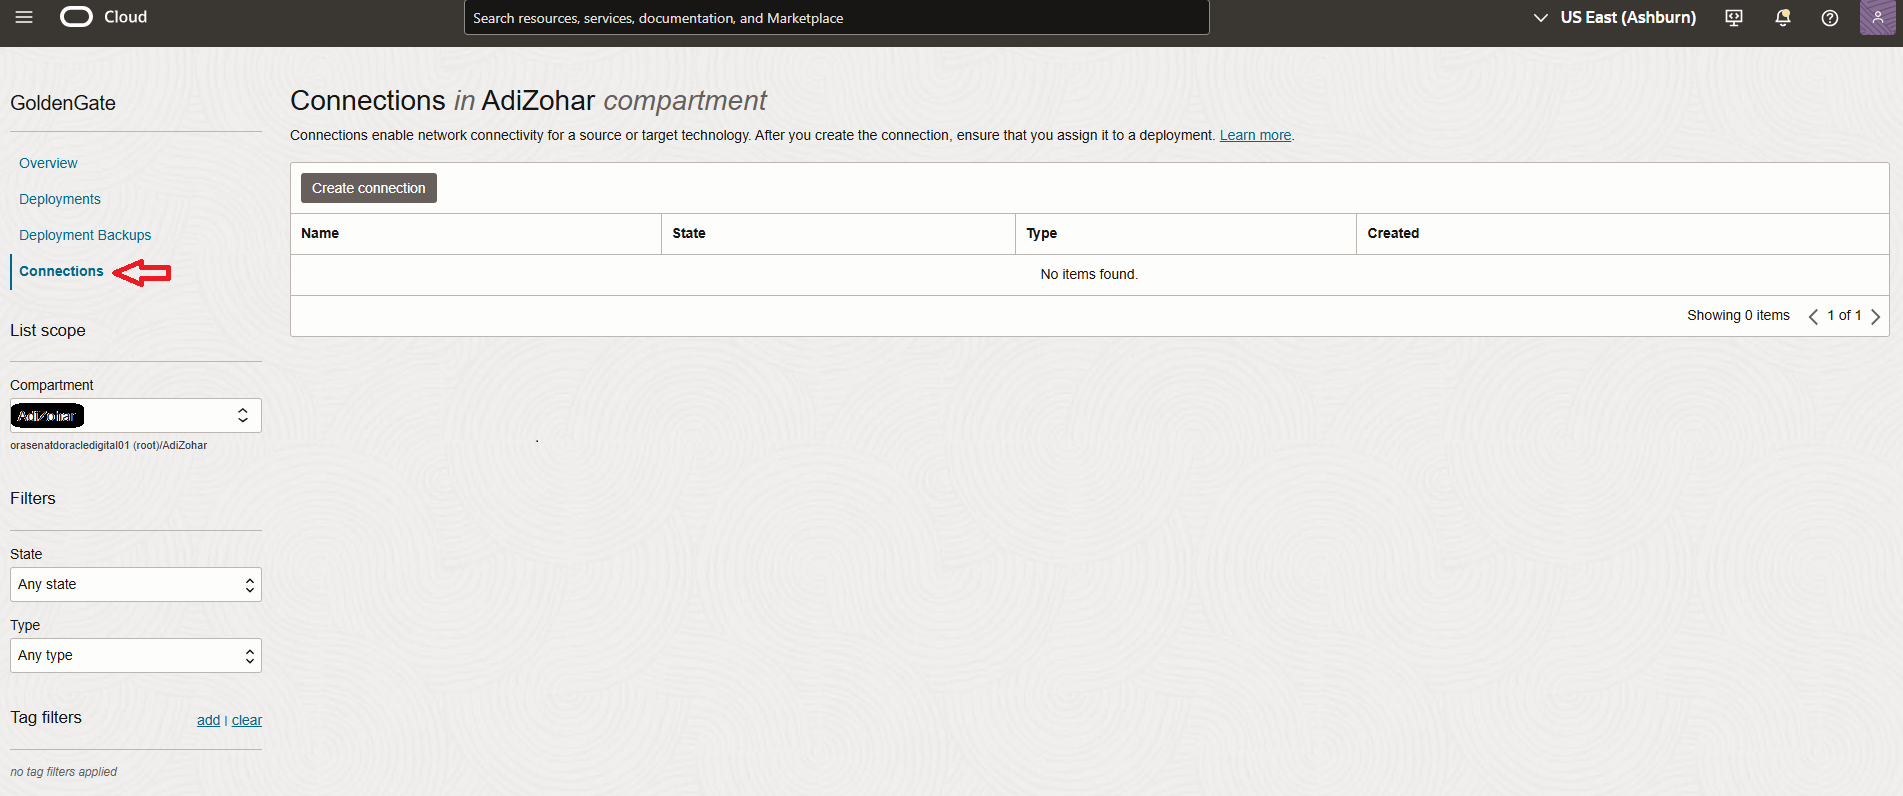
- Next, go to the Connections section within the GoldenGate console, and click on Create Connection.
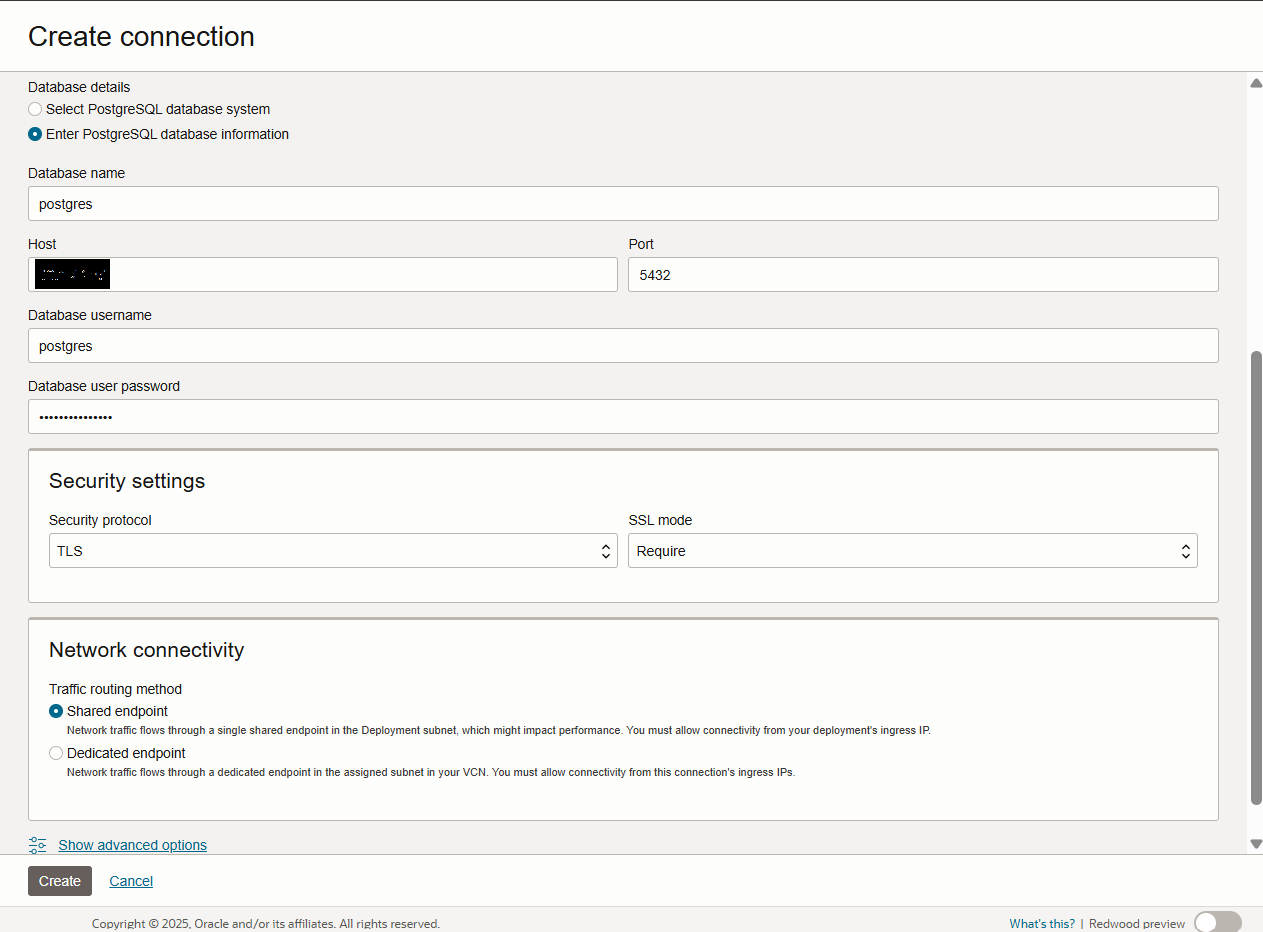
- Next, In Create Connection page, provide the connection name and select type as OCI PostgreSQL
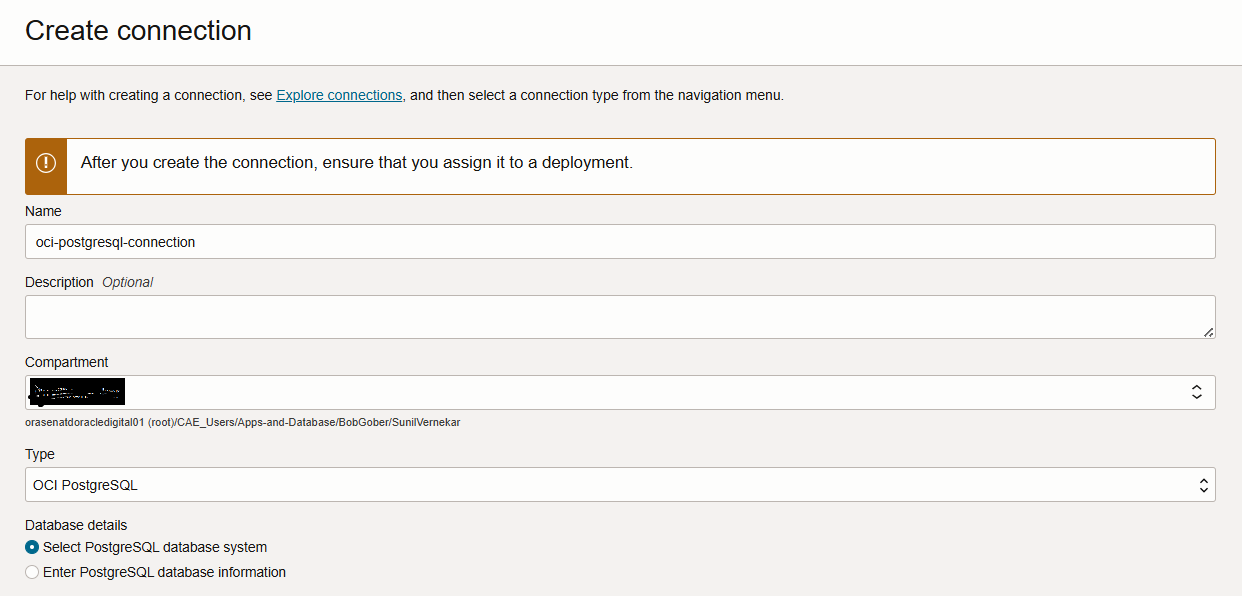
- Next, In the same page you must provide the Database details and you have 2 options to either, Select PostgreSQL database system or Enter PostgreSQL database information.
If you choose Select PostgreSQL database then, select your database from drop down by choosing the correct compartment in which the PostgreSQL DB exists.
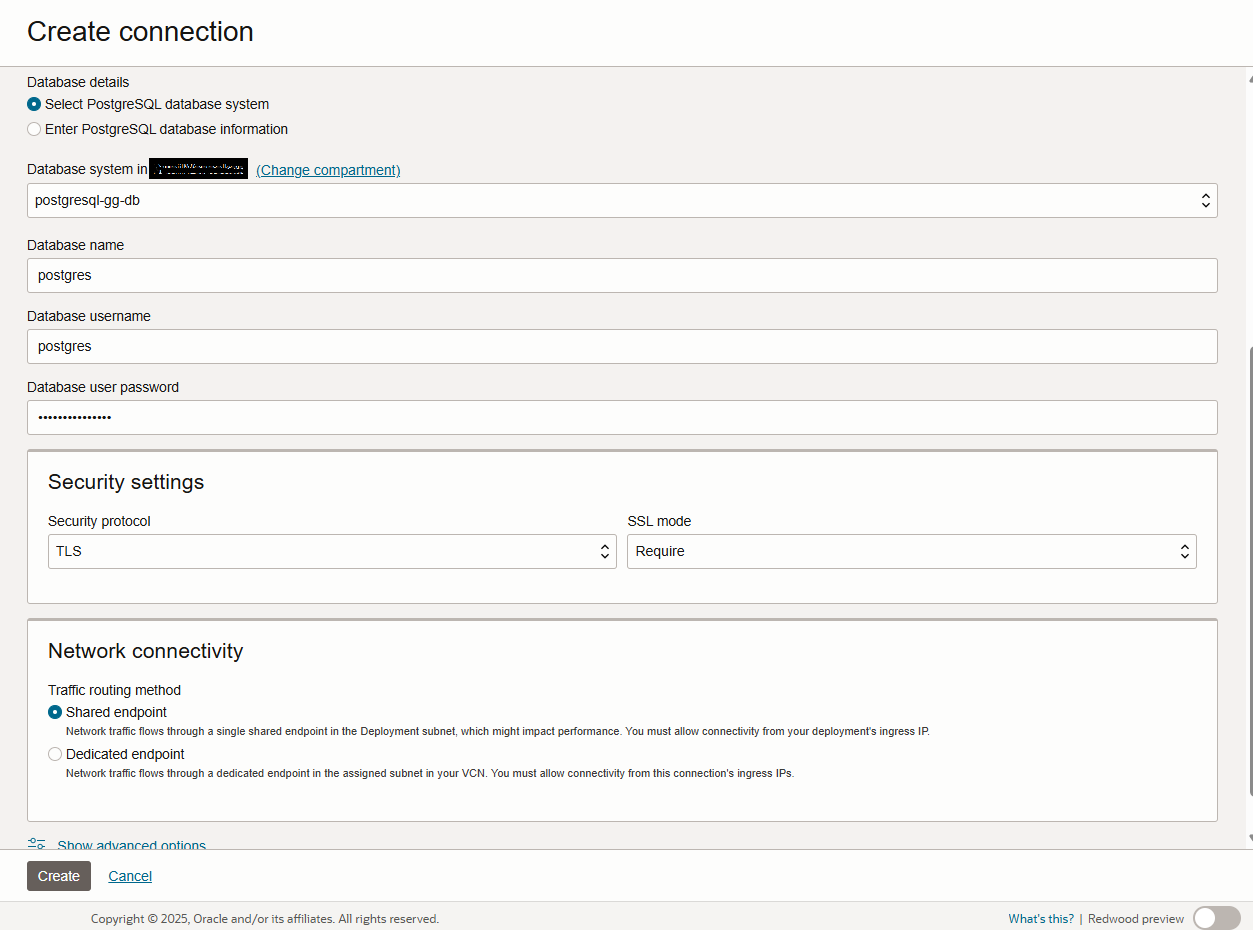
And if you choose Enter PostgreSQL database information then, you need to provide the IP Address of the PostgreSQL DB and port 5432.
In Database name, provide your database name in PostgreSQL DB System. When you created the PostgreSQL DB System in Step 2 for that, the default database name is postgres.
Username and Password can be of Goldengate user created in PostgreSQL DB or you can use system user provided while creating the PostgreSQL DB in Steps 2.
In the Security Setting in both cases would be TLS Protocol and SSL Mode Require.
In Network Connectivity, it can be either shared or dedicated.
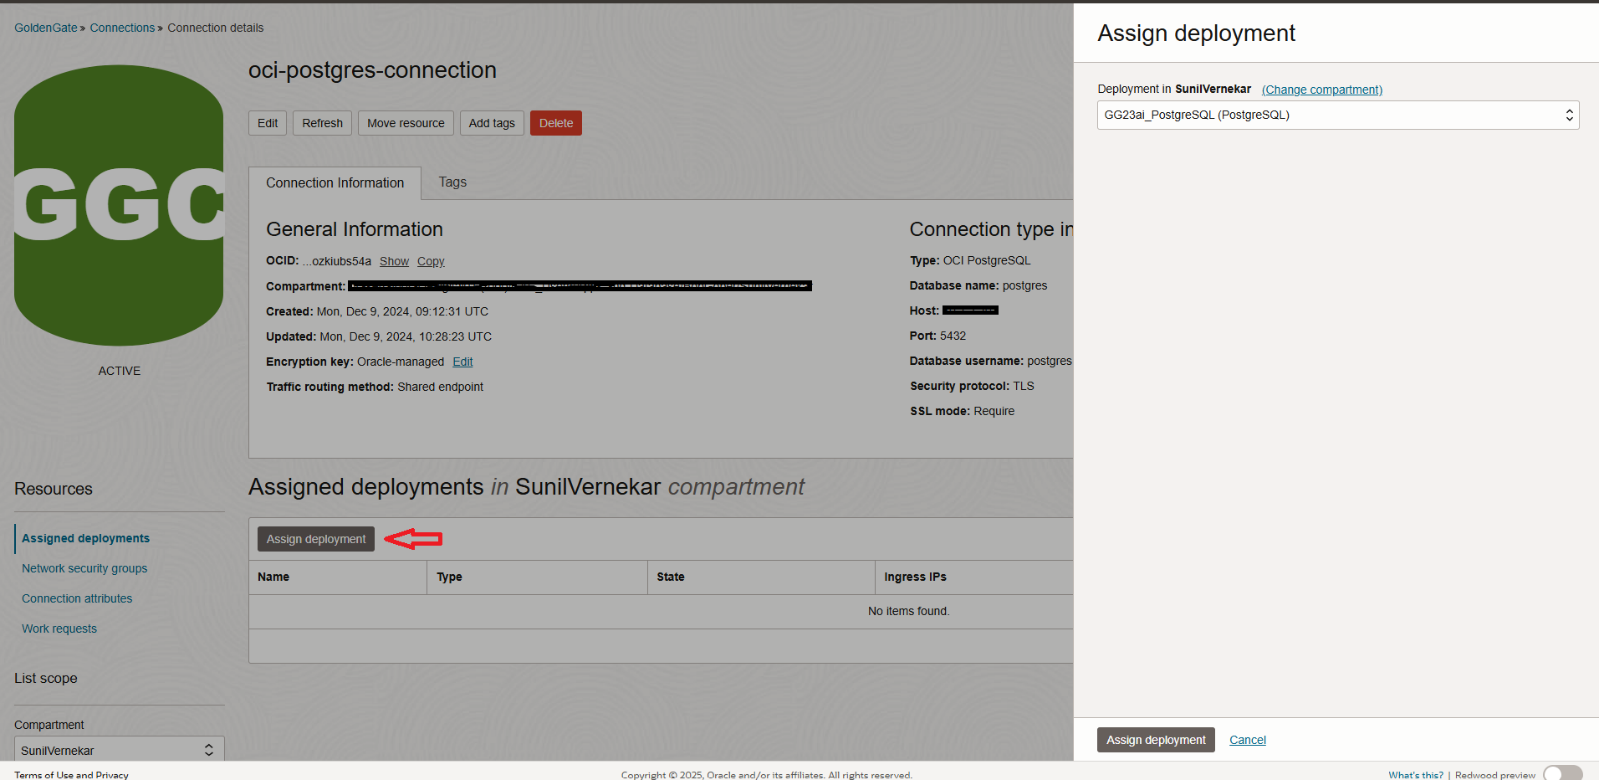
- Next, click on the created connection and assign it to your OCI Goldengate deployment.
- Create OCI Goldengate Extract on OCI PostgreSQL DB:
To enable GoldenGate to start capturing changes, the user must be granted the necessary replication privileges. In this example, I’m using the default admin user which is “postgres” for GoldenGate capture.
If you choose to create a separate user for GoldenGate, ensure that it has all the required privileges. You can refer to the GoldenGate for PostgreSQL documentation for the complete list of permissions needed.
Prepare Database Users and Privileges for PostgreSQL
ALTER ROLE POSTGRES REPLICATION;
Or
ALTER USER POSTGRES WITH REPLICATION;
Also provide all privileges on the data schema to Goldengate user. You might have to do the same of ggschema that you would create for checkpoint table in case of replication.
GRANT ALL PRIVILEGES ON SCHEMA soe TO postgres;
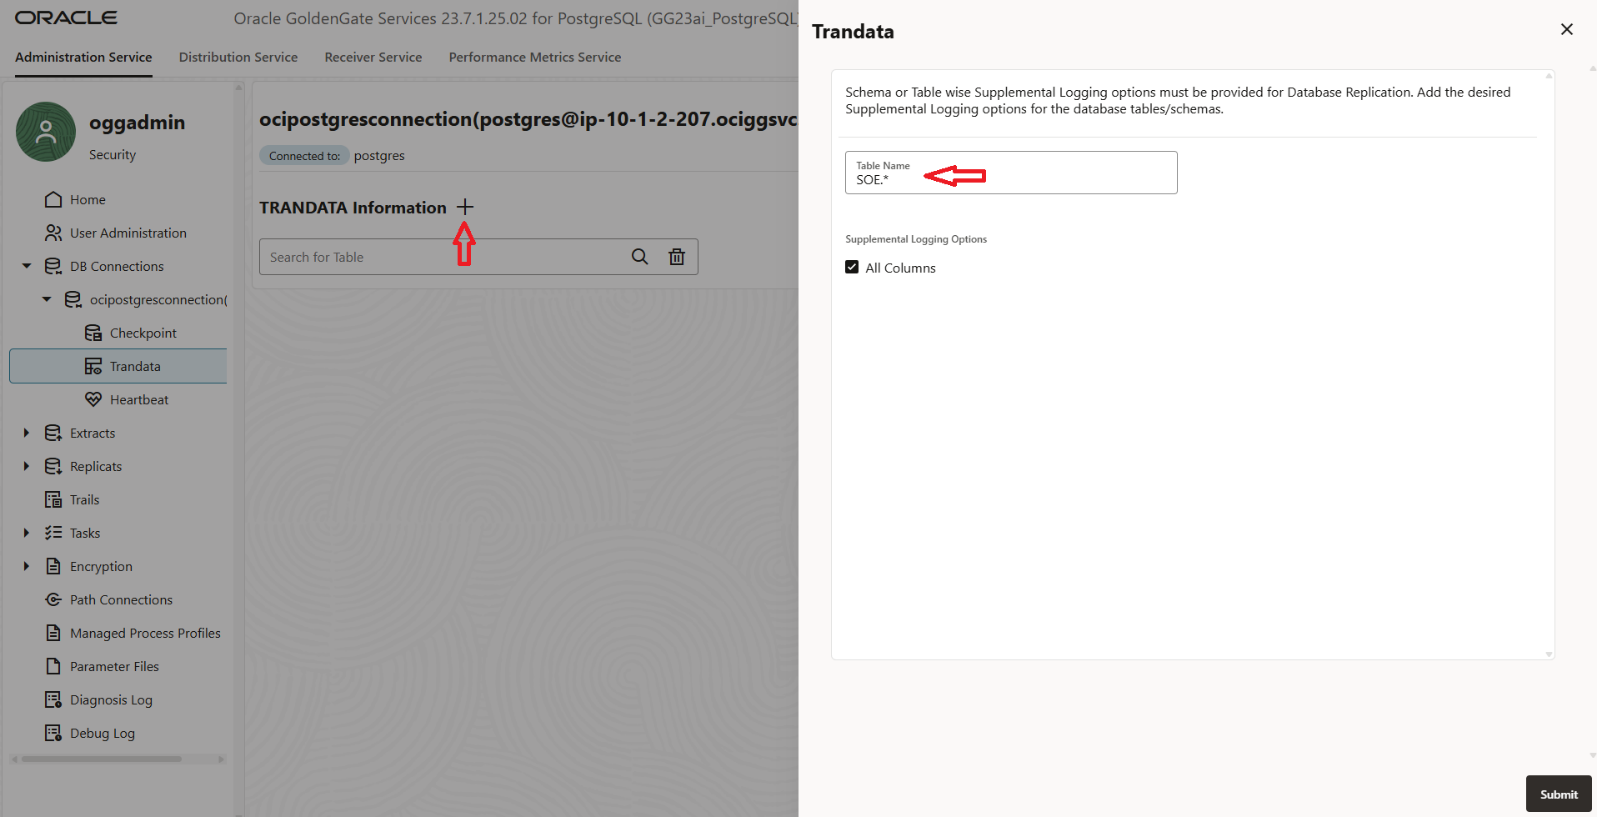
- First step is to enable supplemental logging. Supplemental logging is a process in which Oracle GoldenGate sets source database table level logging to support change data capture of source DML operations.
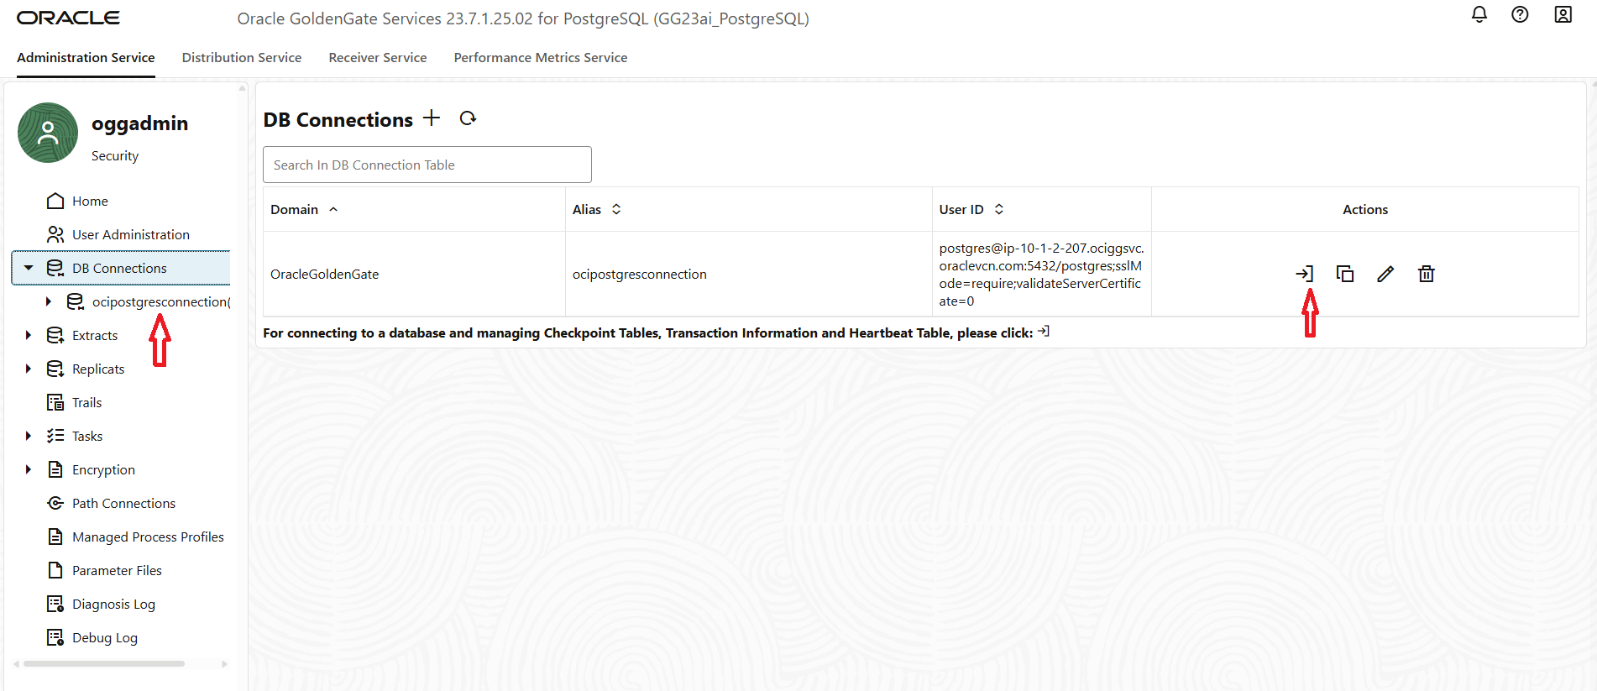
After logging into the OCI GoldenGate Console, navigate to the DB Connections section. Here, you’ll see all the database connections associated with this GoldenGate deployment—set up earlier in Step 3, and then click on connect button.
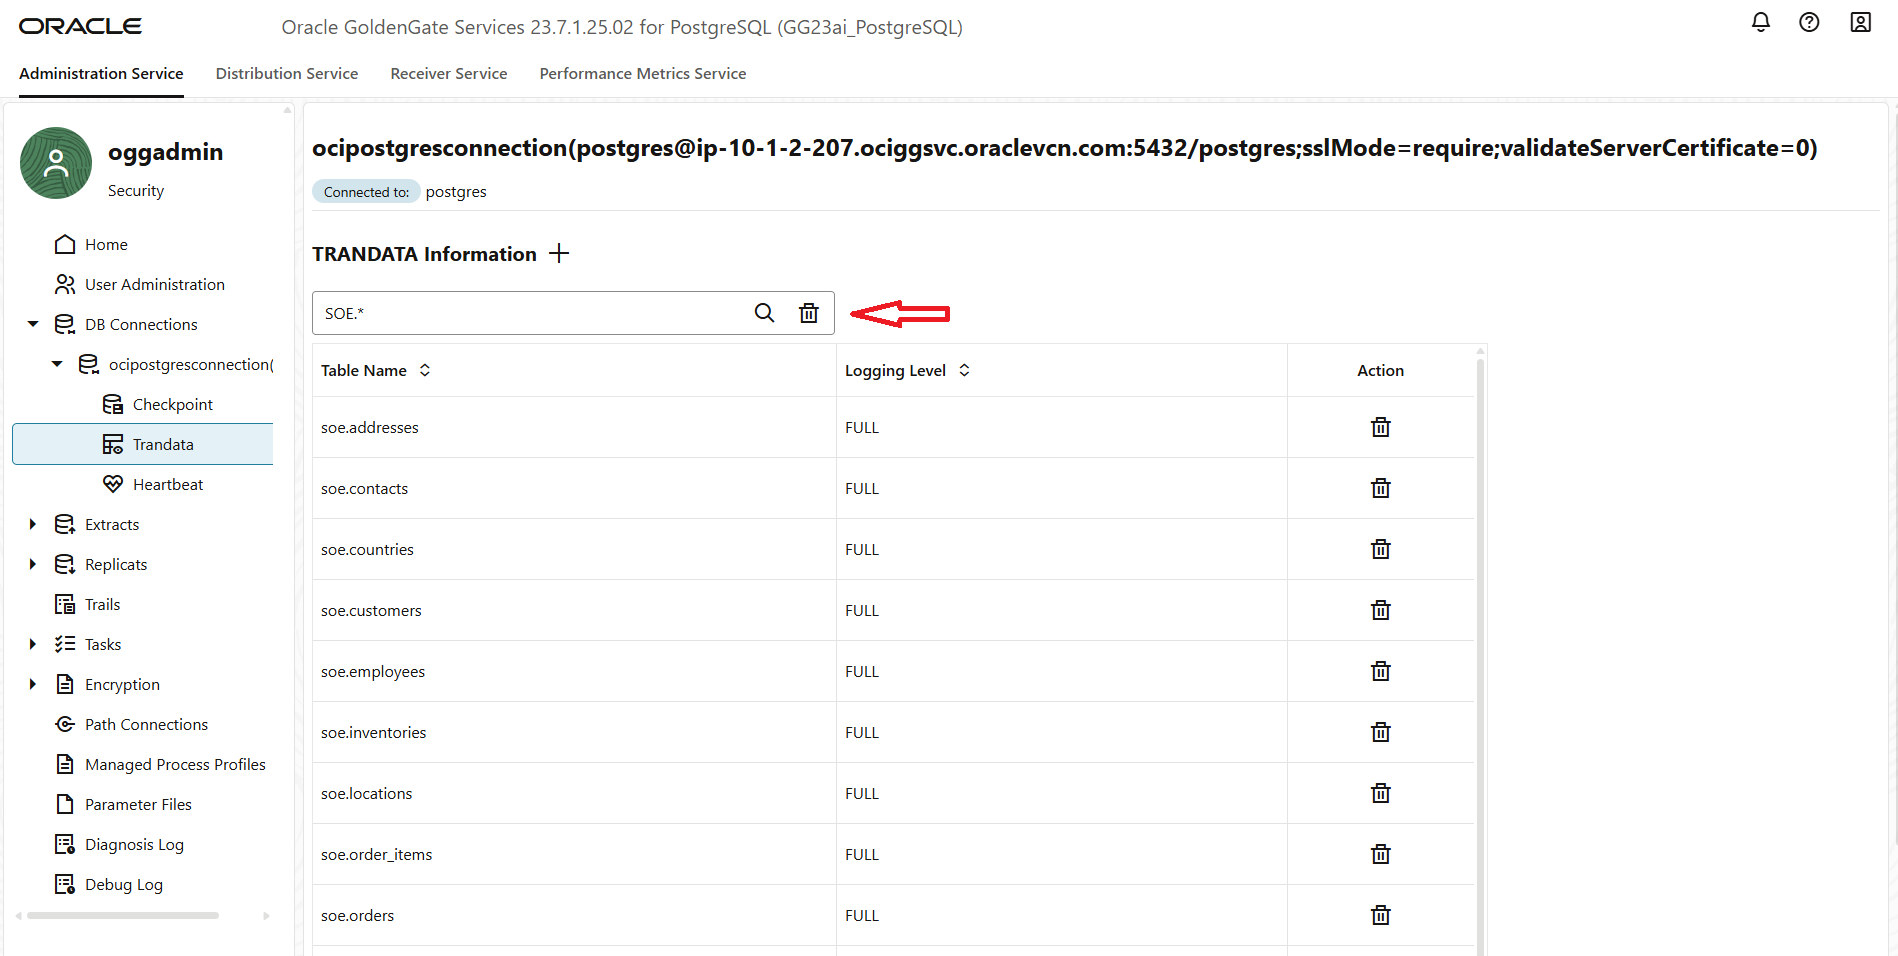
- Next, navigate to the Trandata section in the OCI GoldenGate console. Click on the “+” (Add Trandata) button and specify the schema(s) that contain the tables you want GoldenGate to capture and submit.
- Next, you can now view all the tables that have supplemental logging enabled. This allows you to verify that the required tables are properly configured for change data capture by GoldenGate.
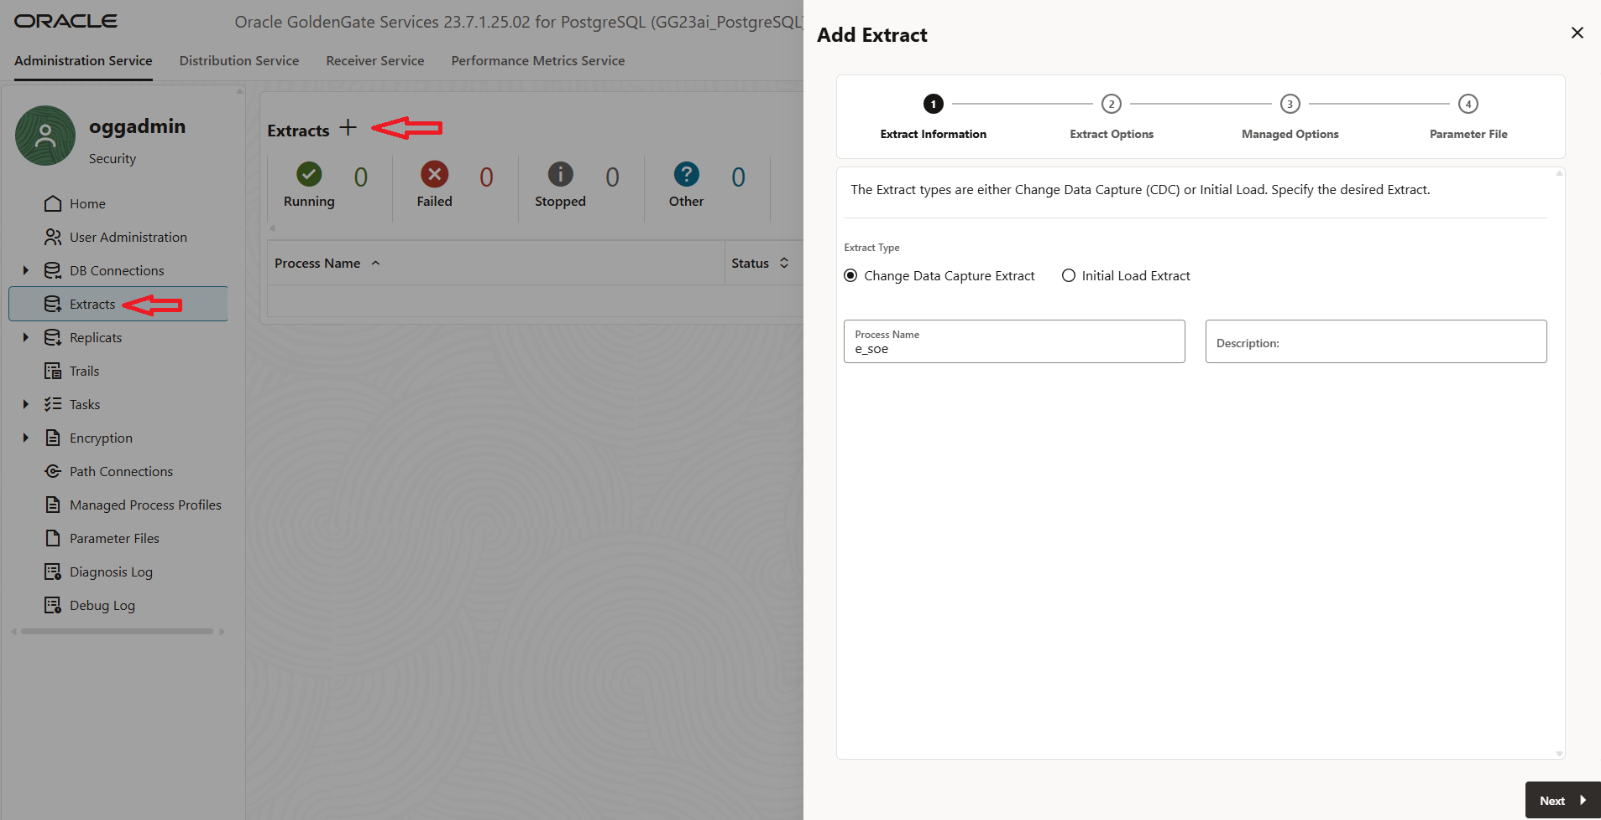
- Once supplemental logging has been enabled, the next step is to create the Extract process. To do this, navigate to the Extracts section in the OCI GoldenGate Console and click the “+” button to add a new extract.
You’ll be presented with two options:
- Change Data Capture (CDC) Extract – used for capturing ongoing changes from the source tables in real time.
- Initial Load Extract – used for performing a one-time data load of existing records.
For real-time replication, select the Change Data Capture Extract option. Provide an extract name and click on next.
- On the Extract Options – Select When to Begin
When configuring the Extract, you’ll be prompted to choose the point in time from which GoldenGate should begin capturing changes. You can select from the following options:
- Now – Starts capturing changes from the current point forward.
- Custom Time – Specify a custom timestamp to begin capturing from a specific point in the past.
- Position in Log – Use a specific log sequence number or position within the WAL logs to start extraction (typically used for advanced recovery or restart scenarios).
- End of Log – Begins capturing from the very end of the current transaction log, skipping all prior changes.
Choose the option that best aligns with your replication requirements. For most real-time CDC use cases, “Now” is the recommended starting point.
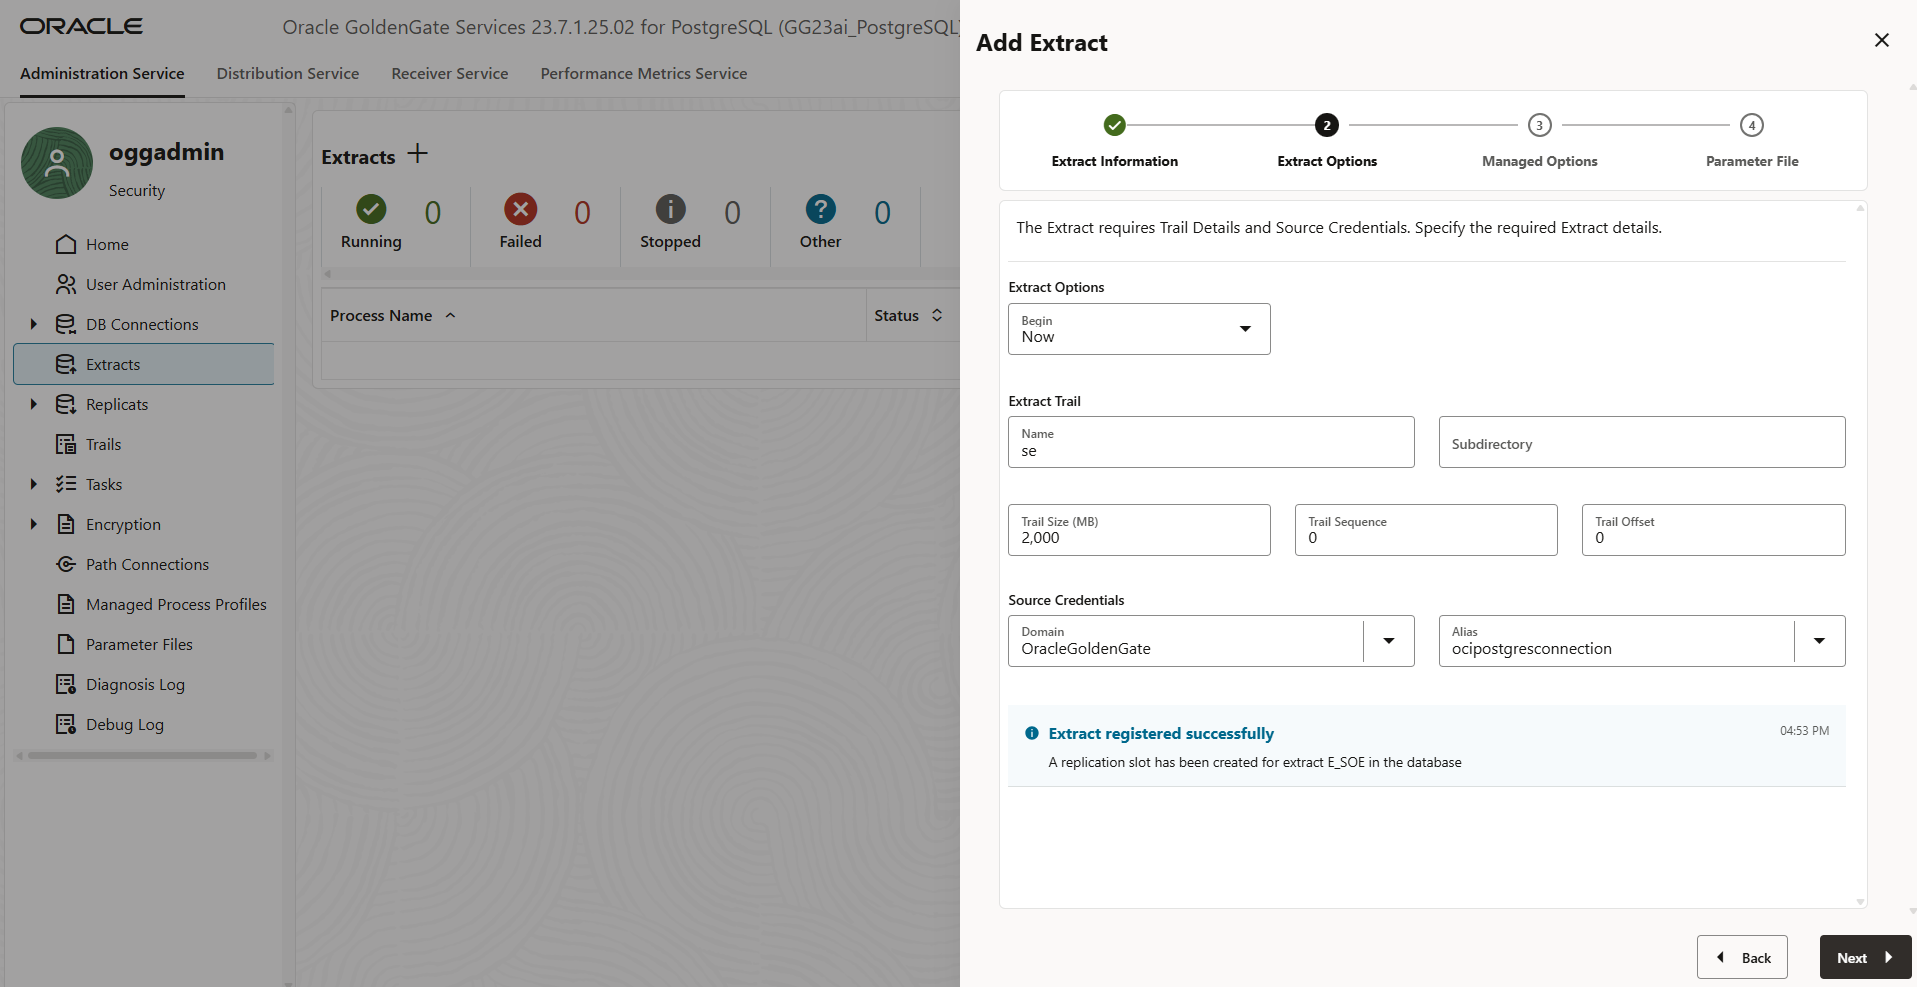
Enter Extract Trail Details
Next, provide the details for the Extract Trail, which defines how and where GoldenGate stores the captured changes before delivering them to the target:
- Name: A two-character identifier for the trail file (e.g., aa, tr).
- Subdirectory: The directory within the deployment where the trail files will be stored.
- Trail Size: Maximum size (in MB) for each trail file before a new one is created.
- Trail Sequence: (Optional) Starting sequence number for the trail files.
- Trail Offset: (Optional) Starting byte offset within the trail file.
Then, select the appropriate Source Credentials Domain and Alias from the dropdown menus to authenticate the Extract process.
Once all fields are filled in, click on Register and then Next to proceed with the extract configuration.
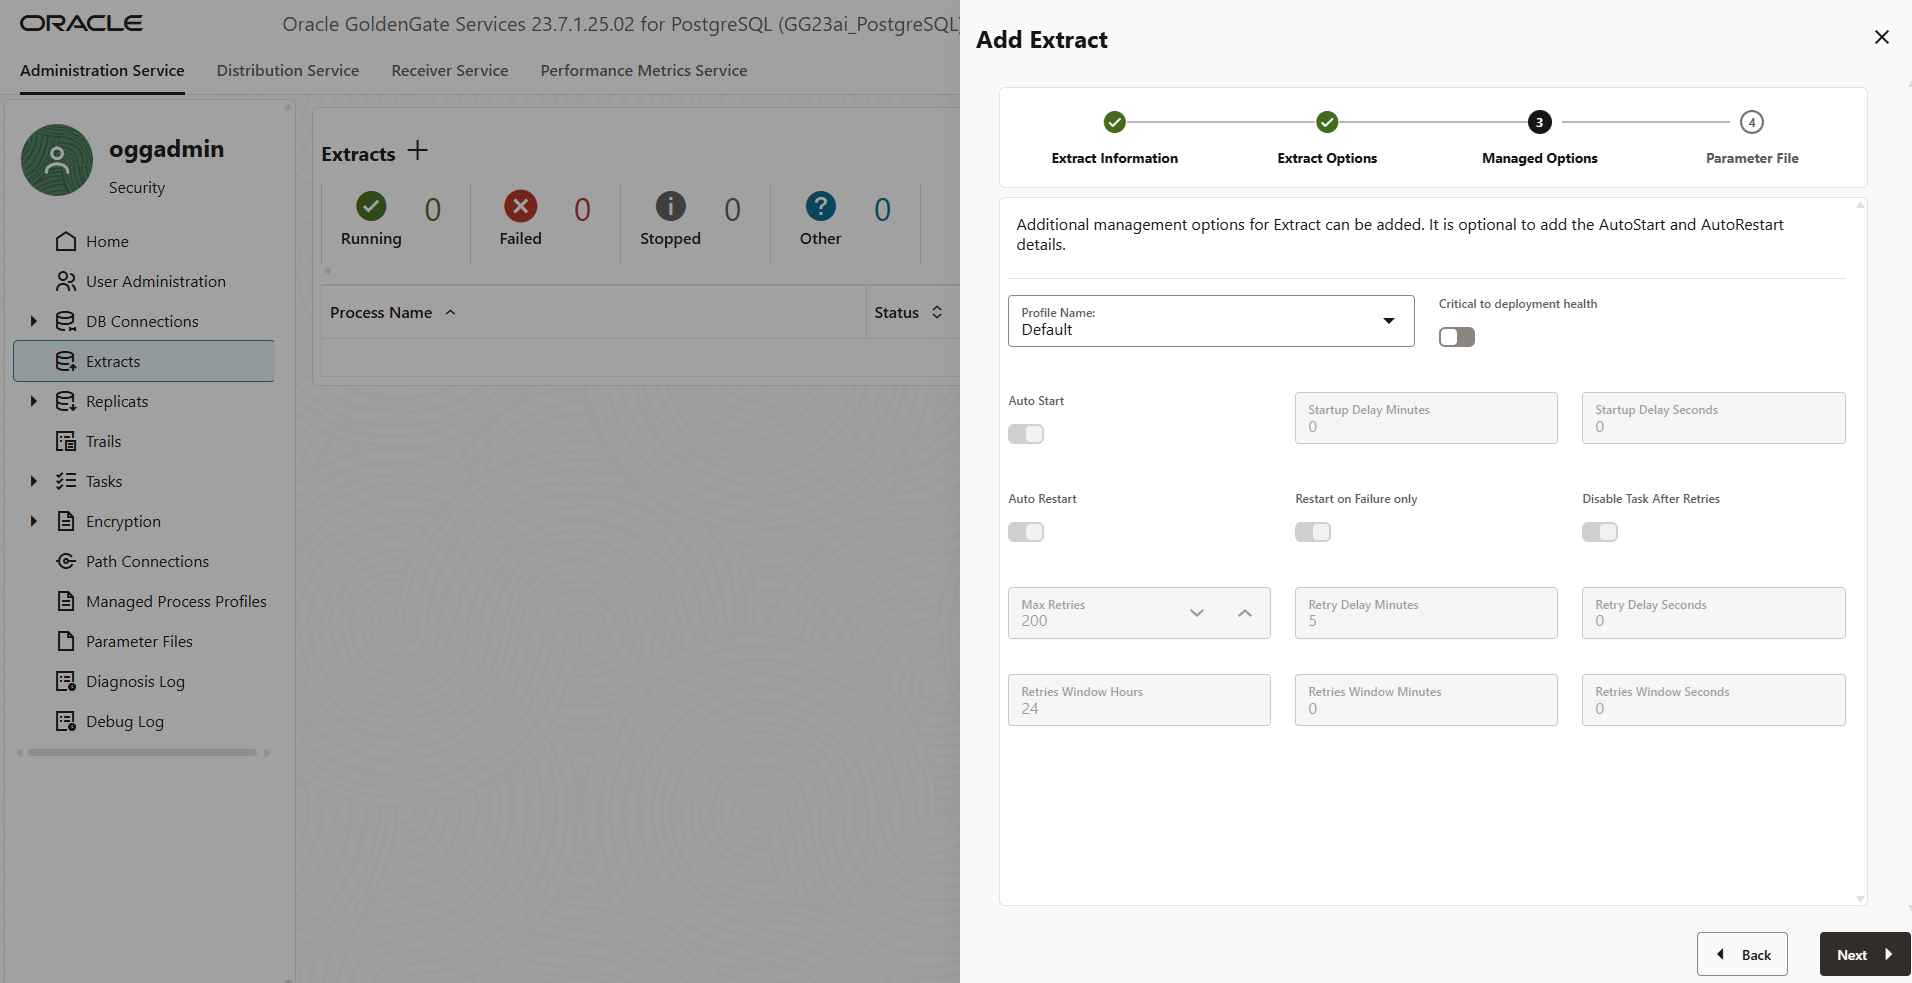
- On the Managed Options page, you can configure additional settings to control how the Extract process behaves within your GoldenGate deployment. Complete the optional fields as needed:
- Profile Name: Select a profile to apply predefined runtime settings (optional).
- Enable Critical to Deployment Health: Marks this Extract as critical—any issues with it will reflect in the overall health status of the deployment.
- Enable Auto Start: Automatically starts the Extract process when the deployment is started.
- Enable Auto Restart: Automatically restarts the Extract if it stops unexpectedly.
After configuring these options, click Next to continue with the setup.
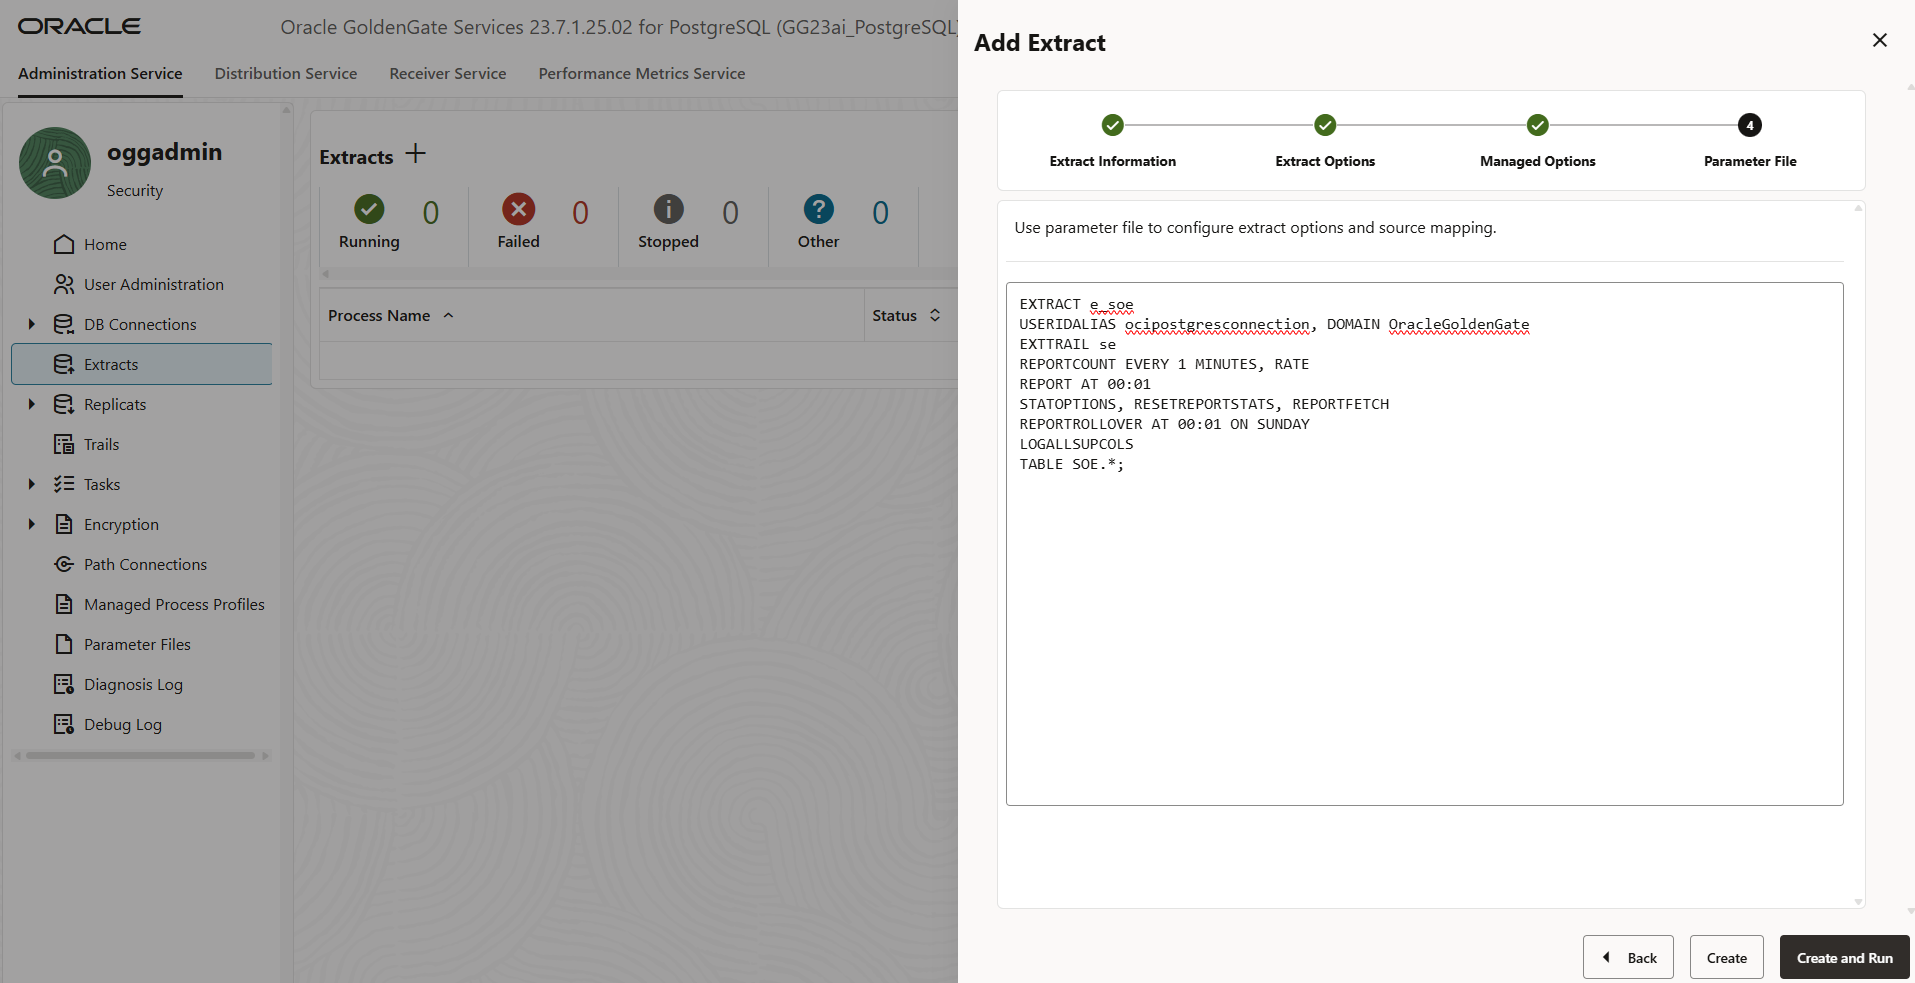
- On the Parameter File page, you can edit the text area to define the parameters for the Extract process. This is where you specify the tables or schemas you want to capture changes from.
You can list multiple tables or use wildcards as needed. Once you’ve added the appropriate table details, click Create and Run to start the Extract process.
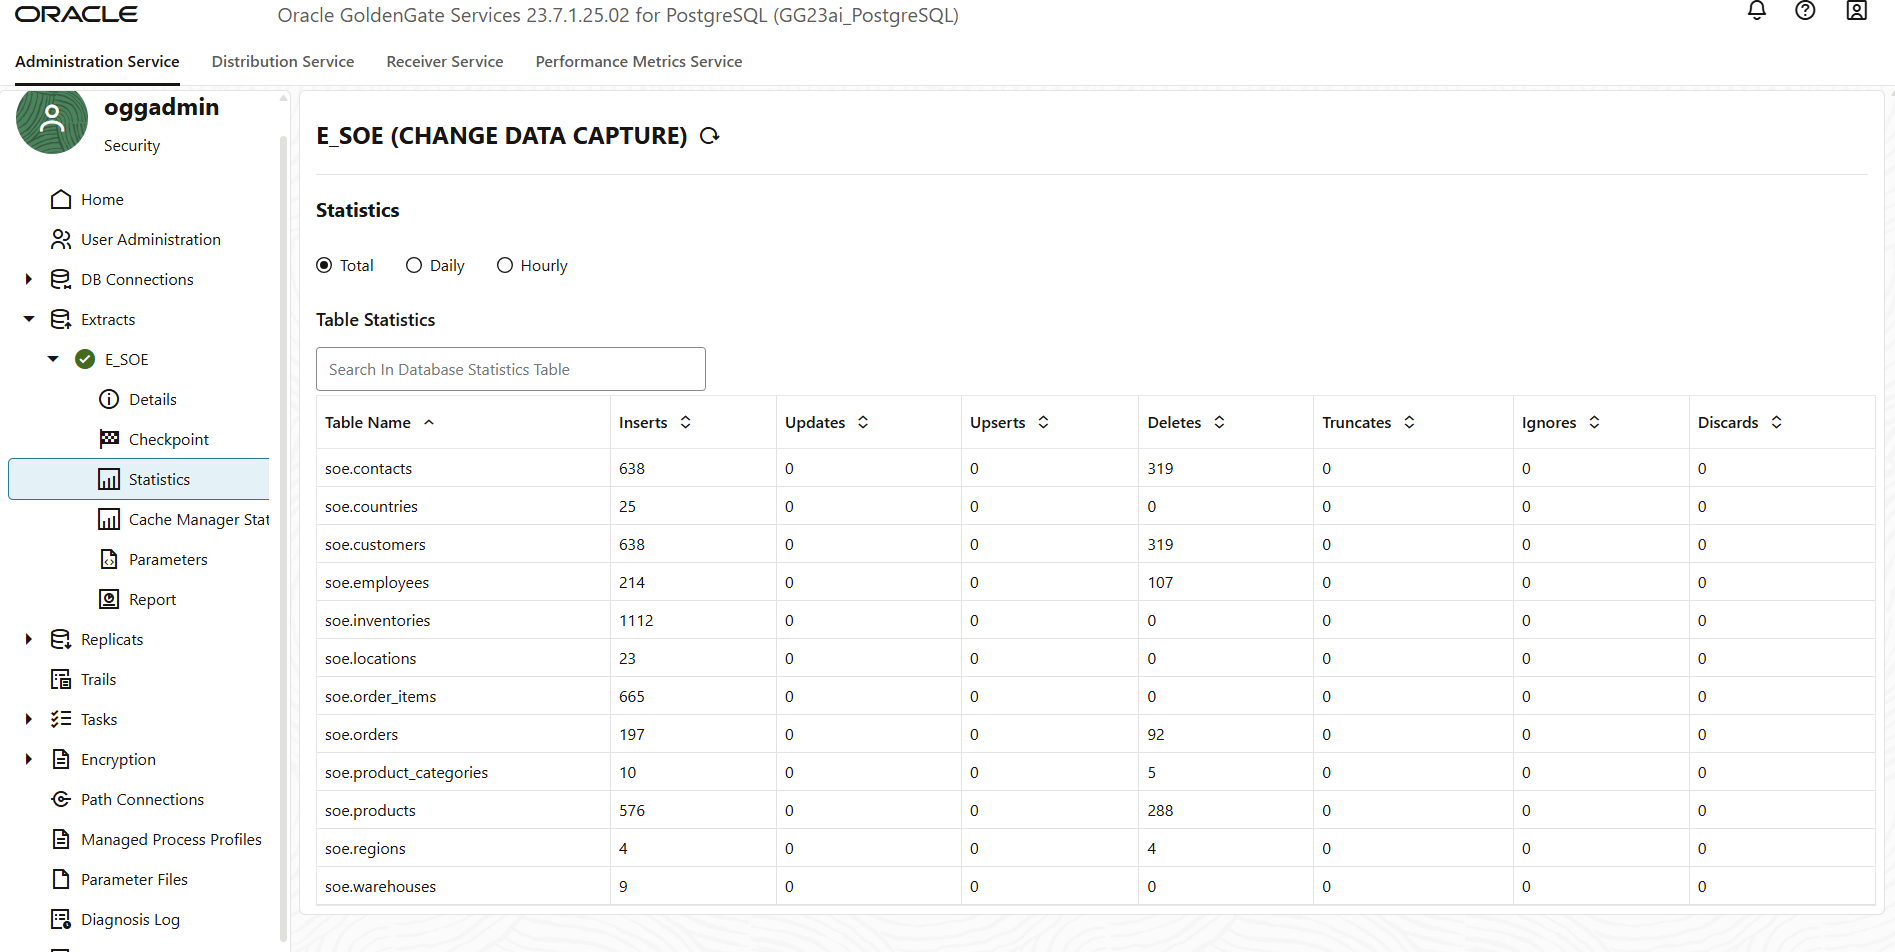
- After creating the Extract, you’ll be redirected to the Extracts page. From here, you can select your Extract process to view its details, monitor its status, and review logs or metrics for ongoing activity.
Reference:
https://docs.oracle.com/en/middleware/goldengate/core/23/coredoc/prepare-postgresql.html
https://docs.oracle.com/en/cloud/paas/goldengate-service/index.html