Oracle Cloud Infrastructure (OCI) GoldenGate is a fully managed cloud service that customers can use to ensure that their valuable data is always available and analyzable in real-time. Best of all, Oracle Cloud Infrastructure GoldenGate is built on the industry leading, highly trusted real time data technology – Oracle GoldenGate.
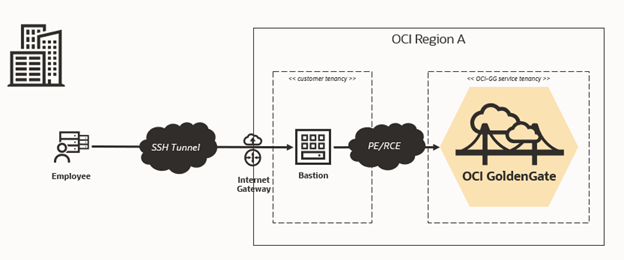
By default, OCI GoldenGate deployments are only accessible using a private endpoint from machines running inside the OCI network, or through a bastion host which secures access to OCI resources. You can create your own bastion host using a compute instance and manage it yourself, or you can use the new OCI Bastion service!
OCI Bastion provides restricted and time-limited access to target resources that don’t have public endpoints. Bastions are essential in tenancies with stricter resource controls. Targets can include resources like Compute instances, Bare Metal and Virtual Machines, MySQL, ATP, OKE v2 and any other resource which allows SSH access.
In just a few easy steps, you can use OCI Bastion to connect to your OCI GoldenGate Deployment Console using a private IP.
What You Need
Ensure that you have the following in place:
- A free trial or paid Oracle Cloud Infrastructure account
- Access to OCI GoldenGate and OCI Bastion
- Required IAM policies added for both OCI GoldenGate and OCI Bastion
- VCN and subnet details for the target OCI GoldenGate deployment
Create the bastion
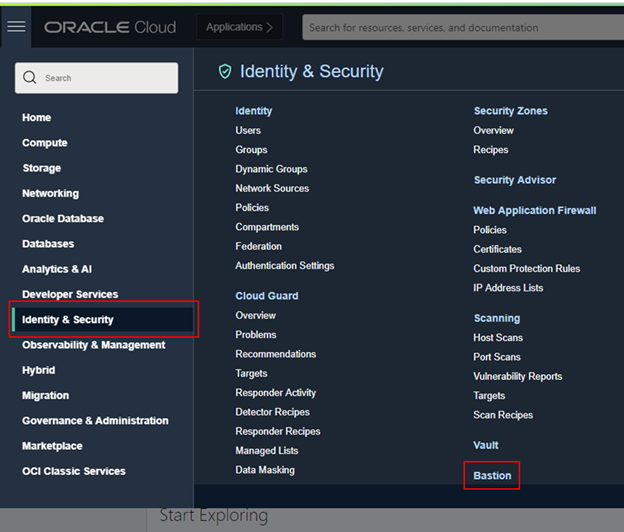
- Log in to OCI Console. From the navigation menu, click Identity & Security, and then select Bastion.
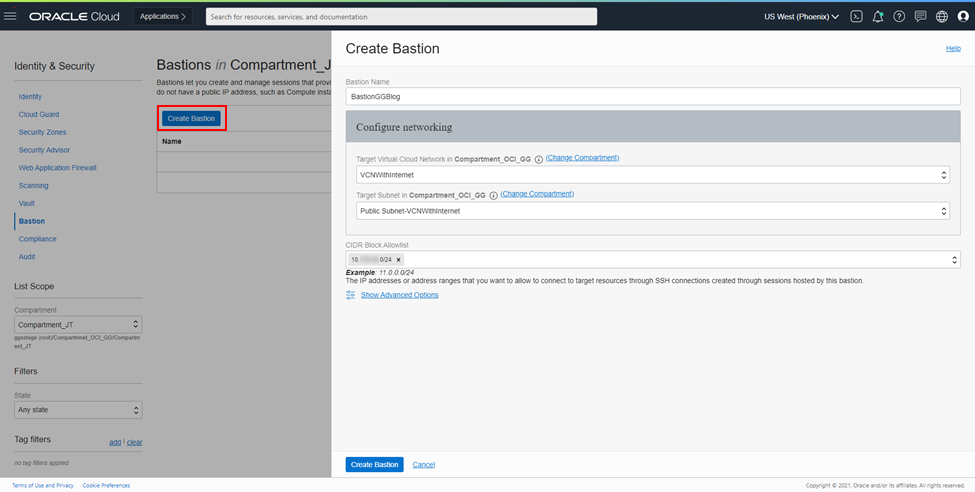
- In Bastion, select the appropriate compartment, and then click Create Bastion.
- In the Create Bastion screen:
- Enter a Bastion Name.
- Use the same VCN as the target OCI GoldenGate deployment you want to access.
- Pick a subnet which has access to the subnet in which the OCI GoldenGate deployment resides.
-
- In the CIDR Block Allowlist, enter a CIDR block that includes the IP address of the machine you will be using to access the Bastion and connect to the deployment console in OCI GoldenGate. It could be your laptop IP address for example.
- Click Create Bastion
Create the session
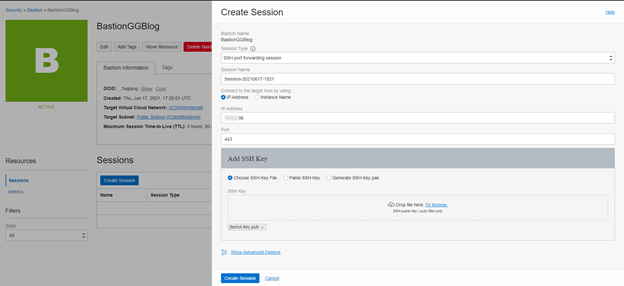
After the bastion is active, create an SSH port forwarding session:
- Click Create Session, complete the fields as follows, and then click Create Session:
- For Session Type, select SSH port forwarding session.
- Optionally, you can give it a name.
- For IP Address, enter the OCI GoldenGate deployment’s private IP. You can find the private IP on the OCI GoldenGate deployment’s Details page.
- For Port, enter 443.
- For Add SSH Key, provide the public key file of the SSH key pair to use for the session, or create a new pair.
- After the session is created, from the session’s Actions (three dots) menu, select Copy SSH Command.
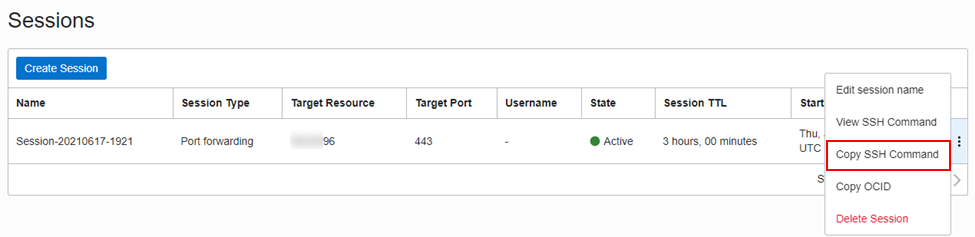
- Paste the command into a text editor, and then replace the <privateKey> and <localPort> placeholders with your private SSH key and port 443. You can also add -v to get some debugging information when connecting, this can be useful for troubleshooting.
Ex: ssh -i <path to private SSH key> -N -L 443:<IP>:443 -p 22 ocid1.bastionsession.oc1.phx….@host.bastion….oraclecloud.com - Run the command using the command line interface to create the tunnel.
- Open a web browser and go to localhost:443. Accept the security exception, if prompted, and then continue to the Deployment log in page.
- Enter your OCI GoldenGate Deployment credentials and proceed!
Learn more
Setting up an OCI Bastion and session to access a secured OCI GoldenGate deployment is quick and easy. If you want to learn more about OCI GoldenGate or OCI Bastion, check out:
- OCI GoldenGate
- OCI GoldenGate Documentation
- OCI Bastion
- Simplify secure access with OCI Bastion
- OCI Bastion Documentation
Contributor: Jenny Chan, Database User Assistance