Oracle Cloud Infrastructure (OCI) GoldenGate is a fully managed service providing a real-time data mesh platform, which uses replication to keep data highly available and enable real-time analysis.
OCI GoldenGate for MySQL was released in December 2022. Customers using GoldenGate on Marketplace and on-premises can now migrate to a fully managed service.
This blog will show you how to migrate from GoldenGate Marketplace (MySQL) to OCI GoldenGate for MySQL.
Pre-requisites
- Have GoldenGate Marketplace (MySQL) up and running
- Create OCI GoldenGate deployments for MySQL and Oracle
- Create OCI GoldenGate connections for MySQL and Autonomous Data Warehouse (ADW)
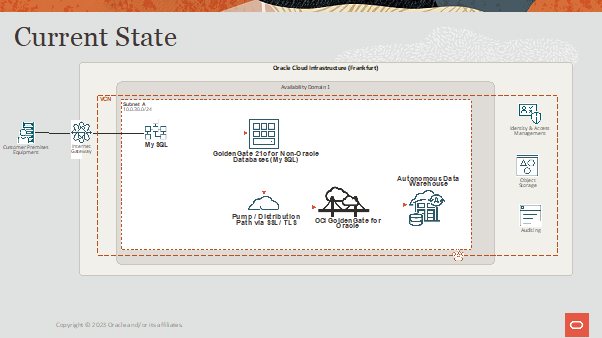
The current state:
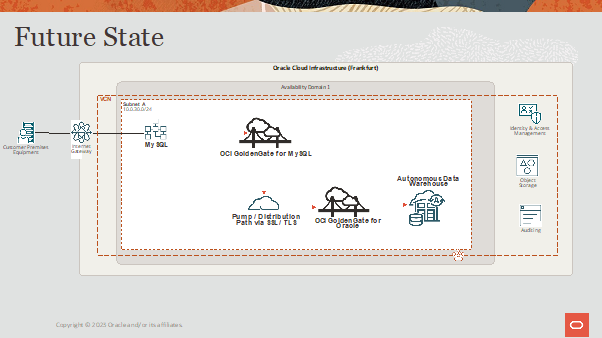
The future state:
To move from the current state to the future state, we will go through the following steps:
- Create new Extract on OCI GoldenGate (MySQL)
- Create Distribution Path between OCI GoldenGate deployments
- Start Extract on OCI GoldenGate for MySQL
- Stop Extract on Marketplace GoldenGate
- Stop old Distribution Path
- Create Replicat using timestamp
- Verify the data in the source and target
Creating Extract, Distribution Path and Replicat
Creating Extract
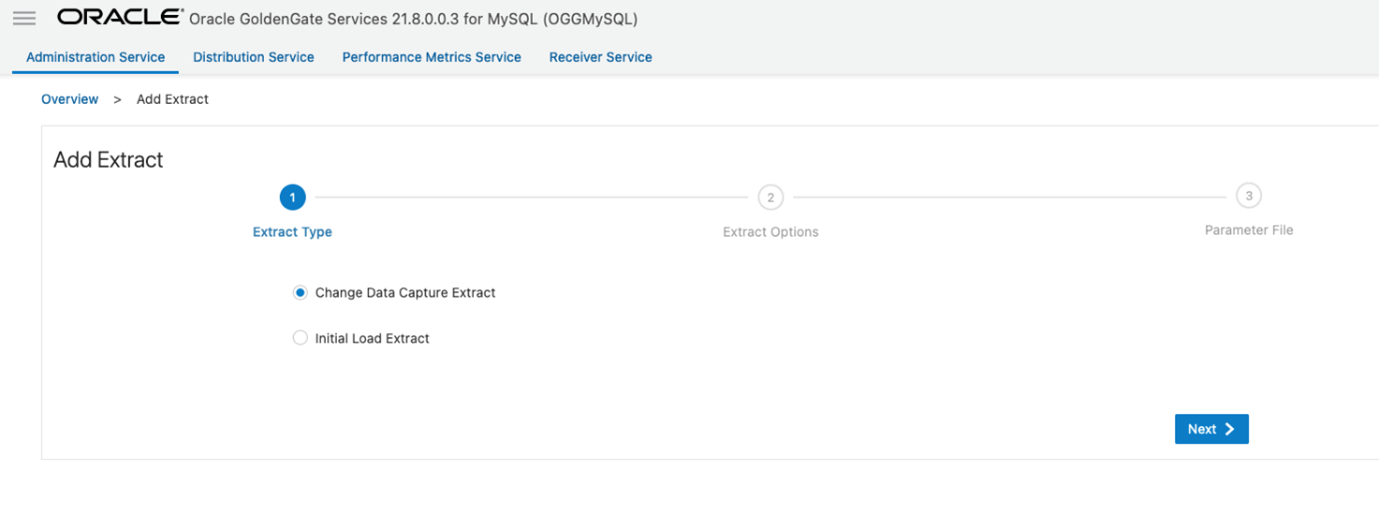
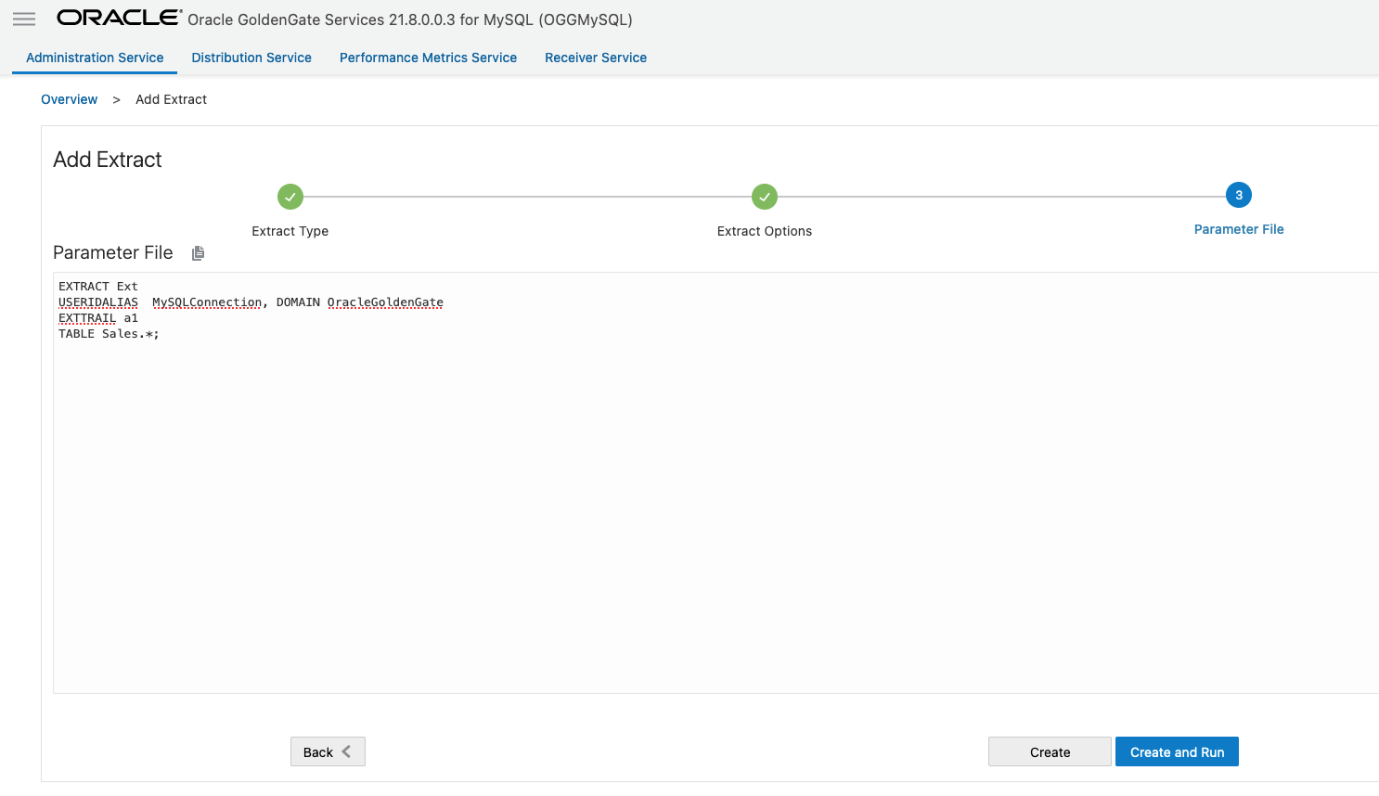
Click Add Extract (plus icon) in the Extracts panel to create either an Initial Load Extract or a Change Data Capture Extract. Select Change Data Capture Extract and click Next.
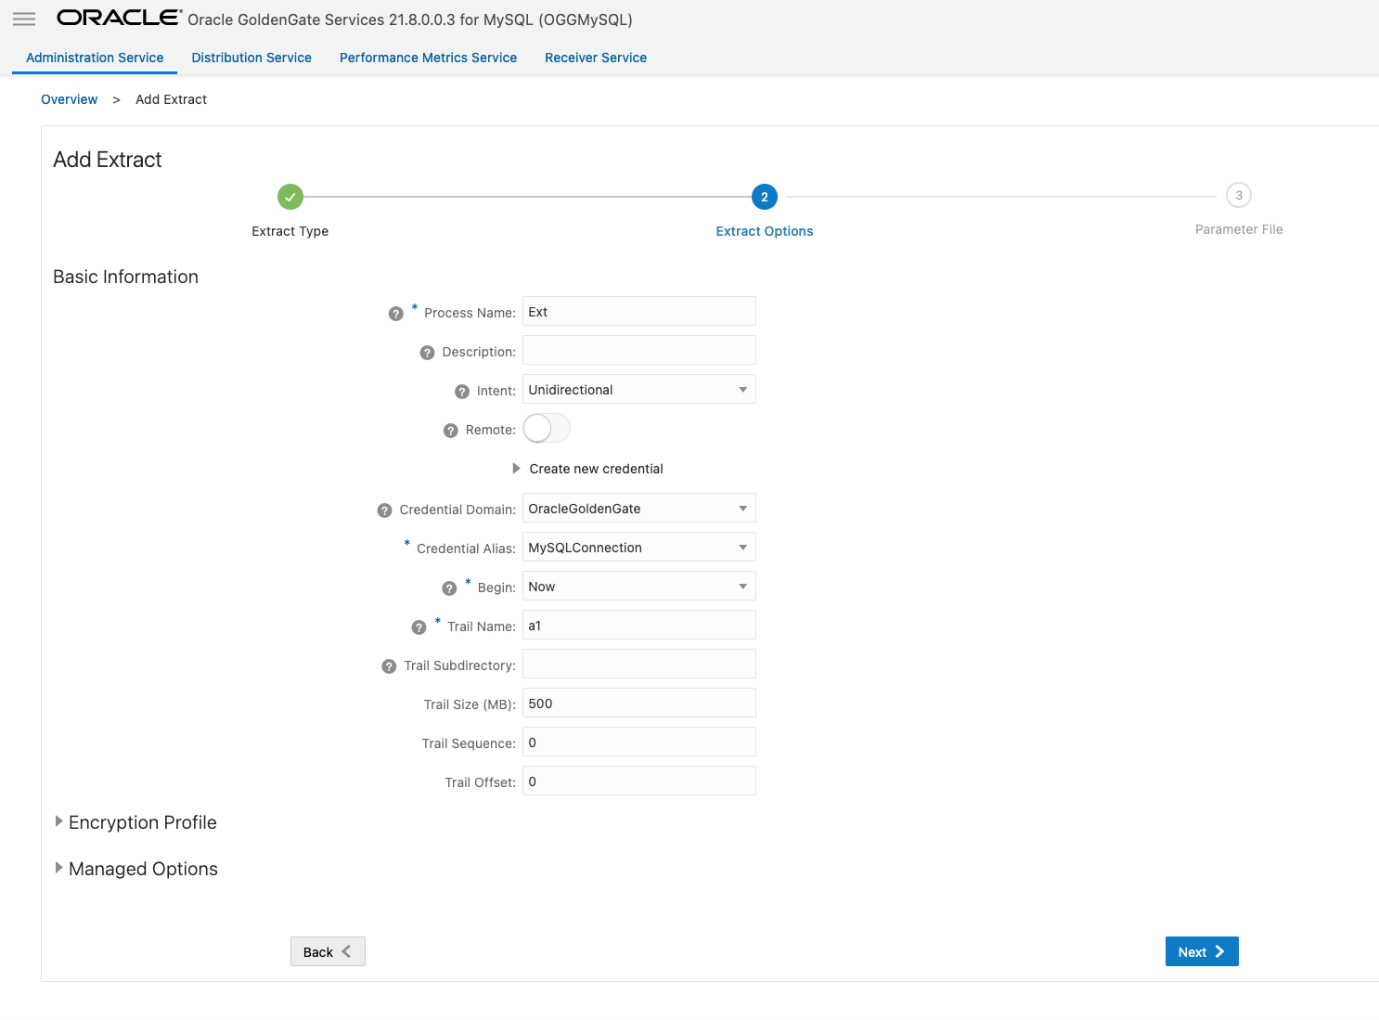
Enter a Name, select the Credential Domain and Alias, and enter a Trail Name. Click Next.
Specify which tables and schemas GoldenGate will capture data from in the Parameter Files page, then click Create.
Creating Distribution path
Before we create the distribution path, we need to create a credential in OCI GG for MySQL. This credential uses a GoldenGate user from the target OCI GoldenGate for Oracle deployment.
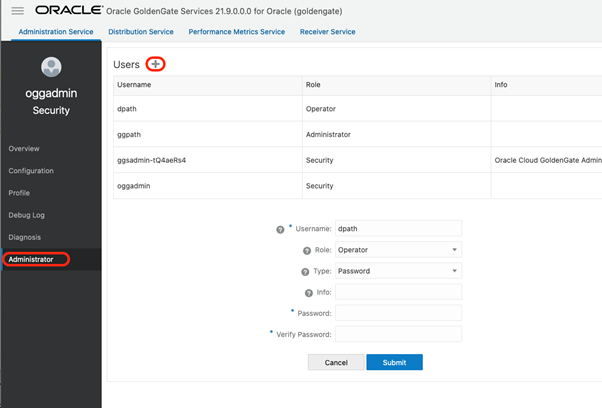
Create a new user for the Distribution Path
In OCI GoldenGate (for Oracle) Console, open the menu and click Administrator. Add a new user by clicking on the sign ‘+’. Specify the username, the Operator role, set the Type to Password, and provide your password:
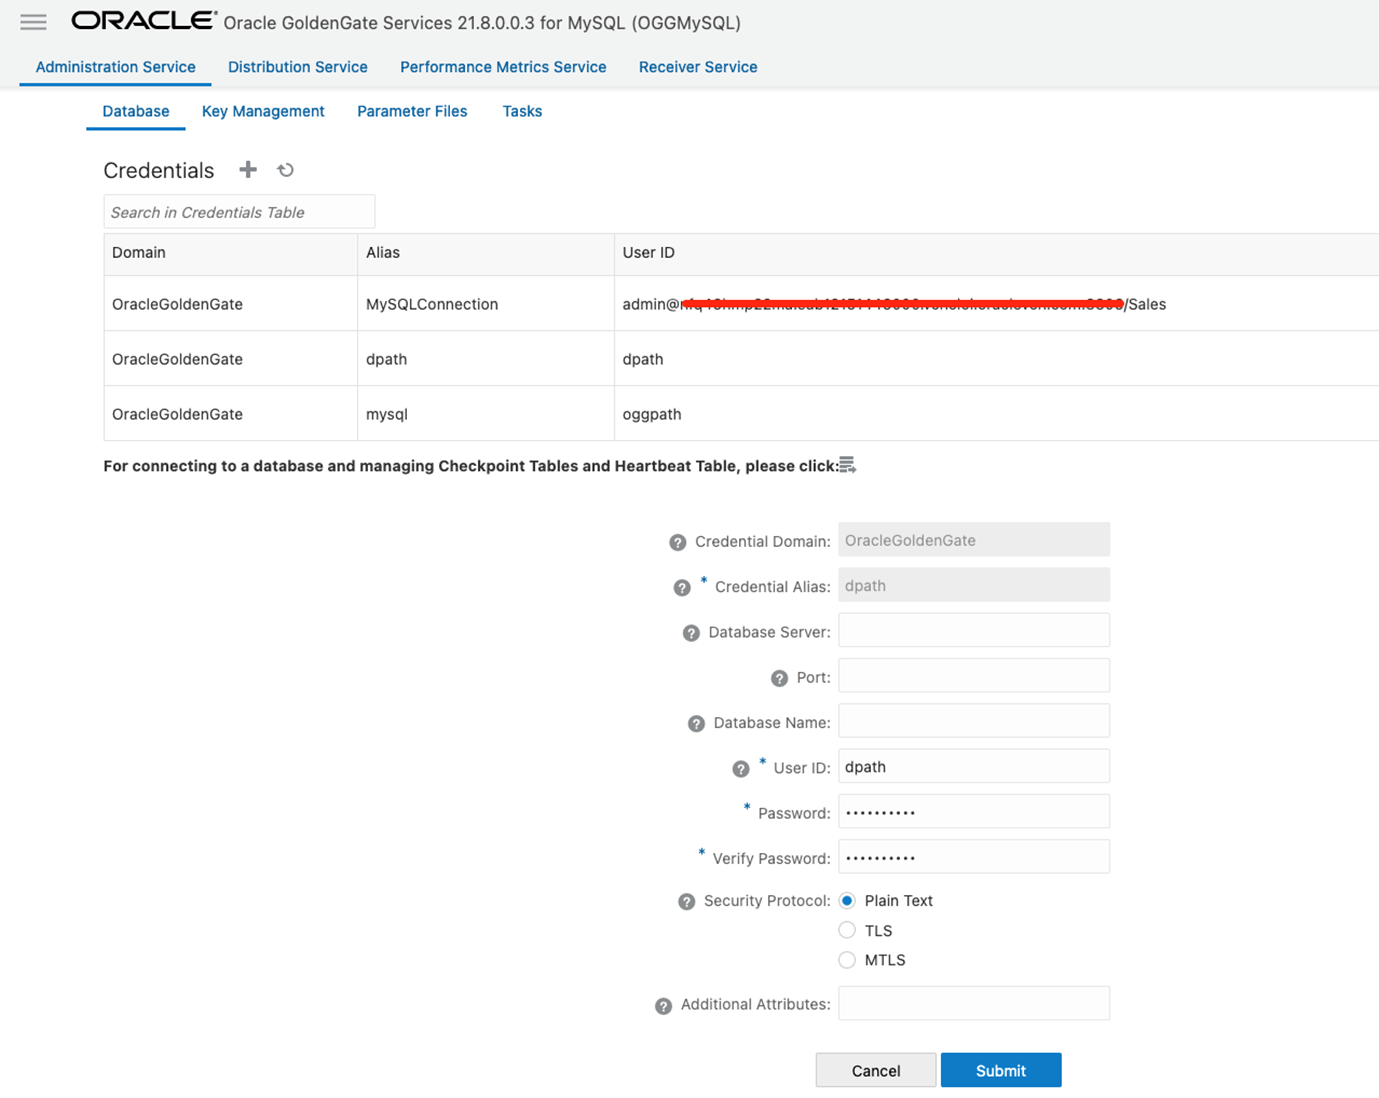
Add a new credential on the source GoldenGate deployment
Go to OCI GoldenGate for MySQL. Open the menu, click Configuration, and add a new Credential with the same username and password you defined for the GoldenGate user:
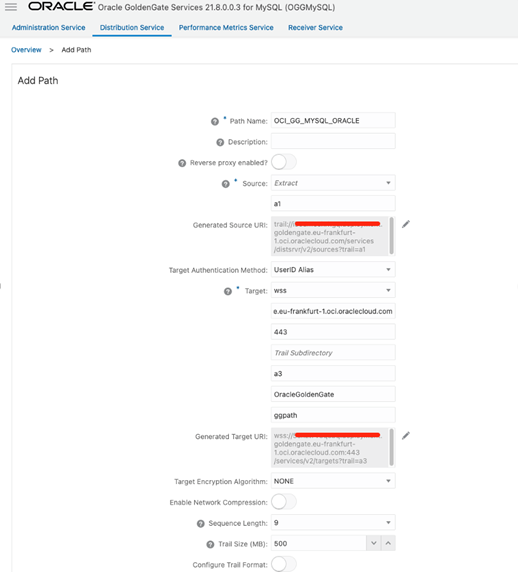
Create a Distribution Path
In OCI GoldenGate for MySQL, go to Distribution Service and click Add Path (‘+’ icon). Enter the Path Name, Trail Name (same as GoldenGate Classic trail name). Specify the OCI GoldenGate for Oracle hostname for Target and port 443. Enter the Trail Name, Domain, and Alias from the credential created in the previous step. Click on Create Path and then start the distribution path:
Starting the MySQL Extract in OCI GoldenGate and stopping the Extract in GoldenGate Marketplace
Go to OCI GoldenGate for MySQL deployment and start the new extract.
Then, SSH into your GoldenGate Marketplace (MySQL) instance, and use adminclient to connect to it before you stop the extract. We are using the adminclient to get all details from last transaction that has been processed.
cd /u01/app/ogg/bin
./adminclient
connect https://<hostname or IP> as oggadmin !
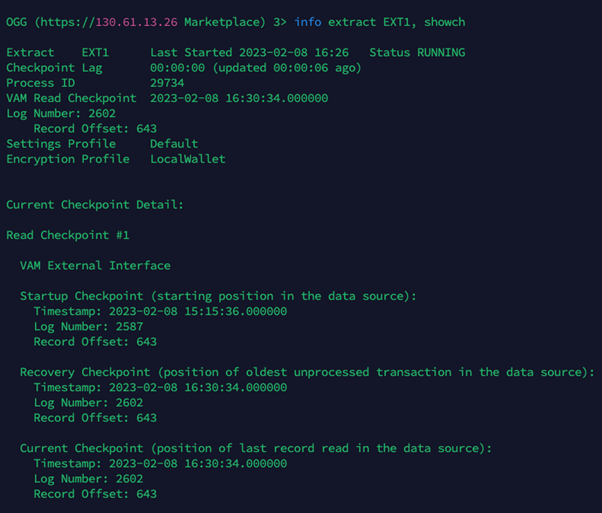
info extract EXT1, showch
Review the timestamps displayed under “Recovery Checkpoint” and “Current Checkpoint” and check that the time difference is less than one hour. If the time difference is greater than one hour, wait a couple of minutes and run the command again. If the difference remains greater than an hour then consider committing the open transactions in your source database so that you can move forward with the migration.
Now, run this command to find the oldest open transaction tracked by Extract:
send extract EXT1, showtrans
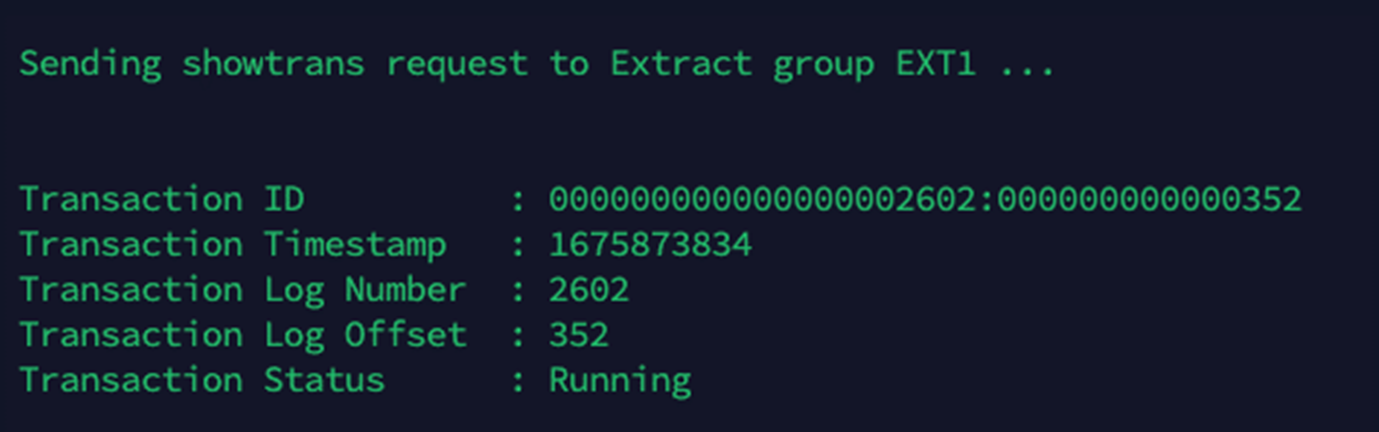
Copy the output of this command and stop the extract and distribution path between GoldenGate Marketplace and OCI GoldenGate for Oracle.
Creating new replicat
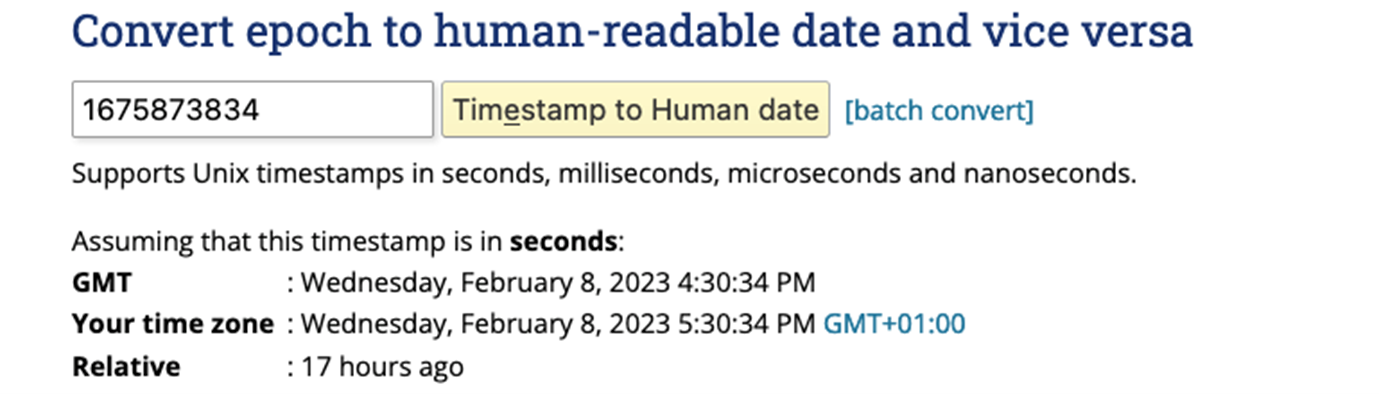
Before we create the replicat, we should convert the transaction timestamp seen above (1675873834) into a human-readable date. The Transaction timestamp is shown as Unix Epoch. You can use an online converter like https://www.epochconverter.com/ to convert the timestamp to GMT:
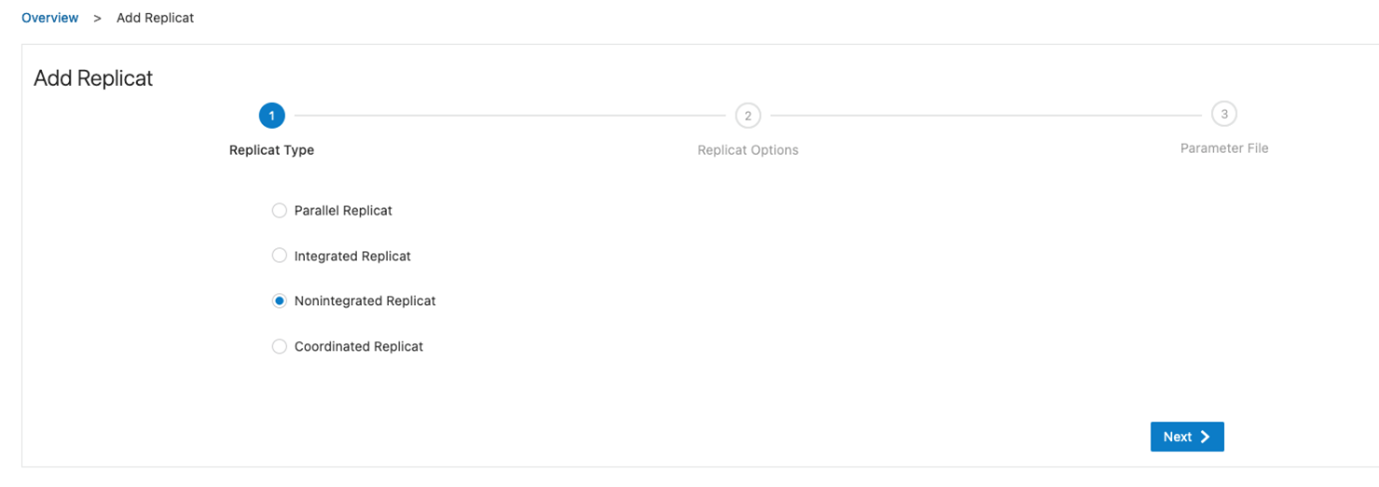
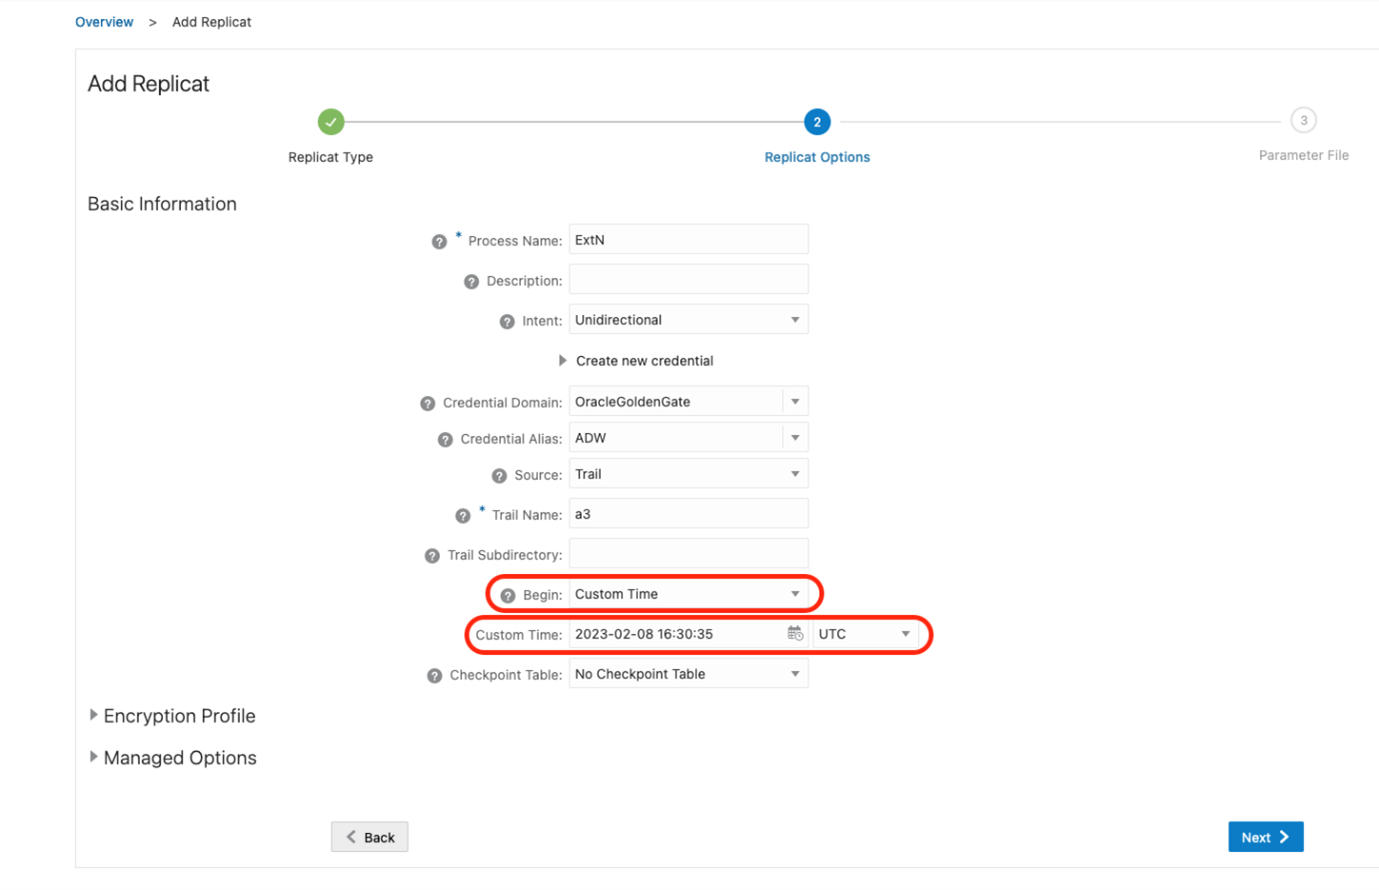
Now that we have the Timestamp, let’s create the replicat. Go to your OCI GoldenGate deployment for Oracle and add a new Replicat. Click Overview and Add Replicat (plus icon) in the Replicats panel. Select NonIntegrated Replicat for Autonomous Databases as a target:
Enter a Process Name, select a Domain and Alias, and specify the Trail Name (the same one you used for the distribution path). It’s highly recommended to use a checkpoint table. We need to change the Begin Now to Custom Time. In Custom Time, we must specify the last transaction timestamp plus (+) one second to avoid repeating the older transactions. Pay attention to the time zone, you have two options Local and UTC. In this case, I used UTC. You must adapt the timestamp transaction to that time zone.
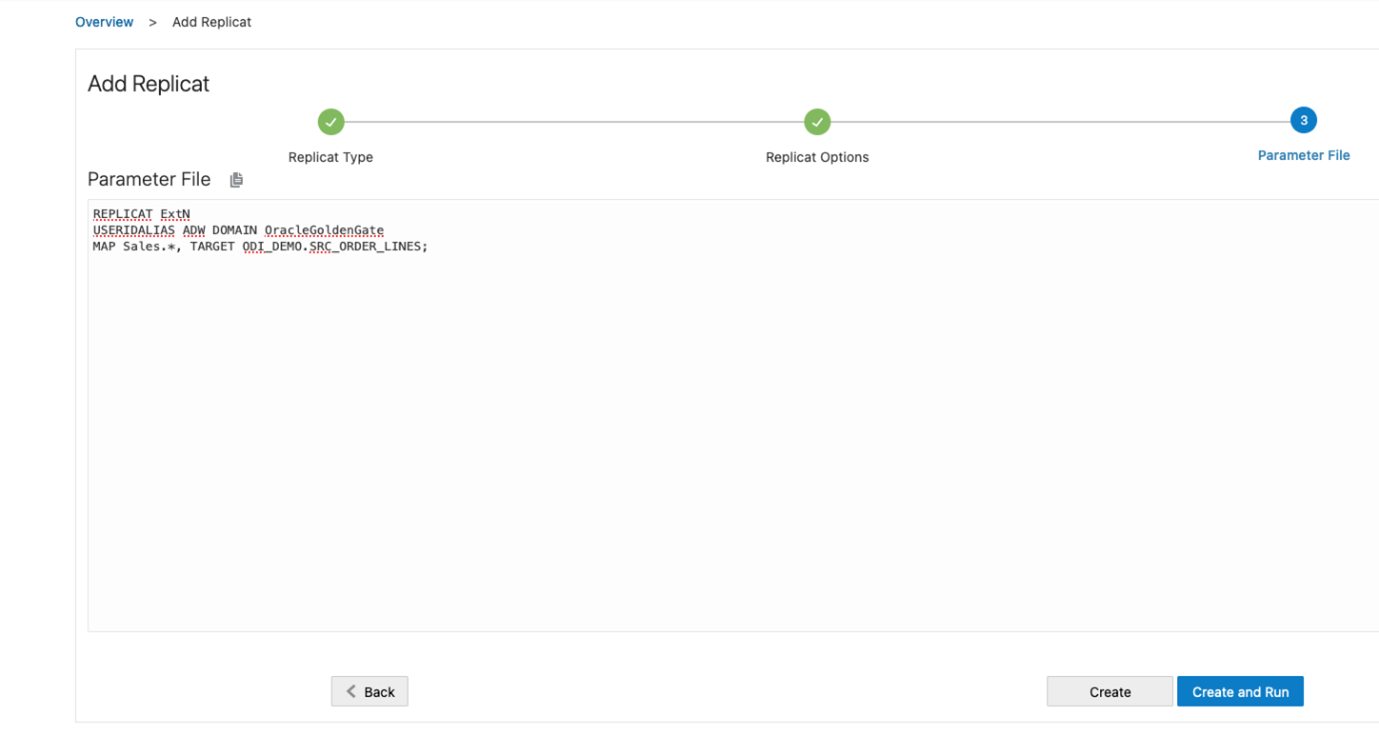
Specify how the source and target tables will be mapped by the Replicat and click Create and Run.
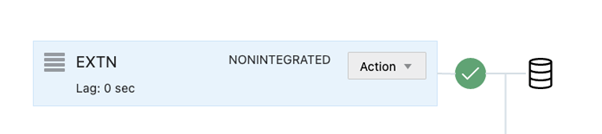
Our Replicat is now up and running in OCI GoldenGate console.
Now, you can check if data is being replicated correctly from MySQL to Autonomous Data Warehouse.
We have seen how we can easily migrate GoldenGate Marketplace (MySQL) to OCI GoldenGate for MySQL. The example uses GoldenGate Marketplace running on OCI Compute but is also applicable to GoldenGate running on-premises. We hope this blog will help you migrate GoldenGate Marketplace (or on-premises) to OCI GoldenGate.