This blog demonstrates how to configure a GoldenGate deployment within Oracle Database@Azure to enable real-time data replication between two Autonomous AI Database in Oracle Database@Azure instances—one located in the UK region (source) and another in the US East region (target).
The GoldenGate in Oracle Database@Azure deployment runs in the US East-Ashburn region, bridging Azure and Oracle Cloud Infrastructure (OCI) through Resource Anchors and Network Anchors (ggsaz-ranchor and ggsaz-netanchor).
By following this step-by-step guide, you’ll learn how to provision GoldenGate deployment within Oracle Database@Azure, establish connectivity to Autonomous AI Database in Oracle Database@Azure, configure Extract and Replicat processes, and validate end-to-end data synchronization—all within the Azure environment, powered by Oracle’s multicloud integration with Microsoft.
Before you begin
Ensure that you:
- An existing Oracle GoldenGate on Oracle Database@Azure deployment running in Ashburn region.
If not, follow the Part 1: How to Provision Oracle GoldenGate within Oracle Database@Azure - Source and Target Oracle Autonomous AI Database provisioned along with schema and tables created.
- Review how OCI GoldenGate connects to your sources and targets.
- Depending on your Oracle GoldenGate version:
- Unlock the GGADMIN user in Autonomous Database.
- Configure the required policies to enable secure Vault and Secrets access, such as use secrets, use vaults, and read secret-bundles. For more information, see Minimum recommended policies.
- Ensure network connectivity exists between the vnets used by the Oracle Database@Azure instances and the GoldenGate deployment across regions, so that all replication traffic stays within the Azure backbone. Ensure that you use Vnet/VCN in Region A, which was peered with Vnet/VCN in Region B.
1) Create Database Connections for both Source and Target
After provisioning your GoldenGate deployment, the next step is to configure database connections for the source and target Autonomous AI Databases . These connections enable GoldenGate to securely connect and replicate data across source and target environments.
Before proceeding, ensure that:
- The GGADMIN user is unlocked in both source and target Autonomous AI Database.
- Required Vault and Secrets policies (e.g., use secret-bundles, read vaults, use secrets) are in place.
- You have the wallet and connection details for both Autonomous AI Database.
Create the Source Database Connection (AZADBSRC_UK)
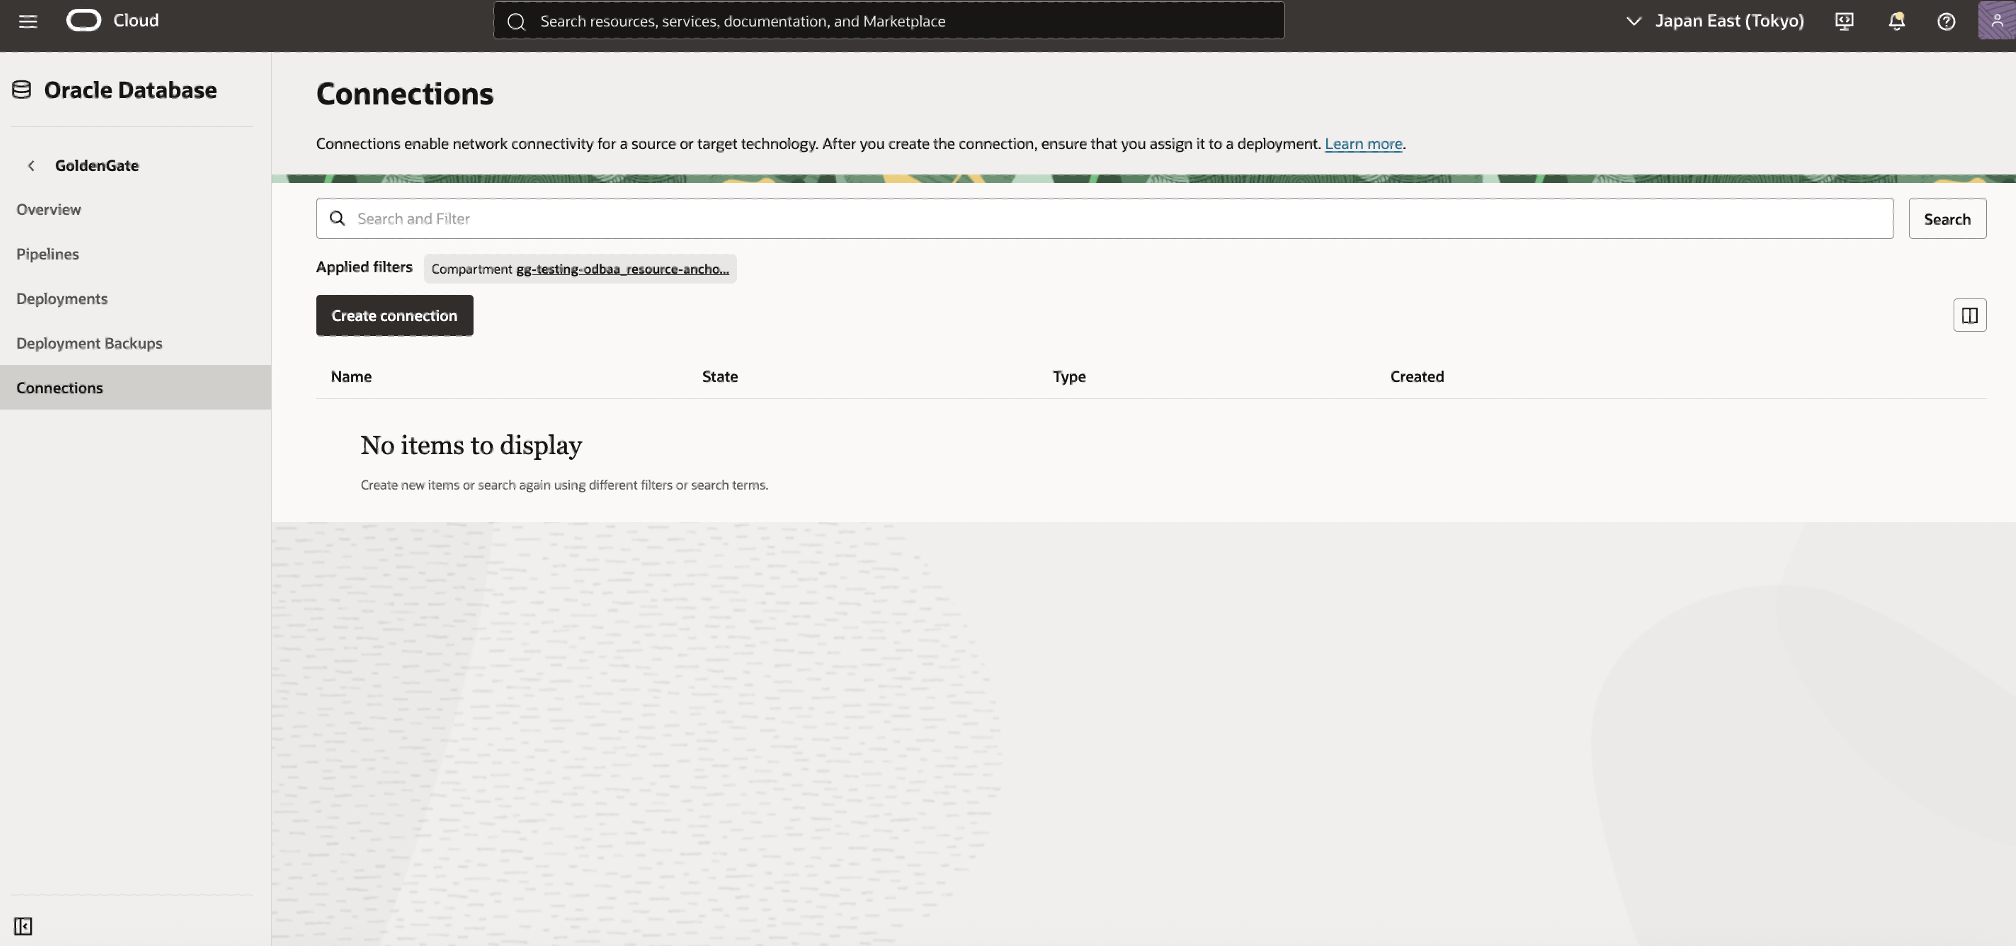
- From the OCI Console, open Oracle GoldenGate → Connections.
- Click Create Connection.
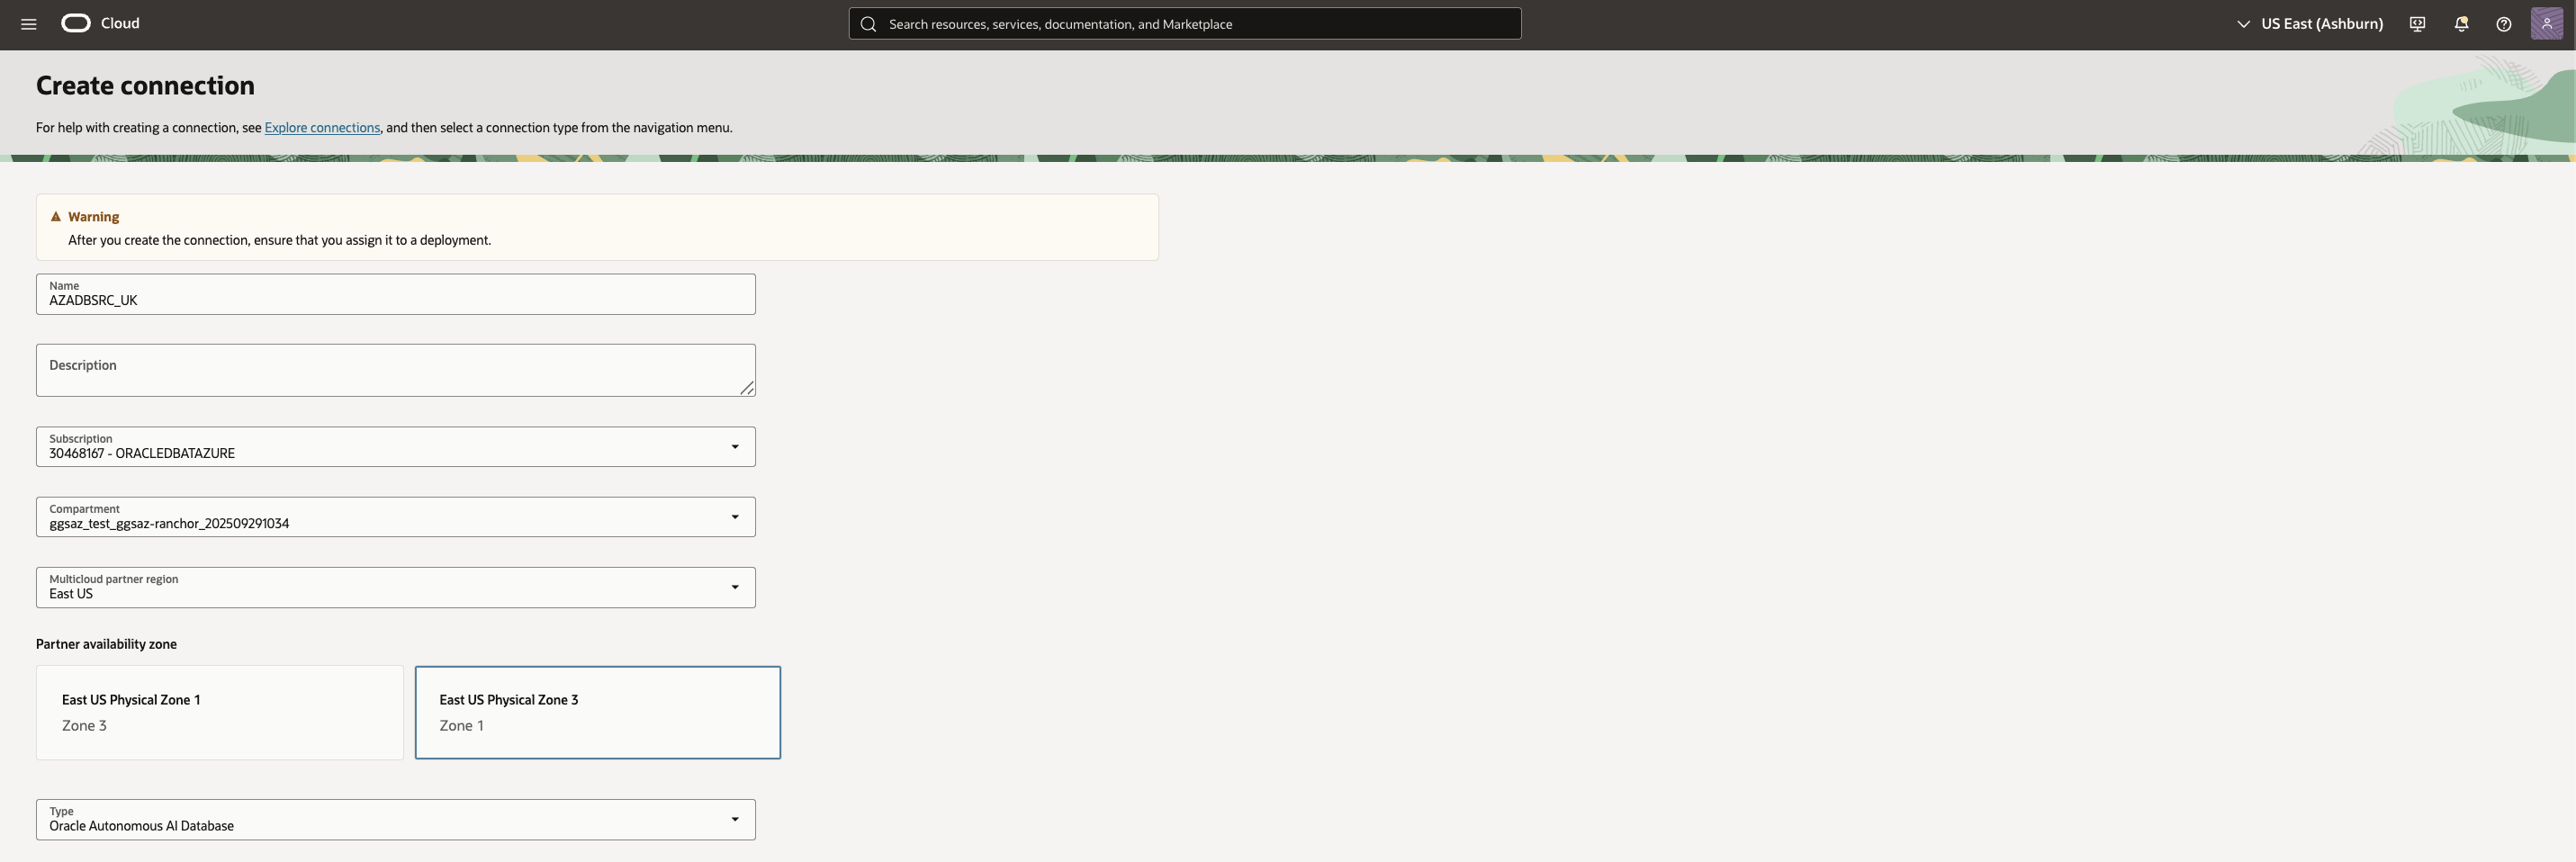
3. Complete the connection details:
- Name: AZADBSRC_UK
- Subscription: ORACLEDBATAZURE
- Compartment: Select the OCI compartment associated with the Resource Anchor ggsaz-ranchor.
- Multicloud Partner Region: Choose EAST US.
- Partner Availability Zone: Select Zone 1.
- Type: Oracle Autonomous AI Database
4. Under Database Details:
- Enter Database information, and provide the Database connection string.Provide the Autonomous AI Database Low connection string and upload the database wallet.
- Ensure Database Username is ggadmin (this is mandatory for GoldenGate).
- Select the Password Secret associated with the ggadmin user.
- Select the Wallet Secret associated with the source Autonomous AI Database.
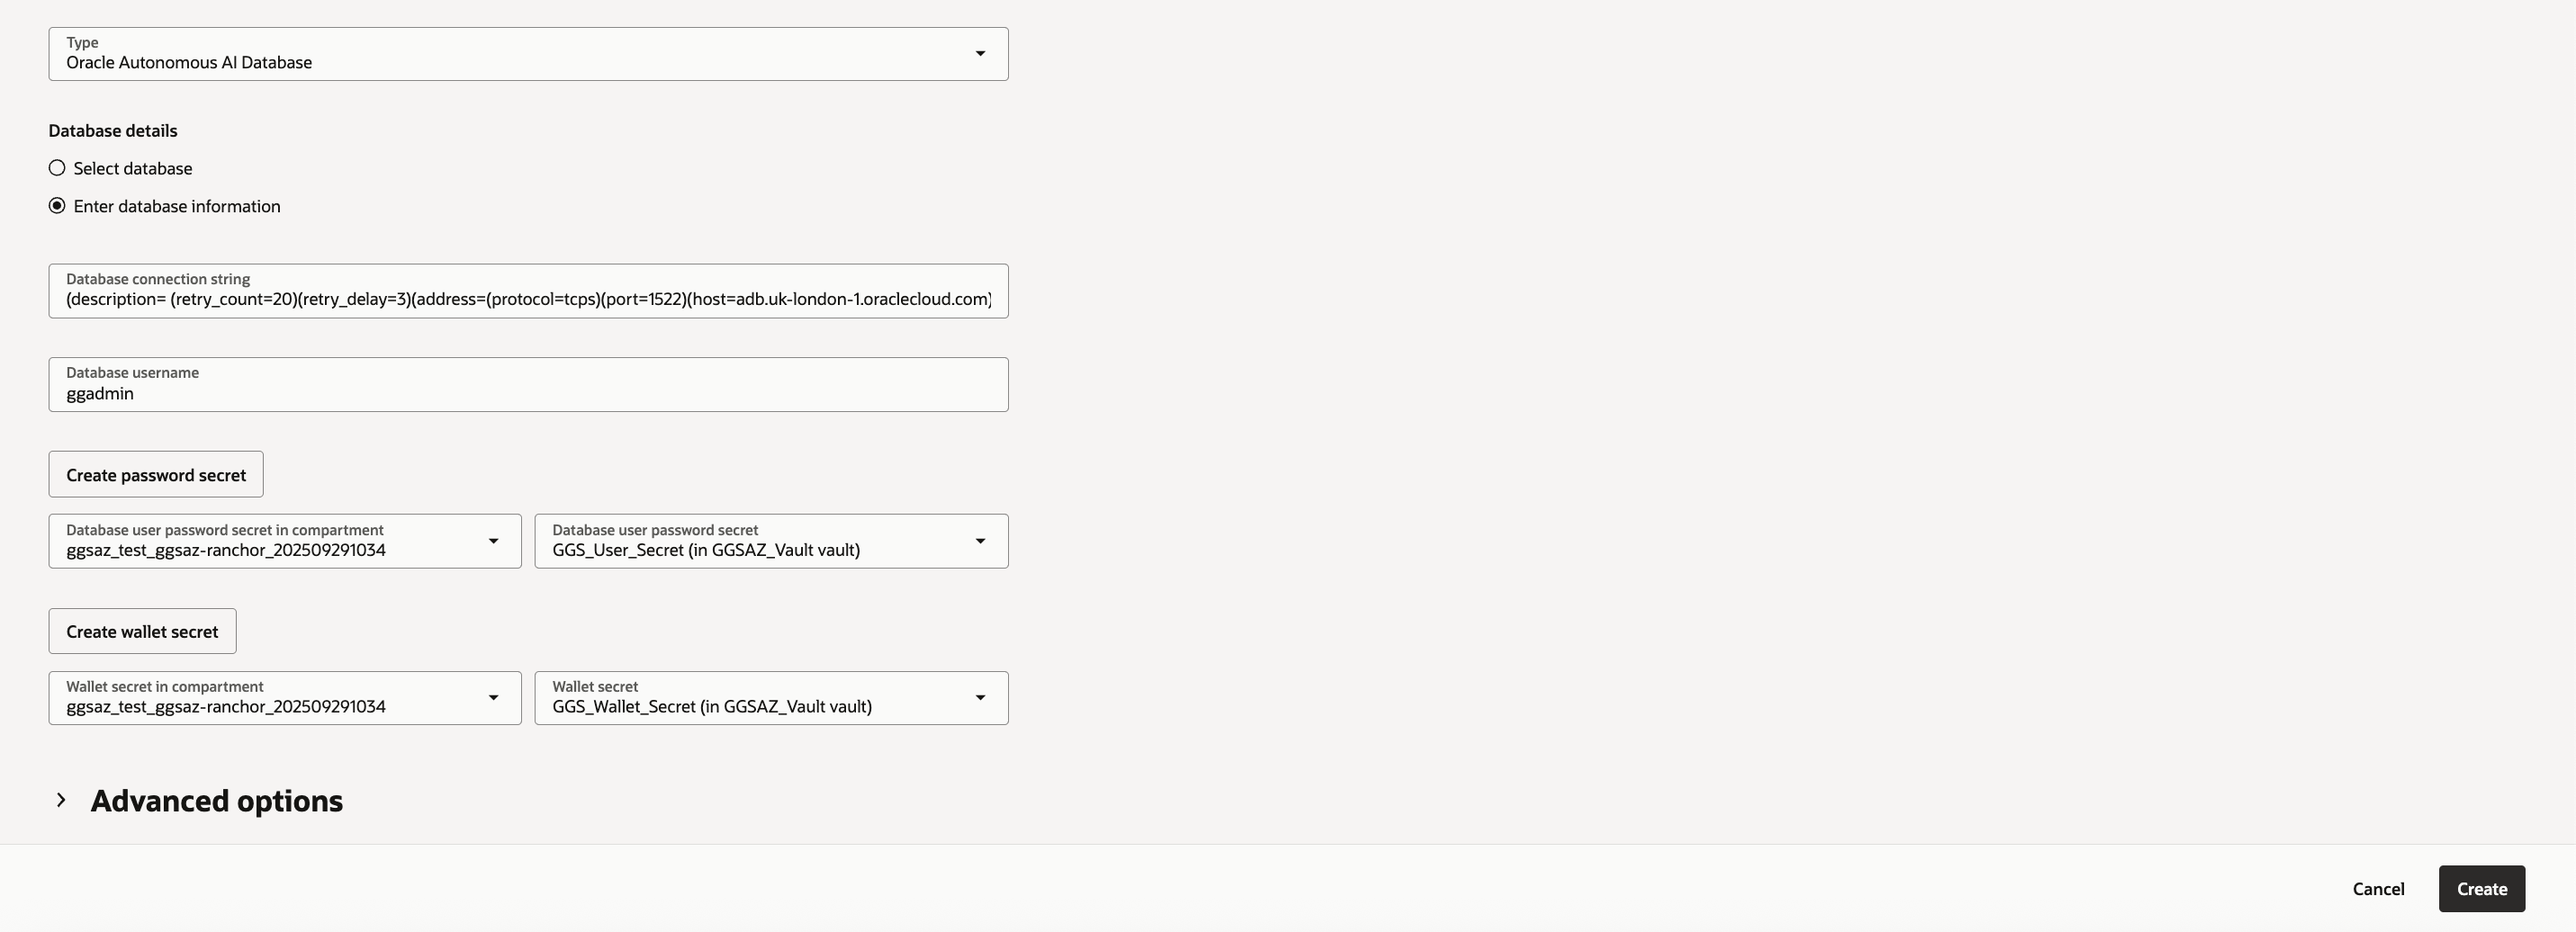
5. (Optional) Expand Advanced Options to define network connectivity:
- Shared Endpoint – Shares the endpoint with the assigned deployment.
- Dedicated Endpoint – Uses a dedicated endpoint for network traffic through the specified subnet.
6. Click Create Connection.
The new connection AZADBSRC_UK will now appear in the Connections list and will later be assigned to the deployment as a source connection.
Create the Target Database Connection (AZADBTGT_ASH)
Repeat the same procedure to create a second connection for your target Autonomous Database located in the Ashburn region.
- Click Create Connection again.
- Enter the following details:
- Name: AZADBTGT_ASH
- Subscription: ORACLEDBATAZURE
- Compartment: Choose the compartment linked to ggsaz-ranchor.
- Multicloud Partner Region: East US.
- Partner Availability Zone: Zone 1.
- Type: Oracle Autonomous AI Database
- Under Database Details:
- Select the target Autonomous AI Database (Ashburn region).
- Keep Database Username as ggadmin.
- Select the password secret corresponding to this user.
- Review all parameters and click Create Connection.
Once both AZADBSRC_UK and AZADBTGT_ASH connections are created successfully, you can assign them to your deployment (GGSAZ_ORCL) for replication.
2) Assign Connections to the GoldenGate Deployment
Once both source and target database connections (AZADBSRC_UK and AZADBTGT_ASH) are created, the next step is to associate them with your GoldenGate deployment. Assigning connections links your databases to the replication environment so that GoldenGate can establish secure, managed data movement channels between OCI and Azure.
- In the OCI Console, navigate to Oracle GoldenGate → Deployments.
- Select your GoldenGate deployment .
- Click Assigned Connections.
- Click Assign Connection.
- In the Assign Connection dialog:
- From the dropdown list, select the source connection AZADBSRC_UK.
- If the connection is in another compartment, click Change Compartment and locate it under the compartment linked to your Resource Anchor ggsaz-ranchor.
- Click Assign Connection.
- Repeat the process to assign the target connection AZADBTGT_ASH to the same deployment.
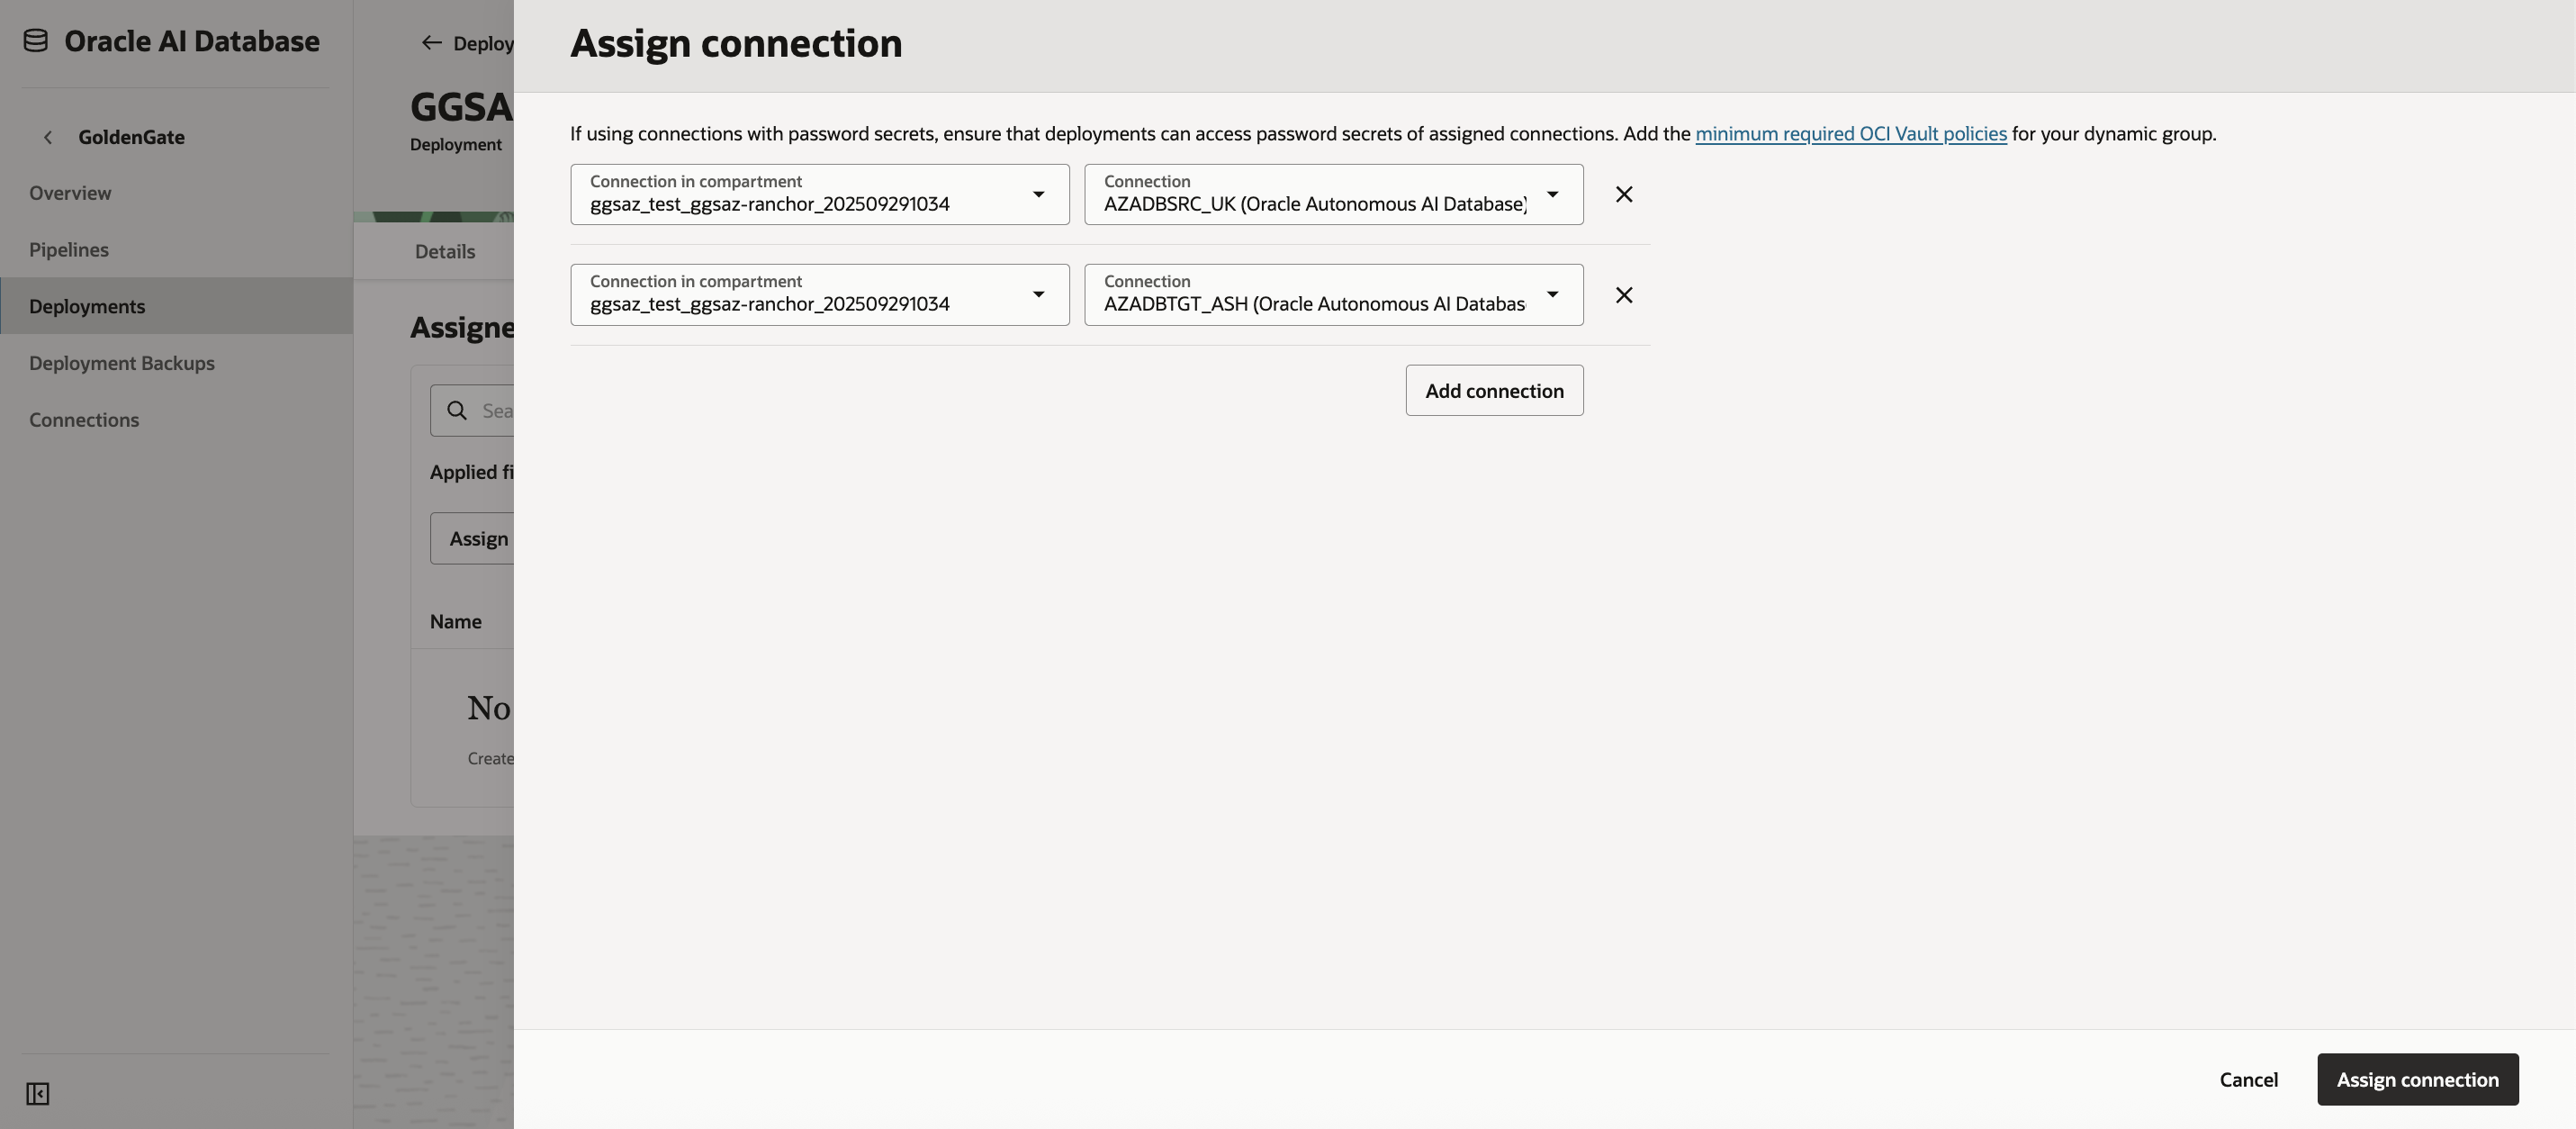
After successful assignment, both connections—AZADBSRC_UK and AZADBTGT_ASH—should appear under the Assigned Connections list for GGSAZ_ORCL.
You can also view and manage these relationships from each connection’s Details Page under Assigned Deployments.
3) Test Connection Connectivity
After assigning the connections, it’s important to validate that GoldenGate deployment can successfully connect to both source and target databases. This ensures that the required networking, authentication, and endpoint configurations are functional.
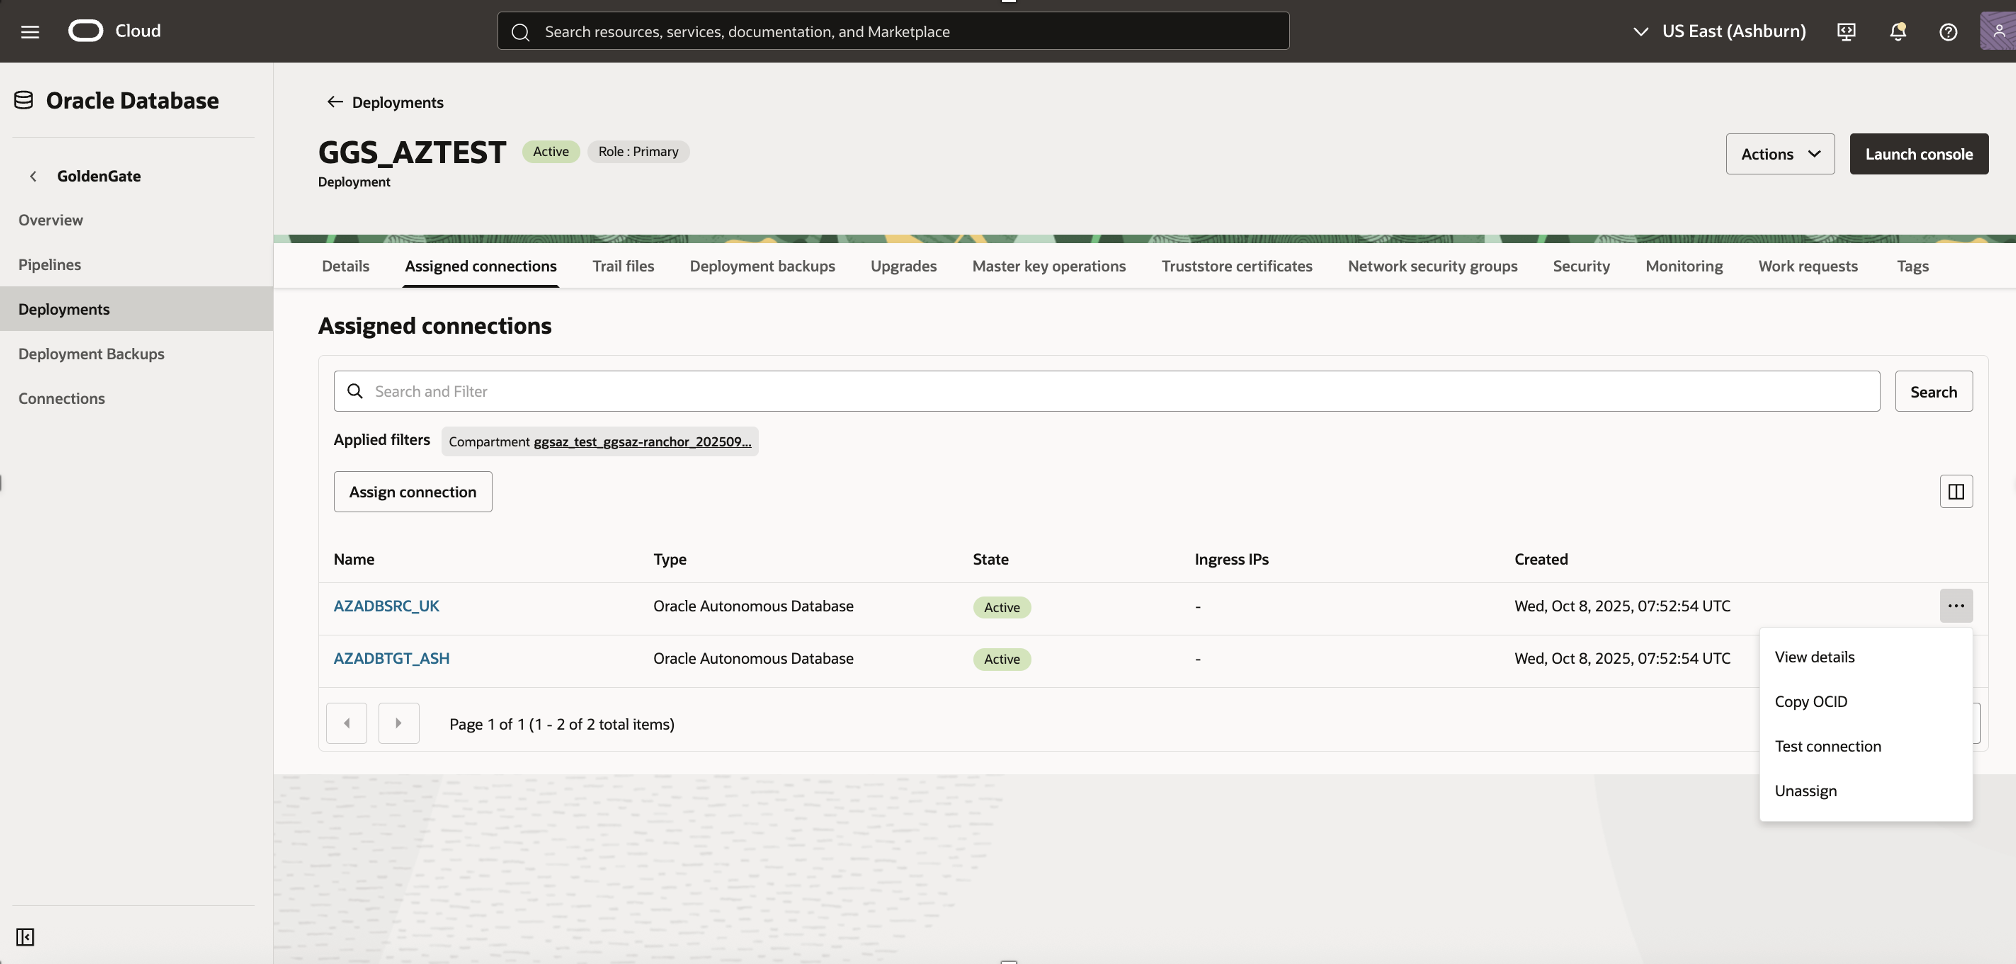
- Navigate to the Deployment Details page of the GoldenGate deployment.
- Select Assigned Connections.
- Locate the connection you wish to test (e.g., AZADBSRC_UK).
- From the Actions (⋮) menu next to the connection, select Test Connection.
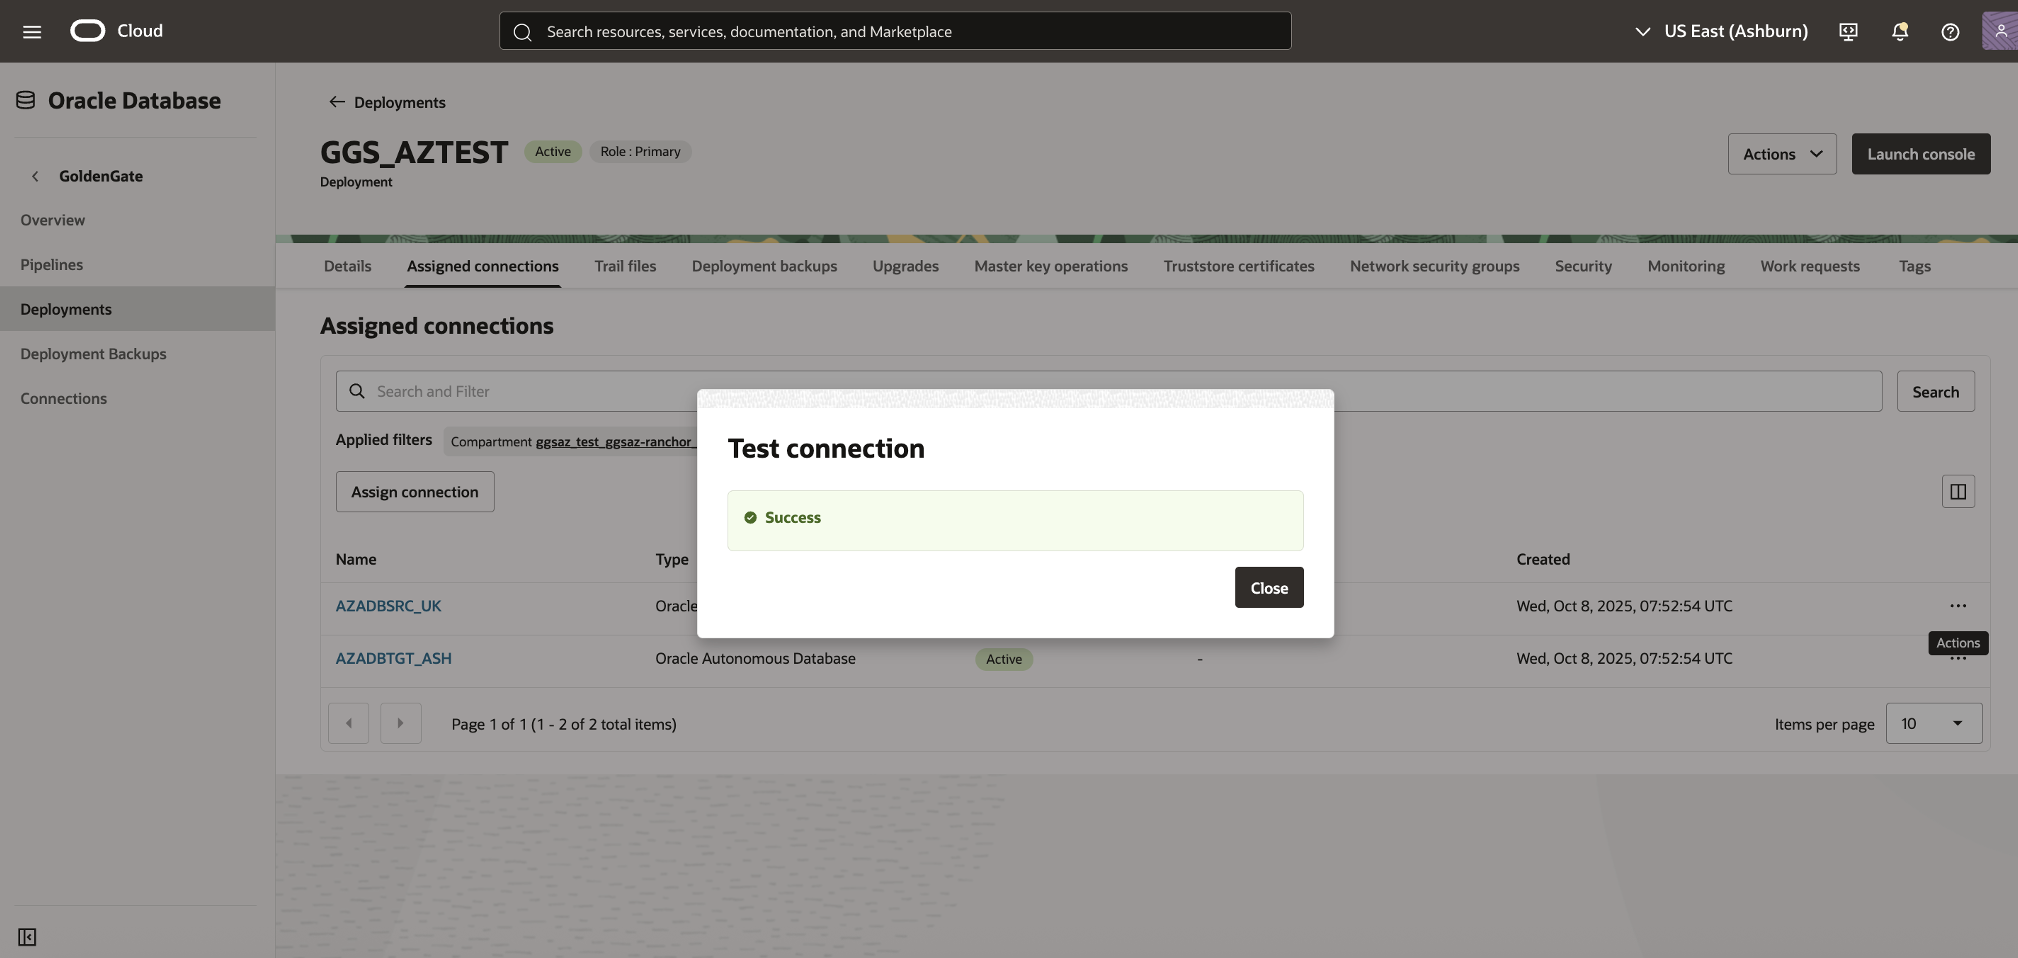
- The Test Connection dialog opens, displaying one of the following:
- A success message, confirming connectivity; or
- An error message, indicating a configuration or network issue.
- If the test fails, verify your credentials, compartment policies, and network anchor settings in Azure.
- Repeat the test for the target connection AZADBTGT_ASH.
Once both tests return successful results, your GoldenGate deployment is fully connected to the source and target Oracle Autonomous AI Databases and ready for replication setup.
4) Unlock the GGADMIN User and Enable Supplemental Logging
Each Oracle Autonomous AI Database includes a built-in GGADMIN user account that is used by Oracle GoldenGate for replication management. By default, this account is locked. You must unlock it and enable supplemental logging in the source database before starting replication.
Enabling supplemental logging ensures that all required transactional details are captured in the database redo logs, allowing GoldenGate to perform accurate and consistent replication.
Unlock the GGADMIN User in the Source Database
- Sign in to the Azure Console or OCI Console and navigate to Oracle Database → Oracle Autonomous AI Database.
- From the list of databases, select Source Autonomous AI Database.
- On the Database Details page, click Database Actions, then select Database Users.
- If prompted, log in as the ADMIN user with the corresponding password.
- In the user list, locate GGADMIN, click the ellipsis (⋮) icon, and select Edit.
- In the Edit User panel:
- Deselect the Account is Locked option.
- Enter the password defined for the ggadmin user during connection setup.
- Click Apply Changes.
- Next, in the Database Actions navigation menu, select SQL under Development.
- Run the following command to enable supplemental logging:
ALTER PLUGGABLE DATABASE ADD SUPPLEMENTAL LOG DATA;
Unlock the GGADMIN User in the Target Database
Repeat the steps 1-6 to unlock GGADMIN user in target database too.
Both source and target Oracle Autonomous AI Database must have the GGADMIN account unlocked and accessible for GoldenGate processes to authenticate successfully. This account will be used later for Extract and Replicat configurations in your GoldenGate deployment .
5) Configure Data Replication in GoldenGate deployment
After successfully creating the deployment and assigning connections, the next step is to configure replication within Oracle GoldenGate. This involves creating an Extract process to capture transactional data from the source database and a Replicat process to apply those transactions to the target database.
All configurations are managed from the GoldenGate Deployment Console, which can be accessed from the OCI Console.
Access the GoldenGate Deployment Console
- From the OCI Console, navigate to Oracle GoldenGate → Deployments.
- Select your GoldenGate deployment .
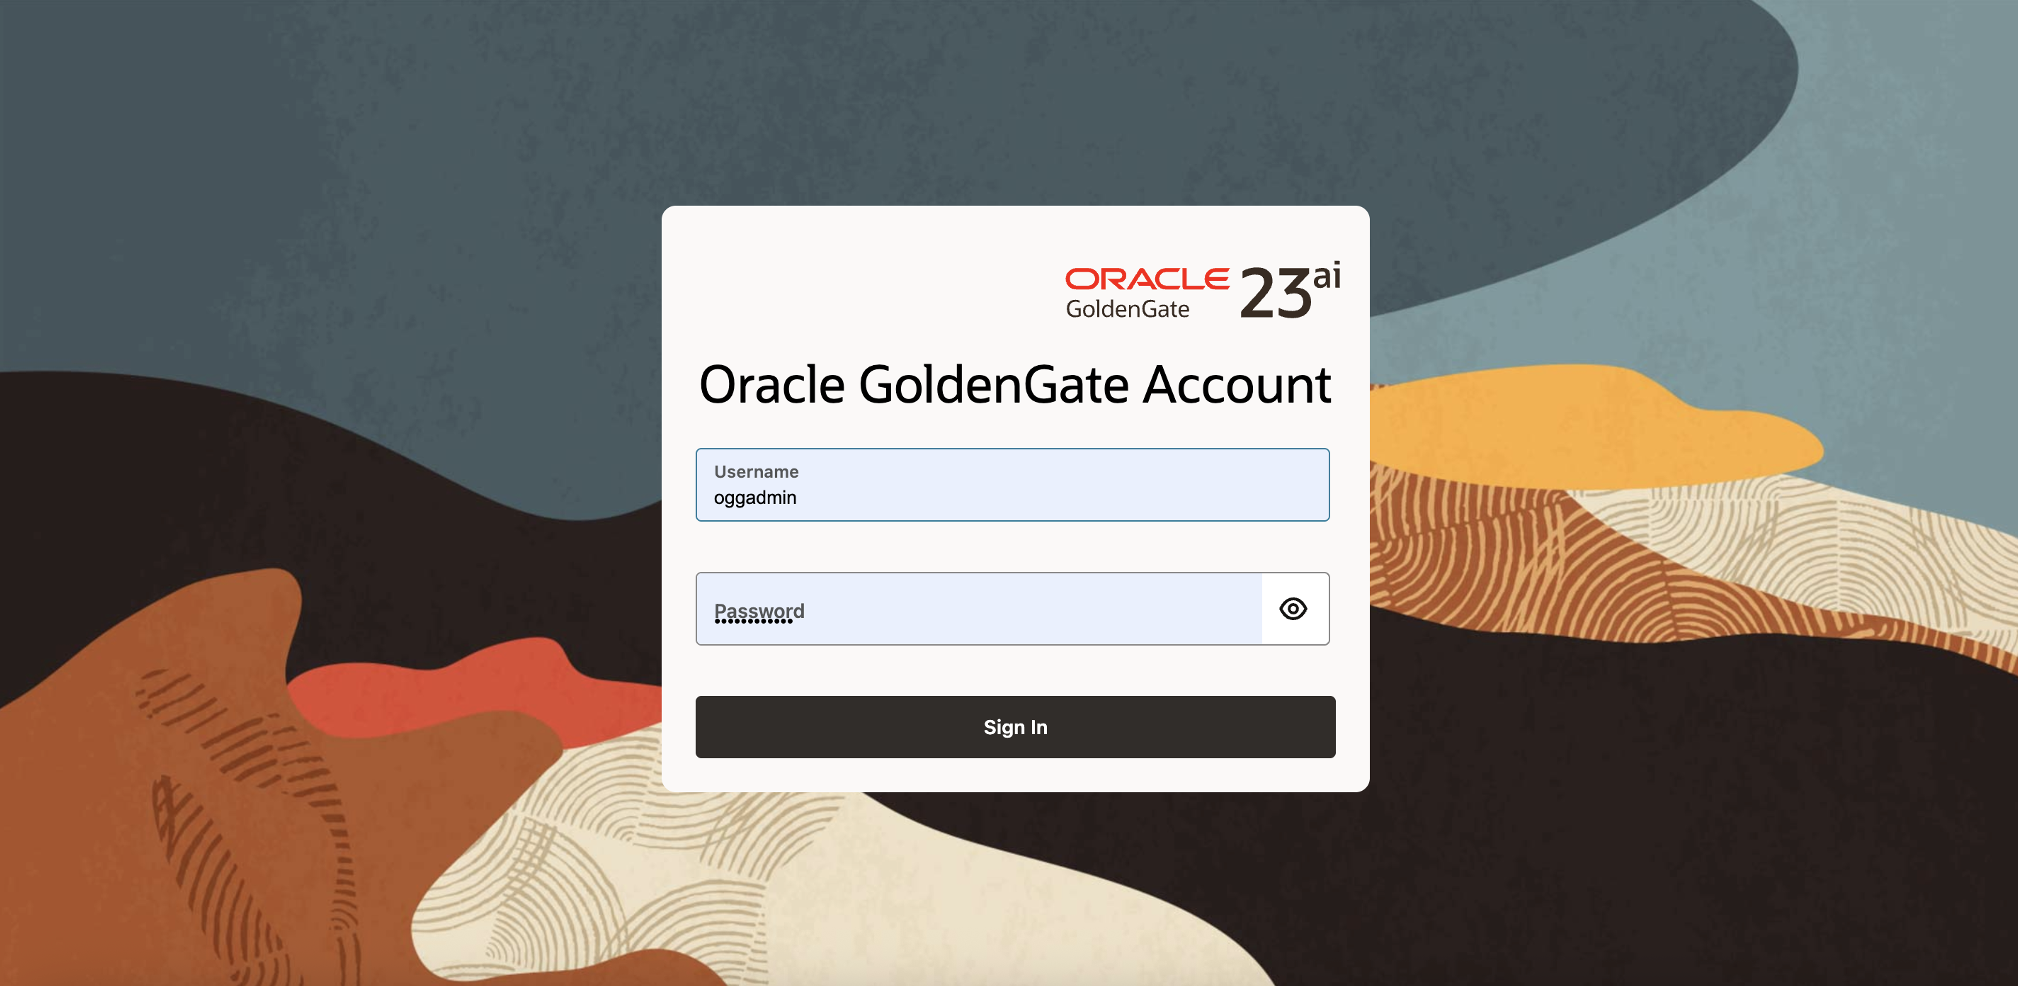
- Click Launch Console.

Log in using the GoldenGate administrator username and password defined during deployment creation.
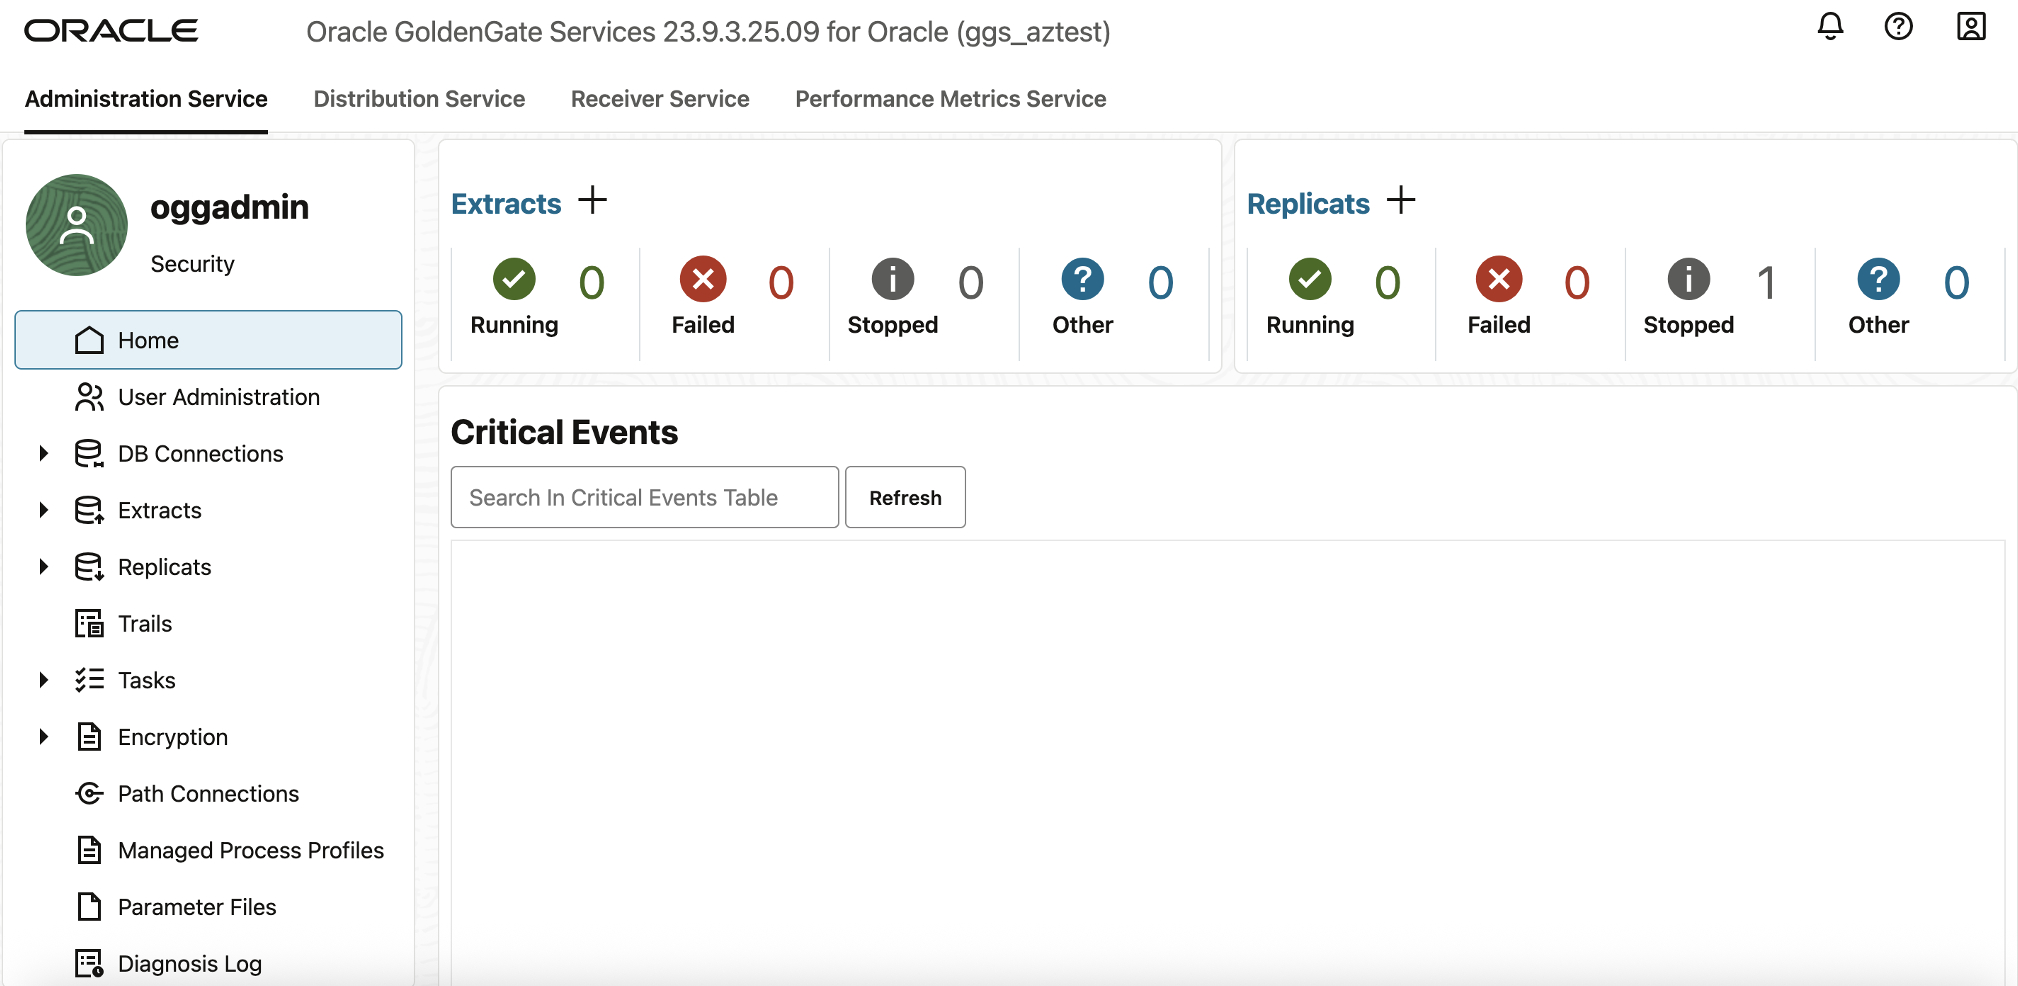
Once logged in, you will see the GoldenGate 23ai Deployment Home Page, which provides access to Administration, Distribution, and Receiver Services, along with real-time performance metrics Service.
Enable Trandata and create Checkpoint table
- Enable Supplemental Logging (TRANDATA)
Enabling table-level supplemental logging (TRANDATA) ensures Oracle GoldenGate can capture the required before and after values of columns involved in replication.
Steps to Add TRANDATA:
- In the OCI GoldenGate deployment console, expand DB Connections.
- Select your source database connection.
- Next to TRANDATA Information, click ➕ Add TRANDATA.
- In the Schema Name field, enter the database schema name (for example, DEMOUSER, or your specific application schema).
- Click Submit.
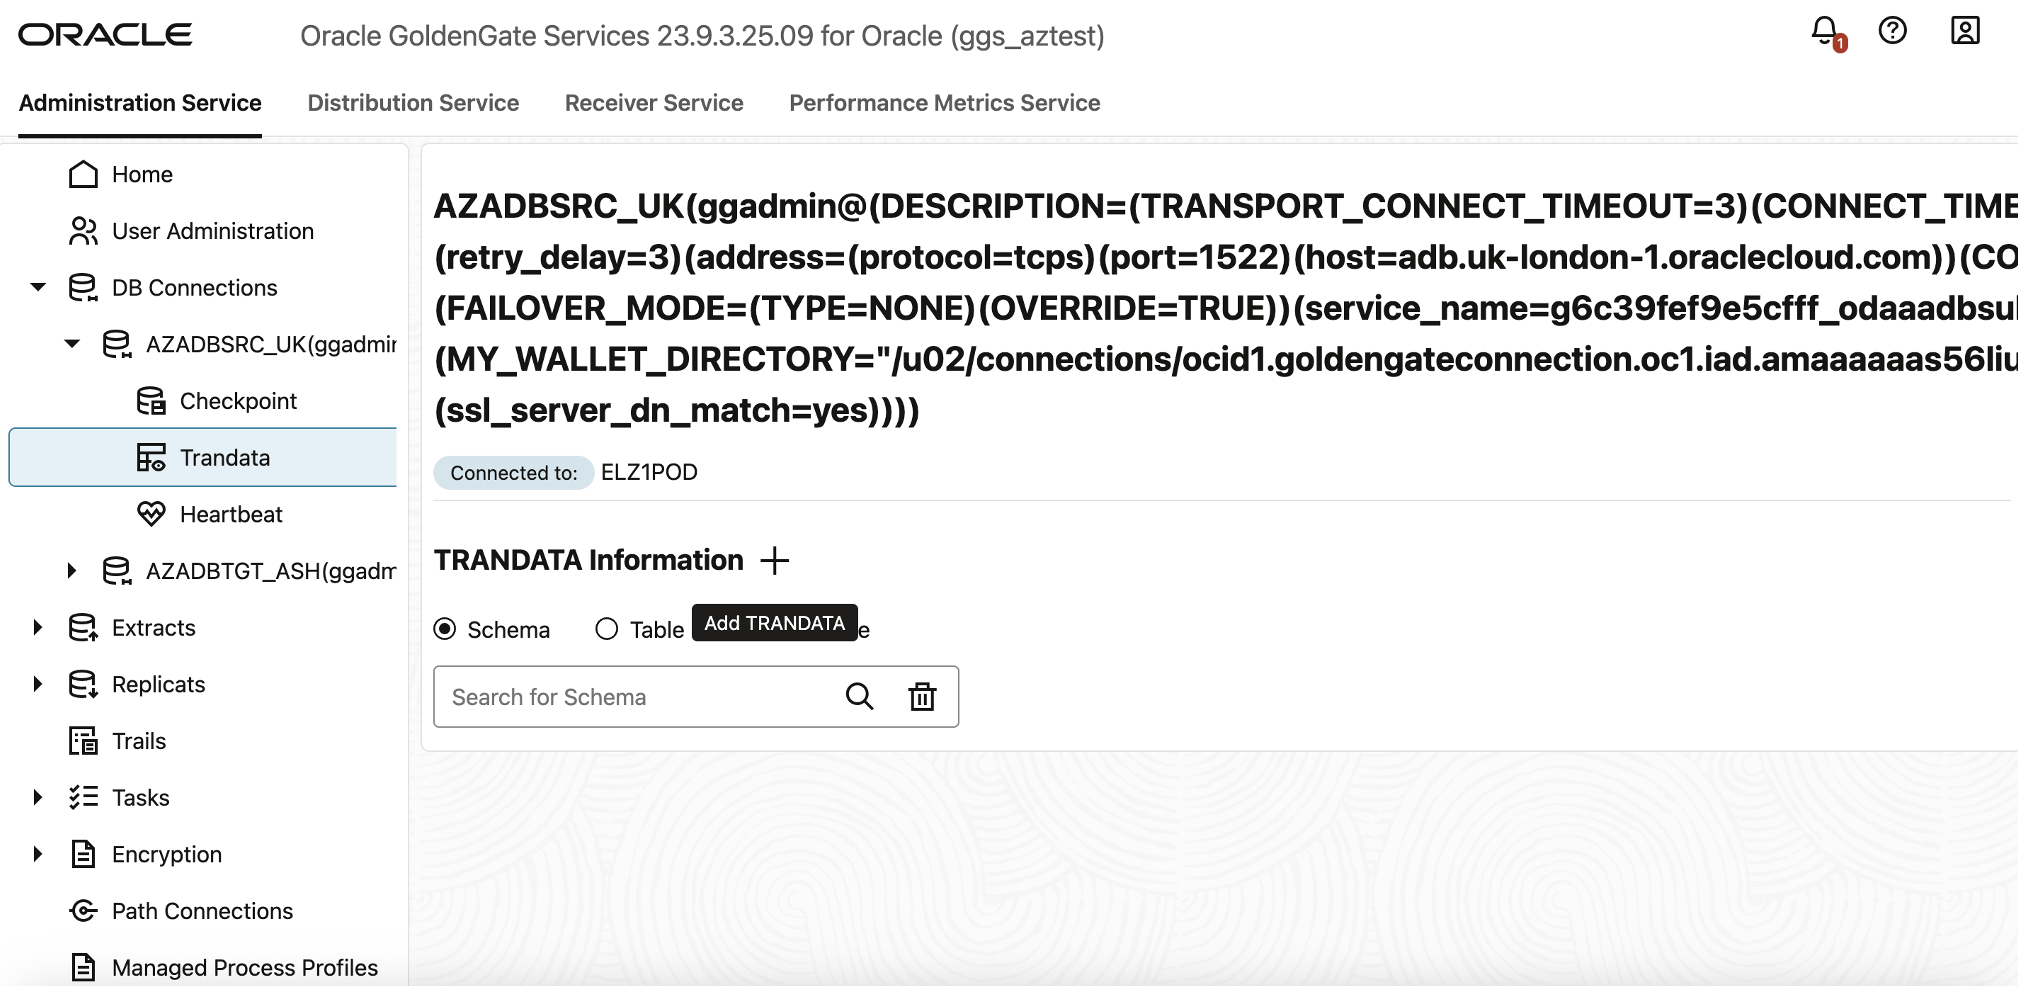
Once TRANDATA is enabled, GoldenGate can accurately capture all necessary changes from the source database’s redo logs.
Add a Checkpoint Table
A Checkpoint Table is essential for the Replicat process. It stores information about the current position in the trail file, allowing Replicat to resume processing from the last checkpoint after a disruption—without reapplying or recapturing transactions.
Steps to Add a Checkpoint Table:
- In the OCI GoldenGate deployment console, expand DB Connections.
- Select your target database connection.
- Click ➕ Add Checkpoint.
- In the Checkpoint Table field, enter the checkpoint table name.
- Click Submit.
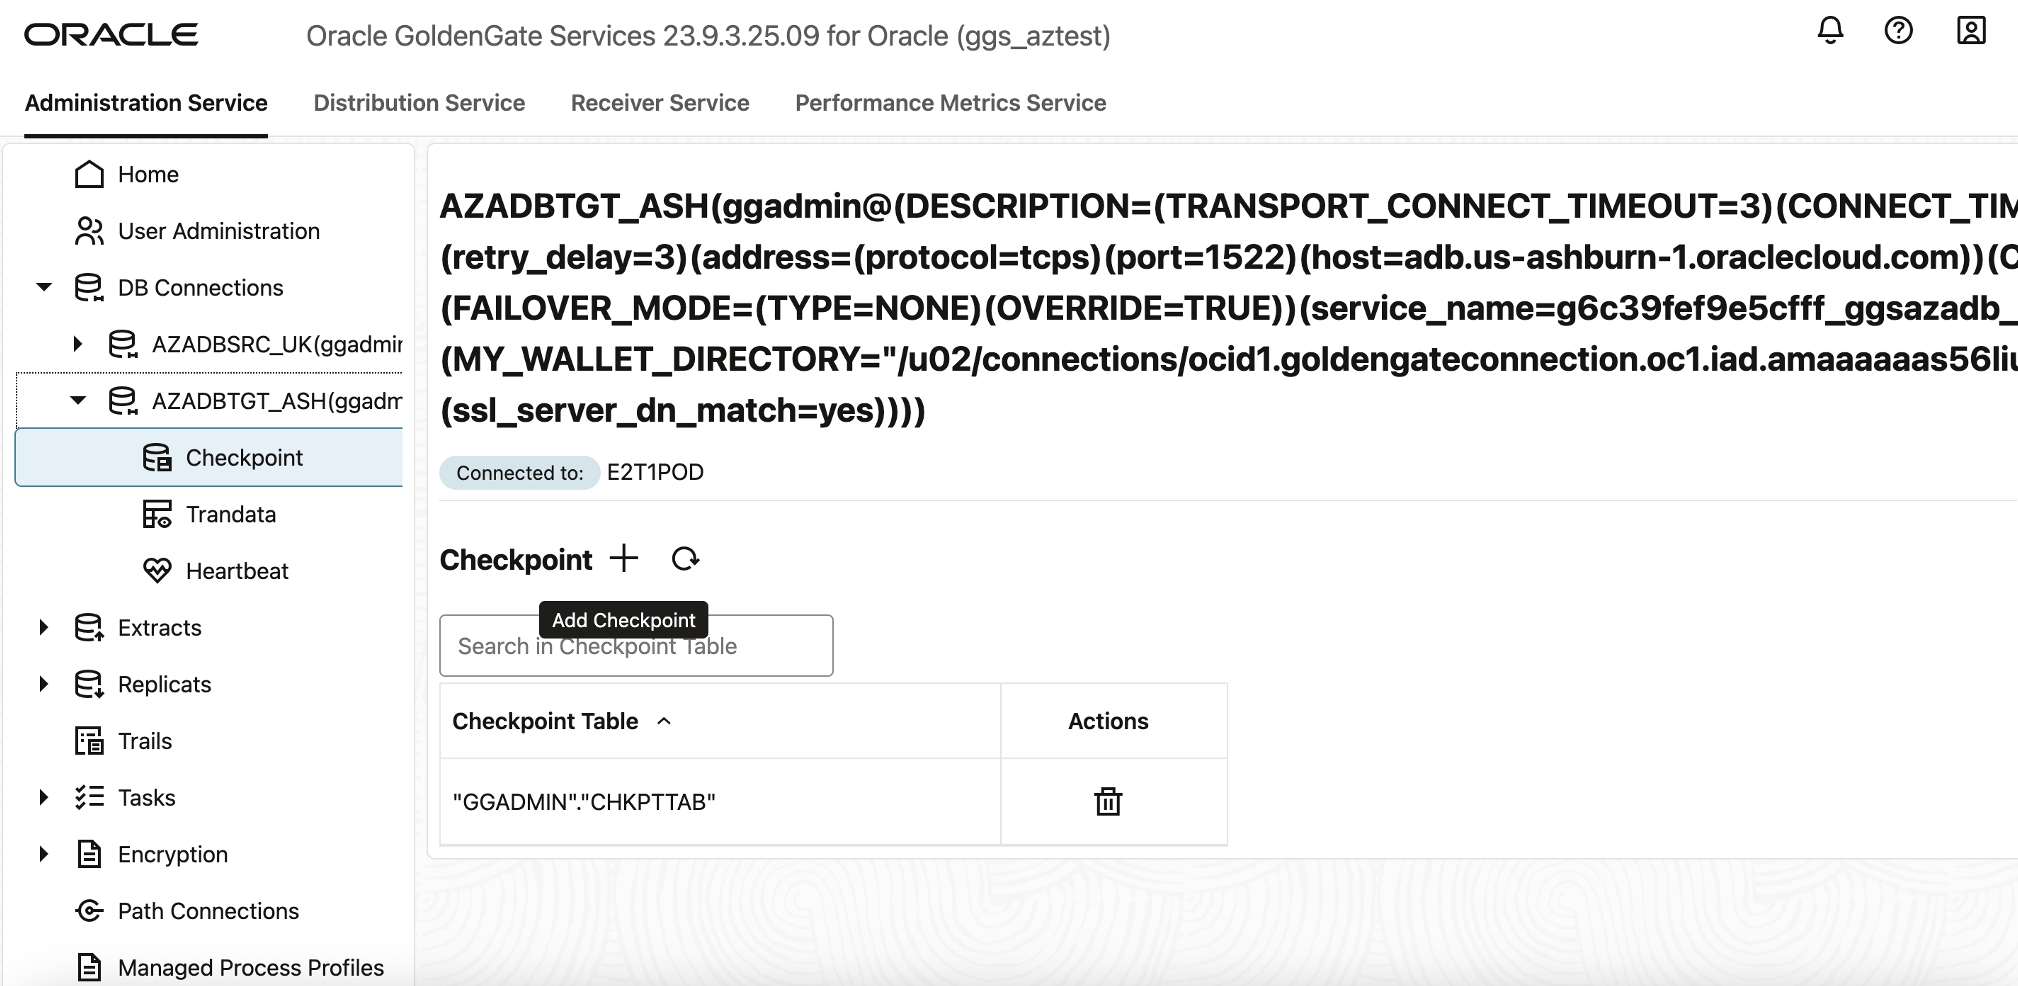
This ensures that the Replicat process can restart gracefully and maintain data consistency across source and target databases.
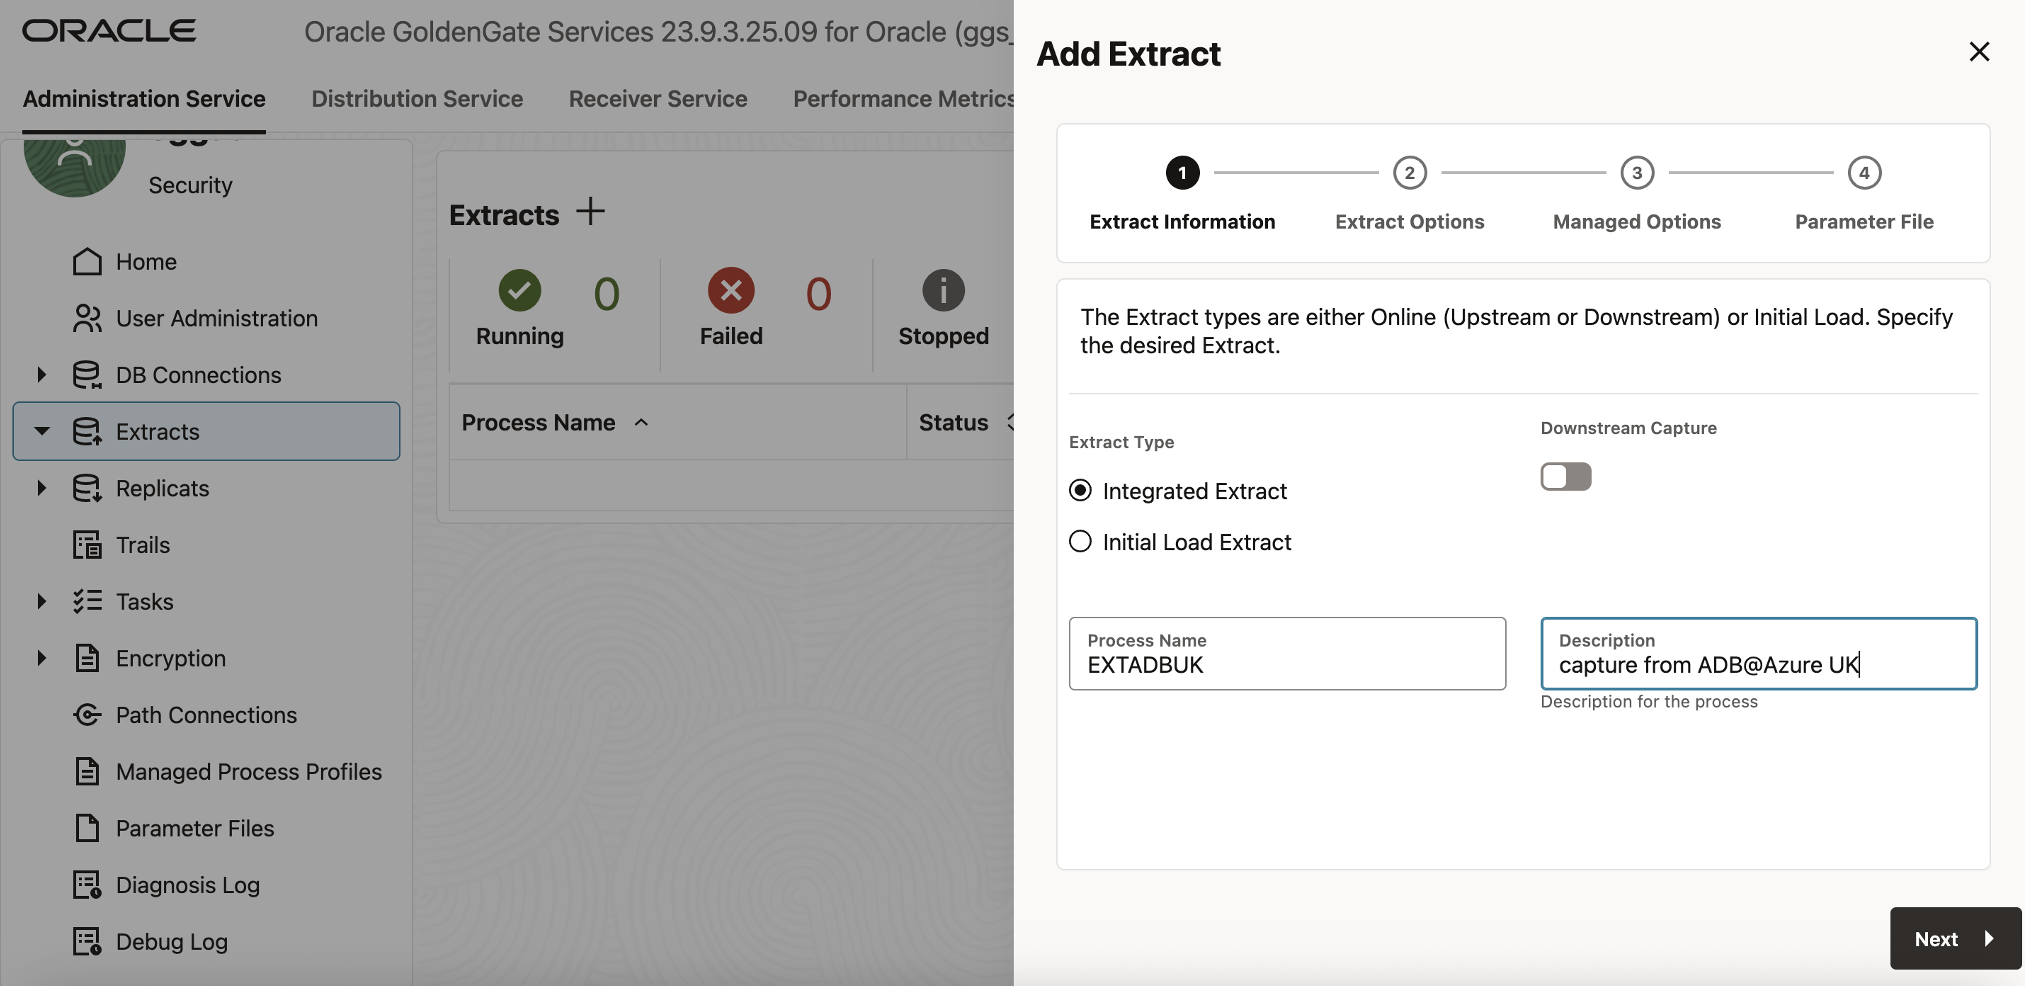
Add an Extract Process
The Extract process reads committed transactions from the redo logs of the source database and writes them to a local trail file for downstream replication.
In the GoldenGate Deployment Console, select Administration Service.
- Click Add Extract.
- In the Extract Information panel, fill in the following fields:
- Extract Type: Integrated Extract
- Process Name: EXTADBUK
- Description: (Optional) Extract process for source ADB UK
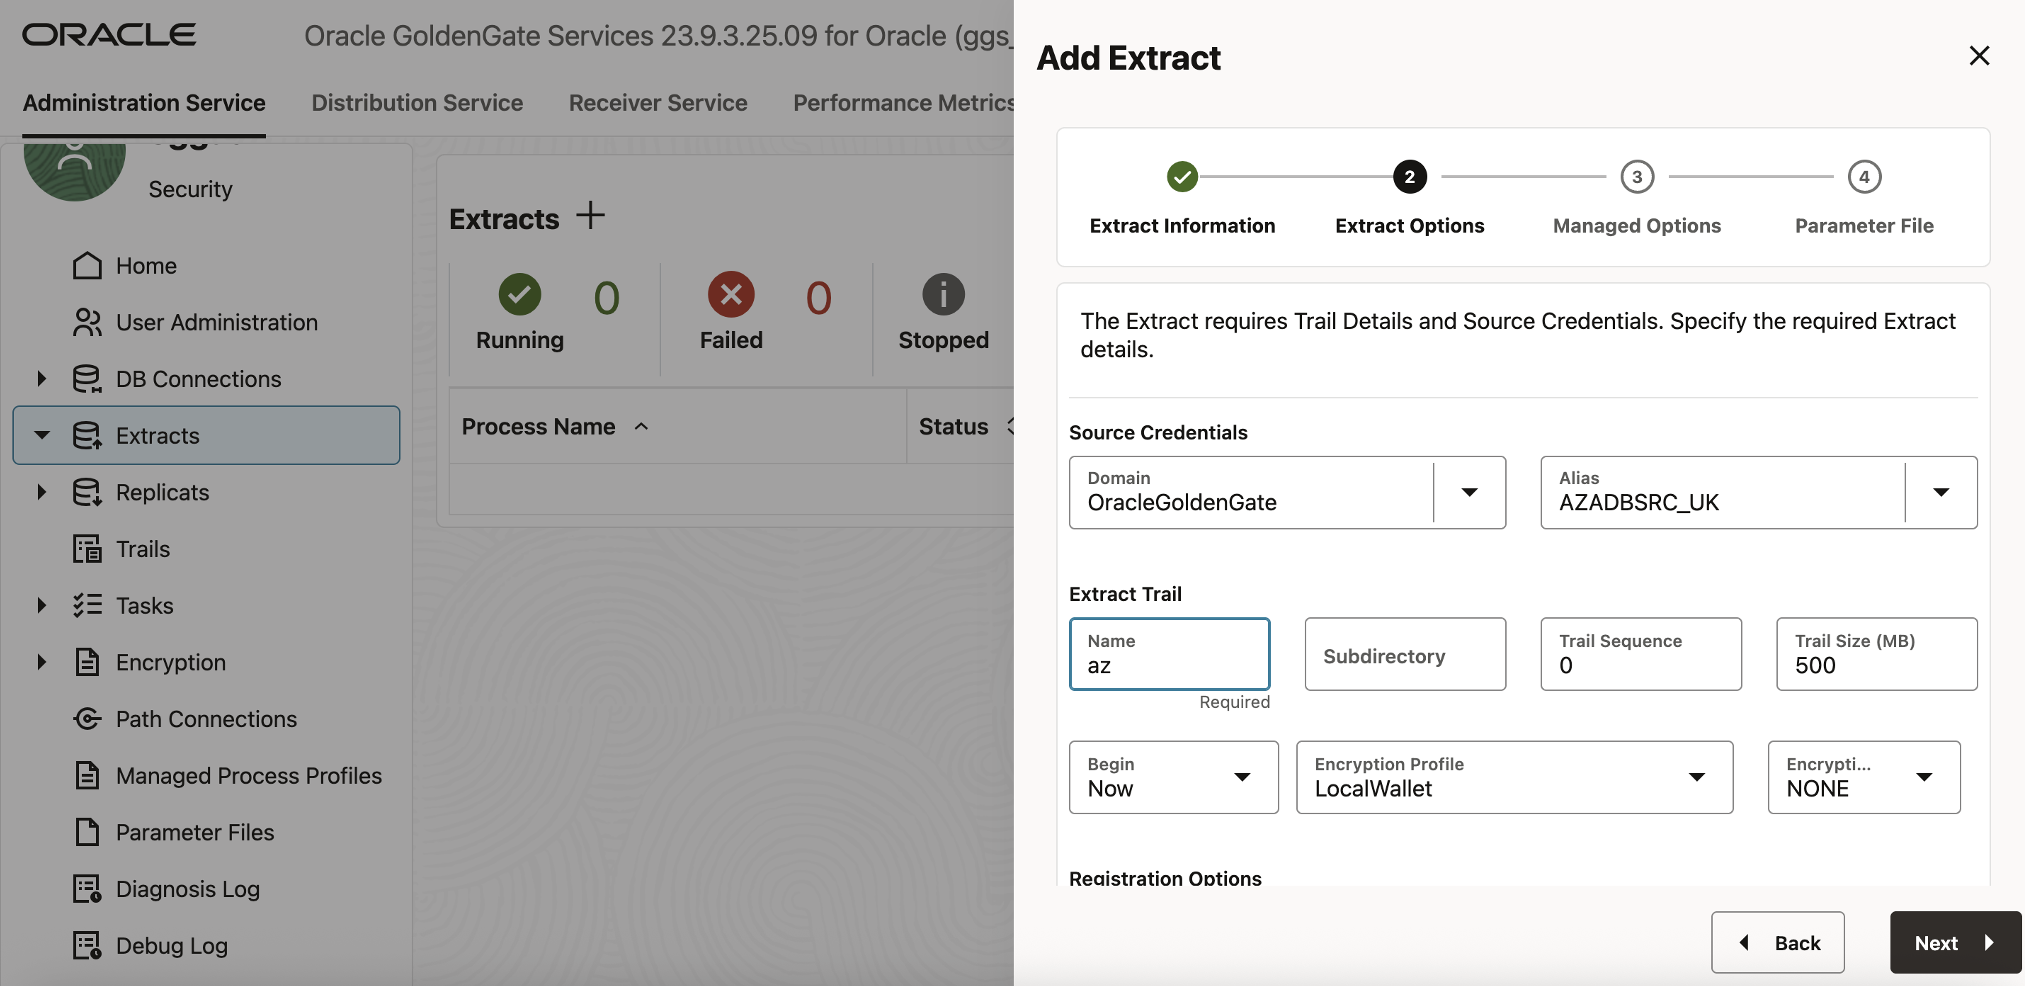
Click Next, then configure the Extract Options:
- Domain: OracleGoldenGate
- Alias: AZADBSRC_UK
- For Extract Trail Name, enter az.
Under Managed Options, enable Critical to Deployment Health.
In the Parameter File editor, add the following lines below any existing text:
DDL INCLUDE MAPPED
— Table list for capture
TABLE DEMOUSER.*;
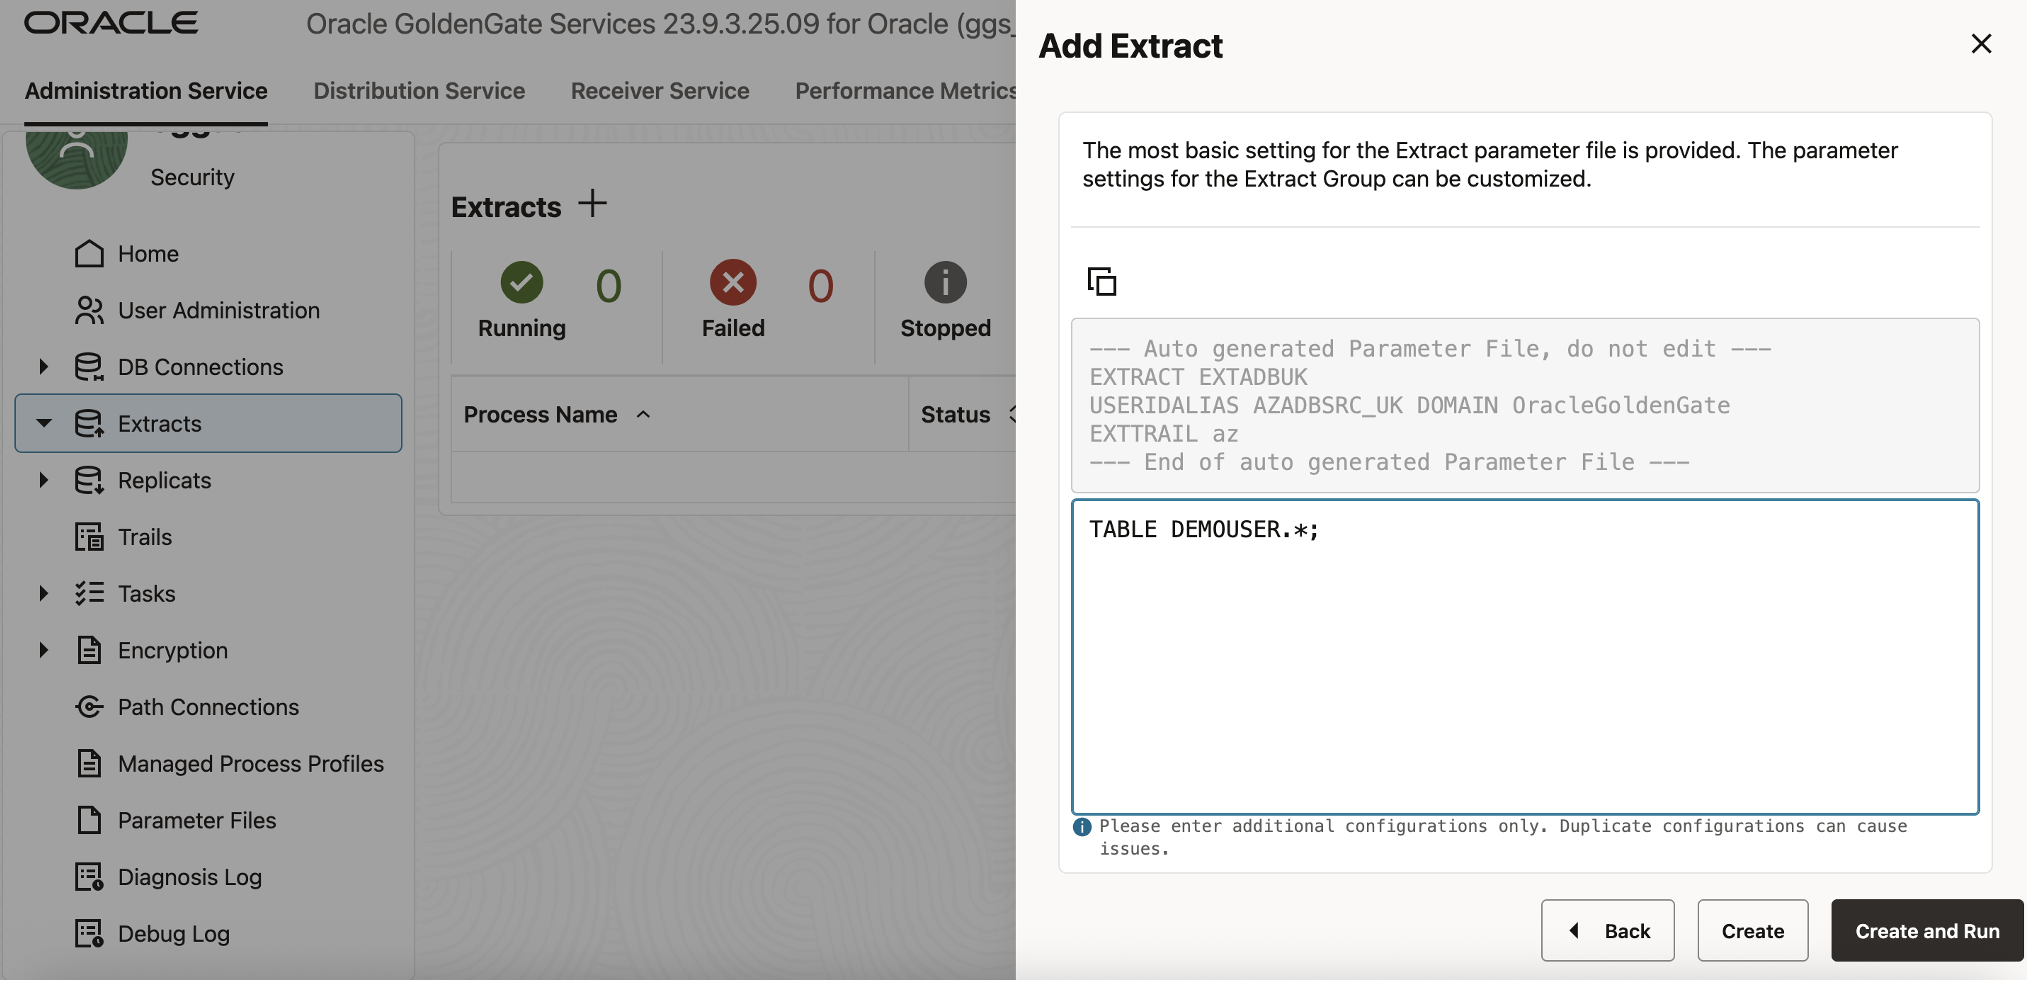
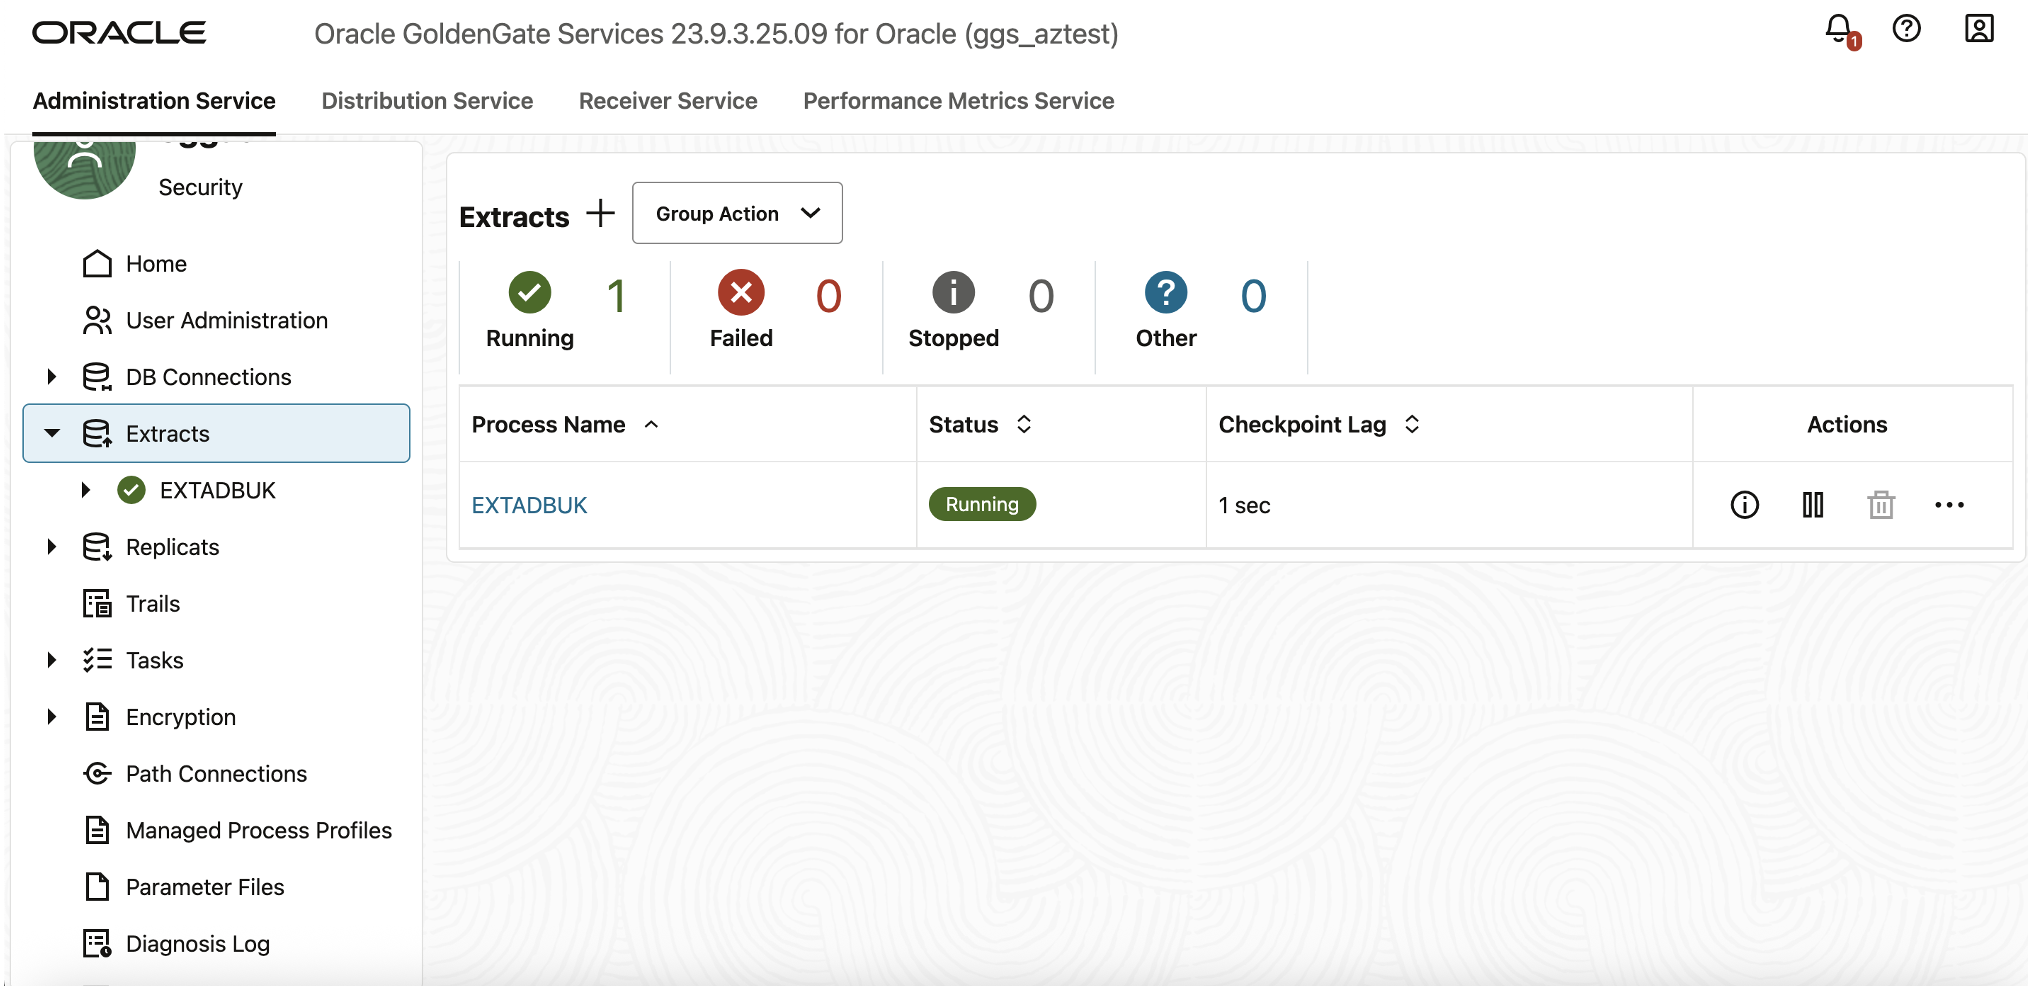
Click Create and Run.
GoldenGate will now start the EXTADBUK process and begin capturing data changes from the source database. After a short initialization period, the process status will display Running.
Add a Replicat Process
The Replicat process reads the trail files generated by Extract and applies the corresponding DML and DDL operations to the target database.
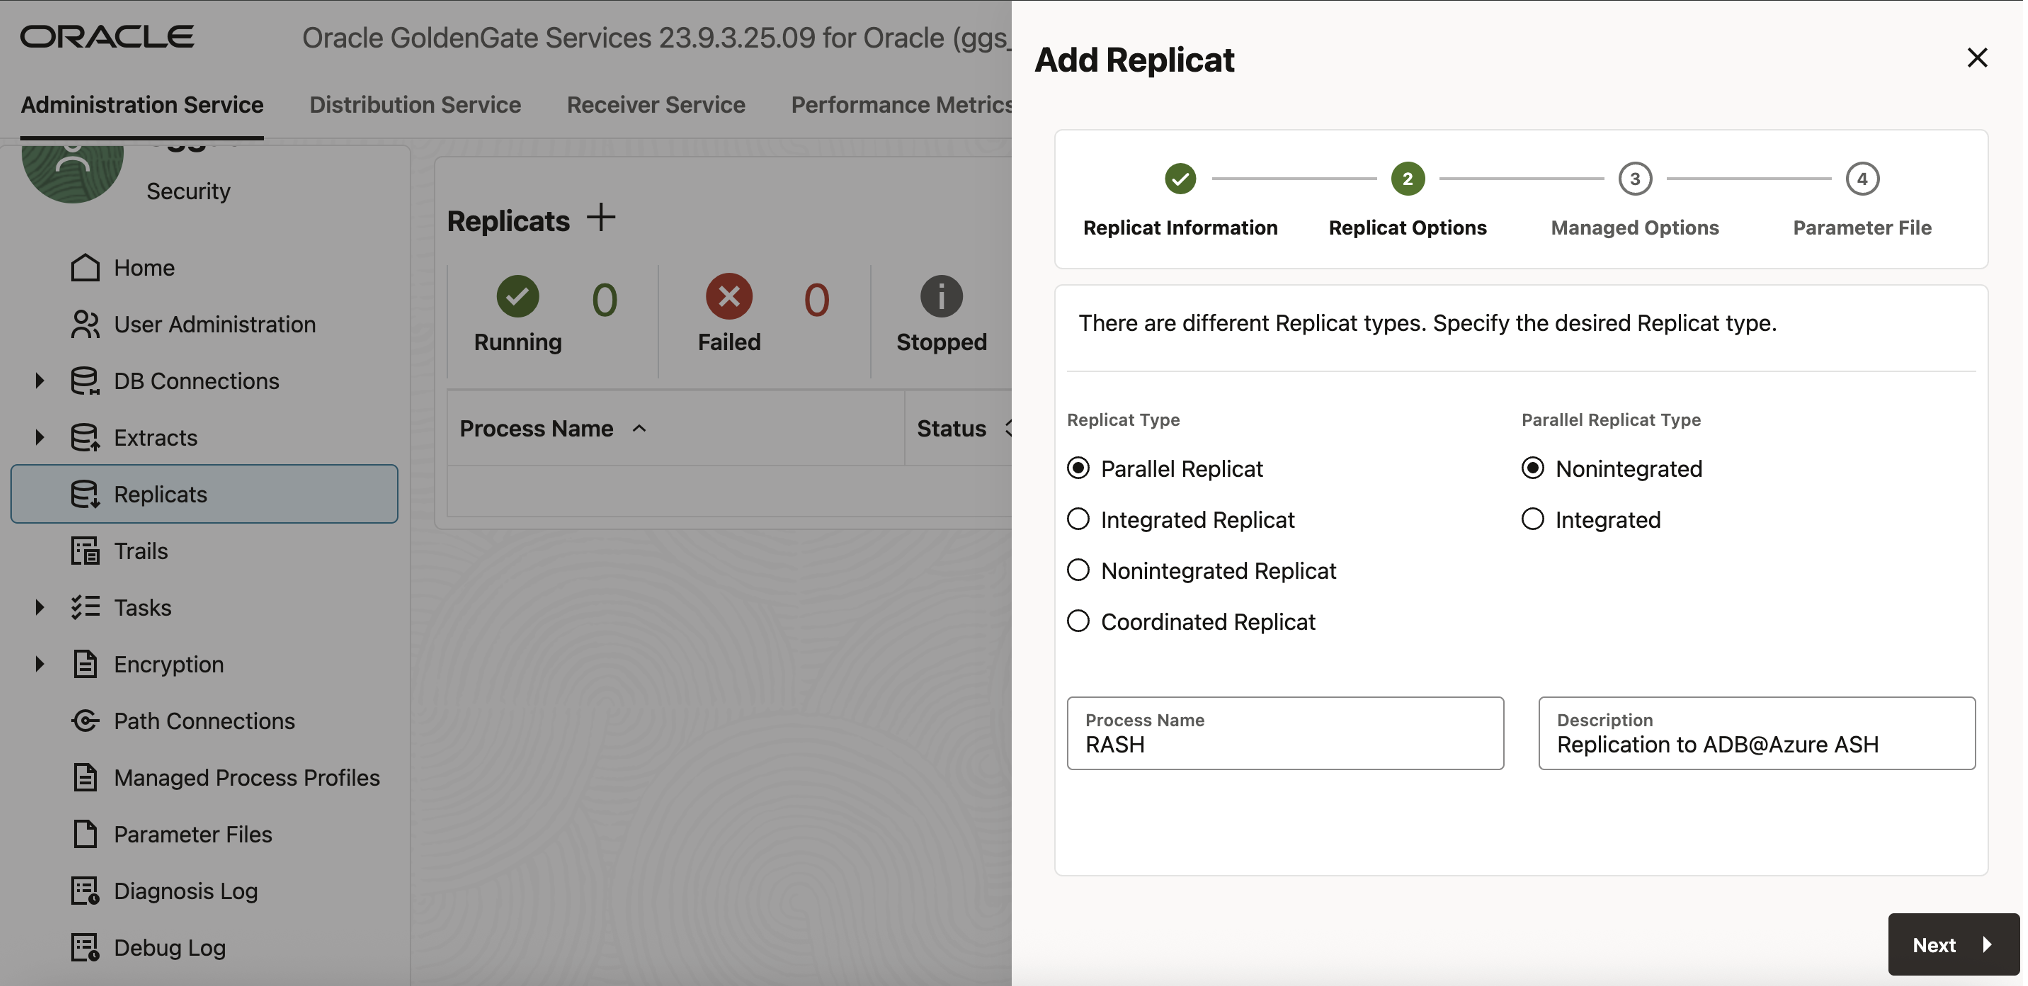
- In the GoldenGate Deployment Console, under Administration Service, click Add Replicat.
- In the Replicat Information panel, enter:
- Replicat Type: Parallel Replicat-Nonintegrated
- Process Name: RASH
- Description: (Optional) Replicat process for target ADB Ashburn
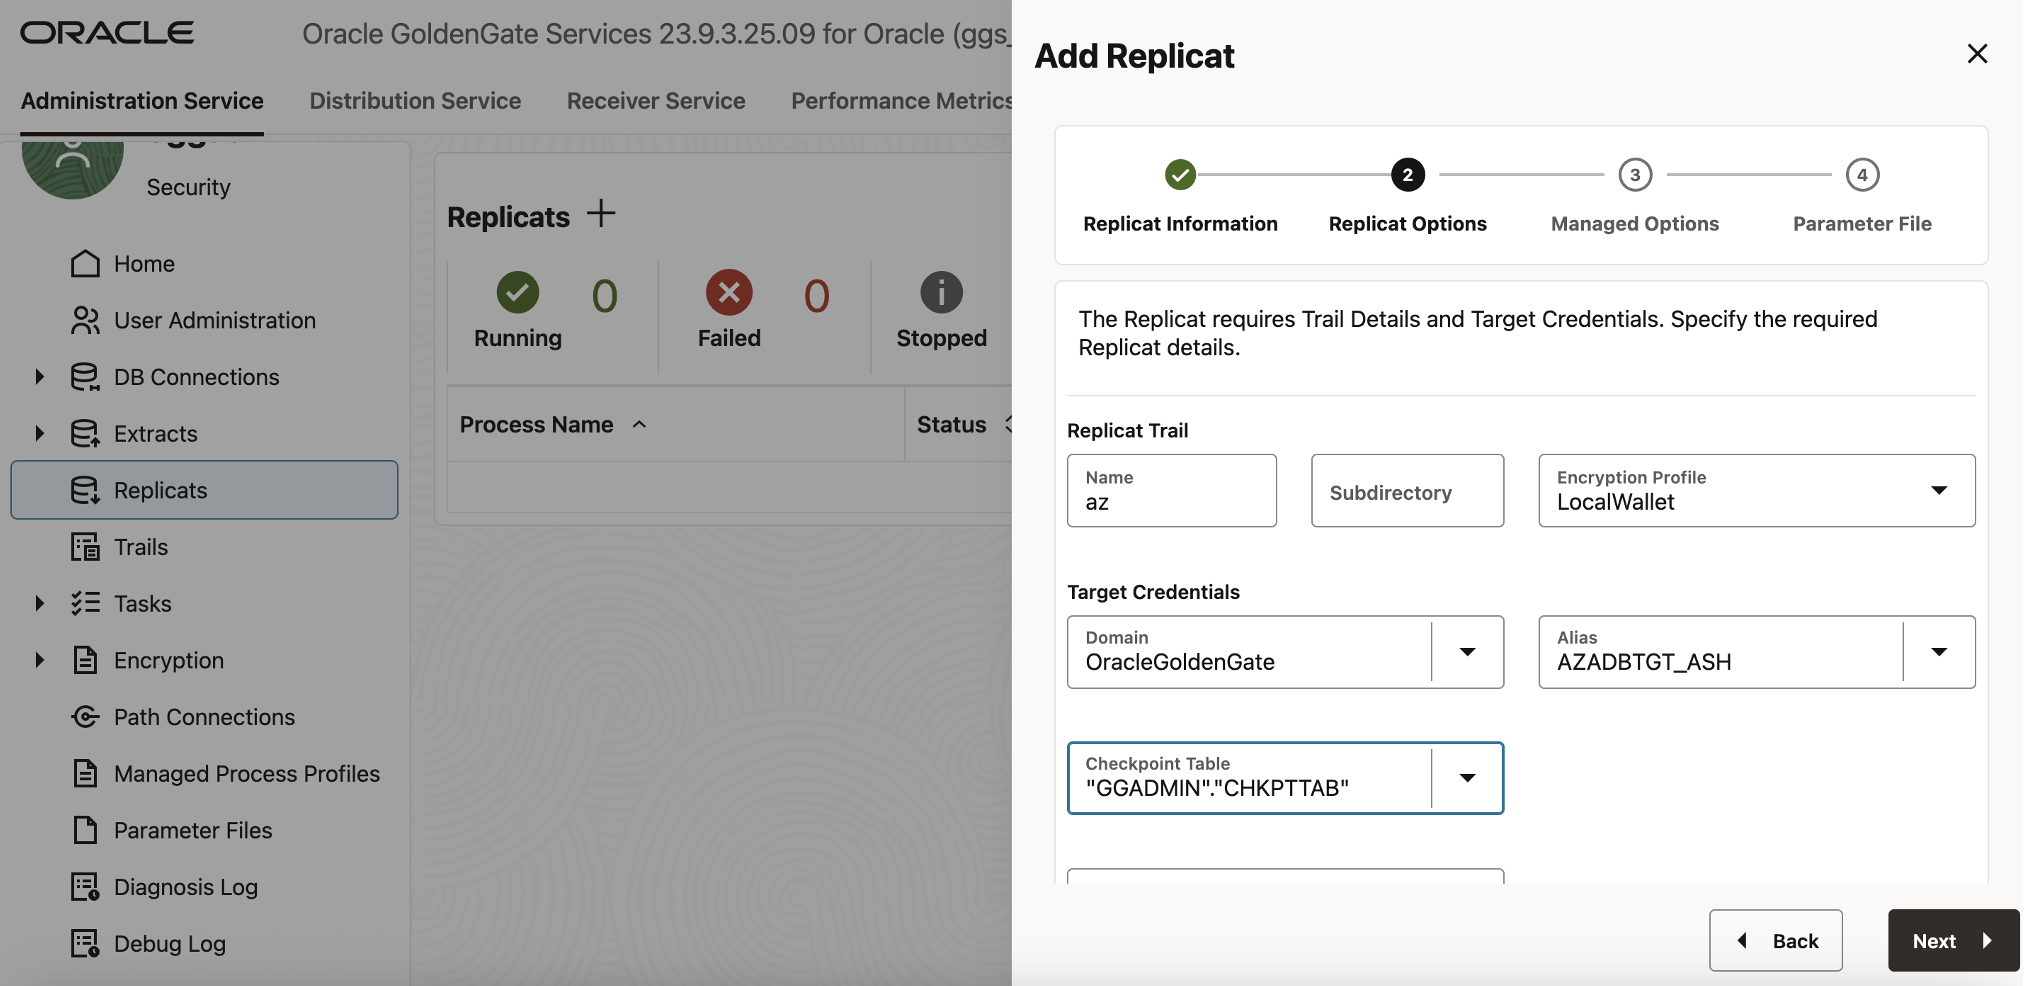
Click Next to open the Replicat Options panel, and configure the following:
- Replicat Trail Name: az
- Target Credentials:
- Domain: OracleGoldenGate
- Alias: AZADBTGT_ASH
- Checkpoint Table: “GGADMIN”.”CHKPTTAB”
Under Managed Options, enable Critical to Deployment Health.
In the Parameter File, replace the default mapping with:
ddl include mapped
— Table map list for apply
MAP DEMOUSER.*, TARGET DEMOUSER_TGT.*;
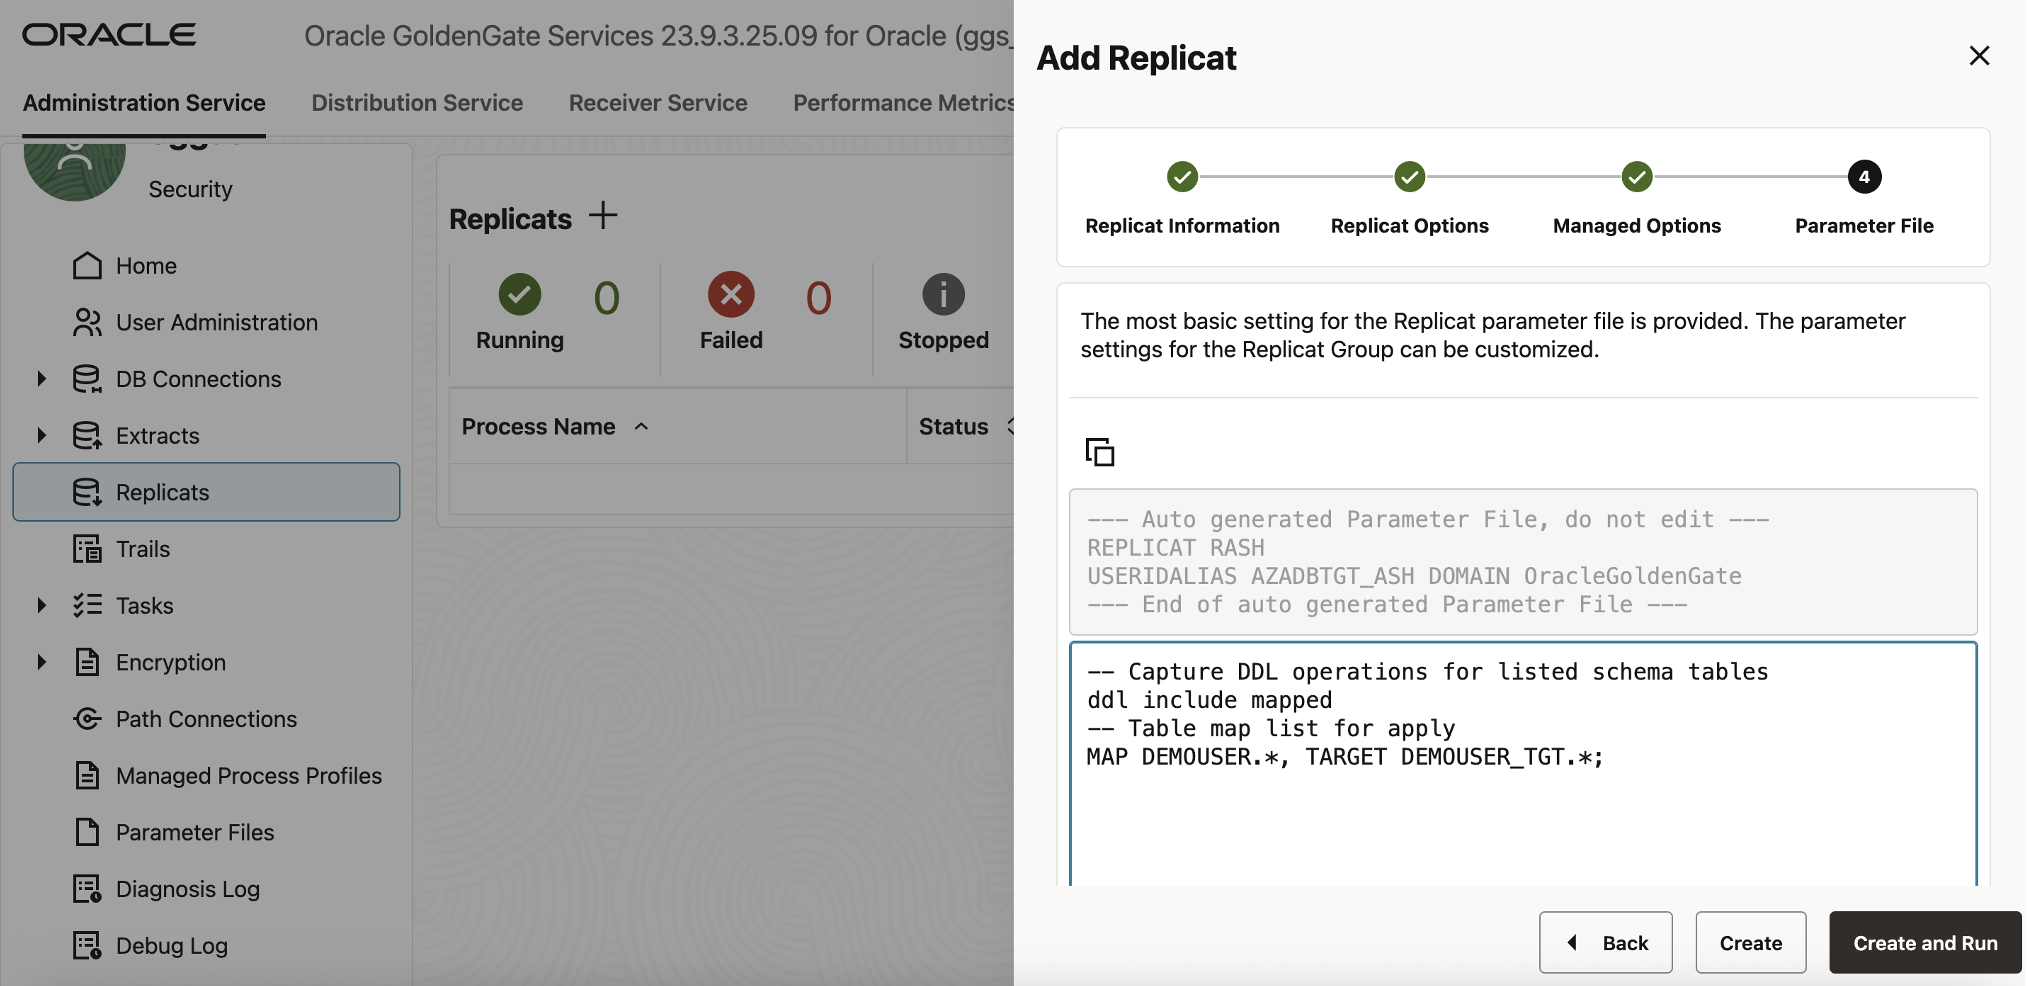
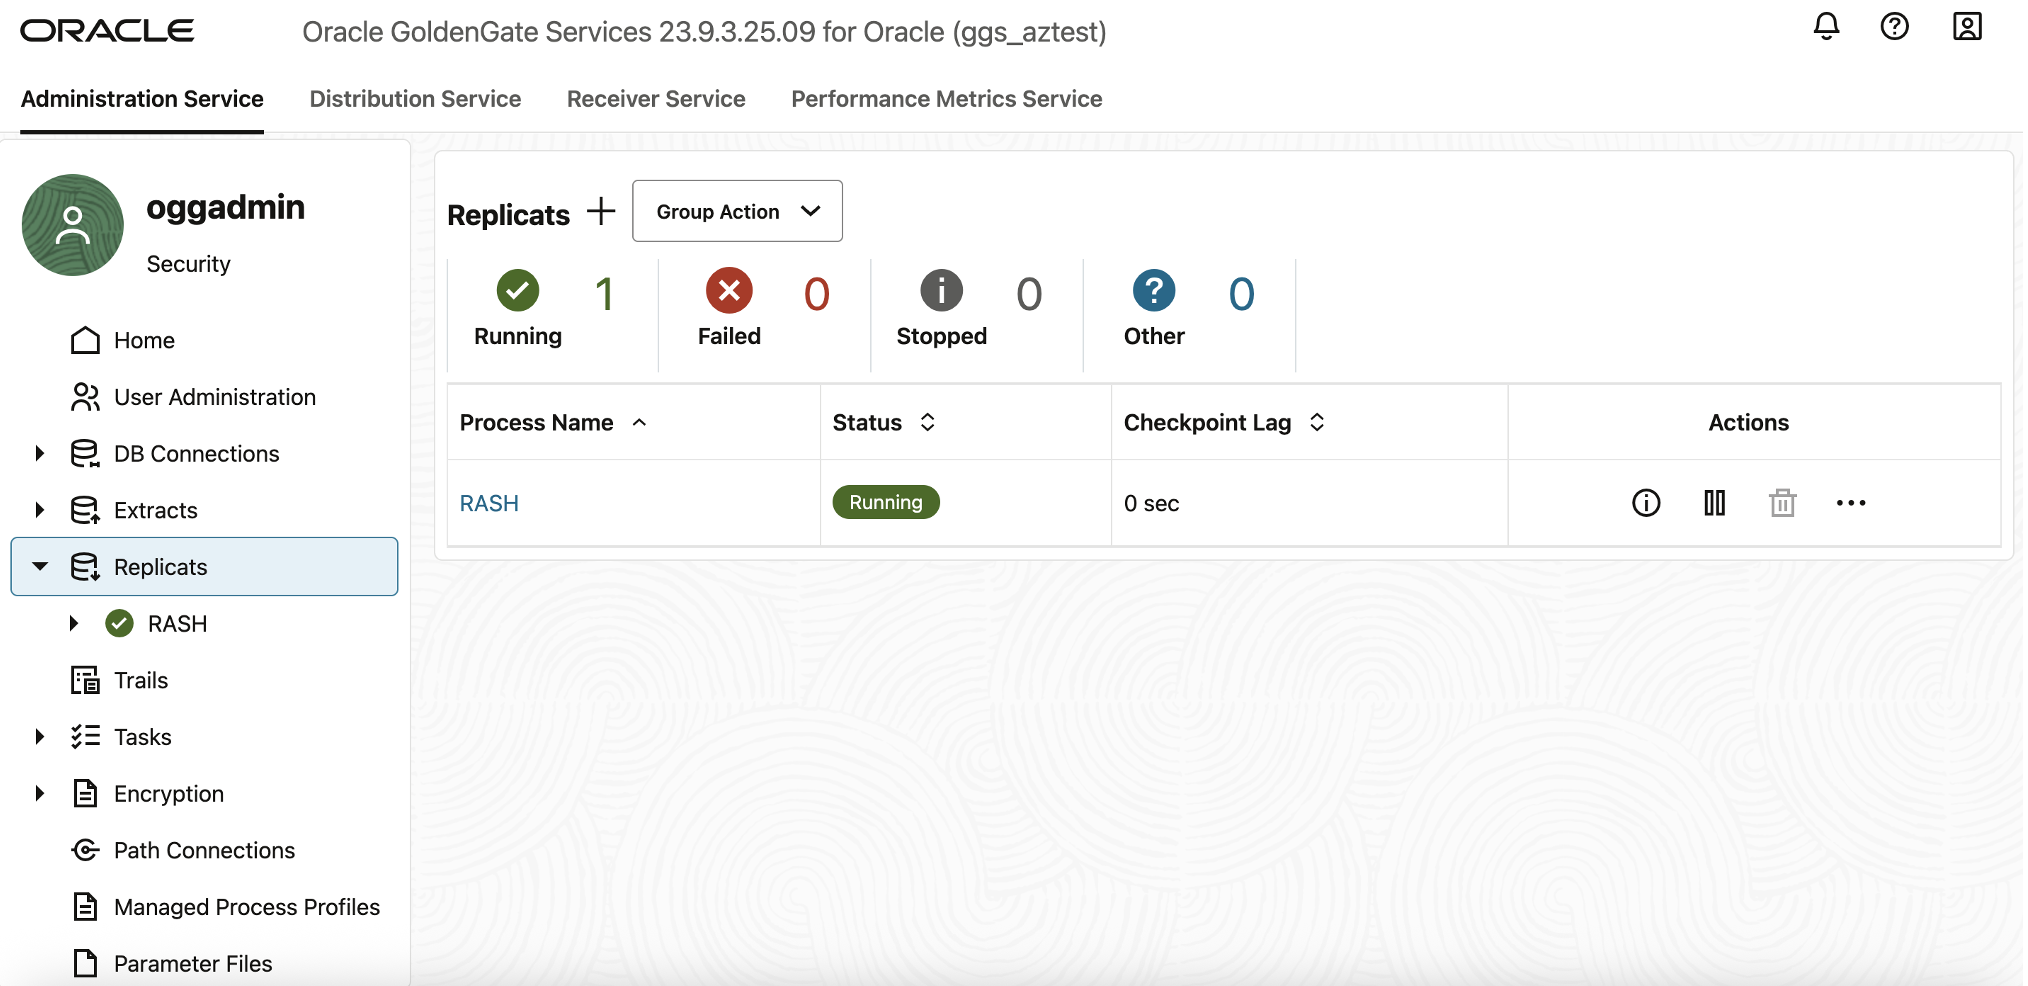
Click Create and Run.
GoldenGate will create and start the RASH Replicat process. After initialization, the process status will display Running, indicating that replication between source and target database is active and synchronized.
Validate and Test Data Replication
With the Extract (EXTADBUK) and Replicat (RASH) processes running, the final step is to validate the replication flow between the source database and target database.This verification ensures that data changes made in the source database are successfully captured and applied to the target in real time through the GoldenGate deployment .
Insert and Modify Data in the Source Database (AZADBSRC_UK)
- In the OCI Console, navigate to Oracle AI Database → Autonomous AI Database.
- Select the source Autonoumous AI database .
- From the Database Actions menu, select SQL.
- Log in using the admin/schema user credentials.
- Execute the following SQL script to insert, update, and delete sample records in the DEMOUSER.GG_DEMO_ORDERS table:
INSERT INTO demouser.gg_demo_orders (order_id, order_number, customer_id, status, order_total, updated_by) VALUES (1001, ‘SO-1001’, 501, ‘NEW’, 1299.99, ‘seed’);
INSERT INTO demouser.gg_demo_orders (order_id, order_number, customer_id, status, order_total, updated_by) VALUES (1002, ‘SO-1002’, 502, ‘PENDING’, 249.50, ‘seed’);
INSERT INTO demouser.gg_demo_orders (order_id, order_number, customer_id, status, order_total, updated_by) VALUES (1003, ‘SO-1003’, 503, ‘NEW’, 79.00, ‘seed’);
INSERT INTO demouser.gg_demo_orders (order_id, order_number, customer_id, status, order_total, updated_by) VALUES (1004, ‘SO-1004’, 504, ‘NEW’, 999.00, ‘seed’);
— Example using IDENTITY column
INSERT INTO demouser.gg_demo_orders (order_number, customer_id, status, order_total, updated_by) VALUES (‘SO-1005’, 505, ‘NEW’, 159.95, ‘seed’);
COMMIT;
— UPDATE: Apply changes to simulate order lifecycle events
UPDATE demouser.gg_demo_orders SET status = ‘PENDING’, order_total = order_total + 10, updated_at = SYSTIMESTAMP, updated_by = ‘oms-batch’ WHERE order_id = 1001;
UPDATE demouser.gg_demo_orders SET status = ‘SHIPPED’, updated_at = SYSTIMESTAMP, updated_by = ‘shipping-svc’ WHERE order_number = ‘SO-1002’;
— Bulk update for all NEW orders
UPDATE demouser.gg_demo_orders SET status = ‘PENDING’, updated_at = SYSTIMESTAMP, updated_by = ‘ops’ WHERE status = ‘NEW’;
COMMIT;
— DELETE: Cancel one order
DELETE FROM demouser.gg_demo_orders WHERE order_id = 1003;
COMMIT;
This script inserts five orders, updates existing records, and deletes one order to simulate real-world transactional activity.
Verify Extract and Replicat Health
- In the Deployment Console, select Extracts.
- Verify that the EXTADBUK process is in Running state.
- Click the process name to view Statistics for captured transactions.
- Navigate to Replicats.
- Verify that the RASH process is also Running.
- Check the Statistics tab to confirm successful data replication.
- Both processes should show matching counts for inserts, updates, and deletes, confirming that replication is functioning correctly.
Validate the Data on the Target Database
- In the OCI Console, navigate to Oracle Database → Autonomous AI Database.
- Select the target Autonomous AI database .
- From the Database Actions menu, open SQL and log in as the admin/schema user.
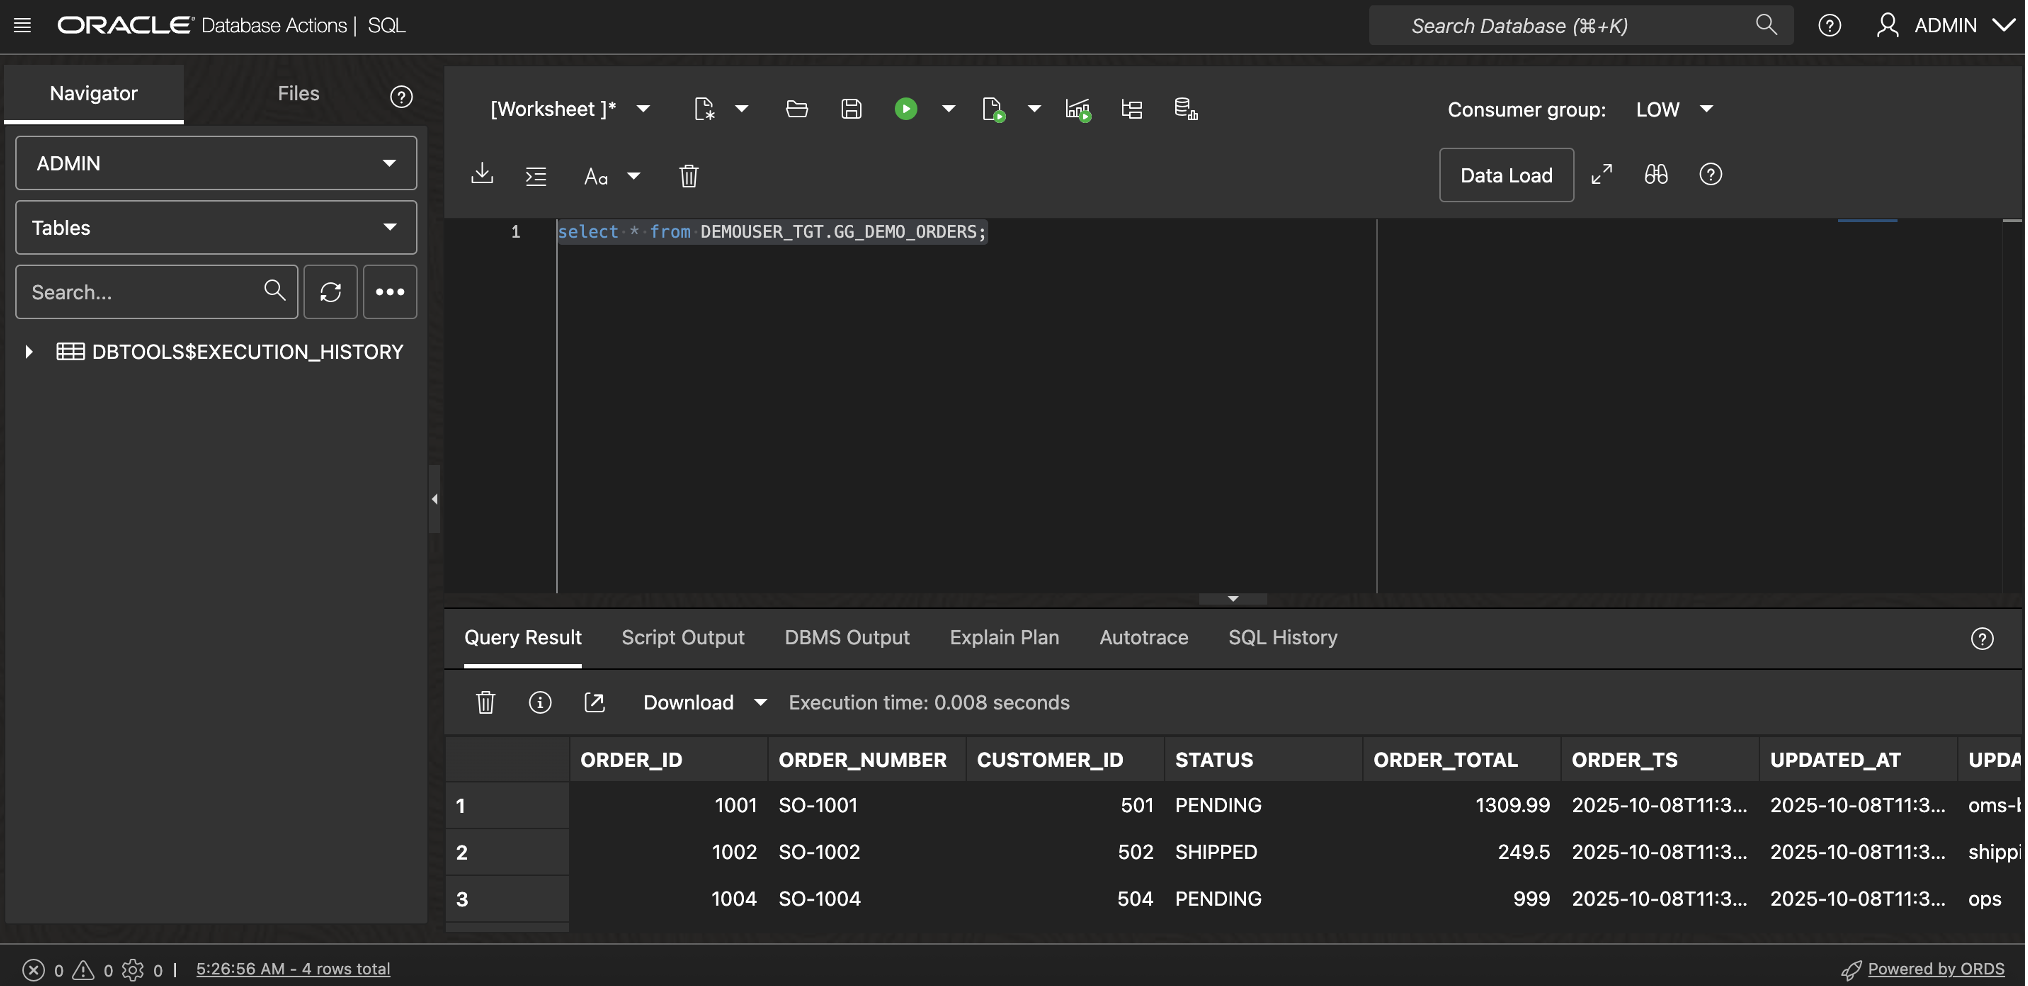
- Run the following query to verify that all replicated rows are present and updated:
SELECT order_id, order_number, customer_id, status, order_total, updated_by FROM demo.gg_demo_orders ORDER BY order_id; - You should see the data reflected on the target Aunomous AI database that was previously inserted and modified on the source.
Result: Successful Replication using GoldenGate deployment
If all validation steps succeed:
- The Extract (EXTADBUK) and Replicat (RASH) processes show Running status.
- Row counts and transaction metrics match between source and target.
- Queries on both databases return identical datasets.
This confirms that GoldenGate in Oracle Database@Azure is successfully replicating data across two Autonomous AI Database@Azure delivering real-time, cross-region synchronization.
Conclusion
With Oracle GoldenGate In Oracle Database@Azure offering, customers can achieve seamless, real-time data replication between Autonomous AI Database@Azure instances distributed across regions—such as UK (source) and US East (target)—while maintaining full control from within the Azure portal.
In this use case, the GoldenGate deployment running in EAST US (Zone 1) demonstrates the simplicity and efficiency of Oracle’s multicloud integration with Microsoft Azure. Through Resource Anchors, Network Anchors, and GoldenGate deployments, organizations can now replicate mission-critical data securely across continents with minimal latency and zero manual infrastructure management.
Now is the perfect time to modernize your data strategy and unlock the full potential of real-time insights across your multicloud environment. Get started today by deploying Oracle GoldenGate in Oracle Database@Azure, and take advantage of your existing MAAC credits—just as you do with Oracle Database@Azure—to simplify billing and accelerate time to value.
For more information,
OCI GoldenGate Quickstarts
Explore the Getting Started Guide
Azure blog (top news): https://aka.ms/OAIW25Blog
Microsoft Announcement blog : https://aka.ms/AIWTC25

