Updated on 05/24/2023
Autonomous Database on Dedicated Infrastructure now supports VM Cluster node subsetting on all X8M and newer generation Exadata Infrastructures. Node subsetting has the same customer experience and requirements on both platforms – Cloud@Customer and public cloud. Read through this blog to understand the advantages of node subsetting and its feature set.
_________________________________________________________________________________________________________________________________________________________
I am excited to announce the general availability of Autonomous Exadata VM Cluster (AVMC) Node Subsetting on Autonomous Database on Exadata Cloud@Customer. Node Subsetting compliments the recently released Multiple VM Autonomous Database, bringing even more efficiency for database consolidation while maintaining performance and security isolation for all workloads. With the support for node subsetting, you can select the subset of database server hosts on your Exadata Infrastructure to run each workload. Efficiently sizing your AVMCs gives you the advantage of enabling the creation of more AVMCs on a given Exadata Infrastructure, so more application teams can securely leverage a single dedicated resource without compromising on predictable performance. This makes it even more efficient to setup a consolidated database environment that adheres to typical data governance requirements.
OCI Console Experience
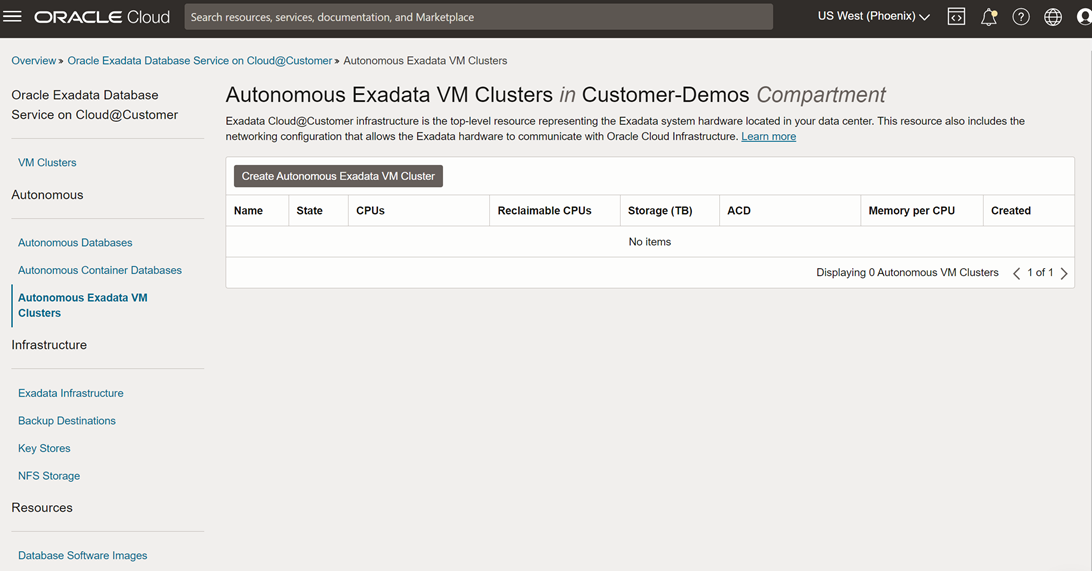
To create an AVMC, navigate to the AVMC home page and click “Create Autonomous Exadata VM Cluster”.
Create AVMC page largely remains the same except for the “Configure Autonomous VM Cluster Resources” section. You will now see a new section that shows your default DB Server selection and allows you to edit the default selection. By default, all the DB Servers with the minimum resources needed to create an AVMC will be selected. Click the “Edit DB Server Selection” button to change the default selection.
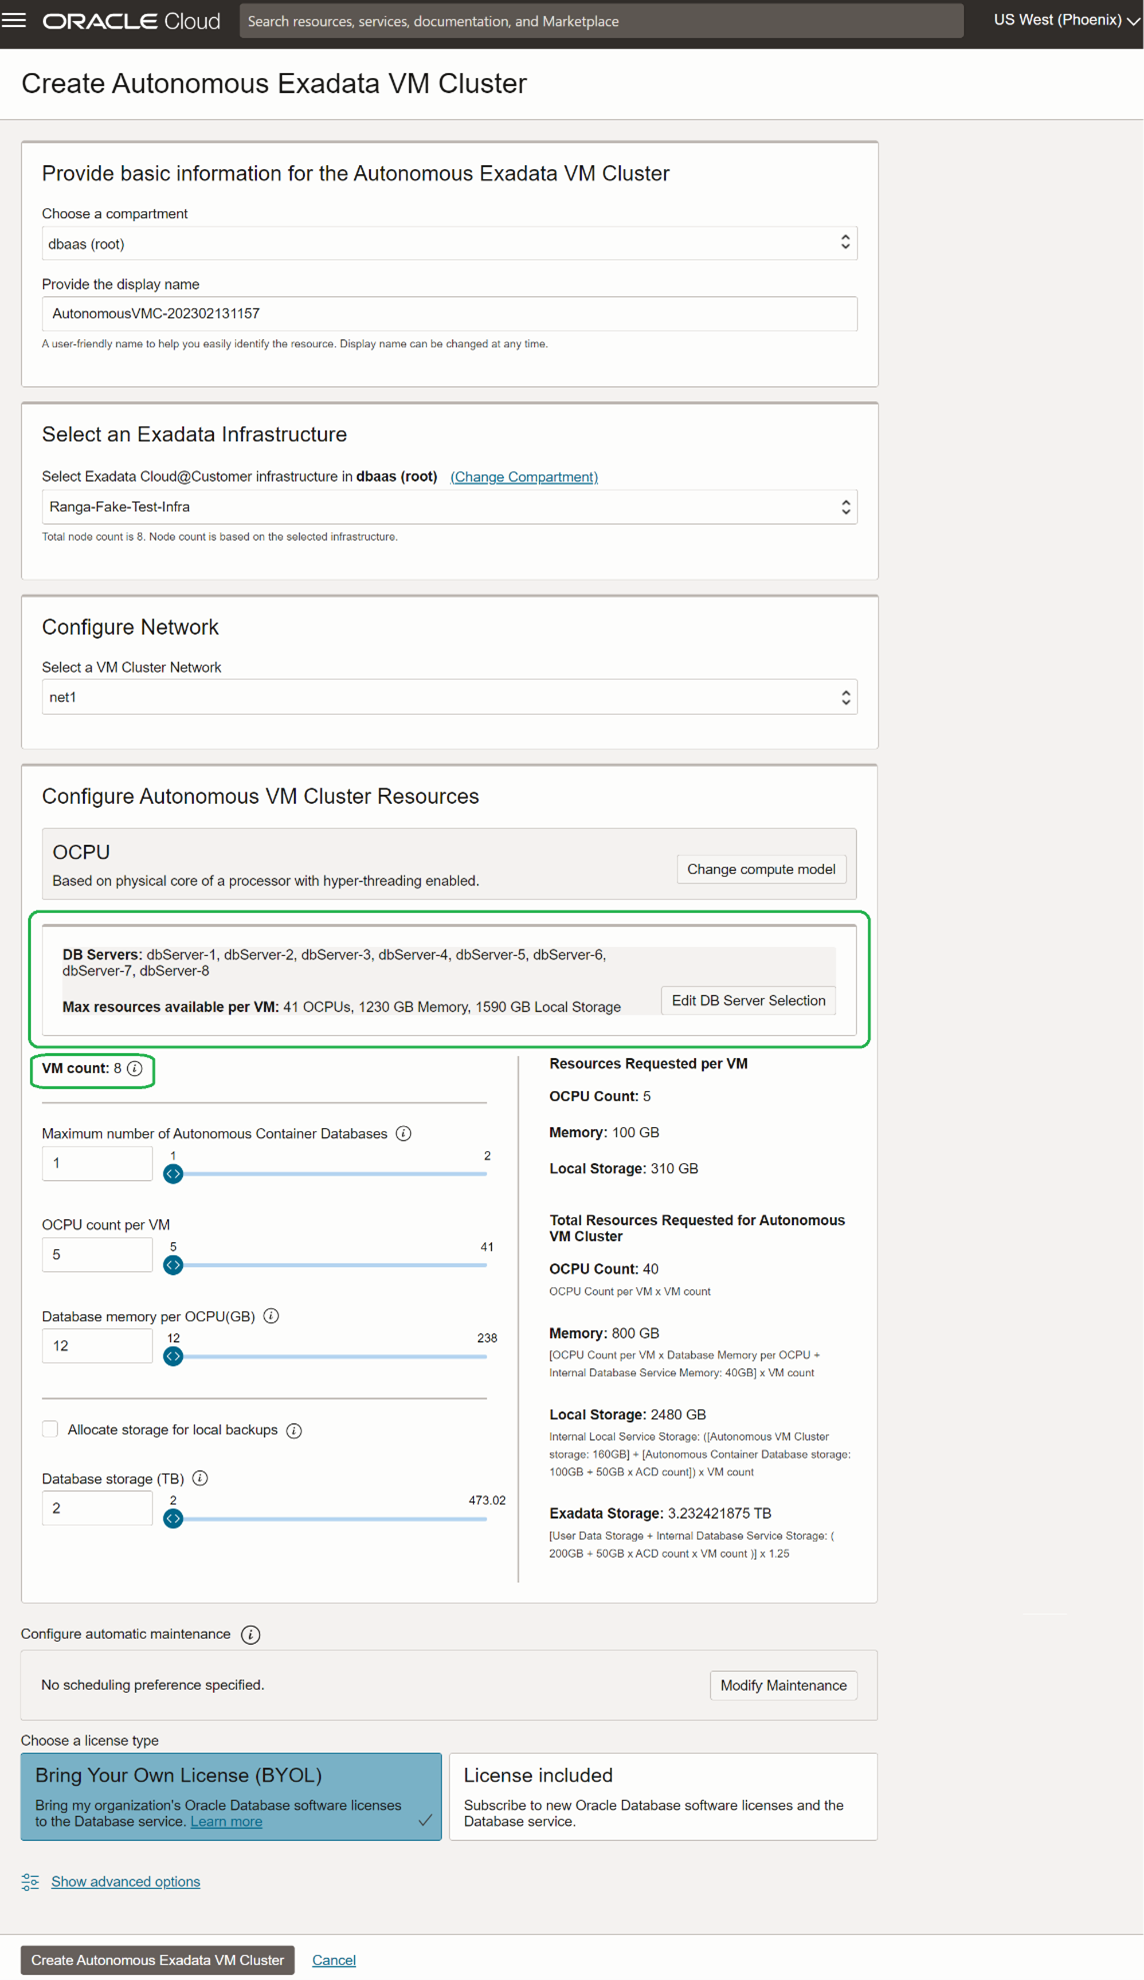
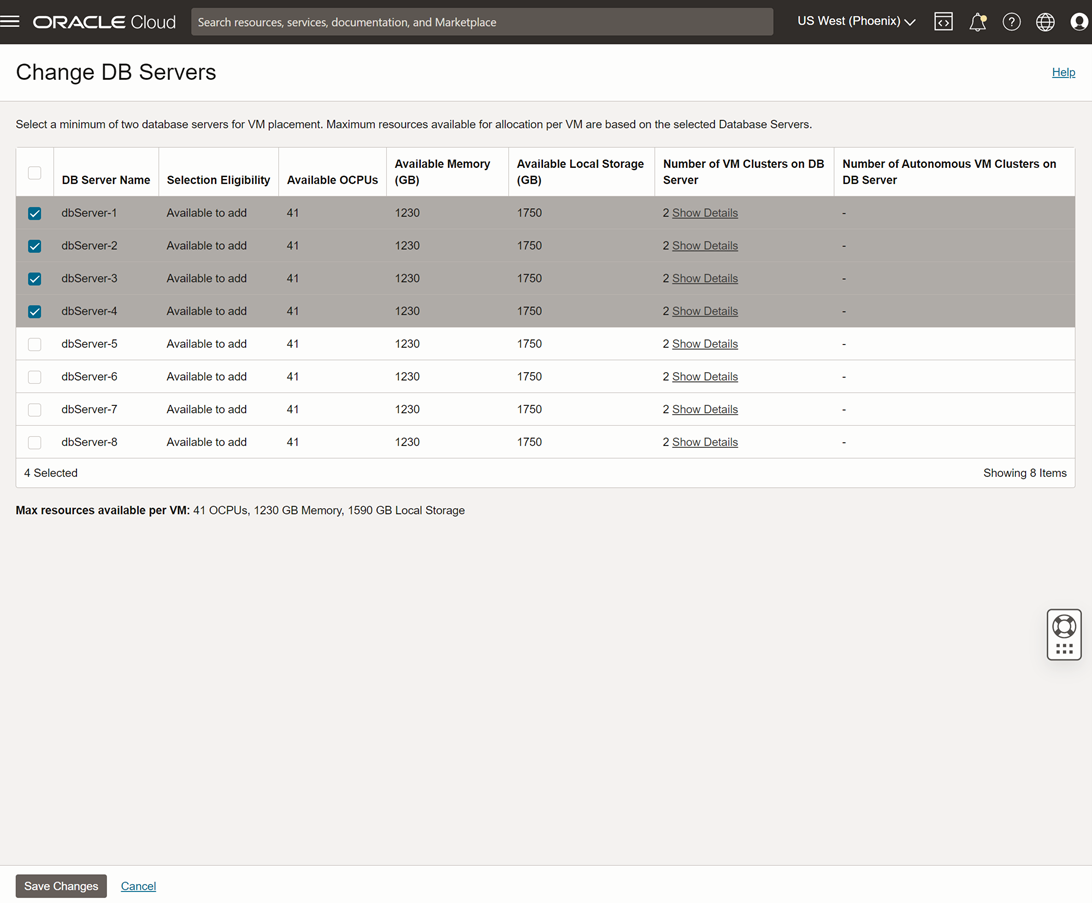
On the DB server selection page, deselect the DB Servers on which you do not want to deploy the AVMC and click save. You must select at least two DB Servers as Autonomous Database uses highly available RAC configuration.
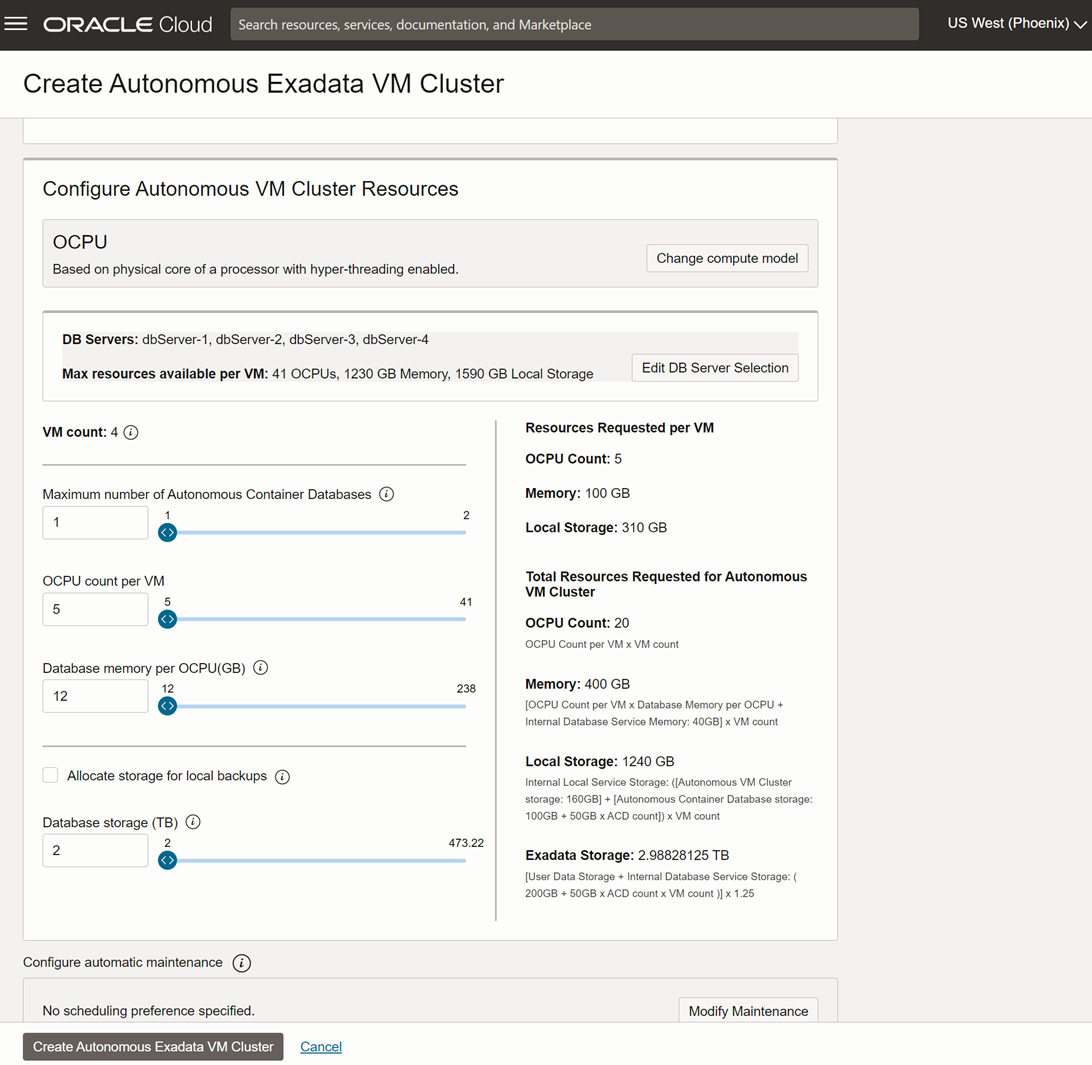
Autonomous VM Cluster’s resource configuration section will reflect the change in DB Server selection. VM Count changes based on the number of DB Servers selected. Finally, configure the ACD count, CPU, Memory and Storage resources as needed and hit create.
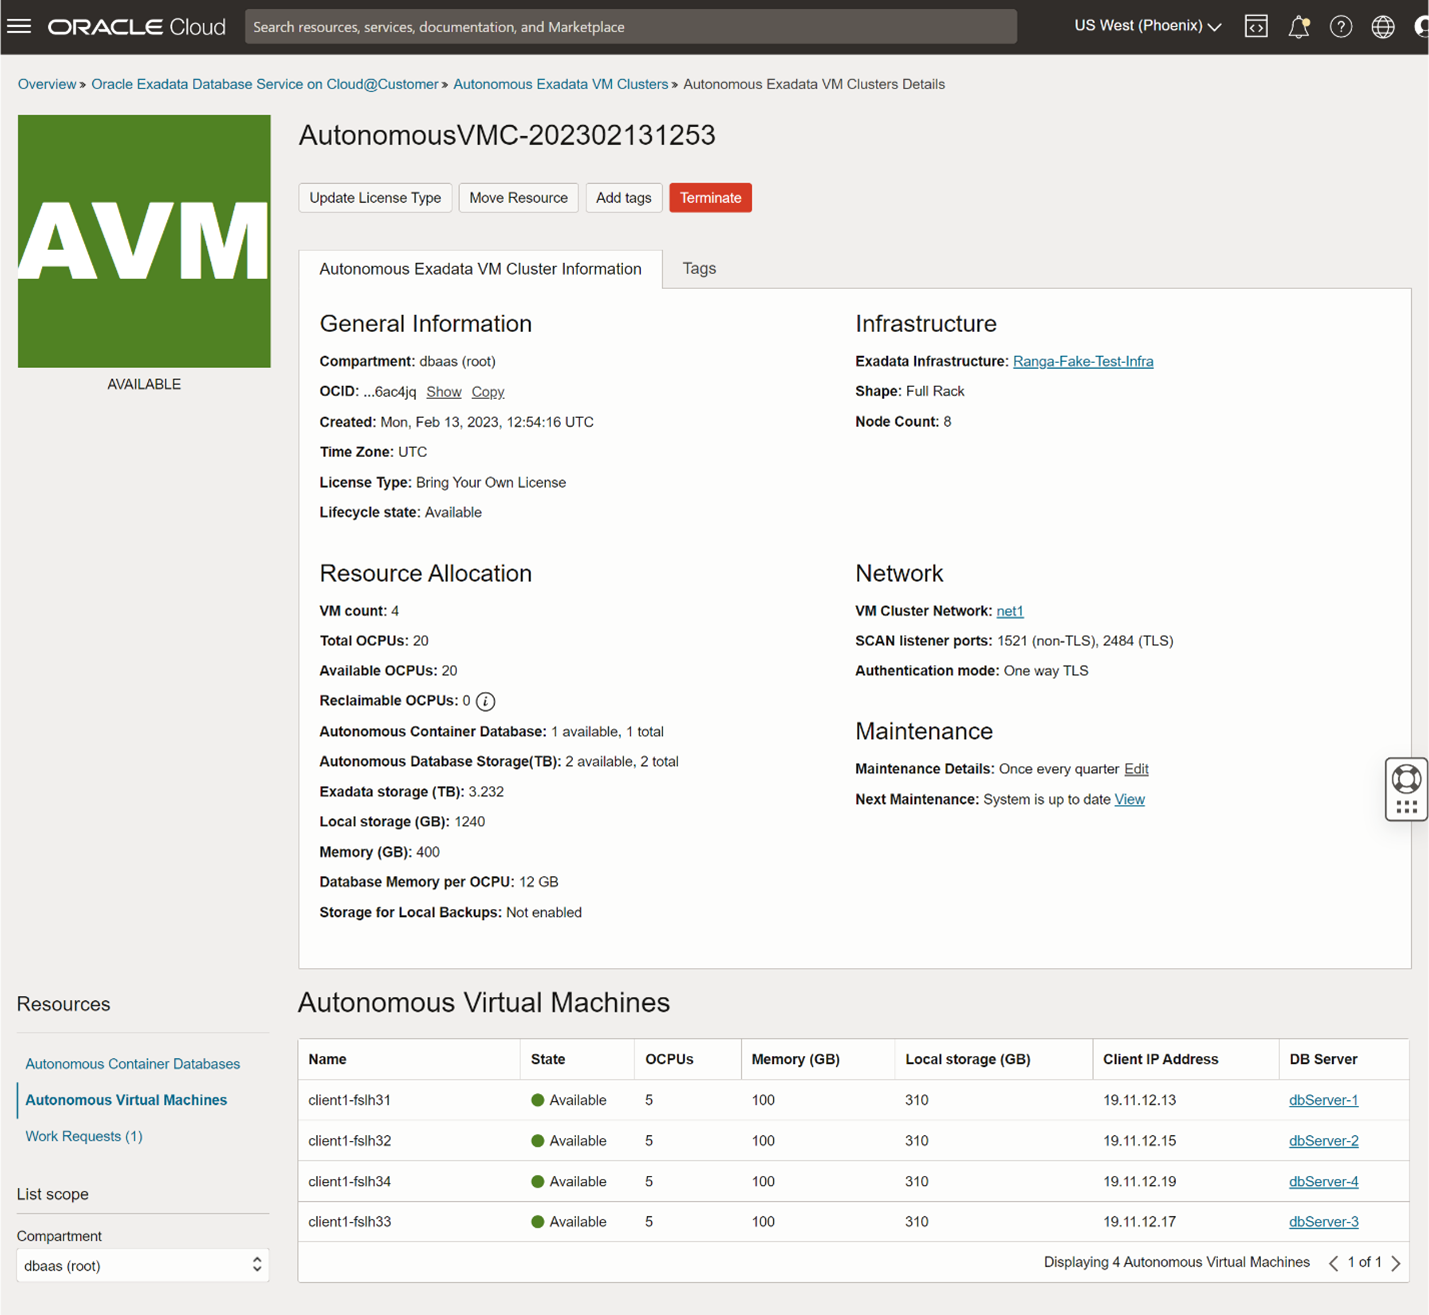
Once the AVMC is created, you will see a new resource called Autonomous Virtual Machines in the resources section on the AVMC details page. Select the AVM resource to view the list of AVMs, and resources allocated per AVM and identify the DB Servers on which the AVMs are deployed.
Other Considerations
- At the time of GA release, you cannot add or remove VMs from the AVMC after the AVMC is created.
- All the VMs in the AVMC will be of the same size.
Summary
Autonomous Exadata VM Cluster Node Subsetting allows you to select the database servers needed for your workload and efficiently size your AVMCs. This adds to the efficiency of Multiple VM Autonomous database, enabling higher density consolidation of workloads with the highest security and performance isolation.
With the support for Multiple VM Autonomous Database and Autonomous VM Cluster Node Subseting on Exadata Cloud@Customer, it has never been easier to efficiently configure a self-service Autonomous Database environment while still meeting data governance requirements by isolating project teams and workloads to their own VM and Network resources. Learn more about Autonomous Databases here.