
This blog post shows you how to further improve your security posture by using an Advanced Intrusion Detection Environment (AIDE) to run periodic file integrity checks on your Oracle Cloud Infrastructure (OCI) Linux virtual machines (VMs). This blog is the first part of three. Part two covers securing AIDE and making configuration changes and part three talks about automating AIDE installation and comparison runs.
When securing your operating system, you have many options. In the world of Enterprise Linux operating systems, like Oracle Linux, an often overlooked but effective warning system is looking for file system changes that shouldn’t have happened, according to your change plans, manual, or automated.
AIDE is such a solution, available for Oracle Linux through the software repositories, which are enabled by default on Oracle Linux. But what does AIDE provide? According to AIDE’s README file, AIDE is a tool for monitoring file system changes. You can use it to detect unauthorized monitored files and directories. AIDE was written to be a simple and free alternative to Tripwire.
AIDE includes the following features:
-
File attributes monitored: Permissions, inode, user, group, file size, mtime, atime, ctime, links, and growing size
-
Checksums and hashes supported: SHA1, MD5, RMD160, and TIGER. CRC32, HAVAL, and GOST if Mhash support is compiled in
-
Plain text configuration files and database for simplicity
-
Rules, variables, and macros that you can customize to local site or system policies
-
Powerful regular expression support to selectively include or exclude files and directories to be monitored
-
gzip database compression if zlib support is compiled in
-
Standalone static binary for easy client and server monitoring configurations
-
Free software licensed under the GNU General Public License
As you can see, AIDE is a versatile and configurable tool, but for simplicity’s sake, we can stick to some more basic configuration in this blog post. Let’s have a look at the installation process.
Installation
After logging in to your system, on Oracle Linux 8, install AIDE with the following command, assuming the default “opc” user:
sudo dnf install -y aideThis command works out of the box and doesn’t require setting up other repositories. For AIDE to work, it needs to be able to compare a current state with an initial (or updated) baseline. If you run AIDE after a fresh install, the baseline is the safe state. This way, you control the baseline and have reasonable assurances that the baseline is safe.
So, to generate an initial database—our safe state—enter the following command:
sudo aide --initThe output of this command looks like the following screenshot:
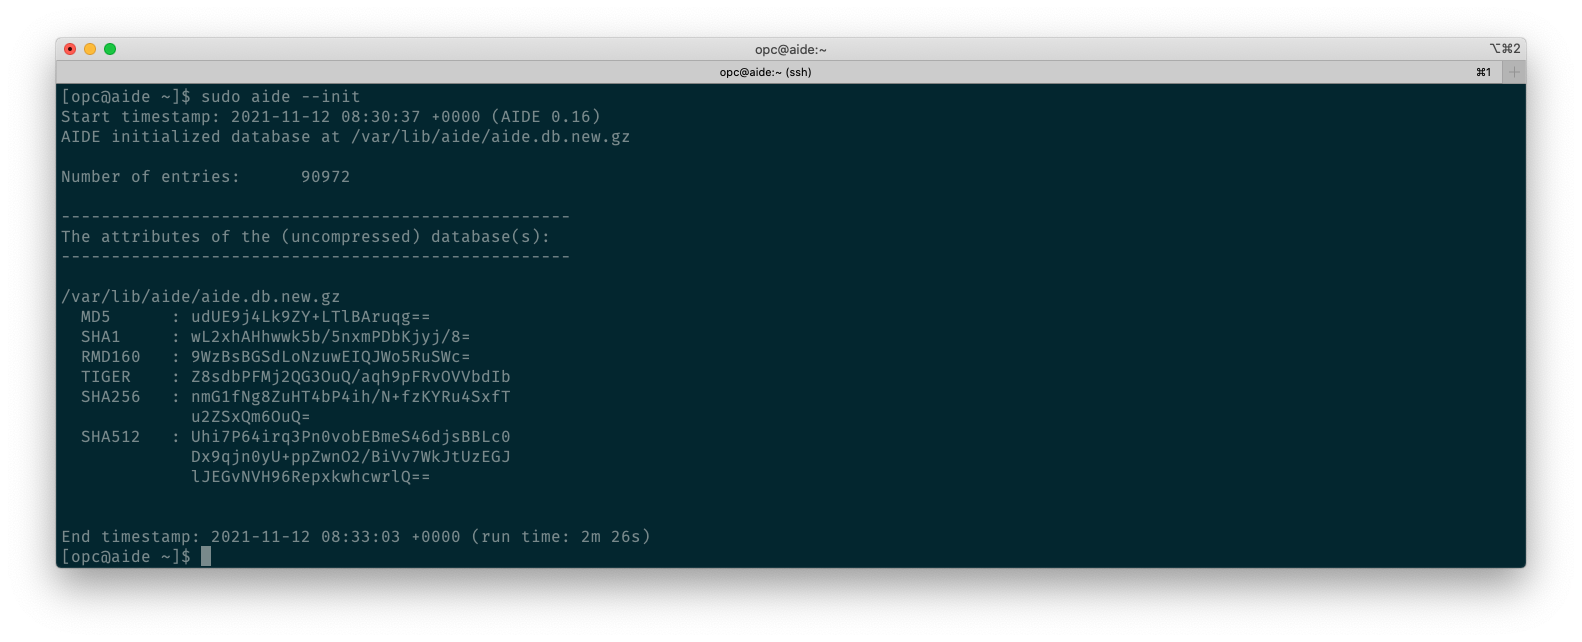
With the default configuration, the aide –init command checks a set of standard important directories and files as defined in the /etc/aide.conf file. To include other directories or files in the AIDE database and to change their watched parameters, you need to edit /etc/aide.conf, which isn’t in scope of this blog post.
Finally, to use the newly created baseline database, we remove the .new extension.
sudo mv /var/lib/aide/aide.db.new.gz /var/lib/aide/aide.db.gzFailure to remove the extension leads to the error message, “Couldn’t open file /var/lib/aide/aide.db.gz for reading.” This defined name in the standard config file differs from the one generated with the –init parameter.
Running a compare manually
Now that we have our initial baseline, you can install other software as part of your project. This software can add users and groups and make changes to certain files, such as installing packages like postfix and Dovecot for setting up an email server.
Before making changes, let’s run a manual compare to see the outcome of the check. To initiate a manual check, enter the following command:
sudo aide --checkThe output without any changes looks like the output in the following screenshot:
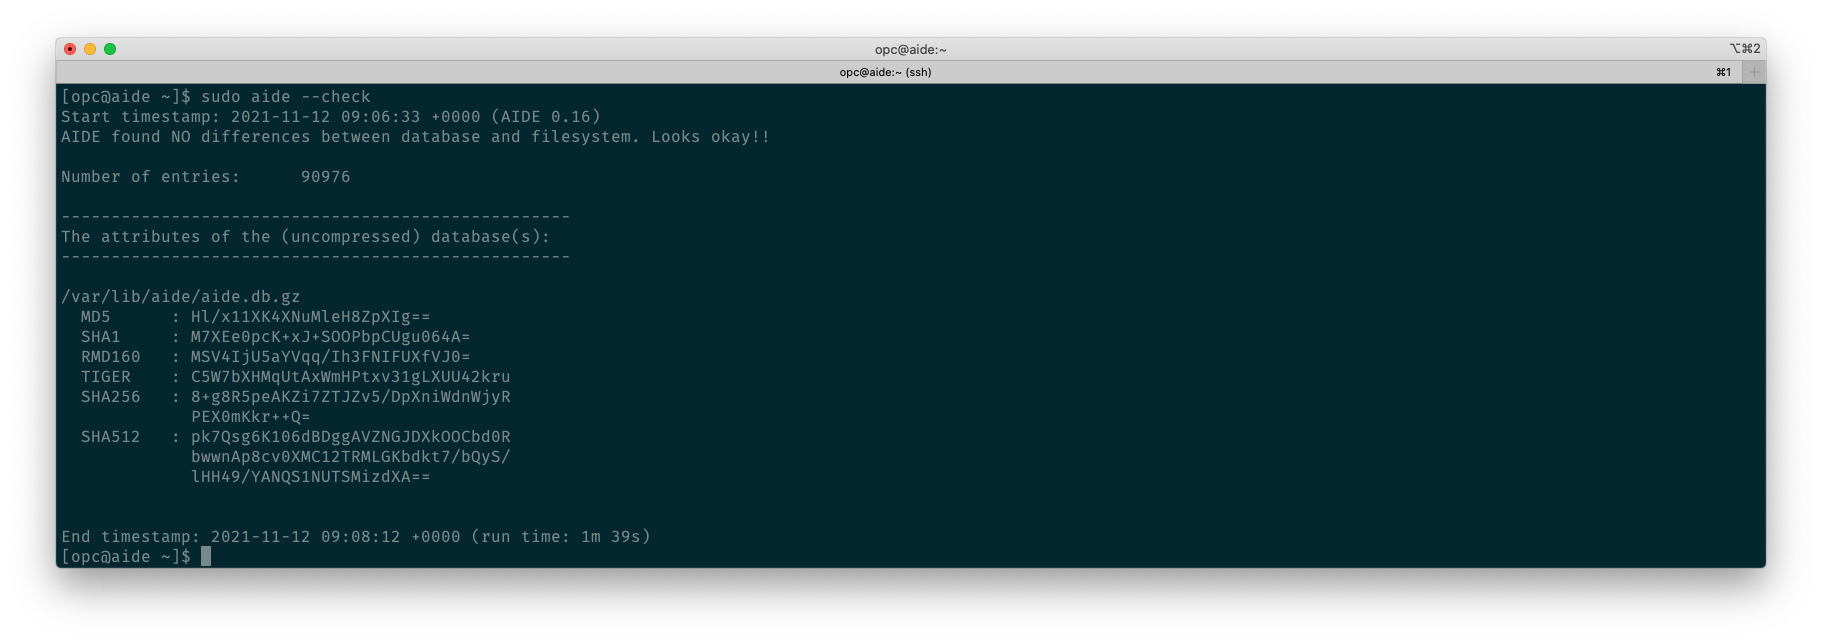
AIDE reports no differences.
Let’s install the Dovecot and postfix packages to generate some changes to the system with the following command:
sudo dnf install -y dovecot postfixAfter we install the packages, we run the check command again:
sudo aide --checkThis time, the output is lengthy and surpasses the terminal scrolling memory. So, with the following command, we reroute the output to a file for closer inspection:
sudo aide --check > output.txtWith the following command, we see various sections in the AIDE report:
cat output.text | moreThe first section alerts us that changes have been found. We get a nice summary of the total of entries checked, changed, removed, and added. After the summary, AIDE provides a list of added entries because of the packet installation we did:
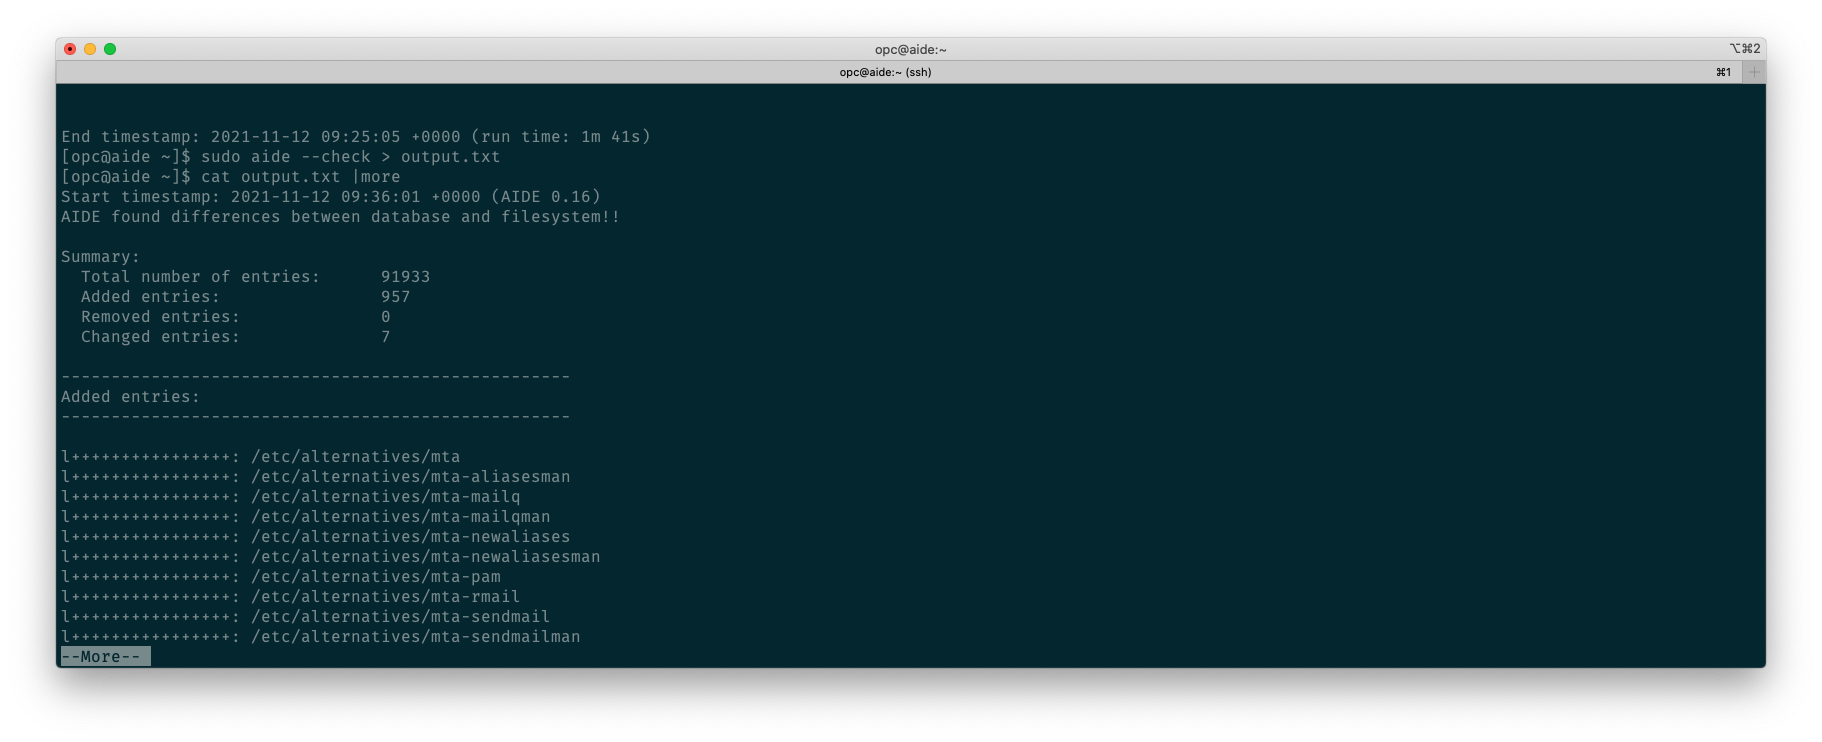
The second section informs us about the changes, as shown in the following screenshot:

The last section shows us the attributes of the AIDE database itself, which have been changed too. In this case, we have no section on removed entries.
If you read the AIDE report and are comfortable with the changes, I recommend rerunning the AIDE initialization. The log files can become quite long, and you probably don’t remember all the changes made over time. Remember, the goal is to quickly spot changes, which you can do by running the following command:
sudo aide --init && sudo mv /var/lib/aide/aide.db.new.gz /var/lib/aide/aide.db.gzTo be continued
With that, we conclude part one of three. You can find AIDE’s project homepage on GitHub.
