Welcome to part one of this two-part blog describing RESTful services authentication with APEX. Part one focuses on basic authentication, and part two focuses on OAuth 2.0 authentication.
What is APEX?
Oracle APEX is the world’s most popular low-code development platform for enterprise apps. APEX enables you to build scalable and secure enterprise apps, with world-class features that you can deploy anywhere. Most middle-tier apps must define application data structures to hold, convert, interact, and maintain data flow between the app to the database—APEX eliminates all of this. APEX also reduces the need for complex remote APIs for most use cases, isn’t architected as distributed components, and remote calls to the database are eliminated.
Let’s talk authentication
You can utilize the following types of authentication to access your table with REST:
- Basic authentication (First party): Provide username and password.
- OAuth 2.0 client credentials flow: Pass along client ID and client secret to authenticate and get an access token.
Storing usernames and passwords in an application is not recommended, so OAuth 2.0 is the recommended and most secure solution. Also, with machine-to-machine (M2M) communication, such as CLIs, daemons, or backend services, username and password logins don’t make sense.
ORDS authentication overview
APEX runs on an Oracle database, which is what makes it so unique and powerful. So, a lot of concepts and documentation cross over between APEX and standard Oracle Database service, including Oracle REST Data services (ORDS). ORDS is a java application that allows you to access your Oracle Database resources through REST. It bridges HTTPS and your Oracle database, pushing the content generated by APEX in the database to the webserver, where it serves the pages to your browser or mobile device. I’m referring to ORDS here, but it also applies APEX.
To show the security model for ORDS, let’s start with a diagram from Jon Dixon’s article, Using Roles and Privileges to fine-tune access to ORDS Web Services.
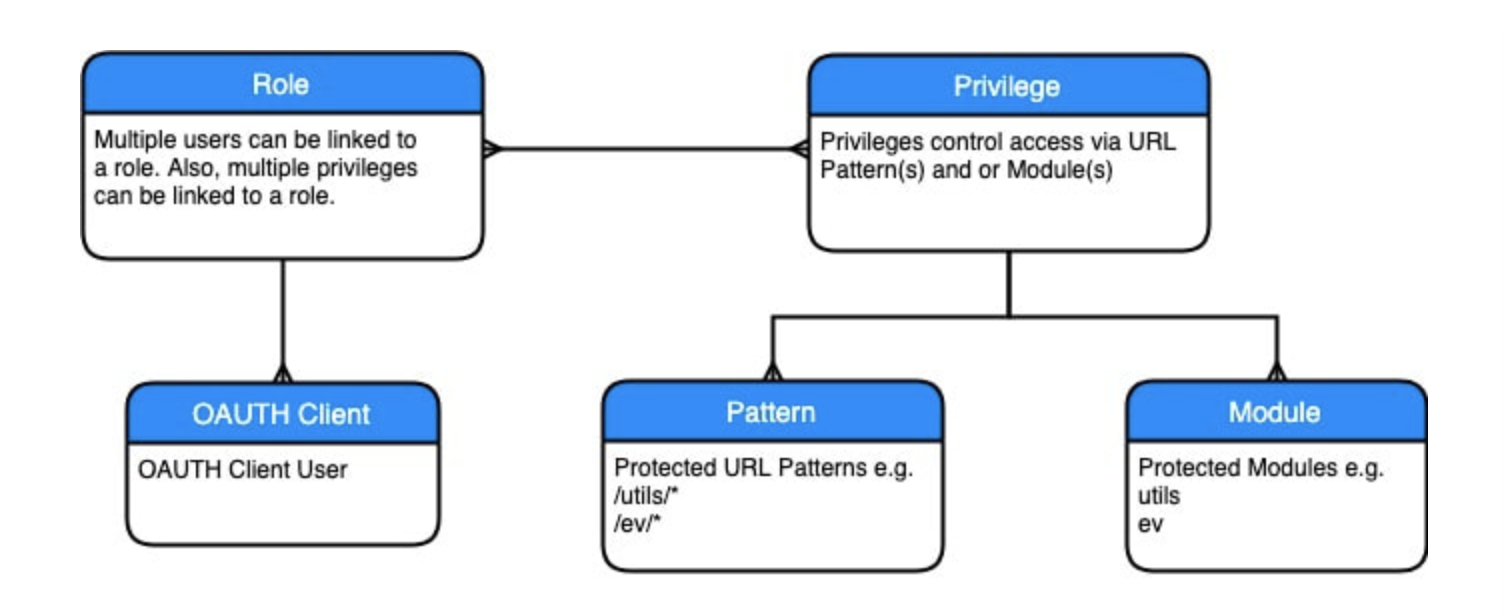
The role acts as a link between one or more users and one or more privileges. The privilege details you need to access a resource. When creating a privilege, you can secure either an entire module or secure based on URL patterns. A privilege locks down a resource. When you click Yes for Authorization Required, APEX automatically makes a privilege for your table. A role is a simple link between users and privileges. When you add roles to multiple privileges, that role can access multiple privileges.
Privileges lock down a table. Users are assigned roles. You can assign this role to one or more privileges. So users assigned that role can access to the tables those privileges lock down.
Prerequisites
We’re deploying a protect REST API on a table in Oracle Database. If you don’t have a table, create one in the SQL Workshop by selecting Object Browser. Alternatively, you can install a sample data set in SQL Workshop by clicking Utilities and Sample Datasets. Enable AutoREST by navigating to the REST tab and clicking Yes for Rest Enable Object and Authorization Role. You might need to register a schema with ORDS first.
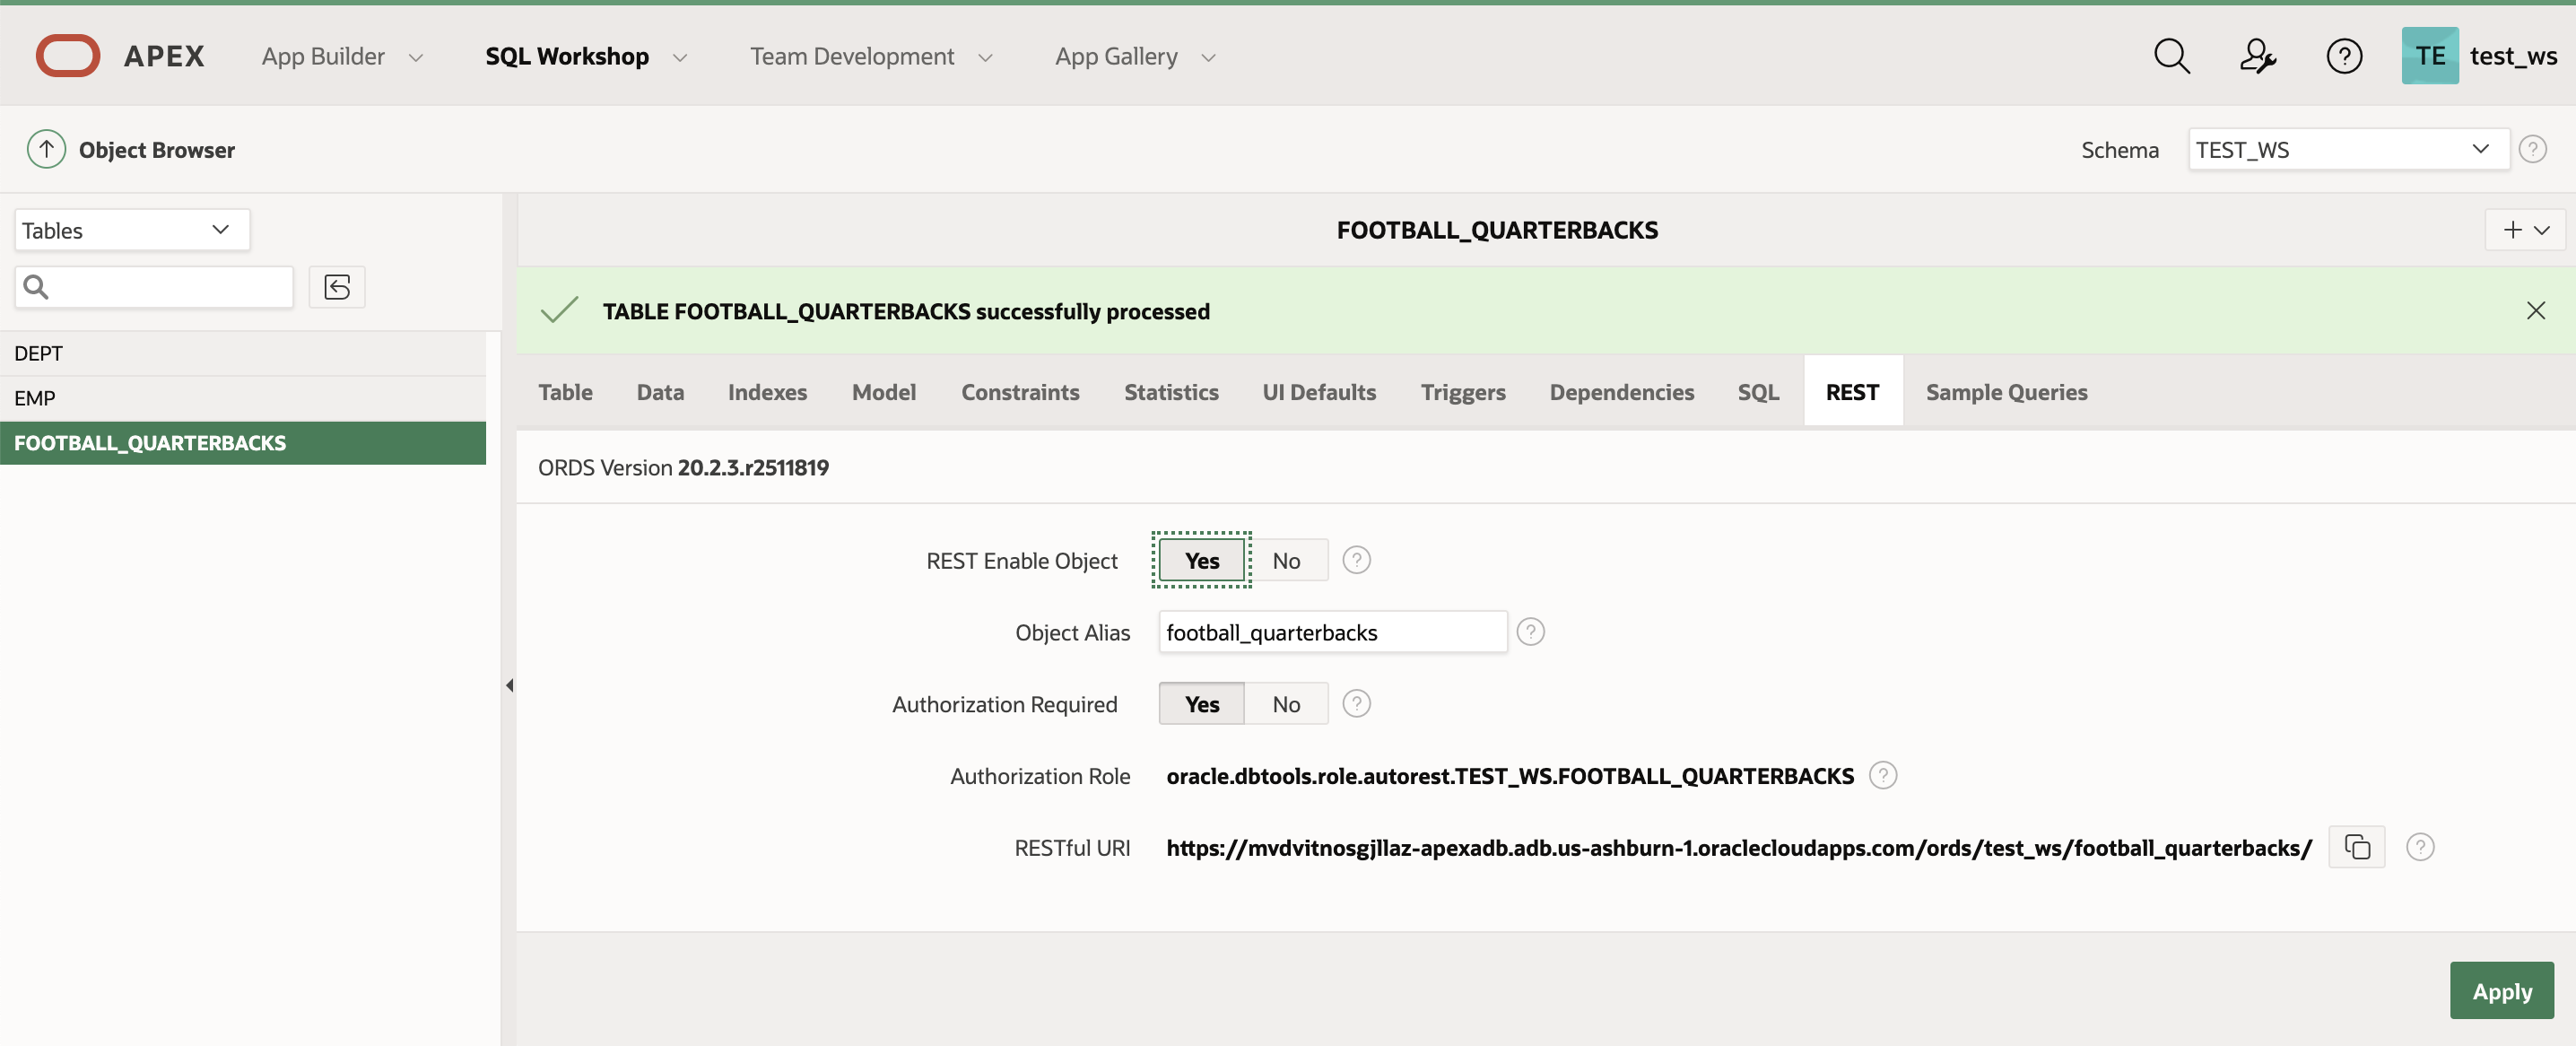
AutoREST provides individual tables and views an API. For more flexibility, such as customized output formats or extra validation, you can also configure your own handlers.
Basic authentication steps
Basic authentication uses the following flow:
- Create a role and add that role to the autogenerated privilege.
- Create an APEX group with the same name as the role you created.
- Create an APEX user and add user to group you created.
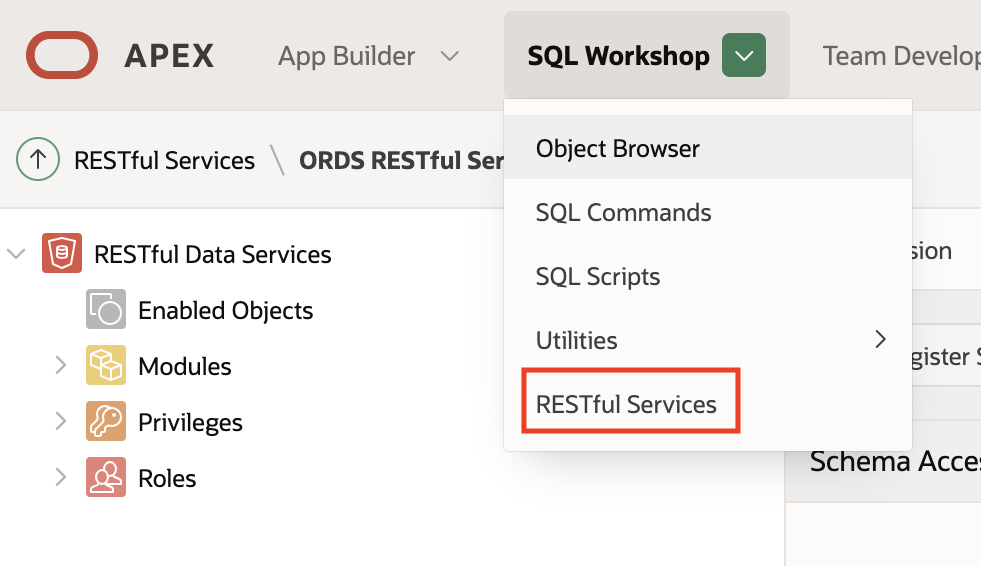
1. Expand the SQL Workshop menu and navigate to RESTful Services.
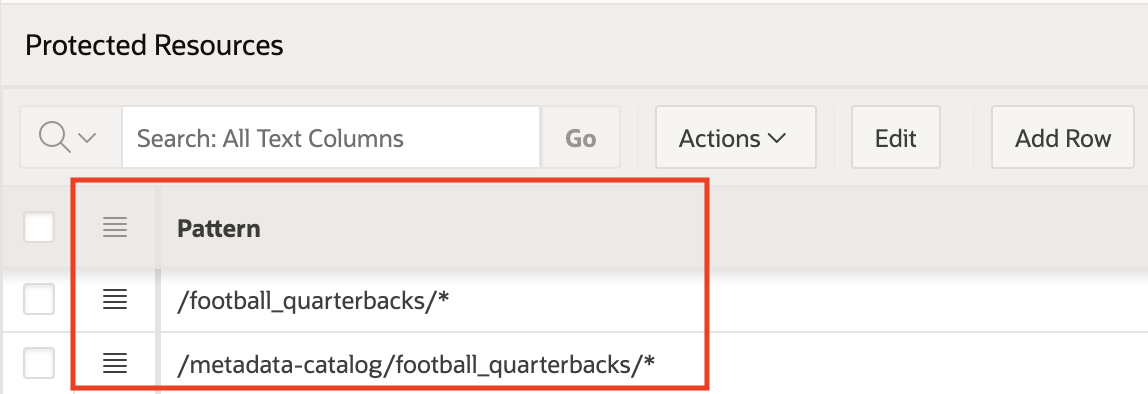
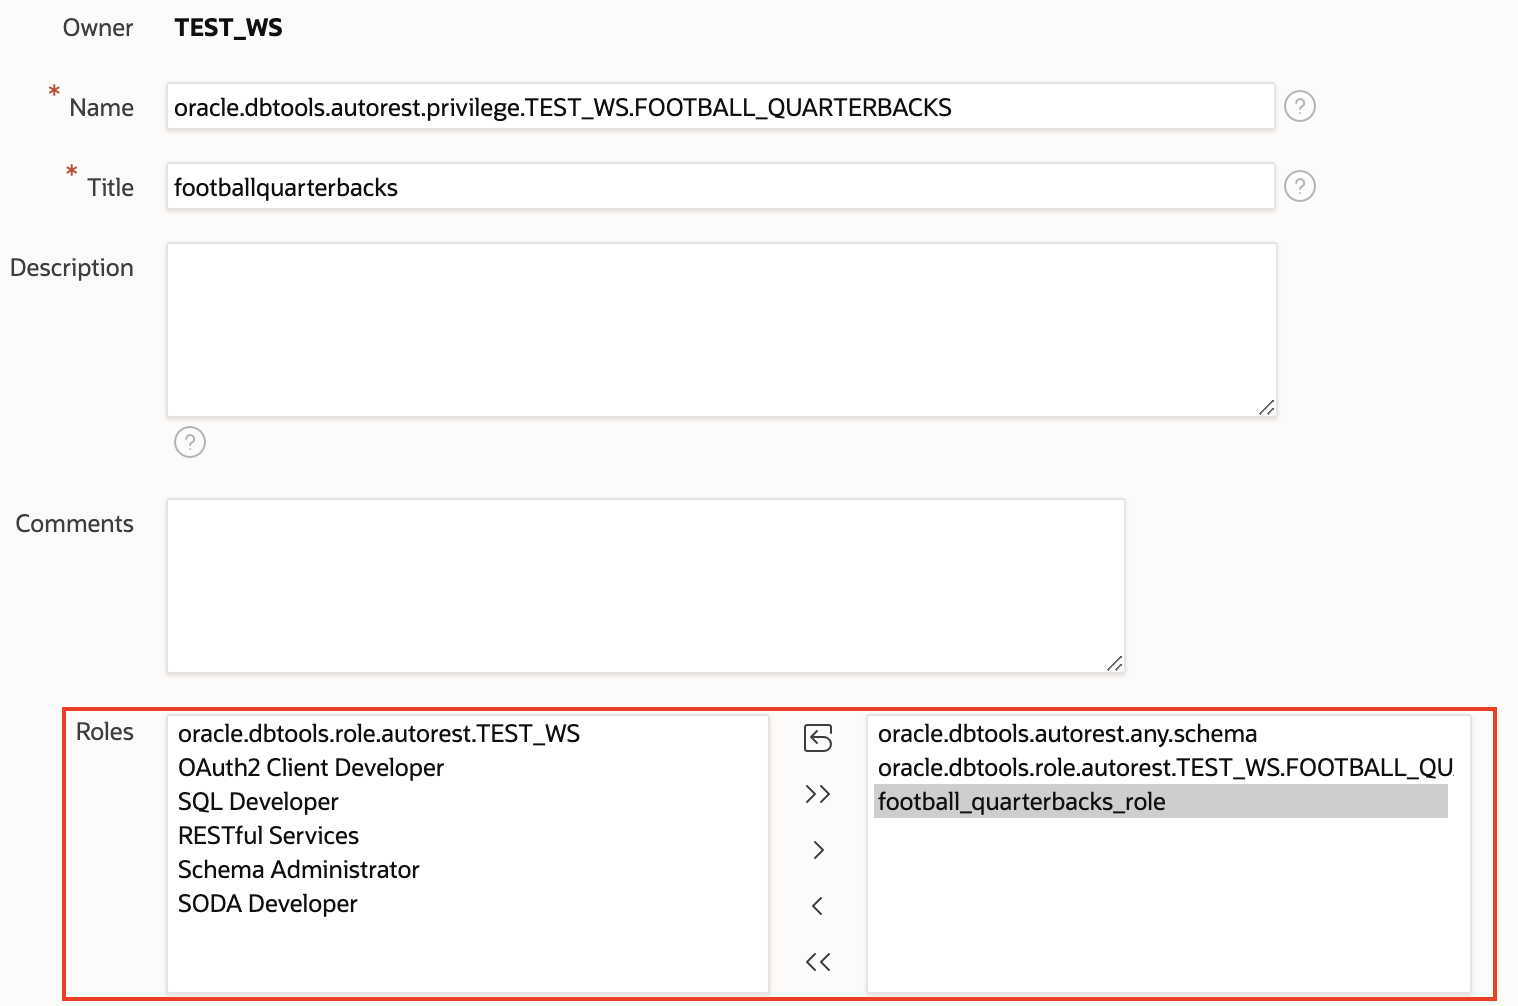
2. When you click Authorization Required for the table, ORDS automatically generates a privilege. You can see this privilege under Privileges. Mine is called oracle.dbtools.autorest.privilege.TEST_WS.FOOTBALL_QUARTERBACKS.

3. The privilege uses patterns to protect the resource.
4. While ORDS also automatically generates a role based on the privilege name, I’m going to create my own, but you use the auto-generated one. Navigate to Roles on the left and click Create Role.
5. Name your role whatever you want. I call my example football_quarterbacks_role. Then click Create Role.
6. Go back to the privilege and add the role that you created.
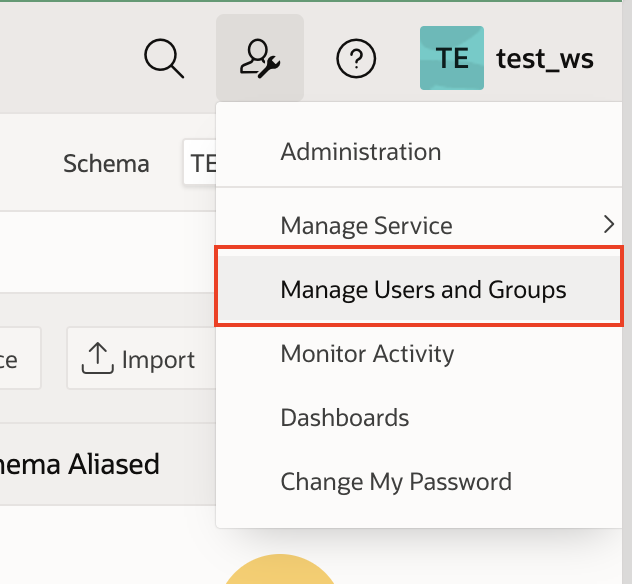
7. Create a group and user in APEX. In the top bar, click the administration icon and then Manage Users and Groups.
8. Navigate to Groups and click Create User Group.
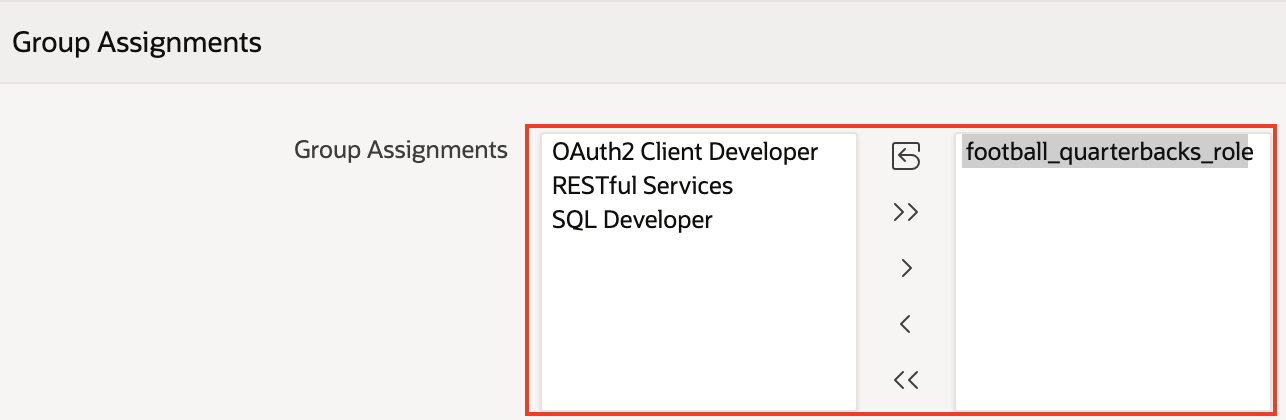
9. Name the group the same as the role that you created. This step is important. I name my group football_quarterbacks_role.

10. Next, create a user. Name this user whatever you want. I call mine football_quarterbacks_user.
11. Assign this user to the group that you created.
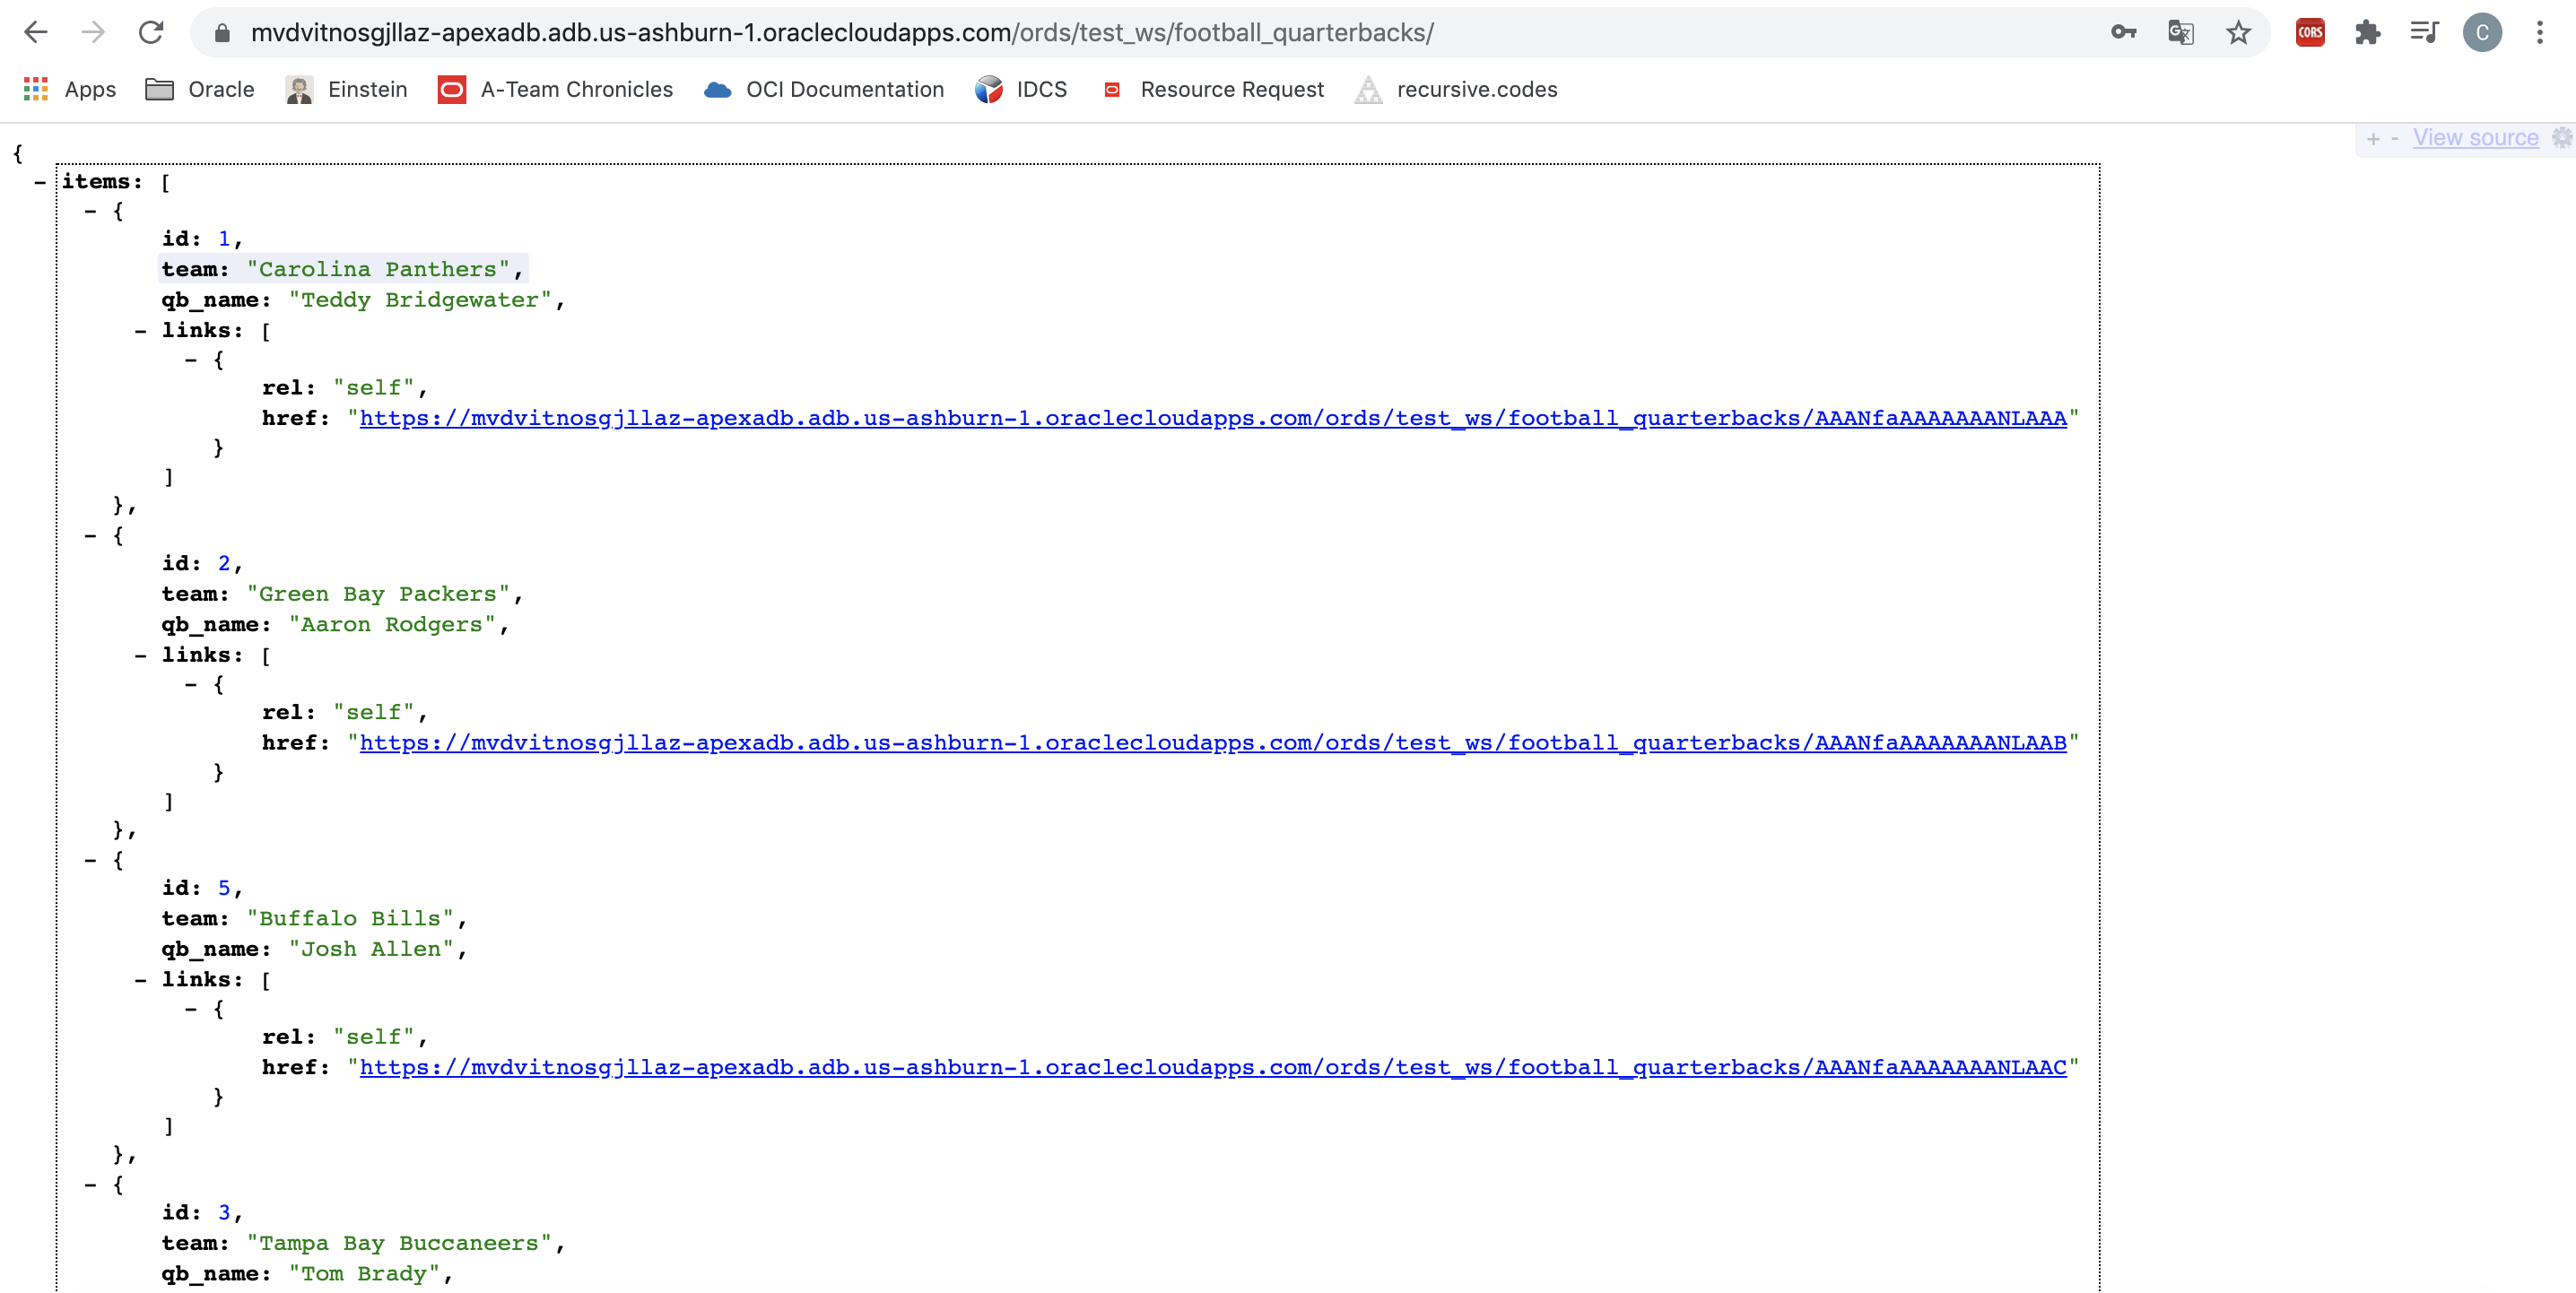
12.Navigate to the URL of your table and log in with the user credentials you made.

You can now access your table with the authenticated user you created.
Conclusion
In this post, we explored basic authentication for APEX applications. However, passing around usernames and passwords isn’t the best security practice, so OAuth 2.0 is the recommended solution. View part two of this blog series for OAuth 2.0 instructions.
I acknowledge that this example was extremely simple. AutoREST on a table is more than just seeing the data. You can use those APIs to load more data, update, delete, or even query. Resource handlers, queries or anonymous PL/SQL blocks responsible for handling a particular HTTP method, also provide much more flexibility than AutoREST. I encourage you to design an application that combines resource handlers with basic authentication.
If you want to test ORDS out yourself a great starting point is Oracle’s Free Tier or a 30-day free trial, which includes US$300 in credit to get you started with a range of services including two Always Free Autonomous Databases with APEX, compute, storage, and networking.