Co-authored by Gabriel Feodorov.
Creating a network file system (NFS) and mounting it on a Compute instance is easy, but trying to do it on a Docker container is a different story.
Right now, everything is shifting to cloud native technologies, and Docker and Kubernetes are the main actors in this new infrastructure world. You might encounter the following real-world use cases of mounting an NFS on Docker:
-
You have multiple containers and need access to a unified set of data across all of them.
-
You have a serverless application, which spawns a Docker container by default, that needs access to data from an NFS to perform its read/write tasks.
-
You need more space than your host system offers and using shared storage provides the capability to survive host failures.
-
You have a microservices-based application inside Kubernetes that needs to get the data fast, ensure that the data is reliable, and ensure that the data exists outside of the pod’s lifecycle.
-
You need storage that works on both Linux and Windows containers.
If you’ve ever tried to mount an NFS on a Docker container, you know it’s not going to work natively. By default, Docker containers are unprivileged and can’t, for example, run a Docker daemon or mount an NFS inside them. By default, a container isn’t allowed to access any devices, but a privileged container is given access to all devices. On the other hand, having a privileged container is not secure and not recommended for production use cases.
Nevertheless, you can follow a few solutions to mount an NFS on a Docker container, and we cover them in this post. In this post, we have the following objectives:
-
Create a file system in Oracle Cloud Infrastructure (OCI)
-
Mount the file system on a Compute instance
-
Mount the file system on a Docker container
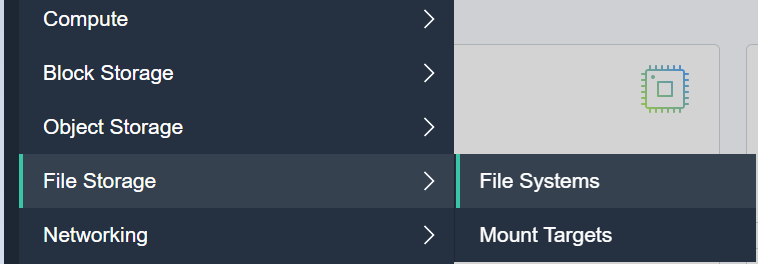
Setting up a file system in OCI using File Storage service
First, let’s create a file system and mount it on a Compute image.
-
From Oracle Cloud dashboard console, select File Storage and then File Systems.
-
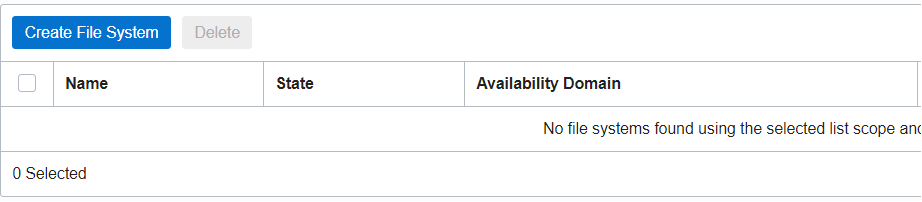
Click Create File System.
-
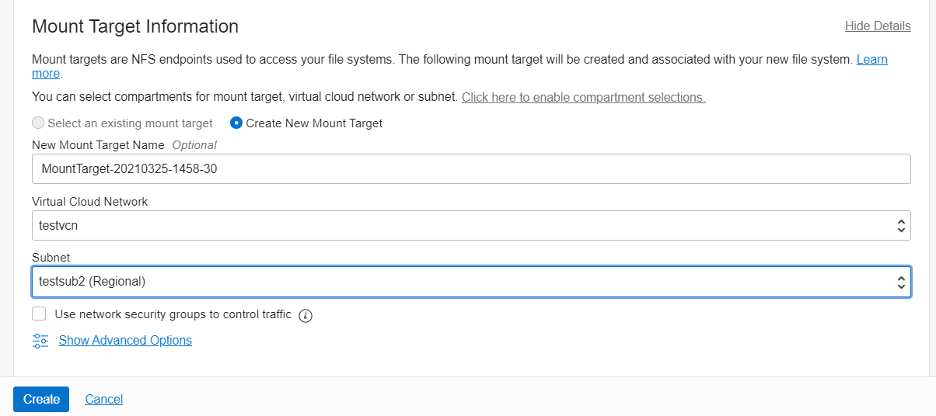
Go to Mount Target Information and click Edit Details.

-
Select the virtual cloud network (VCN) and subnet for the file system and click Create.
-
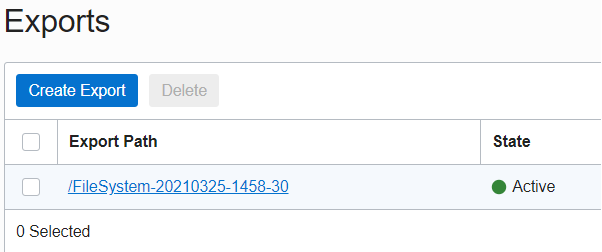
After the file system is created, on the File System page, under Exports, click Export Path, which takes you to Mount Commands.
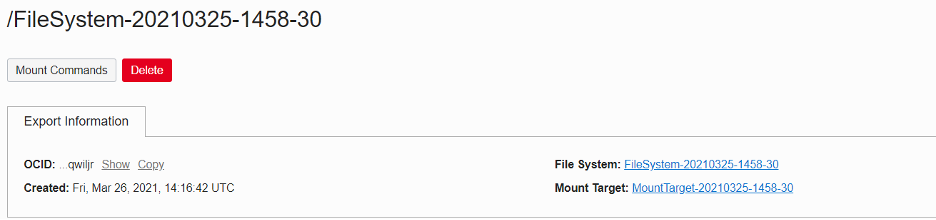
Now, you have all the necessary details on mounting the filesystem on a Compute instance or Docker container.
Mounting the file system on a Compute instance
-
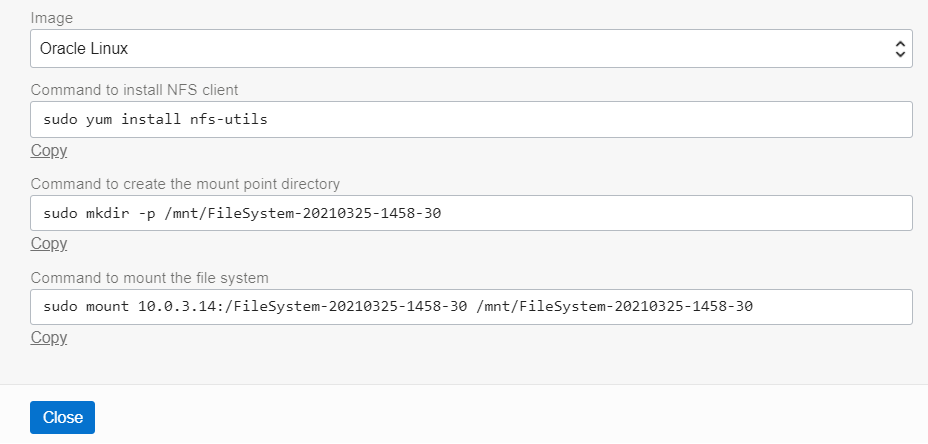
Connect to your Compute instance with the following command:
$ ssh opc@public/private_ipaddress -
Install the nfs-utils packages.
$ sudo yum install nfs-utils -y -
Create directory for the file system.
$ sudo mkdir -p /mnt/FileSystem-20210325-1458-30 -
Mount the file system.
$ sudo mount 10.0.3.14:/FileSystem-20210325-1458-30 /mnt/FileSystem-20210325-1458-30 -
Go to the mounted directory:
$ cd /mnt/FileSystem-20210325-1458-30 -
Verify that you can create a file with the following command:
$ sudo touch file1
Mounting the file system on a Docker Container
First, create a Docker container and run it with -ti option.
$ docker run -ti image_nameRepeat steps 2–6 from the previous section. You get the following error:
mount.nfs: rpc.statd is not running but is required for remote locking.
mount.nfs: Either use ’-o nolock’ to keep locks local, or start statd.
mount.nfs: Operation not permitted
If you add the ’-o nolock’ option, you get the following error:
mount.nfs: Operation not permitted
Docker allows this operation only if the containers are created with one of the following options:
-
–privileged=True
-
–cap-add SYS_ADMIN
By replacing the first step with either of the following options and following the steps from mounting the file system on a virtual machine, you can mount the file system on a Docker container.
-
$ docker run -ti image_name –privileged=True
-
$ docker run -ti image_name –cap-add SYS_Admin
By making the container privileged or by adding the capabilities of a SYS_ADMIN, you can have nested containers but you give them root access to the host, which makes your environment less secure.
Another option is to use a Docker plugin with NFS mount capabilities, but you need a license, such as NetShare.
How can we solve this issue without giving privileges or paying for third-party tools?
Now that you know why the first two solutions aren’t a good idea, you can mount the NFS in another way. Use the following command:
docker run –it --name

    --mount type=volume,dst=

    ,volume-opt=type=nfs,volume-opt=device=<:/export path>,volume-opt=o=addr=
![]()
The following code block shows an example:
$ docker run -it --name working --mount type=volume,dst=/mnt/FileSystem-20210325-1458-30,volume-opt=type=nfs,volume-opt=device=:/FileSystem-20210325-1458-30,volume-opt=o=addr=10.0.3.14 centos
Results
In this post, we covered the NFS mount issue on Docker containers by going through the steps for creating the file system in OCI to different approaches on how to mount it on docker.
The solution works on all NFS mounts, so if you want to deploy OCFS2 on OCI and mount it on a Docker container, for example, you can easily do that. For more information on deploying the OCFS2 on OCI, check this blog post.