Introduction
Digital native companies are known for building and scaling in the cloud at speed. Over the years, many of these organizations have created highly innovative platforms using technologies like TypeScript and stateless container infrastructures.
In this tutorial, you will deploy a stateless TypeScript application running on Deno to OCI Container Instances, connect it to Oracle NoSQL Database Cloud Service as a persistence layer, and expose it through either a public IP address or an OCI-hosted DNS name.
To make deployment easier, we’ll use a script for loading the database content and Terraform definitions to build out the infrastructure.
Architecture Overview
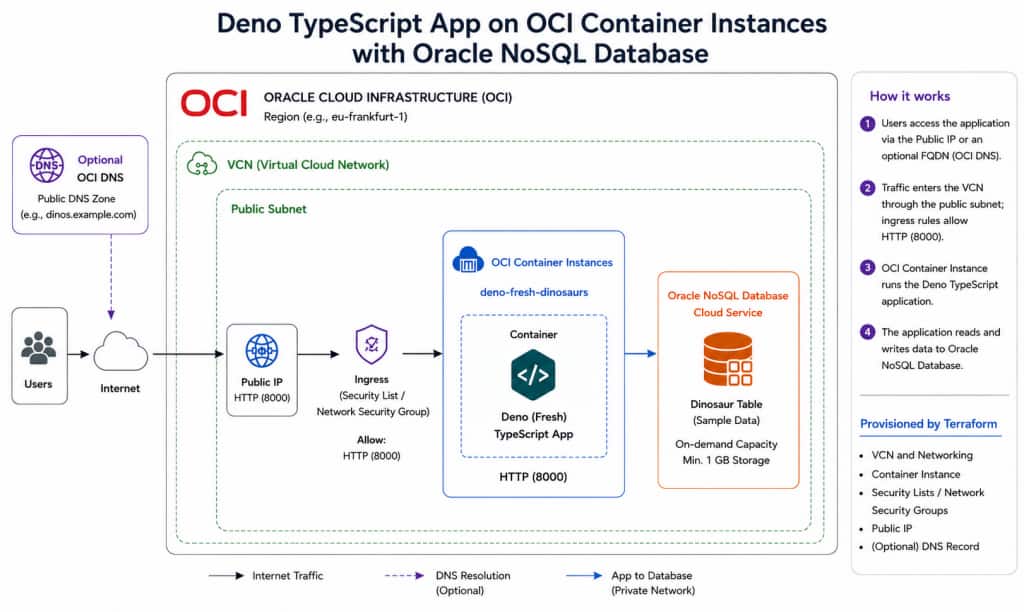
The application runs as a container on OCI Container Instances. It reads data from Oracle NoSQL Database Cloud Service. Terraform provisions the networking, container instance, optional DNS record, and related OCI resources. A script creates and populates the NoSQL table.
Prerequisites
- Access to an Oracle Cloud Tenancy – The user or group used for deployment needs permissions to manage container instances, virtual networking, NoSQL tables, DNS records, Cloud Shell, and create policies in the target compartment.
- Optional: a public DNS zone hosted in OCI, if you want Terraform to create a DNS resource record for the application’s public IP address
Note: This tutorial creates OCI resources that may incur charges, including Container Instances and Oracle NoSQL Database storage/requests.
Task 1: Open OCI Cloud Shell & Install Deno
Let’s begin by launching a OCI Cloud Shell session that will be our terminal and platform for running the example. Also make sure that the network your Cloud Shell is connected to is listed as Public to make sure you can reach the public Internet.
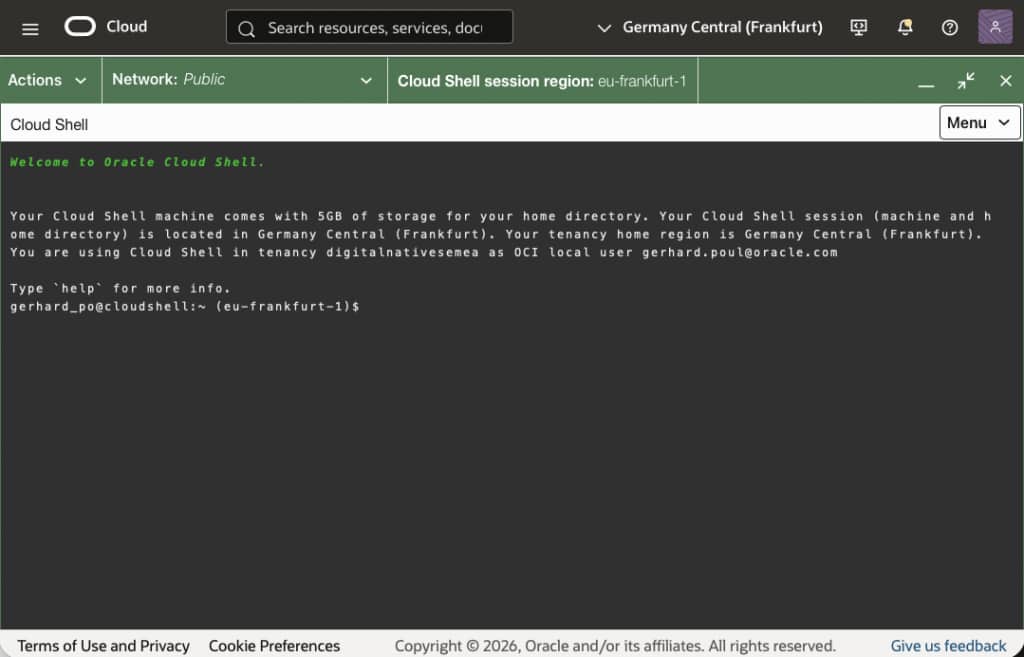
Now let’s install Deno by executing the following command in Cloud Shell:
curl -fsSL https://deno.land/install.sh | shTask 2: Clone the sample repository
git clone https://github.com/gpoul/tf-deno-container-instance.git
cd tf-deno-container-instance/
Task 3: Create NoSQL table and load sample data
After cloning the source repository, we need to create the NoSQL database table and load sample content into the database. The load-db script requires an environment variable to be set for the target NOSQL_COMPARTMENT_OCID.
export NOSQL_COMPARTMENT_OCID=ocid1.compartment.oc1..aaaaaaaax7dexampleexampleexampleexampleexampleexampleAfter this environment variable has been set correctly, invoke the loader script. The loader script creates the sample table in the compartment specified by NOSQL_COMPARTMENT_OCID. The table name is dinosaurs:
cd fresh-dinosaurs/
deno install              # Installs the dependencies
deno run load-db          # Runs the database load task
cd ..
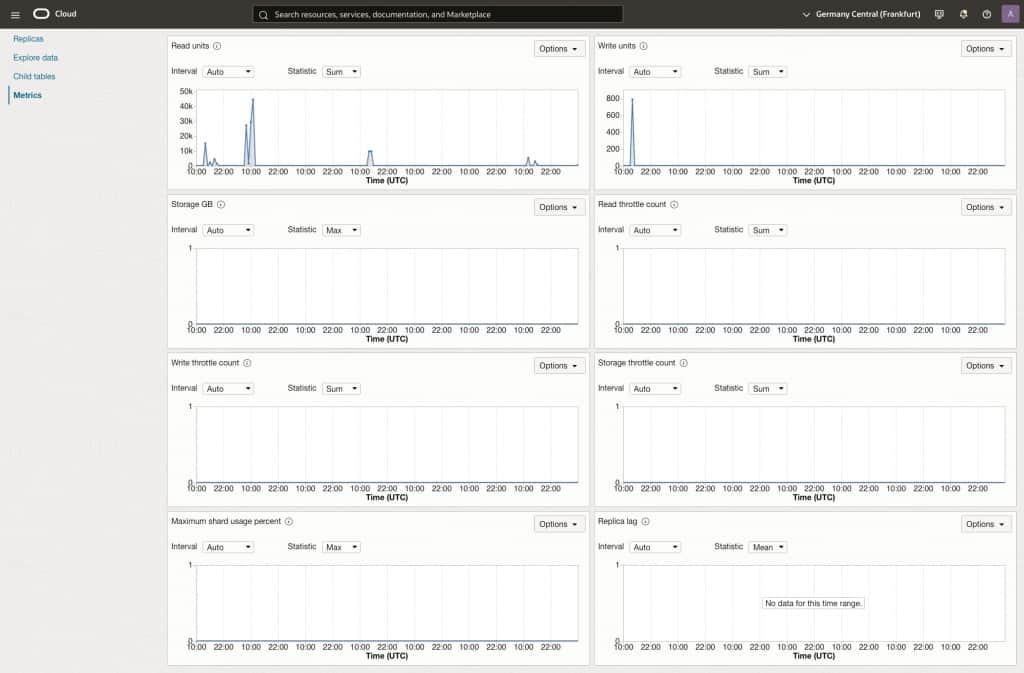
Now open the Oracle NoSQL Database console and confirm that the table has been created. The table has been created with a minimum 1 GB storage size and in on-demand capacity mode. From the console you can also look at the table details and explore the data that has been loaded by executing a test query like SELECT * FROM dinosaurs .
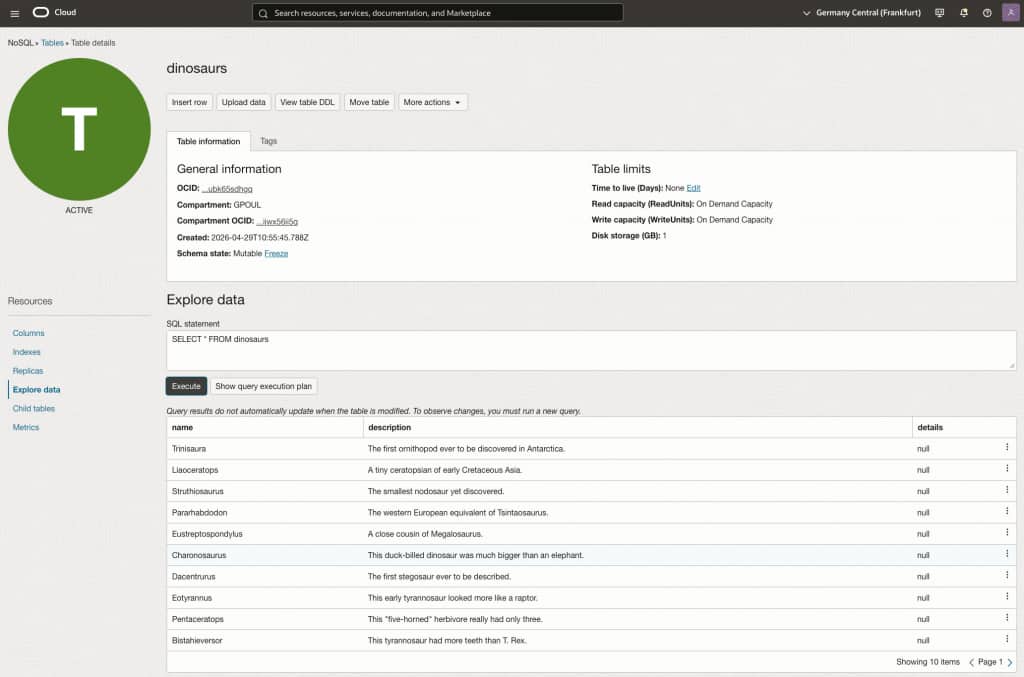
You can also explore the table metrics, the table DDL, and other details to learn more.
Task 4: Provision the container infrastructure with Terraform
Before we can provision the container, we need to configure the Terraform stack. The Terraform configuration defines the container instance and supporting infrastructure required by the sample, including networking and optional DNS configuration.
Use the below example to create a terraform.tfvars file. Use the compartment you created the NoSQL database in for the nosql_compartment_ocid.
tenancy_ocid              = "ocid1.tenancy.oc1..aaaaaaaaxmplsampletenancyocidnotreal1234567890abcdefg"
compartment_ocid          = "ocid1.compartment.oc1..aaaaaaaax7dexampleexampleexampleexampleexampleexample"
region                    = "eu-frankfurt-1"
availability_domain_index = 0

container_instance_name = "deno-fresh-dinosaurs"

# Replace with the public image published by this repository's GitHub Actions workflow.
container_image_url = "ghcr.io/gpoul/fresh-dinosaurs:latest"

# Optional FQDN; the domain must be hosted on OCI
# fqdn = "fresh-dinosaurs.example.com"

nosql_compartment_ocid = "ocid1.compartment.oc1..aaaaaaaax7dexampleexampleexampleexampleexampleexample"
In addition to the compartment for the NoSQL database you also need to set the compartment_ocid to determine which compartment will be used to deploy the container instance into. Also make sure to set the tenancy_ocid and region and that they match the region and tenancy where you already created the NoSQL table above. The application will expect to access the NoSQL table in the same region where the container instance will be deployed.
Optionally you can configure the fqdn; this requires your DNS public zone to already exist on OCI. If fqdn is omitted, Terraform outputs a URL using the public IP address of the container instance. If fqdn is set, Terraform creates a DNS record in an existing OCI public DNS zone and outputs the FQDN-based URL. Terraform does not create a new DNS zone.
You don’t need to adjust the availability_domain_index, container_instance_name, and container_image_url. The sample uses a public image from GitHub Container Registry.
Before we can start to validate our configuration, let’s initialize Terraform first:
terraform initTo make sure all your variables are defined correctly, run:
terraform planAfter the plan completes successfully, deploy the infrastructure:
terraform applyTask 5: Test the deployed application
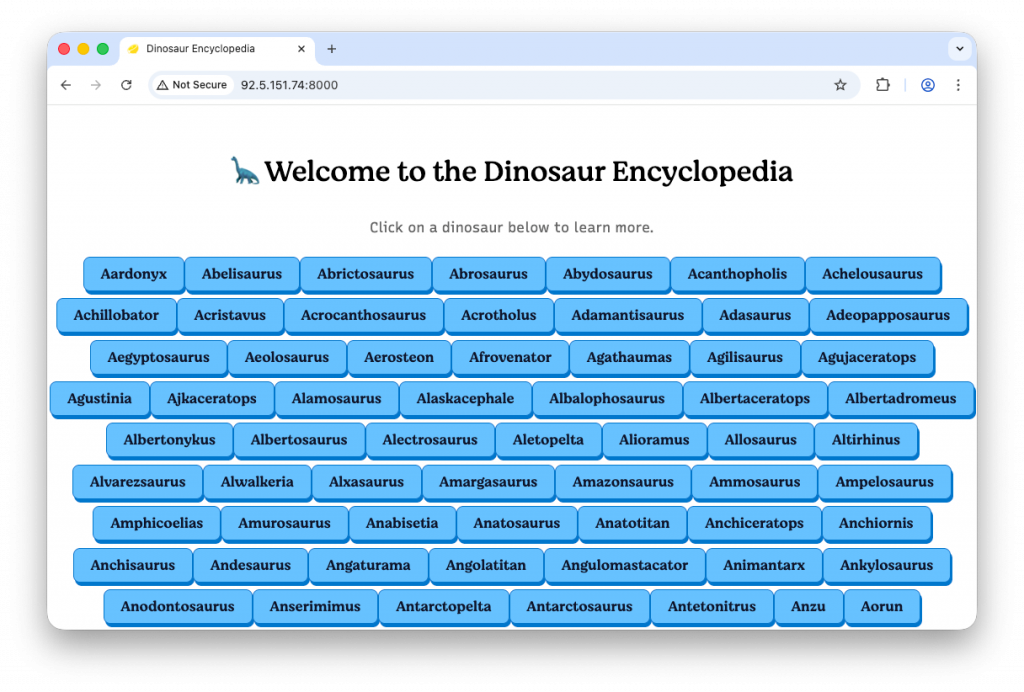
Once the provisioning has finished, the stack outputs will contain a dinosaursUrl where you can access your deployed application on the container instance.
dinosaursUrl = "http://123.123.123.123:8000"Open that URL in your browser and test the application. The list of dinosaurs is loaded from the NoSQL database table we created earlier. If the list loads successfully, querying data from the NoSQL database table worked.
Task 6: Review configuration, logs, and metrics
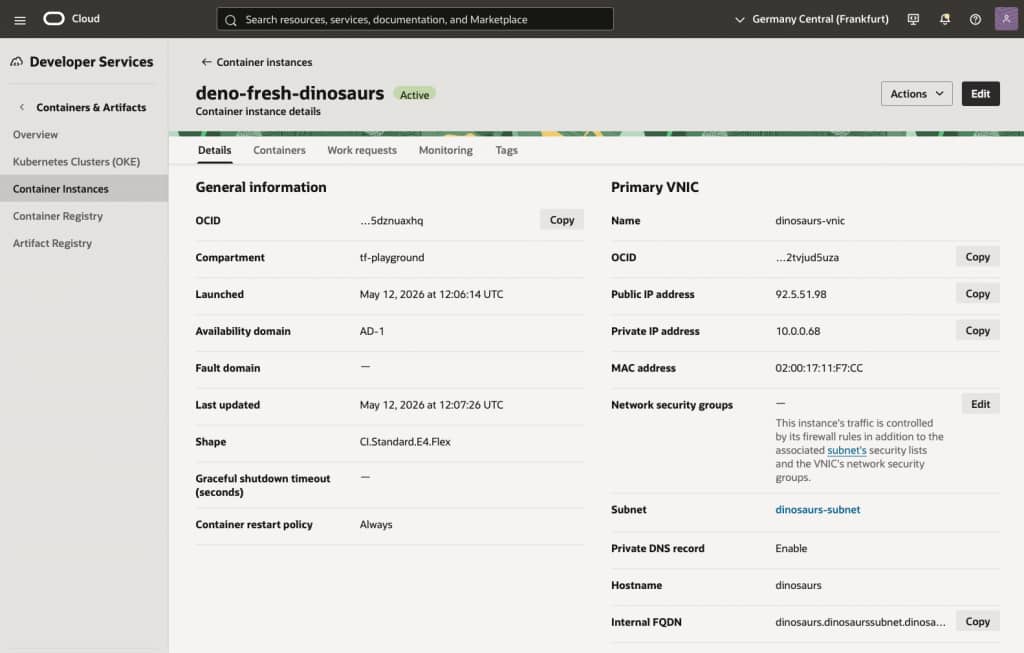
Open your OCI Console / Container Instances page and look at your container instance configuration. From here you can also stop or start the instance and access monitoring metrics.
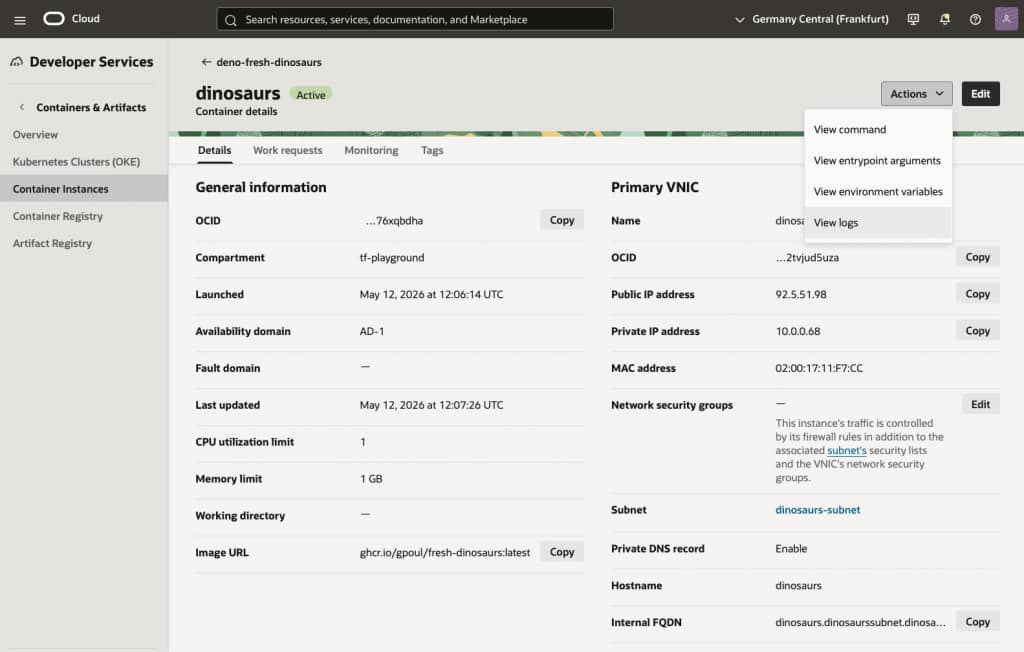
In the Containers tab, you’ll see the one running dinosaurs container on the instance; within the container details you can review its metadata and access runtime logs.
Task 7: Clean up resources (optional)
To remove all the deployed artifacts from your tenancy again, you’ll have to run:
terraform destroy`terraform destroy` removes the infrastructure managed by Terraform. The NoSQL table created by the loader script is not managed by Terraform and remains in the tenancy. Delete it manually from the Oracle NoSQL Database console when you no longer need the sample data.
Dive deeper (further reading)
This tutorial introduced OCI Container Instances by deploying a stateless Deno application backed by Oracle NoSQL Database Cloud Service. To dive deeper, look at the Terraform definitions you used for deployment of the container instance and look at the following resources: