Oracle Cloud Infrastructure (OCI) provides maximum performance and better security to your enterprise database workloads with better pricing models. Oracle Autonomous Database is a reinvented Database Cloud service, which provides workload optimized for transaction processing and data warehousing. It’s an industry first and the only self-driving, self-securing, and self-repairing database.
OCI Database Migration service (DMS) is a fully managed service that provides a self-service experience for migrating oracle databases to OCI. Database Migration communicates to database resources using private endpoints, managed by Database Migration. DMS helps to migrate Oracle databases from on-premises, from third-party clouds, and from within OCI to Autonomous Database. It supports both offline and online migrations methods using FastConnect or IPSec VPN connection. It also supports offline migration using an agent behind a firewall connection. DMS has a zero-downtime migration server and automatically handles configuration.
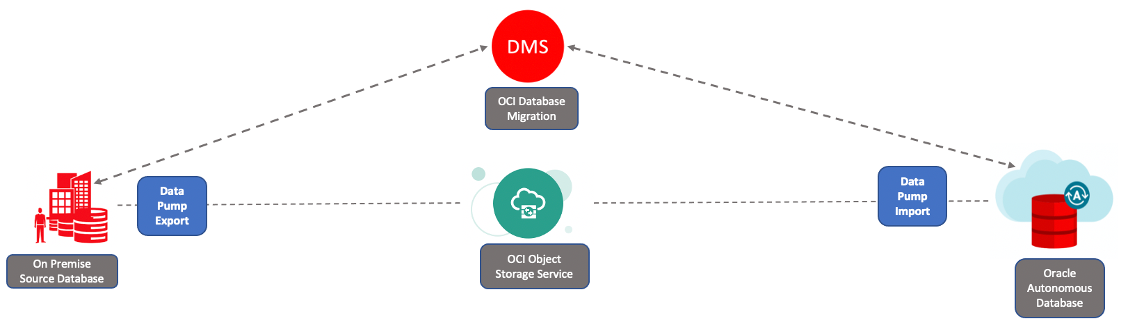
The following example illustrates migrating an on-premises Oracle database to Oracle Autonomous Transaction Processing Dedicated in offline mode using a FastConnect Network setup between on-premises and OCI. The source database version is 19c (19.0.0.0) with platform as Linux x86-64.
Migration process

Provision Oracle Autonomous Transaction Processing Dedicated (ATP-D) on OCI
Create an autonomous database in a private end point running on dedicated Autonomous Exadata Infrastructure (AEI) in a private subnet.
Grant permissions to database migration user
Create a group in OCI for a migration user and grant permissions by creating the following policies for the group:
allow group dms to manage odms-connection in compartment dmsCompartment
allow group dms to manage odms-migration in compartment dmsCompartment
allow group dms to manage virtual-network-family in compartment dmsCompartment
allow group dms to manage tag-namespaces in compartment dmsCompartment
Configure SUDO access for user on the source database server
Identify the OS user with ssh access to the source database server and grant sudo permissions to them. They can then run sudo operations without prompting for a password.
For example, use sudo su – for the root user, and if your database owner is an Oracle user, then run sudo su – oracle.
Prepare the source database for migration
Run the source Oracle database in archive log mode and set the parameter ‘GLOBAL_NAMES’ to ‘FALSE.’

Register the source and target databases in Database Migration
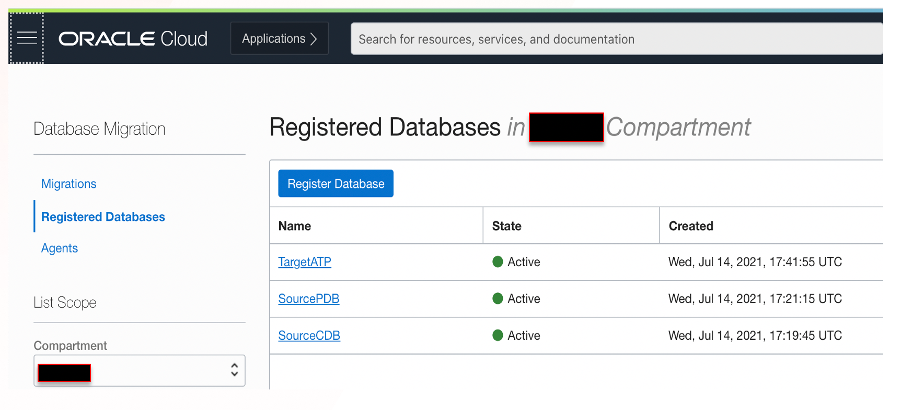
Log in to Oracle Cloud Console. Under Migration, navigate to Database Migration and click Registered Databases. Click Register Database and provide inputs. If the source database is a container database, register both container and pluggable databases.
Input the following fields: Database connection string, database admin user credentials, database SSH hostname and IP address, SSH username, Oracle Vault key, and encryption key. Use either an existing key vault or create a key vault and encryption key. Data Migration uses this key for encryption during database export and import. Data in transit is secured while uploading it to an Oracle Object Storage service bucket.
Set the target as Oracle Autonomous Database. In this example, we use Oracle Autonomous Transaction Processing Dedicated. To register a target autonomous database, you need an autonomous database name, compartment name, Oracle Key Vault, encryption-key details, and database admin user credentials.
Create a migration
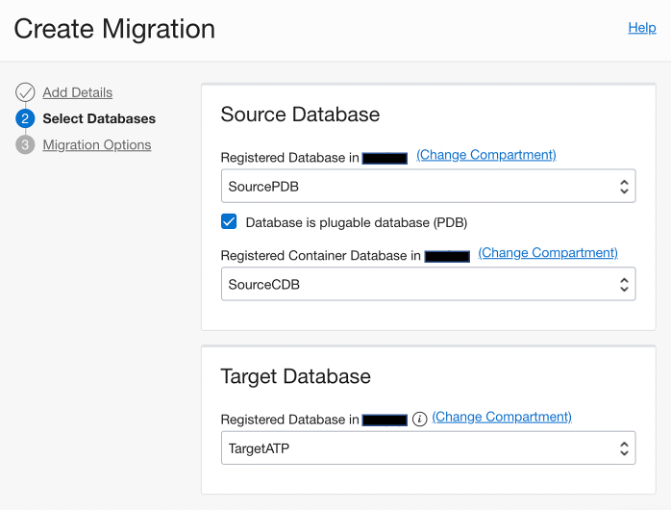
Log in to the OCI Console. Under Migration, navigate to Database Migration, Migrations, and then click Create Migration. Provide the source database name, target database name, migration type, encryption vault and key, database schema details, Object Storage bucket name, and source database directory path with read/write permission for the database owner user.
We can remap schemas and tablespaces while creating a migration. If you need to exclude any objects from a schema while migrating the schema, you can designate them while creating a migration. Excluded objects aren’t migrated to target database.
After creating a migration, validate it before starting the migration job.
Validate your migration
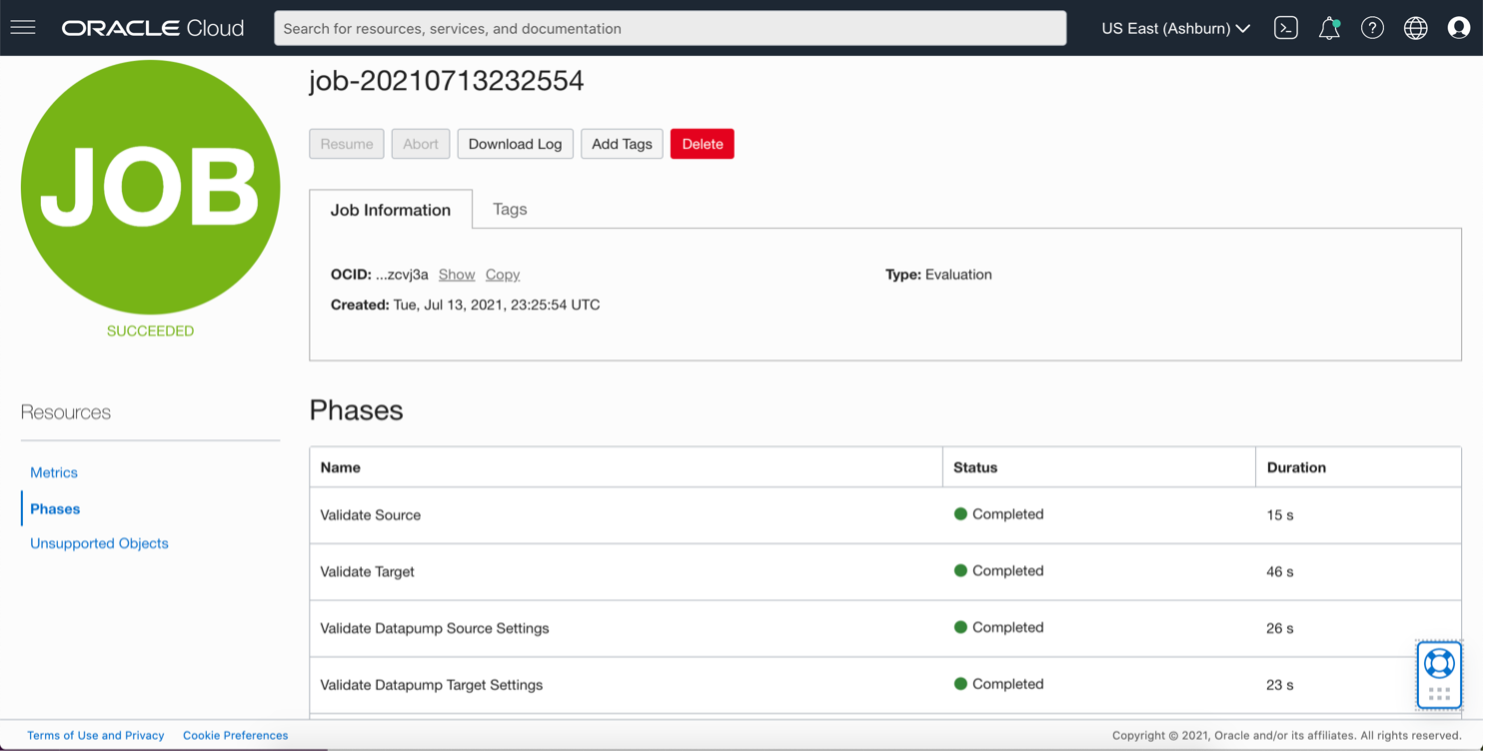
Log in to the OCI Console. Under Migration, navigate to Database Migration, Migrations, and then click Validate to validate the migration. This selection evaluates the details provided during source registration, target databases, and the inputs given during creation of migration.
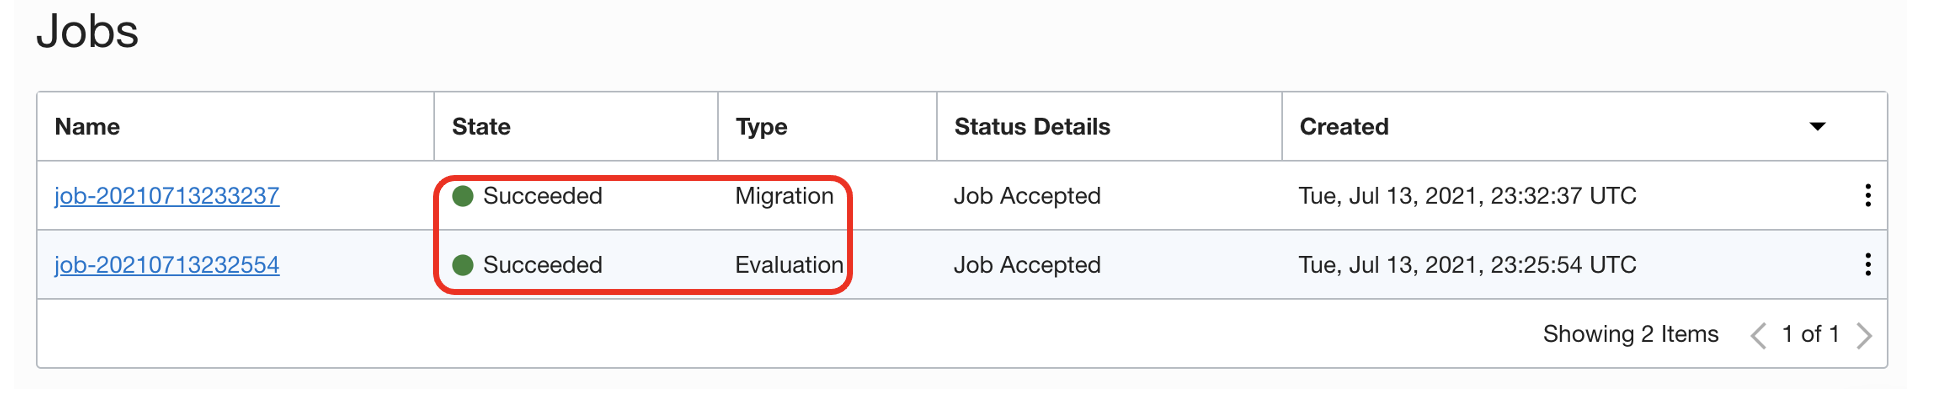
Validation has four phases. When all details in a file are evaluated, the job status changes to “Completed,” and you can download the log file from the Console, as shown in the following image.
Start migration
Under Migration, navigate to Database Migration, Migrations, and click on Migration Job. Then click Start.
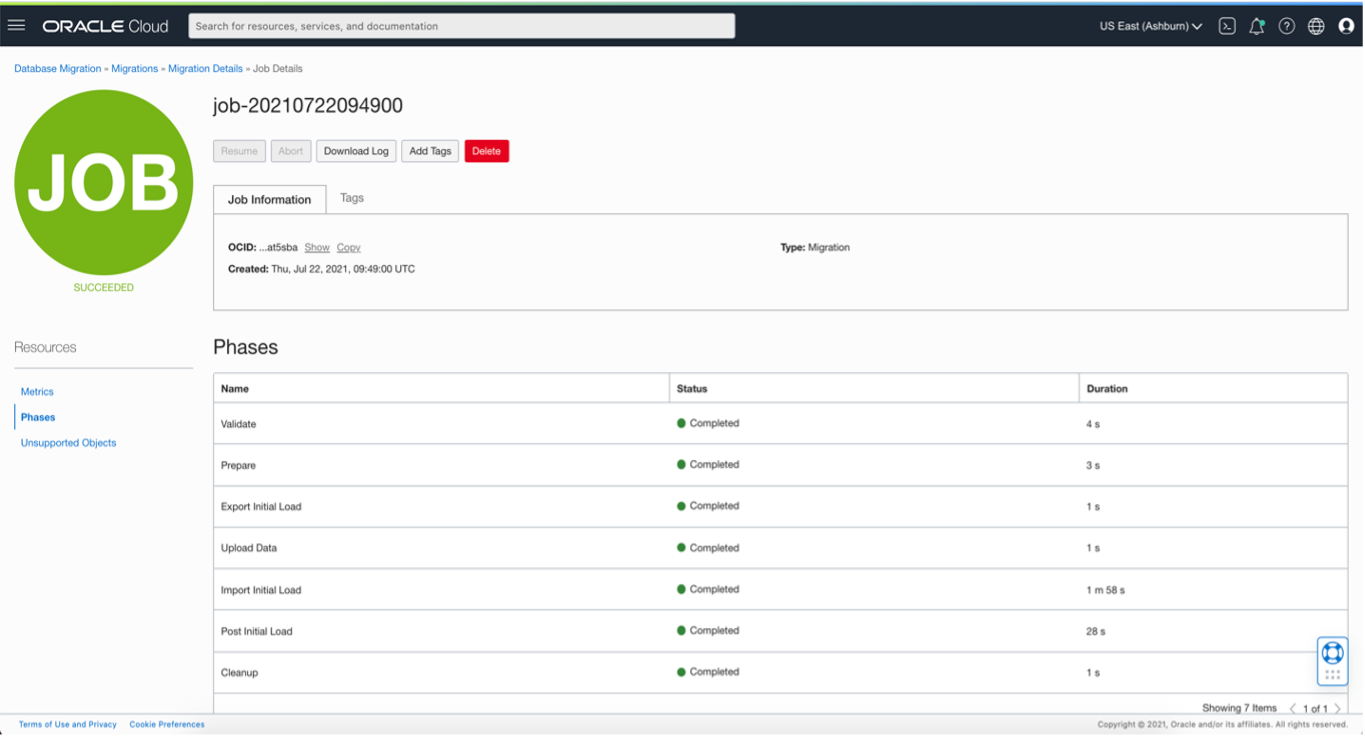
The migration process has seven phases as shown in a following screenshot. It validates the source and target database details, takes an export of schemas from the source database, uploads the export to an Object Storage bucket, and then imports it into Autonomous Database using a private endpoint.
When the data is imported to Autonomous Transaction Processing, it compiles the objects to remove invalid data and cleans up at the end. All database objects present in the source database schema are created in the target database, except schemas that don’t support Autonomous Database.
Before starting the migration to Autonomous Database using DMS, we recommend that you create the database user profiles and roles that are present in the source in the target. Also, remap all user-specific custom tablespaces with DATA and TEMP tablespaces in the target. Use autonomous dedicated support when creating table spaces with BIGFILE. You can either migrate all schemas in the source pluggable database or only selected schemas based on requirement.
When all seven phases are complete, you can log in to the target autonomous database and check the schema details to validate the data. The database import log file is uploaded to Object Storage bucket provided in the migration job.
Conclusion
Every use case is different. The only way to know if Oracle Cloud Infrastructure is right for you is to try it. You can select either the Oracle Cloud Free Tier or a 30-day free trial, which includes US$300 in credit to get you started with a range of services, including compute, storage, and networking.
For more information, see the following resources: