Jenkins is a popular open source continuous integration and deployment (CI/CD) automation tool. Jenkins uses a controller-agent architecture. The controller node deals with scheduling jobs and agents nodes are responsible for running the jobs and delivering artifacts. Operating the Jenkins controller and the required files in single machine makes the setup easy, but it creates a single point of failure. If any issues with the VM or disasters arise, rebuilding is difficult and time-consuming.
In this tutorial, we show how to install Jenkins and setup High Availability using Oracle Cloud Compute and File Storage services.
What is OCI File Storage?
File Storage provides a durable, scalable, secure, enterprise-grade network file system. You can connect to a file storage system from any bare metal, virtual machine (VM), or container instance in your virtual cloud network (VCN). For more details, see the documentation.
Prerequisites
First, you need access to an OCI environment. If you don’t have one, you can easily create your Always Free instance, which comes with lots of free capacity and US$300 in trial credits.
When you have an environment, ensure that your user has been assigned to a group with permissions to manage the instance-family resources and storage-family. A security best practice has you create a user, instead of using a Console user that already has permissions assigned to it. If you need help, check out the docs to create a group and grant proper permissions to users.
Architecture
We’re following the Separation of Storage and Compute architecture, where we store all the Jenkins home ($JENKINS_HOME) contents in File Storage, achieving abstraction between Compute and the storage.
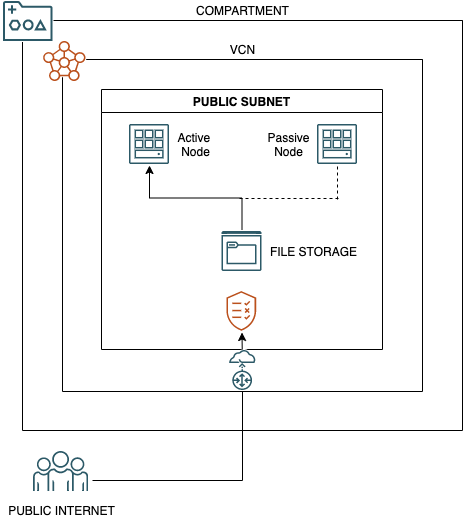
Setting up VCN and deploying instances with File Storage
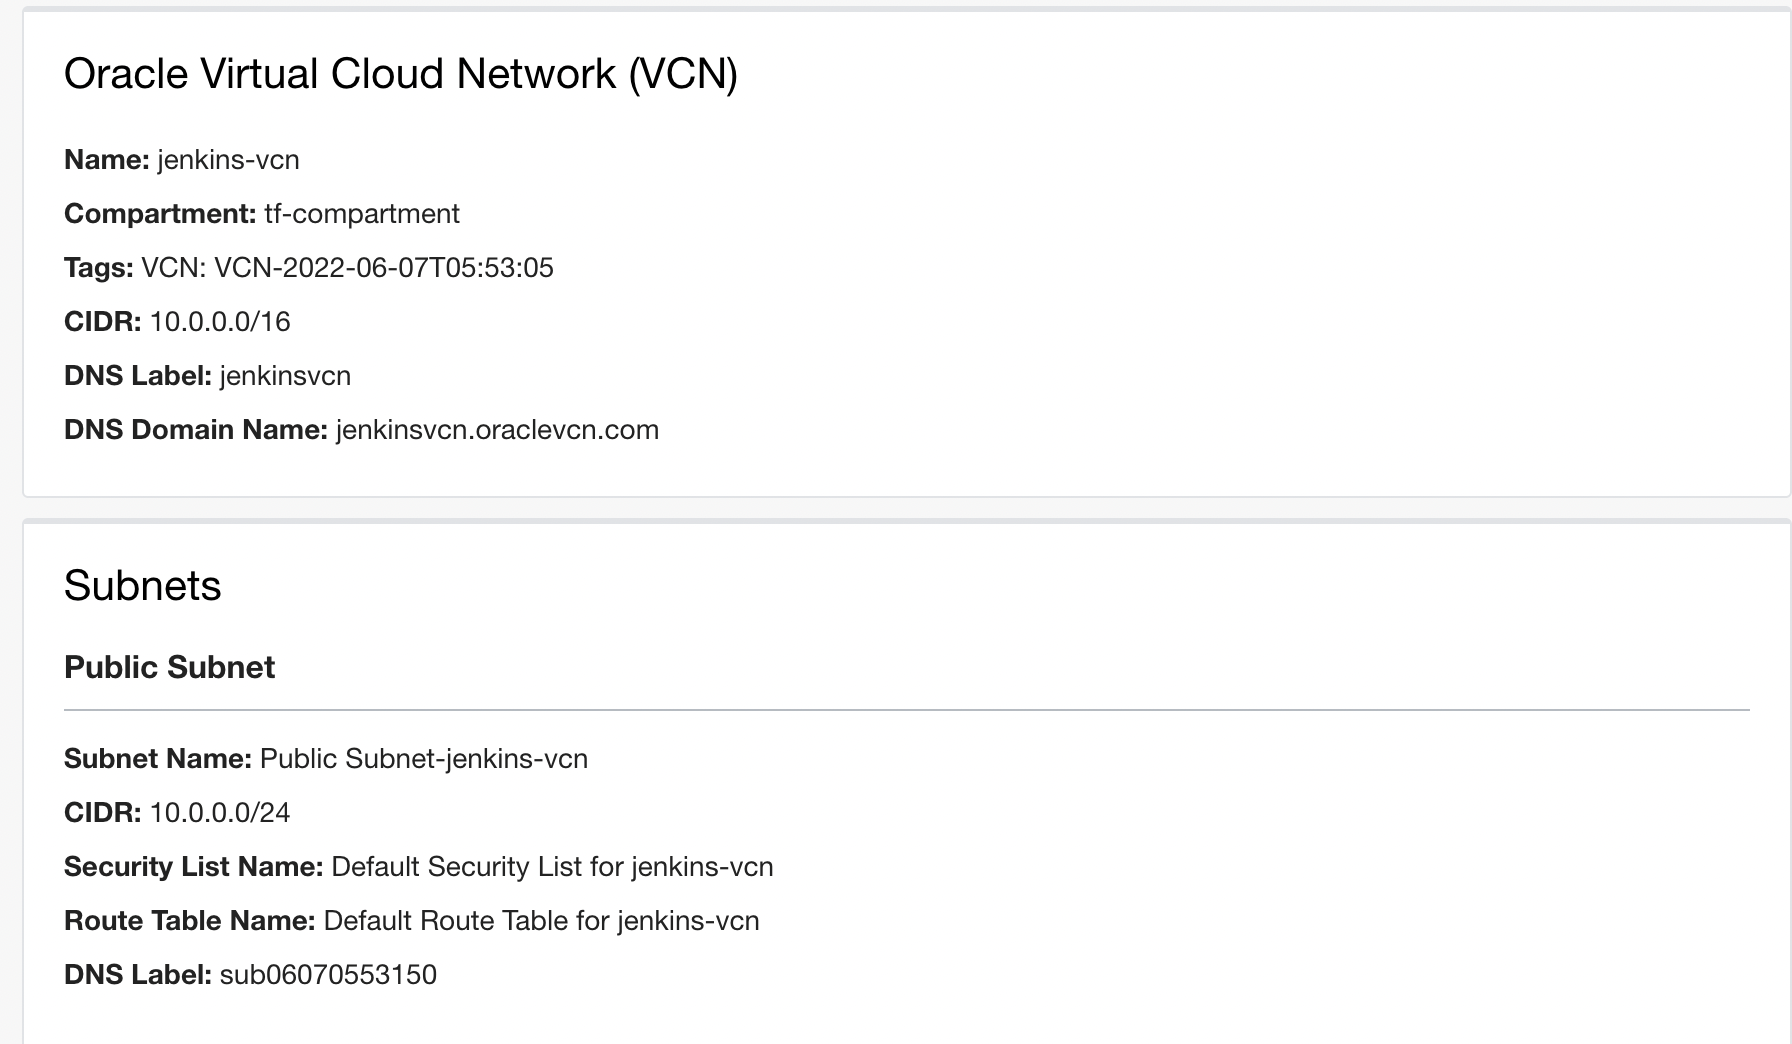
Create a VCN and subnet in an availability domain for your controller node. This subnet hosts our VM for Jenkins and File Storage mounting.
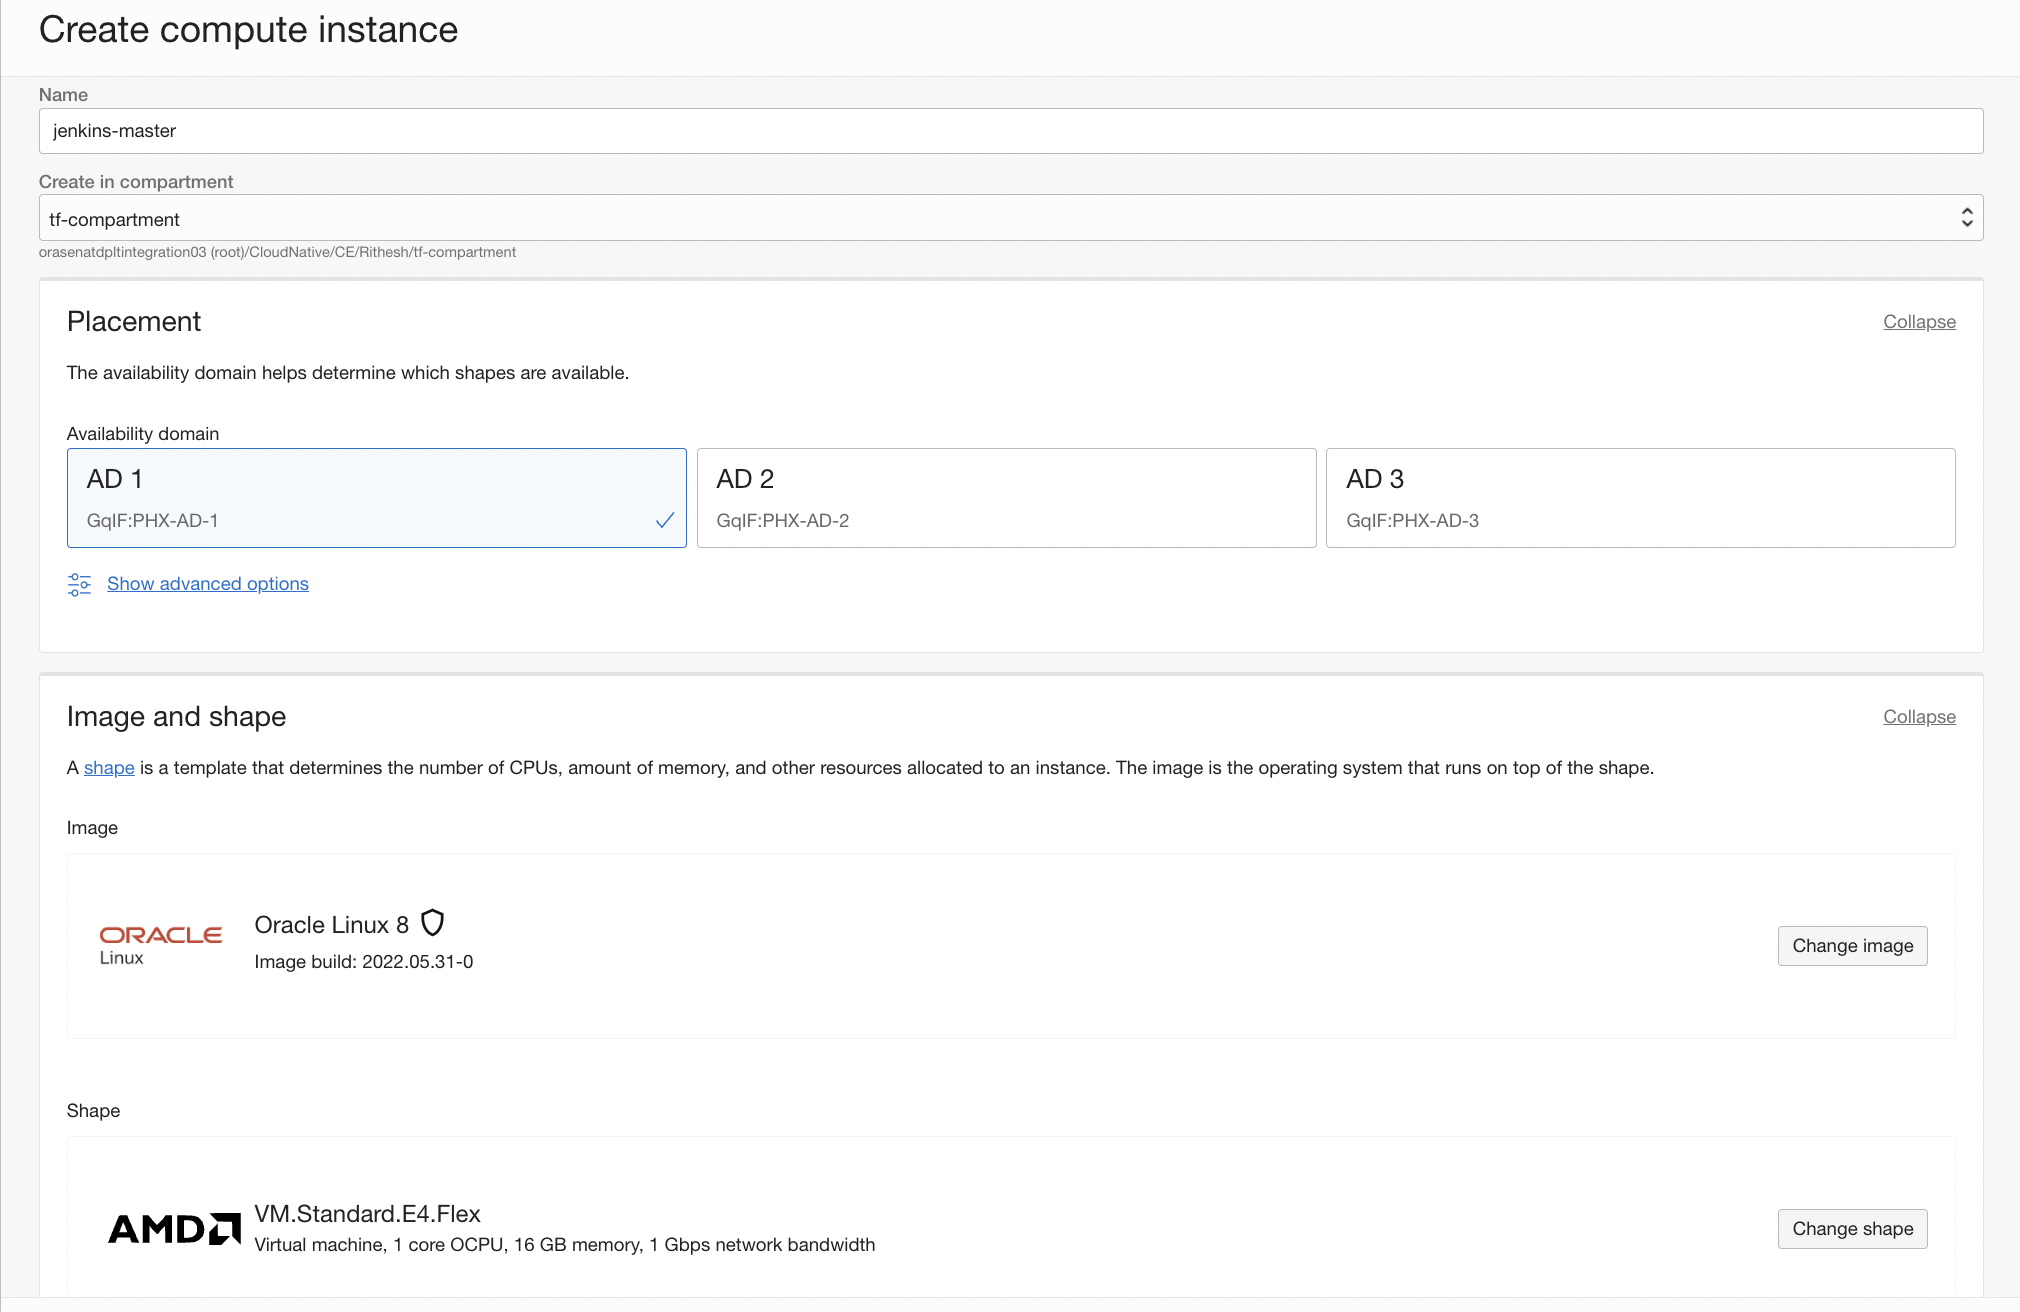
When the VCN and subnet are set up, deploy a new VM in the subnet that you created.
Our example uses the VM.Standard1.1 shape, which runs Oracle Linux 8. Because this controller node doesn’t run jobs or pipelines, we can have a smaller shape for this instance.
Select the VCN (jenkins-vcn) and subnet (public subnet) that you created.
Provide the public key for accessing the VM. You can create one in the Console. After providing all the details, click Create Instance.
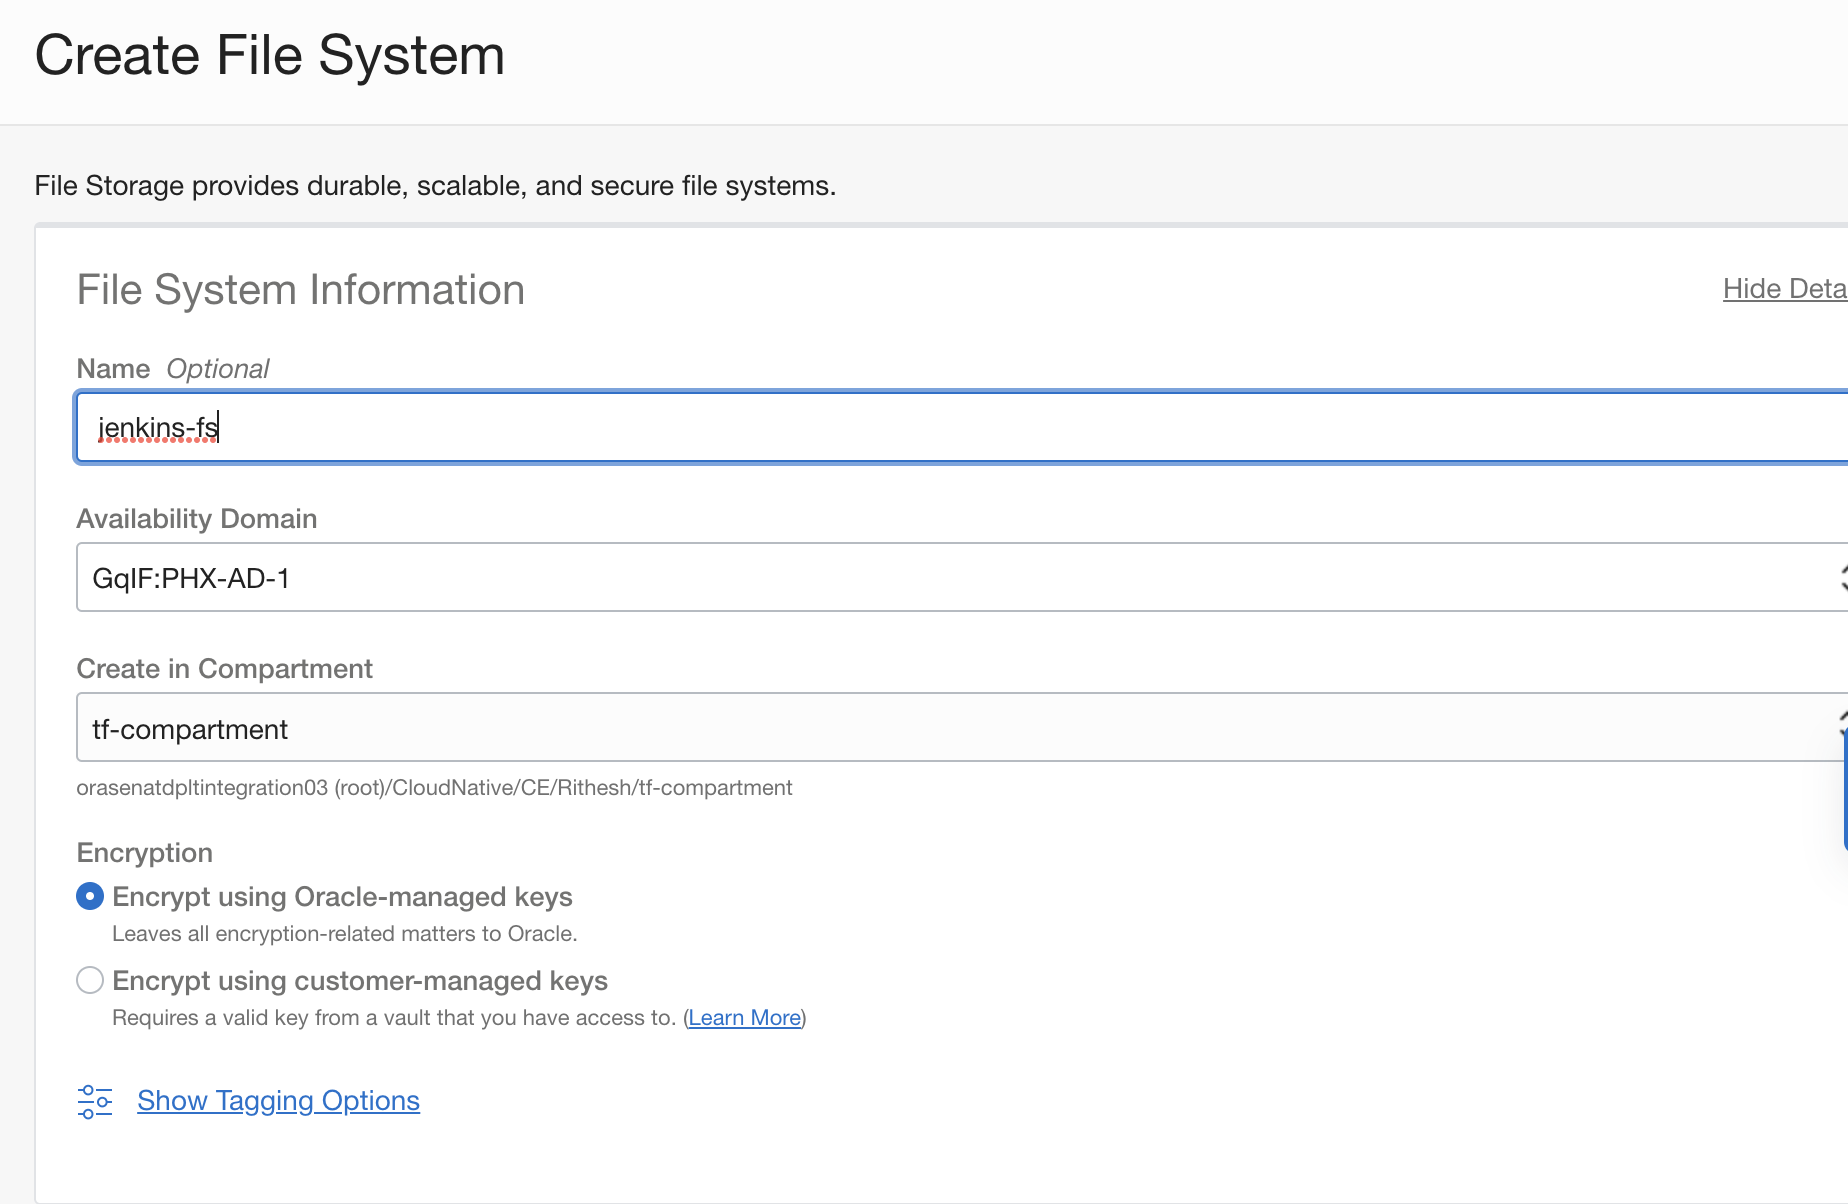
When the VM is up and running, create your file system, which acts as storage to the Jenkins controller.
Provide a name to the file system.
Provide the details for the export information. Exports control which file systems are available to a given mount target. For more details, see Managing Mount Targets.

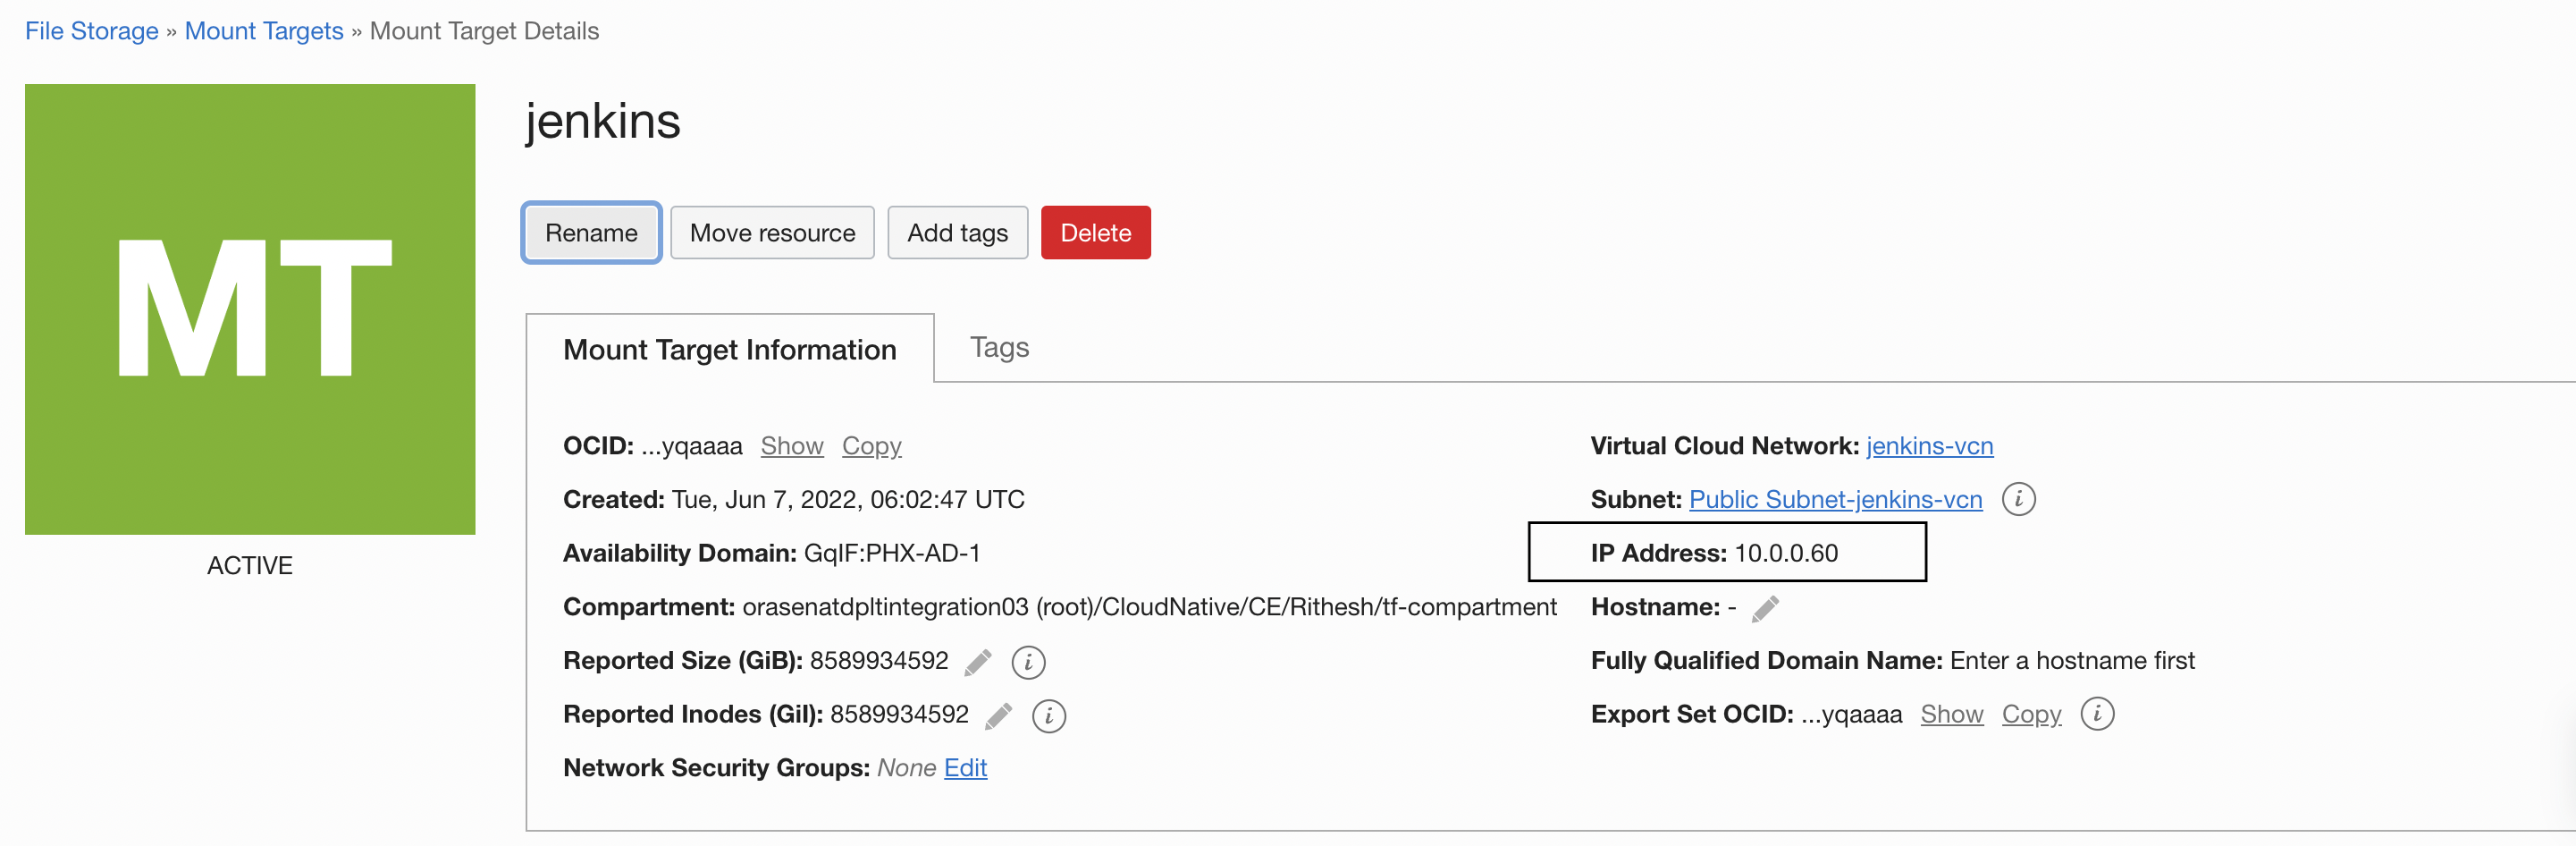
Provide the details for the mount target. Mount targets are network file system (NFS) endpoints used to access your file systems. Then, click Create.

Mounting file storage to the VM
To use the file storage that we created, we need to mount it to the Jenkins controller VM. You can get the mount commands in the Exports section under the File Storage details.
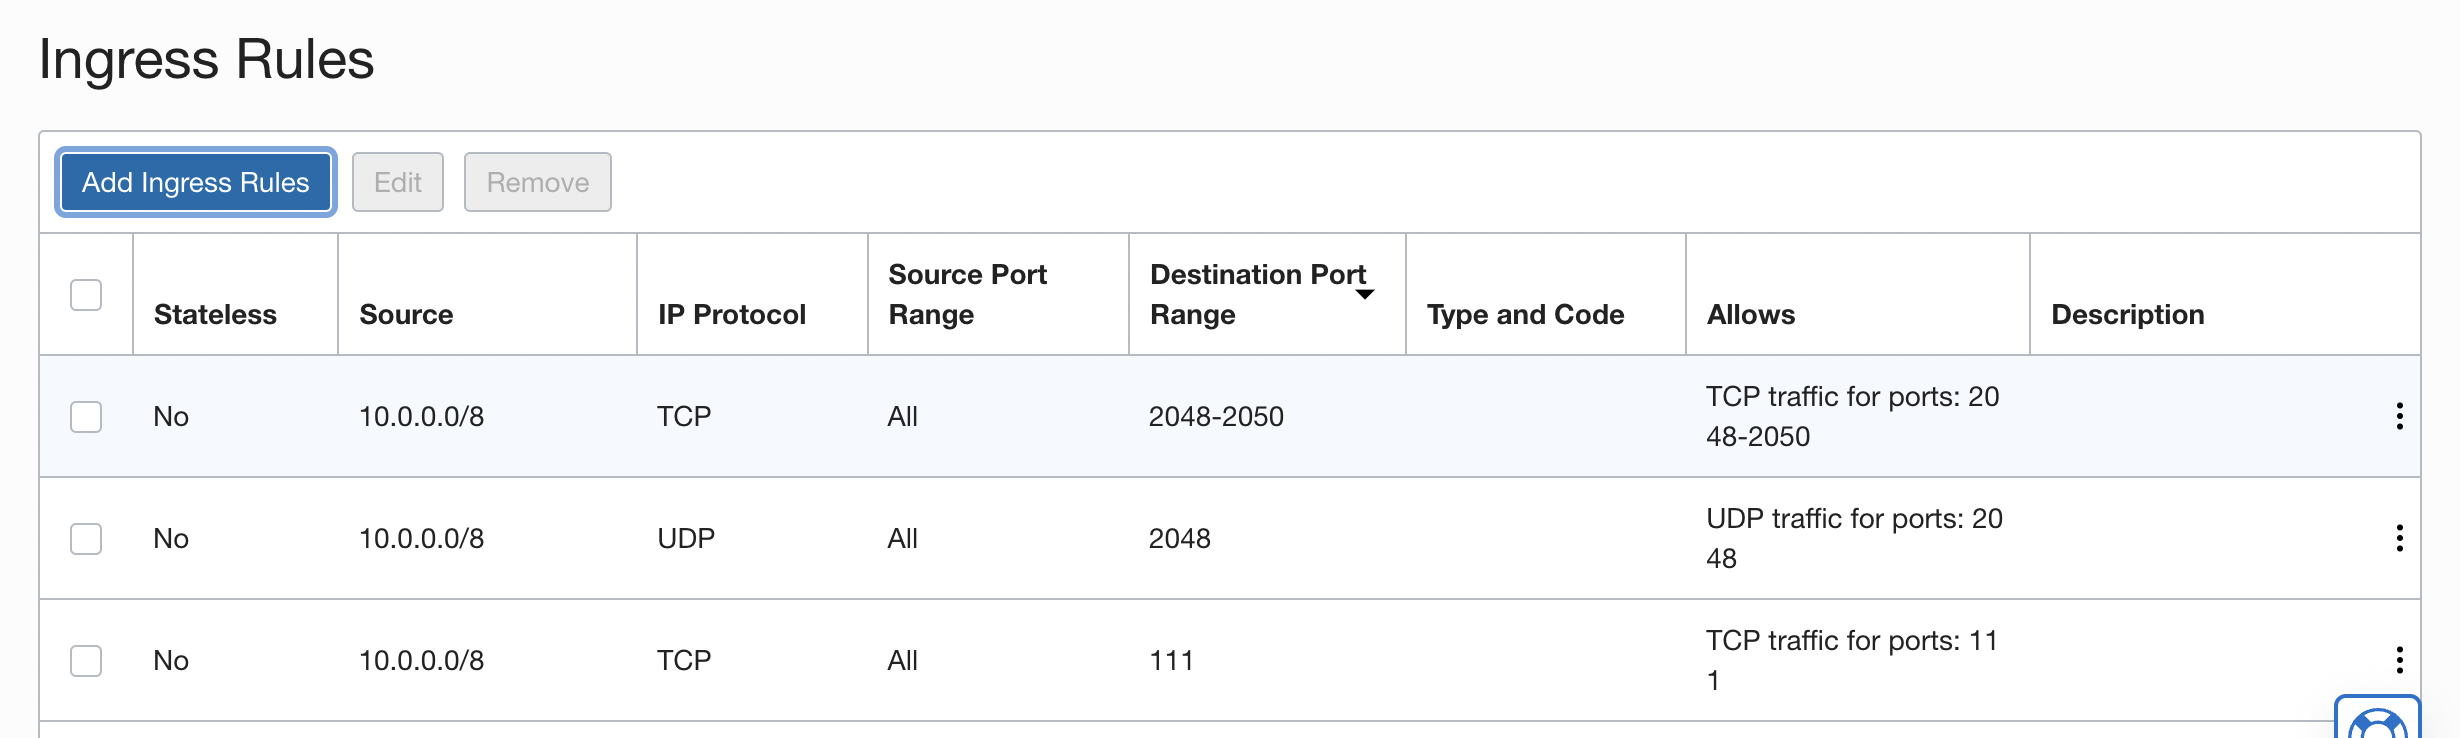
Before mounting a file system, you must configure security rules to allow network traffic to and from the mount target. You can set up security rules in subnet security lists, network security groups (NSGs), or by using a combination of both. In our case, we’re not using NSGs. We’re only opening the following ports in security lists:
-
Stateful ingress to TCP ports 111, 2048, 2049, and 2050, and UDP ports 111 and 2048.
-
Stateful egress for TCP source ports 111, 2048, 2049, and 2050, and UDP source port 111.
After you complete these steps, log in to the VM and mount the file storage by running the following commands:
-
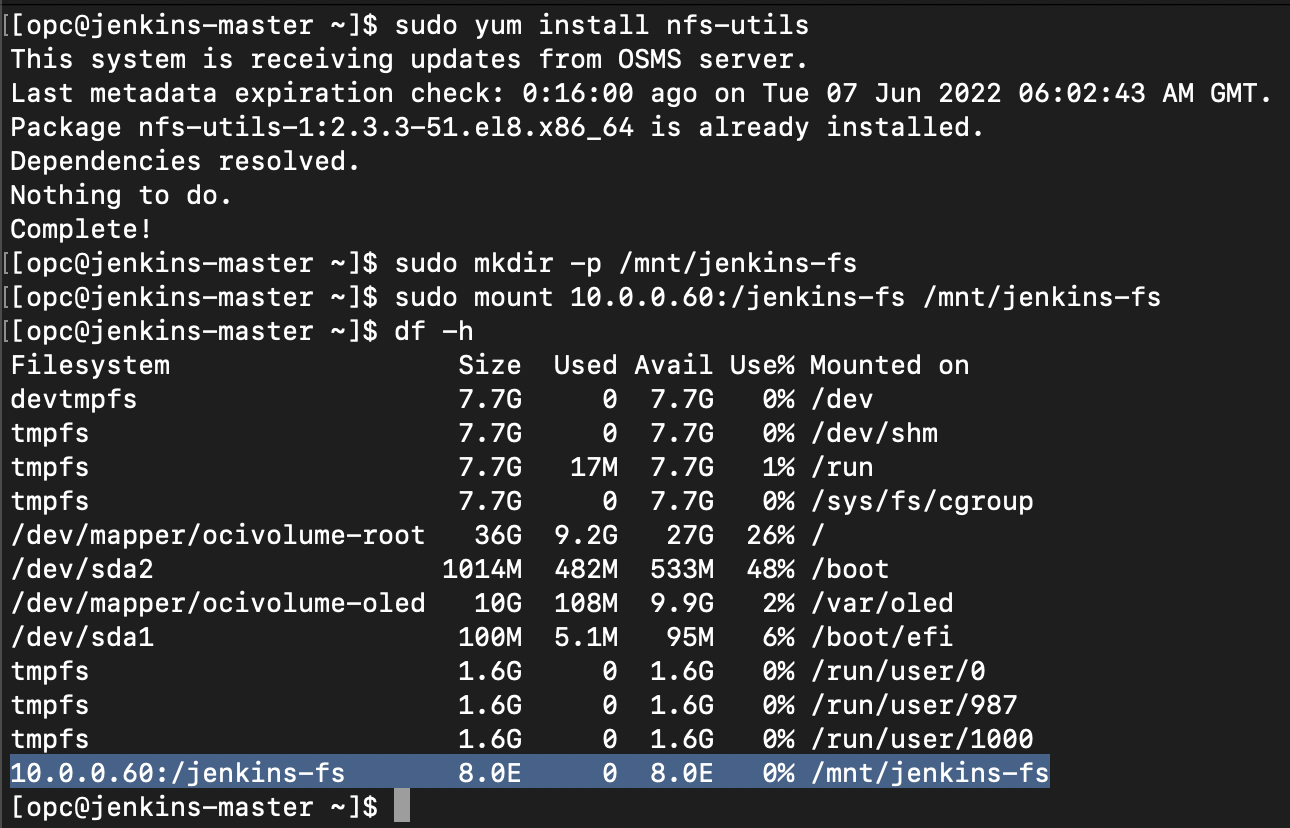
Install nfs-utils using the command, sudo yum install nfs-utils.
-
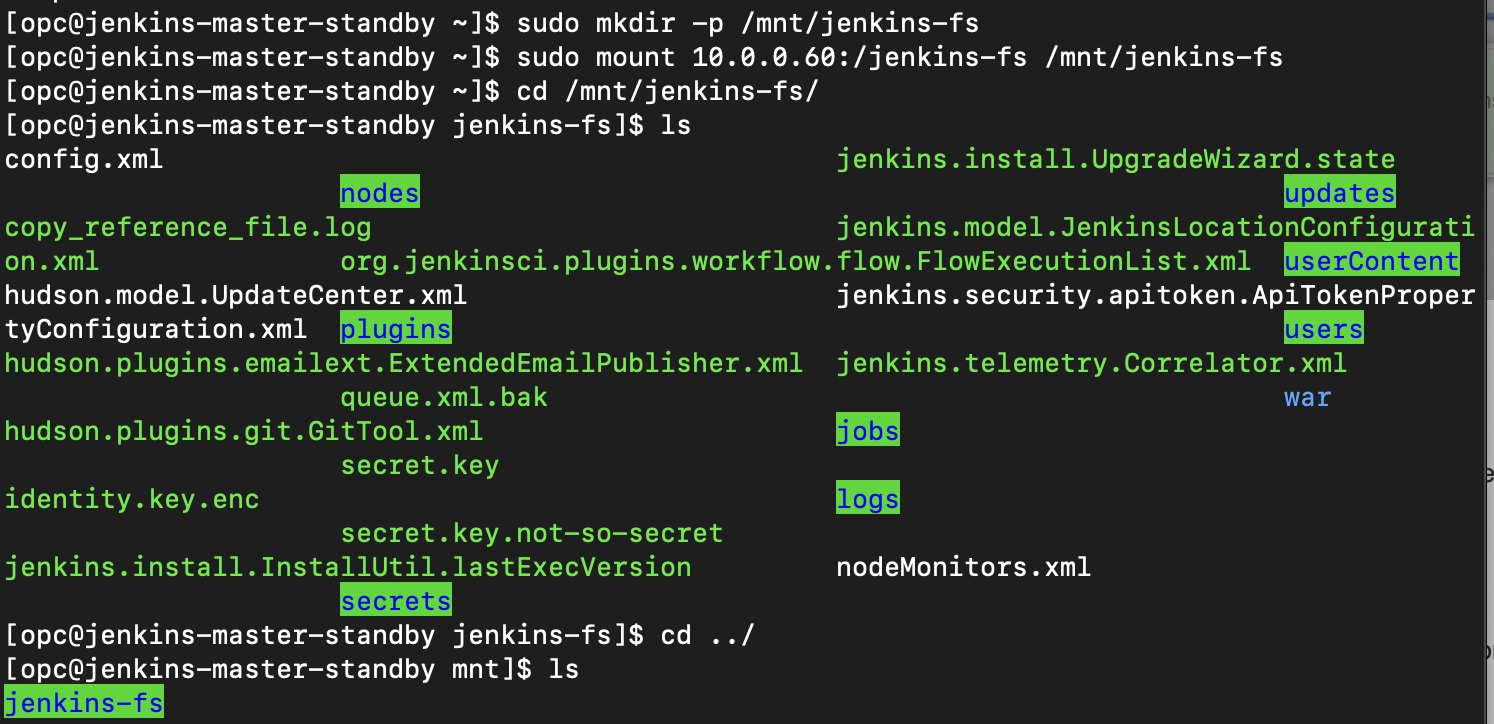
Create a mount for the File Storage in the VM using the command, sudo mkdir -p /mnt/jenkins-fs.
-
Mount the file storage to the mount that we created. You can obtain the export IP from Mount Target page. Our example uses 10.0.0.60. Run the command, sudo mount 10.0.0.60:/jenkins-fs /mnt/jenkins-fs.
After running all the commands to check whether the file storage system has been mounted successfully, verify with the command, df -h.
For NFS, File Storage is unmounted on server restart. To fix this issue and automatically mount File Storage on restart, follow the steps in the documentation.
Installing Jenkins as a Docker image
We’re using the Jenkins Docker image for the setup. You can use the same setup for various Jenkins installation methods.
Install Docker using the command, sudo yum install docker. Check if the installation is successful with the command, docker version.

Jenkins runs on the port 8080 by default. To open this port in the firewall, use the following commands:
sudo firewall-cmd --zone=public --permanent --add-port=8080/tcp
sudo firewall-cmd --reload
Give the read and write permission for the Jenkins user managing the containers with the following command. In my case, I have given full permission.
sudo chmod -R 777 /mnt/jenkins-fsNow we start the Jenkins server as the Docker Container with the following command:
docker run -p 8080:8080 -p 50000:50000 --privileged -v /mnt/jenkins-fs:/var/jenkins_home jenkins/jenkins-
-p: Jenkins port. By default, Jenkins runs on port 8080. 50000 port is a TCP listener port that allows inbound agents to connect to it.
-
–privileged: The –privileged flag gives all capabilities to the container and lifts all the limitations enforced by the device cgroup controller. If you want to give granular permissions, you can use -u $UID, which ensures that the container uses the same user ID as the host.
-
-v: Container volume. /mnt/jenkins-fs is our File Storage mount, which is mounted as /var/jenkins_home inside the container. Now, File Storage acts as the Jenkins controller home directory.
This command starts the Jenkins server. When you see the following message in the CLI, you have successfully started the Jenkins server and can proceed to the initial setup for the Jenkins controller.
2022-06-07 10:26:37.448+0000 [id=44] INFO hudson.model.AsyncPeriodicWork#lambda$doRun$1: Finished Download metadata. 13 ms

2022-06-07 10:26:37.530+0000 [id=30] INFO jenkins.InitReactorRunner$1#onAttained: Completed initialization

2022-06-07 10:26:37.772+0000 [id=22] INFO hudson.lifecycle.Lifecycle#onReady: Jenkins is fully up and running
Access the Jenkins Controller using the public IP of the Instance along with the Port 8080.
You receive the following prompt to enter the secret. The secret is displayed in the CLI when starting the Jenkins server. Copy and save it. You can also use the following command to retrieve it. The Secret is automatically removed after the initial setup.
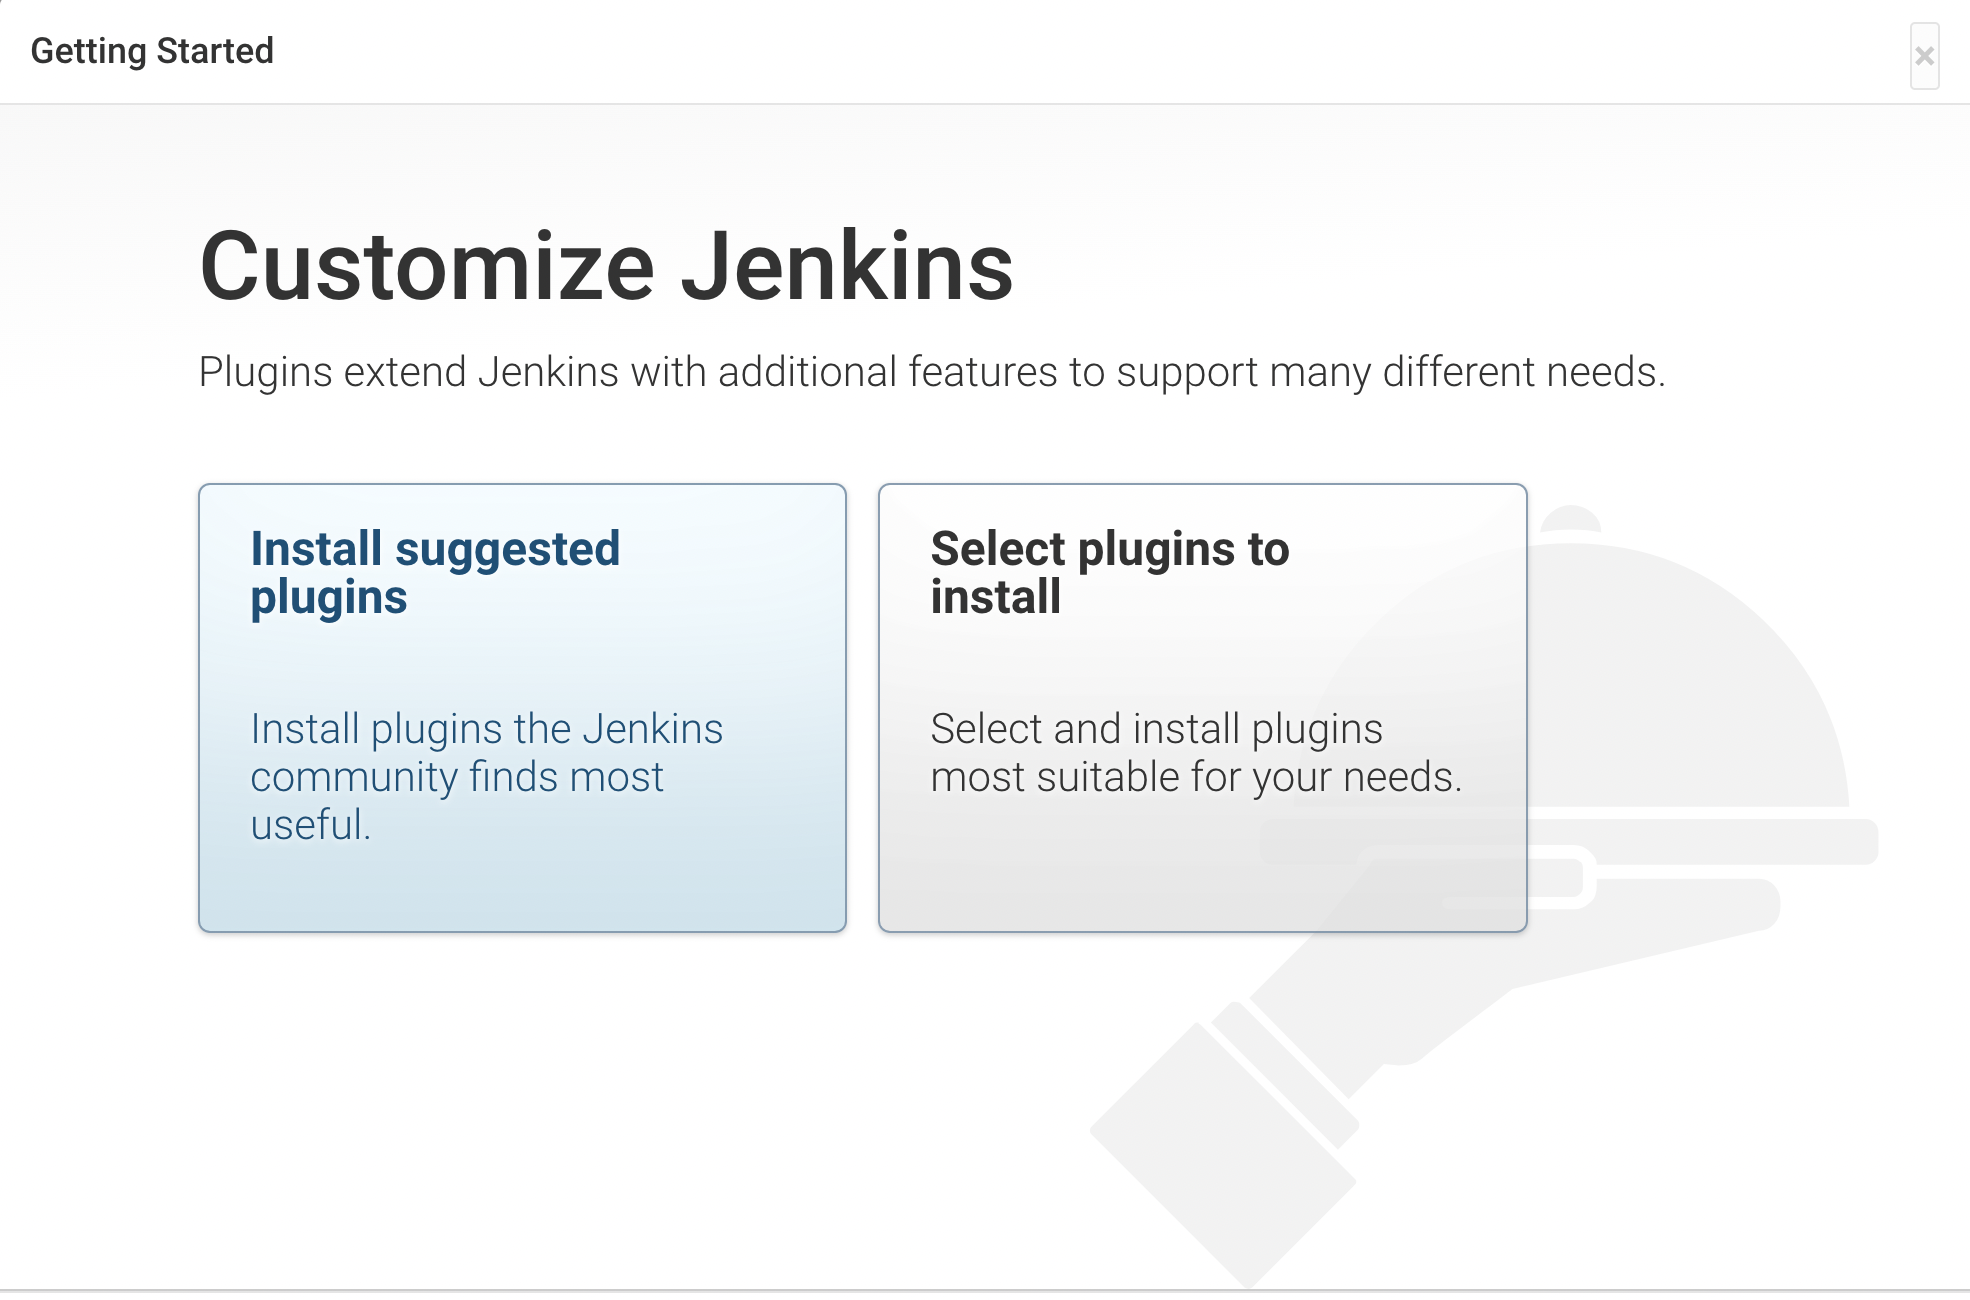
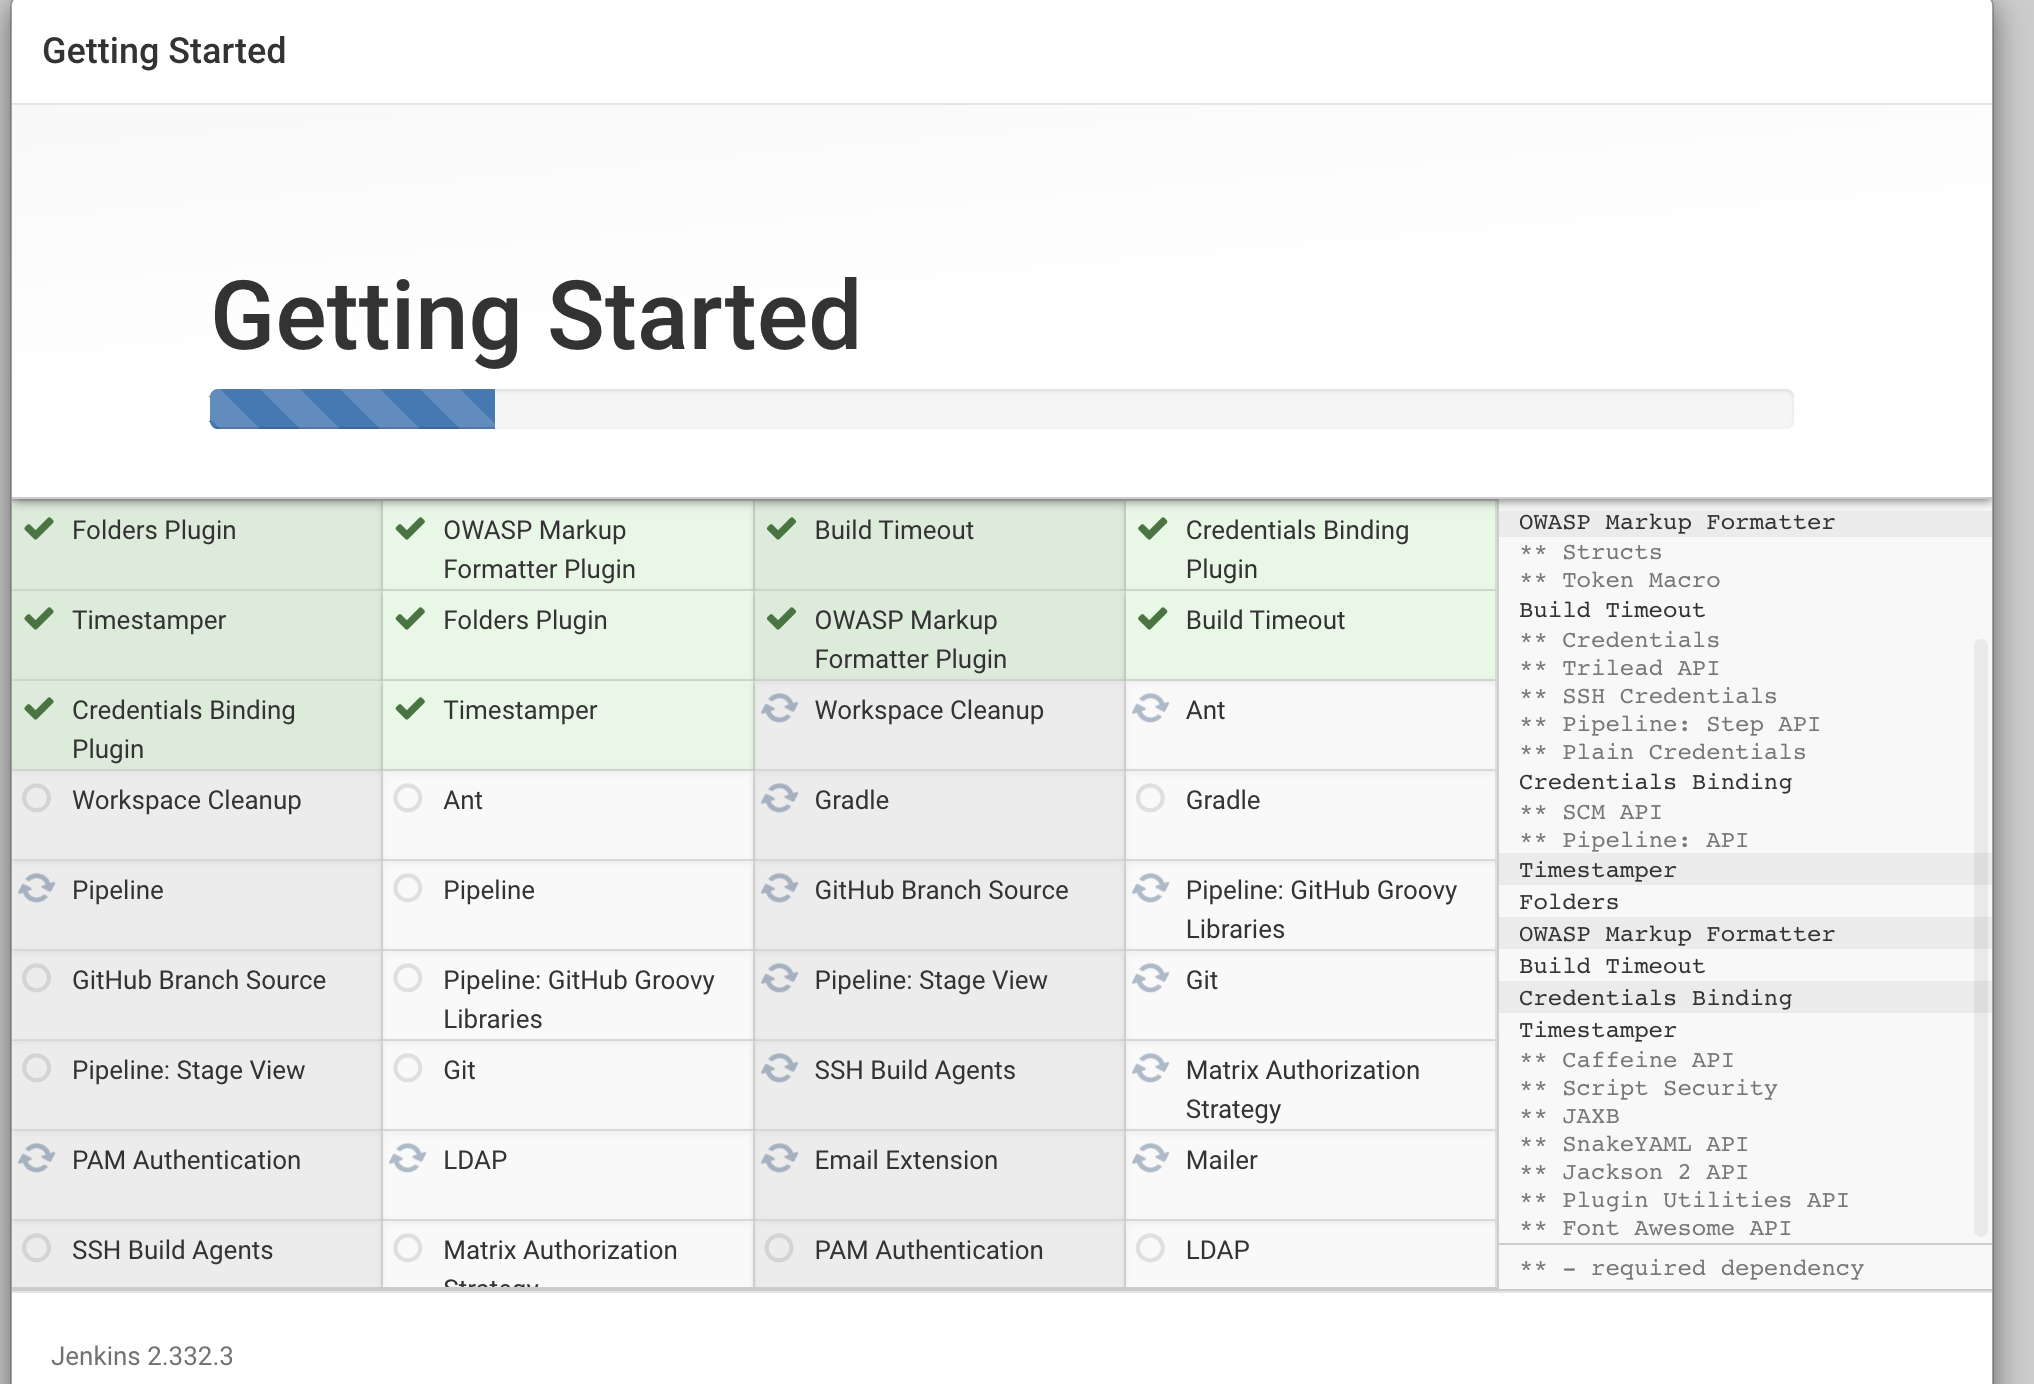
sudo docker exec <CONTAINER_ID> cat /var/jenkins_home/secrets/initialAdminPasswordThen it prompts you for plugin installation. Click Install Suggested Plugins to install all the necessary plugins.
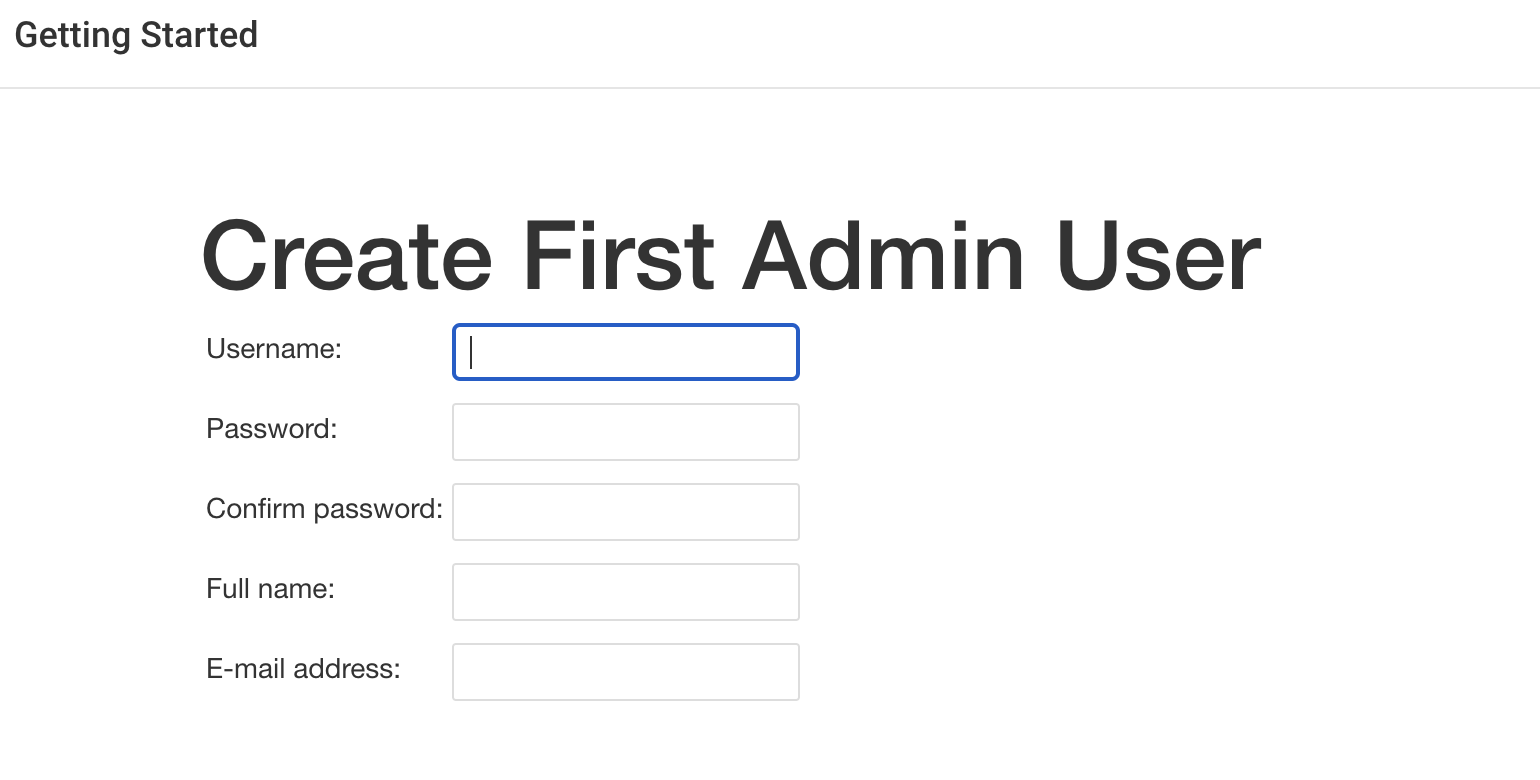
When complete, provide the Jenkins admin user details. Then click Continue.
Next, on the Jenkins home page, you can start creating tasks and pipelines.

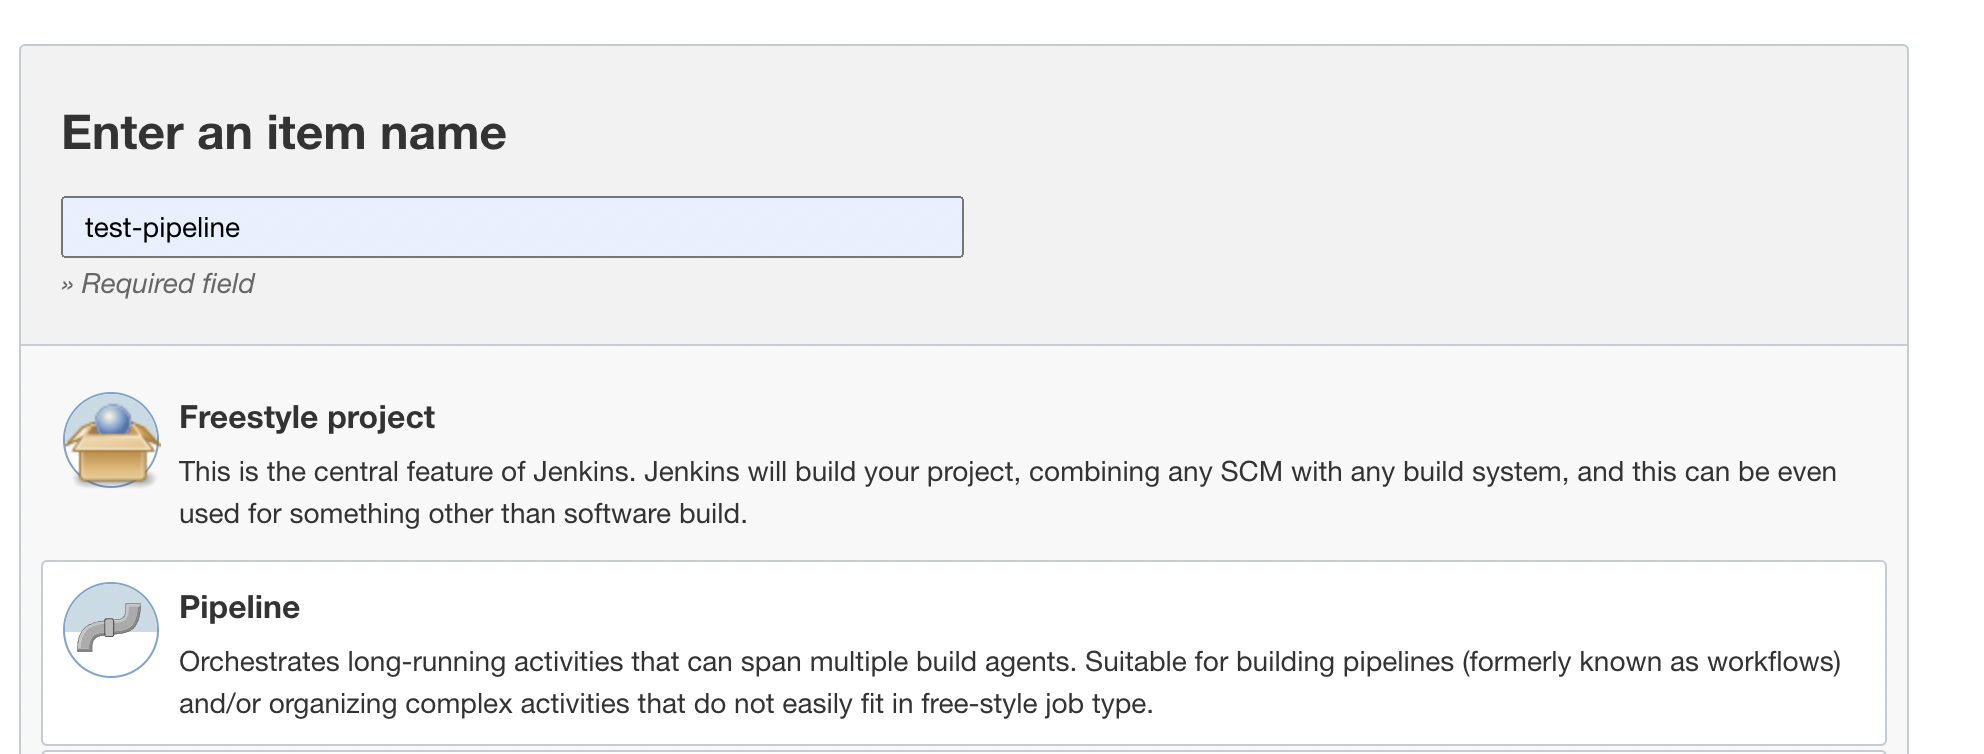
Let’s create a sample pipeline and run it. From the sidebar menu, click New Item, name your pipeline, and select Pipeline. Click Next.
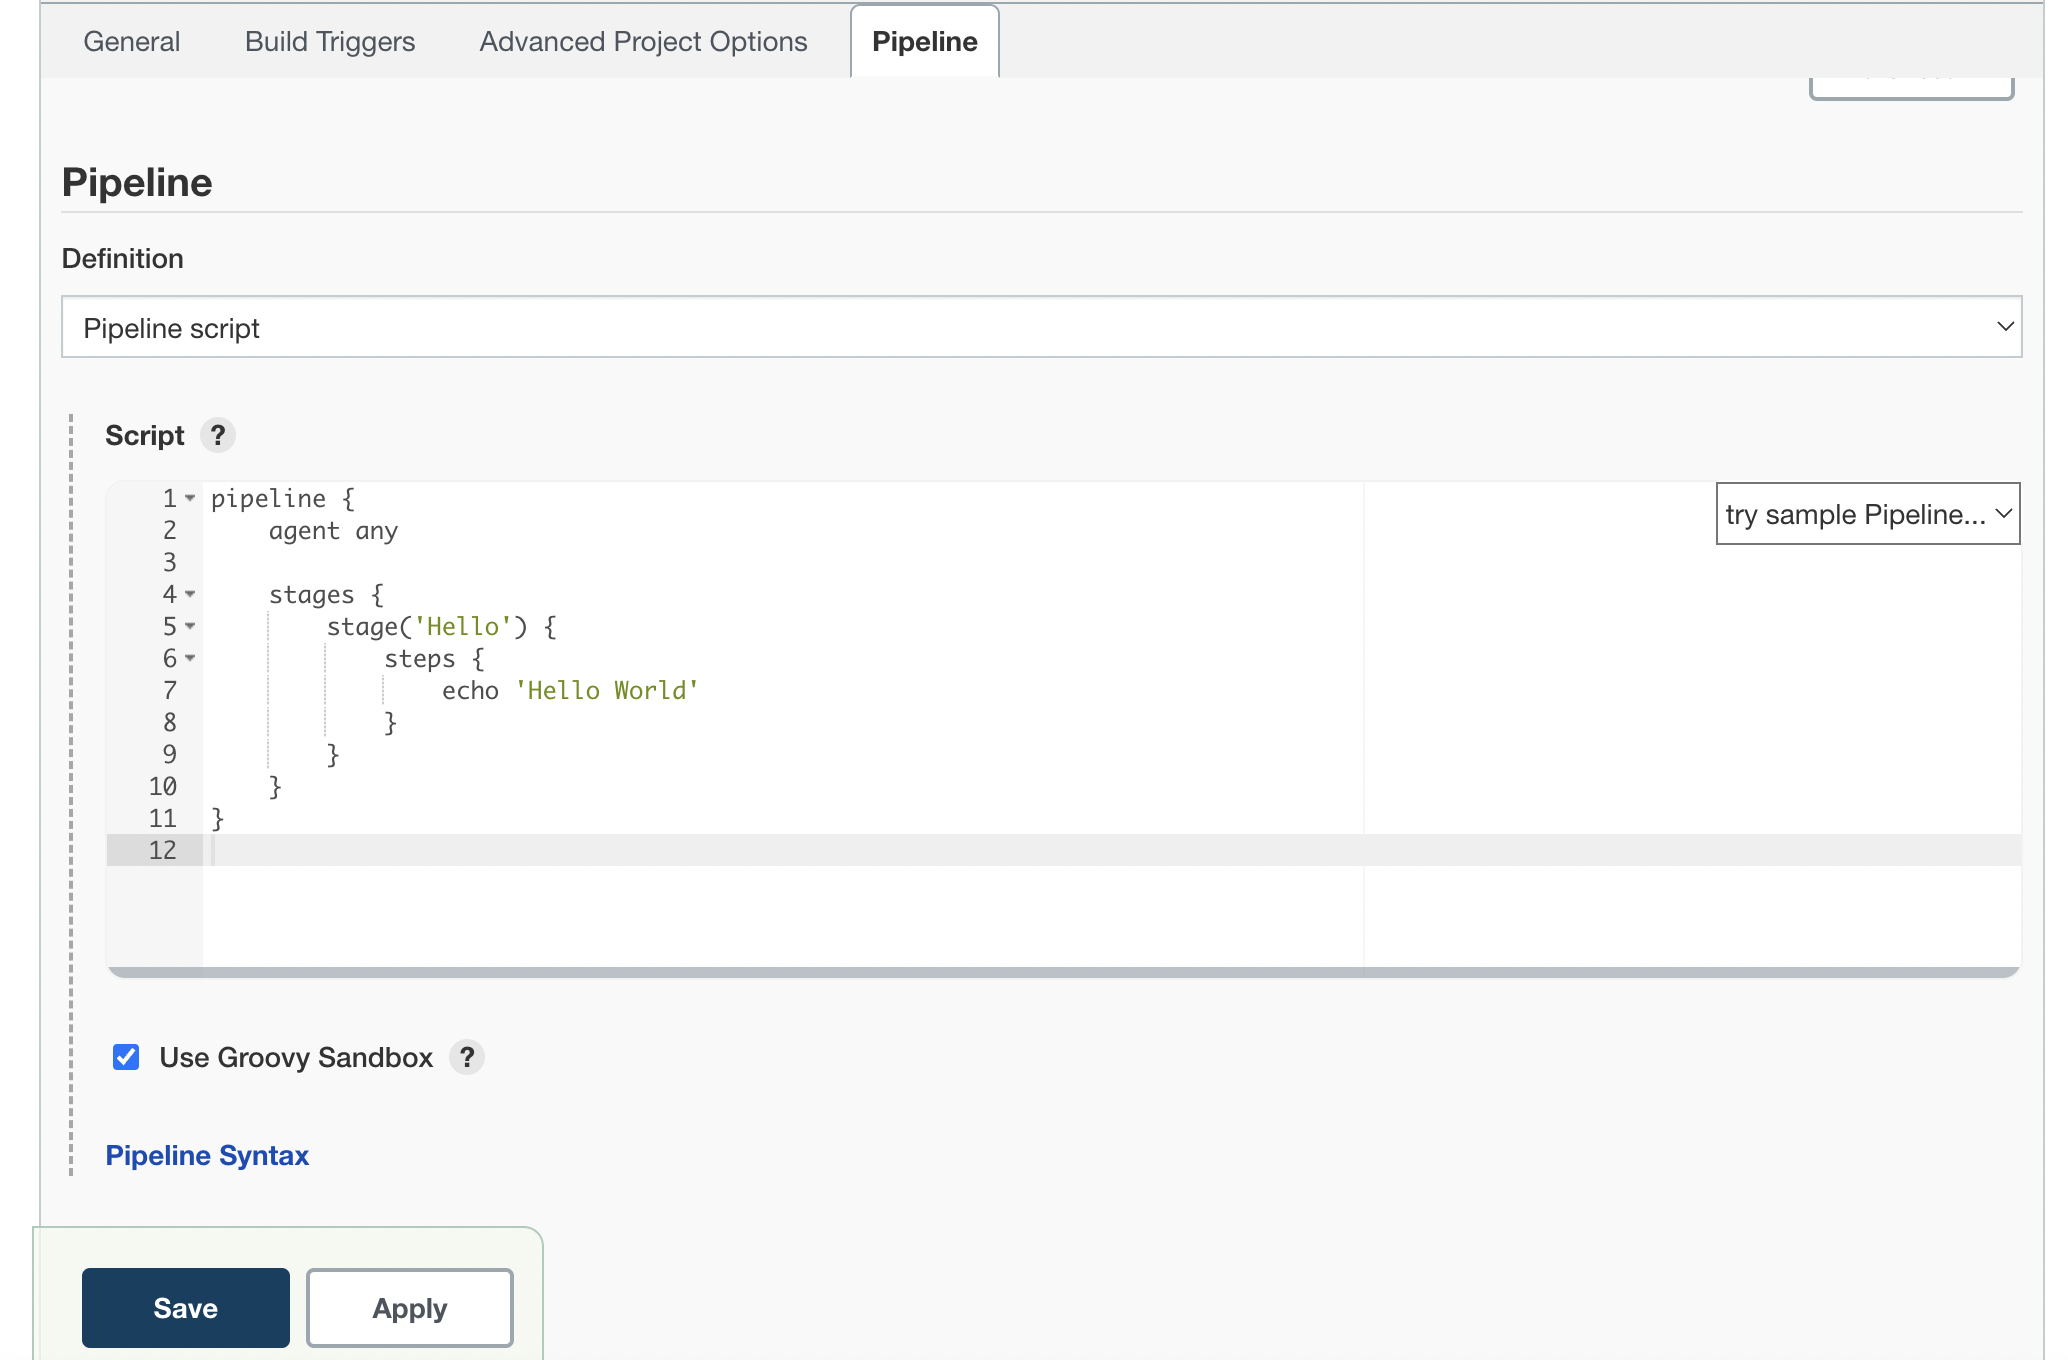
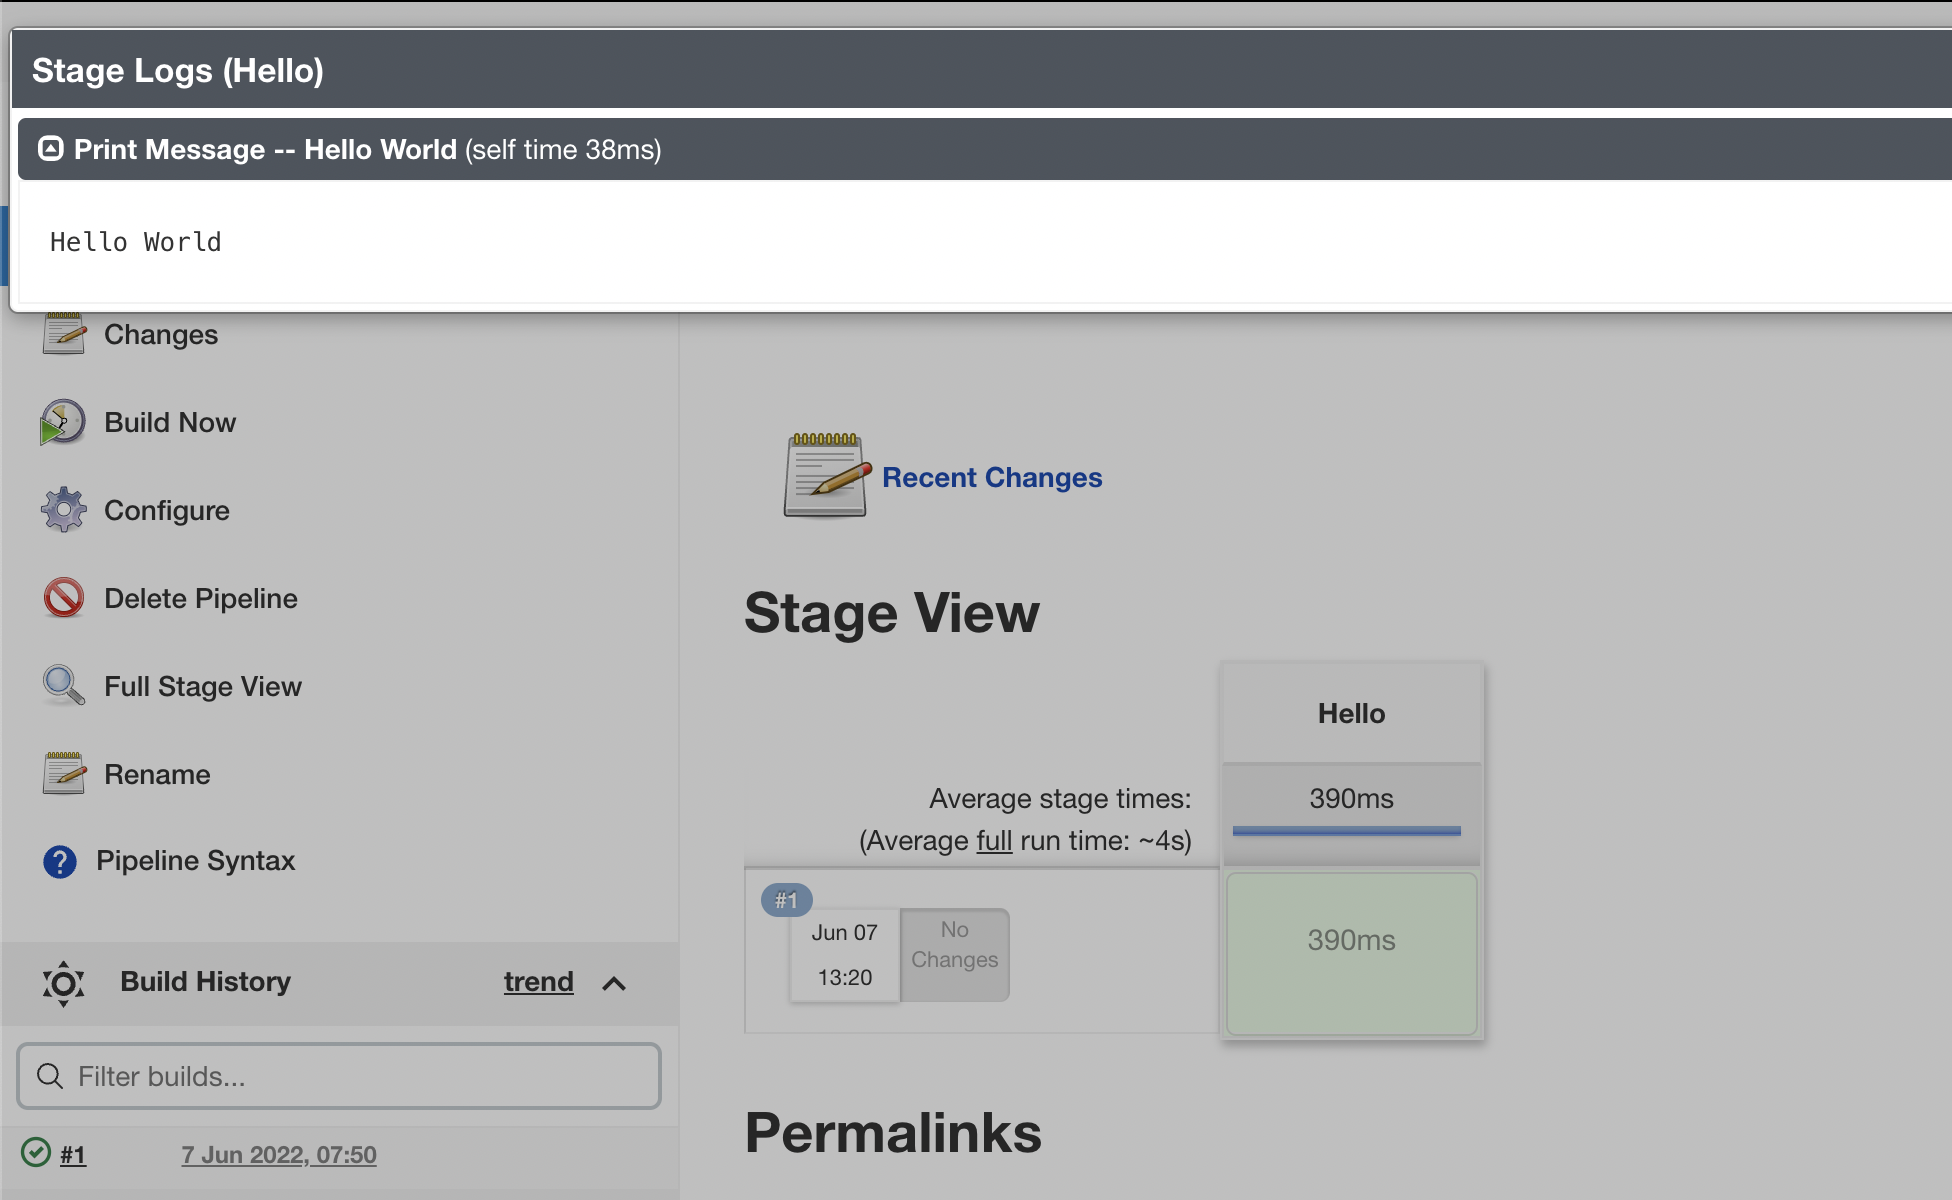
Go to the Pipeline tab and provide the designated script. In my case, I’m using a script to print “Hello World.” Click Save.
Run the pipeline and check. Click the pipeline that you created to see its details page.
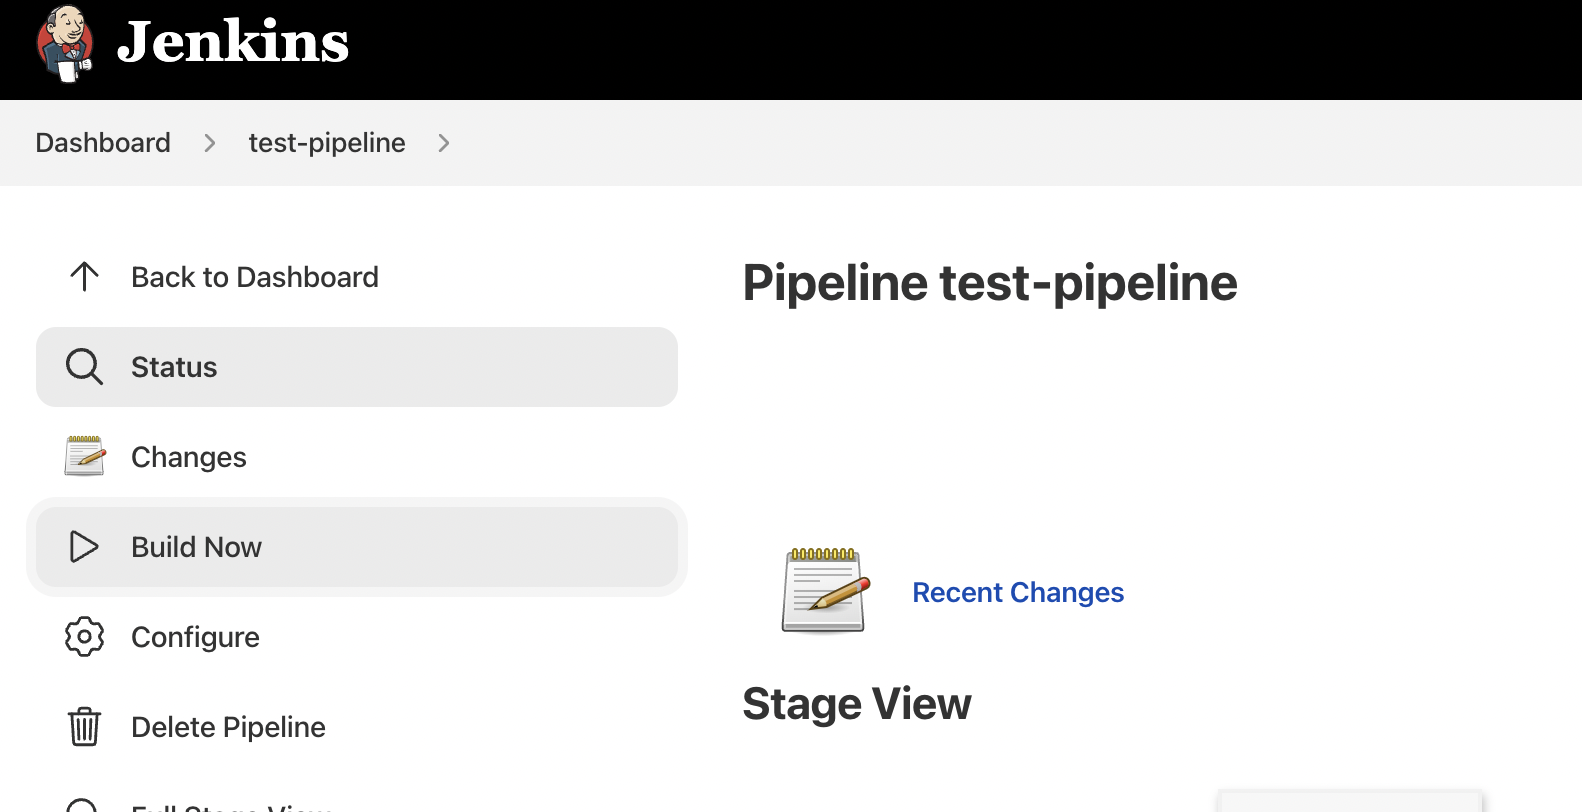
In the sidebar, click Build Now. When the pipeline runs successfully, click the stage logs and check the output.
Testing the High Availability setup
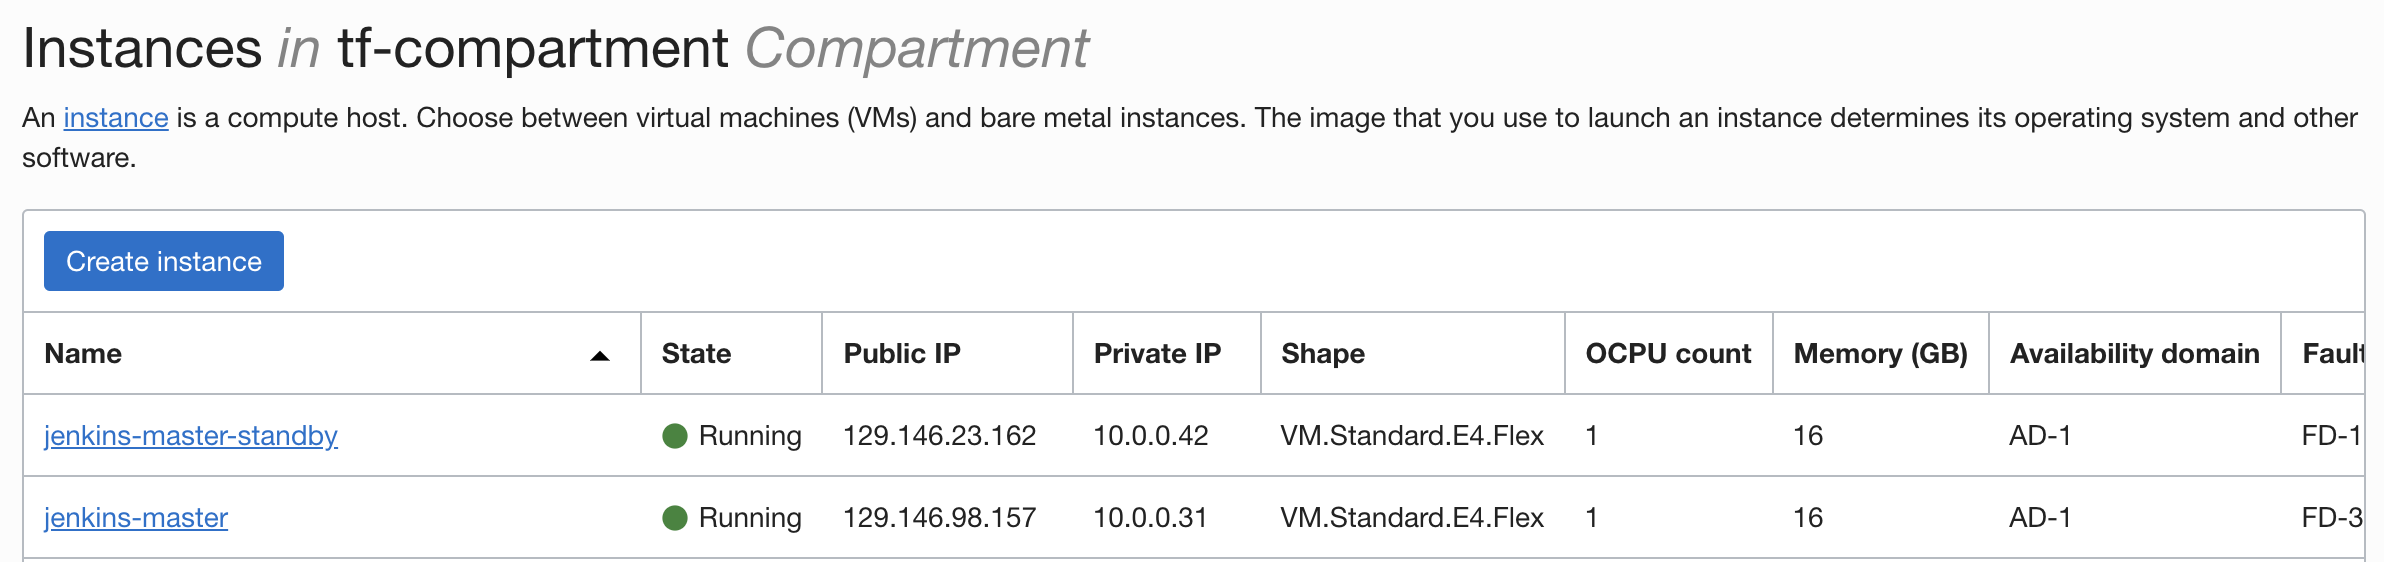
Deploy a new standby VM in the same subnet. You can also create it in another subnet, VCN or region if network connectivity is set up. Now you can see two instances.
Follow the same procedure for the new standby VM as Jenkins controller.
Mount the same file storage to the standby VM that we mounted in the Jenkins VM with same export path.
Check if the mount is successfully mounted using df -h.
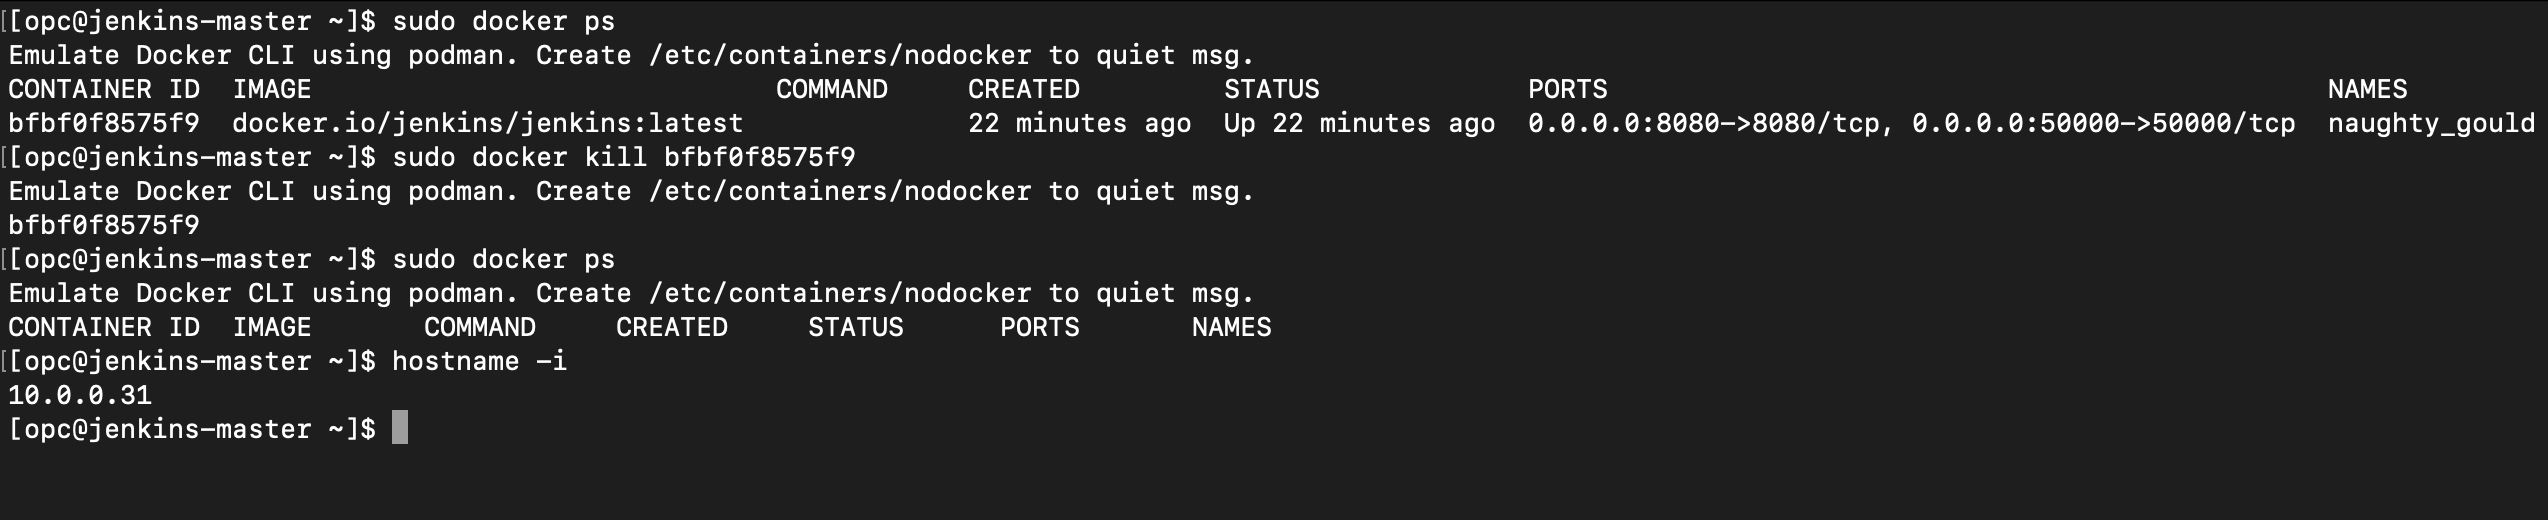
Stop the Jenkins server running in the Jenkins controller node.
Install Docker and run Jenkins using the same command you used for the Jenkins controller.
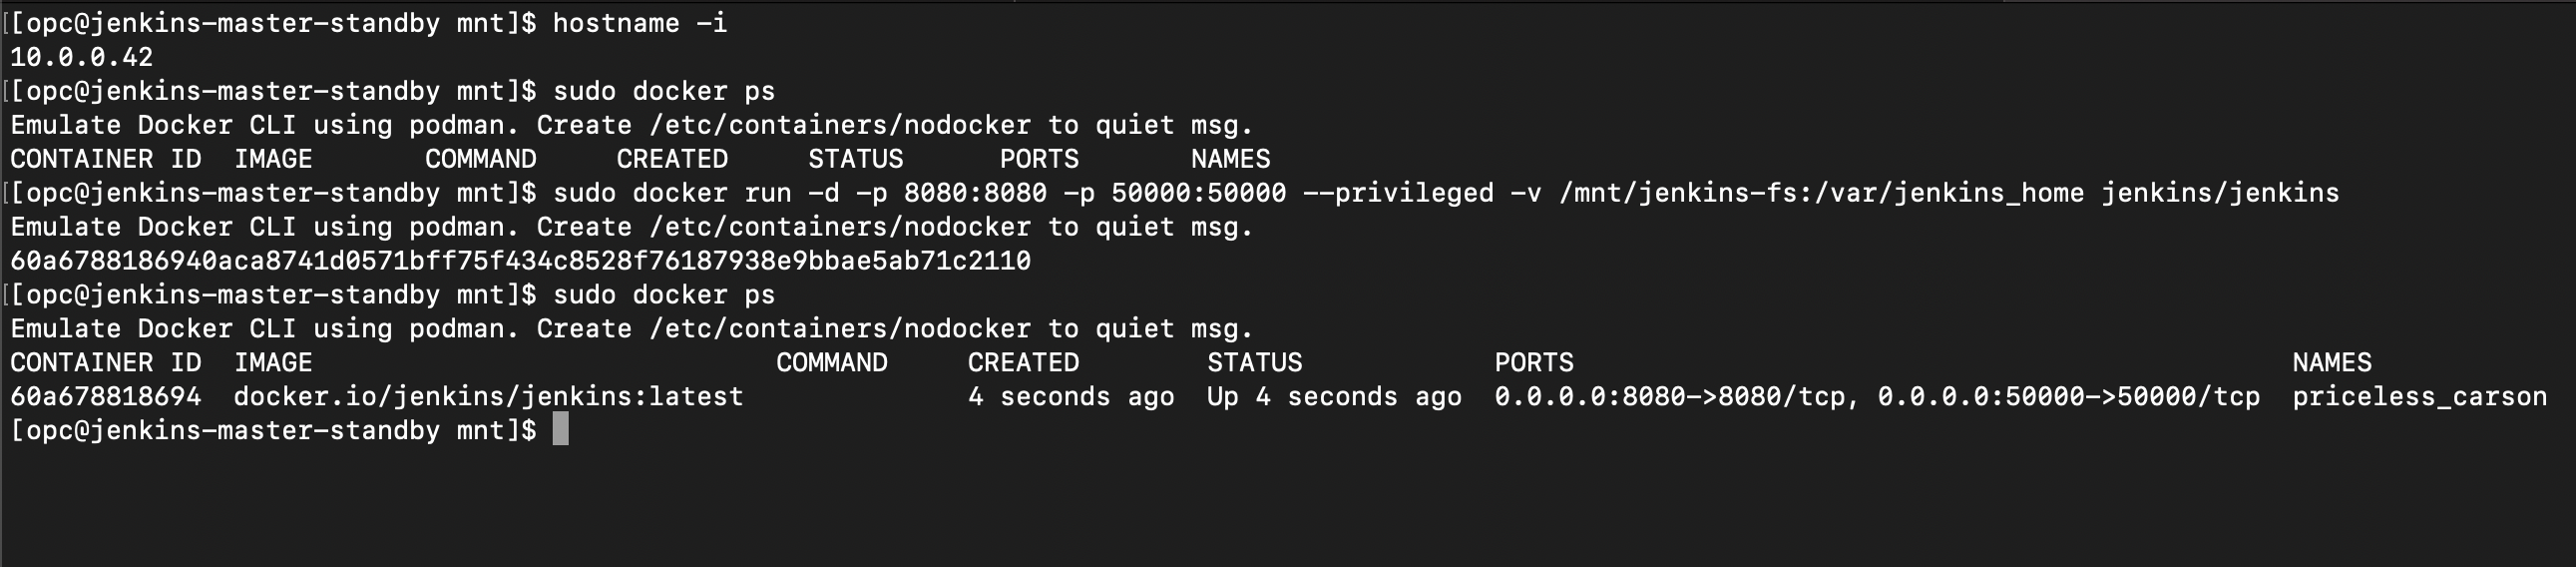
When the container is up, you can use the public IP of the standby server instance with the port 8080. You see the login page instead of the initial setup, which was completed for the controller VM.
You can use the initial admin user credentials that you created to log in to the instance. You land on the Jenkins homepage, showing the list of pipelines that you created from the Jenkins controller instance. You can also run the pipelines.

Conclusion
You have completed the tutorial for setting up the Jenkins with High Availability using OCI File Storage. We created a standby VM with mounted file storage that has all the Jenkins files. If the Jenkins controller VM isn’t accessible, the standby VM points to the same file storage mount. This approach saves you time handling failover, and the setup is straightforward. It also works if you have a controller-agent architecture enabled with all the network setup is done. This step isn’t required if the controller and agents are in same subnet.
Oracle Cloud Infrastructure provides enterprise-grade features for developers to build modern cloud applications while supporting the open source developer tools and solutions you’re already used to. Create your Always Free subscription, which comes with US$300 credits trial credits.