Overview
OCI Secure Desktops is a robust service that empowers administrators to create and manage pools of identically configured virtual desktops on Oracle’s cutting-edge cloud platform. This service is particularly beneficial for organizations that require a secure, scalable, and efficient desktop environment. By leveraging OCI Secure Desktops, administrators can ensure that each virtual desktop is configured with the same settings, applications, and security protocols, which fosters a uniform experience for all users. This consistency is crucial for various organizational needs, including software testing, training environments, and remote work setups, as it allows users to access a familiar interface and functionality regardless of their physical location. Deploying a Secure Desktop Pool with Windows Client OS versions 10 or 11, particularly in Active Directory (AD) integrated environments, benefits greatly from FSLogix. This tool enhances user profile management by decoupling profiles from the desktop infrastructure, allowing for easier updates without disrupting user experience. FSLogix also supports a highly available Secure Desktop design, enabling administrators to maintain productivity during technical issues and streamline management processes by facilitating quick updates without reconfiguring user data. Overall, combining OCI Secure Desktops with FSLogix improves user experience while providing robust control and security for virtual desktop environment.
Advantages of Using FSLogix in Secure Desktop Pools
- Enhanced User Profile Management: FSLogix effectively manages user profile containers, improving overall user experience.
- Decoupling of User Profiles: Separation of user profiles from the desktop infrastructure allows for easier updates and modifications.
- Minimized Downtime: Changes to the secure desktop environment can be implemented without disrupting individual user profiles.
- High Availability: FSLogix facilitates the creation of a resilient Secure Desktop design, ensuring productivity during technical failures.
- Streamlined Management Process: Administrators can quickly roll out updates or changes without reconfiguring or migrating user data.
- Improved Control and Security: Provides administrators with powerful tools to maintain control and security in virtual desktop environments.
The requirement for a reliable and efficient SMB (Server Message Block) share for user profile data management is crucial in modern computing environments. An SMB share facilitates seamless sharing of Profile containers and access across different Secure Desktop pools within different Availability Domain or Regions, making it an essential component for collaborative work. By combining SMB shares with Oracle ZFS, organizations can meet their storage requirements while benefiting from advanced features that enhance data management, protection, and accessibility.
- Robustness ensures data integrity and availability, especially with frequent access and modifications.
- Built-in high availability (HA) features minimize downtime and maintain user productivity.
- Advanced replication capabilities create duplicate copies of user profile containers across different locations.
- Replication safeguards against data loss and enables efficient disaster recovery strategies.
- Snapshot capability allows for point-in-time copies of user profile containers.
- Snapshots aid in backup and recovery processes, enabling easy reversion to previous versions in case of accidental deletions or corruption
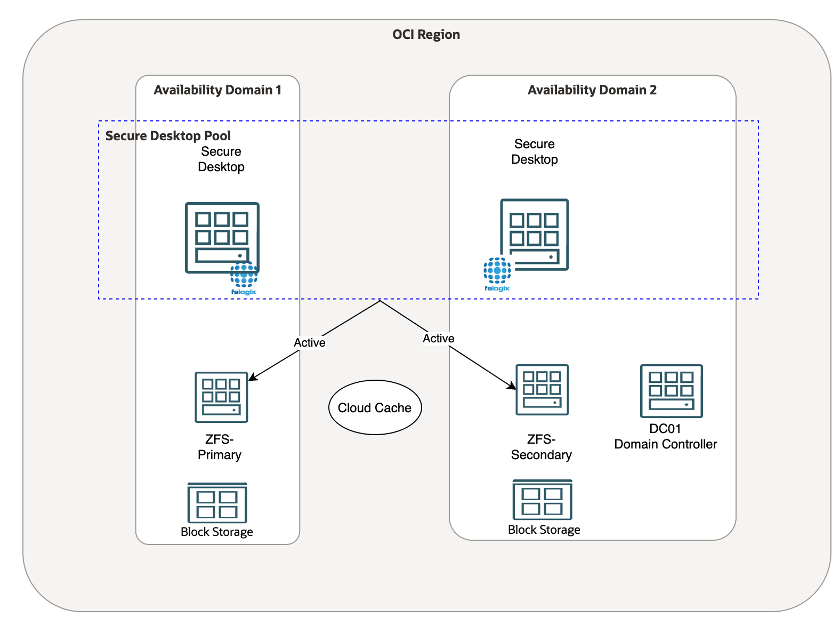
Architecture
In this architecture, we have a dedicated setup within our Oracle Cloud Infrastructure (OCI) region to support OCI Secure Desktops with FSLogix and ZFS SMB shares.
- ZFS SMB Setup
- ZFS appliance is deployed in two Availability domains from OCI Marketplace.
- ZFS appliance configured with Active Directory and enabled SMB service.
- OSD Environment Setup
- For the OSD environment, we have created a two different availability domains.
- A dedicated VCN with the CIDR block 10.73.0.0/16 has been provisioned for OSD.
- Within this VCN, a private subnet (10.73.10.0/24) has been created, and the DNS and domain settings are configured to point to the AD server.
- OSD Provisioning
- OSD is provisioned using the Oracle Resource Manager (ORM) stack available on the Oracle Marketplace.
- The ORM stack create policies, dynamic groups, and user access for the Secure Desktops service
- Active Directory Integration
- To enable AD integration for OSD, we will create an OCI Vault to securely store domain credentials and other sensitive information.
- These details will be referenced during the configuration process to seamlessly join OSD instances to the AD domain.
- FSLogix Configuration
- FSLogix installed on golden image with required Group policy settings.
- FSLogix profile containers redirected to ZFS SMB shares.
Task #1 — Create ZFSSA instances using marketplace image
You can deploy and configure the ZFSSA instance as a primary only, or as both primary and secondary with an SMB share for high availability. You can select a different shape when creating the ZFSSA instance with either the E4, E5 or E5 shape.
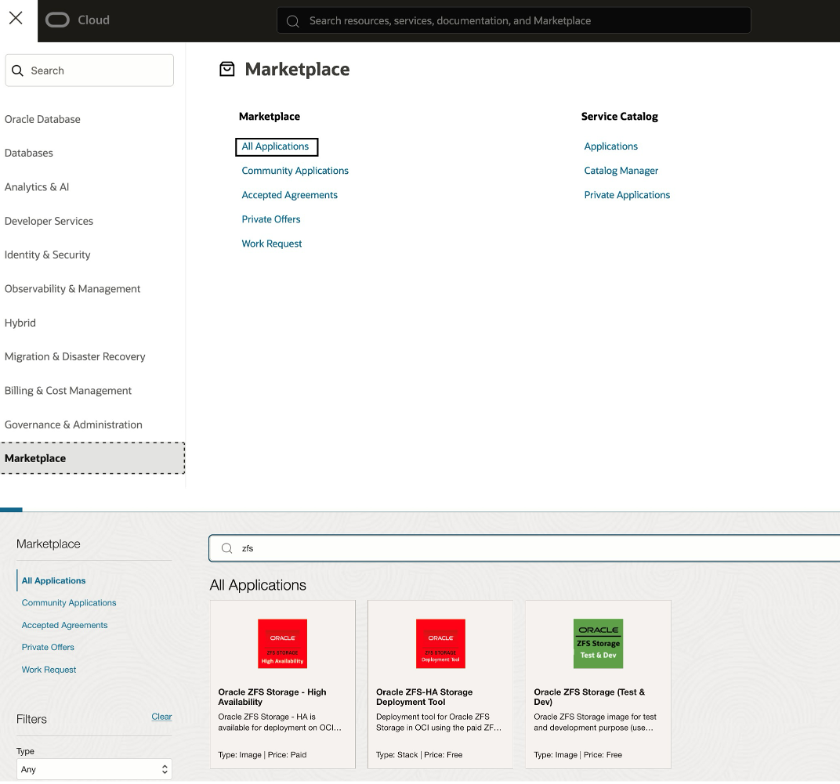
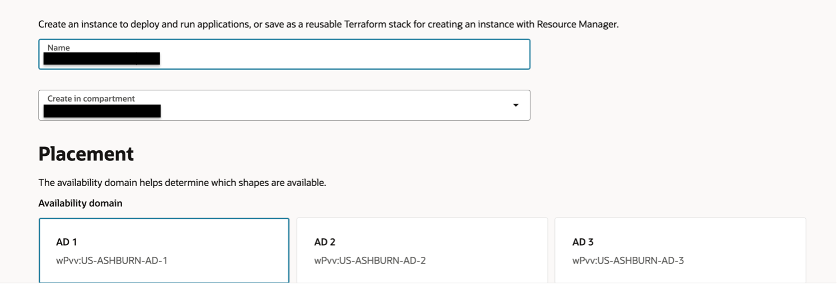
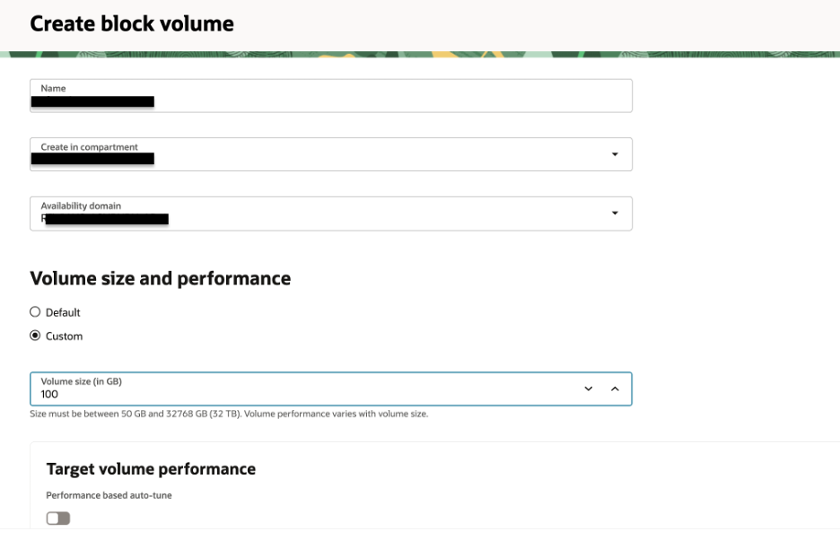
Select ZFSSA Storage Deployment tool and click on launch stack and choose your Name and Availability Domain
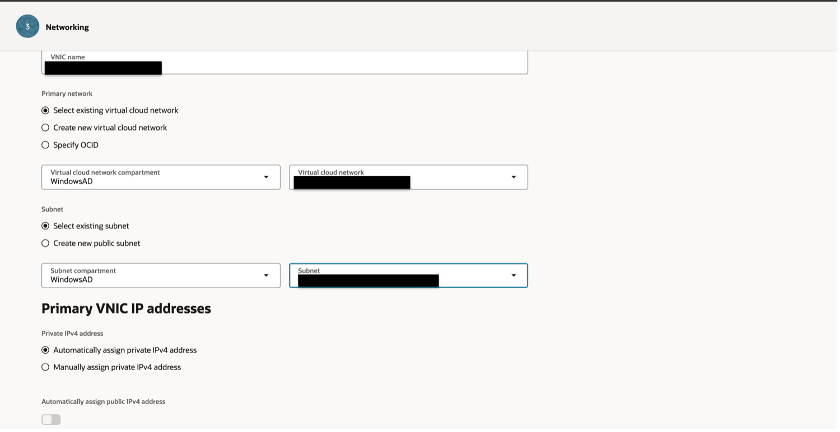
Choose Appropriate VCN and Subnet
Attach Block volume for ZFS SMB share. You can select size according to requirement
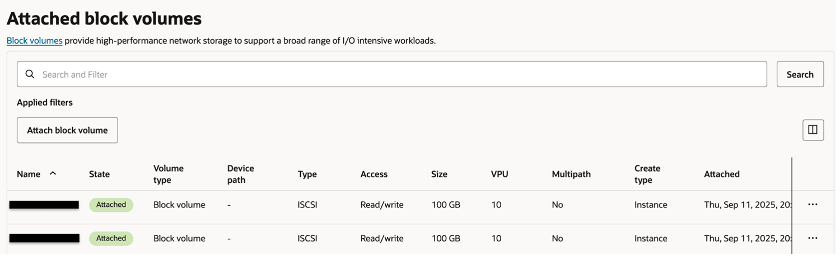
Create and attach two block volumes to the ZFSSA instance, so they can be used later to form a mirrored storage pool
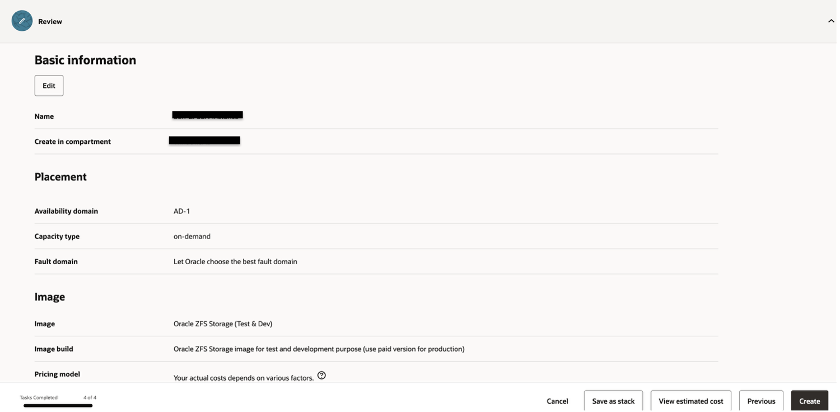
Review the basic information for the ZFSSA instance, then click “Create” to provision the instance
Task #2 — Configure the ZFSSA
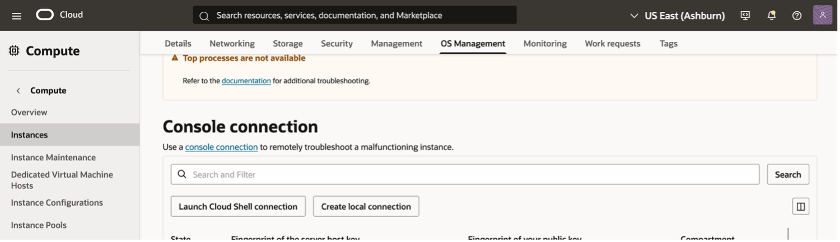
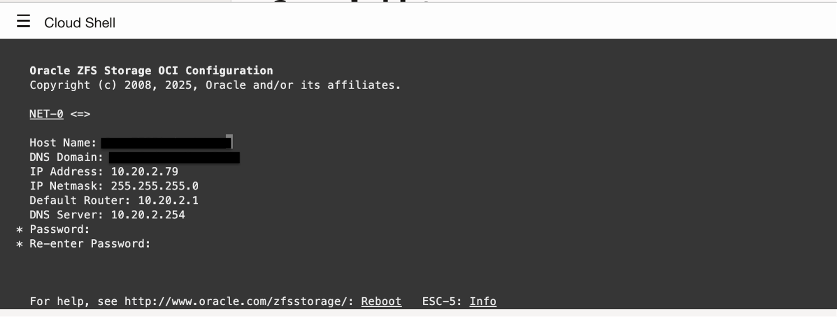
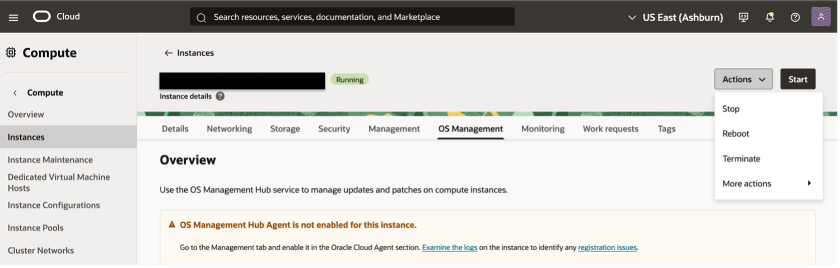
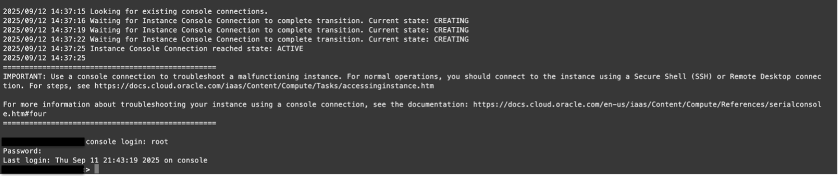
After creating the ZFSSA instance, go to Instance OS Management and select “Launch Cloud Shell Connection” to start the instance and perform the initial setup, including configuring the root user password. Press Return when it’s done.
After the ZFSSA instance is created and the root password is set, reboot the instance once
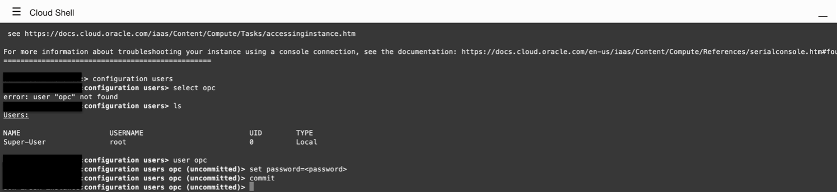
If a user other than root needs to log in to the ZFSSA Instance, create and set that user’s password as shown in the example below.
After setting up the ZFSSA instance, the next step is to launch a desktop within the same subnet. This will allow you to configure the ZFSSA file system, create SMB shares, and set permissions.
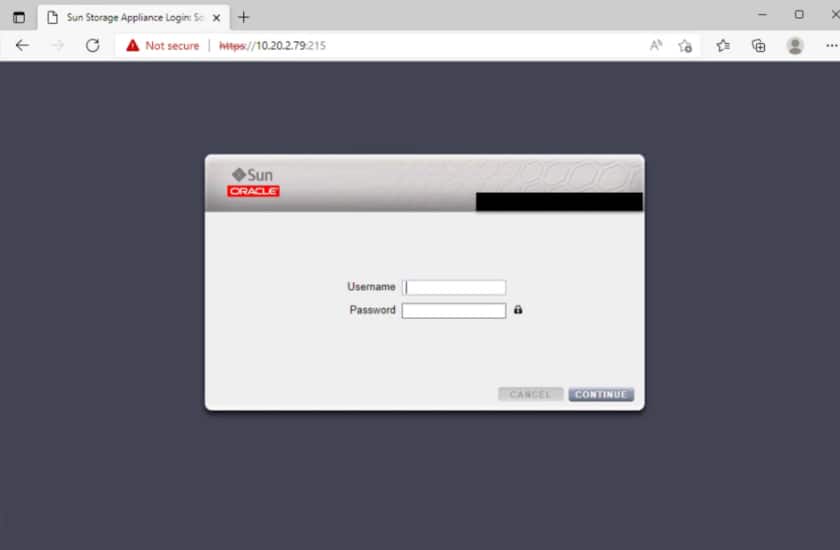
Login to the ZFFSA using the root username and password configured in the previous steps
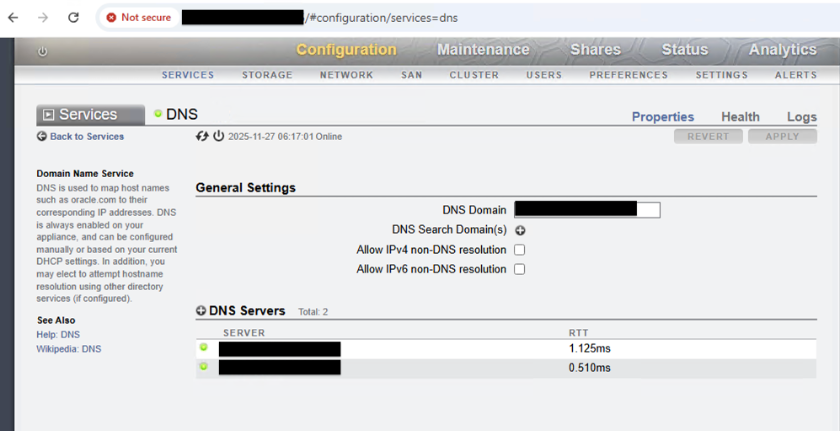
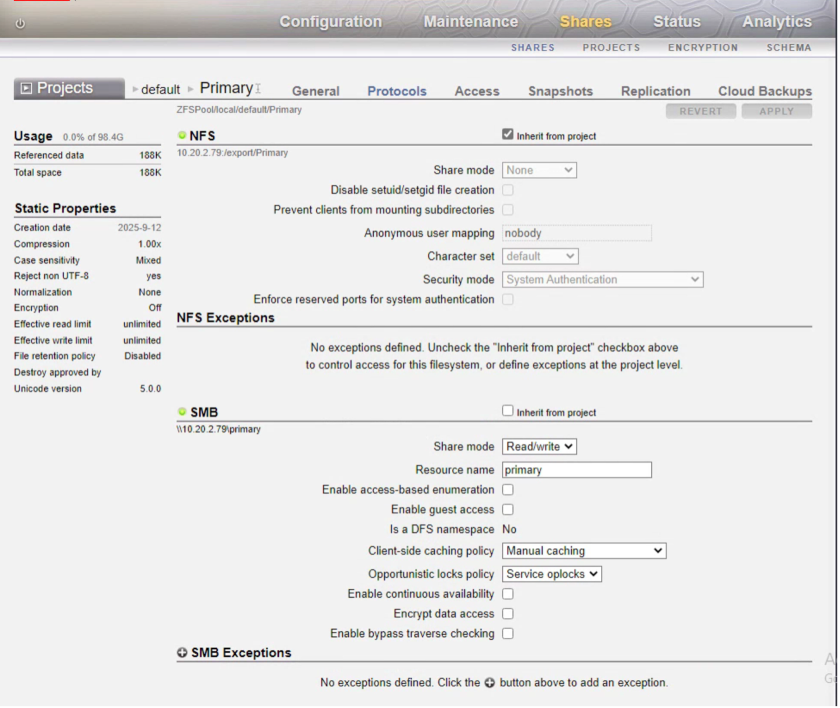
Navigate to Configuration > Services and enable the SMB service under Data Services, and verify DNS service is enabled and configured with the appropriate DNS servers.

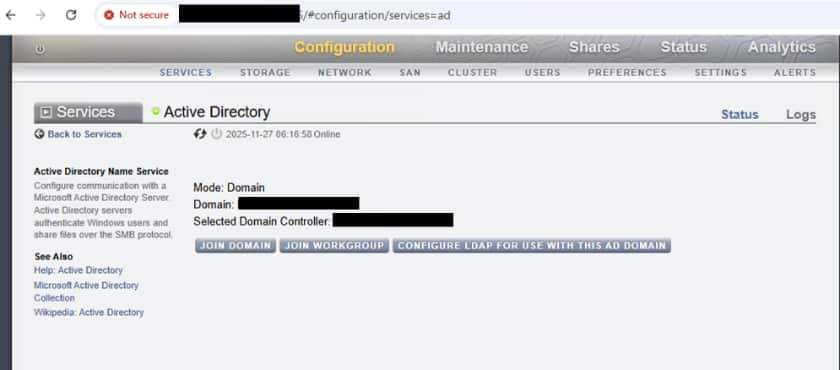
Select Active Directory under Directory Services and enable this service

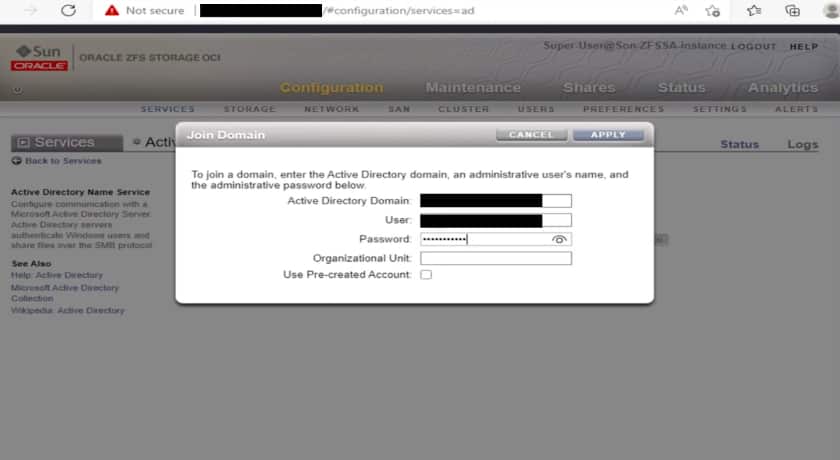
Click JOIN DOMAIN and enter the AD domain, User, Password then click APPLY to join the domain
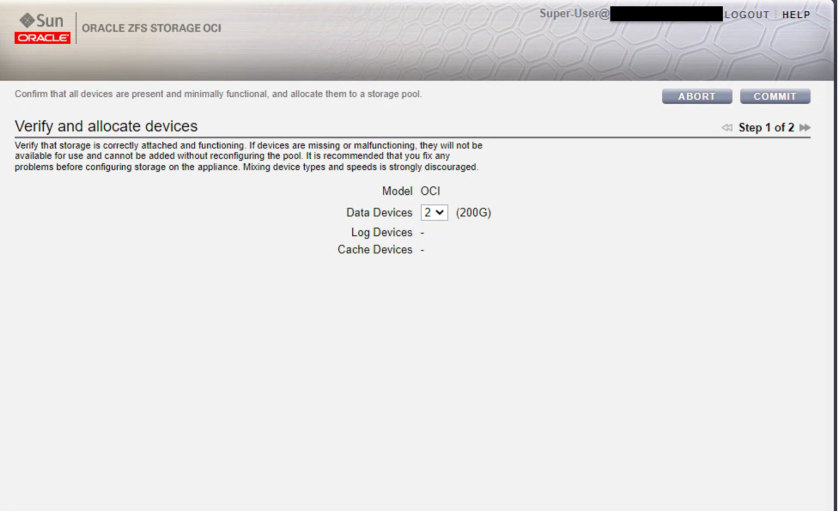
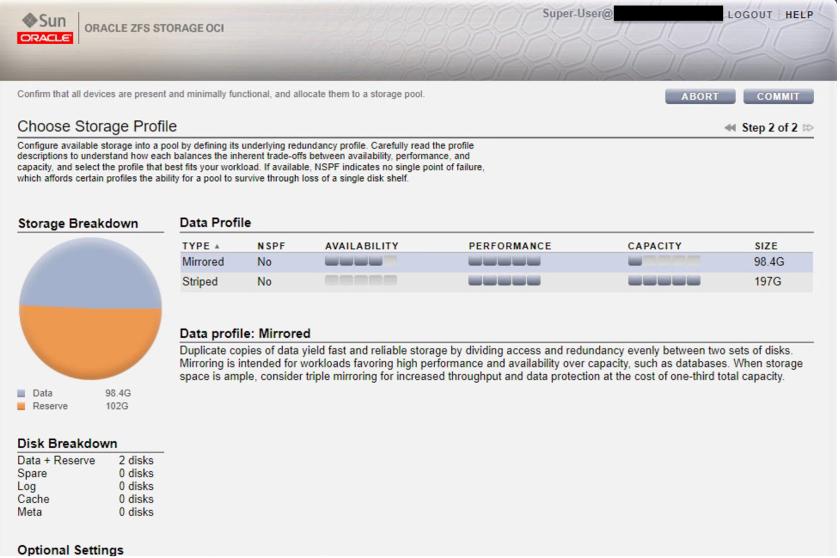
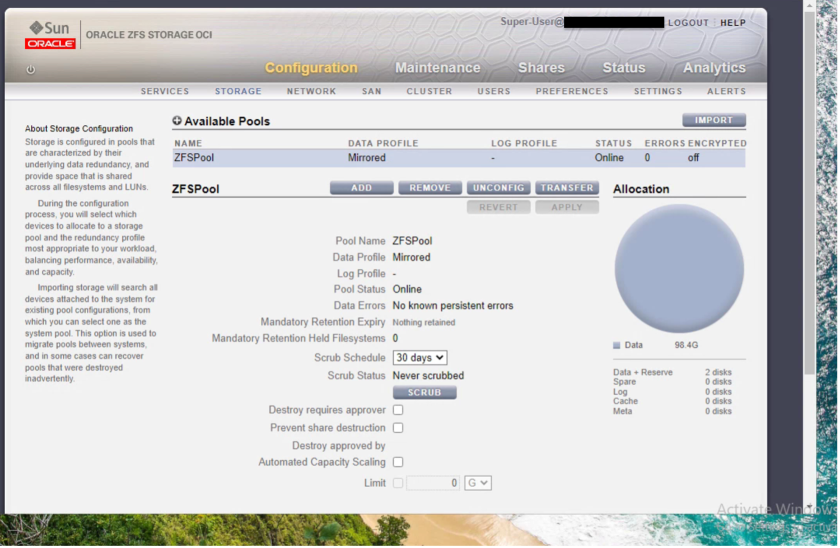
Navigate to Configuration => Storage in the ZFSSA UI to set up ZFSSA pool:
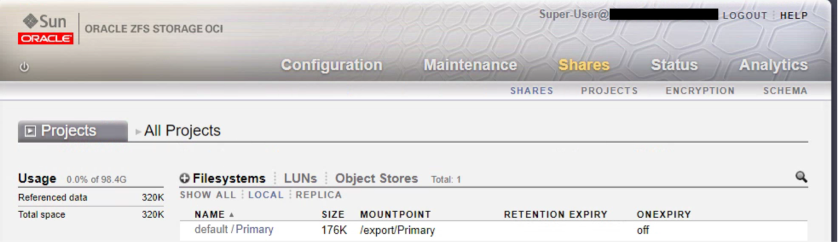
Next go to Shares tab, click Projects, Click plus to create a project name. Then create a File System by selecting Shares, click File Systems and click plus sign.
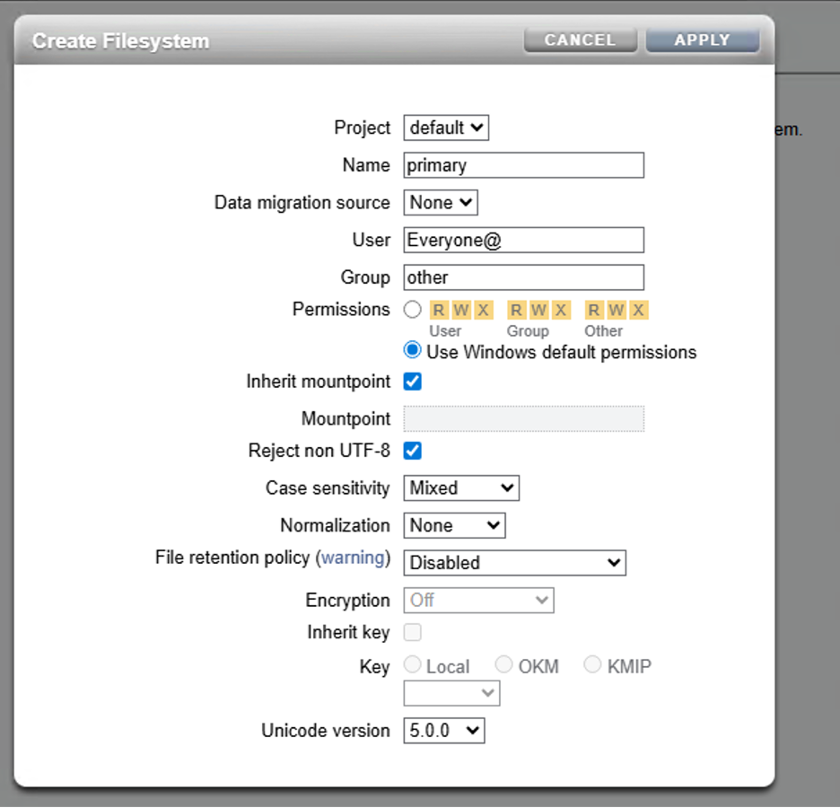
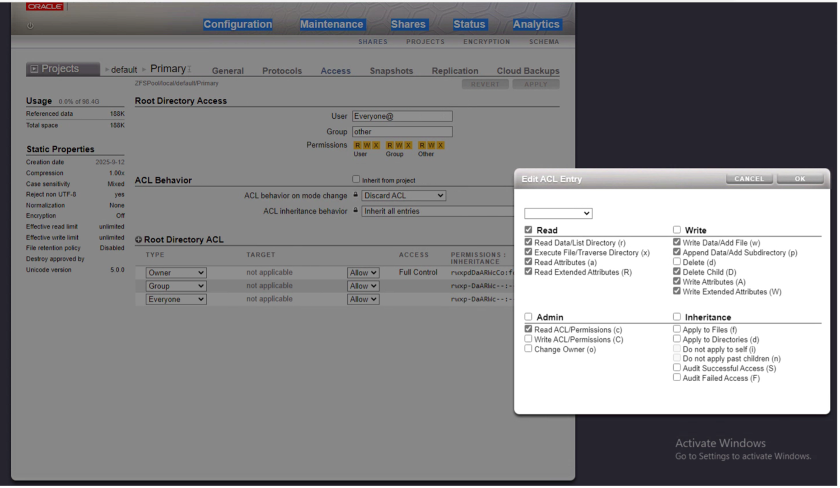
Note: The filesystem permission in the screenshot above is set as everyone@ which allows access to all users. To limit access, you should assign permissions to specific users or groups.
Navigate to Shares > Access, under Root Directory ACL, click plus sign to add new entry for Everyone Type, Click Edit Entry and set the desired permissions for the (Owner/Group/Everyone) Types as shown below:
Owner Type:
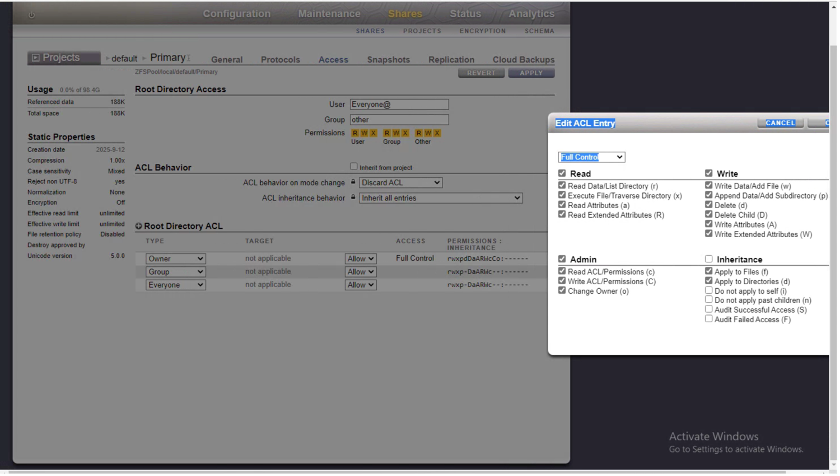
Group/Everyone Type:
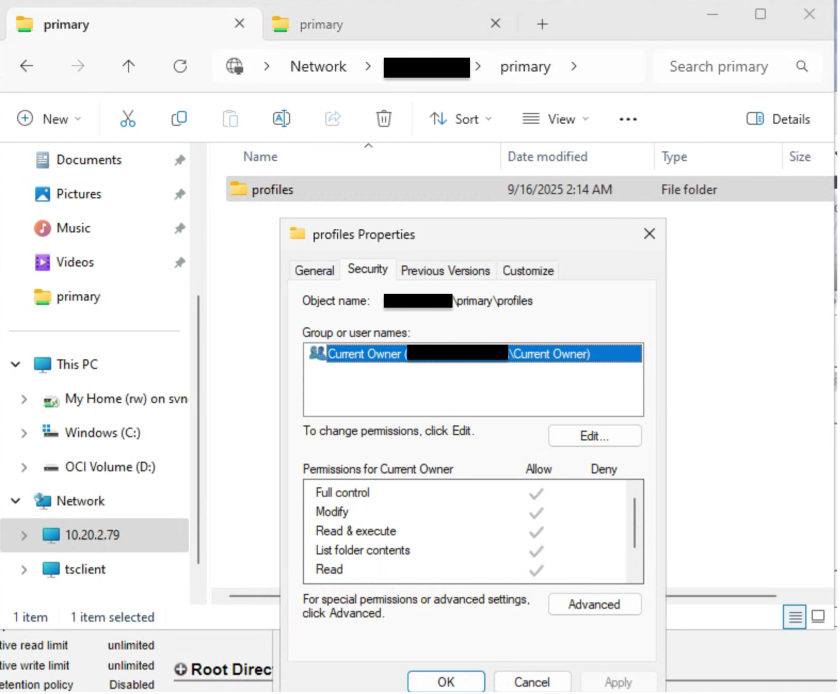
Task #3 — Configure NTFS permissions for ZFSSA SMB share
- Open File Explorer and select This PC
- Enter \<share> in the address bar at the top
- Create a “profiles” folder within the share to store all user profiles
- Right click on the profile folder and choose Properties
- Navigate to the Security tab
- Click on “Advanced” to configure
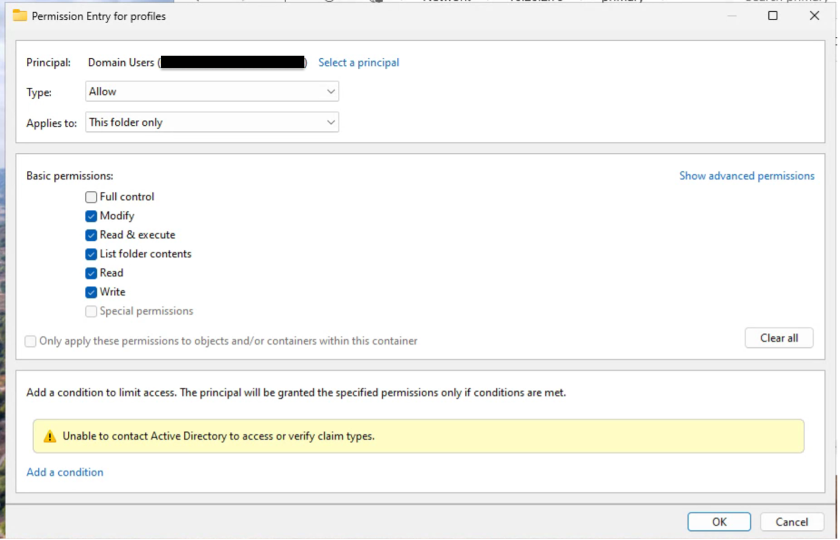
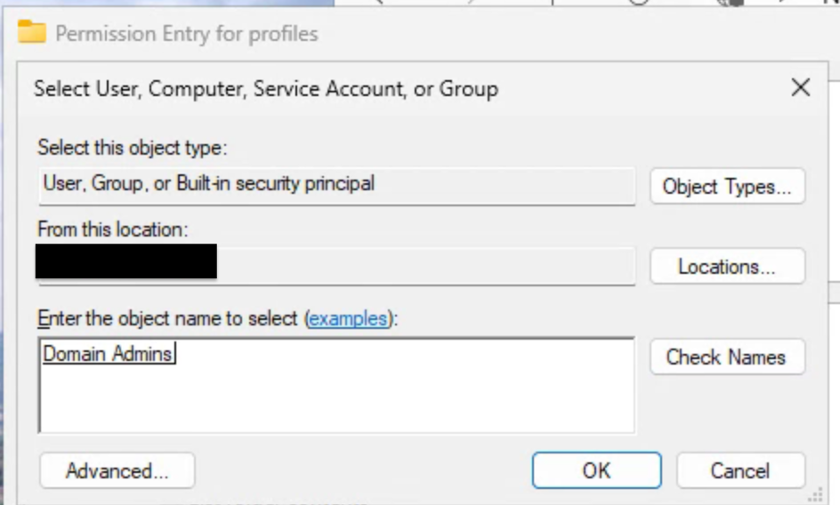
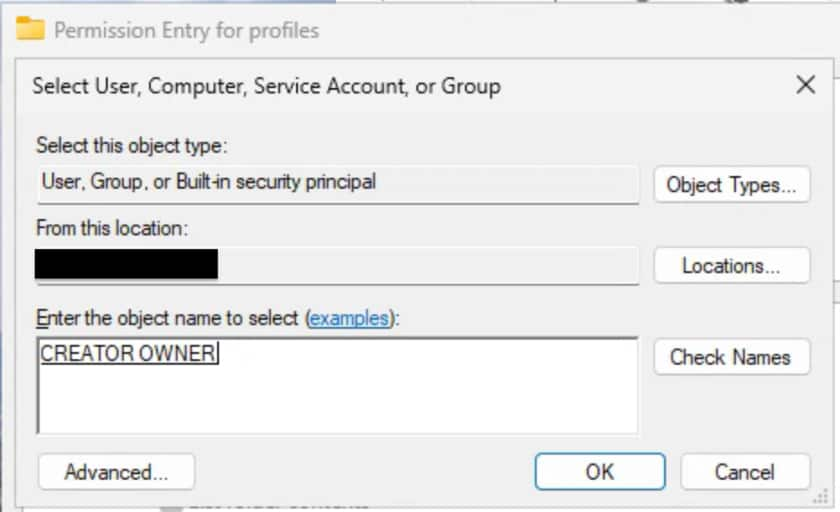
Adding new Principals (Domain Users, Domain Admins and CREATOR OWNER) for the “profiles” folder by following these steps: Domain Users • Click Add • In the new Permission Entry windows, click Select a Principal • Enter the name of the user/group (Domain Users) then click Check Names and OK
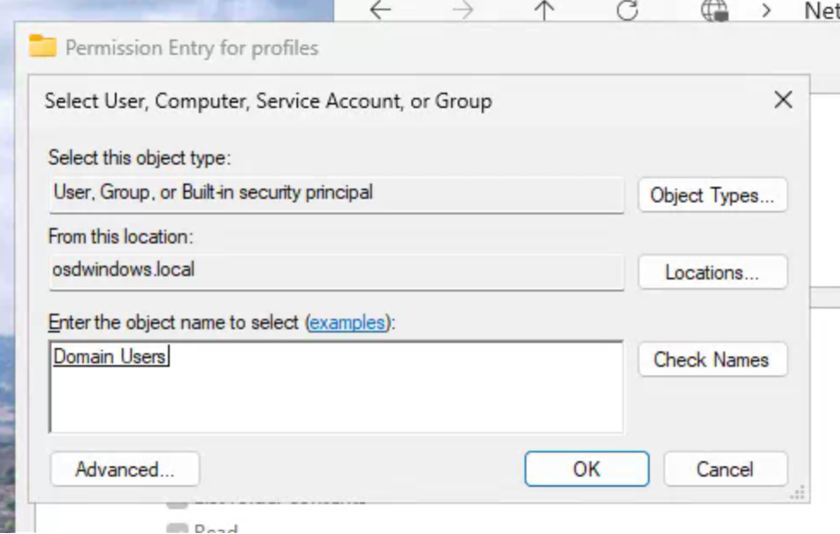
Set the permissions for ‘Domain Users’ as shown below and click OK
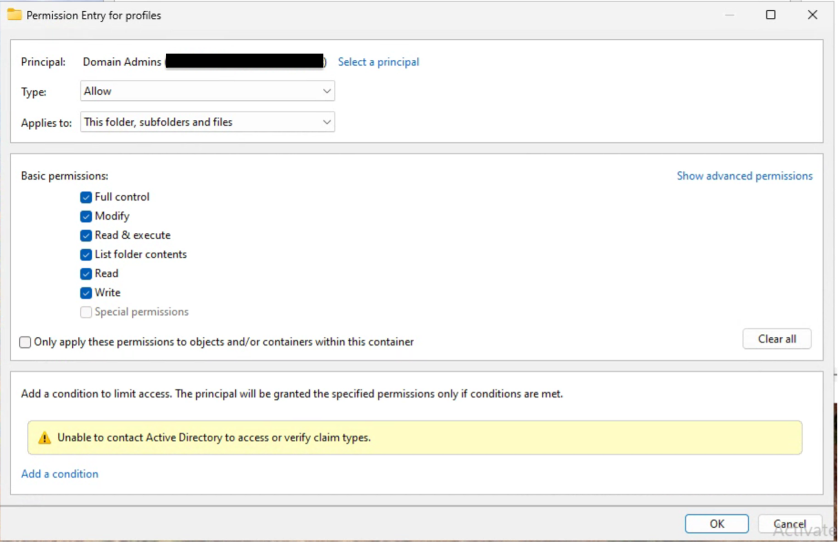
Repeat the same steps for the new Domain Admins and CREATOR OWNER users
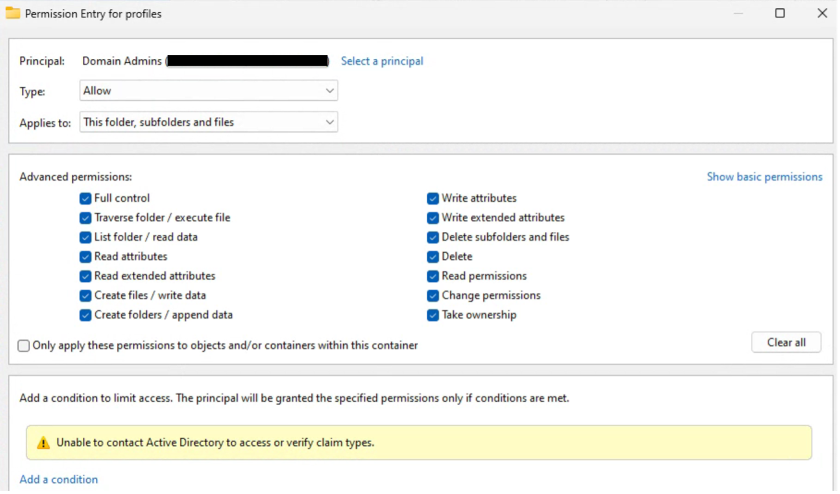
Set the permissions for ‘Domain Admins’ as shown below and click OK
Set the permissions for ‘Creator Owner’ as shown below and click OK

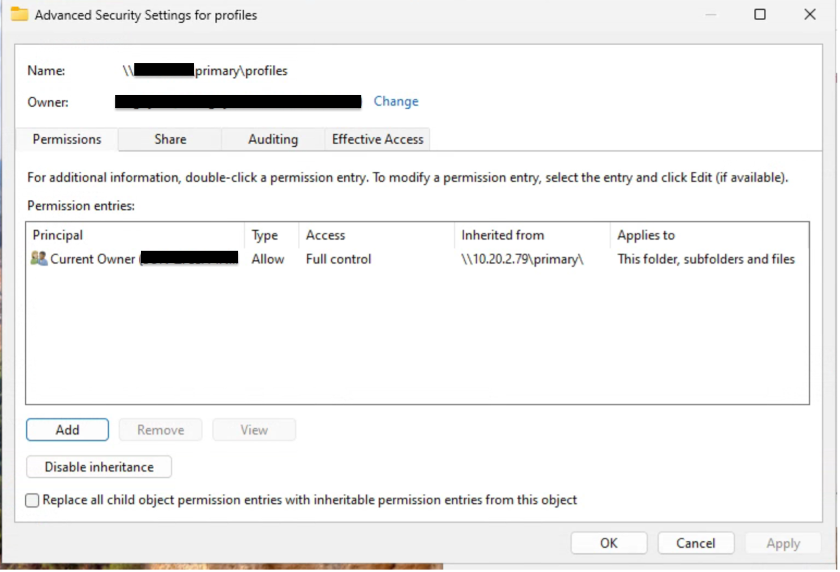
Remove all other users from the ZFSSA Profiles folder, retaining only these three users: CREATOR OWNER, Domain Admins, and Domain Users. To remove a user who has inherited permissions from the parent folder, you need to break the inheritance first by following these steps.
- In the Advanced Security Settings window, click on ‘Disable inheritance’.
- A prompt will appear. Select ‘Convert inherited permissions into explicit permissions on this object’. This allows you to edit or remove these permissions for specific users
- Find the user you want to remove (e.g., Current Owner), select them, and click Remove
- Click Apply and then OK
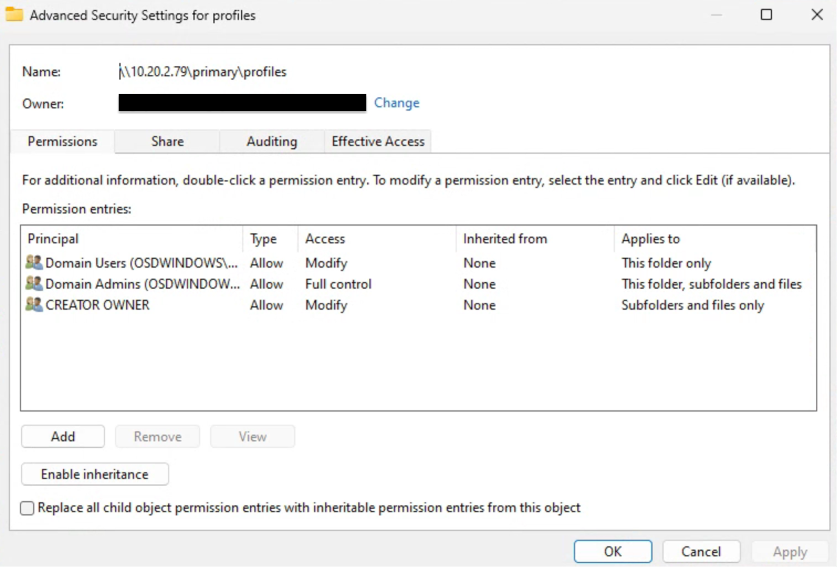
After completing these steps, the Advanced Security Settings for the Profiles folder should appear as shown below
Task #4 — Deploy and configure FSLogix in Secure Desktop to create a Golden Image
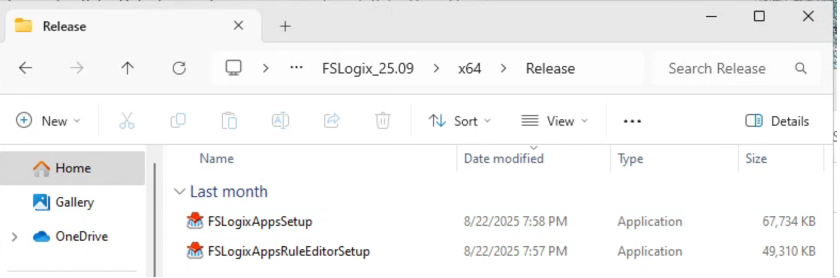
• Visit the official Microsoft download page for FSLogix and download the latest version of the FSLogix installer (https://learn.microsoft.com/en-us/fslogix/how-to-install-fslogix) • Install FSLogix on Windows 11 desktop and verify that FSLogix app is installed successfully

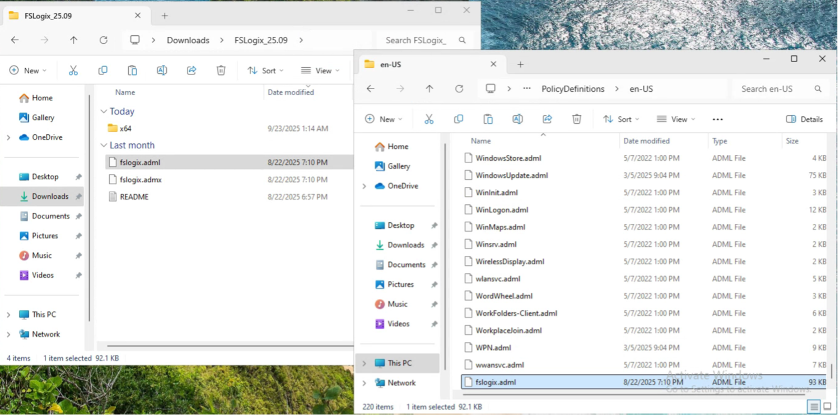
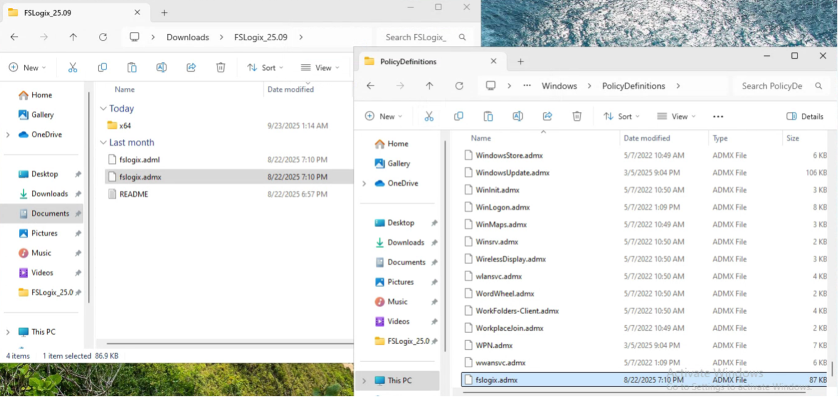
Navigate to the folder where the FSLogix setup files have been extracted Example: Directory of C:_25.09 08/22/2025 07:10 PM 94,357 fslogix.adml 08/22/2025 07:10 PM 89,024 fslogix.admx • Locate fslogix.adml and copy it to C:-us • Locate fslogix.admx and copy it to C:
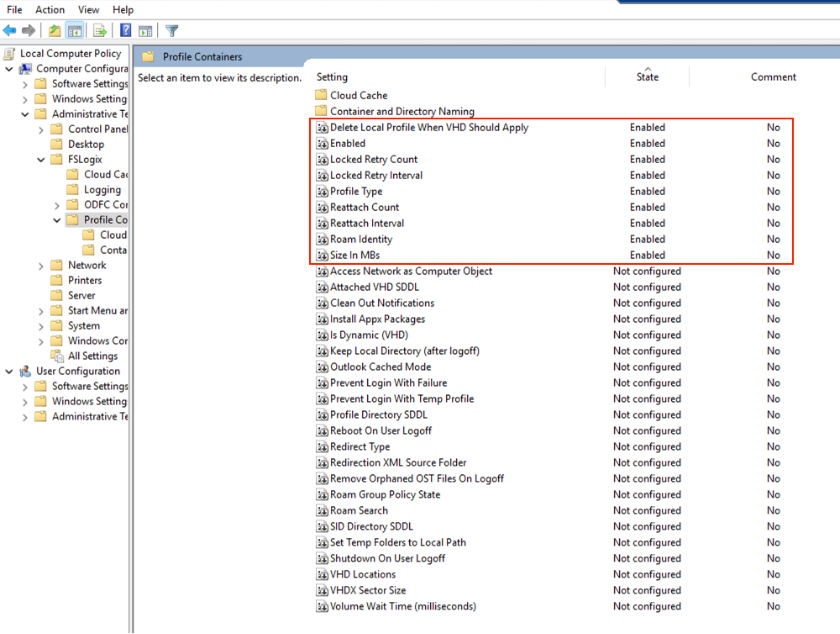
Next, configure Profile Container Settings • Type ‘gpedit.msc’ and press Enter • Navigate to: Computer Configuration>Administrative Templates>FSLogix>Profile Containers • Configure these key settings
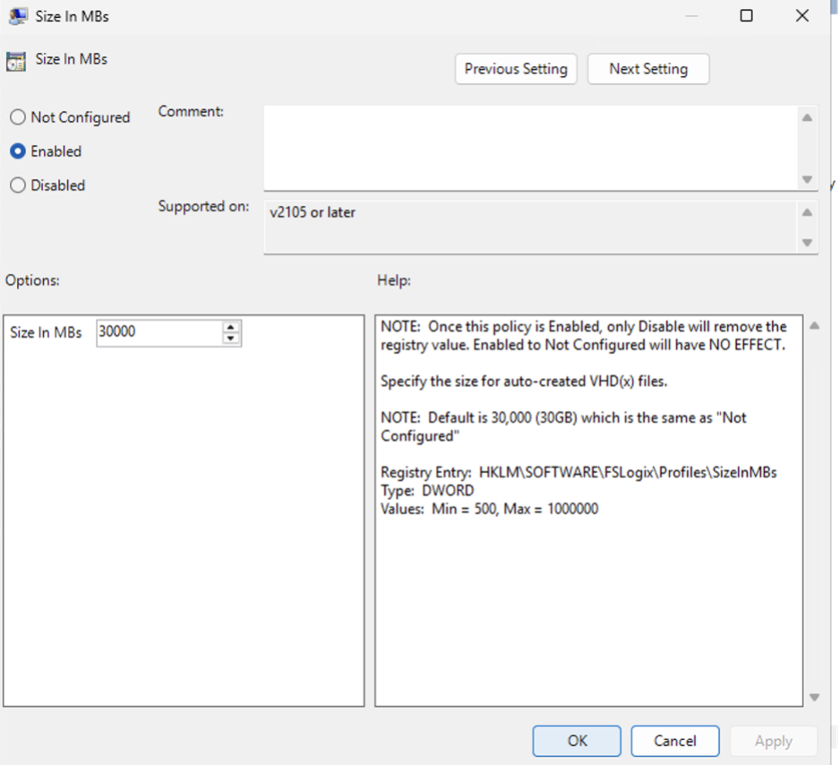
NOTE: The following settings in FSLogix Profile Container should be enabled, with the specific individual settings/values configured as indicated below.
- Delete Local Profile When VHD Should Apply : Enabled
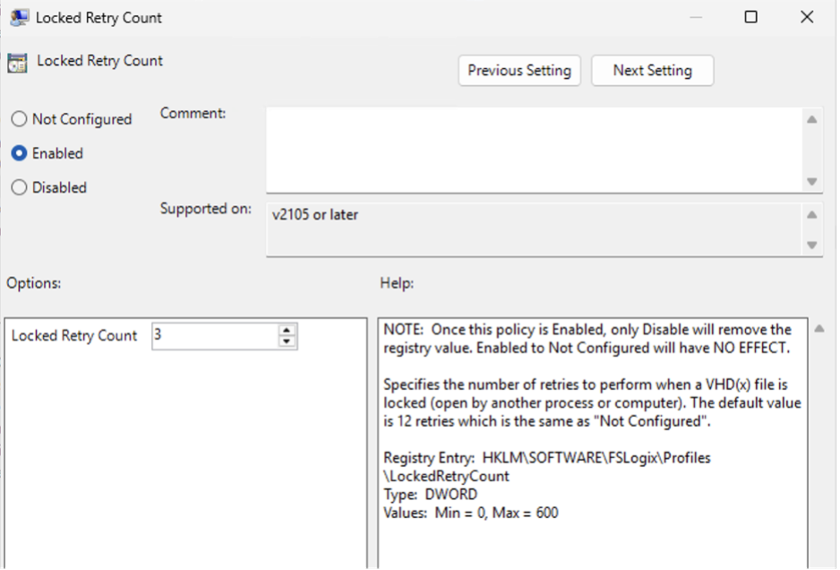
- Locked Retry Count (count = 3)
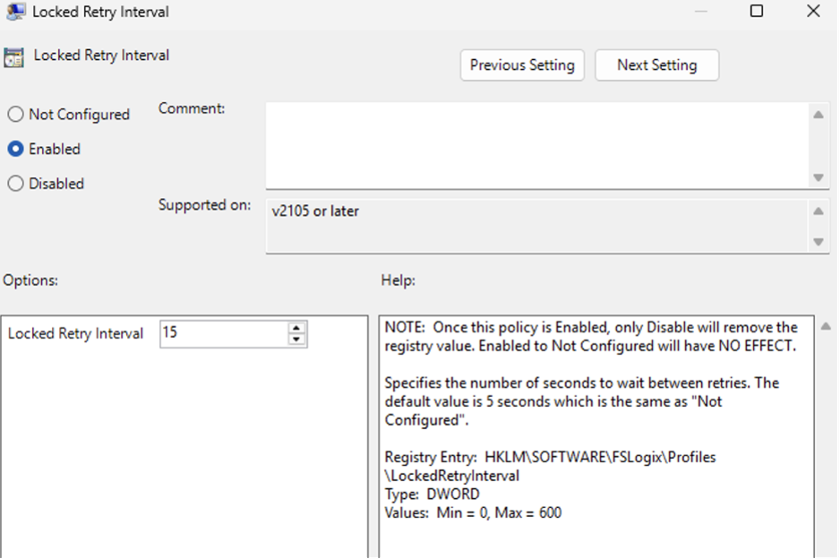
- Locked Retry Interval (interval = 15)
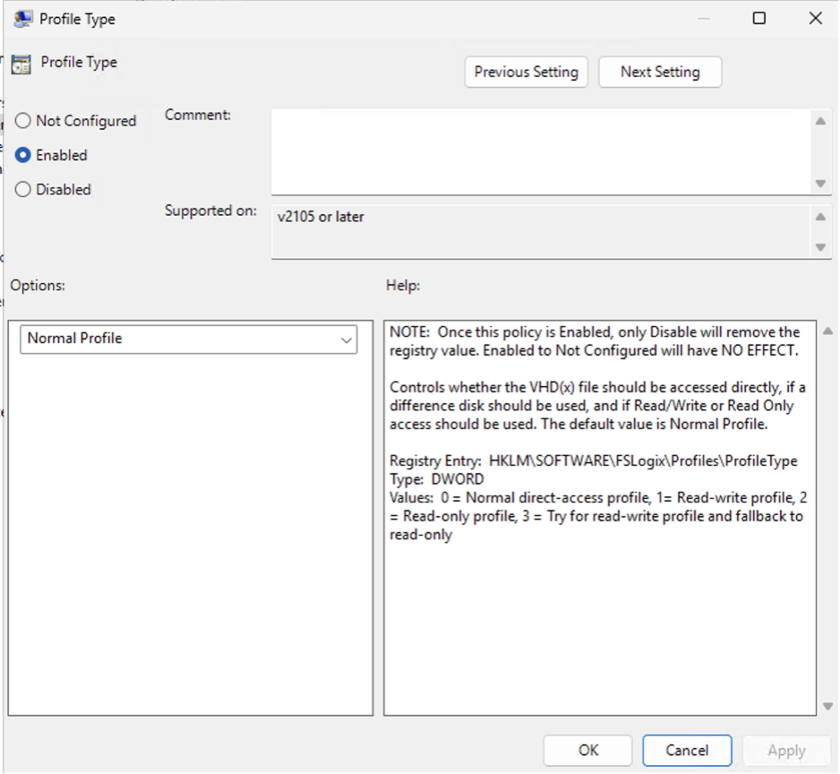
- Profile Type (profile type = Normal profile)
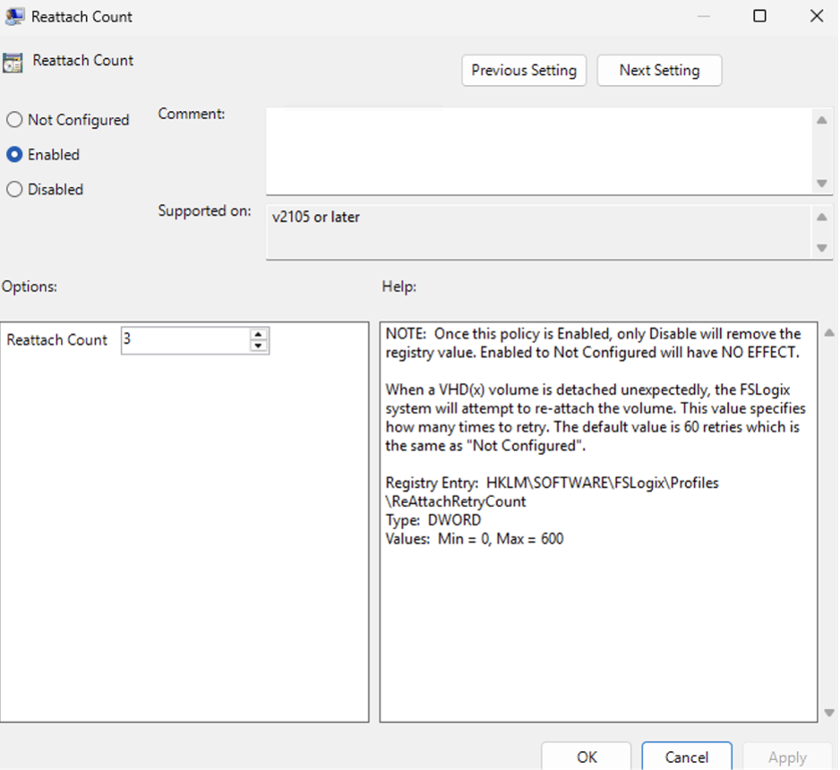
- Reattach Count (count = 3)
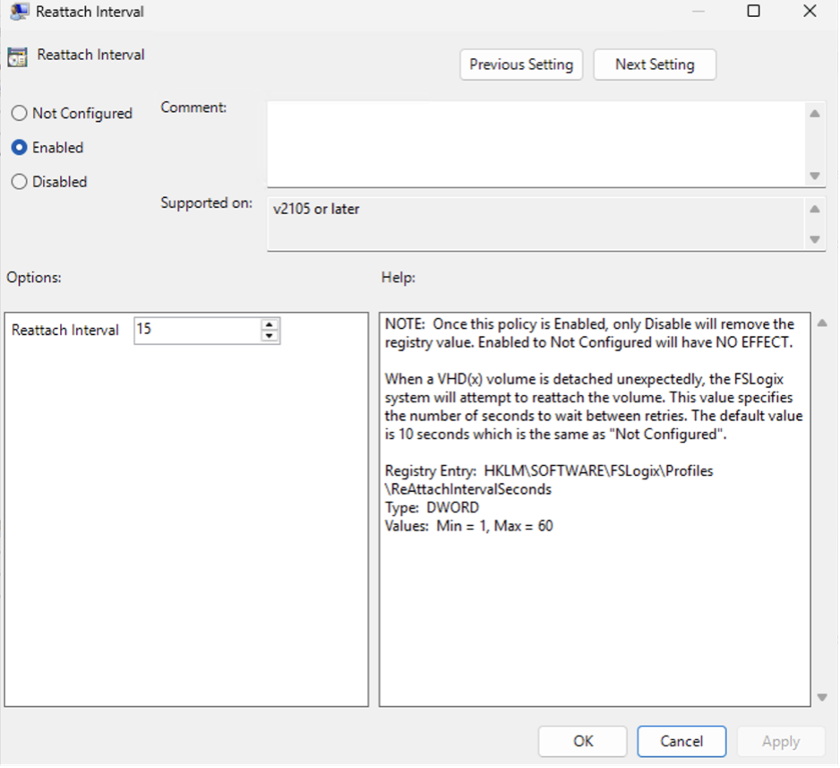
- Reattach Interval (internal = 15)
- Roam Identity (enabled)
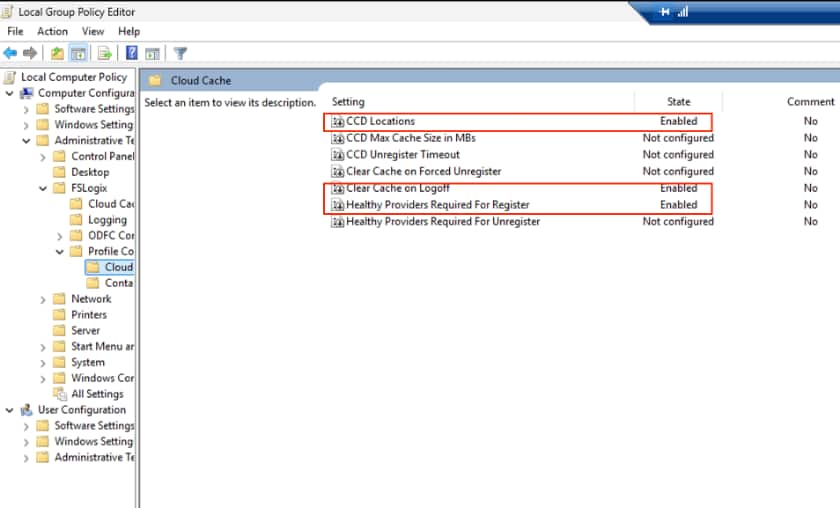
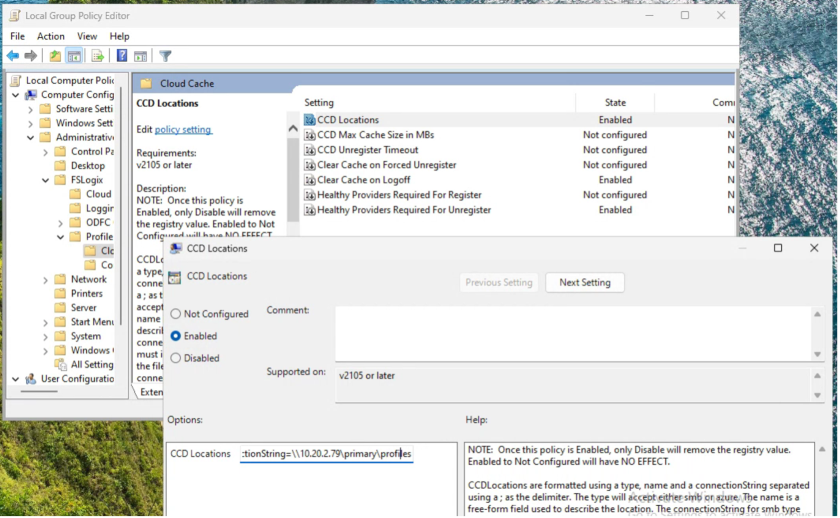
- Size in MBs (size = 30000) Go to Computer Configuration>Administrative Templates>FSLogix>Profile Containers> Cloud Cache
- CCD Location (Set it to Enabled then under CCD Locations then enter your ZFSSA share path: type=smb, name=””,connectionString=‘\<smb-share>’ Example: type=smb,name=”SMB Primary”,connectionString=\10.20.2.79
- Clear Cache on Logoff (set itset it to Enabled)
- Healthy Providers Required for Register (set it to Enabled and value = 1)
See screenshots below

Task #5 — Create a custom image and test FSLogix
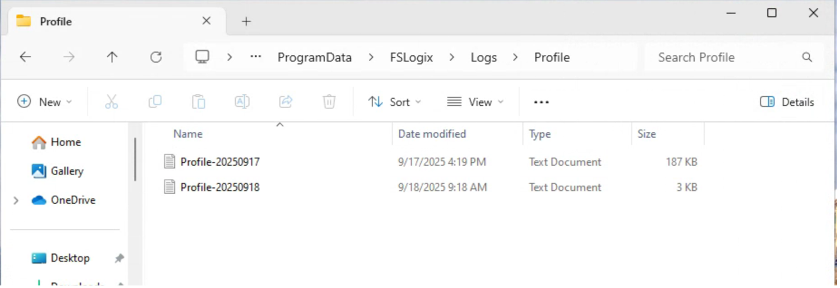
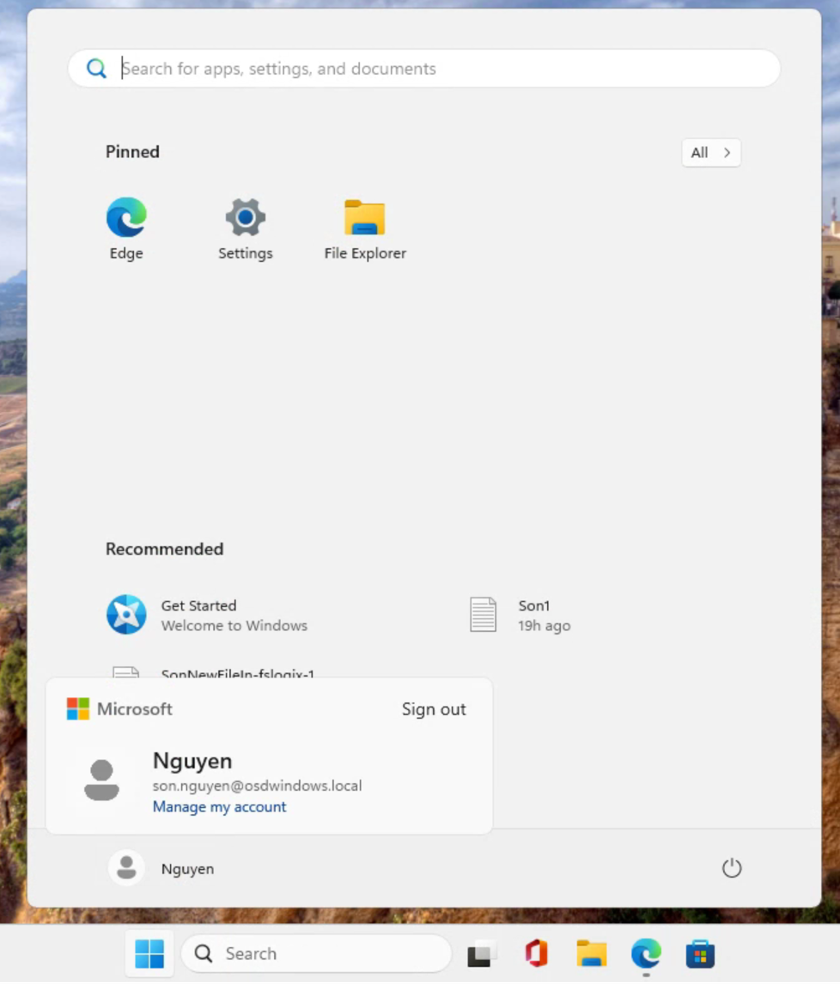
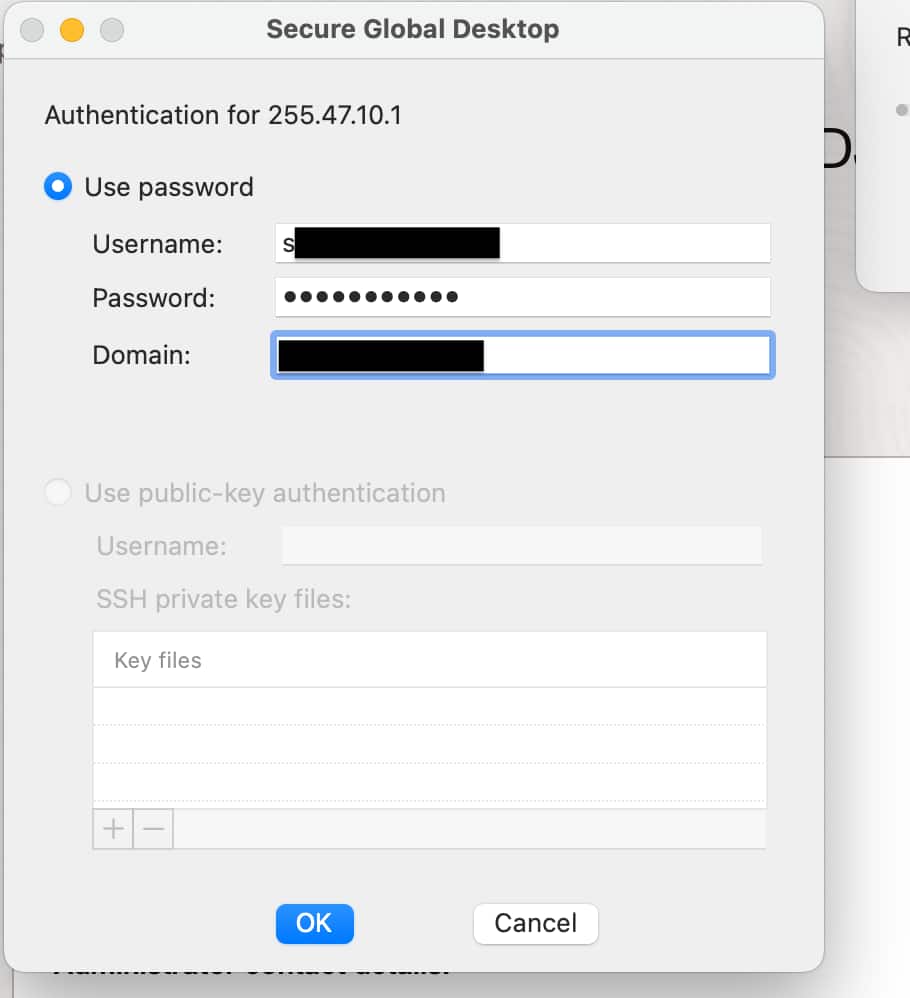
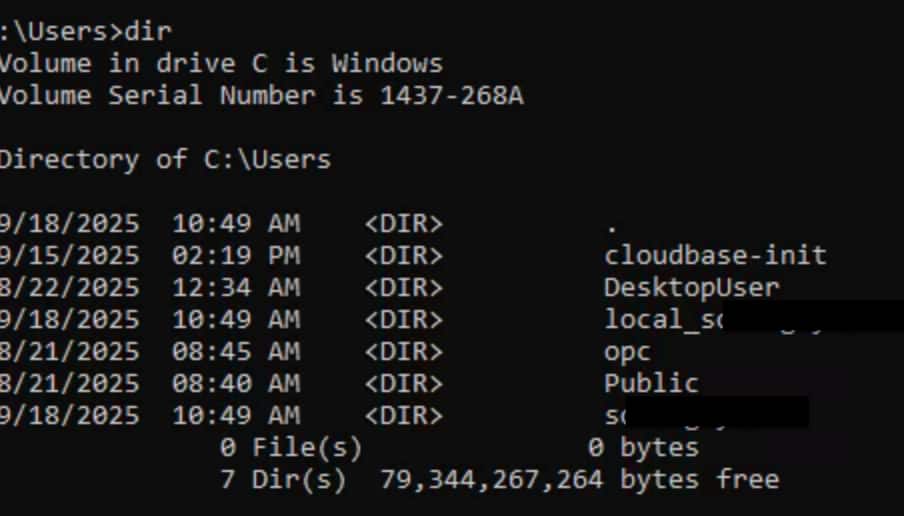
• After applying all the changes, create a custom image of the Windows 11 desktop with the required Windows image tags • https://github.com/oracle-devrel/technology-engineering/blob/main/cloud-infrastructure/virtualization-solutions/oracle-secure-desktops/ad-integration/files/index.md • Next, provision a secure desktop pool using the custom image • Launch a desktop using your AD credentials • Go to the ZFSSA SMB share (e.g., \zfssa-ip) to verify whether a VHD/VHDX folder for your user is created • Examine the FSLogix logs located at the default path: C:. Select the most recent profile log file and review it for entries confirming successful profile mounting and activity
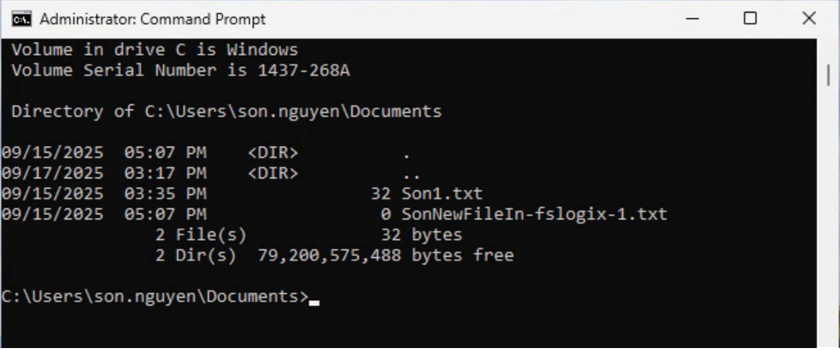
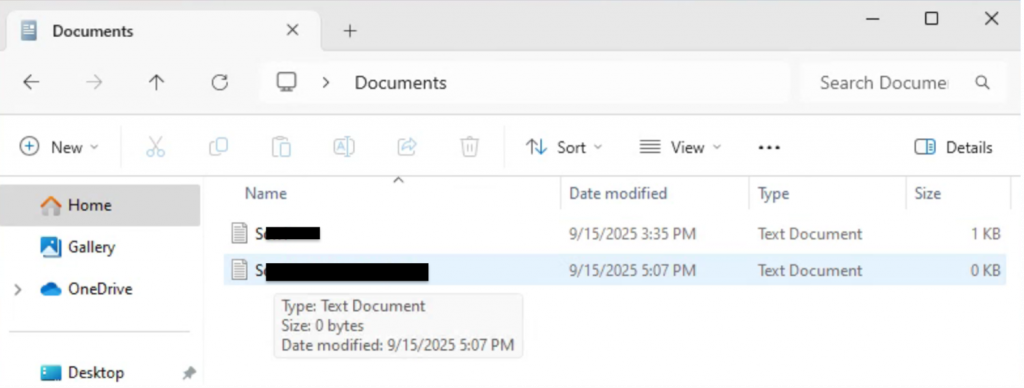
Confirm that both and folders exist in the C:directory
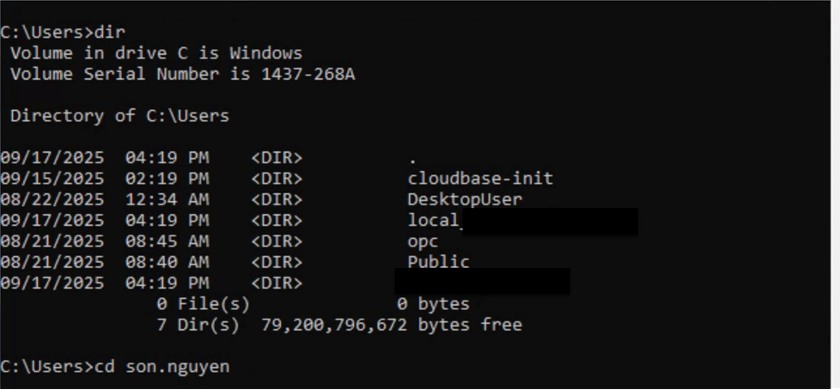
Create a test folder and files within the C:<AD_User> directory
Sign out of the Windows 11 desktop (very important step) Note: Signing out of Windows 11 is crucial for FSLogix to function correctly, as it ensures that the user profile data is properly saved to the FSLogix profile container located on the ZFSSA.

Delete the existing desktop


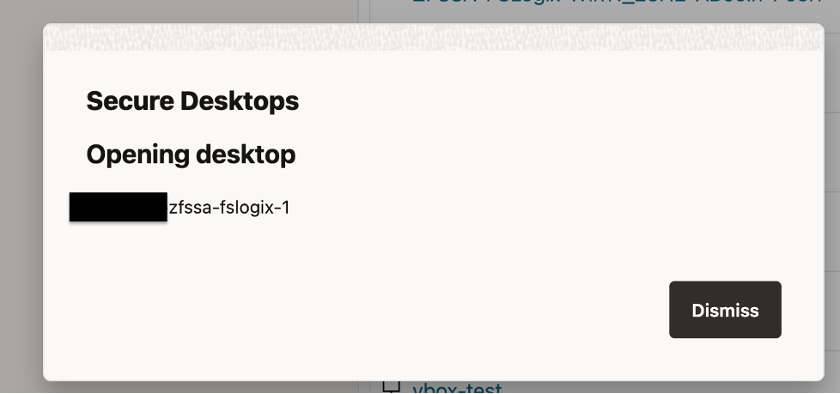
Launch a new desktop
Acknowledgements
- Author
- Nikhil Verma, Principal Cloud Architect, NACIE