In this article, we look at how to back up your Oracle Cloud Infrastructure (OCI) Database service to OCI Object Storage using RMAN with encryption. Database comes with a fully managed automated backup offering, which is easy to set up and configure, so why do we need to use another method to perform a backup of the Oracle database?
You might have several reasons, one of which is retaining the backup copy for more than the default 60 days for business requirements or compliance. You might also want to restore the backup copy to another OCI region or even restore the database to an on-premises host.
You can easily tweak the steps shown in this article to cover the different ways of backup can be performed. For example, it can be tuned to back up Oracle Database on-premises to OCI Object Storage or to store backup copies in an archive Object Storage for a longer retention period.
Creating an Object Storage bucket
First, we create an Object Storage bucket.
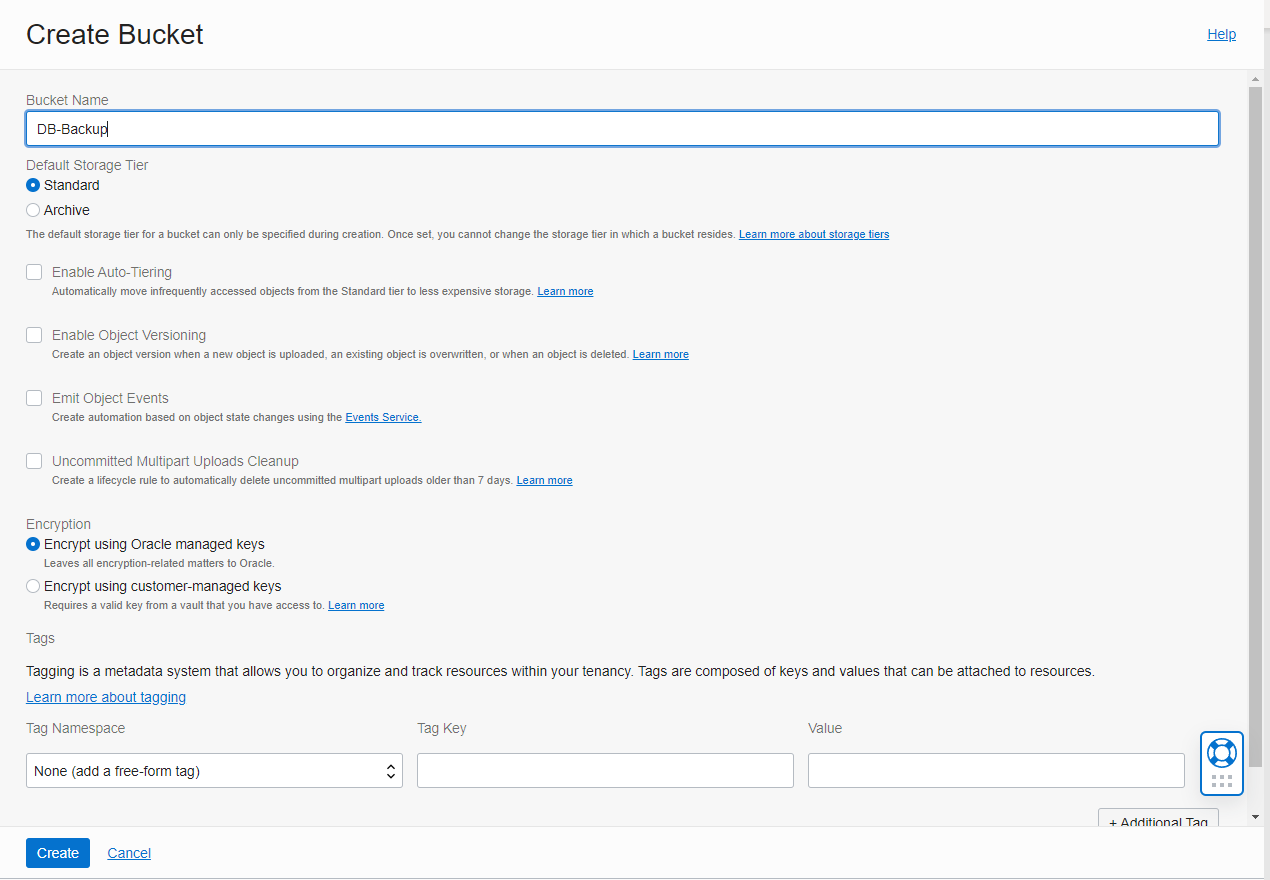
We can create a bucket using the default value if no existing bucket has been created. Having a separate bucket to store our Oracle Database backup is a good idea.
When the bucket has been created, we need the bucket URL. Because I I’m creating the bucket in the Sydney region, the bucket URL is https://objectstorage.ap-sydney-1.oraclecloud.com.
Other than the Object Storage URL information, we also need the following information:
-
Public fingerprint API key
-
Tenancy OCID
-
User OCID
-
Bucket name
Install Oracle Database Cloud Backup Module on the database node
Next, we install the Oracle Database Cloud Backup Module. Download the installer and install it on the database node.
Another commonly asked question is how to determine the Database service IP address when it’s running. You can obtain that information by checking the Nodes section in the Console.

For a public IP address, we can SSH to the node IP address directly, and for a private IP address, we can use a bastion host:
Ensure that you’re running the command using your Oracle username instead of opc, so that you don’t run into permission and ownership issues later.
Let’s create directories to store encryption key files and library files. We use the path to these directories during the Oracle Database Cloud Backup Module installation.

We also create three more directories to store the wallet for authentication and authorization, library files, and API key files. You can generate public and private API key files using OpenSSL and obtain the fingerprint.

Now we can run the installation command:
java -jar oci_install.jar \
  -configFile /home/oracle/oci/configfile.ora \
  -host https://objectstorage.us-ashburn-1.oraclecloud.com \
  -pvtKeyFile /home/oracle/oci/keys/oci_api_key.pem \
  -pubFingerPrint 22:97:d0:5b:50:00:00:00:00:00:00:00:00:11:da:78 \
  -tOCID ocid1.tenancy.oc1..********************************l7ygvujdqjkaq \
  -uOCID ocid1.user.oc1..**********************************lyz3uo2jqq \
  -libDir /home/oracle/oci/lib \
  -walletDir /home/oracle/oci/wallet \
  -bucket RMAN_BACKUP
Verify the content of the directory to see if go ahead and connect to RMAN.
Running RMAN for the first time
Finally, connect to RMAN and configure it for the initial usage.
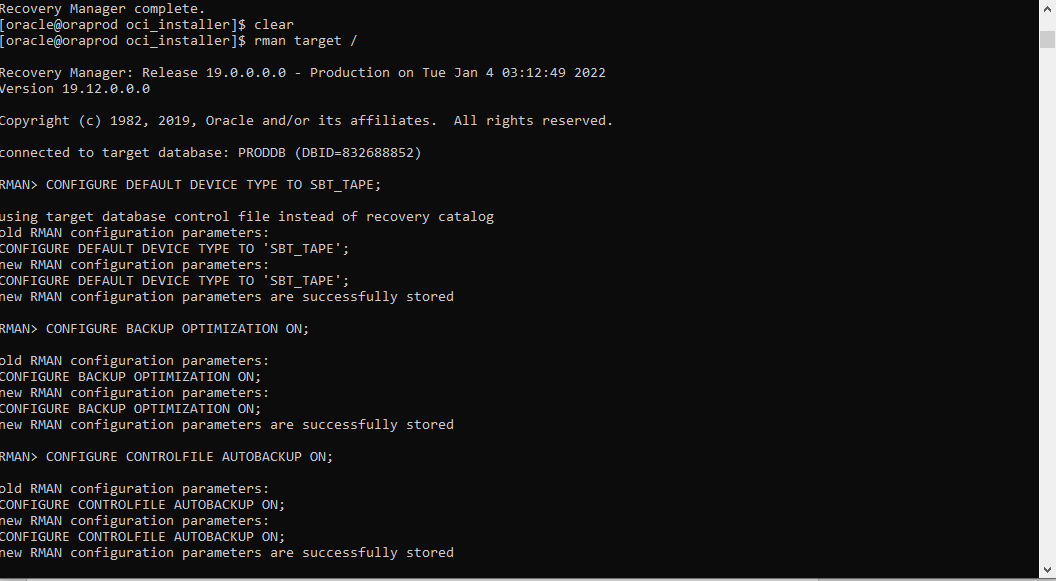
Before we can start our RMAN backup, let’s set up the configuration parameters.
RMAN> CONFIGURE DEFAULT DEVICE TYPE TO SBT_TAPE;
RMAN> CONFIGURE BACKUP OPTIMIZATION ON;
RMAN> CONFIGURE CONTROLFILE AUTOBACKUP ON;
RMAN> CONFIGURE CONTROLFILE AUTOBACKUP FORMAT FOR DEVICE TYPE SBT_TAPE TO '%F';
RMAN> CONFIGURE ENCRYPTION FOR DATABASE ON;
We can also set different retention period for this backup by running the following command:
CONFIGURE RETENTION POLICY TO RECOVERY WINDOW OF 90 DAYS;The last command, which turns on encryption for the database, is commonly missed, which results in a media-related error when the backup is running. Oracle Database service backup to cloud must be encrypted either through TDE, which we achieve here, or using passphrase encryption.
By default, RMAN uses TDE-based encryption. We can enable passphrase encryption by using the SET ENCRYPTION command.
Before we can start our backup, we have one final command:
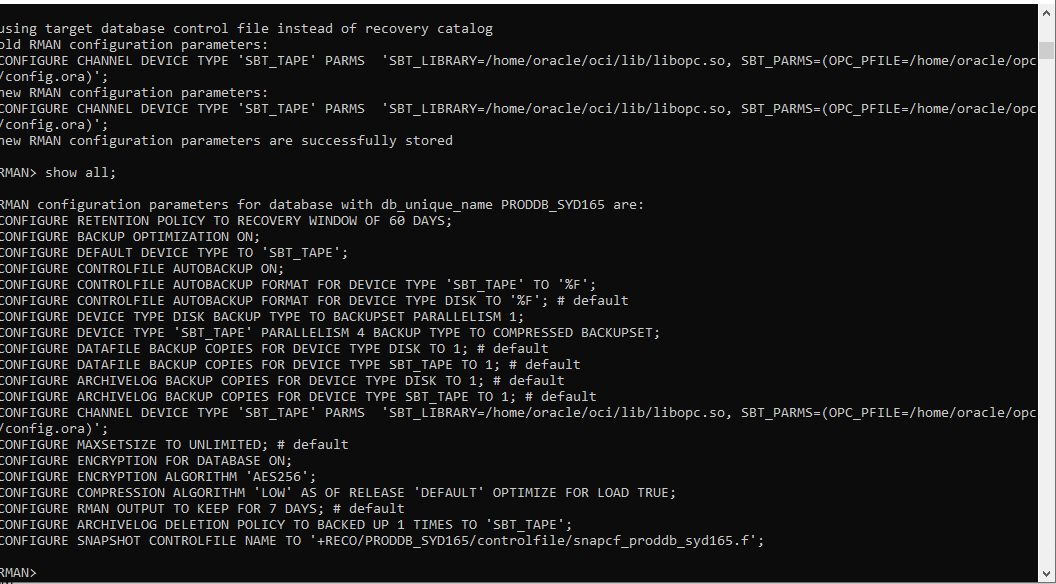
configure channel device type sbt parms='SBT_LIBRARY=/home/oracle/oci/lib/libopc.so, SBT_PARMS=(OPC_PFILE=/home/oracle/opc/config.ora)';This command configures RMAN to use an SBT device and points to the config file specified earlier. We can quickly check all RMAN parameters set by running the show all; command.
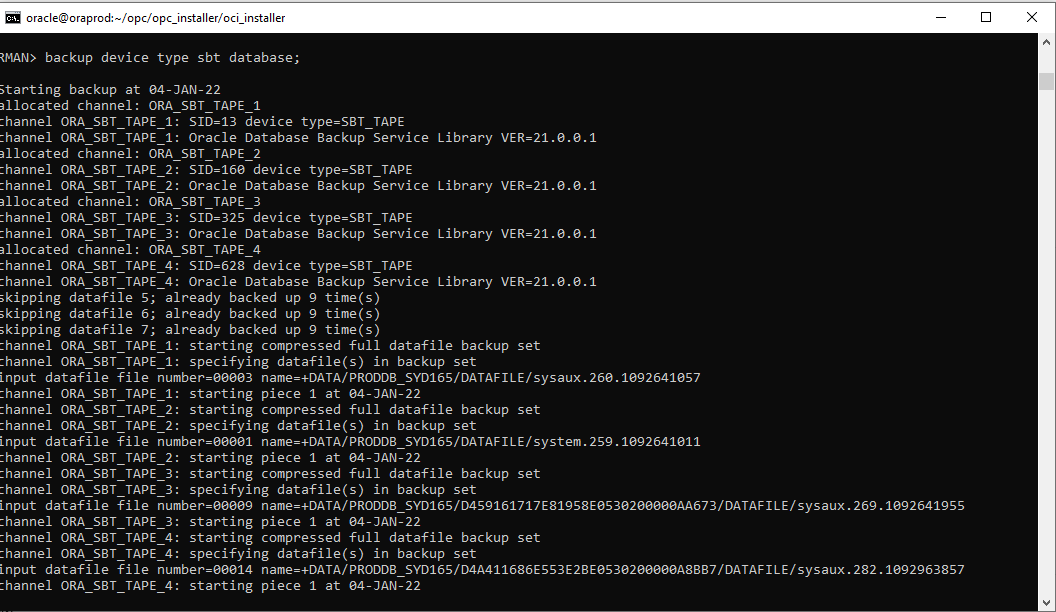
We run our manual backup with the command, backup device type sbt database. You can also back up a specific pluggable database if you have SYSBACKUP or SYSDBA privilege by connecting to the pluggable database.
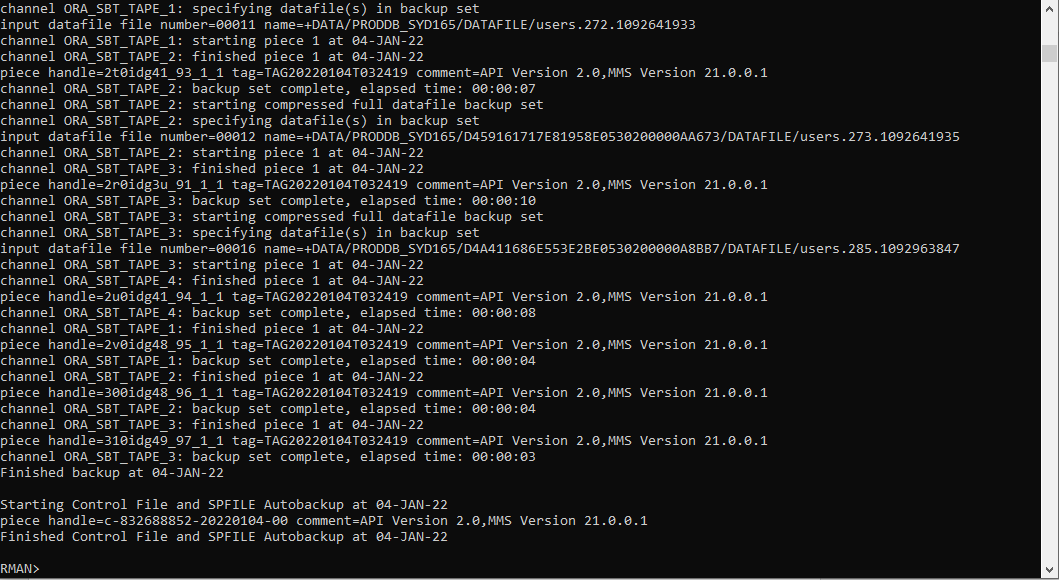
Our backup has been performed successfully!
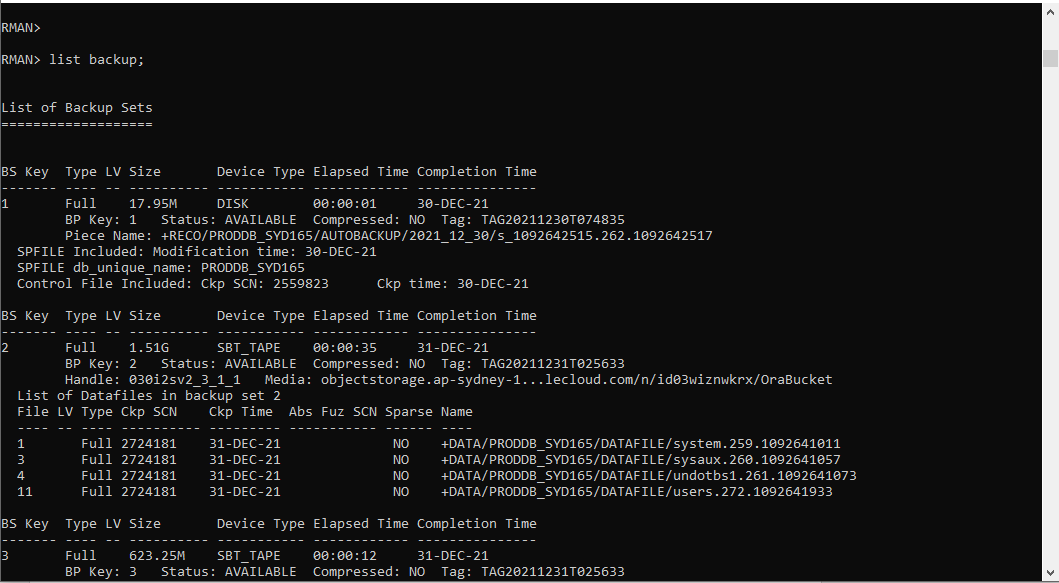
Let’s verify the state of our backup by running the list backup; command. We can see all the backup set in RMAN and that the backup has been made to Object Storage media in Oracle Cloud Infrastructure.
Conclusion
In the next article, we look at how to restore data using the backup that we made, and we will also explore how to restore that backup data to a different region.