Welcome back! We recently released a connector for extracting data from Fusion Application using BI Publisher connector in Oracle Cloud Infrastructure (OCI) Data Integration. Today, we’re learning about the scheduling feature in OCI Data Integration.
In this blog, we will learn how to create a BI Publisher report and then extract data from Oracle Fusion Application using a BI Publisher connector in OCI Data Integration service. We will first look at how to create a BIP report in Fusion Application and then create a data flow in OCI Data Integration to extract data from Fusion Application.
Before we go ahead and create a BIP report, we need to understand that users of OCI Data Integration, can extract data from pre canned BIP reports and to ensure that the Fusion servers are not impacted due to the extraction of high volume data using BIP reports, users have to ensure that in the SQL query they specify two clauses:
- OFFSET
- FETCH NEXT
These properties are used for chunking (pagination) by OCI Data Integration service. The user has to specify the parameter used for offset and fetch next x rows while configuring the source operator.
Why do we need chunking?
When the number of records or the data volume is huge, extract requests might time out. Chunking/Pagination is a common mechanism to protect against such failures. The request is divided into smaller chunks so that extract requests do not fail, while at the same time complete data can be extracted from the source system. In BIP reports, the OFFSET, the FETCH NEXT and the ORDER BY clauses are used to achieve the same.
The key components of a BIP report are:
- Data Model
- Report (Layout)
- Output format
Before you get started, ensure that you have the required permissions to proceed.
Create Data Model
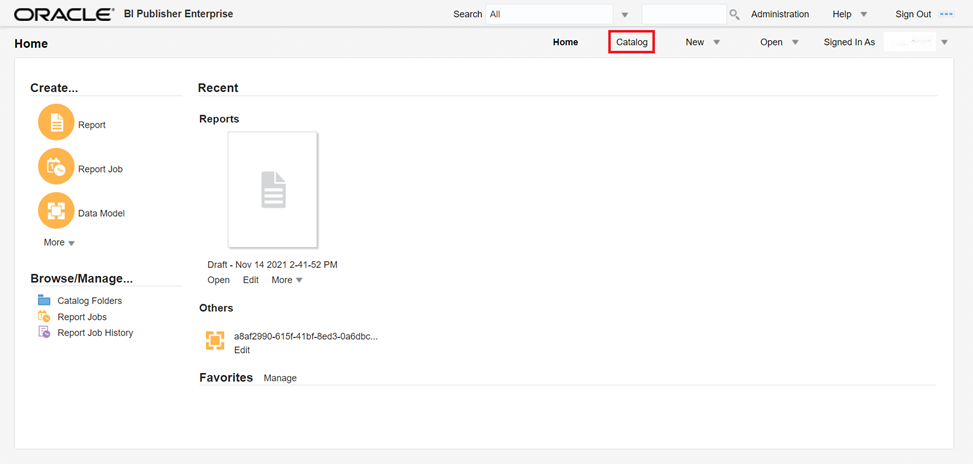
Once you have logged in to Oracle BIP, click on Catalog to view the folders:

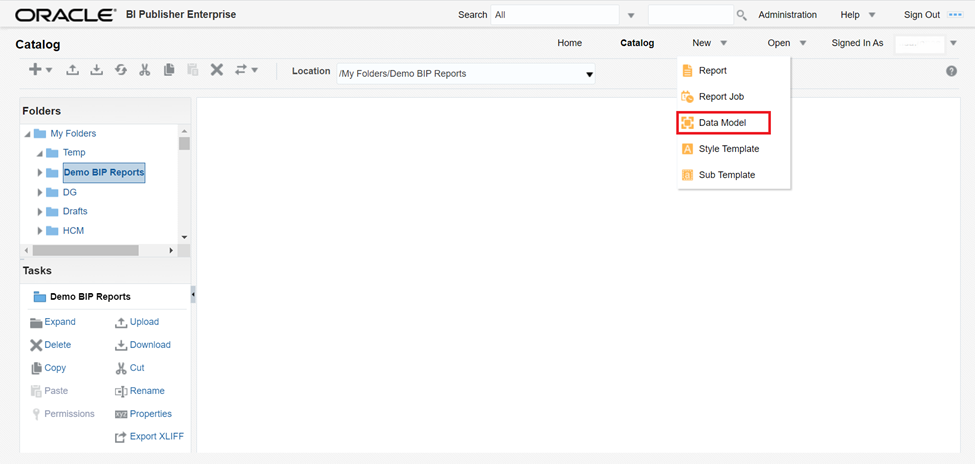
In this example, I have created a folder, Demo BIP Reports, for saving my work. You will start by creating the data model by going to New Data Model, as shown below:
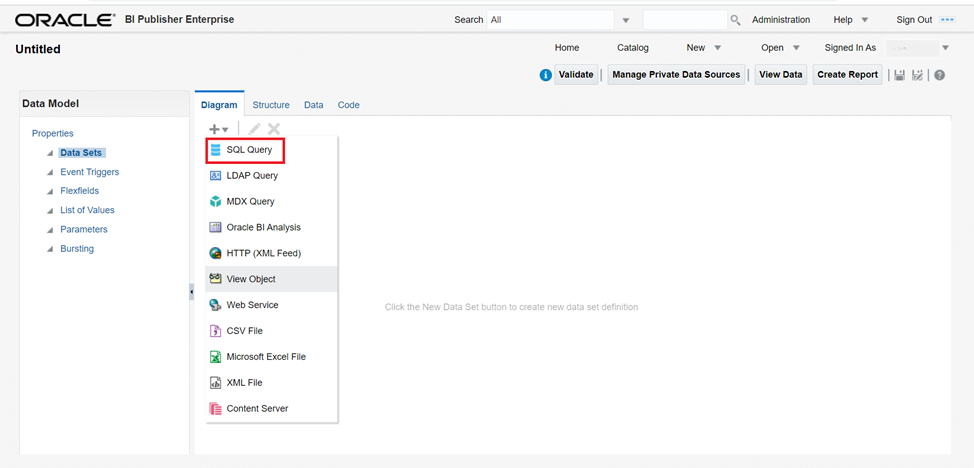
You will be taken to the Create Data Model page; here click on the “+” icon and select SQL query to specify data source and SQL query.
The SQL query is just like any other standard SQL query and you can specify report parameters in the where clause like: business_unit = :P_Business_Unit, so that when the report runs, users will have to specify the business unit for which they want to run the report. Additionally, as discussed earlier, users have to specify two more clauses in the SQL as shown below:
- order by: <<list of columns defining an unambiguous sort order>>
- offset : << parameter name>> rows
- fetch next : <<parameter name>> rows
The lack of an appropriate order-by is likely to result in duplicate or missing rows. Go ahead and write the SQL query in the SQL Query text area as shown below and then click on OK to save the Data Set:
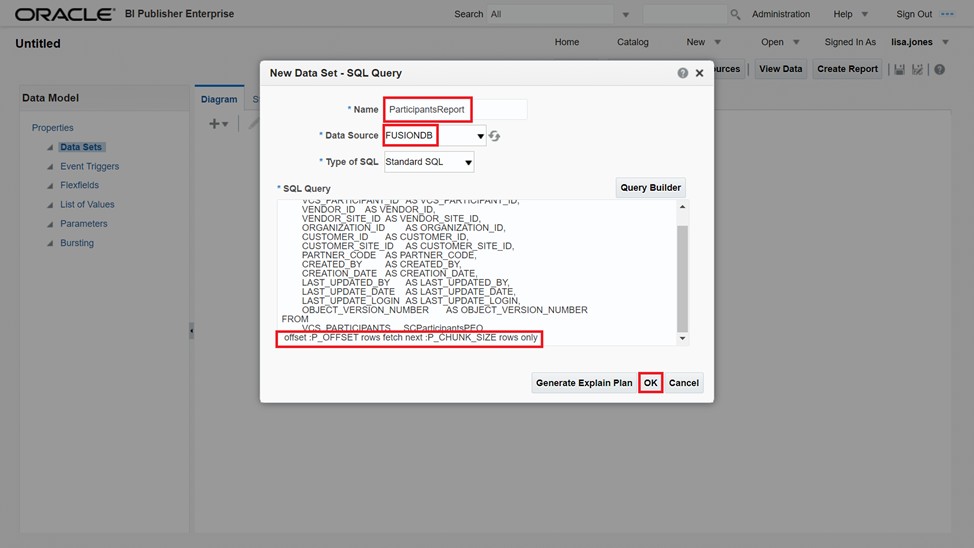
Make sure your SQL Query contains OFFSET, FETCH NEXT and appropriate ORDER BY clause. Once you click OK, you will receive a prompt to bind parameters as shown below:
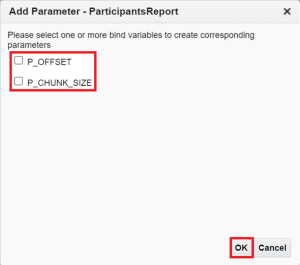
Check both the check boxes and hit OK. This will bind the selected parameters to the report and will show up under parameters in data model as shown below:
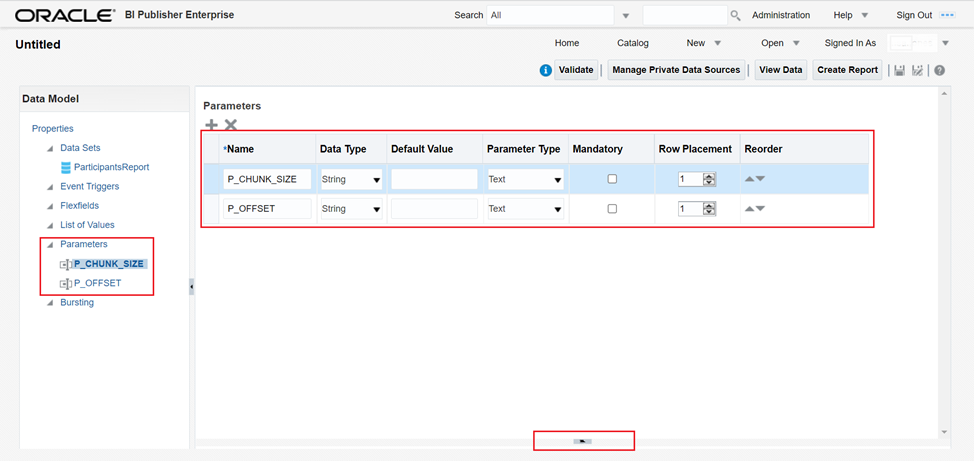
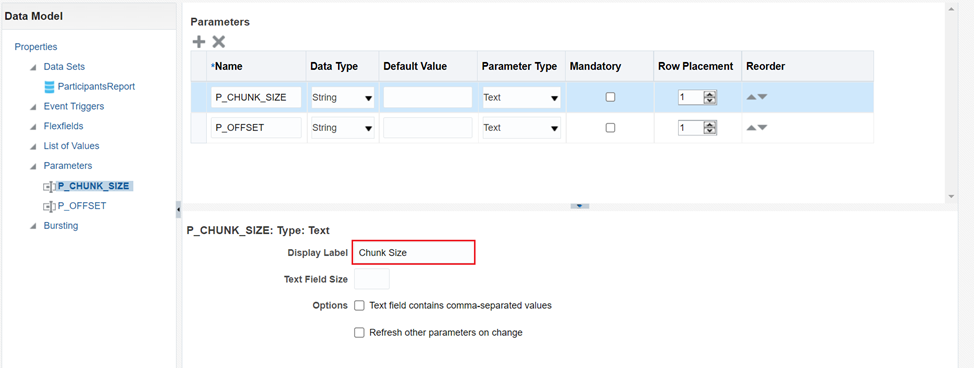
Optionally on the Parameters page, drag the highlighted separator, and provide display text for the Chunk Size and Offset parameters.
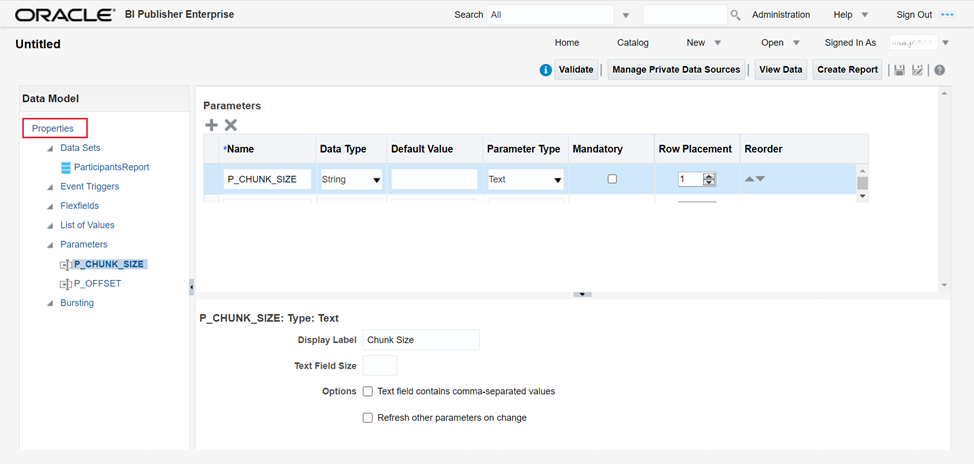
Once you have created the data model, it is time to visit the data model properties. Click on the Properties node on the left hand tree as depicted in the image below:
Make sure the following three properties are checked:
- Enable CSV Output
- Include Parameter Tags
- Include Empty Tags for Null Elements
Refer the screenshot below for details:
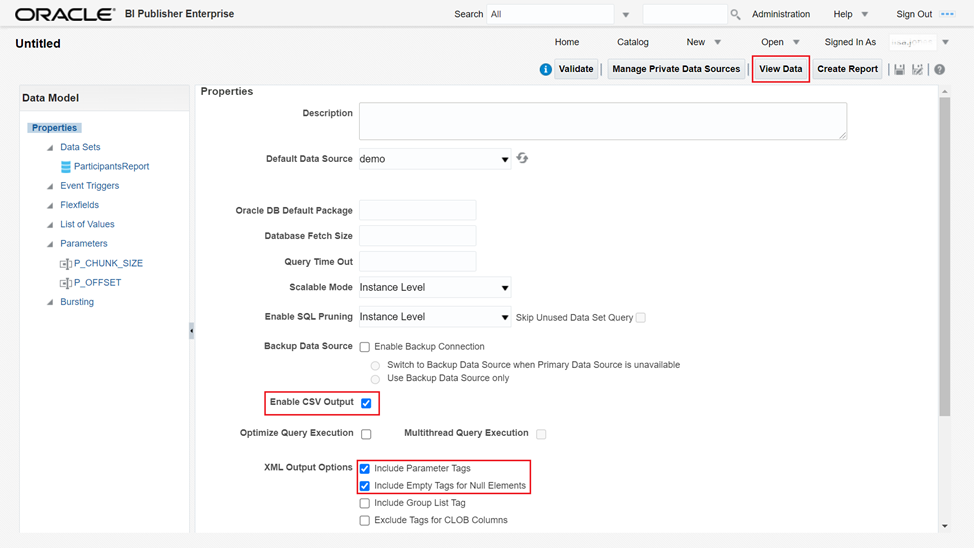
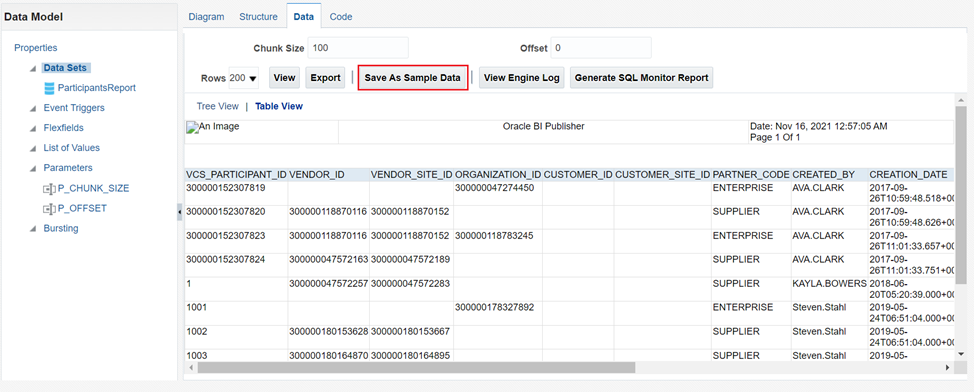
Click on the “View Data” button to view sample data. The data tab will open up and provide values for Chunk Size and Offset, and you can click on View as shown below. Once the data shows up you can click on the Table View to view the data in a tabular form.

Once the sample data shows up, click on “Save As Sample Data.”
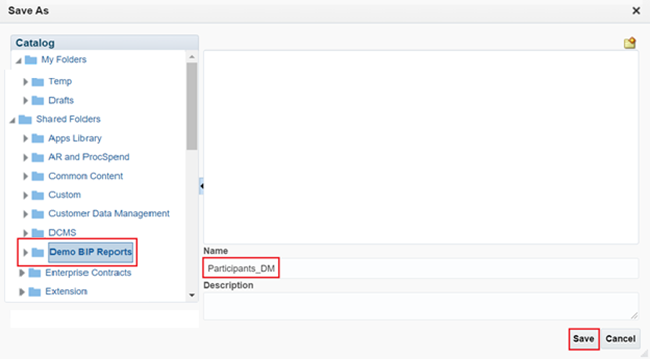
You will get a prompt confirming that the data has been saved as a sample. Now save the data model by clicking on the save icon:

Select the folder where you want to save the data model, provide a name and click save (refer to the image below for details):
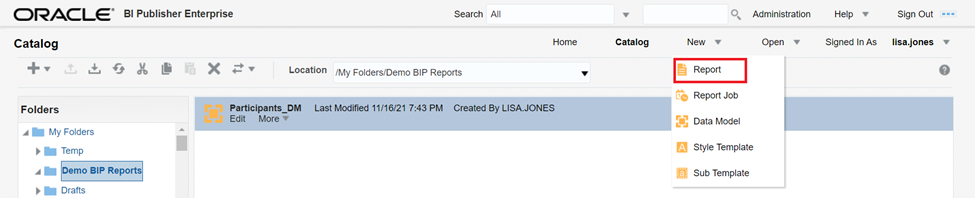
Create Report
Now let us create a report using the data model we just created, by clicking on New and then Report:
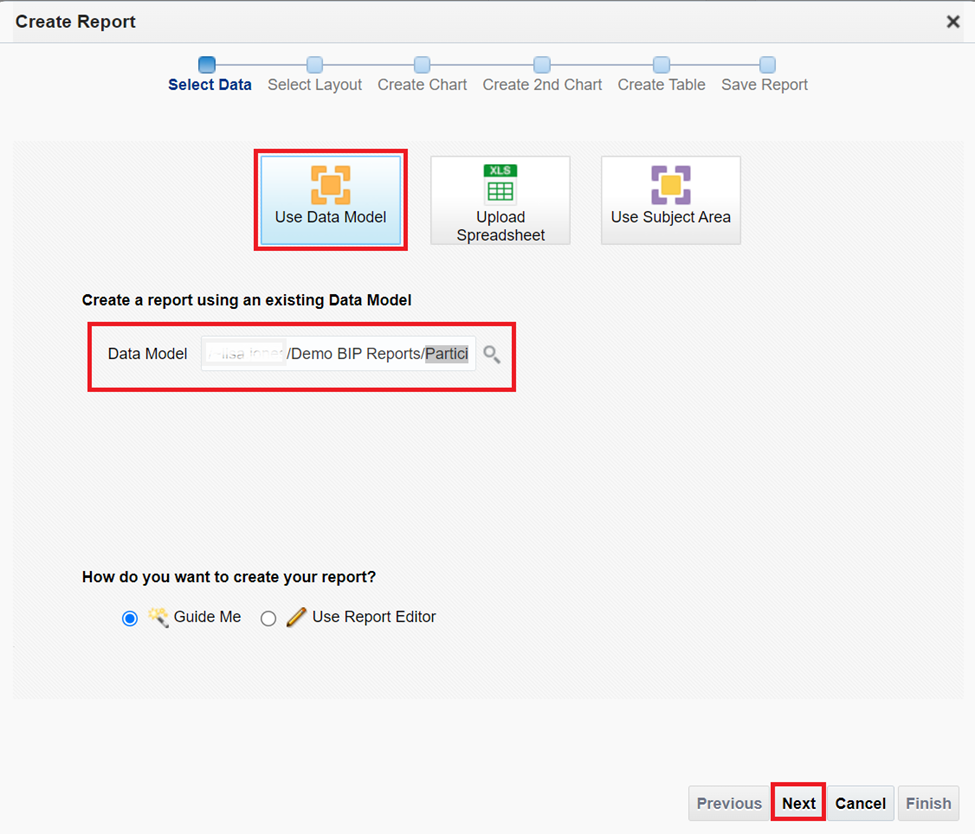
In the Create Report wizard:
- Select Use Data Model
- Browse to the Data Model we created in the previous step
- Click on Next
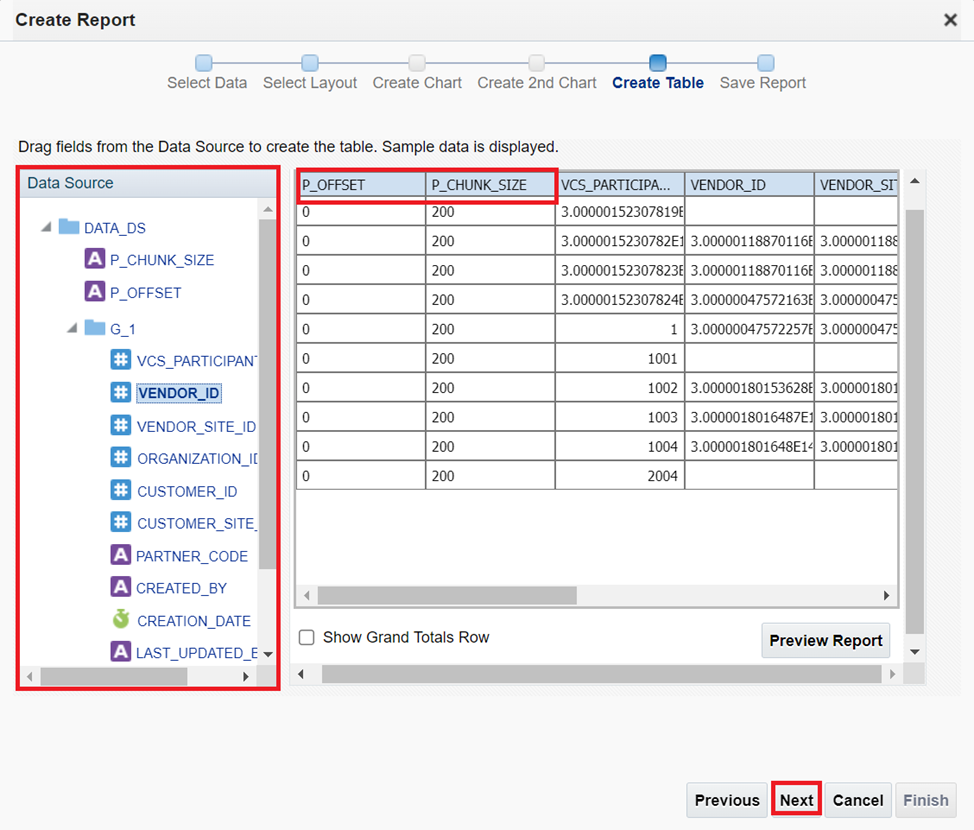
In the Select Layout step, let the page options be Portrait and Layout be Table and click Next. In the Create Data step, add the fields that are needed in the report, from the left hand data source. In this example, I have unchecked the Show Grand Totals Row as I do not want it in my report. Finally, click on Next.
In the Save Report screen click on Finish, and provide a location and name to the report in the Save As pop up as shown below:

Configure Report Output Format
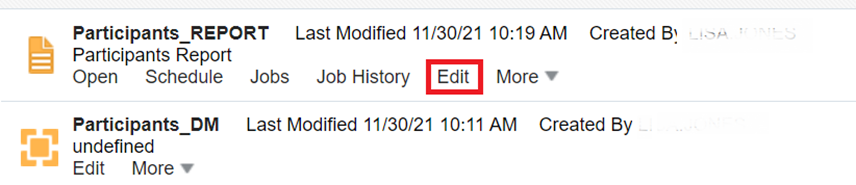
After you have created the report, click on Catalog, browse to the report, and edit the report as shown below:
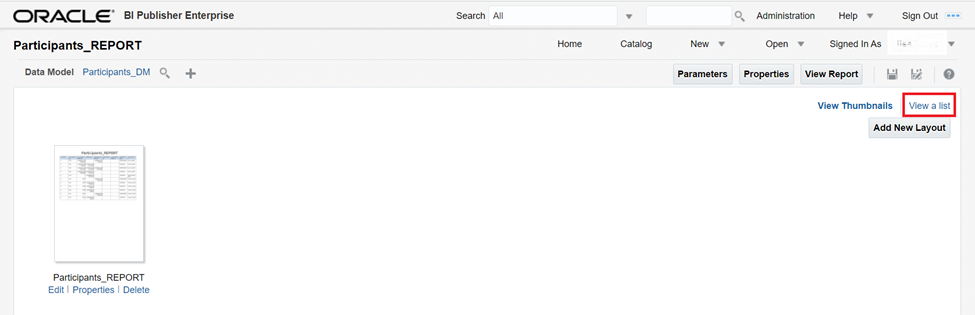
Now, click on “View as list” as shown in the image below:
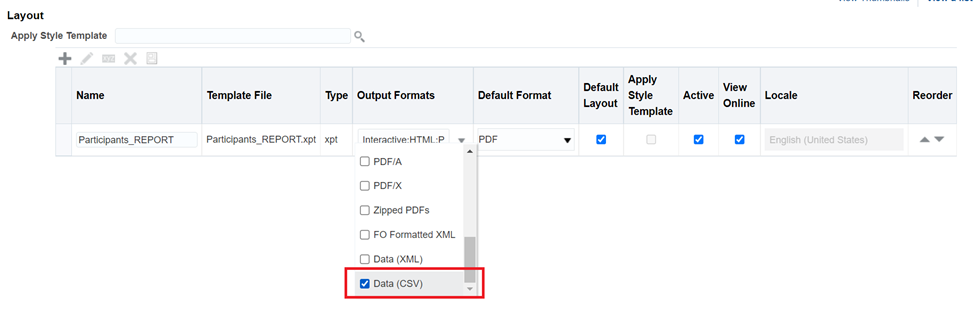
Make sure the Data(csv) is selected in the Output Formats and Default Format is csv as shown in figure 20 and 21 below:

Using OCI Data Integration to extract data from BIP reports
Once we have created the BIP reports, we will now create a Data Asset and a Data Flow to extract data from Fusion application using this report. Let us start by creating a Data Asset.
Create Fusion Data Asset
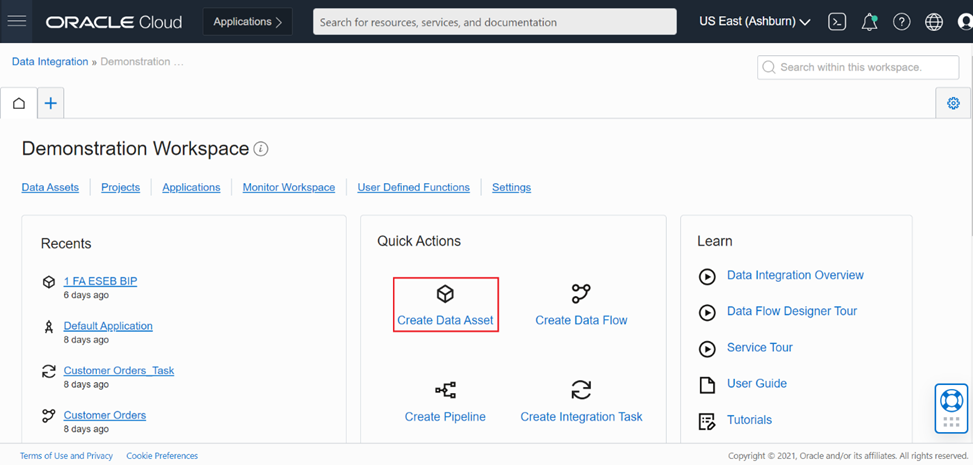
Now login to OCI console, browse to OCI Data Integration service and select a workspace in which you want to create the data asset. Once in you are in the workspace click on the “Create Data Asset” tile.
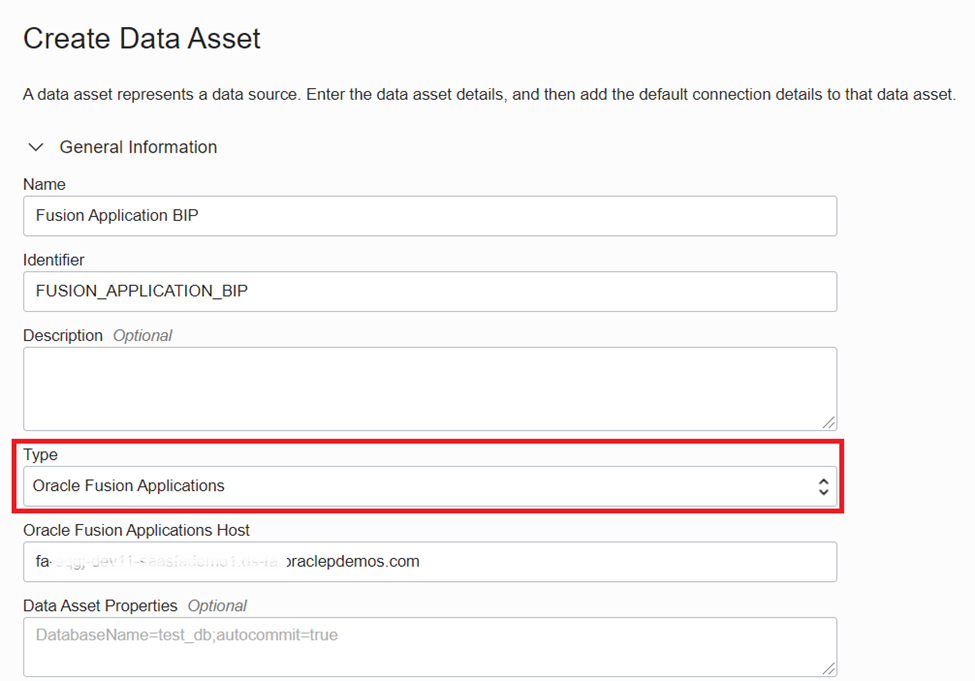
In the Type field, select the Type as Oracle Fusion Applications and provide the host name for the Fusion Application in the Oracle Fusion Applications Host field.
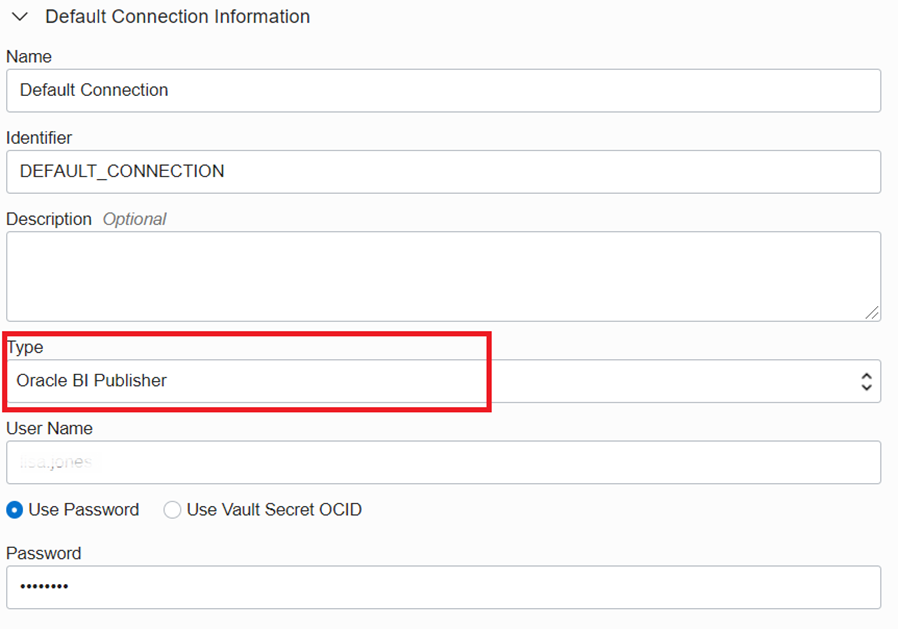
In the Connections section, select the Type as Oracle BI Publisher and provide the Username and Password.
Create a data flow for data extraction
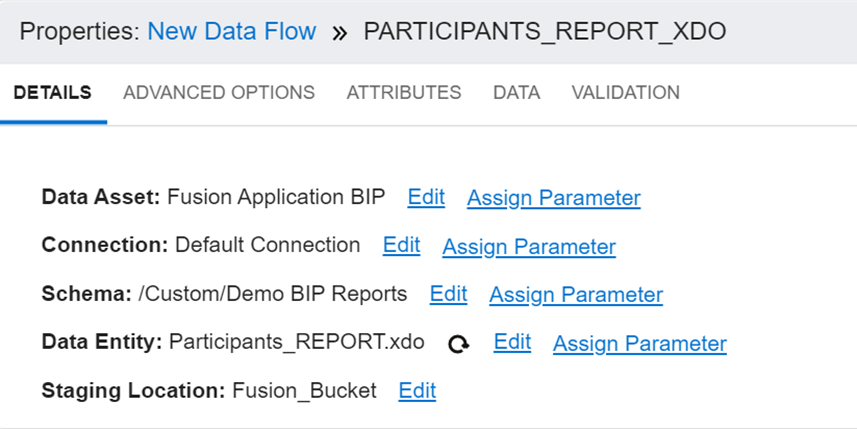
Now let us create a simple data flow in OCI Data Integration to extract BIP reports from Fusion and load it into Oracle Autonomous Data Warehouse, in the data flow let us configure the source operator to extract data from the Participants_REPORT that we created earlier, also specify a staging location as shown below:
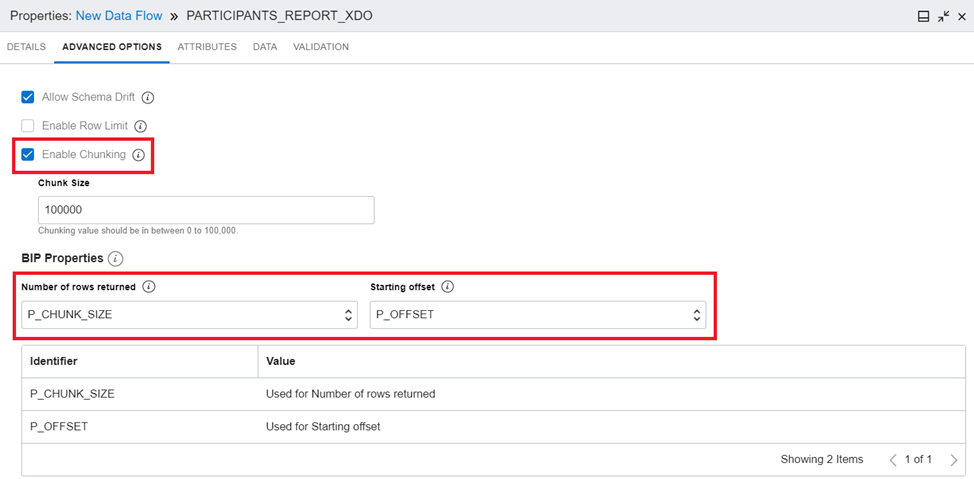
You can view the sample data by clicking on the DATA tab in the source operator. Go to the Advanced Options, and set the chunking properties so that the offset and number of rows returned parameters are selected appropriately.
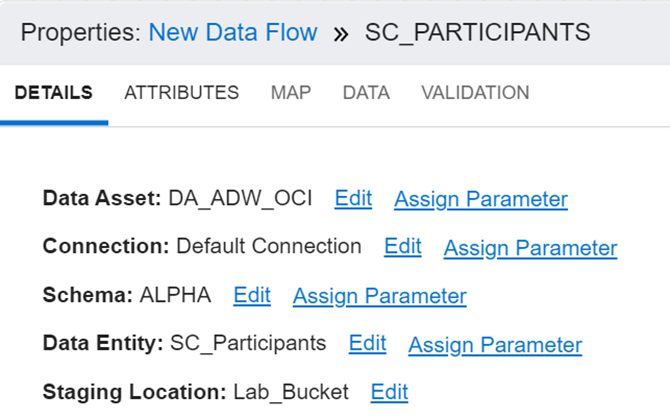
Now drag drop a target operator and configure the Target operator as shown below:
We have created the data flow with fusion BIP report as source now validate the data flow and save it.
After you save the data flow, create an integration task by selecting the newly created data flow, publish it to an application and then execute it.
Conclusion
The Oracle Fusion Applications BI Publisher connector helps users extract BIP reports seamless and integrate it with other data sources. We hope that this blog helps as you learn more about OCI Data Integration. For more information, check out the tutorials, documentation, and the blog site.