In the first part of this blog series, we created an Oracle Linux virtual machine (VM) on Oracle Cloud VMware Solution. In this second part, we create two types of Oracle autonomous databases.
We access the first database type through a private virtual cloud network (VCN) endpoint and access the second database type through the service gateway. Creating two types of databases demonstrates the network configuration required for each database type to a VMware Solution VM.
Create an Oracle autonomous database accessed by VCN
In the Oracle Cloud Infrastructure (OCI) Console, go to the menu and select Oracle Database and then Autonomous Database.
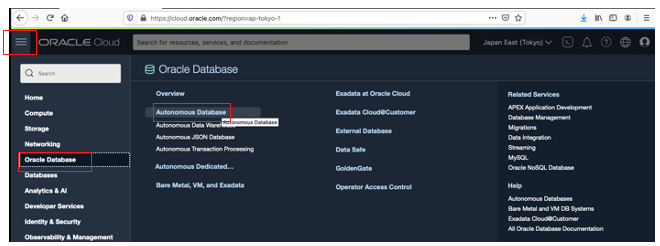
Choose your compartment and click Create Autonomous Database. In this example, I use Oracle Cloud VMware Solution.

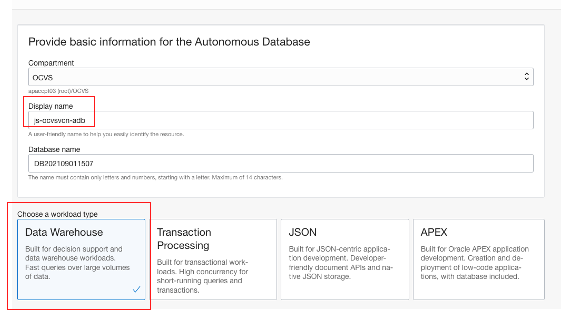
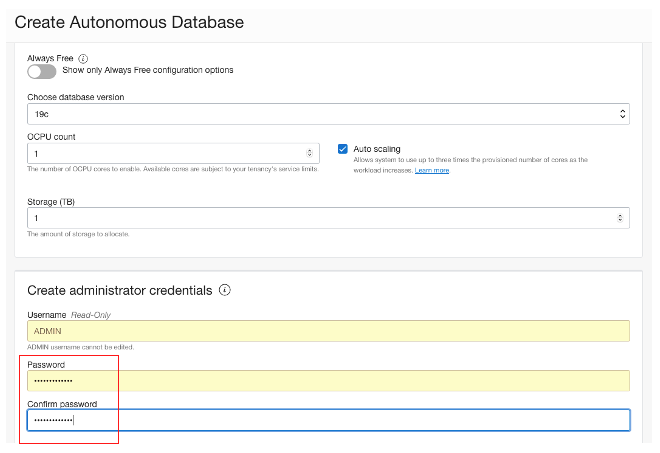
Pick a display name for your database. I chose a name advising that the autonomous database is created in the VMware Solution VCN. Then choose the workload type.
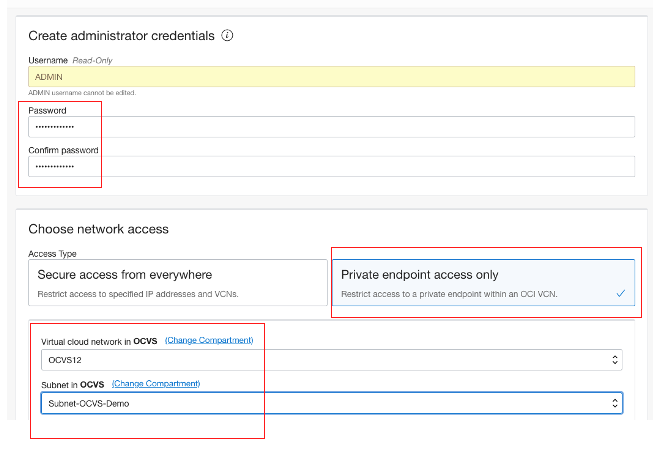
Enter the password and password confirmation fields, choose Private endpoint access only, and then pick the VCN of the VMware Solution cluster and subnet. I picked the subnet from the Oracle Cloud VMware Solution software-defined data center (SDDC) page, in the resources of SDDC Networks and Subnet tabs.
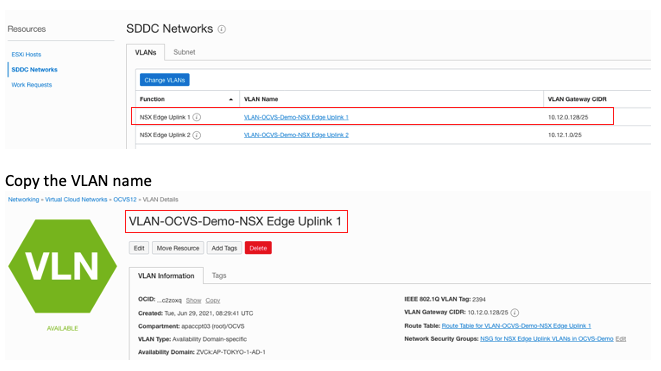
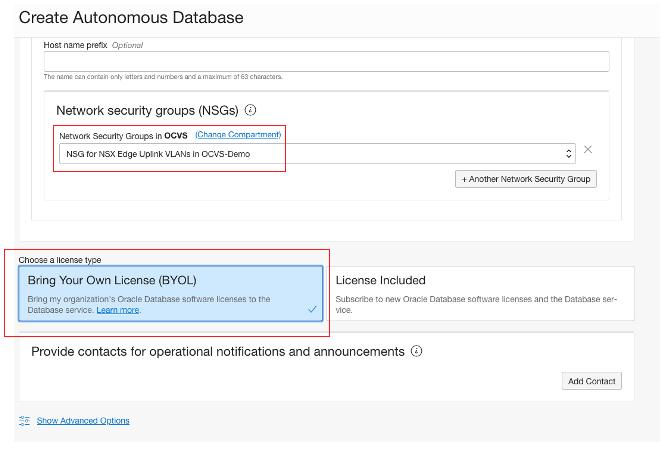
Pick the network service gateway (NSG) for the NSX Edge Uplink 1, and click the VLAN name.
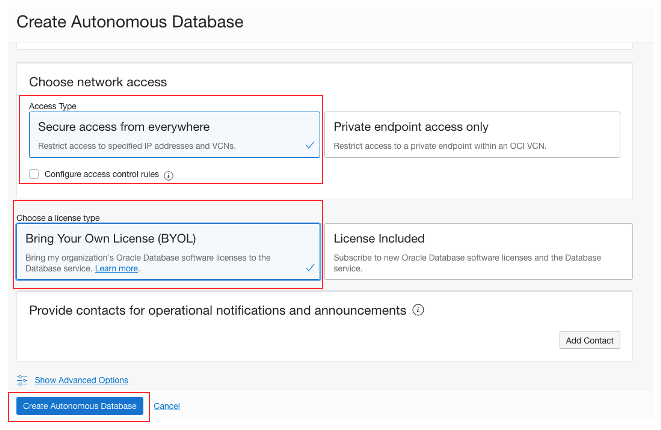
After entering the NSGs in the VMware Solution, choose the license type and click Create Autonomous Database.
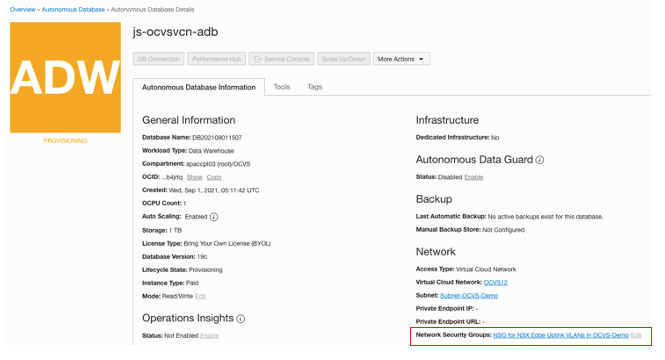
On the following page, click Network Security Groups.
Update the NSG and add an egress rule with the SDDC NSX external access IP address. You can find this IP address in the SDDC. Under Resources, go to the SDDC Networks and click the “NSX Edge Uplink 1” VLAN.

This VLAN has an external access address for the cluster, which we use as the source IP address for accessing the database through an ingress rule.
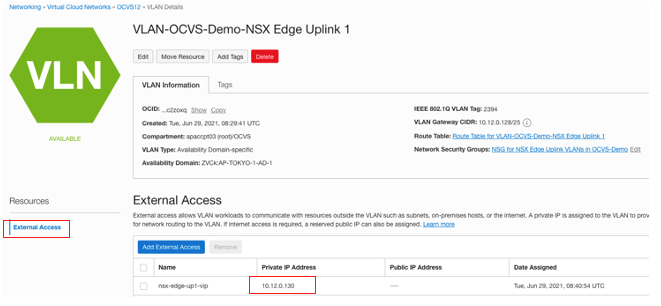
Check the source CIDR block of the NSX.

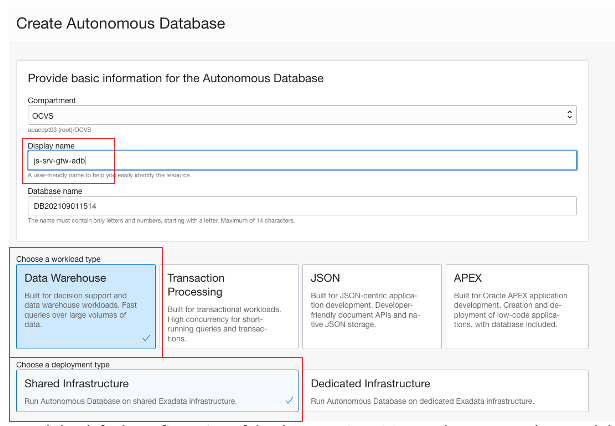
Create an Oracle autonomous database accessed through the service gateway
Enter the database display name, workload type, and deployment type.
I used the default configuration of database version, OCPU and storage, and entered the admin. password.
For this database, I used “Secure access from everywhere” for the access type with Bring Your Own License (BYOL). Then click Create Autonomous Database.
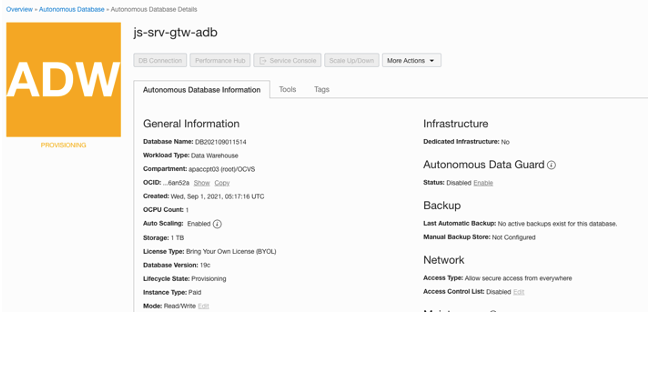
See the summary database creation page using secure access from everywhere through the service gateway.
Copy the database wallet and install SQL Developer RPM on your Oracle Linux VM
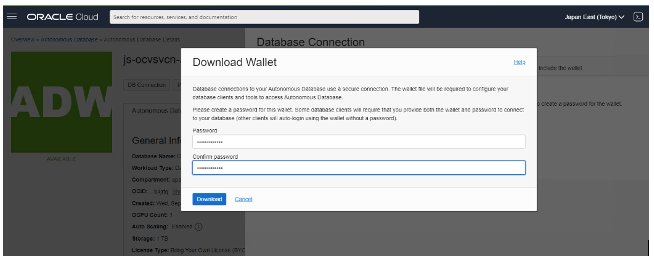
Download the wallet for both databases from the jump host using the OCI Console. In each database in the Console, under Database Connection, choose Instance Wallet for the wallet type and click Download Wallet. Then enter your password.
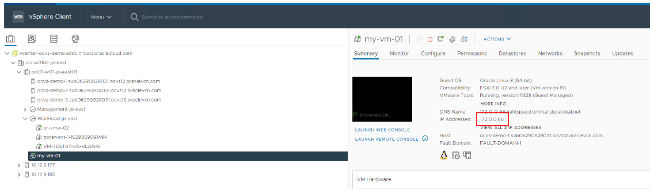
Then go to the JumpBox and download the Autonomous Database Wallet zip files to the VM. To run file transfer protocol (FTP), you need the IP address of the VM. To locate the VM IP address, go to vCenter, and get the IP address assigned to the server.
Run FTP to the server with the IP address and copy the wallet.
sftp johnsmith@172.0.0.66
sftp> mput <ADB Wallet file name>.zip
sftp> exit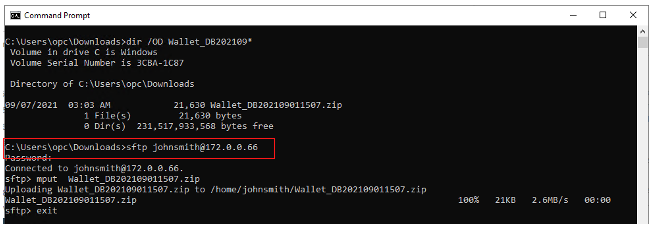
Download the SQL Developer Linux RPM and Java Development Kit (JDK). Transfer SQL Developer to the Oracle Linux VM with the following command:
% sftp johnsmith@172.0.0.66
sftp> mput <SQL Developer Linux >.rpm
sftp> exit
Transfer the JDK RPMs to the Oracle Linux VM with the following command:
% sftp johnsmith@172.0.0.66
sftp> mput <JDK Linux >.rpm
sftp> exit
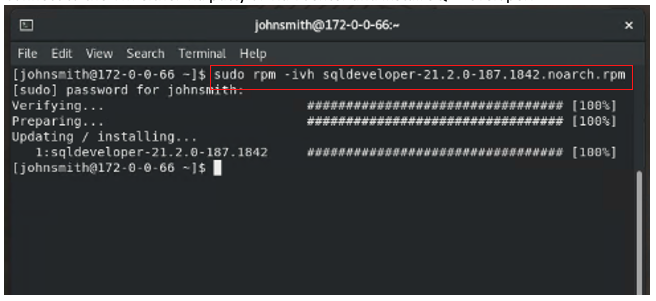
Connect to the VM either through putty or vCenter and install SQL Developer.
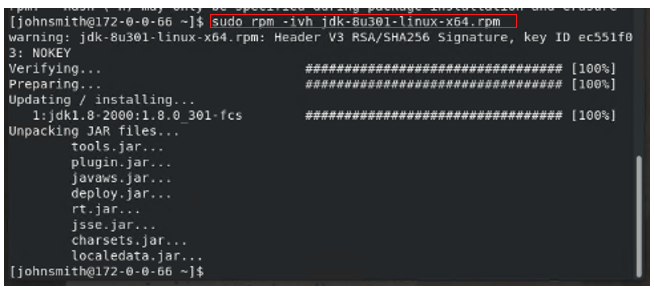
Then install the JDK file, which is required to start SQL Developer.
You have now created two autonomous databases, copies the wallet to the Oracle Cloud VMware Solution virtual machine, and installed the SQL developer tool to connect to the database.
To be concluded
In part 3 of this blog, we configure the DNS and network to enable Oracle SQL developer running on an Oracle Cloud VMware Solution virtual machine to connect to the databases that we created.
Want to learn more about Oracle Cloud VMware Solution and Autonomous Database? See the following resources: