This blog discusses steps to configure Oracle Cloud Infrastructure (OCI) Database Management for On-Premises Oracle Databases. OCI Database Management provides comprehensive database performance and management capabilities to monitor and manage Oracle databases. Oracle delivers the best of Oracle Enterprise Manager as a cloud service. DBAs no longer have to maintain the system, freeing up time to focus their high-value skills. In addition, key innovations like Database Fleet Automation simplify and speed database fleet management for both on-premises and databases deployed on Oracle Cloud Infrastructure. These capabilities aren’t limited to OCI. You can also manage databases running on-premises using this feature. With Database Management, you have the following capabilities:
- Monitor multiple Oracle databases that are part of your fleet.
- Use database groups to group multiple Oracle databases, deployed across compartments.
- Create and run custom SQL and PL/SQL scripts on a single Oracle database or a database group.
- Use the Performance Hub and AWR Explorer for monitoring the performance of the Oracle Database.
To enable and use Database Management, follow the steps listed in this blog post:
- Install management agents for Database Management.
- Register the Oracle database as an external database.
- Enable Database Management for registered databases.
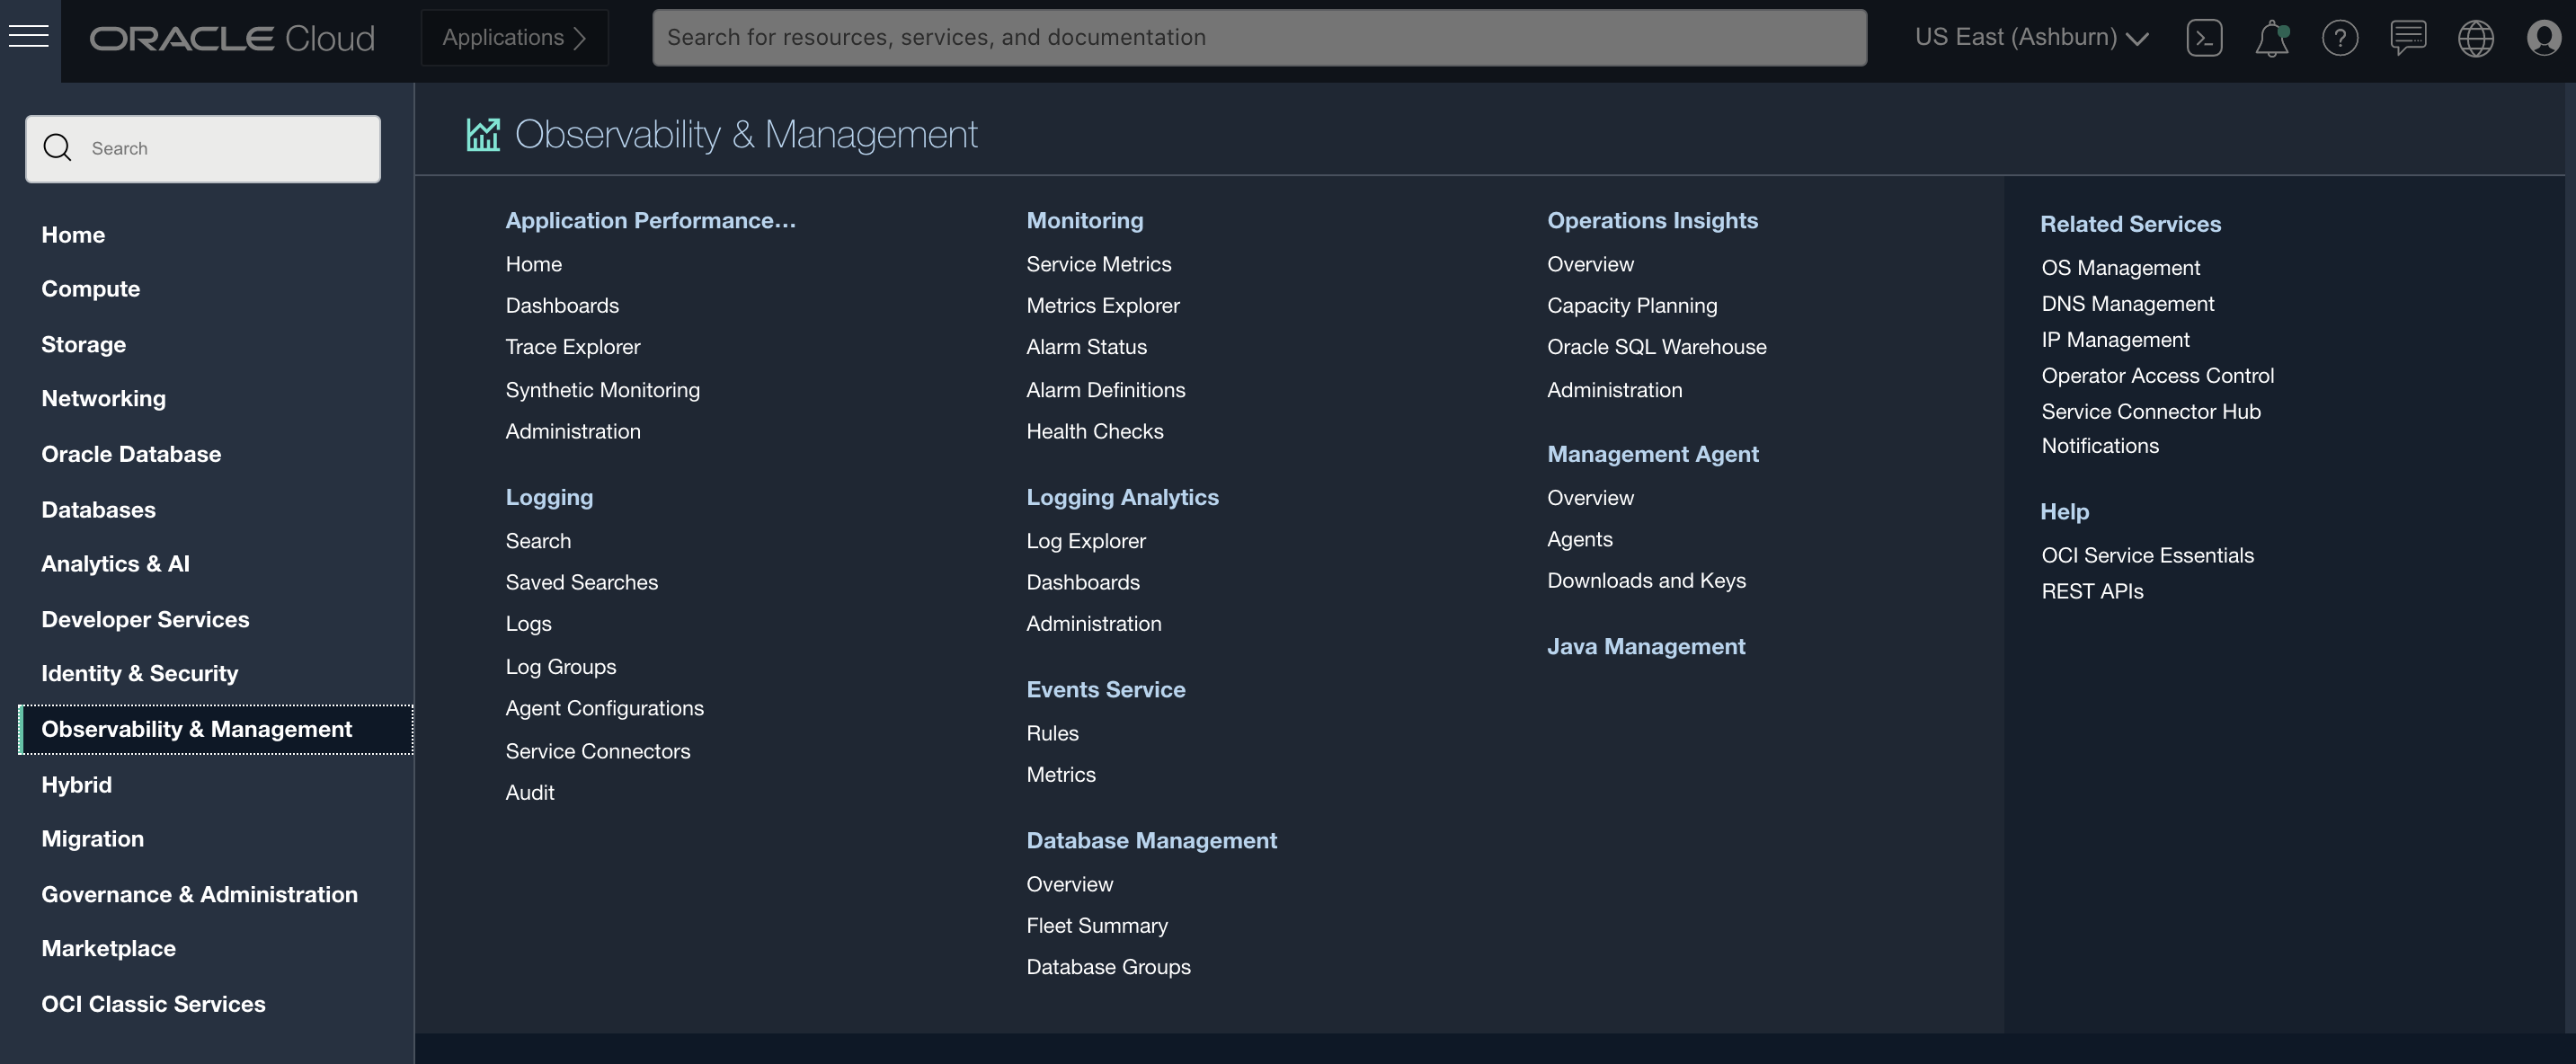
You can access all the features mentioned in this blog post from Observability and Management.
Installing Database Management
Install the management agent on the host where Oracle Database service is running. Database Management uses the management agent for operations such as collecting data and metrics and for running jobs on the database. To download the agent, go to Management Agent and select Downloads and Keys.
When the agent has been downloaded, create an agent install key, which is necessary to the management agent installation. You can use a single agent key for multiple agent installations.
Install the agent on the server
Copy the management agent rpm to the management agent host with the following command:
[root@instance-20210626-1617 ~]# rpm -i /tmp/oracle.mgmt_agent.rpm
Checking prerequisites
              Checking if any previous agent service exists
              Checking if OS has systemd or initd
              Checking available disk space for agent install
              Checking if /opt/oracle/mgmt_agent directory exists
              Checking if 'mgmt_agent' user exists
              Checking Java version
                            JAVA_HOME is not set or not readable to root
                            Trying default path /usr/bin/java
                            Java version: 1.8.0_291 found at /usr/bin/java
              Checking agent version
Executing install
              Unpacking software zip
              Copying files to destination dir (/opt/oracle/mgmt_agent)
              Initializing software from template
              Creating 'mgmt_agent' daemon
              Agent Install Logs: /opt/oracle/mgmt_agent/installer-logs/installer.log.0
              Setup agent using input response file (run as any user with 'sudo' privileges)
              Usage:
                            sudo /opt/oracle/mgmt_agent/agent_inst/bin/setup.sh opts=[FULL_PATH_TO_INPUT.RSP]
Agent install successful
[root@instance-20210626-1617 ~]#
Configure the agent on server
After the management agent has been installed, configure the agent using the following command:
[opc@instance-20210626-1617 ~]$ sudo /opt/oracle/mgmt_agent/agent_inst/bin/setup.sh opts=/tmp/response.rsp
Executing configure
              Parsing input response file
              Validating install key
              Generating communication wallet
              Generating security artifacts
              Registering Management Agent
Starting agent...
Agent started successfully
Agent setup completed and the agent is running.
In the future agent can be started by directly running: sudo systemctl start mgmt_agent
Ensure that you delete /tmp/response.rsp or store it in secure location.
[opc@instance-20210626-1617 ~]$
Use the agent install key to create the response file passed in the previous code block. You can also edit the response file to set the agent name and wallet credentials. After the configuration is complete, delete the response file or store it in a secure location.
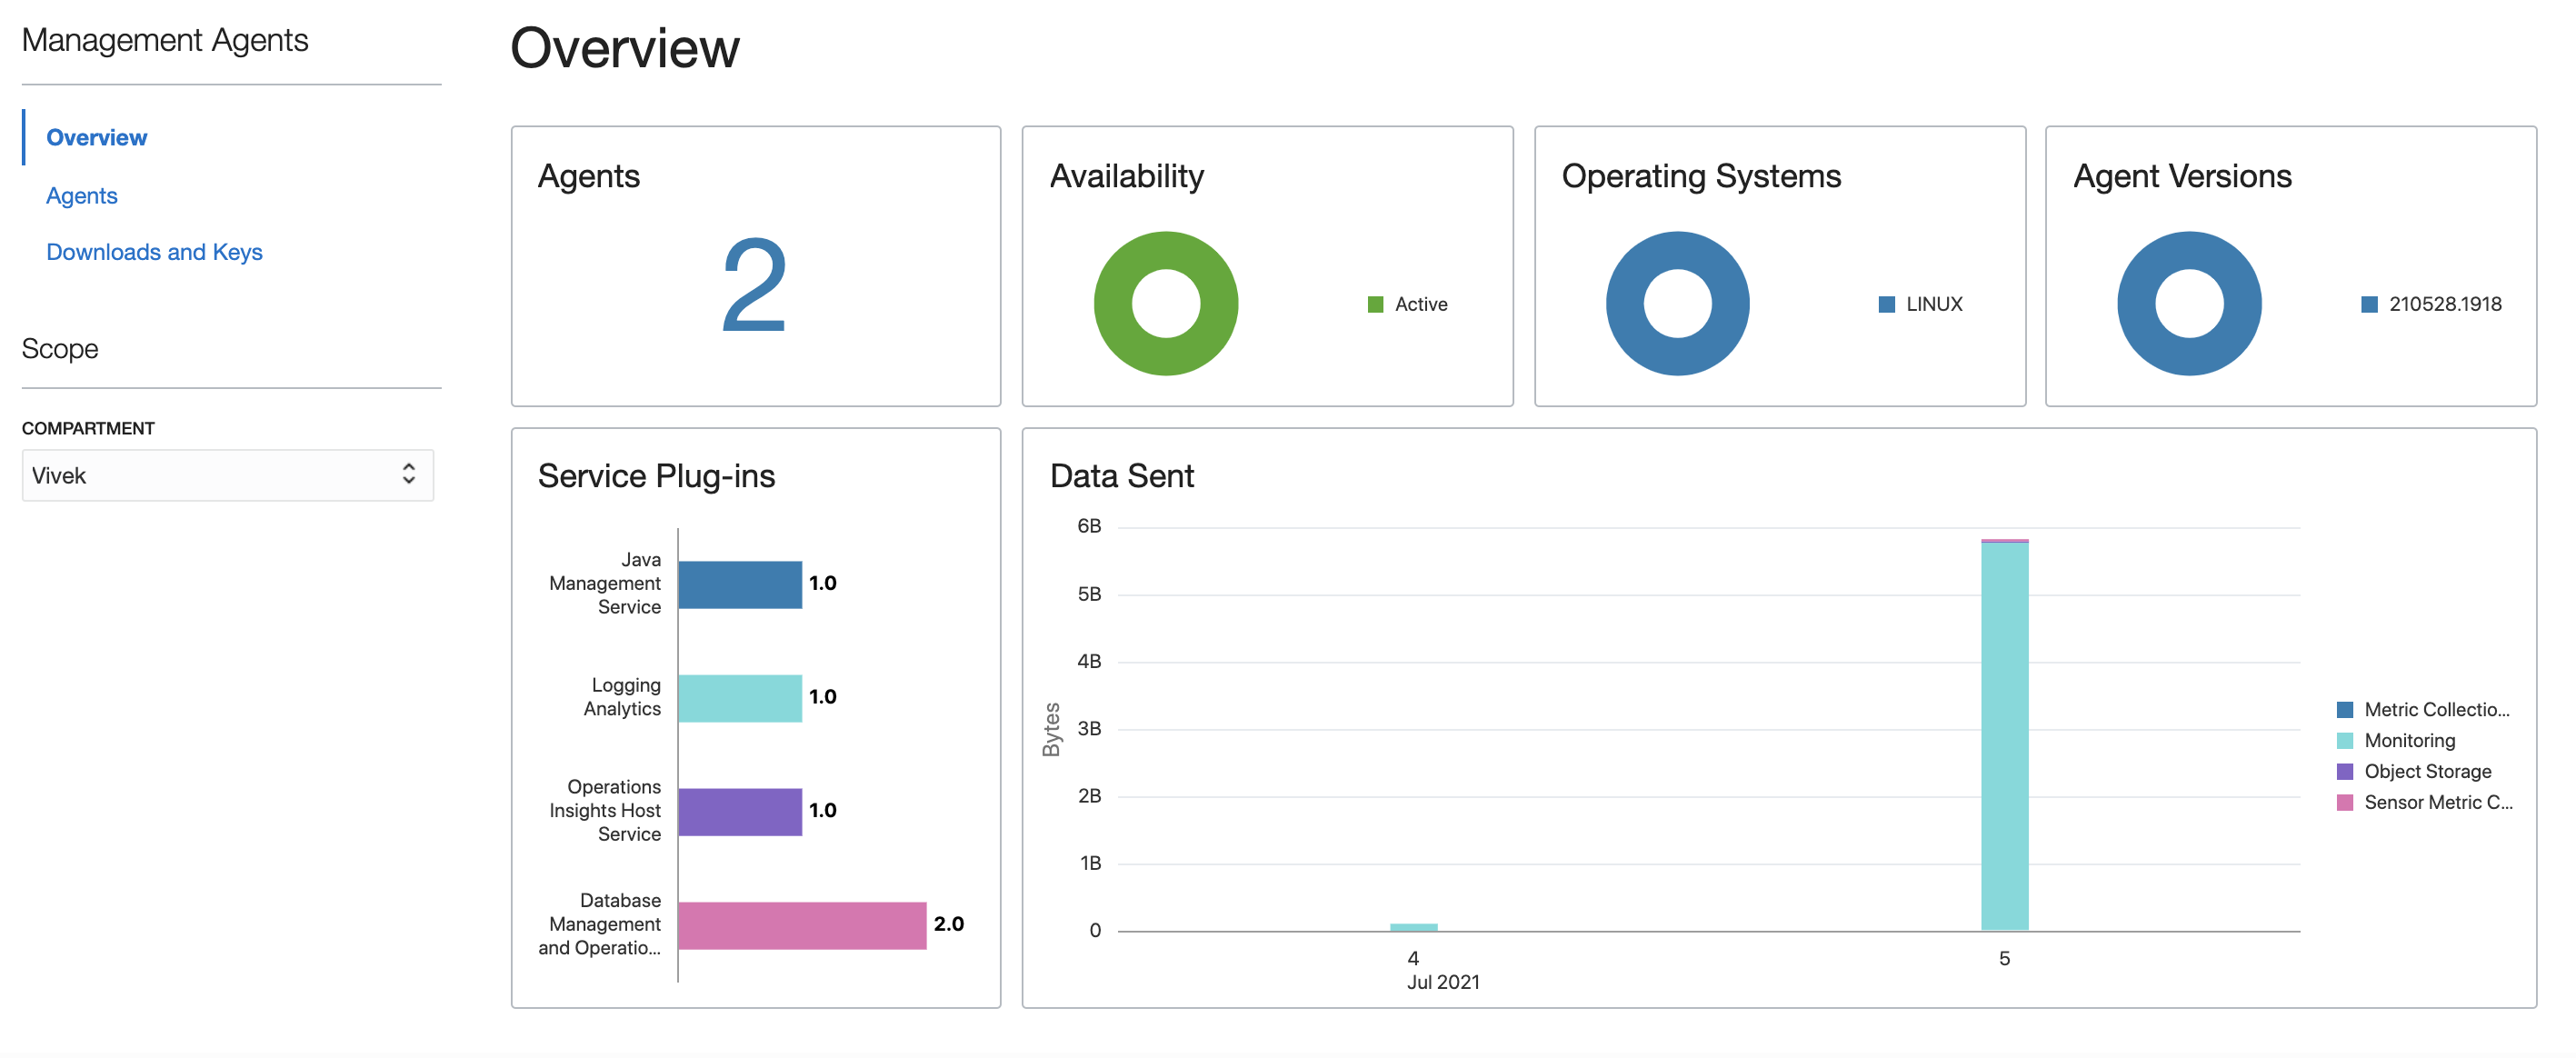
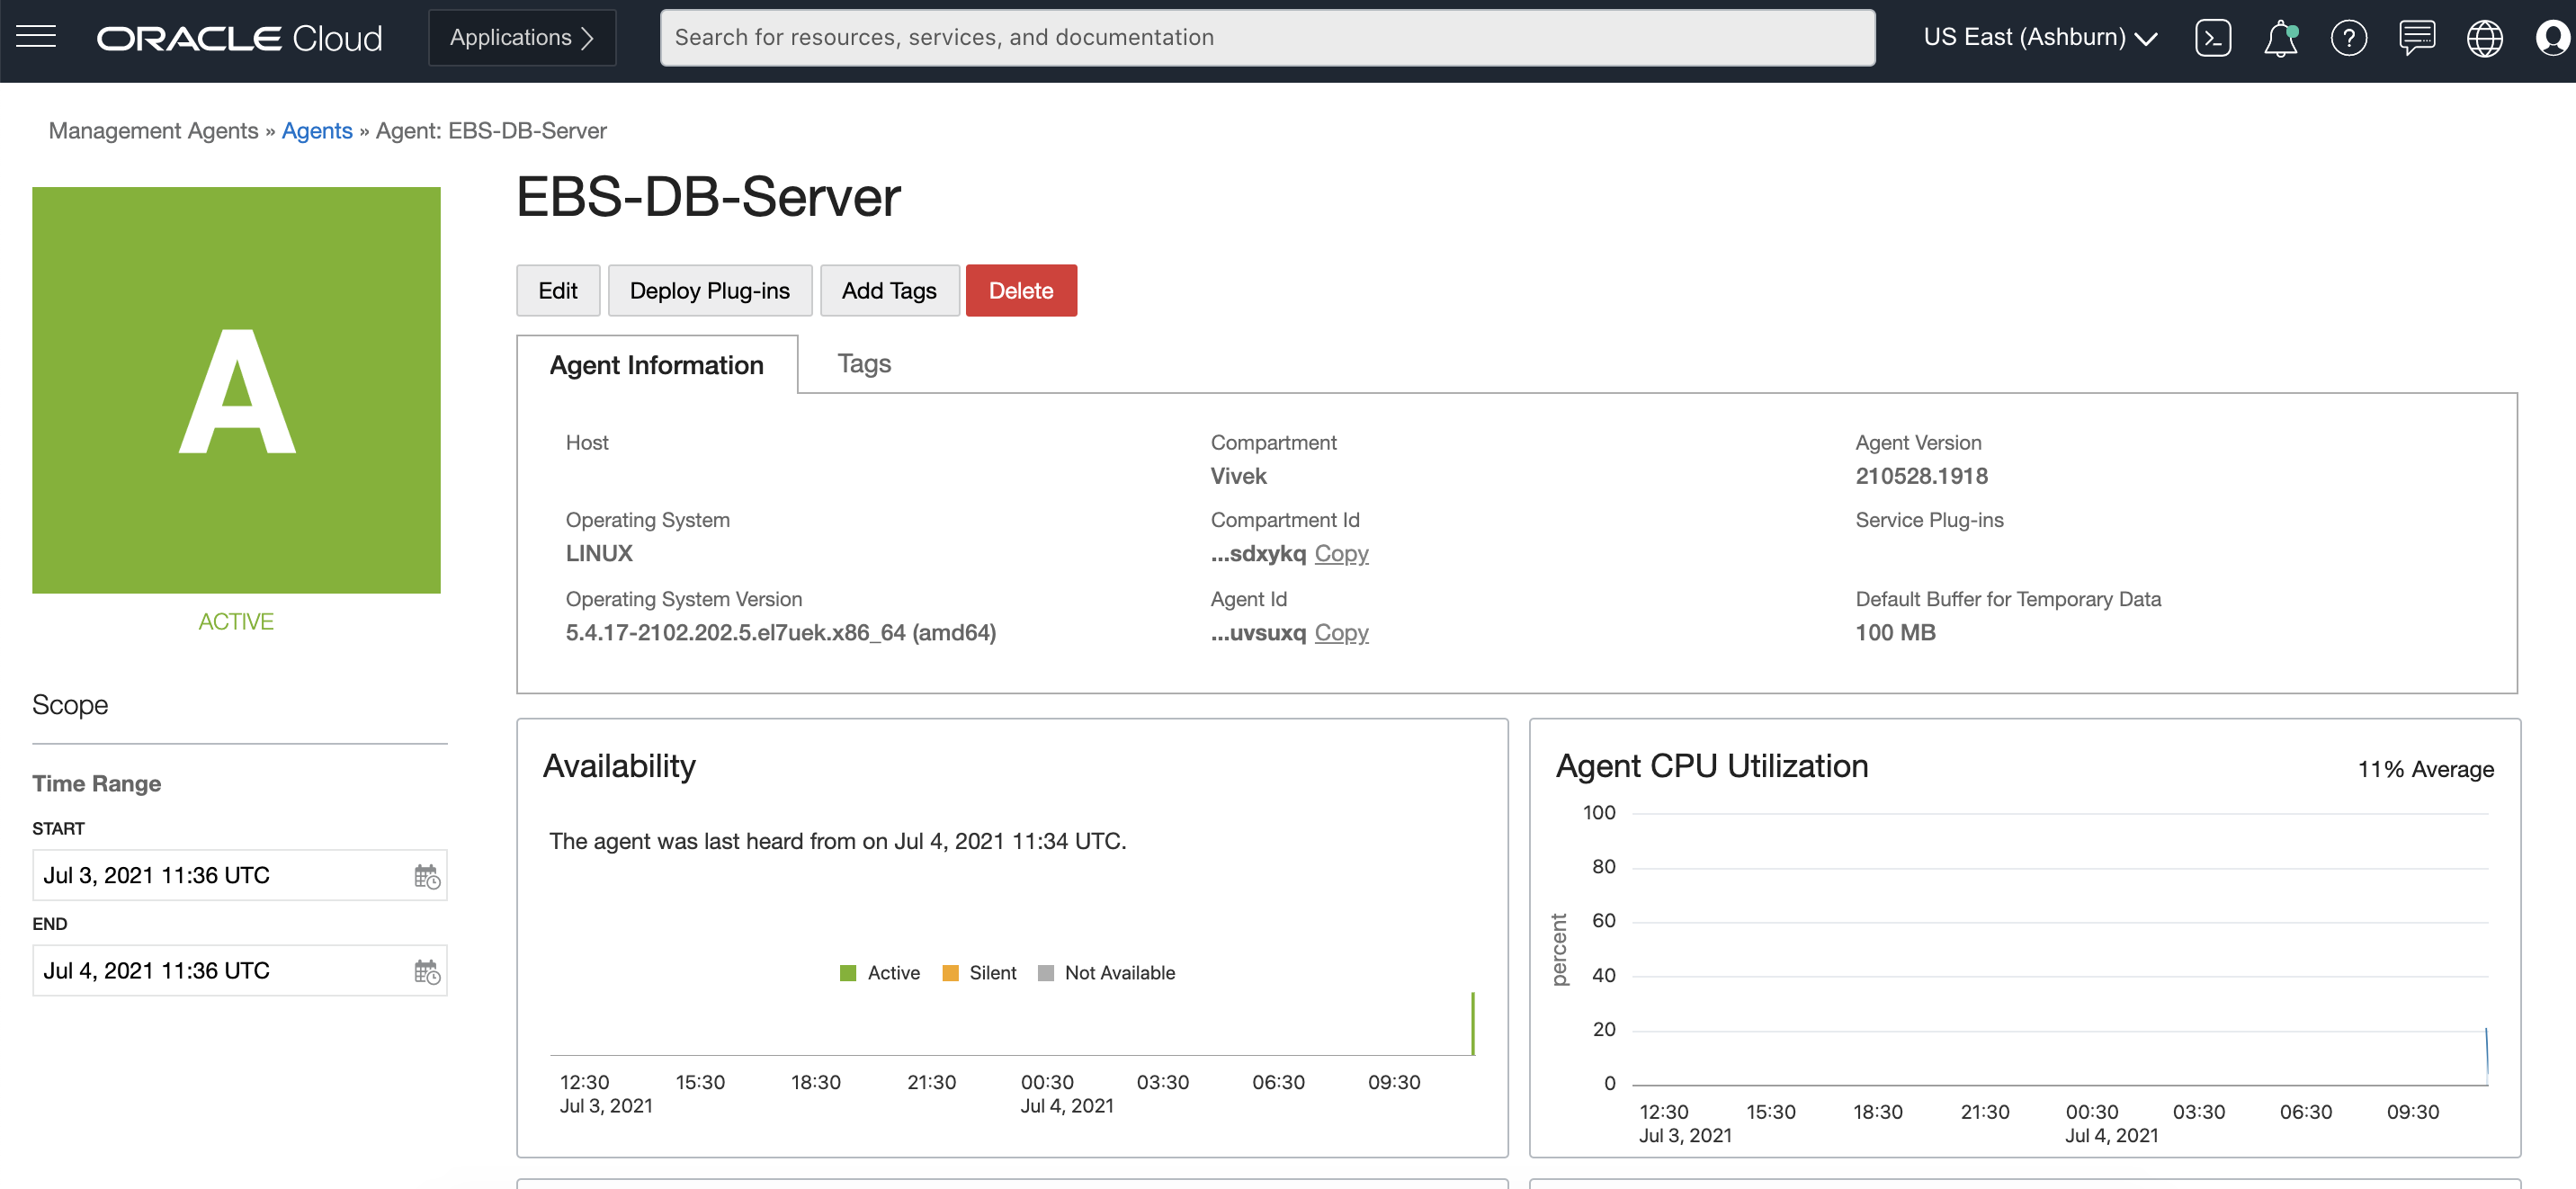
Verify the agent under Management Agents
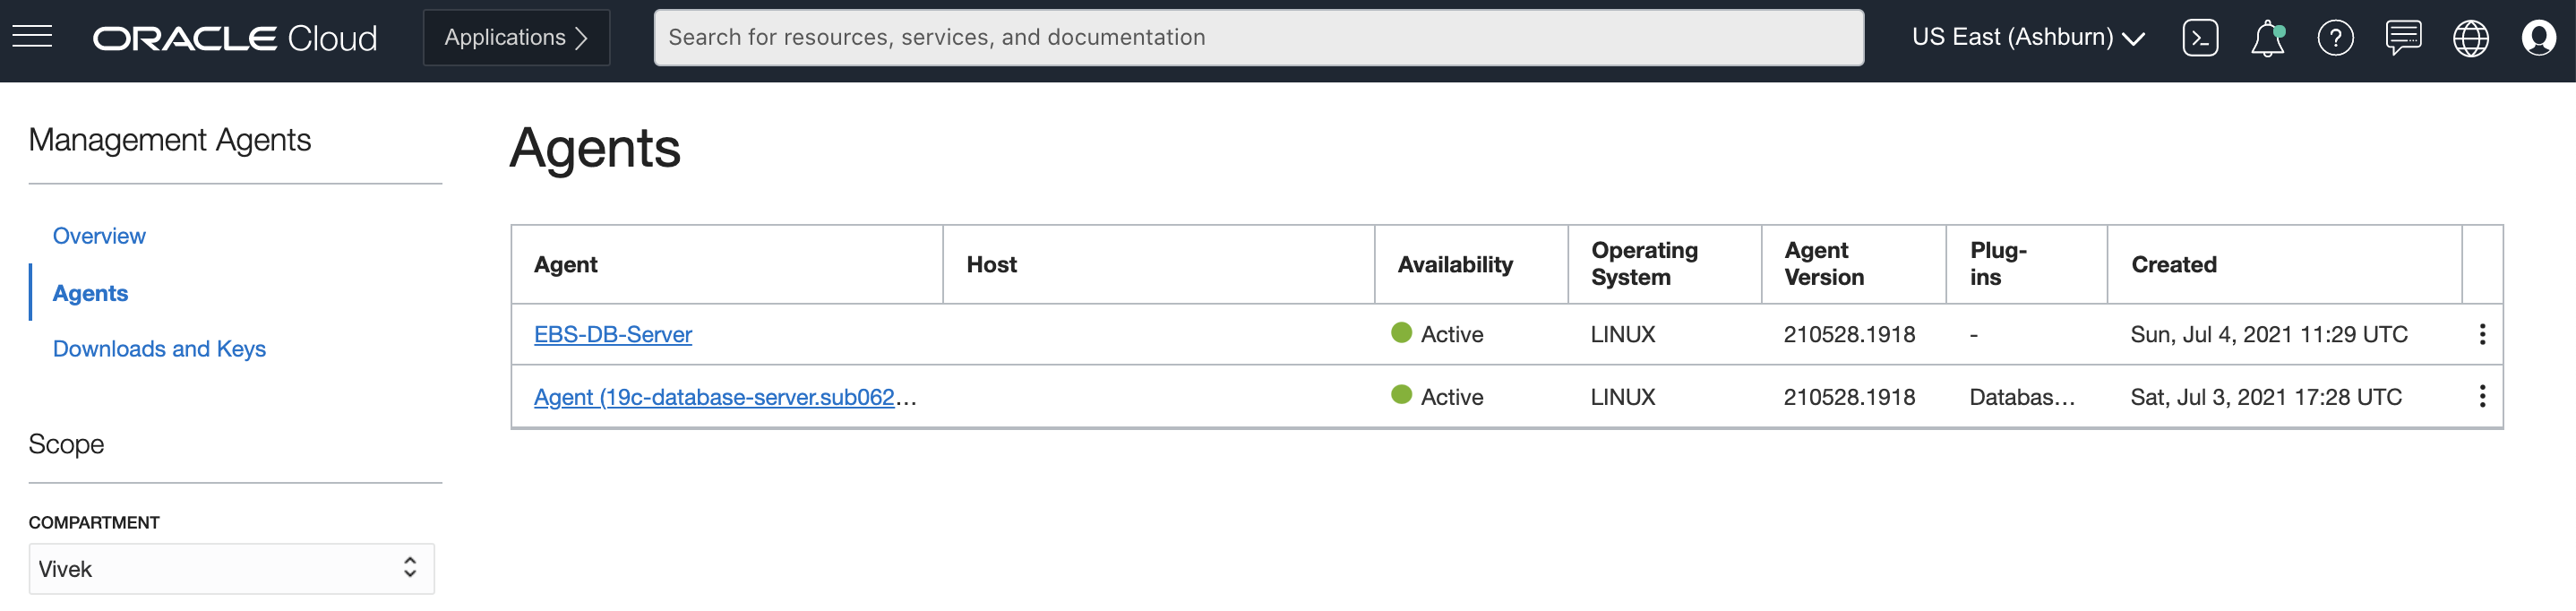
Ensure that agent availability is active. If the status of the agent is not active, check the prerequisites for deploying management agents. Click the agent and check the host details.
Register the external database
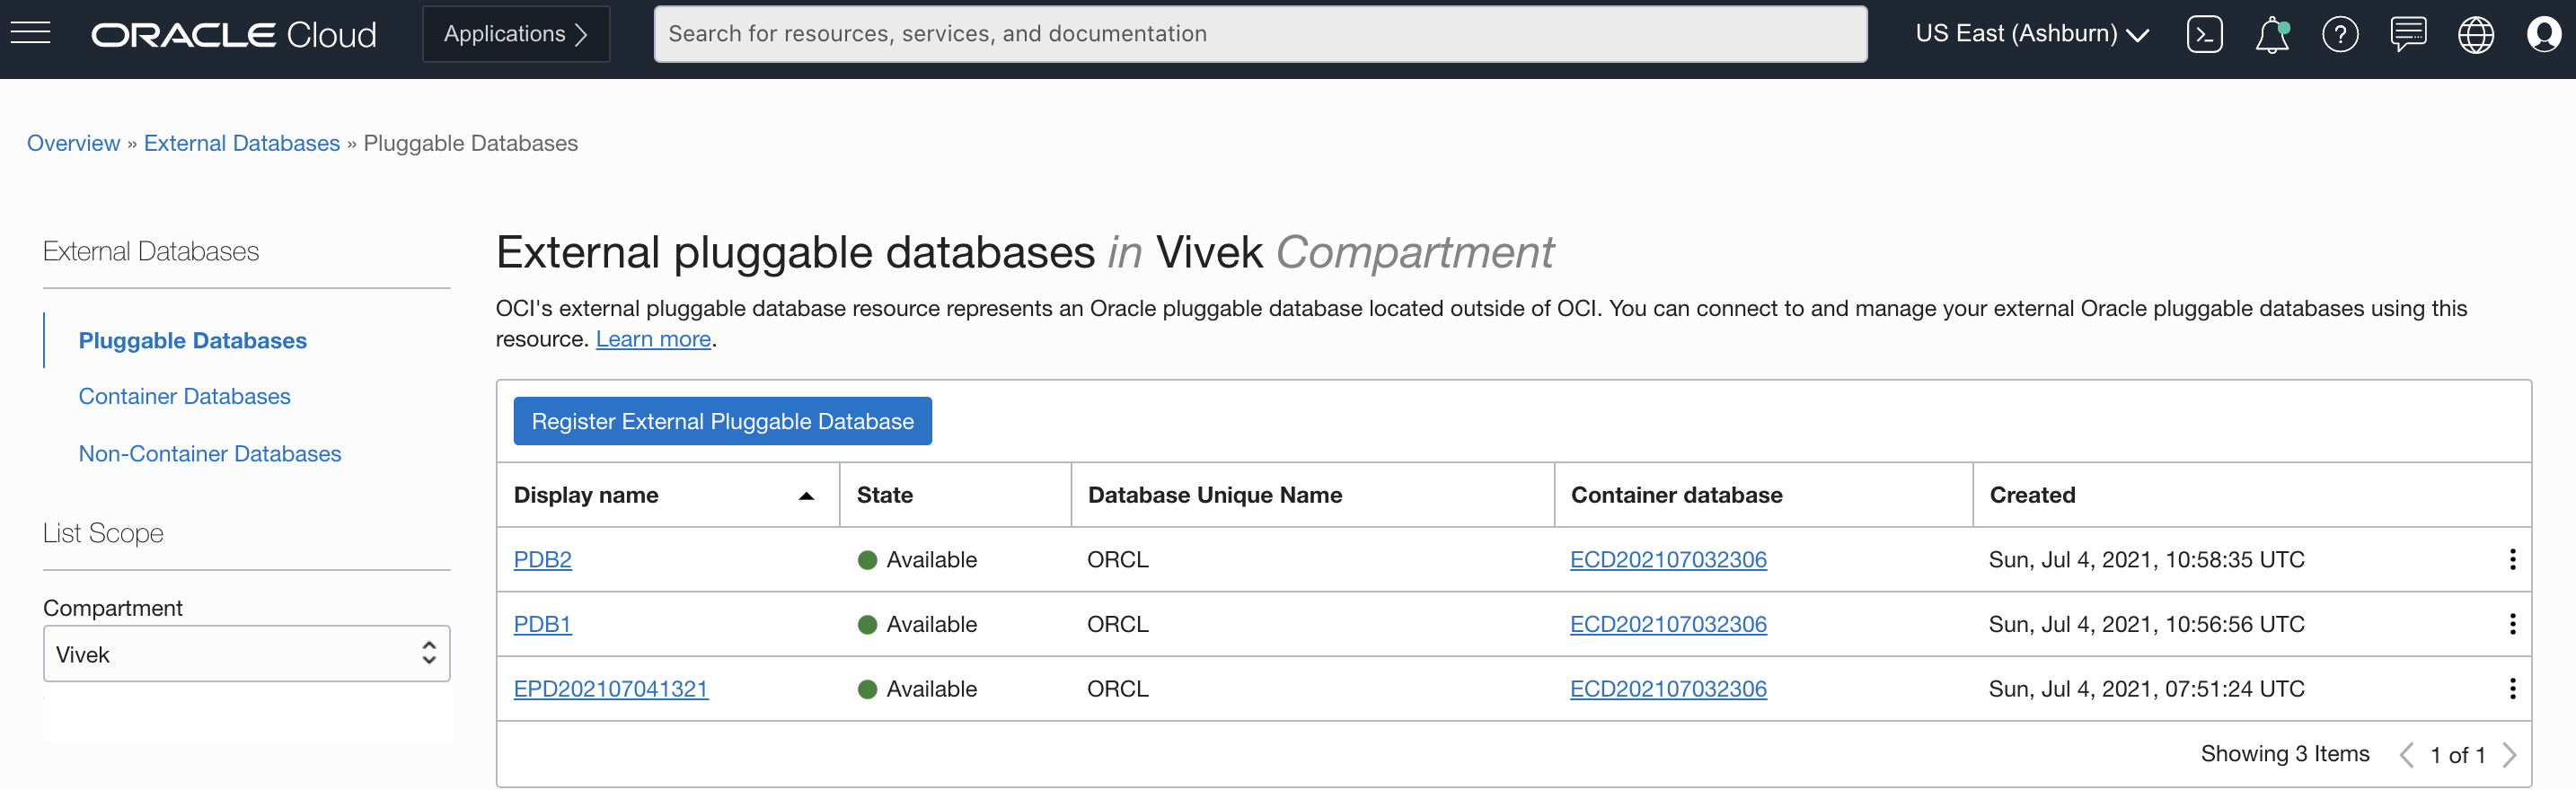
Next, we register the Oracle database on the management agent host as an external database. From the Console, go to Oracle Database and click External Database. We can register pluggable, container, and non-container databases.
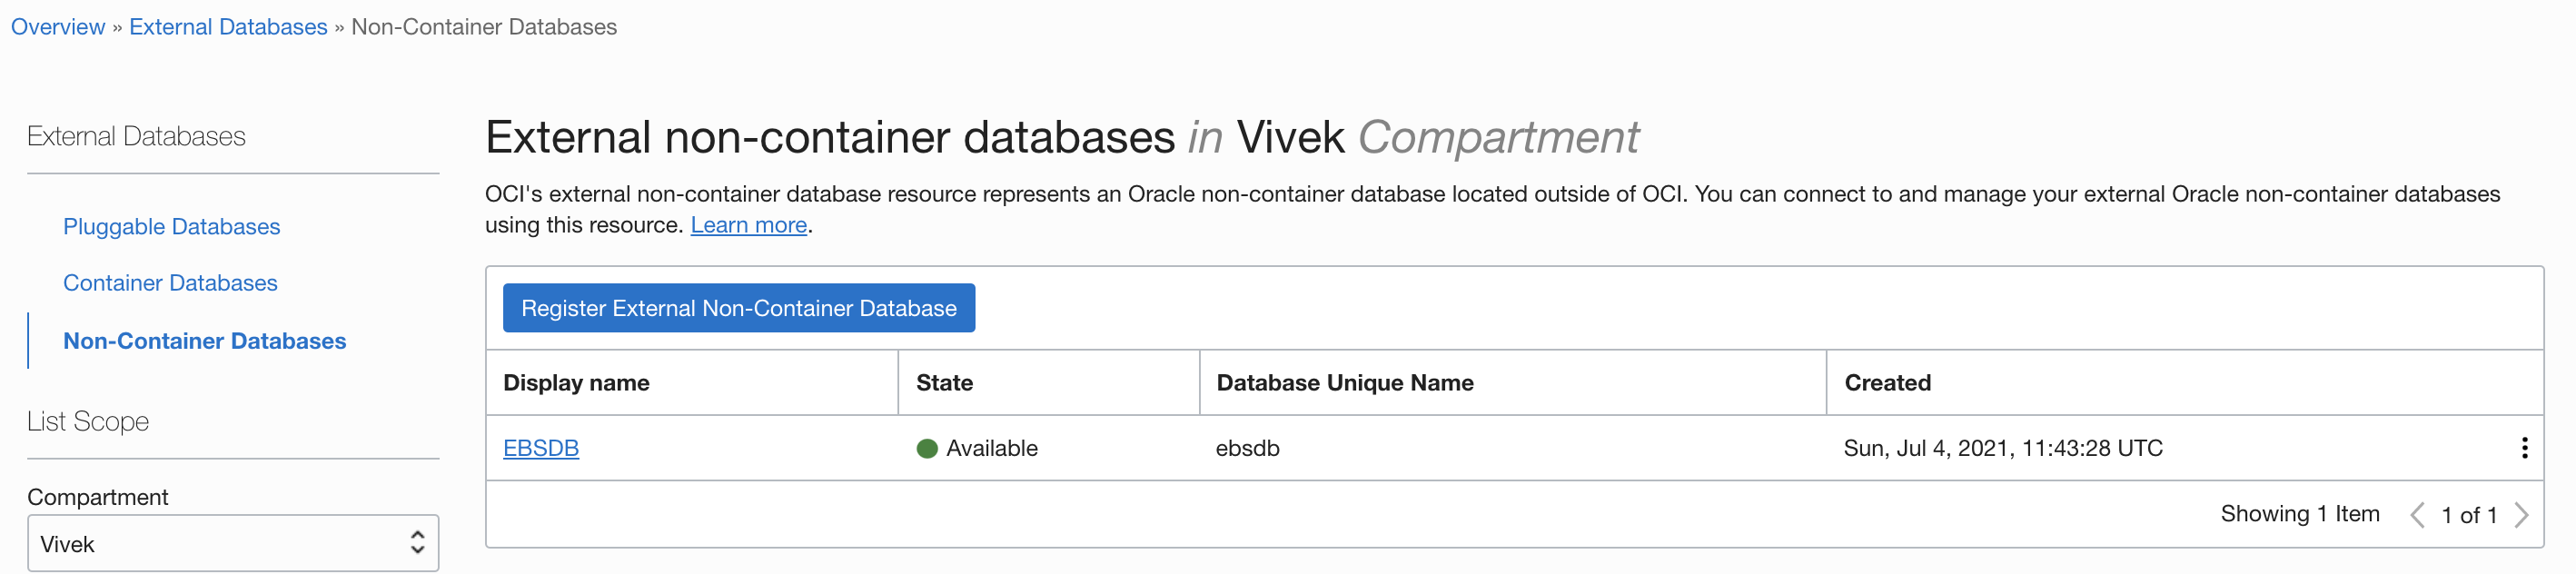
Go to Non-Container Databases and click Register External Non-Container Database. Enter all required details, such as connector agent ID, connection string information (server name and port), and database connection credentials.
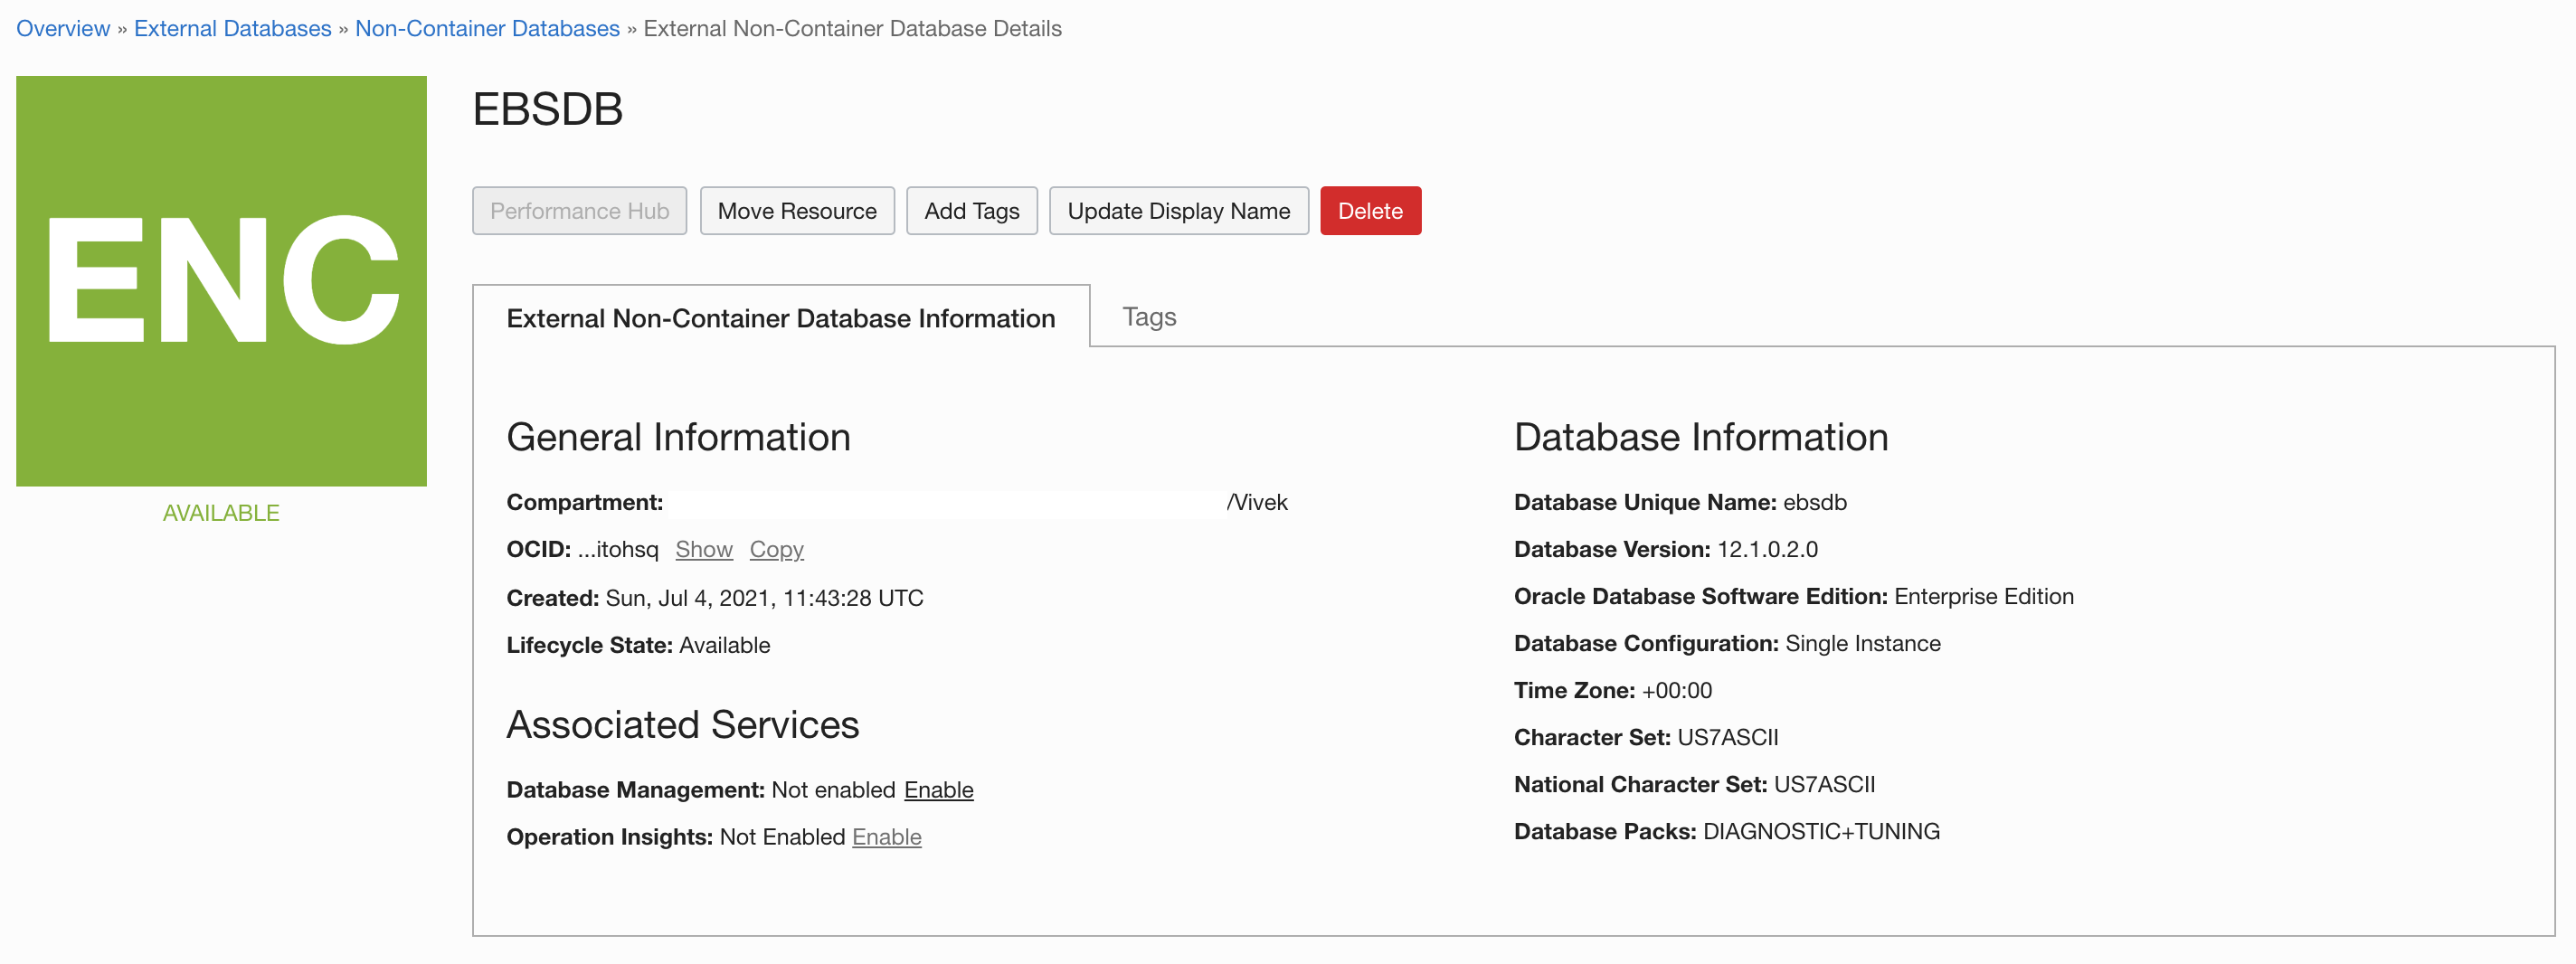
Verify the status of the external database as available. If the registration fails during connection to Oracle Database service, verify that the management agent host isn’t blocking any connections to the port and service.
Enable Database Management for your registered database
Click the database name registered under External Databases. This selection displays the general information about the database.
To enable Database Management, go to Associated Services, Database Management, and click Enable.
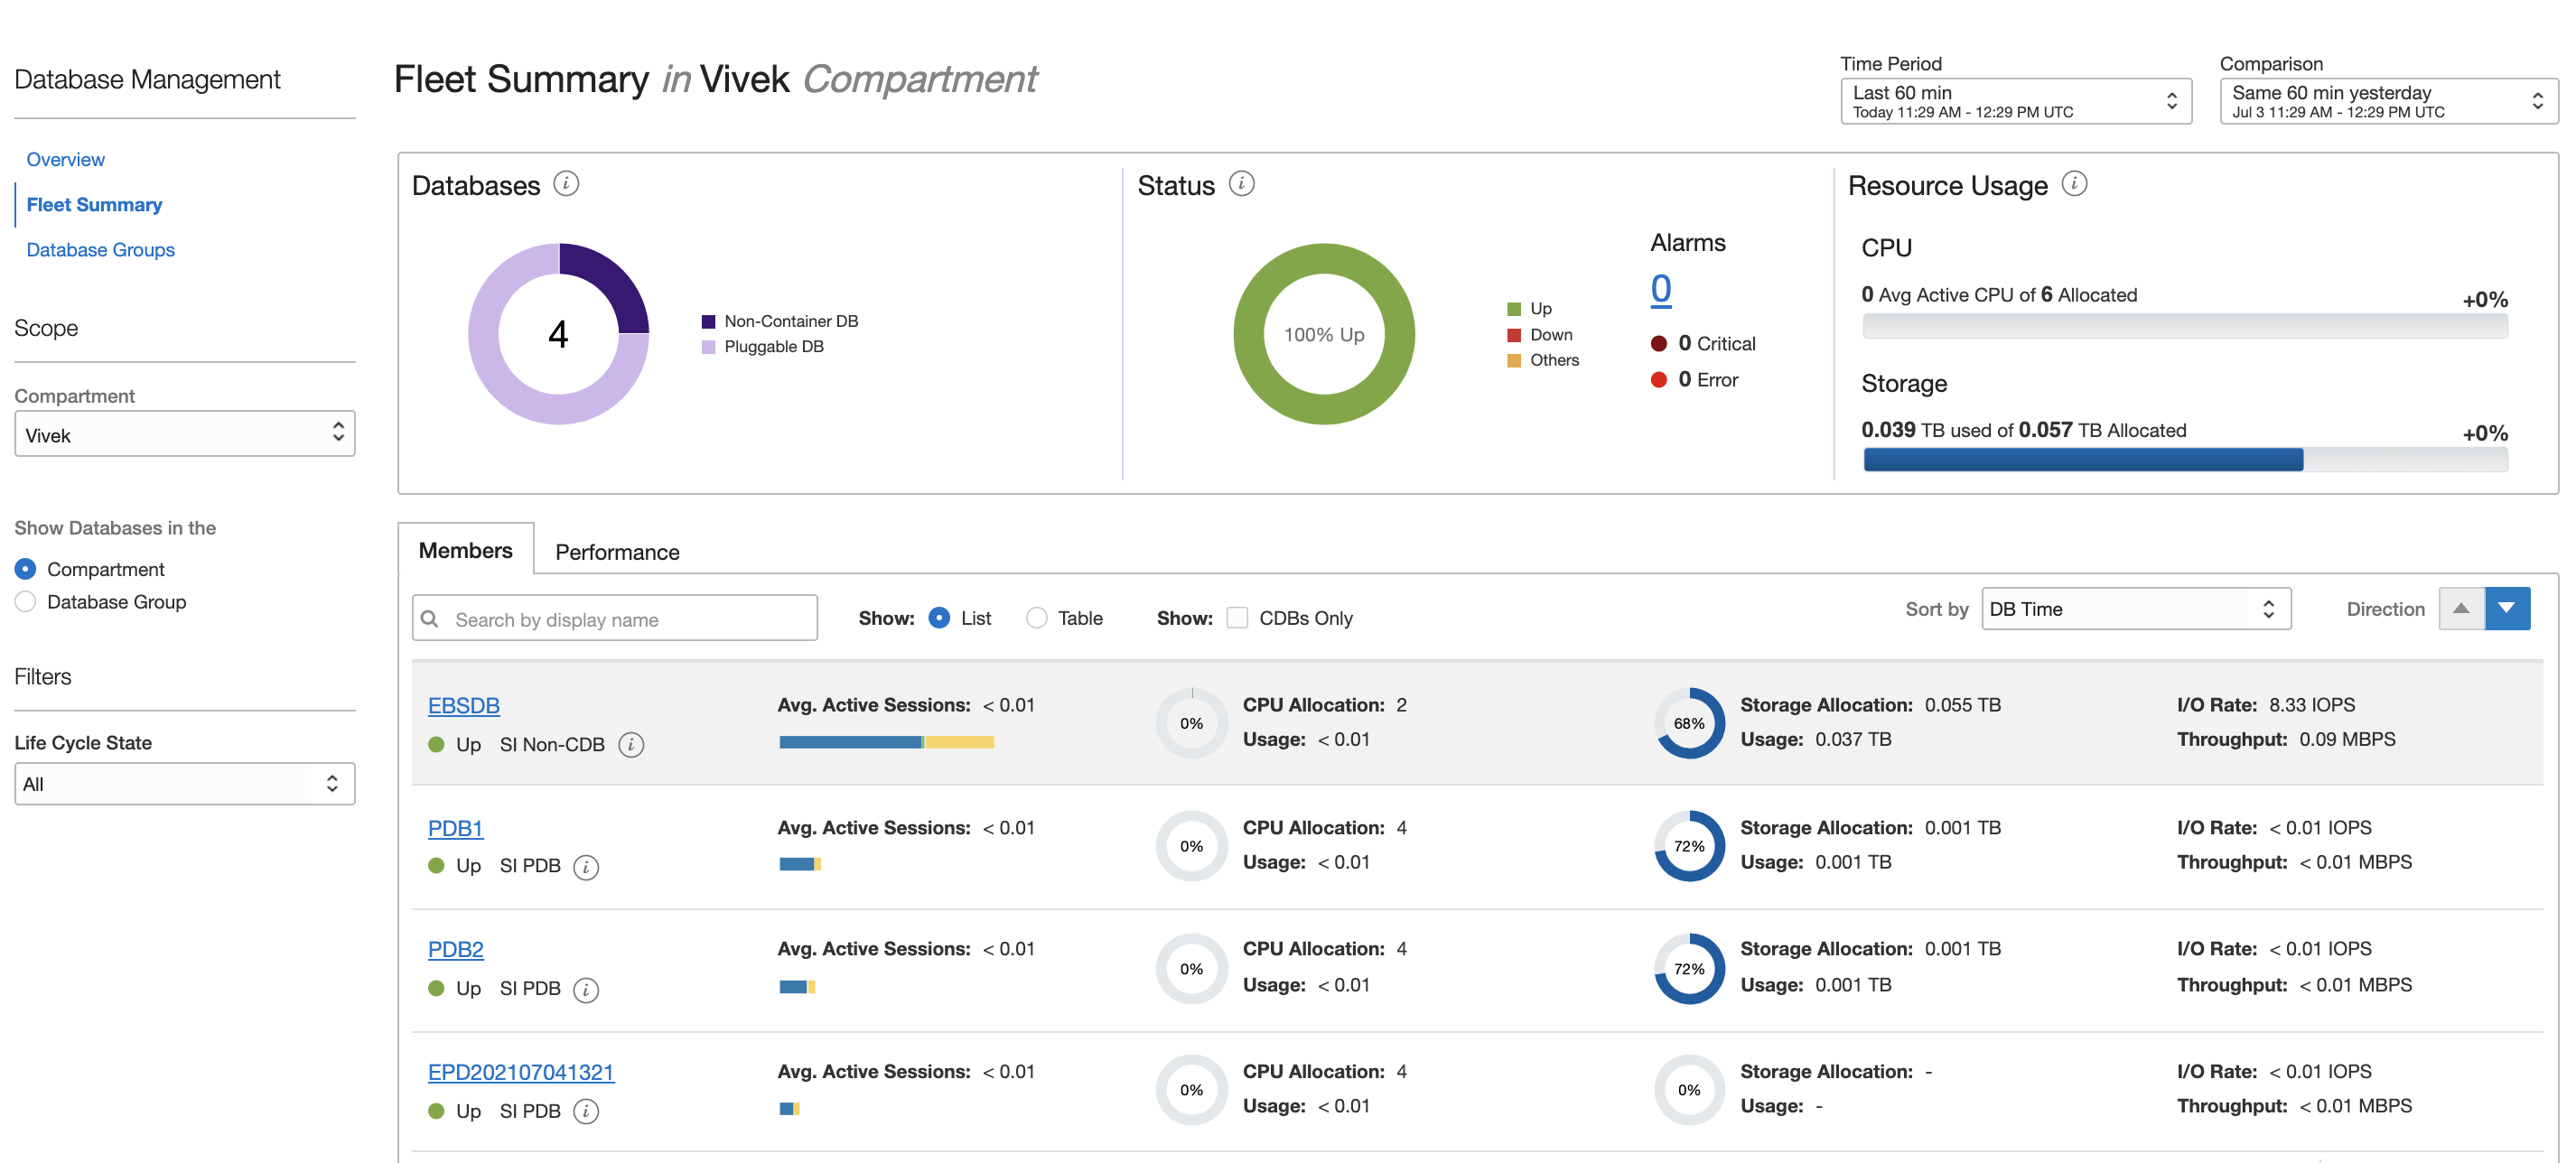
When Database Management is enabled, under Database Management, go to Fleet Summary and confirm that the database is listed. On the Fleet Summary page, you can monitor multiple Oracle databases, which include single-instance and Real Application Cluster (RAC) databases. With this capability, you can proactively detect and identify the cause of performance issues across a fleet of databases and respond to performance and configuration-related alerts.
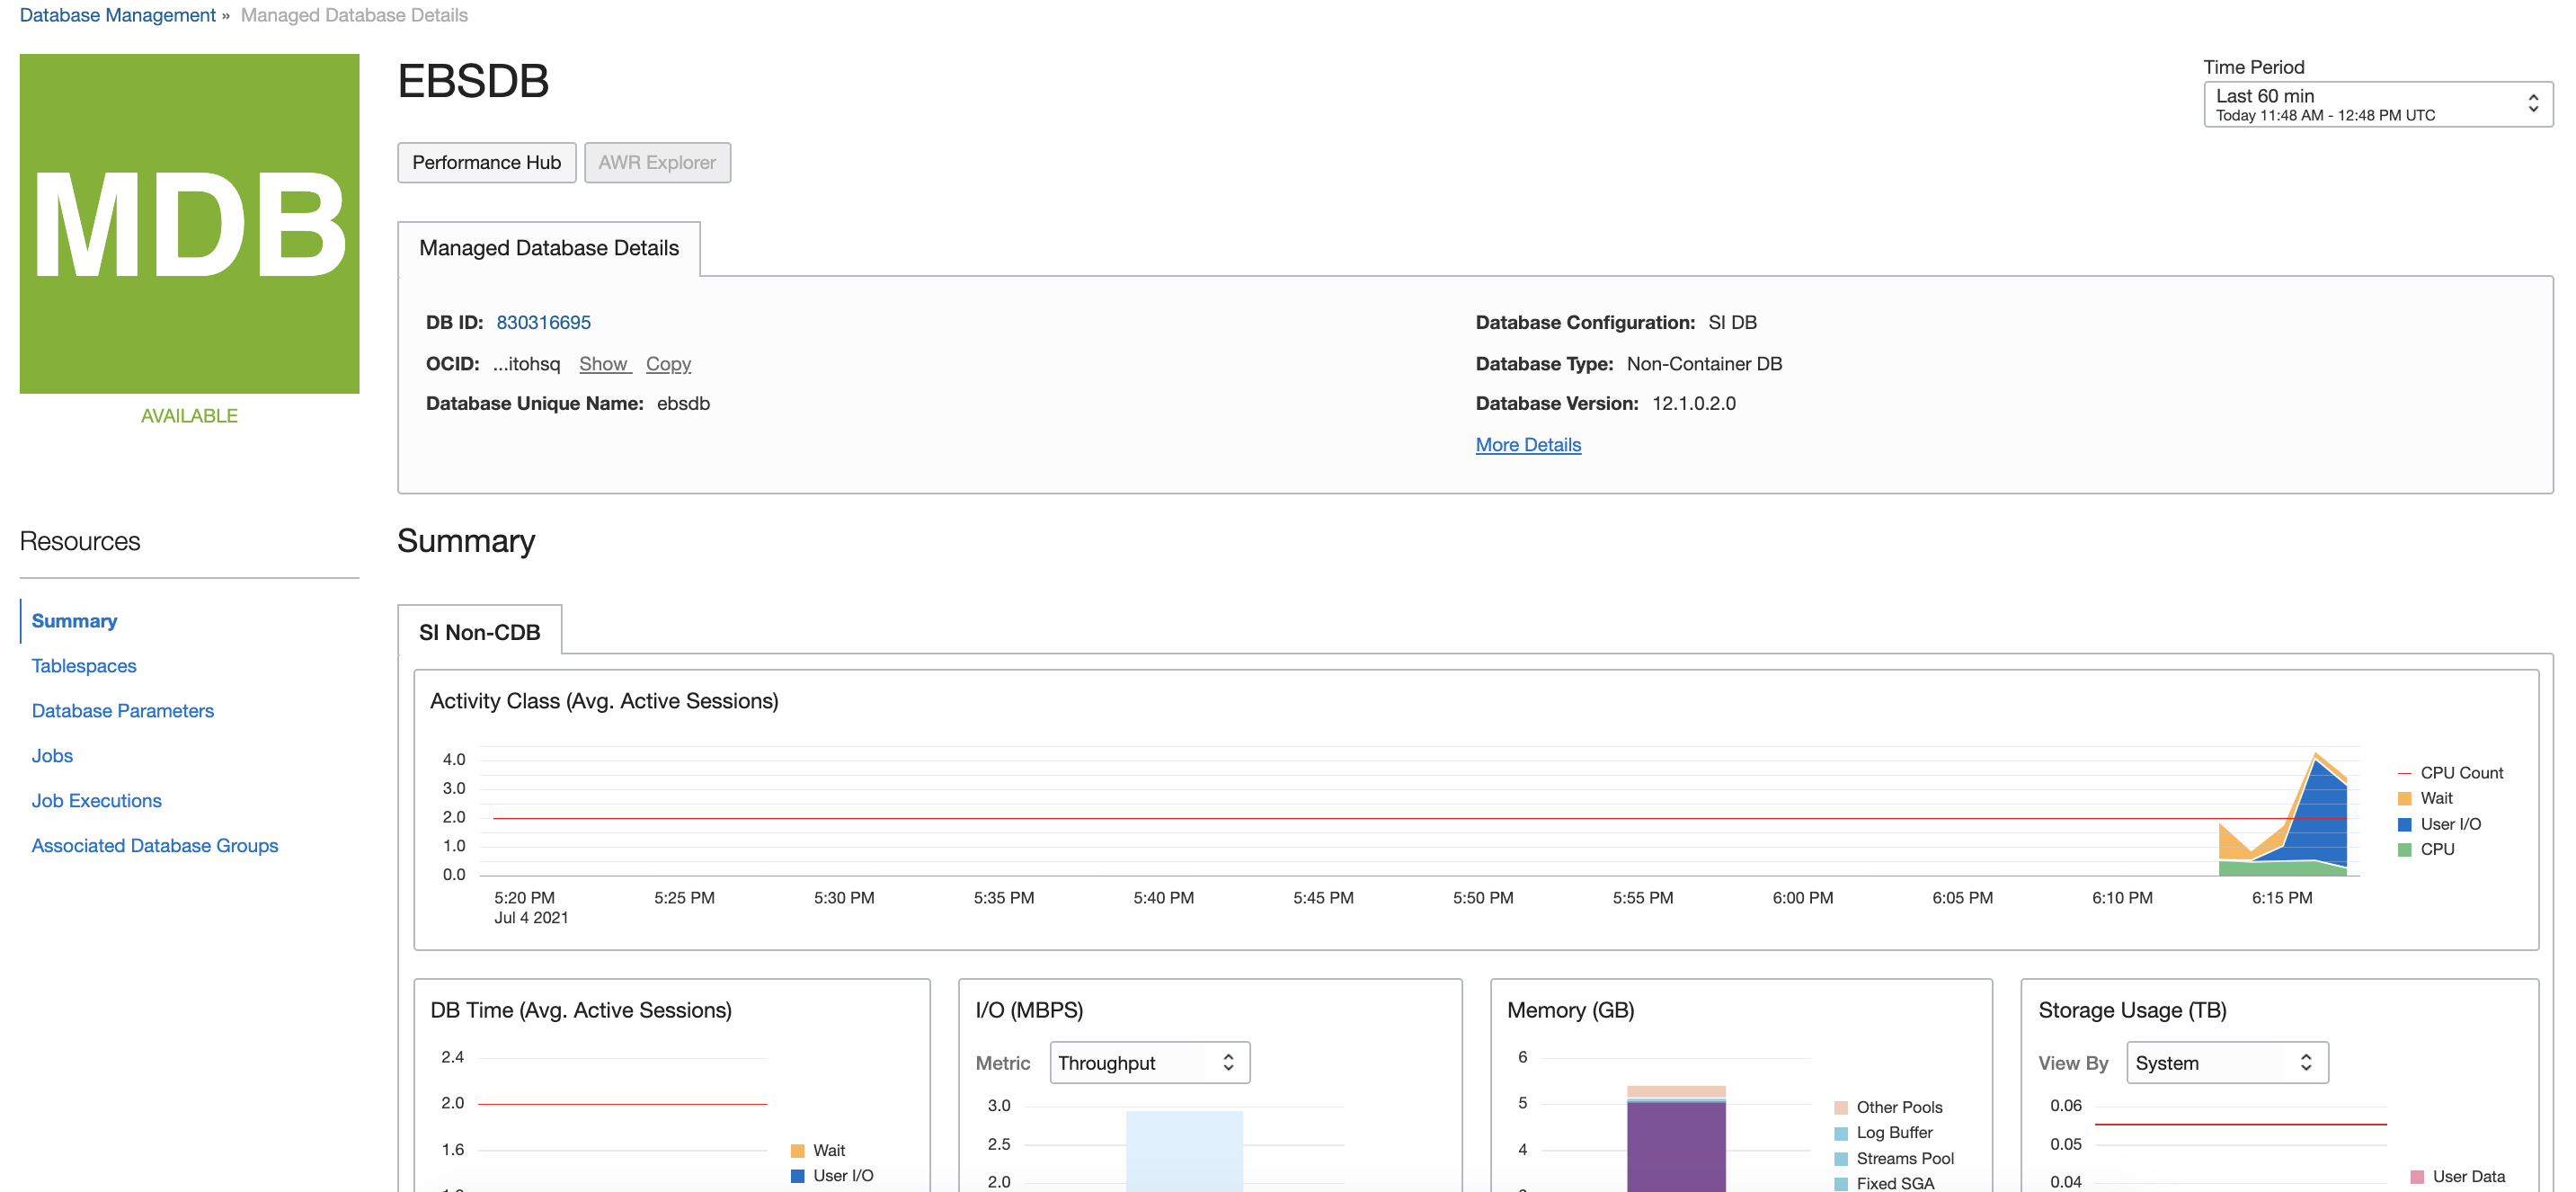
To open Managed Database details, such as the database ID, OCID, database configuration, and database type, click the name of the Oracle database. To view more details about the database, such as edition and compartment, you can click the More Details link in this section.
Click Performance Hub to go to the Performance Hub and analyze and tune the performance of the Oracle database. With this tool, you can view real-time and historical performance data.
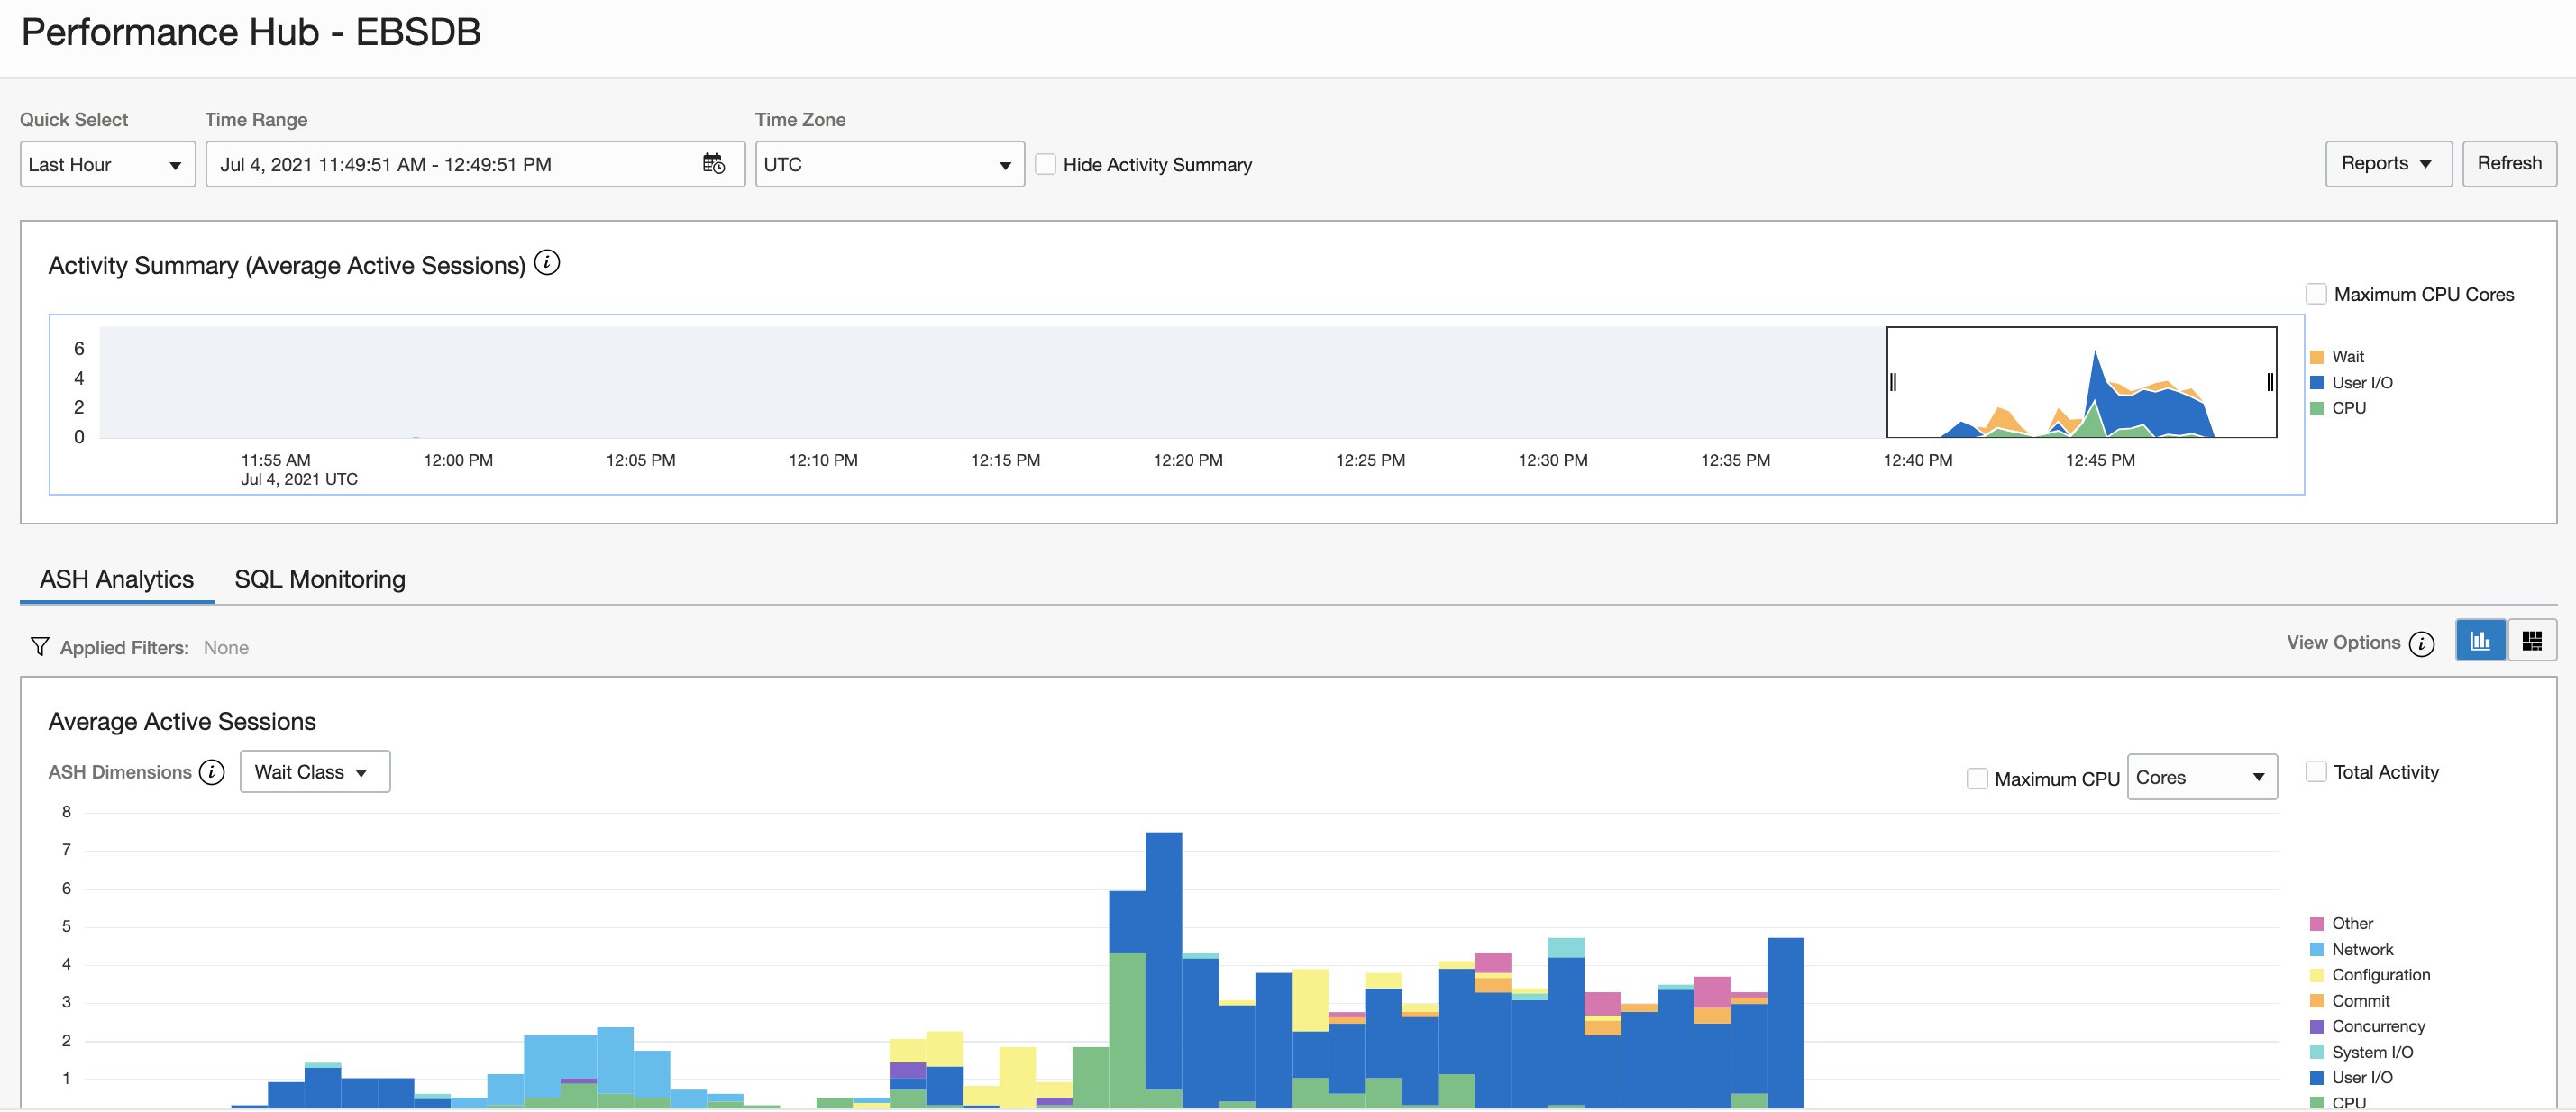
The Performance Hub window consists of a graphical time range display that you use to select the period of all data to be displayed. It includes the following tabs that display performance data:
-
ASH analytics
-
SQL monitoring
-
Workload
-
Blocking sessions
-
Automatic Database Diagnostic Monitor (ADDM), available for databases using shared Exadata infrastructure
Conclusion
To learn more, visit the Oracle Cloud Observability and Management Platform product page and see the following resources: