Creating a Compute instance from a VMDK requires some manual steps: Uploading the VMDK to a bucket, converting it to a custom image, and creating the Compute instance. But what if you have a lot of VMDK files? If you want to migrate your virtual machines (VMs) from VMware to Oracle Cloud Infrastructure (OCI), manual migration takes a lot of your time.
In this blog, we walk you through a simple automated solution that does the job for you. It uses the OCI Functions and Events services to detect when an object is uploaded in a bucket, converts it to a custom image and then creates the Compute instance based on that custom image.
The workflow
Whenever you upload a VMDK into a designated bucket, an Events rule triggers a function that creates a custom image from that object.
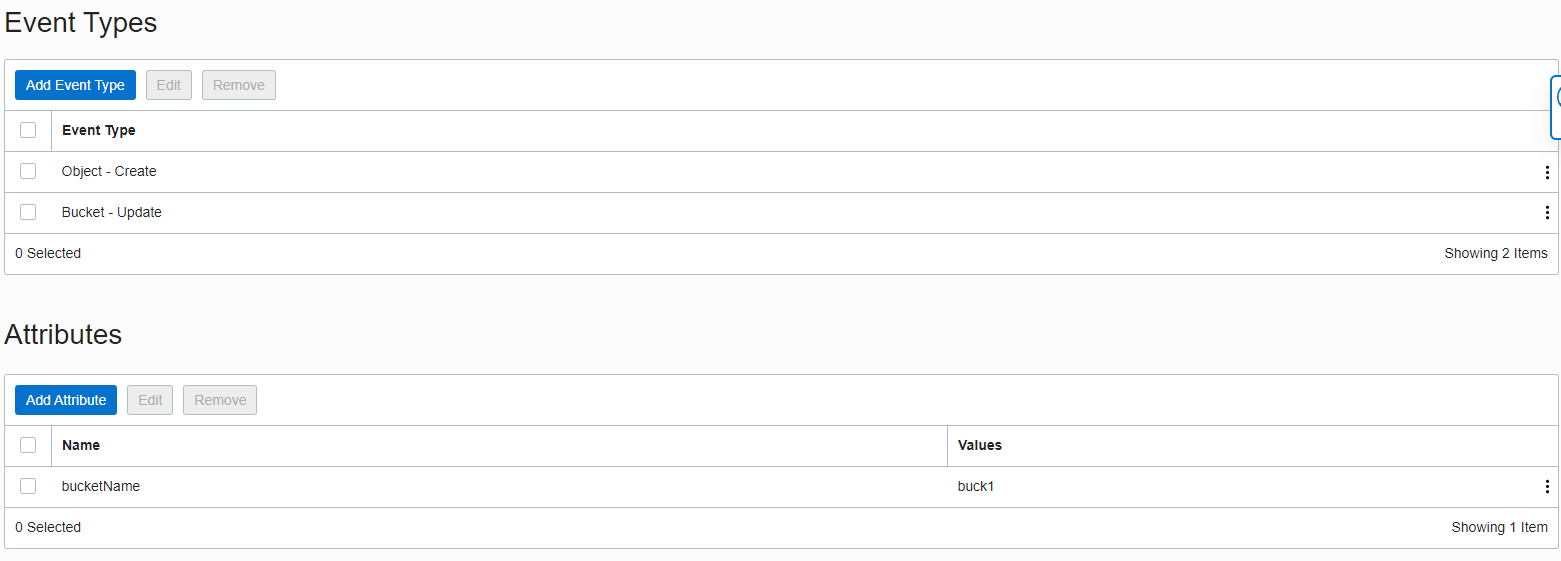

Then, another event rule triggers when the Custom Image is created. This event triggers another function to create a Compute instance based on that custom image.


The shape for the Compute instance is taken from the configuration of the function that creates the instance. If the object’s name ends with “_2.2,” the shape uses VM.Standard2.2. The underscore is important, so ensure that you add it.
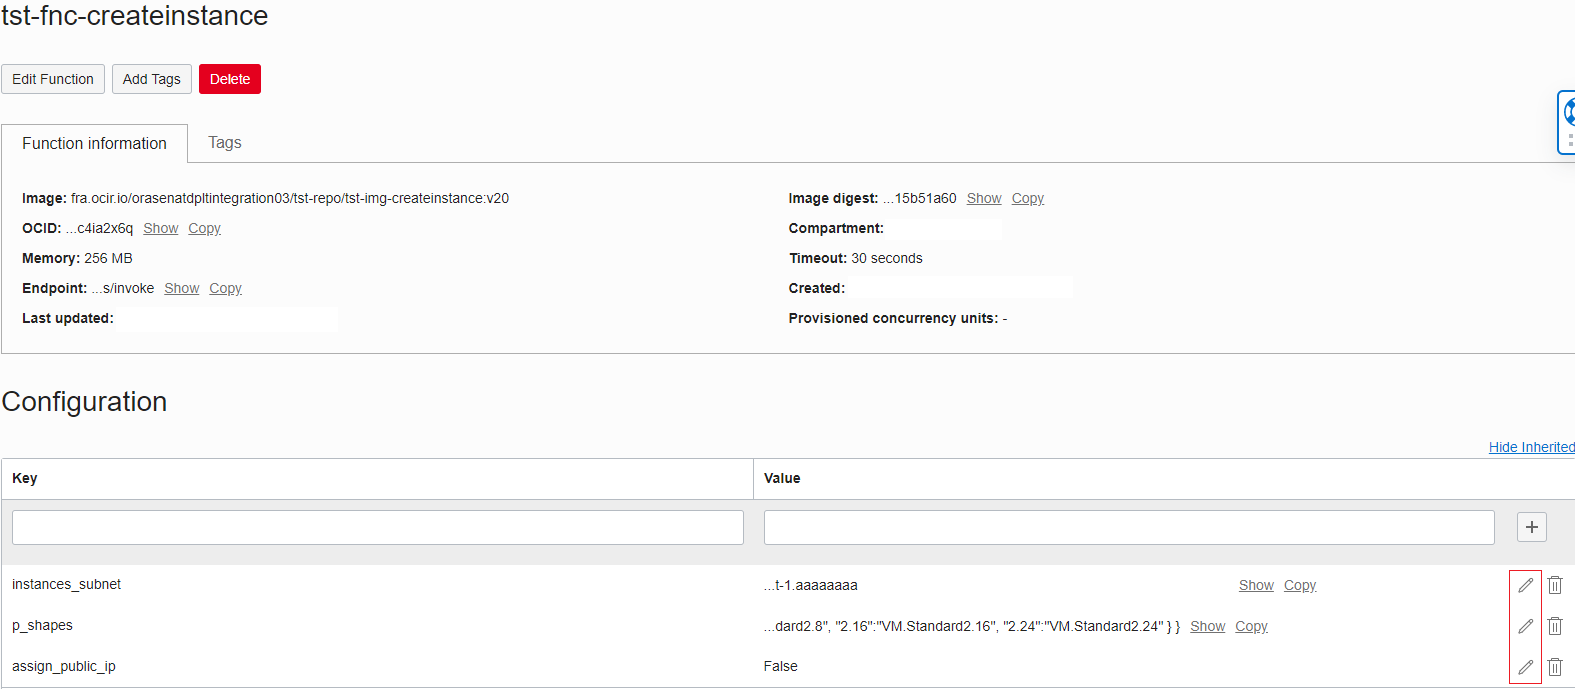
You can change the configuration of the function from the Console by clicking the Edit button marked with red. You can change either the subnet in which the instances are created, regardless of if the instances have public_ip, and edit the corresponding shape for each key in the shapes map. For example, “2.1” has the corresponding shape VM.Standard2.1.
If you want to manually upload VMDKs in the designated bucket, you need to manually set the name of these files when you upload them. So if you have a VMDK file example_vm.VMDK and are using the default configuration, you want the VM.Standard2.4. When uploading the VMDK, name the object example_vm_2.4 to trigger the correct automation.

If you have ever tried to export VMs from VMware, you know that you can’t specify the name of the exported VMDK. You can only specify the path. So, we also came up with an automated solution to help with the export and upload the VMDKs with proper names based on the hardware specifications from VMware.
We cover this solution further in this blog post. Because the conversion from VMDK to Compute instance is separate and you can use any option you choose to upload the VMDKs, we divided this tutorial to the following parts:
-
Conversion from VMDK to Compute instance using Functions and Events
-
Automation process to parallel export and import VMDKs from VMware into an OCI Object Storage bucket
Converting the VMDK into a Compute instance
We wanted to make the deployment as simple as possible, so we created an Ansible playbook that creates all the required components for this solution, except the bucket and the subnets, where the application and the Compute instances reside.
You can find the following items in the setup folder:
-
convert_VMDK_image: Folder containing the Docker image for the function that converts the VMDK into a custom image
-
create_instance_image: Folder containing the Docker image for the function that creates the Compute instance.
-
destroy_setup.yaml: Ansible playbook that removes the resources created by the setup playbook.
-
inventory_setup.ini: Inventory file that contains the editable variables for the setup playbook
-
readme.md: Readme file
-
setup.yaml: Ansible playbook that creates the required resources
The setup.yaml playbook frees you from the manual work to deploy the functions and creates the related resources with the following steps:
-
Creates an authentication token to allow the Docker registry login.
-
Creates a dynamic group for the OCI Functions service.
-
Creates the policies for the dynamic group to read objects from buckets and manage instance-family in your compartment.
-
Creates a container repository.
-
Builds both Docker images and pushes them to the repository.
-
Creates an application for the functions to reside in.
-
Creates the two functions: One for converting the VMDK to a custom image and one for creating the Compute instance
-
Creates the two event rules: One that triggers the convert function and one that triggers the “Create compute instance” function
-
Writes the details about the resources created in the “inventory_setup.ini” file to be later used by the “destroy_setup_yaml” when you want to destroy the resources created by this playbook
Prerequisites
-
An OCI Object Storage bucket that has Emit Object Events enabled

-
A subnet for the application
-
A subnet for the Compute instances
-
Docker (it must be up and running because it’s used to build the two images and push them to the repository)
-
OCI Authentication: Uses the default ~/.oci/config file to authenticate to OCI
-
Privileges to create dynamic groups and policies, which are created by the setup.yaml playbook and used by the functions. For more information, see Accessing Other Oracle Cloud Infrastructure Resources from Running Functions and Example of OCI Function as Resource Principal [enabled] to invoke OCI services.
Populating the inventory_setup.ini file
Set the values for the following variables:
-
user_id: Your user OCID
-
region: The region where you create the resources
-
compartment: The compartment where you create the resources
-
bucket_name: The name of the preexisting bucket where you upload the VMDKs
-
repository_name: A name that you set for the repository
-
app_name: A name that you set for the application
-
app_subnet_id: The OCID of the subnet where the app resides
-
instances_subnet_id: The OCID of the subnet where the app resides
-
assign_pub_ip: If the instances have public IPs (The default is False.)
-
tag_build: A tag that you set for the images
-
func_convert_VMDK: A name that you set for the function that converts the VMDK to a custom image
-
convert_docker_image: A name that you set for the converted Docker image
-
func_create_instance: A name that you set for the function that creates the Compute instance
-
create_instance_docker_image: A name that you set for the created instance Docker image
Running the code
To deploy everything, run the command, ansible-playbook setup.yaml -i inventory_setup.ini -vvv. To destroy the resources created with setup.yaml, run the command, ansible-playbook destroy_setup.yaml –i inventory_setup.ini -vvv.
Automation for exporting the VMDKs from VMware and importing to the bucket
The export_import.yaml Ansible playbook exports the VMDKs from VMware and importing them in an Object Storage bucket. Both export and import are done in parallel using async and poll, which is quicker than doing the process individually.
In the export_import folder, you can find the following files:
-
export_import.yaml: Ansible playbook that takes care of the export from VMware and import into the bucket
-
setup.iss: Response file used to install the WinVirtIO agent on Windows machines
Depending on how you set the RunWinTasks variable, you have the following options:
-
If you set RunWinTasks to true, it gets all virtual machines (VMs), including the Windows ones. If you want to create Compute instances from Windows VMs, you need the WinVirtIO agent installed on them. This playbook has a block of code that checks if the agent is already installed on the Windows machines. If not, it copies and installs it using a response file. The block of code only runs if the “RunWinTasks” variable is set to true.
-
If you set RunWinTasks to false, only the Linux VMs are exported and uploaded in the bucket.
Workflow
The code gathers information about the VMs and creates the following lists:
-
vm_list: List of all VMs
-
windows_vm_list: List containing only the Windows VMs
-
linux_vm_list: List containing only the Linux VMs
If RunWinTasks is set to true, it runs the Windows-related block of code, which checks if the WinVirtIO agent is installed on the Windows machines. If not, it copies and installs it using the response file. It shuts down all VMs (both Windows and Linux) to export them and powers them back on after.
If RunWinTasks is set to false, the code goes to the Linux block of code, where it powers off only the Linux VMs, exports them, and powers them on.
In both scenarios, the export is done the same way. It checks the hardware specifications of each VM and exports them in a designated folder inside the v_path variable.
export_dir: "{% if item.instance.hw_memtotal_mb <= 15360 and item.instance.hw_processor_count < 2 %}./{{ v_path }}/2.1{% elif item.instance.hw_memtotal_mb <= 30720 and item.instance.hw_processor_count < 3 %}./{{ v_path }}/2.2{% elif item.instance.hw_memtotal_mb <= 61440 and item.instance.hw_processor_count <= 4 %}./{{ v_path }}/2.4{% elif item.instance.hw_memtotal_mb <= 122880 and item.instance.hw_processor_count <= 8 %}./{{ v_path }}/2.8{% elif item.instance.hw_memtotal_mb <= 245760 and item.instance.hw_processor_count <= 16 %}./{{ v_path }}/2.16{% elif item.instance.hw_memtotal_mb > 245760 and item.instance.hw_processor_count > 16 %}./{{ v_path }}/2.24{% endif %}"This process covers all shapes for VM.Standard2. So, if a VM with the name “Vmtest” has 15–30-GB memory and fewer than three CPUs, the VM is exported to “v_path/2.2/VMtest/Vmtest.VMDK.”
After either of the blocks have finished, it gets the VMDK files path, such as v_path/2.2/testlinux/testlinux.VMDK, uploads the VMDKs, and sets the object’s name based on the folder that they were in, such as testlinux_2.2.
Prerequisites
-
Windows Ansible modules: Run the command, ansible-galaxy collection install ansible.windows
-
Winrm installed on the Windows VMs
-
Oracle VirtIO Driver: If you want to export and create Instances from Windows machines, install these drivers. The script takes care of the installation using the response file, but the zip file containing the drivers needs to be downloaded and put in the export_import folder where the response file resides.
If you want another version or the PAR is not working, you can download it from Oracle delivery site. To install the drivers, use the following steps:
-
Go to the delivery site.
-
Search for “Oracle Linux.”
-
Select a version: To get 1.1.5, select Oracle Linux 7.7.0.0.0.
-
In the checkout, select Platform x86 64 bit.
-
Accept the terms.
-
Select “Oracle virtio Drivers Version for Microsoft Windows 1.1.5” from the list to download it.
-
Move the zip file in the export_import folder where the response file is.
The Windows Ansible modules, Winrm, and Oracle virtio Drivers are only required if you set RunWinTasks to true.
-
Populating the variables
You can find the following variables needed by the workflow inside the playbook:
-
v_bucket_name: The name of a preexisting bucket where you upload the VMDKs
-
v_namespace: The Object Storage namespace. To view your Object Storage namespace, open the profile menu in the Console, click Tenancy, and find it listed under Object Storage Settings.
-
v_path: The path where the VMDKs are exported
-
v_pattern: “*.VMDK.” Don’t edit this one. The workflow uses it to look only for VMDK files.
-
Hostname: VMware hostname
-
Username: VMware password
-
Datacenter: VMware data center
-
RunWinTasks: Command to run the code block that installs the virtio agent and exports all VMs. If set to false, only the Linux VMs are exported.
-
ansible_winrm_passL Password for the Windows machines
-
ansible_winrm_user: Username for the Windows machines
Running the code
To run the code, use the command, ansible-playbook export_import.yaml -vvv.
Conclusion
You can use both solutions covered in this blog post separately. The first deploys functions and events that create the custom images and Compute instances when a file with its name ending in either _2.1, _2.2, _2.4, _2.8, _2.16, _2.24 is uploaded in the designated bucket. You can use any method you want to upload them.
The second automation (export_import.yaml) helps you export VMDKs from VMware and import them to the bucket faster because both export and import are done in parallel. Using this playbook automatically sets the name of the VMDK files when they’re uploaded to the bucket. If you don’t want to use automation, set the name manually.
For more info on how to get the Oracle virtio drivers, see Announcing Oracle virtio Drivers 1.1.5 for Microsoft Windows. For information on importing a VM to Oracle Cloud Infrastructure, see Import a VMware Virtual Machine to Oracle Cloud Infrastructure.