Last Updated: 19-5-25
Below are the steps to Integrating Oracle Identity Cloud Service (IDCS) with WebLogic Server (On-Prem) using SAML :
WebLogic Service Provider (SP) Configuration :
Step 1 :
Create a SAML Identity Provider and SAML Authenticator
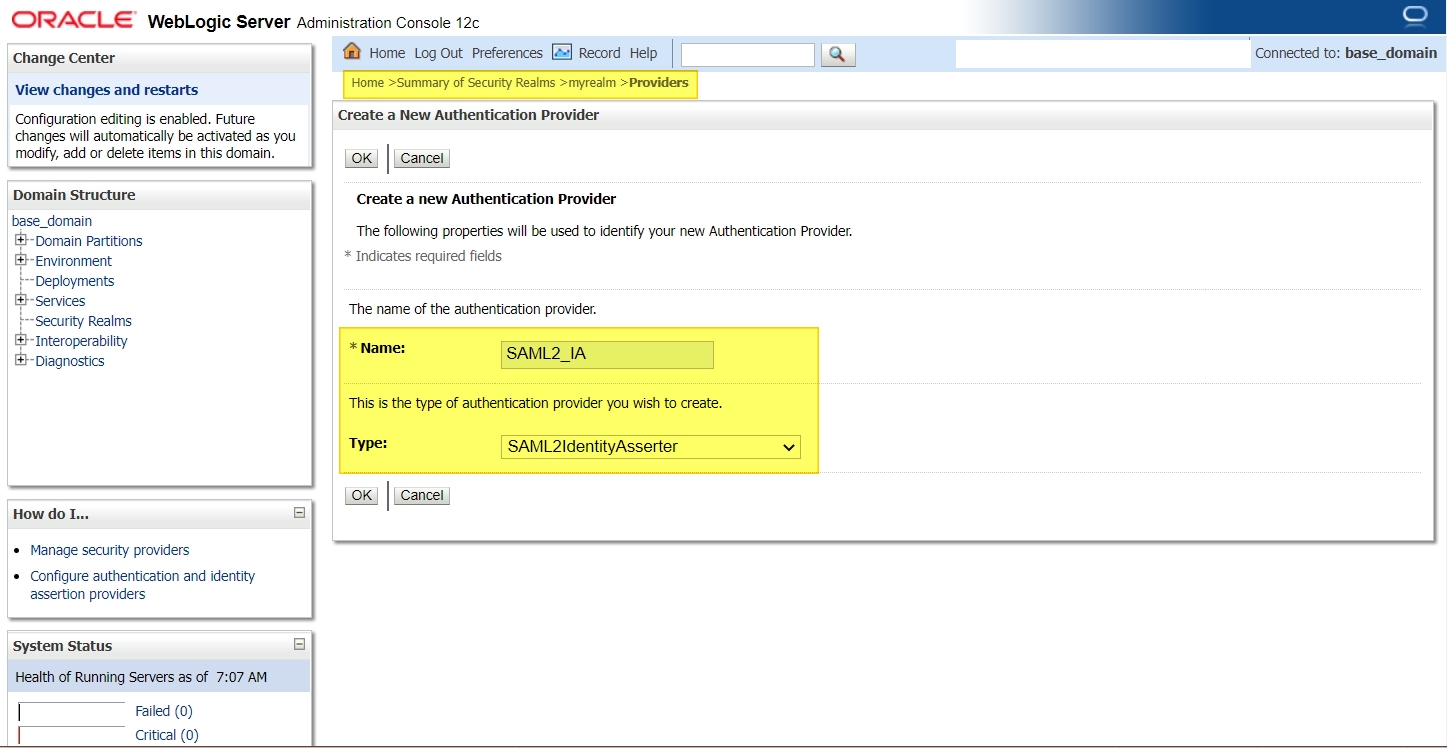
Since Weblogic Server is the Service Provider (which accepts a SAML token), we need to create a SAML Identity Asserter provider from the console :
Login to console -> Security Realms -> myrealm -> Providers -> Authentication -> new :
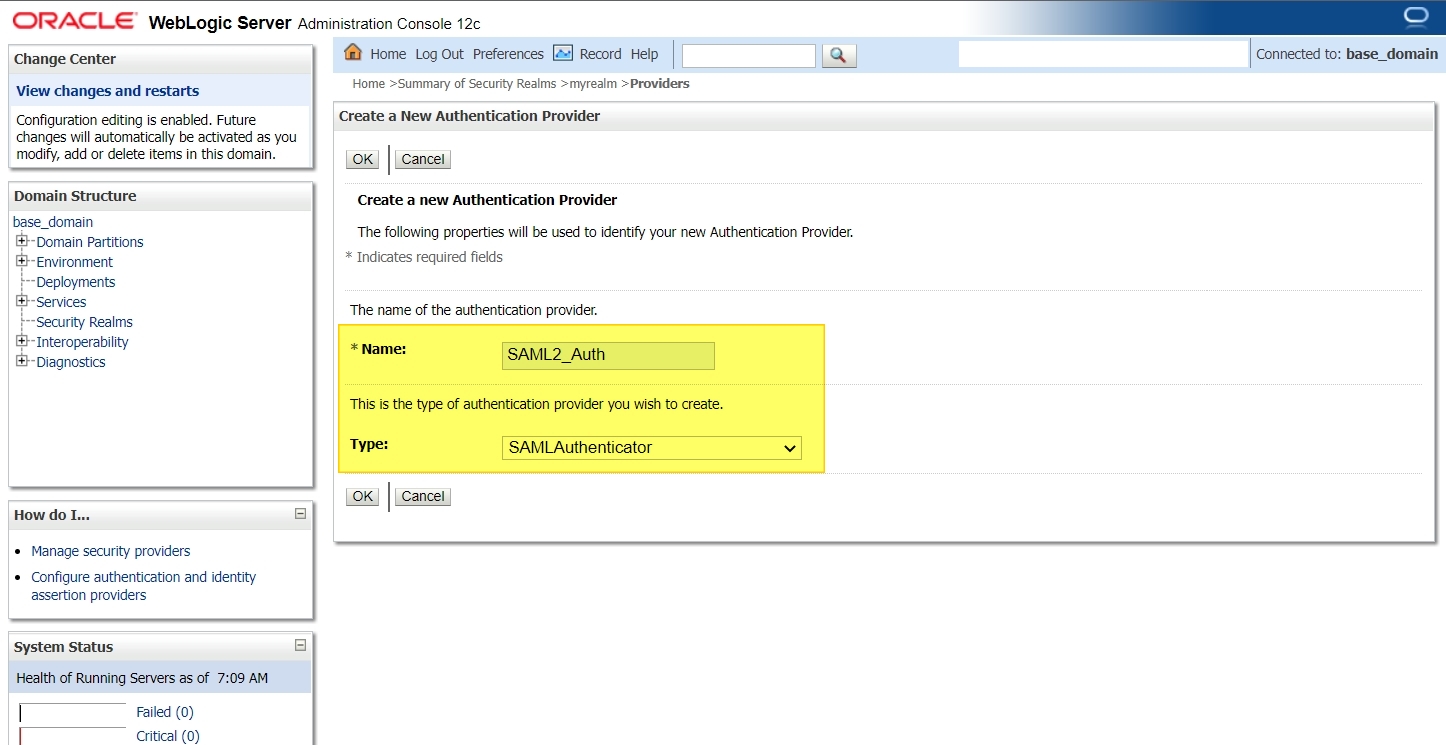
In this scenario, all the users will be present in IDCS and not in WLS, so we need to create a SAML Authenticator to enable a virtual user (a user that does not correspond to any locally-known user) to log in via SAML OR you could even configure an Authentication provider and connect to an LDAP which has all the list of users and Groups (in which case you dont need virtual user configuration).
Have a look at the following doc for more info on the same :
Link: https://docs.oracle.com/middleware/12213/wls/SECMG/saml_atn.htm#SECMG205
Login to console -> Security Realms -> myrealm -> Providers -> Authentication -> new :

Now restart all the servers in this domain.
Step 2 :
Select the server where SSO application will be deployed and navigate to “Federation Services” as shown below :
Login to console -> +Environment -> Servers -> <server_where_SSO_application_will_be_deployed> -> Federation Services -> SAML 2.0 General :
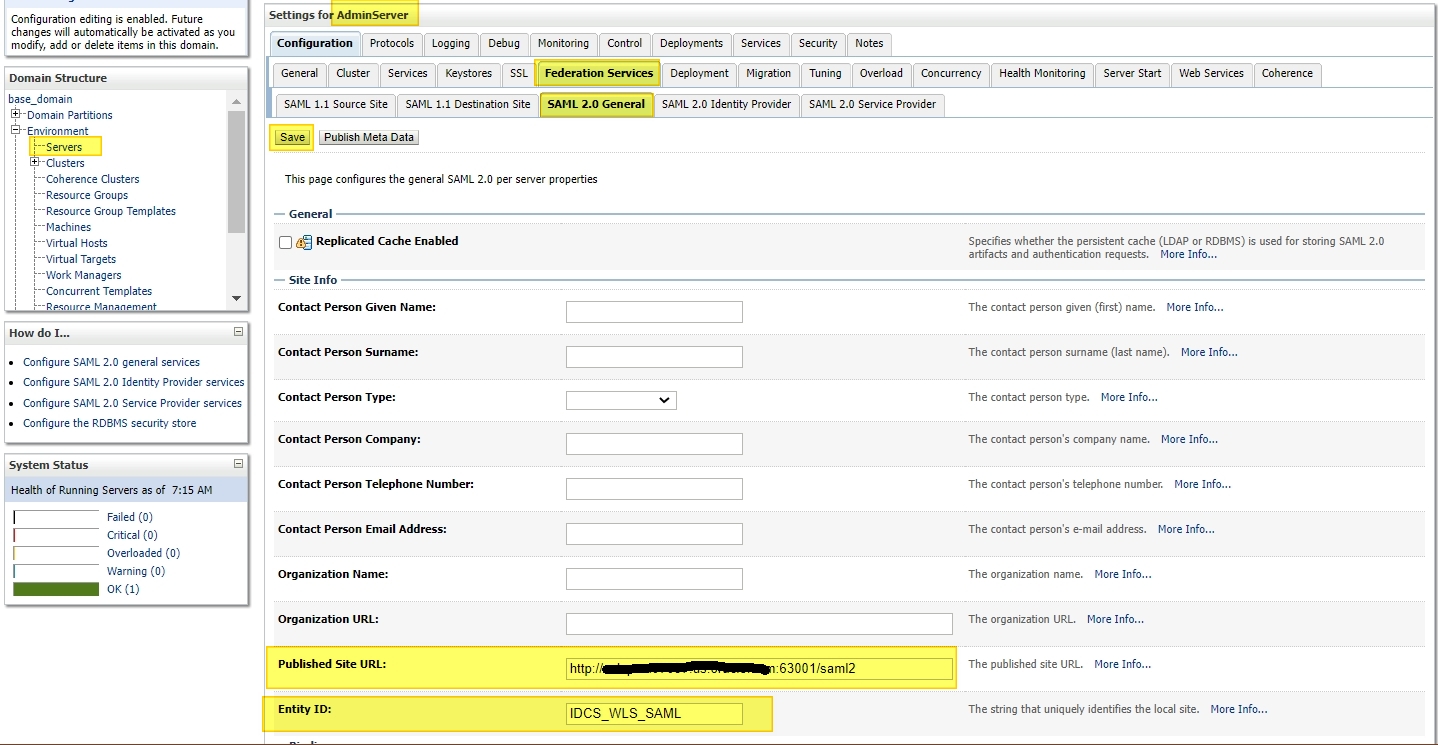
Two most important fields here are :
– Published Site URL : <protocol>://<public_host>:<public_port>/saml2
// This URL should always contain an external host:port.
// Protocol can be http or https.
// URL should always contain “/saml2” at the end. (This is an internal application deployed in WLS and cannot be changed).
– Entity ID : <Any_name> (This is a Unique identifier)
Other fields are optional and can be left blank.
Step 3 :
Navigate to SAML 2.0 Service Provider tab :
Login to console -> +Environment -> Servers -> <server_where_SSO_application_will_be_deployed> -> Federation Services -> SAML 2.0 Service Provider :
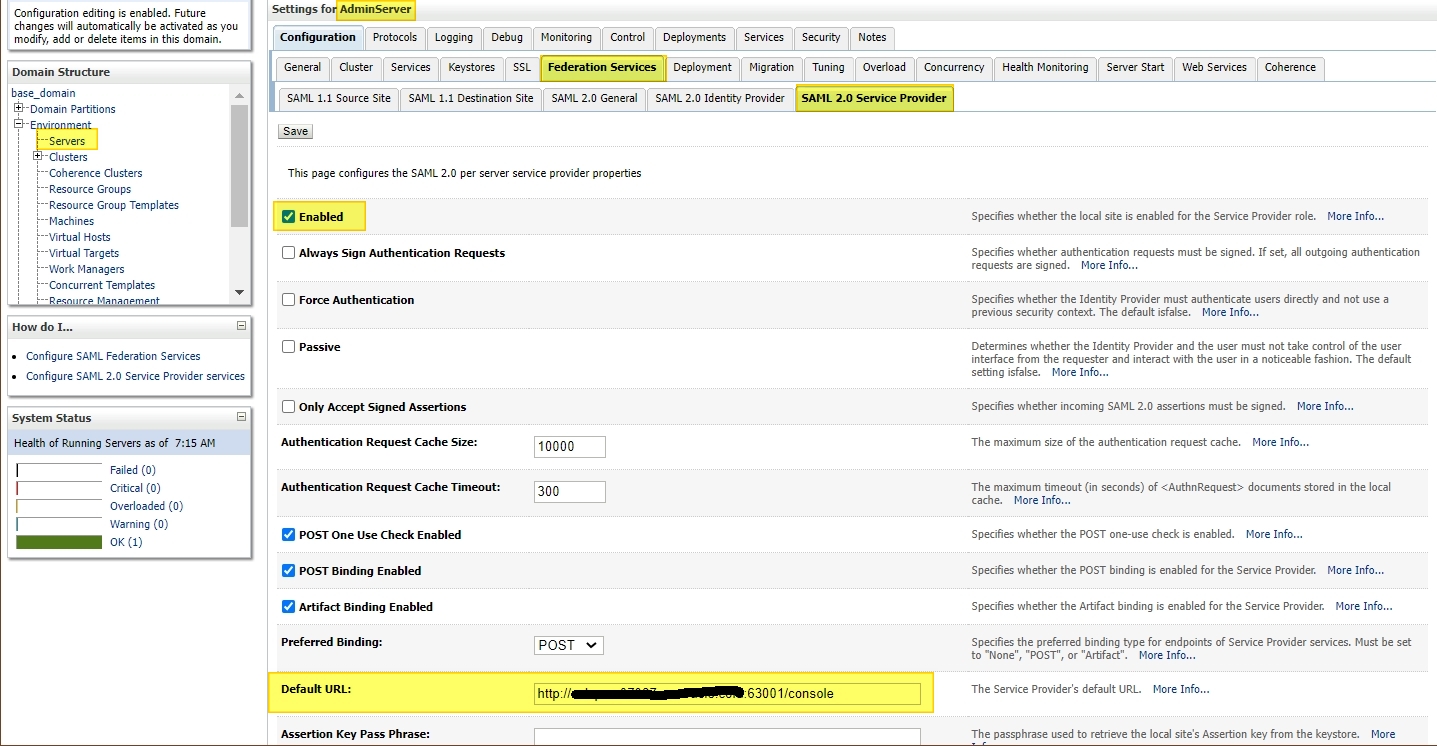
Make sure that “Enabled” checkbox is checked.
IDCS Identity Provider (IDP) configuration :
Step A :
Open the Identity Console from your cloud Dashboard -> User Management page and create a new SAML Application :
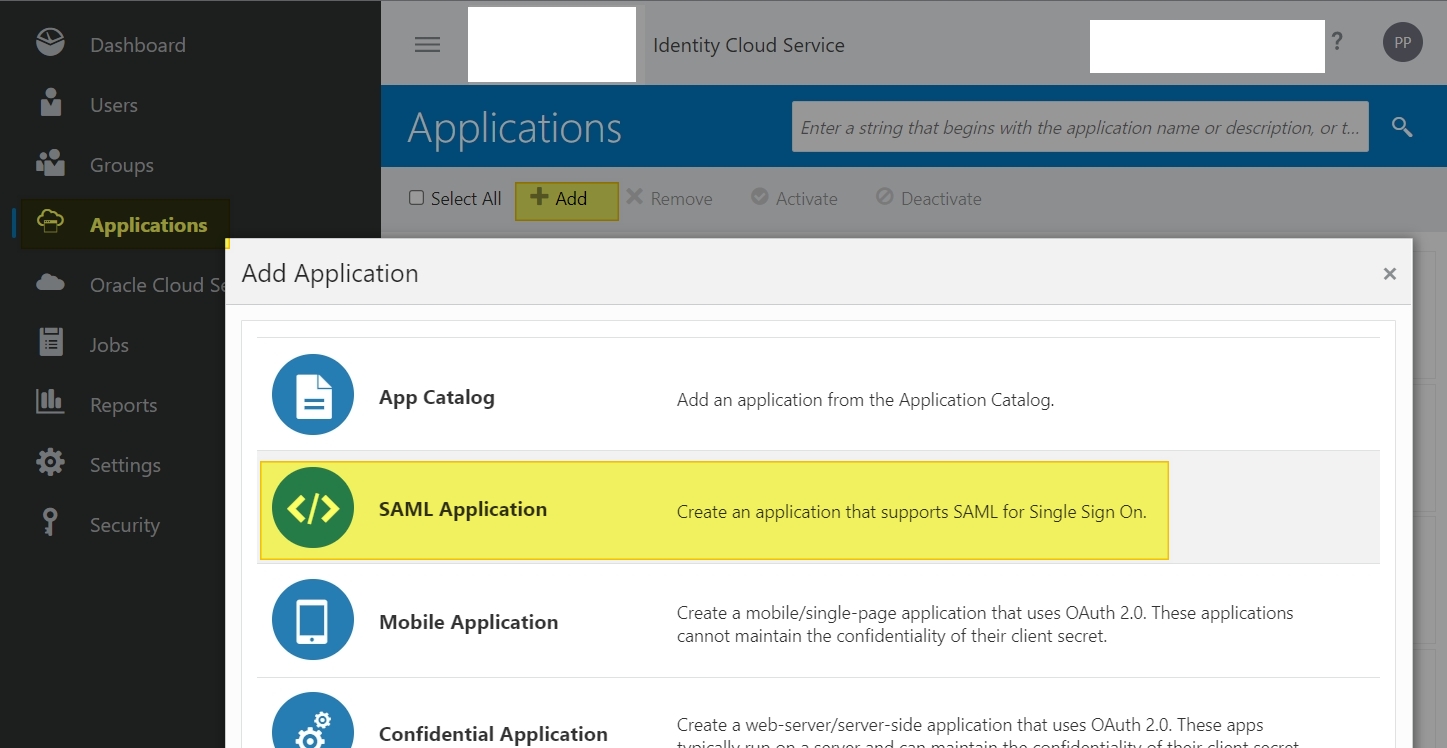
Step B :
Name : Puneeth_IDCS_WLS_SAML_SSO (can be any name)
Application URL/Relay State : https://<publicly_accessible_hostname/IP>:<port>/console
// This can be your application URL deployed in WLS.
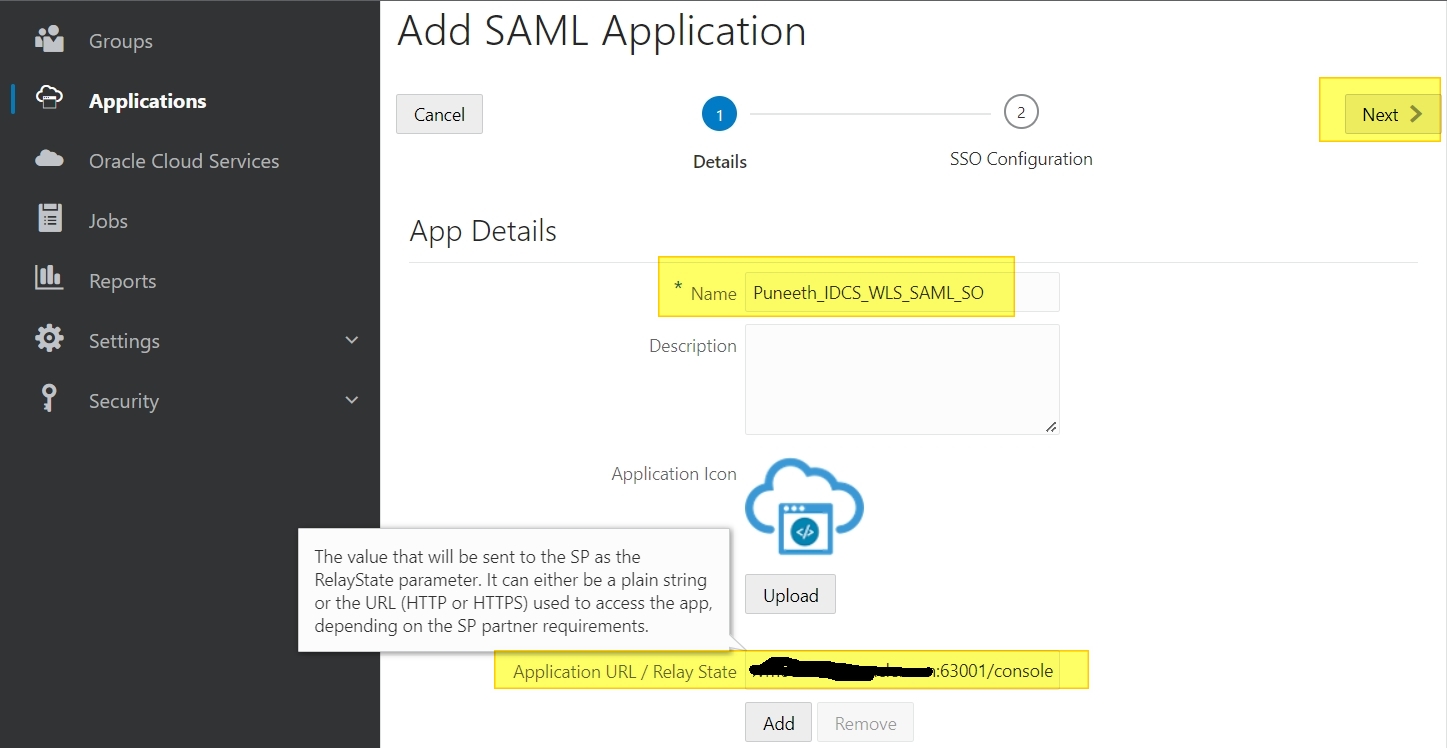
Click Next and update the following info
+General
Entity ID: Puneeth_IDCS_WLS
// Entity ID specified here can be any unique value.
Assertion Consumer URL: https://<publicly_accessible_hostname/IP>:<port>/saml2/sp/acs/post
// NOTE – this URL should always contain “/saml2/sp/acs/post”
NameID Format: Unspecified
// In this example I am using Format as Unspecified.
NameID Value: Primary Email
// In this example, I am using email ID, but you can select any value from the drop-down.
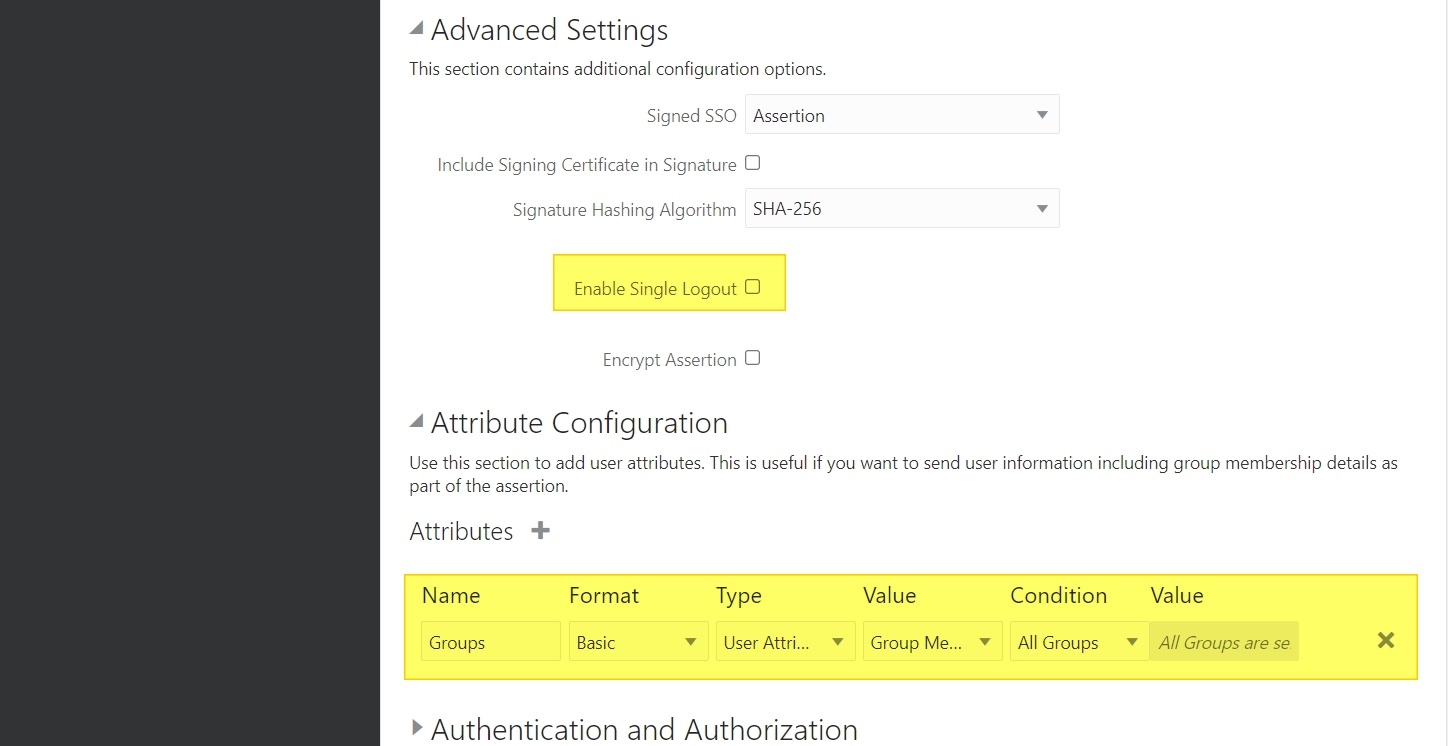
+Advanced Settings
Enable Single Logout (Uncheck)
// In this example, I am not using a single Logout URL
+Attribute Configuration
Name: Groups
Format: Basic
Type: User Attribute
Value: Group Membership
Condition: All Groups
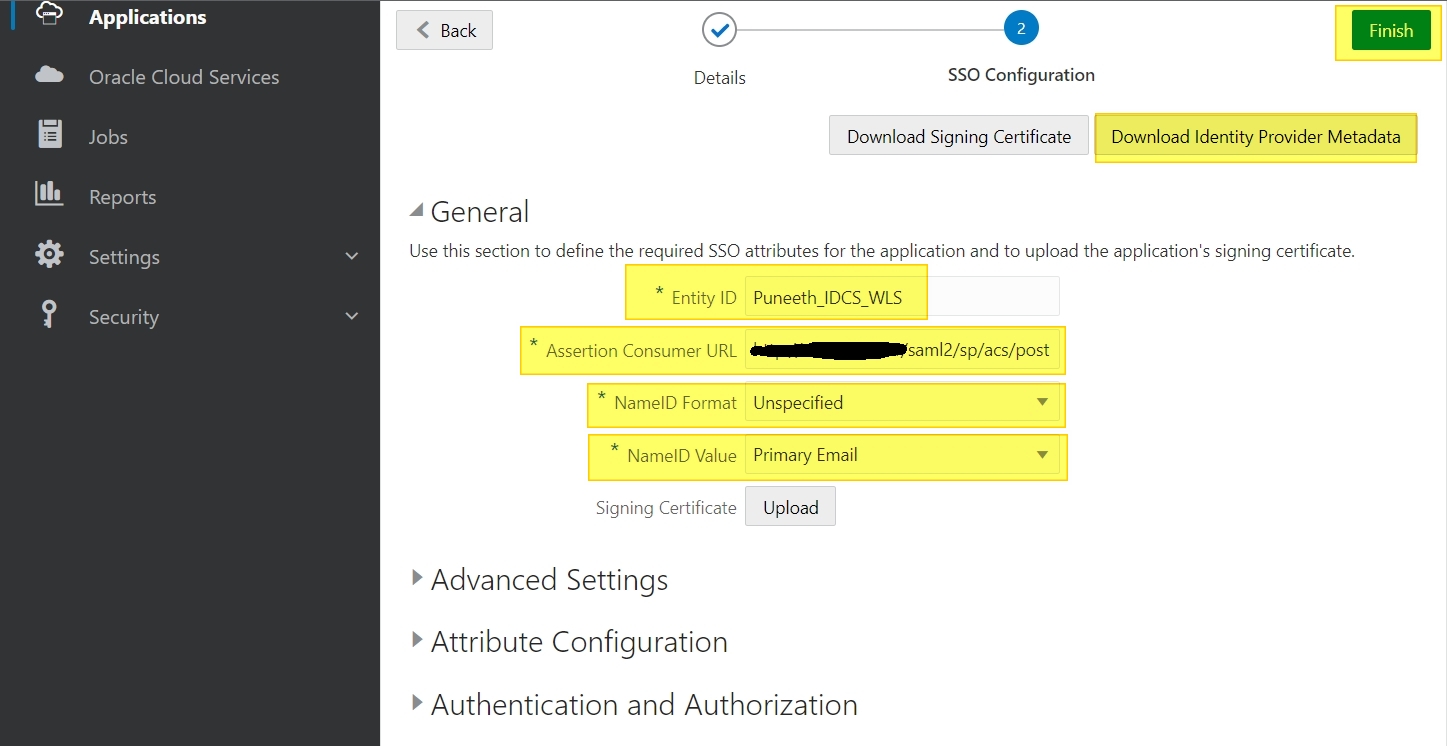
Download the IDP metadata -> Click on “Download Identity Provider Metadata” button on the right top of the screen.
We will use this to create an IDP partner in WLS console.
Then click Finish.
Copy the IDP metadata downloaded from IDCS console to WLS.
Step C :
Search for the application you created by selecting the “Applications” option and activate your application.
Then assign any user to this application.
If you don’t have any users/groups then you can create it by selecting the “Users” or “Groups” option in the menu and then you can assign them to your application.
NOTE: Make sure you activate your application -> Select your application and click on the activate button on the right.
Let’s go back to WLS console and create an IDP partner
Step 4 :
Navigate to the Identity Asserter you created earlier and create the partner :
Login to console -> Security Realms -> myrealm -> Providers -> Authentication ->SAML_IA -> Management -> New -> “New Web Single Sign-On Identity Provider Partner”
Select the IDP metadata and click OK.
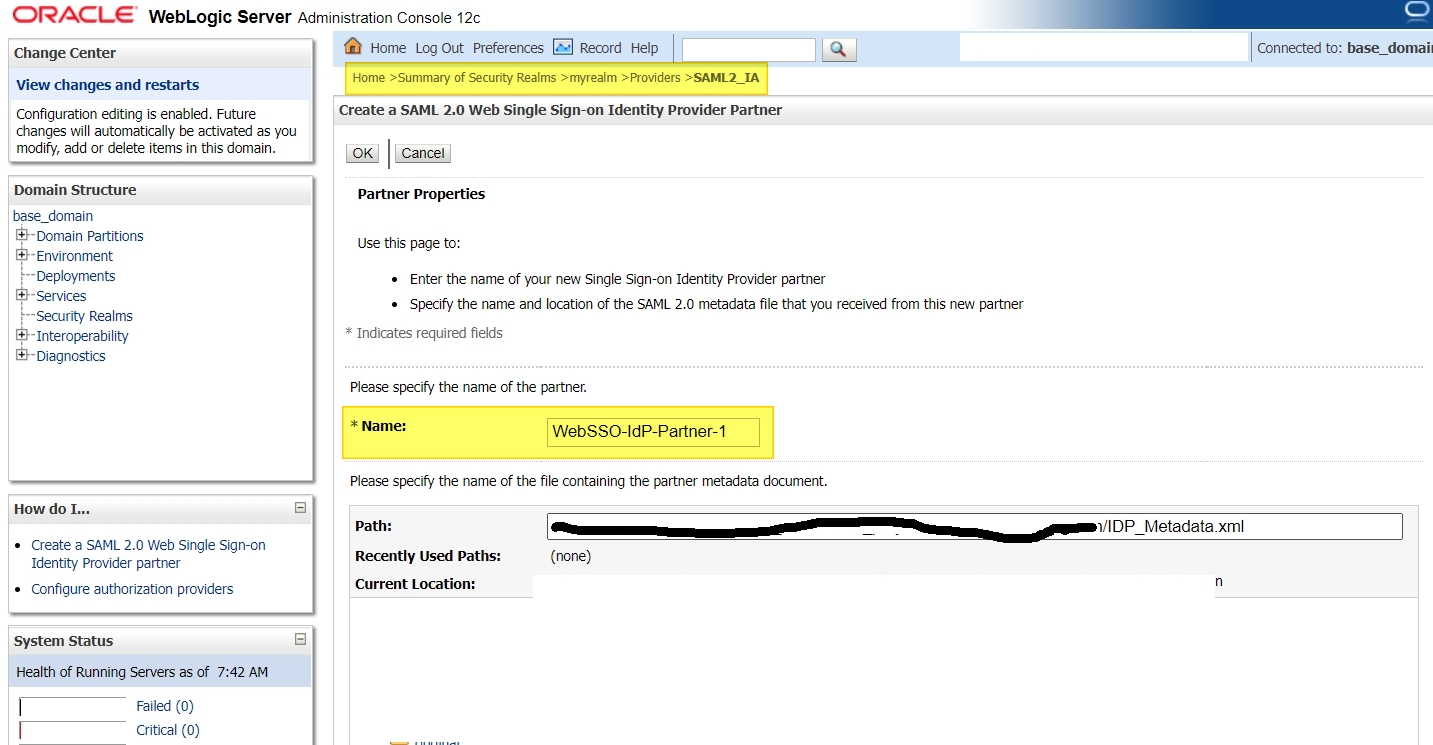
Click on the newly created partner and enter the following info :
Enabled: Check
Virtual User: Check
Redirect URI: /console/*
// This should be the URI of protected page of your application.
Process Attributes: Check
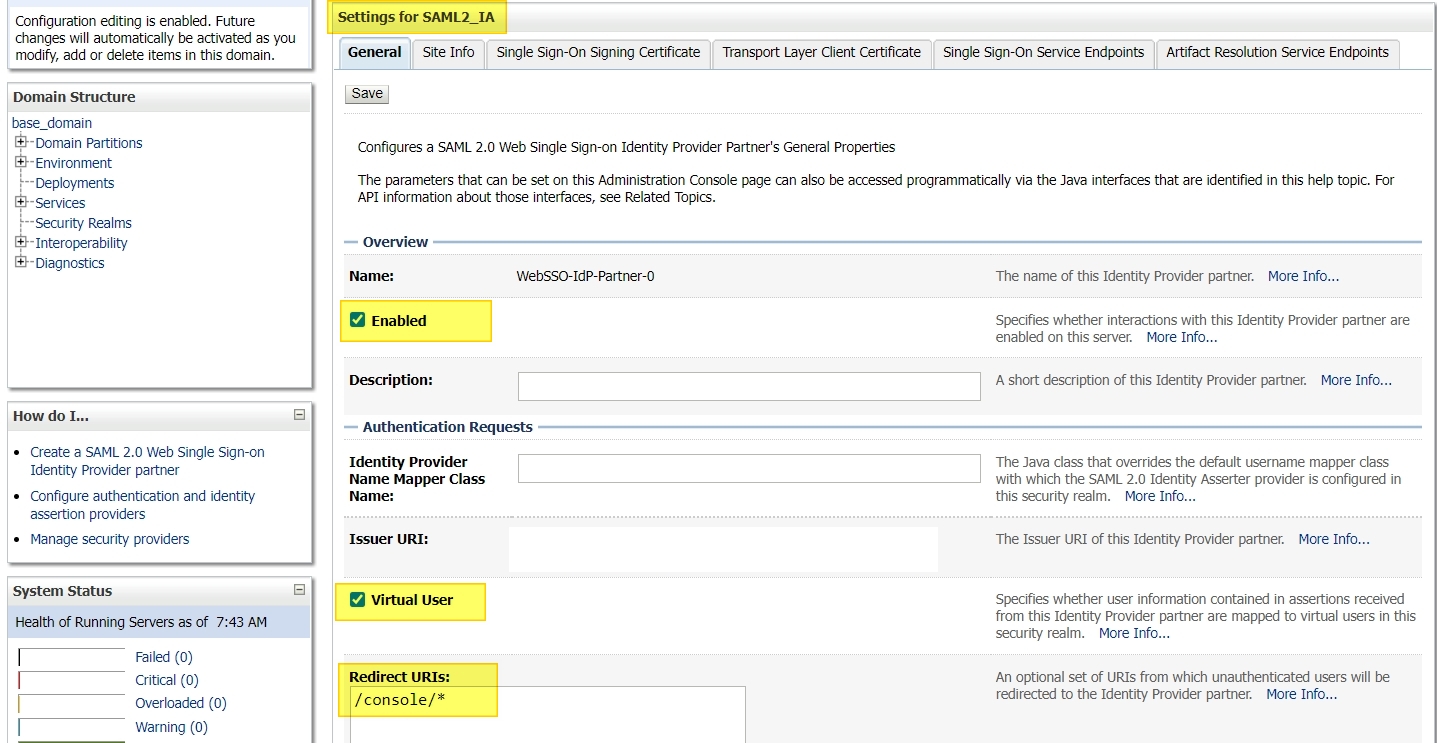
Restart all servers.
Now, when you access the WLS console, you willbe redirected to IDCS for authentication and once it succeeds you should be able to login to console.
NOTE : If the SAML Application you created in IDCS is assigned to a user who is part of the Administrators group, then you should be able to login to console, becasue by default only the users who are part of Administrators group have access to WLS console.
In this example, I am retriving the email address of an authenticated user from IDCS in SAML token. So you will not be able to login to console by default.
To bypass SAML SSO for console use the URL :
https://<publicly_accessible_hostname/IP>:<port>/console/login/LoginForm.jsp
Create a new user in WLS with the emailID and add this to Administrators group OR add Admin role to this user.
Now test SSO on console again and you should be able to login successfully.
