

Oracle APEX Data Reporter is a purpose-built reporting tool that enables business users to create and manage reports without deep technical expertise.
Oracle APEX Data Reporter Series
- Part 1: Putting Self-Service Reporting Back in the Hands of Business Users
- Part 2: Setting Up Your Oracle APEX Data Reporter Environment ← You are here
- Part 3: Managing, Updating, and Moving Your Oracle APEX Data Reporter Environment
With a clear picture of what Data Reporter is, the next step is getting everything configured. The setup spans two phases: initial environment configuration and the ongoing report lifecycle.
(Refer to the Data Reporter Setup diagram for the full breakdown.)
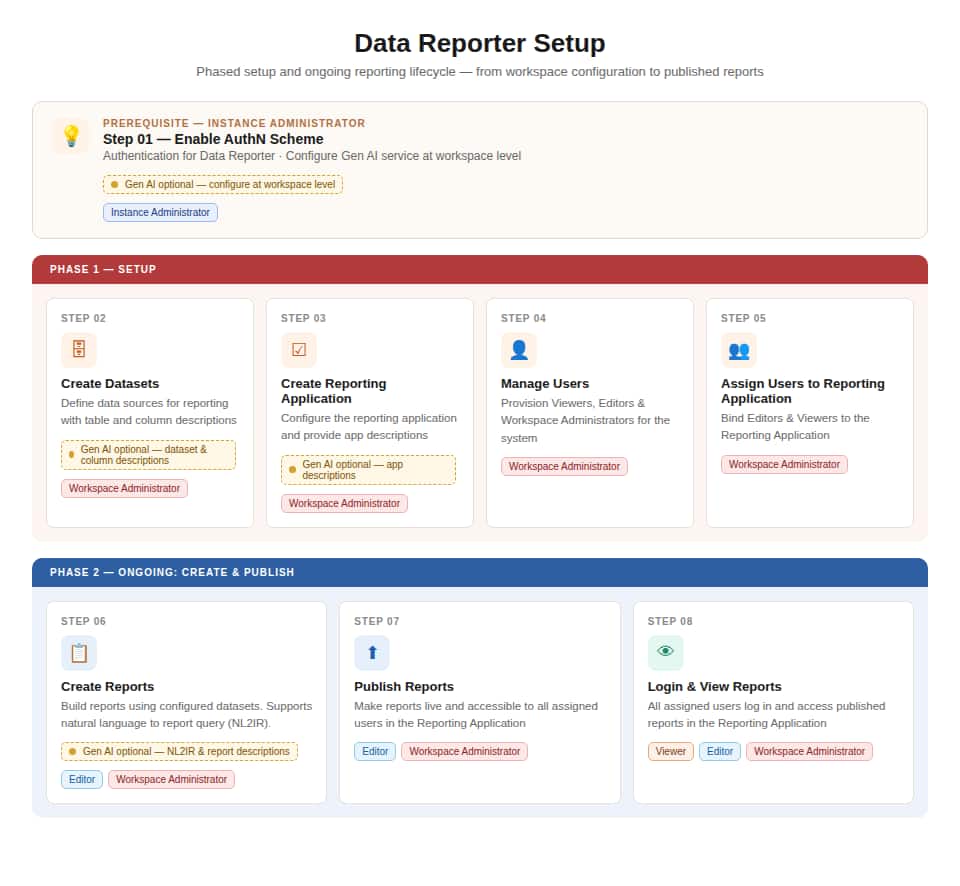
Phase 1 – Environment Setup
Step 1: Enable Authentication
Oracle APEX Instance Administrators configure authentication at the instance level via: APEX Administration Services → Manage Instance → Security → Authentication Control
Before selecting the scheme for Data Reporter, the scheme itself must be defined under Development Environment Authentication Schemes in the same section. Currently supported schemes are: HTTP Header Variable, SAML, and Social Sign-In.
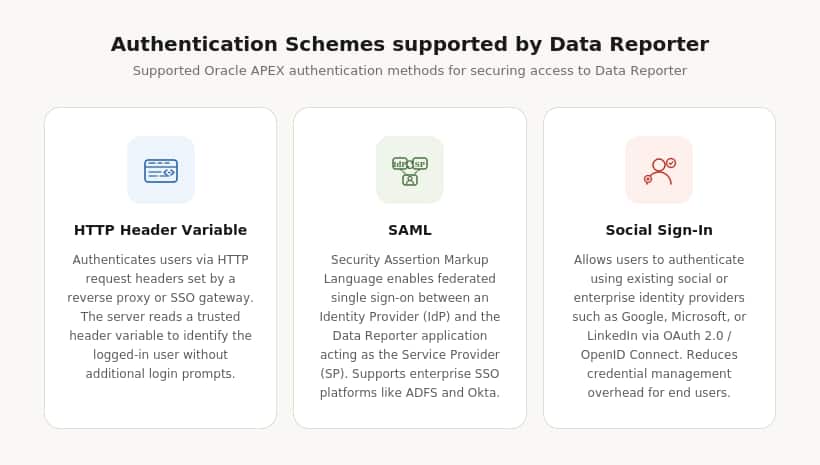
Note: Authentication is a prerequisite. Data Reporter cannot be accessed until this step is complete.
Step 2: Create Datasets
A Dataset is a curated collection of tables and views that defines what data is available for report building. Key characteristics:
- Workspace-scoped: Datasets are defined once and can be reused across multiple reporting applications in the same workspace.
- Administrator-managed: Created and managed by users with the Administrator role (including workspace admins).
- Data governance boundary:Only users with the Editor role assigned to that dataset via Reporting Application can access the underlying tables/views.
- AI-enhanced: If your workspace has Generative AI enabled, meaningful descriptions are auto-generated for datasets based on the selected tables/views.
Step 3: Create Reporting Application
A Reporting Application is the container where Editors build their reports. Think of it as a scoped reporting environment, not a full APEX application.
Important points:
- Multiple datasets can be attached to a single reporting application.
- Access is application-scoped. An Editor in Application A has no visibility into Application B unless an administrator explicitly grants it.
Steps 4 and 5: Manage Users & Roles
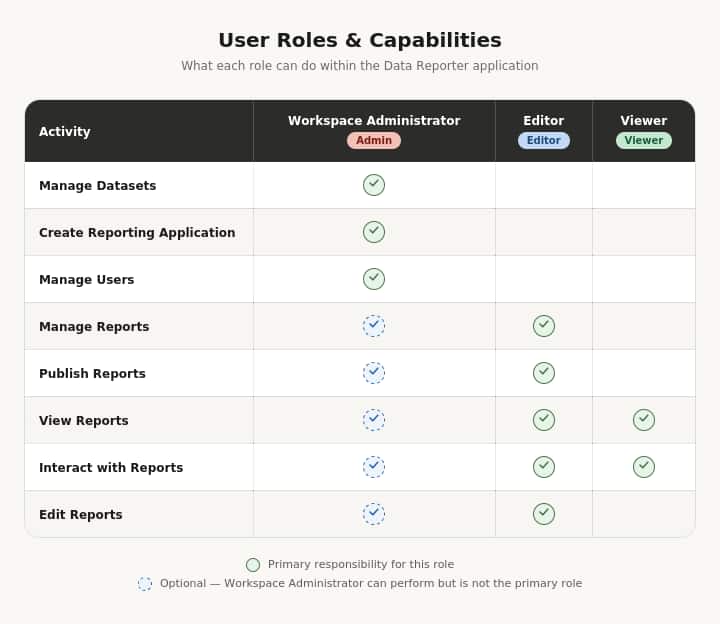
After the reporting application is created, administrators add users and assign them roles. Roles are reporting application-specific, giving Administrators fine-grained control. For example, a user can be an Editor in Application A and a Viewer in Application B simultaneously.
(Refer to the user roles and capabilities diagram for the full breakdown.)
Phase 2 – The Report Lifecycle
Step 6: Create Reports
Users with the Editor role can create reports from the datasets attached to their application.
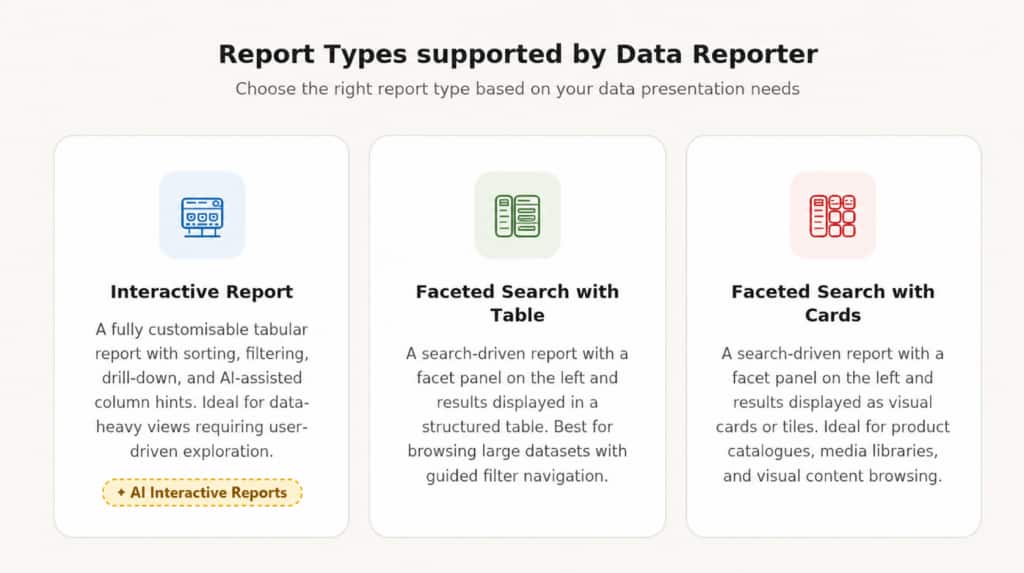
Report creation starts with choosing a report type, then selecting a data source through one of two approaches:
- Table/View selection — pick the table or view to base the report on. No SQL required.
- SQL Query — write a custom query manually, or use APEX Assistant to describe the data needed in plain English and let it generate the query automatically.
Once the report is configured, Editors can run it directly or explore the available formatting and visualization options.
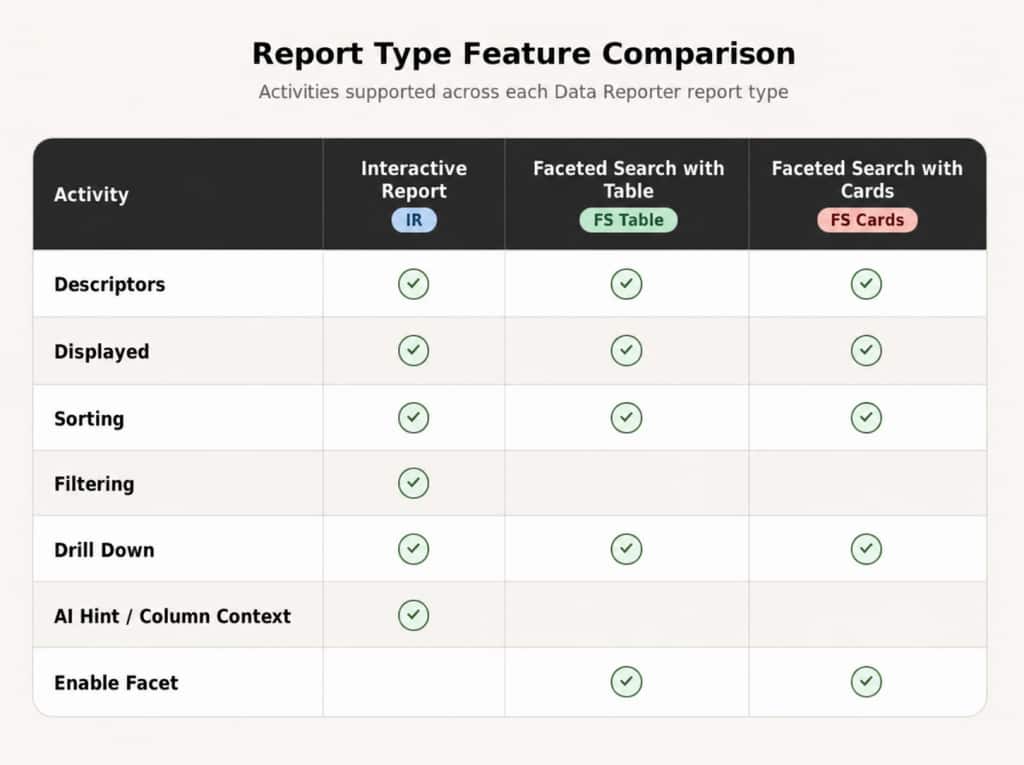
(Refer to the Report Type Feature Comparison for the full breakdown.)
Step 7: Publish Reports
Publishing makes a report live and accessible to all assigned users in the reporting application. Until a report is published, it remains private to its creator. Only Editors and Workspace Administrators can publish reports. Viewers never have access to the unpublished authoring state.
Steps 8: View and Interact
Once published, viewers and editors can log into the reporting application and access reports. Reports are interactive, and users can sort, filter, drill down, and explore within the bounds of what the editor configured.
When a published report needs to be updated, the recommended approach is the draft-based flow: create a draft copy, make changes, preview, then re-publish. The live report remains accessible throughout the process. The updated version only replaces the live report when explicitly re-published.
With authentication configured, datasets defined, a reporting application in place, and users assigned, your Data Reporter environment is live.
That wraps up the Data Reporter setup. With authentication configured, datasets defined, a reporting application in place, and users assigned, your Data Reporter environment is live. Part 3 covers the ongoing management side: updating published reports, evolving datasets, extending reporting applications, and moving your entire setup across environments using export and import.